Introduction
Hi, dev's what's up? Dinesh here!
In this blog post, you will learn how to create a simple multiplayer VR experience in Unity.
There are (as always) tons of ways to achieve this goal, each with different advantages and drawbacks.
In this blog post, we will use the Photon Unity Networking (PUN) plugin, which you can download for free on the asset store and the Unity version 2018.1.5
Photon is very easy to use, and you can get started with a multiplayer VR experience in next to nothing. Or to make it simple: After reading just one blog post.
If you want to get a deeper understanding though, I encourage you to check out the Youtube version of this blog post first and also to read the Photon documentation (which is fantastic btw).
1. Setting up PUN
To keep this blog post relatively short and more comfortable to read for you I'll stick to bullet points for most of the steps you need to do.
Create a Photon App ID
- Go to https://www.photonengine.com/ and create an account
- Then, create an App ID https://dashboard.photonengine.com/en-US/publiccloud
- Photontype is PUN
Setup your Unity project
- Create a new Unity project
- Download Photon Unity Networking(PUN) from the asset store (free)
Setup PhotonServerSettings
- For hosting select Photon Cloud and for region take what fits best to yours.
- Paste in the App ID
- Check Auto-Join-Lobby
Connecting to the Photon Server
- Create an Empty GameObject, call it 'NetworkManager' and attach 'ConnectToServer.cs' to it.
- Start Unity and you should be seeing “Connected”
2. Photon Callbacks
There are three ways to use PUN callbacks.
'Magic Methods'
Basically creating Methods that align with the Method names that Photon sends out via SendMessage. Not recommended, because it’s slow and it is very error-prone.
Using IPunCallbacks and IPunObservable
Those are two interfaces that your class can implement. It is a lot safer than just using those “Magic Methods” how Photon likes to call them. However, if you use an interface, you have to implement all of the interface methods. So, unless your class does tons of network related jobs, it is just overkilling to use them.
Using Photon.PunBehaviour
Instead of deriving from MonoBehaviour, we derive from Photon.PunBehaviour which exposes specific properties and virtual methods.
A general rule for Photon.PunBehaviour is to never call the base method. This approach, however, is (usually) the ideal way to use Photons provided network functions.
3. Using the Callbacks
As you may think, there are lots of callbacks and most of them you don’t need. FYI check them out here. Let’s now take a look at some of the more commonly used callbacks:
public override void OnJoinedLobby()
Get’s called after you successfully connected to the PhotonServer which redirects you to the lobby. From here on it makes sense to Join or Create a room.
public override void OnJoinedRoom()
Get’s called after you successfully joined a room.
public override void OnDisconnectedFromPhoton()
Get’s called after you disconnect from photon. Here you can notify the other players that someone left (e.g., playing a sound).
4. Bringing in VR
I assume that, before you want to build a multiplayer VR app, you have some knowledge about VR already. You know how to set up your project for VR and have some basic understanding of how VR development differs from ‘normal’ Unity development.
In this blog post, we will use the SteamVR plugin you can find on the asset store.
Basic Setup
- Download and import SteamVR
- Drag your Player prefab SteamVR/InteractionSystem/Core/Prefabs into your scene.
- Remove the default Main Camera from your Scene.
The NetworkPlayer GameObject
- Create an Empty GameObject and call it NetworkPlayer. Attach ‘PhotonView’ to the NetworkPlayer GameObject and attach the NetworkPlayer.cs script.
- In the NetworkPlayer GameObject create three child objects representing the head and the hands. This could be anything. Just some cubes or spheres works perfectly fine.
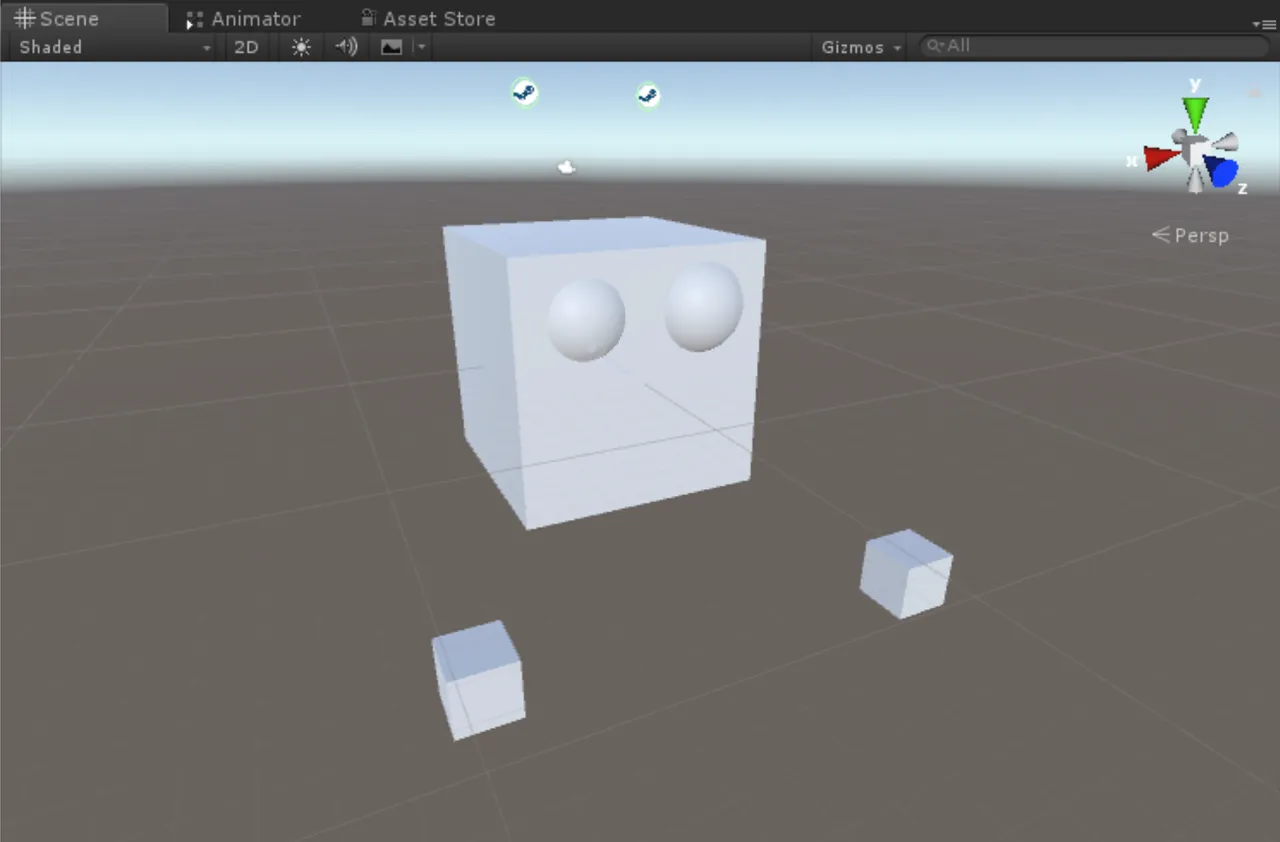
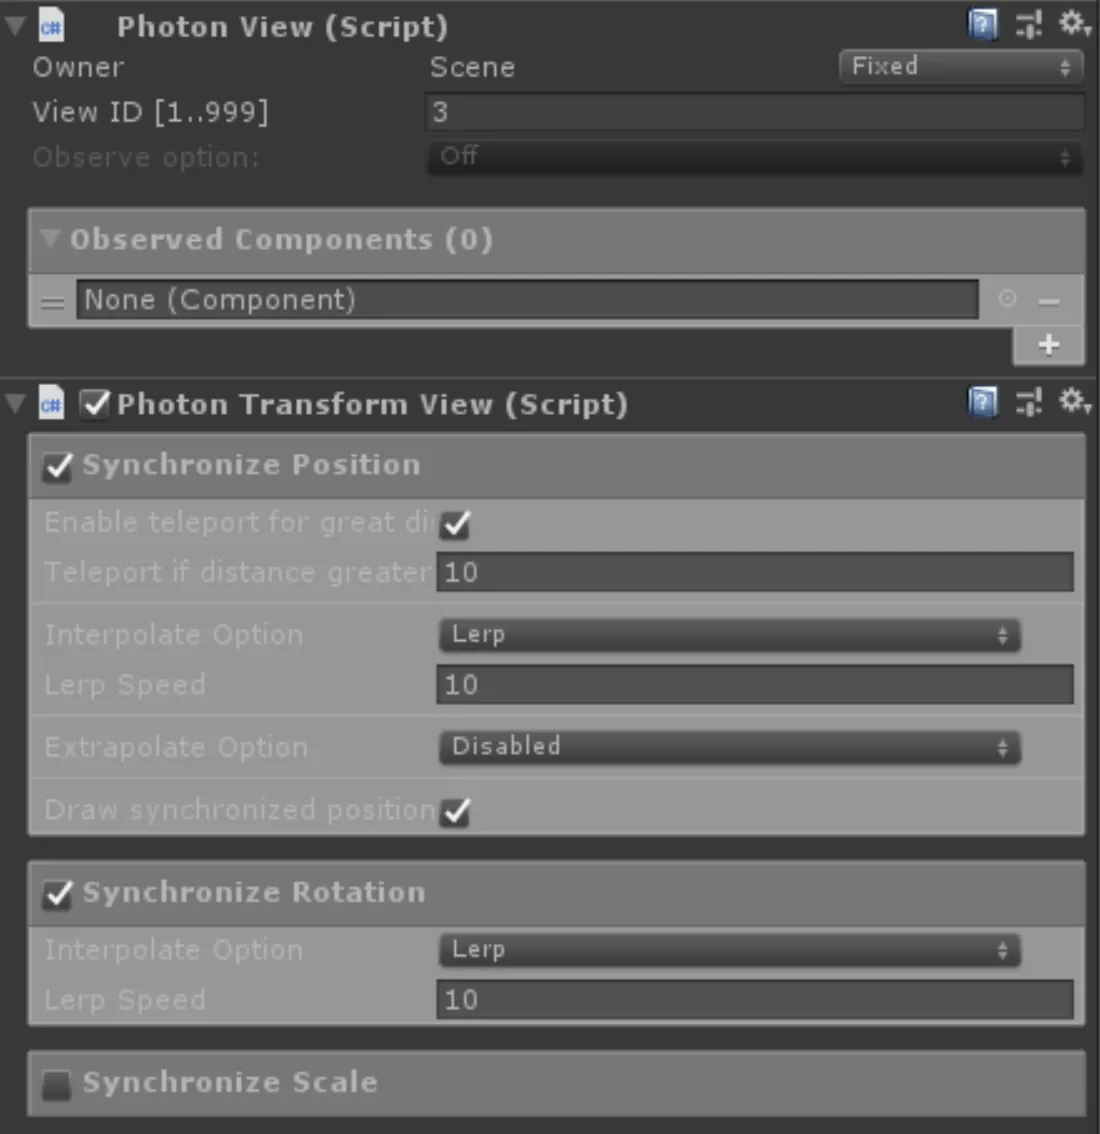
- Add a PhotonTransformView component to the three child objects. This will automatically add a PhotonView as well. In the PhotonTransformView you want to have the following settings:
Now we want to add those three transform views to our Observed Components of our NetworkPlayer. Therefore first lock the inspector and create a 2nd inspector window, so that we can drag the transform-view into the observed component.
Make a prefab out of your NetworkPlayer and store it in a folder called “Resources.” This is necessary; otherwise, PUN can’t spawn it. You can now remove the NetworkPlayer from your scene.
In the inspector, don’t forget to reference the avatar gameObjects from your NetworkPlayer.cs script.
We are almost done. We now need to also spawn the NetworkPlayer. It makes sense to spawn the NetworkPlayer after we successfully joined a room. But of course, you can spawn the player whenever you want.
For spawning the player, we have the SpawnNetworkObjectOnJoinRoom.cs script.
Final Words
We only scratched the surface on network programming, but this blog post (hopefully) helped to get in a foot into Photon and network programming.
If you are interested in learning more about Unity - especially VR | AR | MR development, stay tuned for more!
As always, if you have any questions or remarks let me know: dinesh@univrsitas.com
Cheers