
The Thumbnail gives the viewer of your blog or the viewer of the Steemfeed the very first impression of you.
MAKE SURE THAT HE HAS A VERY GOOD IMPRESSION OF YOU!
A DTube thumbnail needs the following elements without exception: 1. Branding, 2. The right size, 3. A well placed DTube logo.
I will explain all the elements here and then I will show you how to create a savage DTube thumbnail from scratch and implement it into your post in its original size afterwards!
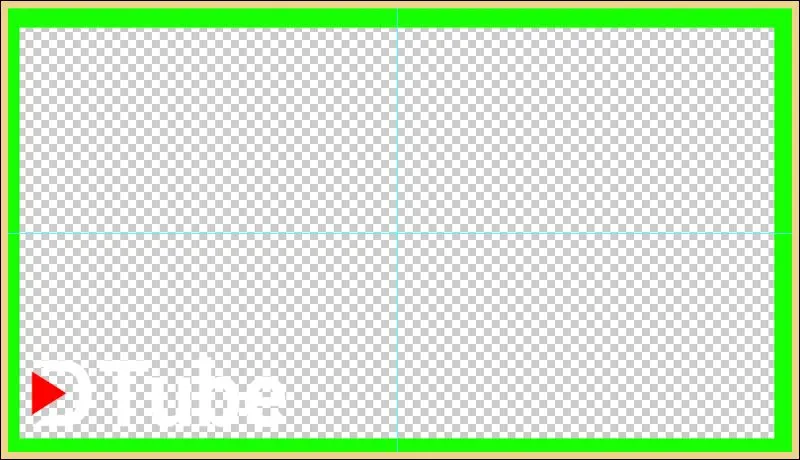
I have also created a Photoshop template for you to (download) to not have to start from scratch (see screenshot below).
1. The Branding
You are representing yourself here, most people use a nickname which ain't good practice.
Using your real name displays that you take Steem serious, that you have courage and most important: It makes people trust you.
Anyway, I am not gonna explain how to apply brand in general but how to apply your brand to your thumbnail.
If you use your real name then your logo is your face, if you use a nickname or own a company that you represent here you use the profile picture or logo of your nickname/company.
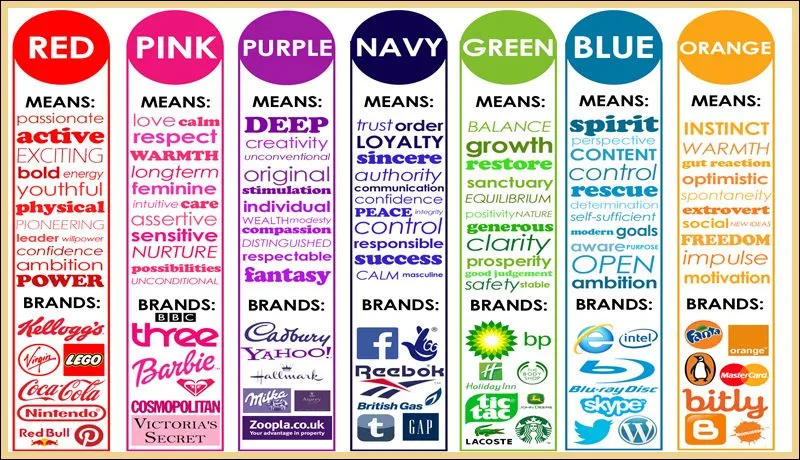
The next thing that your thumbnail needs to complete the branding is your brand colors -> What are your favorite colors that you use in all your posts?
Select 3 colors and add those to the thumbnail and not more, using more colors makes it look too "chaotic".
2. The Right Size
Size doesn't matter... LIES! The right size is 800x450 inches!
Just kidding, the right size is 800x450px and that will look perfect on the Steem feed and in your post!
However, when you submit the uploaded DTube video the thumbnail will look very small on your post and I will show you how to change that in step 5!
3. A Well Placed DTube Logo
The gods of DTube have created a media kit (download) and the video creators loved it
With that media kit, you can select from a couple of DTube logos (transparent as well) to add that to your thumbnail.
I have created a DTube Photoshop template (download) where the logo and the ruler guides are already placed (you can move them of course).
You can remove it if you want but I suggest you do not do that for 1 simple reason.
Most people don't know that it is a video as the thumbnail does not have a play button, however, most Steemians know DTube!
In other words: Putting a DTube logo on your Thumbnail tells your readers that the thumbnail is not only a thumbnail but that it also leads to a video!
4. Creating a DTube Thumbnail From Scratch
This is only for Photoshop users. I have heard that you can do the same with Gimp, however, I have also seen that it lacks some functions that Photoshop has.
If you do not have Photoshop you are missing essential software. If you want to make money online you need Photoshop to design, format & display your presence.
Without it, you will be using google pictures or paying for designers forever and nobody will take you seriously if you do not have your own logo, style & branding. You have to get it, there is no way around it.
With that said, let's create a damn thumbnail from Scratch with Photoshop! You can watch the video only version below or just do it with the text below if you are a veteran Photoshop user.
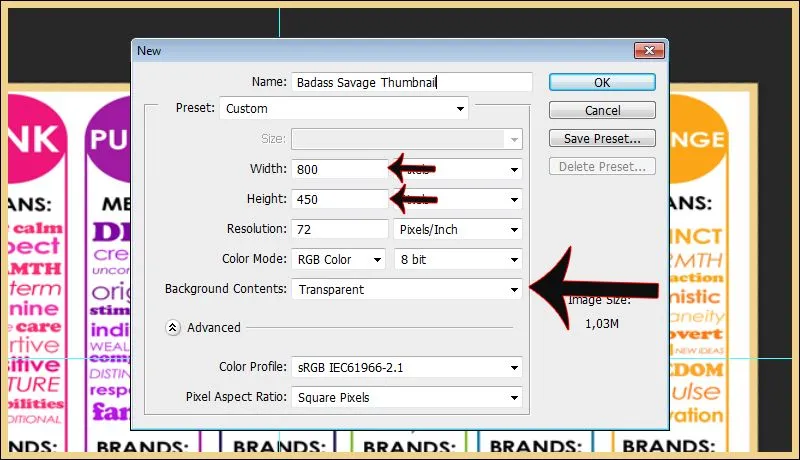
1. Create a new file with transparent background. Enter 800px into the width and 450px into the height.
2. Now you mark the middle with ruler guides. You create ruler guides with the option "New Guide" which is located on the tab "View". Add a horizontal and a vertical one. Select everything with CTRL+T and move the ruler guides to the little point that you see in the middle.
3. Add 3 new layers. The first layer at the bottom is your background, just rename that. The first new layer is for your picture, the second layer is for the DTube logo, the third layer is for the border around it and everything else afterwards is for text layers.
4. Select the border layer and press CTRL+T and now click the right mouse button and select "Stroke". Enter 35px in the width and choose the color for the border (your branding color). Your transparent picture now has a border.
5. Add your picture and align it so that it is perfectly displayed.
6. Add the DTube logo. You do that by opening the Dtube logo from the media kit in a new tab and copy paste that into your new thumbnail tab. There you just have to change its size and place it where you want to.
7. You are fucking done. Save the file as a .psd (to edit it later) and as a .jpg to upload it to Dtube.
5. Implementing it
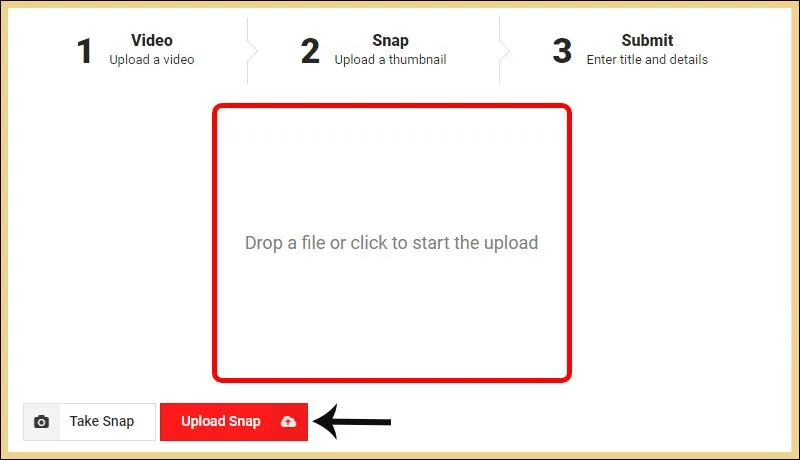
Upload the thumbnail to Imgur and copy the link address to your thumbnail that you uploaded to imgur.
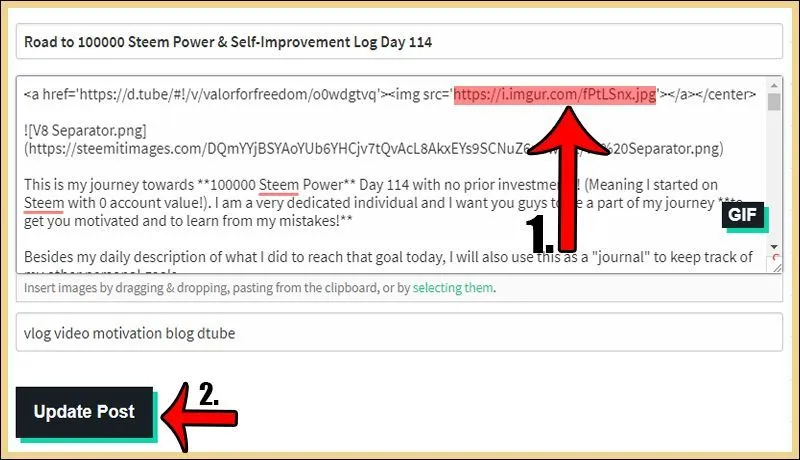
Now you go to your freshly published DTube post on Steemit and hit the edit button.
On the top, you see a specific code which you have to replace and that will be everything to replace the small one with the original one!
Conclusion
1. The right size is 800x450, 2. Brand your thumbnail, 3. add the DTube Logo, upload it on Imgur and replace the address in your Steemit post and that's it.
Your first impression on Steem has dramatically improved!

Get More & Higher Upvotes: Steemfollower
Convert your Bitcoin to EUR/USD (Europe): Wirex
Berserkers Discord Server: Discord