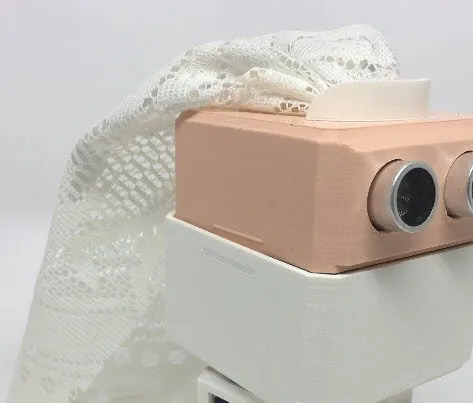
These two 3d printed robots are having a wedding party! Just missing the priest to sign all the papers.

IngaDIY and OlliDIY are the latest 3d design I released on Thingiverse and MyMiniFactory. They were a present for friends that did marry a few days ago.
You can download the files for printing here:
They are a themed remix of the popular open source robot OttoDIY design. It works with both versions OttoDIY Standard and OttoDIY+.
For both versions, you can buy complete sets with all electronic parts on their webpage or source each piece from the bill of material that is also available at the electronics shop of your choice.
I can promise you if you want to give robotics a try or teach it to your kids, this open source platform is worth trying! I wish I would have known it before starting my human-size robot InMoov. OttoDIY is a perfect platform to get your first experience!
Steps when building IngaDIY and OlliDIY
You can follow the regular build instructions available on GitHub for
depending on which one you want to build.
The legs that are part of my 3d design files are for the standard version.
If you want to build the PLUS version, you will need to print the plus version legs.
There are only a few differences when building IngaDIY/OlliDIY.
- You need to glue the bow tie and bow tie holder to the body of OlliDIY Header.
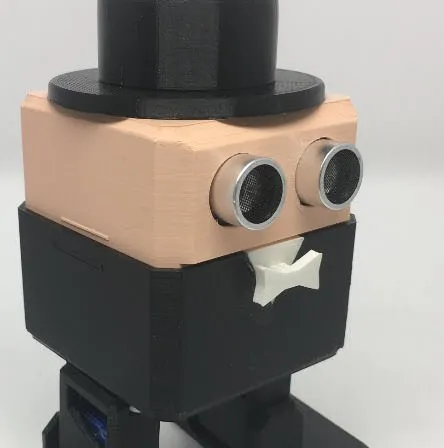
The hat of OlliDIY can just be put together and then glued in place of the head
For IngaDIY I added a crown that is split into two 3d printed pieces and a piece of white fabric. All three things can be glued together with hot glue and then put on the head of IngaDIY
That's it. For the electronics you can follow the standard guide from OttoDIY.
I hope you enjoyed the video and give your "inner robot" a chance.
Happy Printing
Dr. Make
