MyMiniFactory is yet again hosting an interesting design competition, this time using SelfCad, an online 3D design tool with some interesting tools, along with an integrated G-code generator for 3D printing !
Here's my first entry to the practical object design competition using SelfCad:
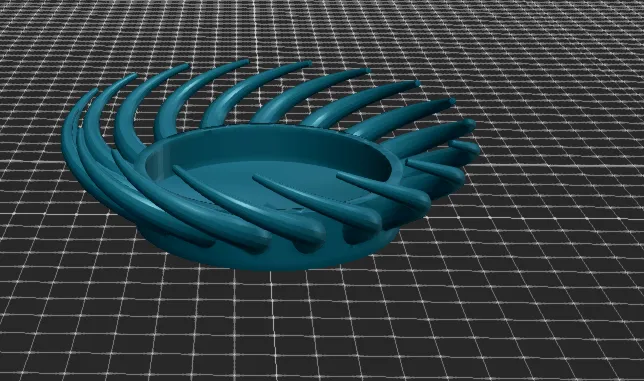
Whirling Flames Tea Light Holder
I started out with a vague idea of creating a tea light holder in the form of a spider, or something similar.
0. Caveat : initial design flaw
At first, I mistakenly believed "Tin Candle" was the name used for tea lights, so I took these dimensions as a starting point:
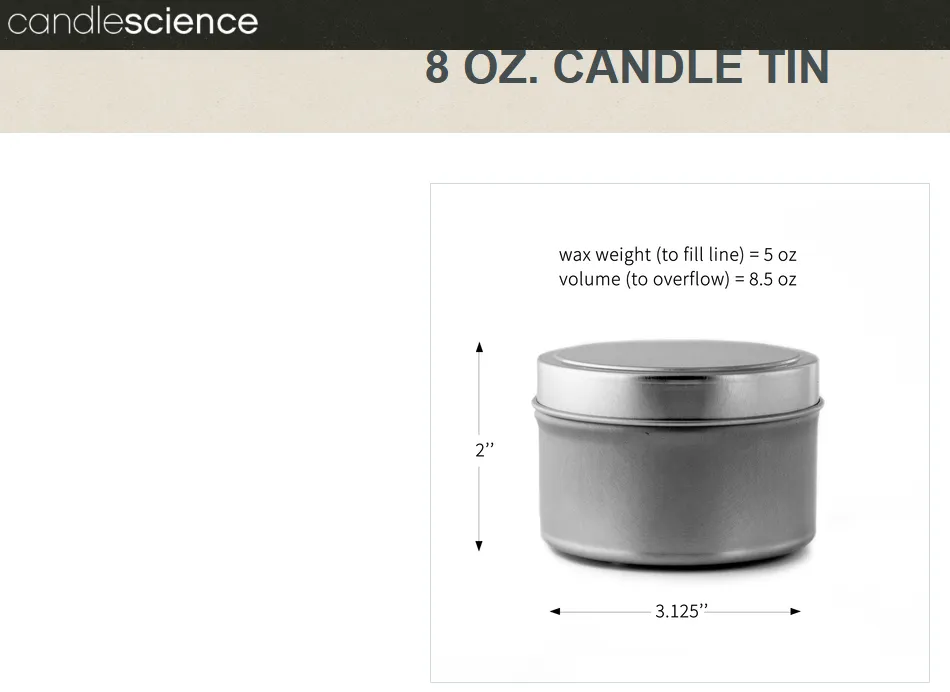
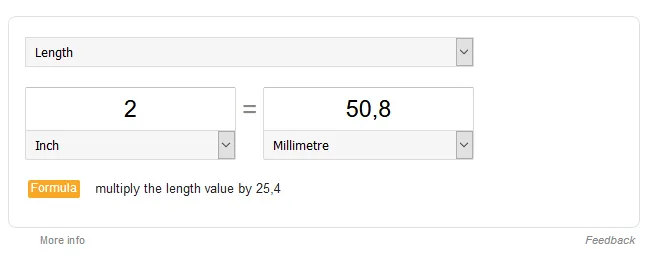
Which I converted to mm:
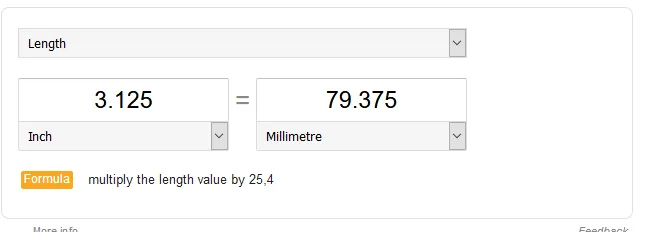
I'm not very good at mentally measuring objects, and didn't have a ruler handy to compare the dimensions to.
But the general design rules and tools apply no matter which size you create the model for, so it shouldn't impact the design too much.
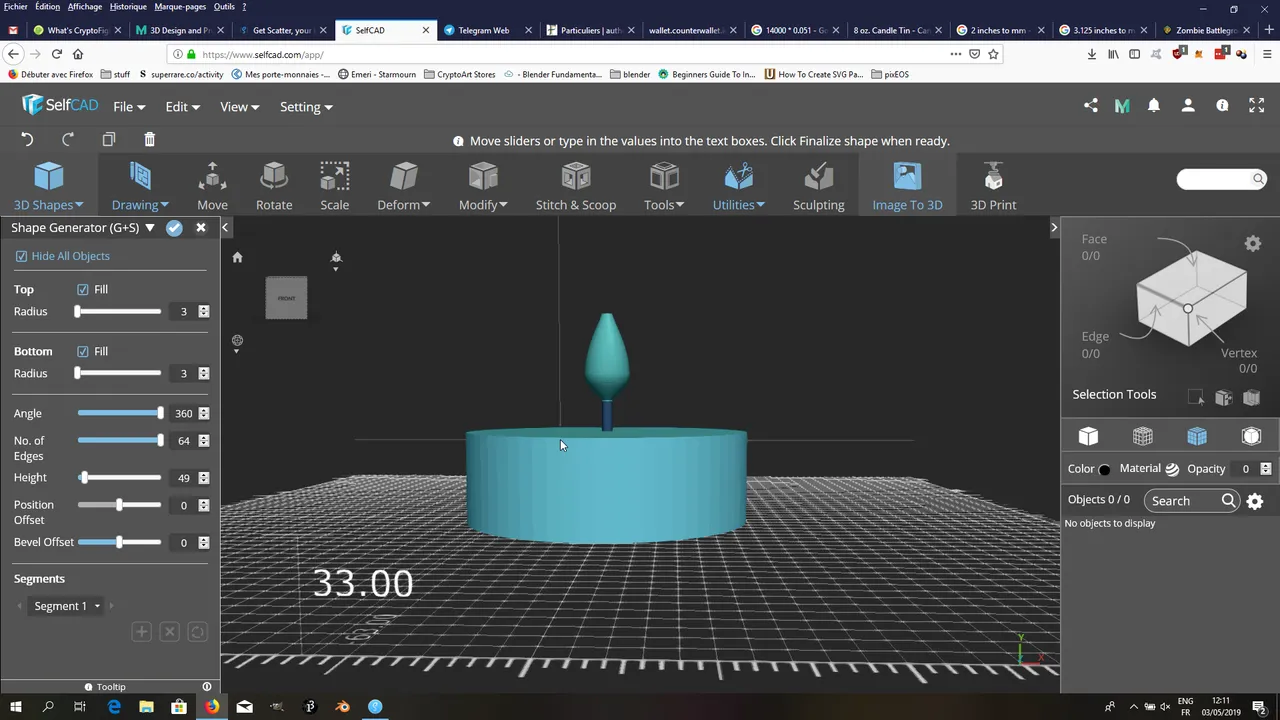
1. Creating a candle model
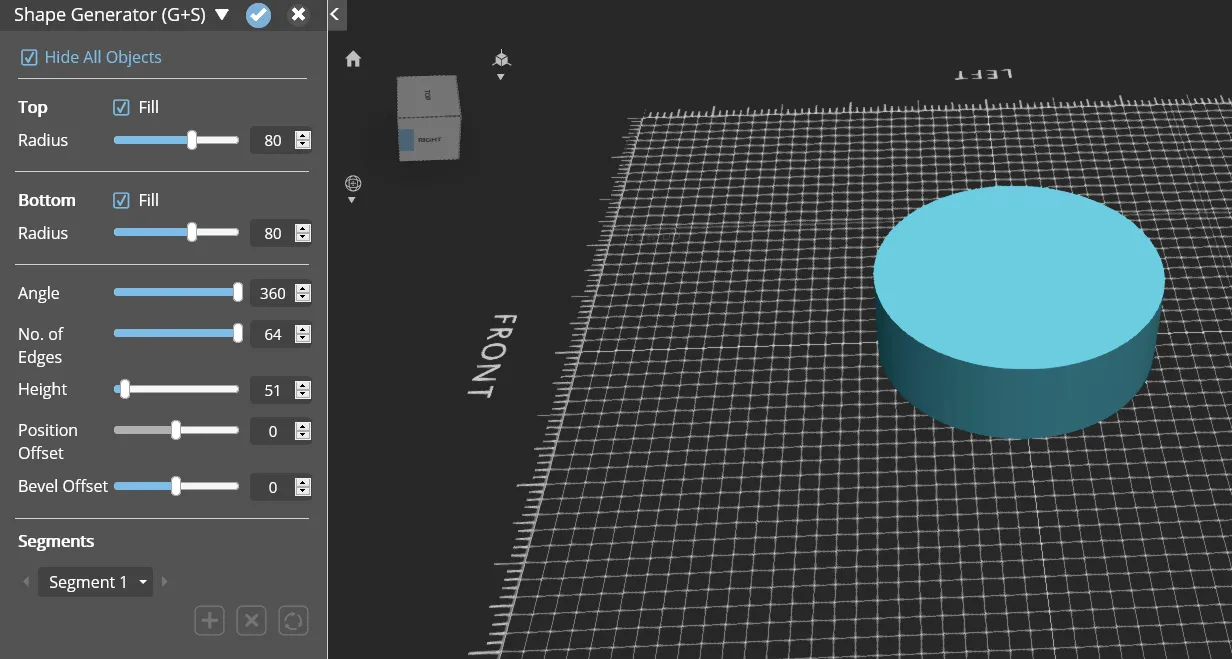
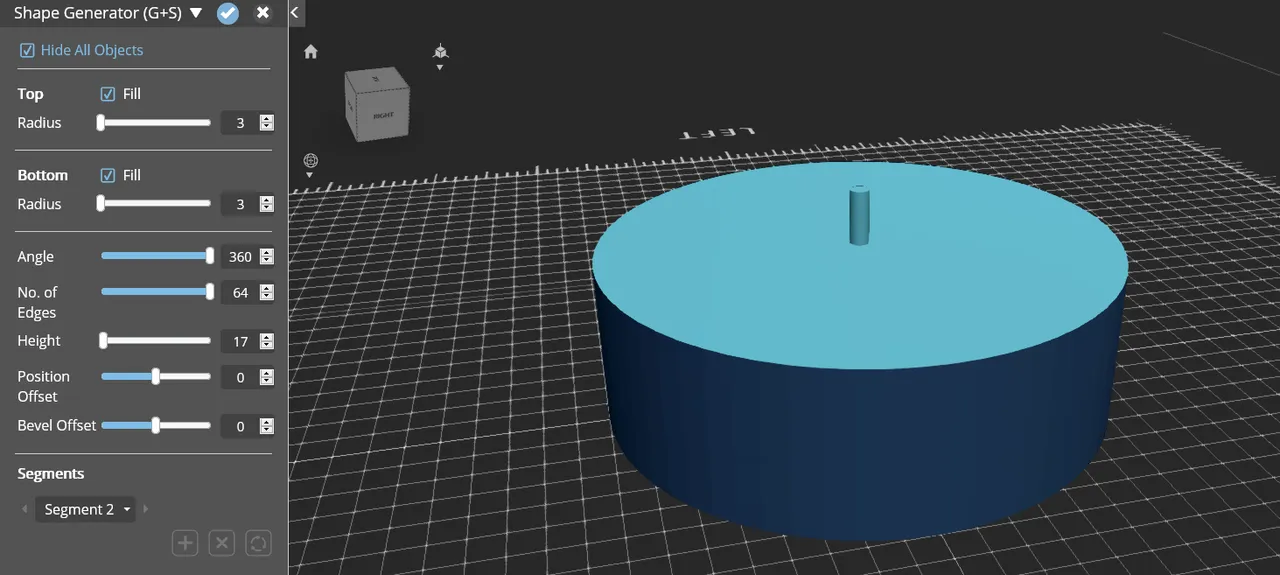
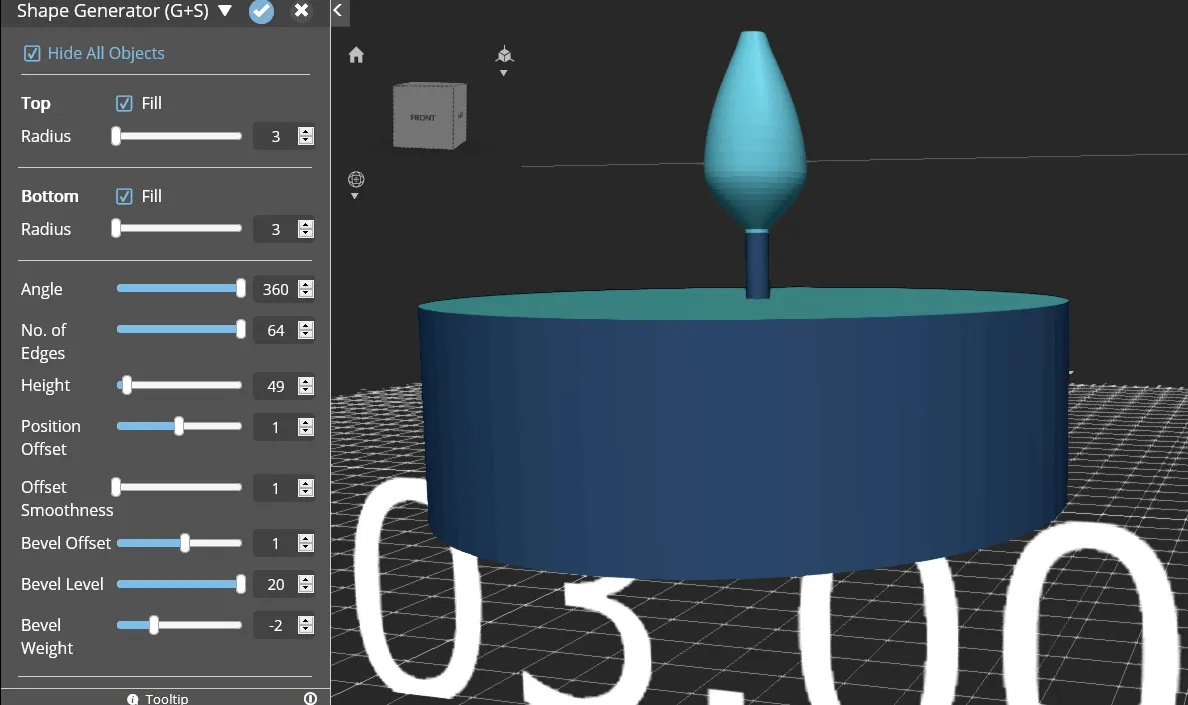
First, we use the Shape Generator to create a candle model.
Segment 1 represents the base (I didn't go so far as to create the thin tin layer around the candle)
Segment 2 is the wick
While segment 3 is a little cosmetic flame ;)
2. Creating the Candle Holder base
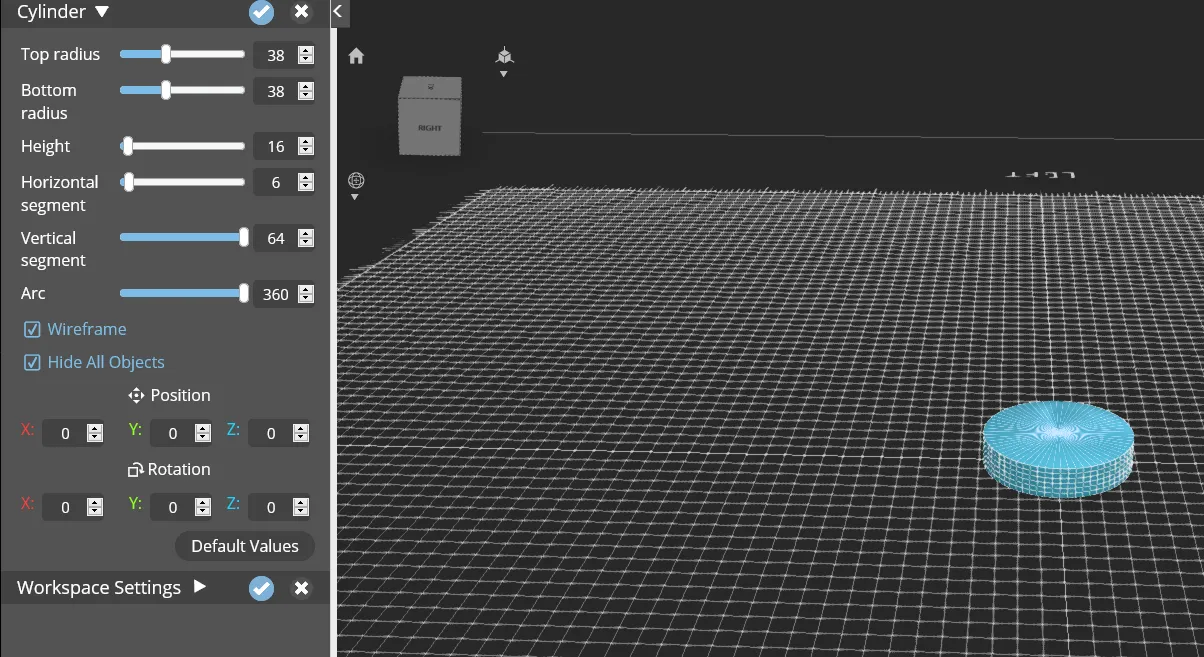
To create the base, I started out with a hexagonal piece, that I later replaced with a cylindrical piece of the same dimensions, but the process is the same:
First, create the object, giving it the dimensions of the candle, but with a couple of extra millimeters:
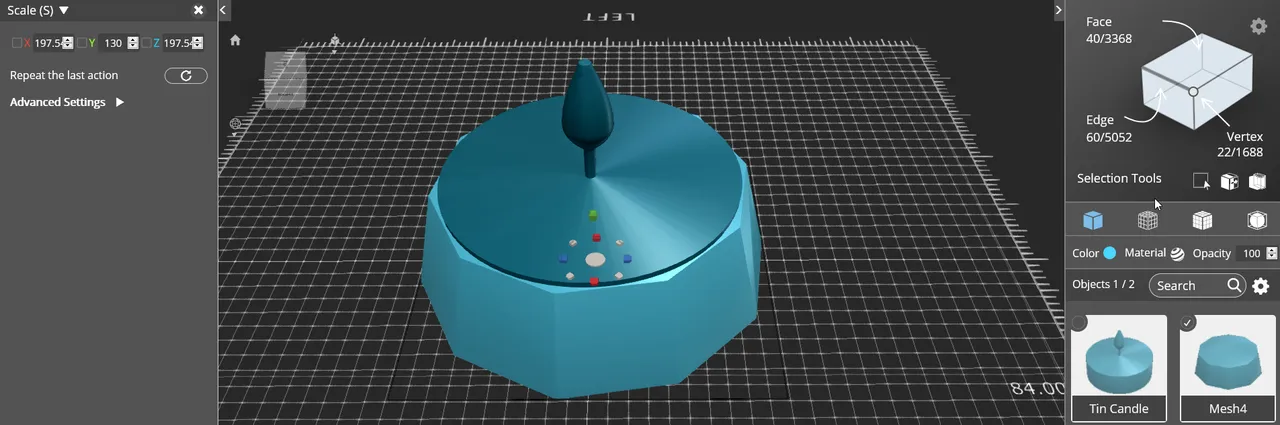
You might notice the candle is also moved a bit upwards, so as to create a bottom and be able to see the difference.
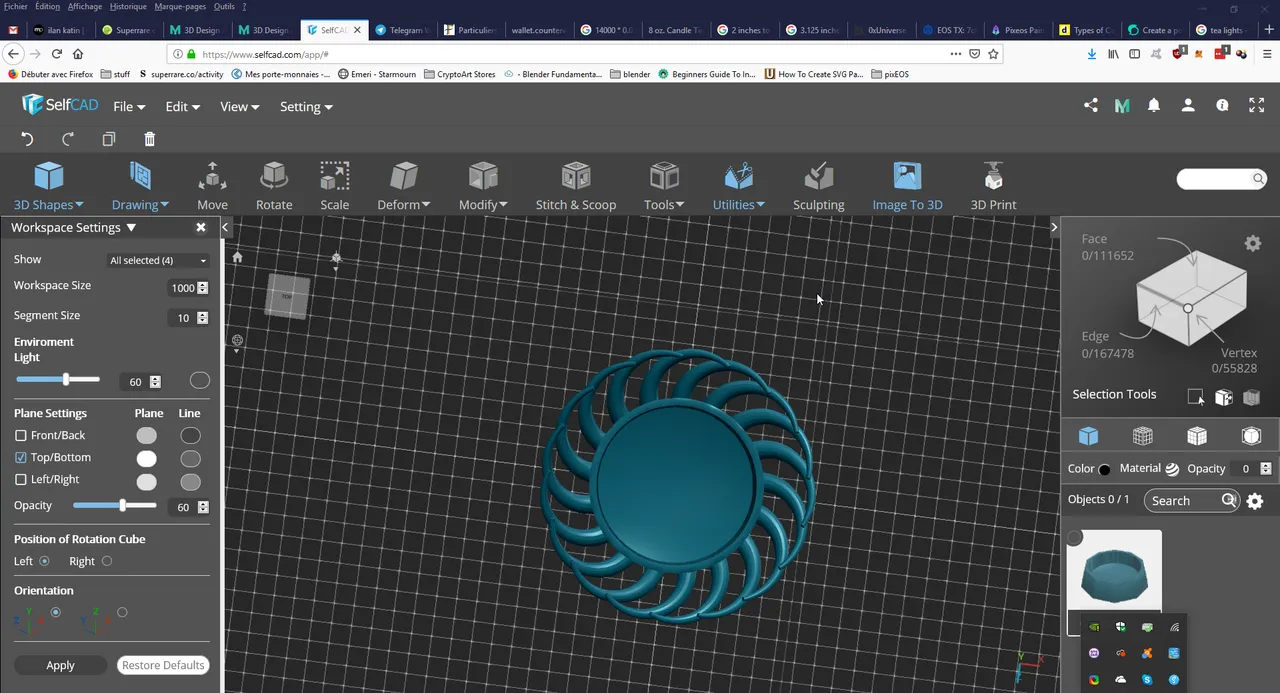
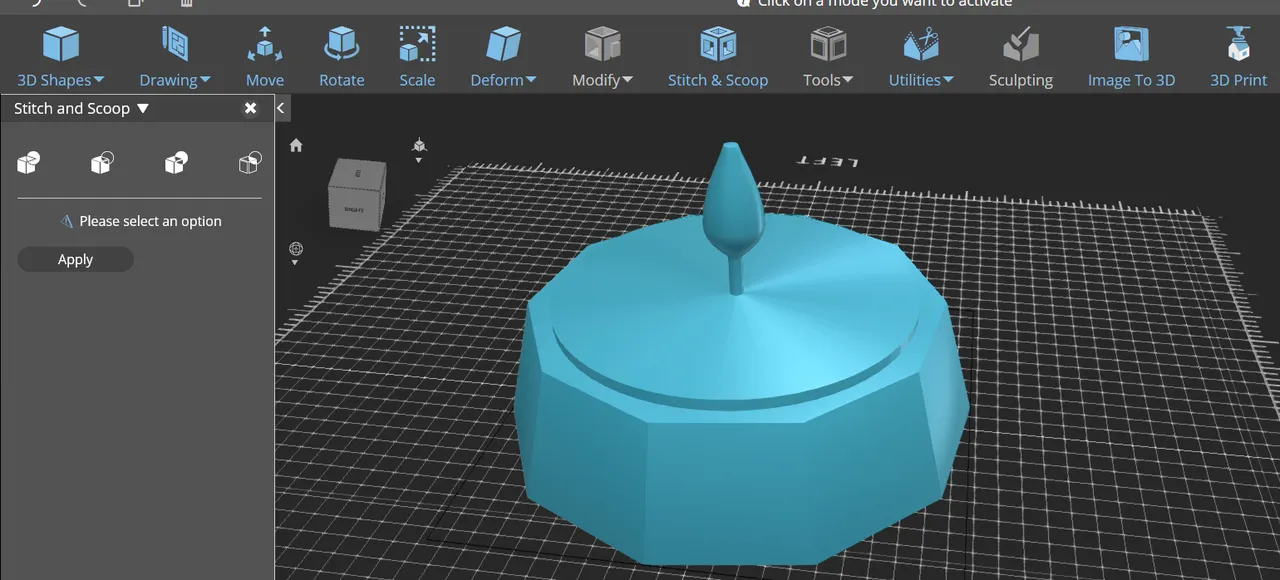
Then we use the "Stitch and Scoop" tool (Boolean operations to unite, cut out or keep the difference of 2+ models) and remove the candle from the holder, leaving a snug fit for a real candle once the model is printed.
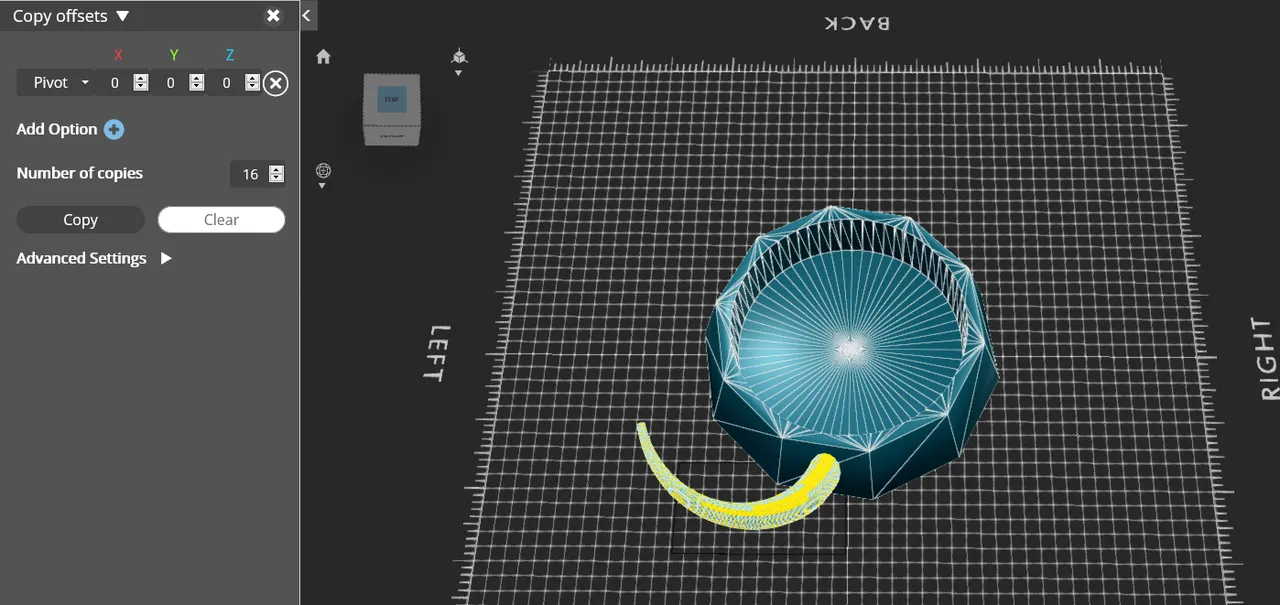
3. Modelling the decorations
Now that we have a holder for a Tea Light Candle (well, in theory anyway ;) , we can design attachments and decorations.
This is a potentially infinite creative step, as there are tons of different ways to customize the holder.
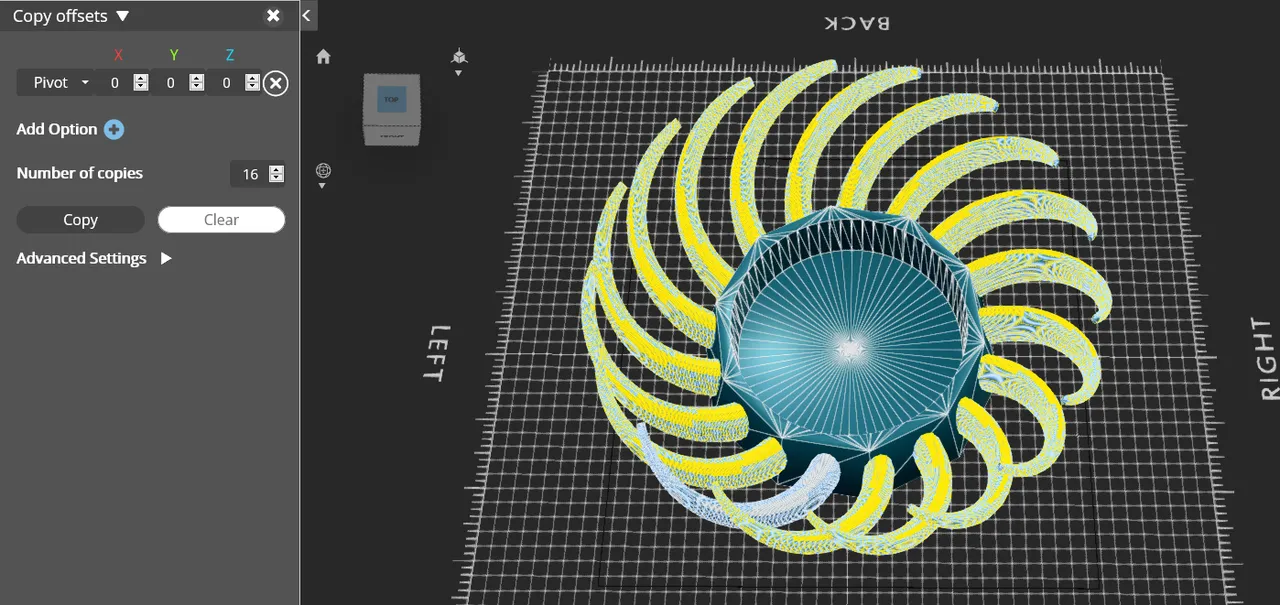
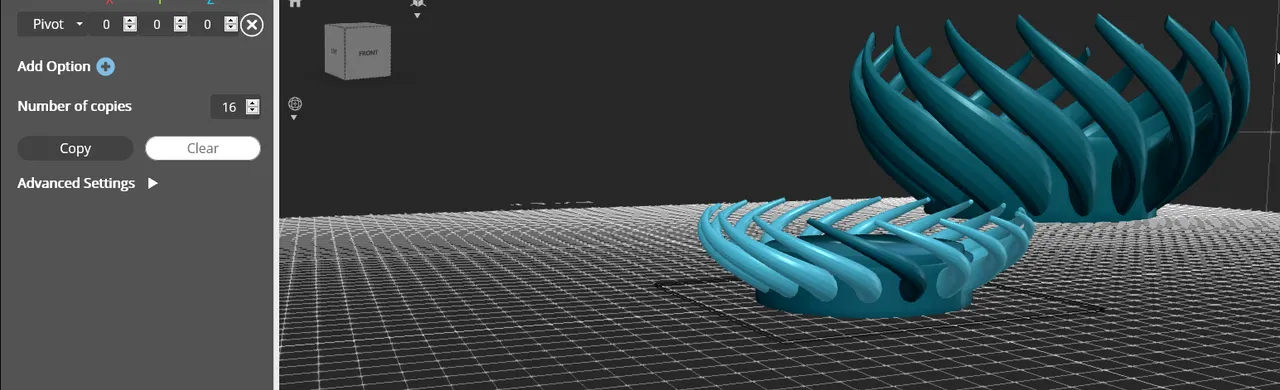
These will be using the "Copy offset" tool, that allows for creating multiple copies and setting them apart with different offset values (based on position, resizing, skewing,tapering... and, the one we'll be using Pivoting).
First, we need something to attach to our model. I choose this tentacle/flame creation I made using the Spiral shape generator:

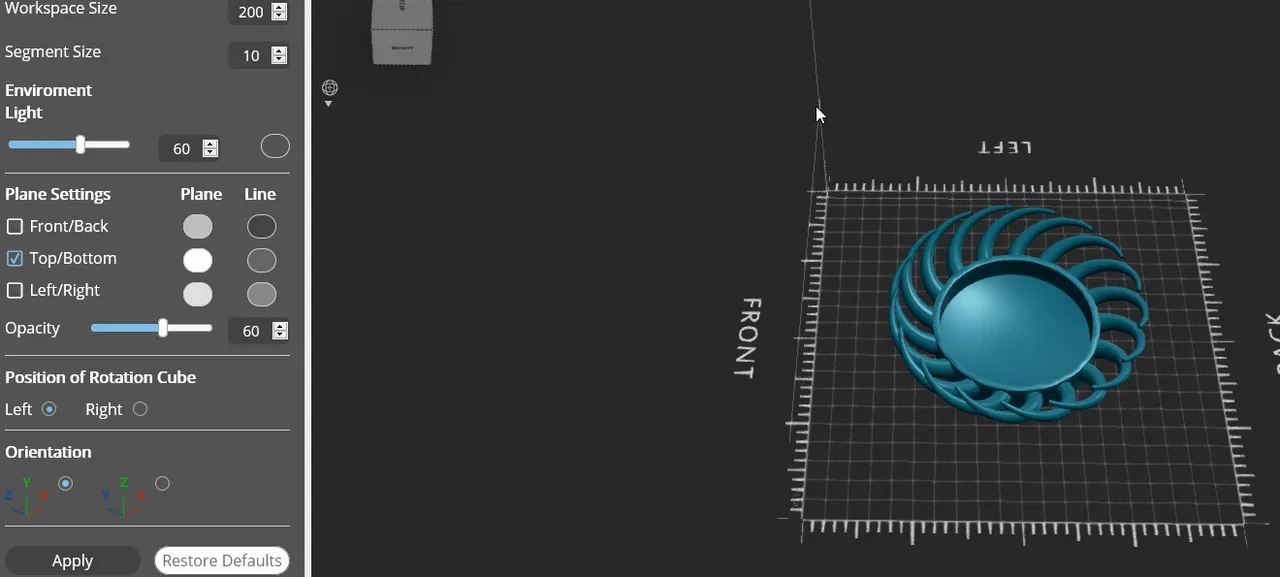
We can then position it on the model (you'll see the hexagonal model be replaced by the all-round one suddenly, that's just me noticing the hexagonal one isn't as good and making a round one using the exact same steps used to create the hexagonal model)
Here's the Copy Offset tool in action:
and here's the point where I switched over to the round model, as well as displaying the candle model in the middle to show how it'll look:
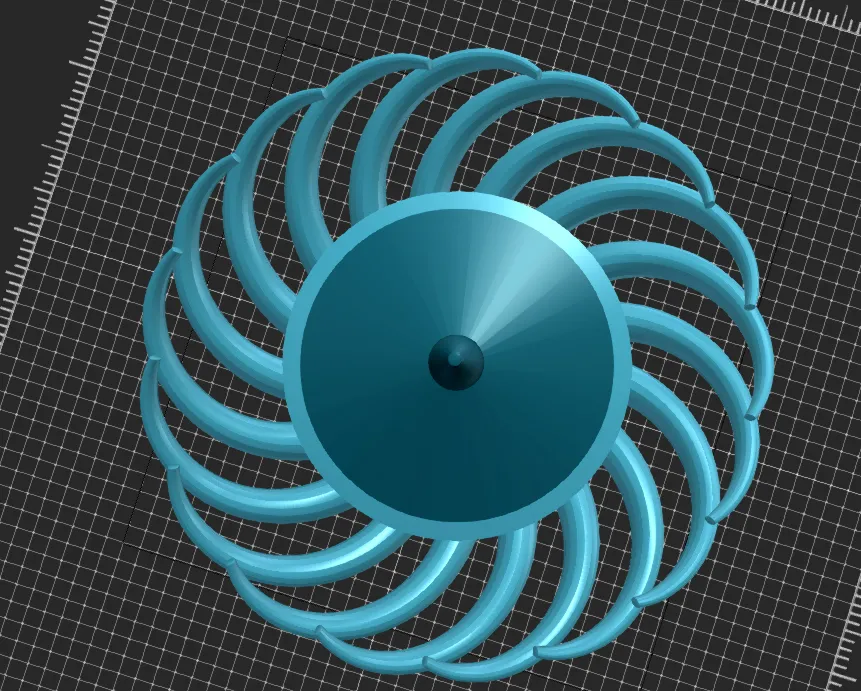
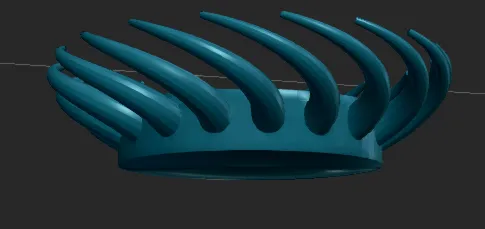
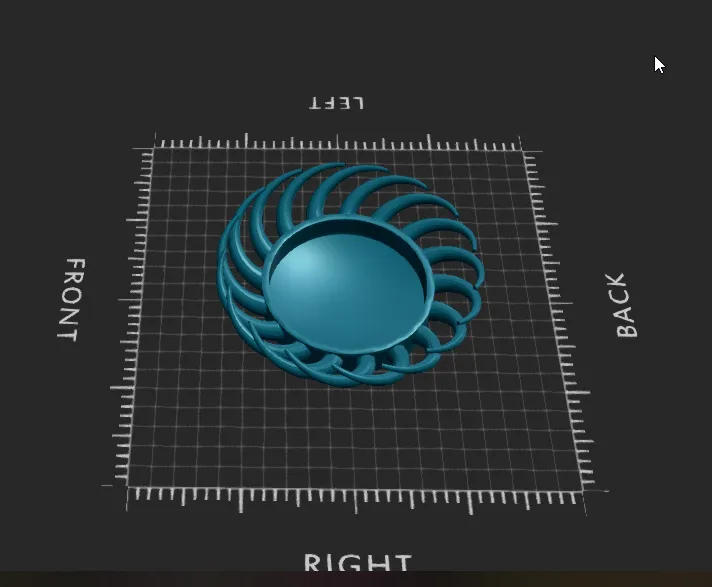
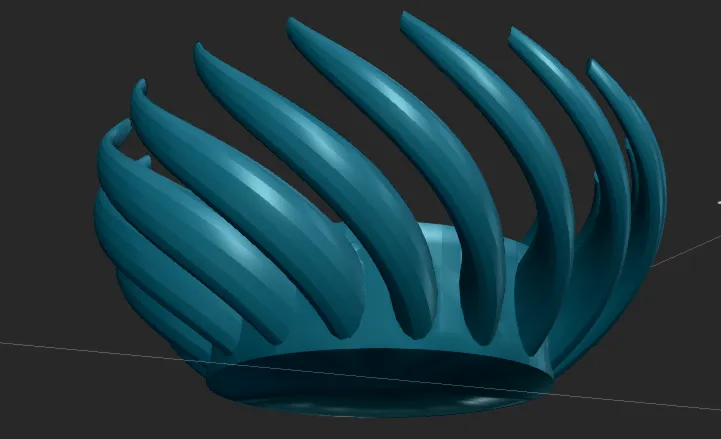
And here's the 'final' model:
4. Redo everything with the correct dimensions...
Here's me redoing all the above steps as fast as possible with the correct dimensions of a tea light ;)

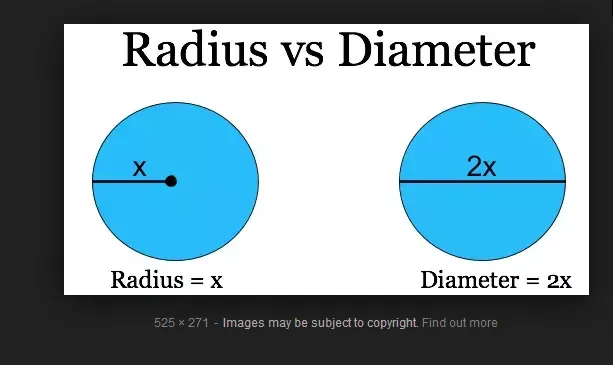
aaaaaaaaaaaand then I noticed Diameter = 2Radius, so I had to redo the calculations a bit XS
Luckily, I can just rescale the model on the X axis to be the same size as a cylinder with the correct radius:
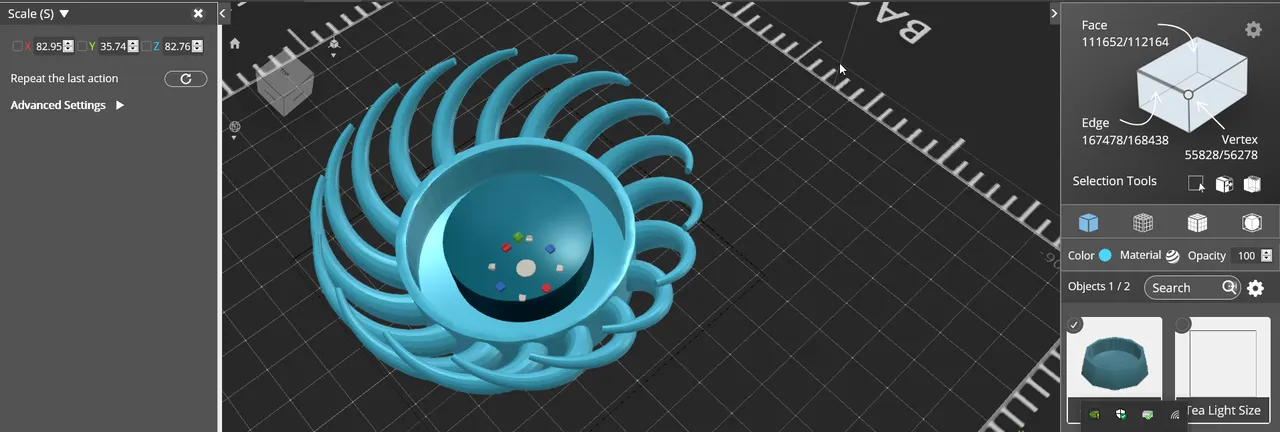
Finally done !
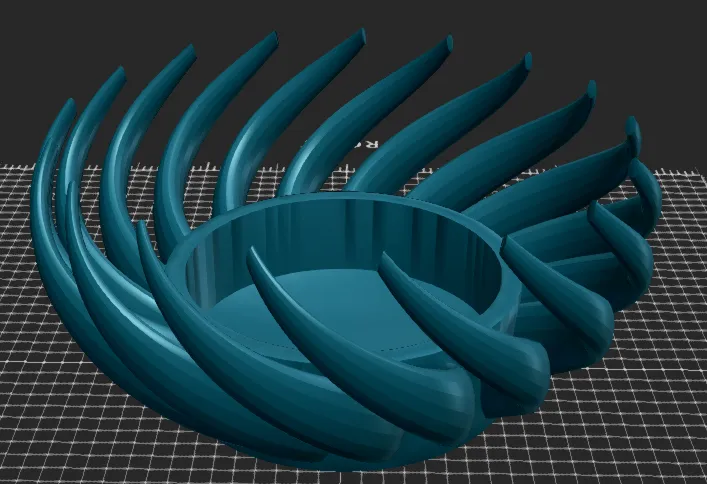
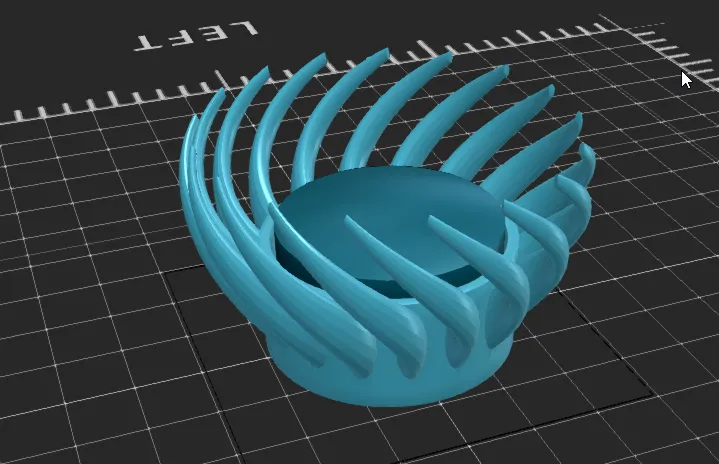
And here's some final shots of the model itself: