
Hola, espero estén teniendo un hermoso día. Hoy quiero compartir con ustedes, el proceso de decoración de un bombillo. Este es el segundo que decoro, sin embargo, el proceso es completamente diferente al primero que realicé y compartí con ustedes hace unos meses.
Hi, I hope you are having a beautiful day. Today I want to share with you the process of decorating a light bulb. This is the second one I decorate, however, the process is completely different from the first one I made and shared with you a few months ago.
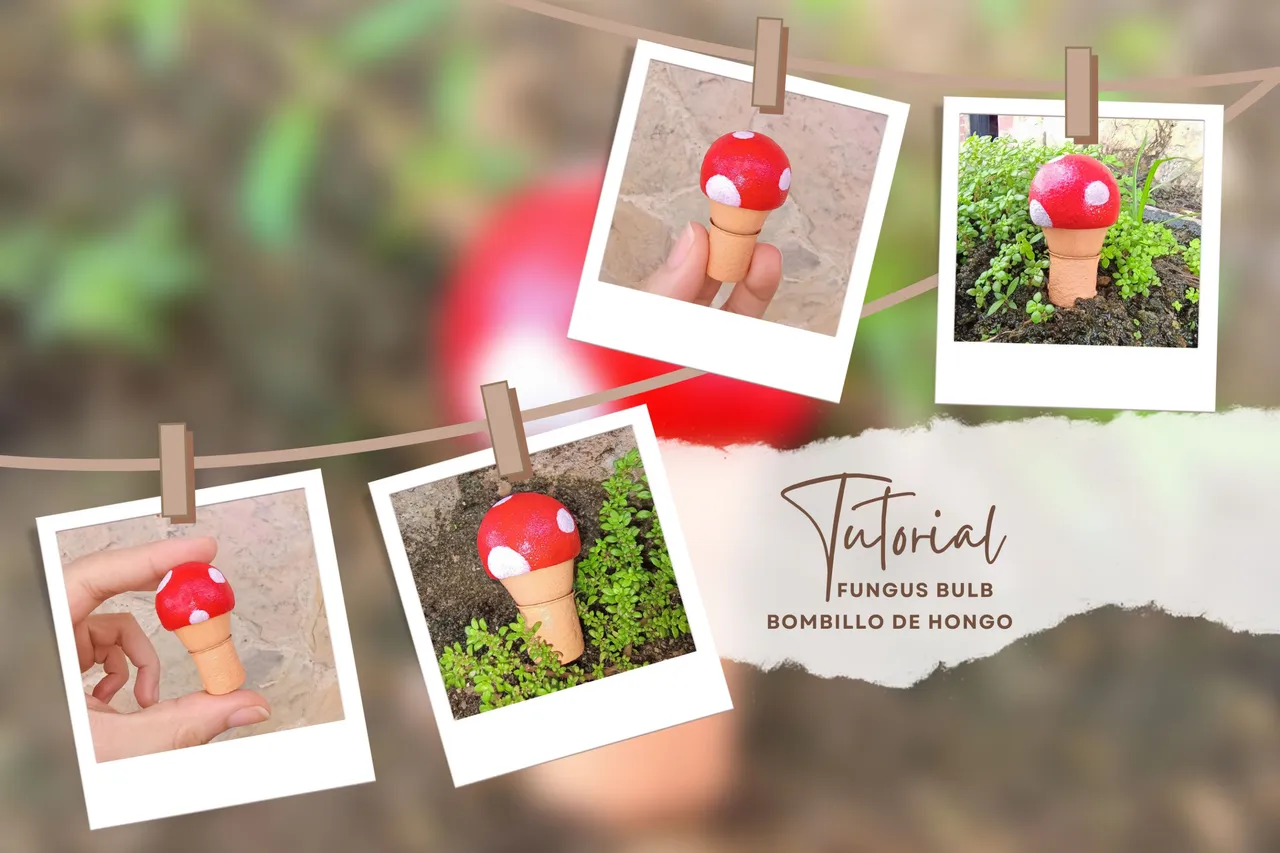
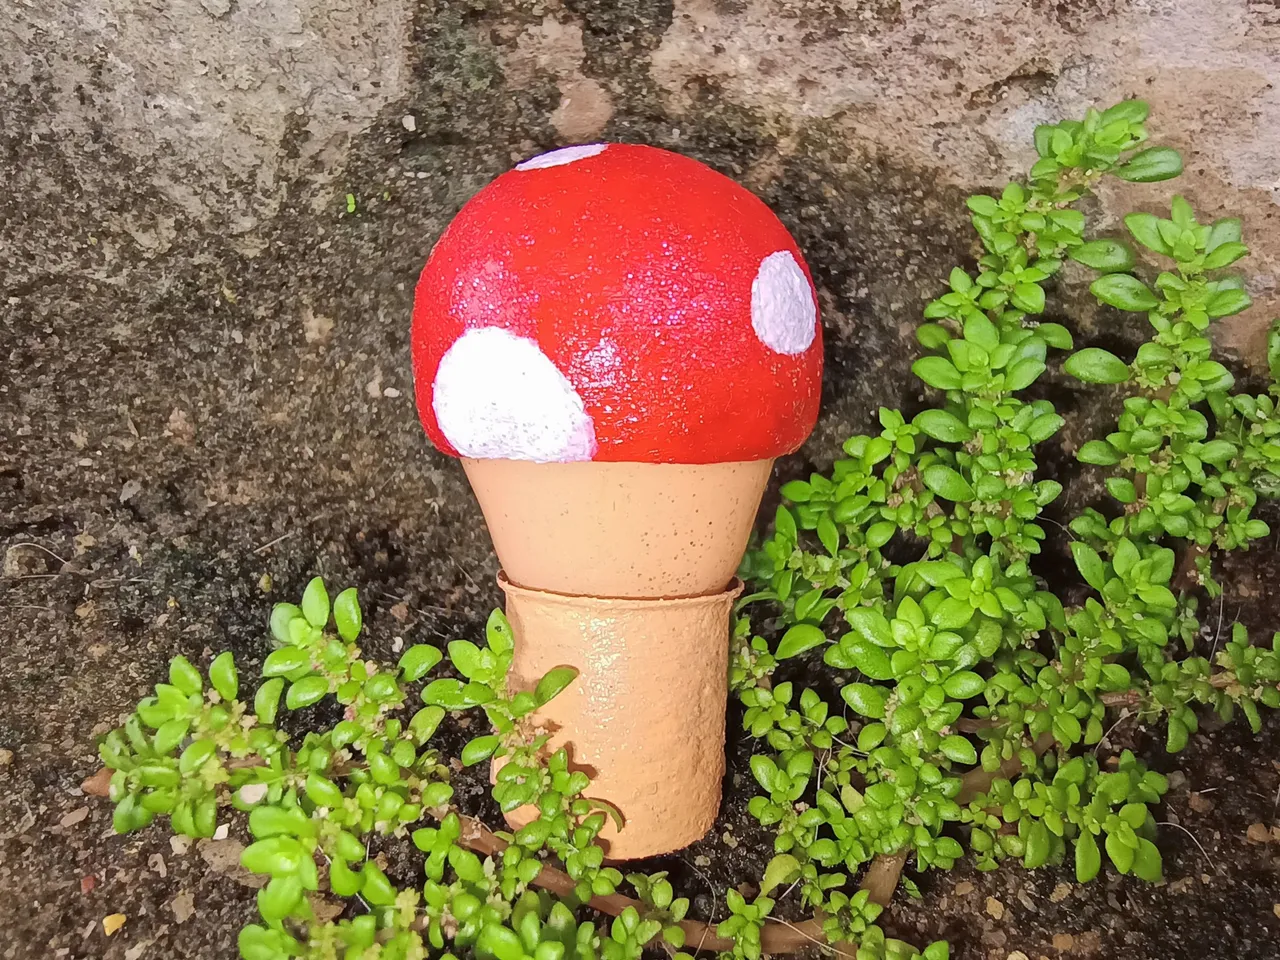
En aquella oportunidad hice una rana, hoy les traigo un pequeño hongo. Esta es una decoración que pueden colocar junto a sus plantas, yo no tengo pero encontré unas y tomé un par de fotos, para mostrarles lo bien que se ve.
On that occasion I made a frog, today I bring you a small fungus. This is a decoration that you can place next to your plants, I don't have any but I found some and took a couple of pictures to show you how nice it looks.

| Materiales | Materials |
|---|---|
| Plastilina roja | Plastilin red |
| Pintura roja | Red paint |
| Pintura blanca | White paint |
| Pintura color carne | Flesh-colored paint |
| Pinceles | Brushes |
| Pinzas | Tweezers |
| Destornillador | Screwdriver |
| Lima de uñas | Nail file |
| Envase hondo de plástico | Deep plastic container |
| Trapito húmedo | Wet paper towel |

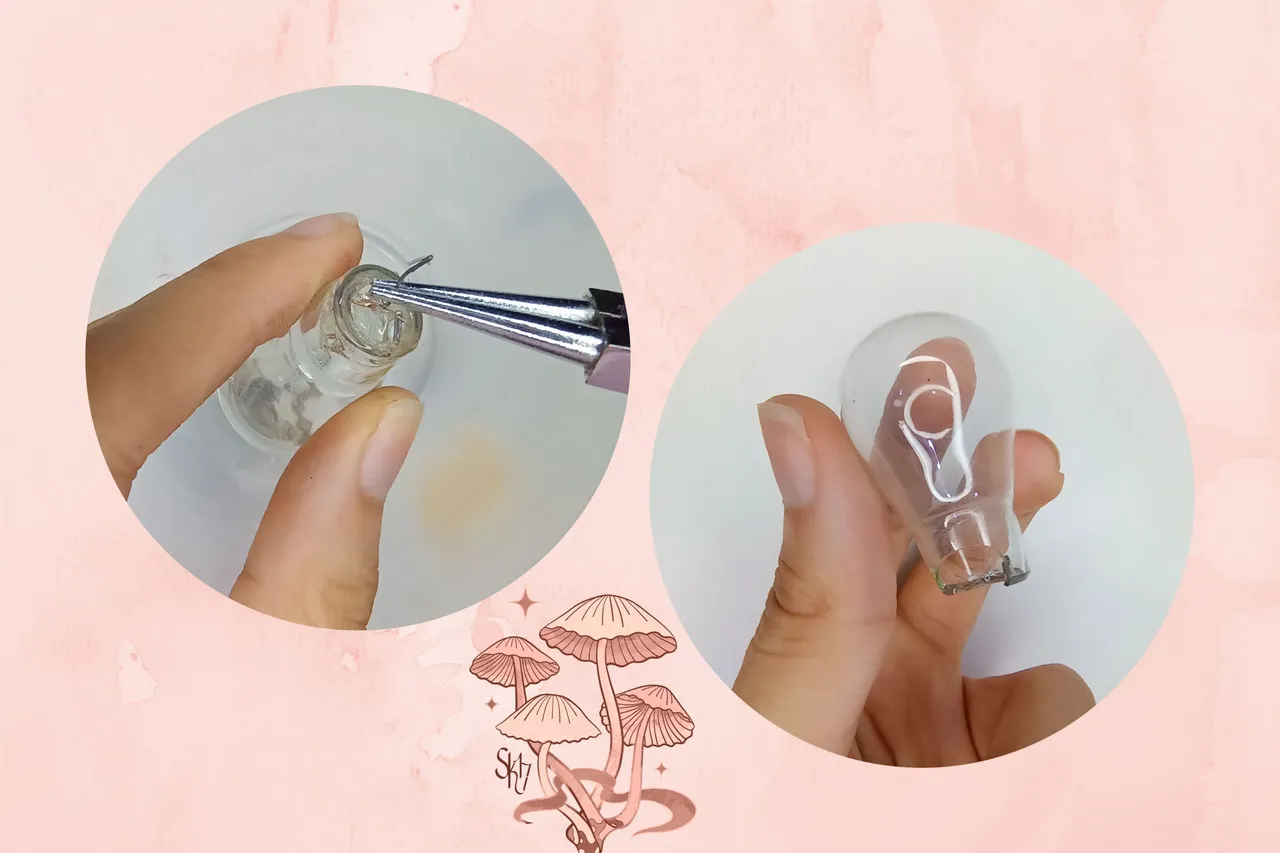
Inicié separando las partes del bombillo, la metálica de la de cristal. Luego coloqué un envase de plástico en la parte de abajo, para ir recolectando todos los desperdicios que irían cayendo y así evitar cualquier tiempo de accidente, con los fragmentos de vidrio.
I started by separating the metal and glass parts of the bulb. Then I placed a plastic container at the bottom, to collect all the debris that would fall and thus avoid any accident time, with the glass fragments.
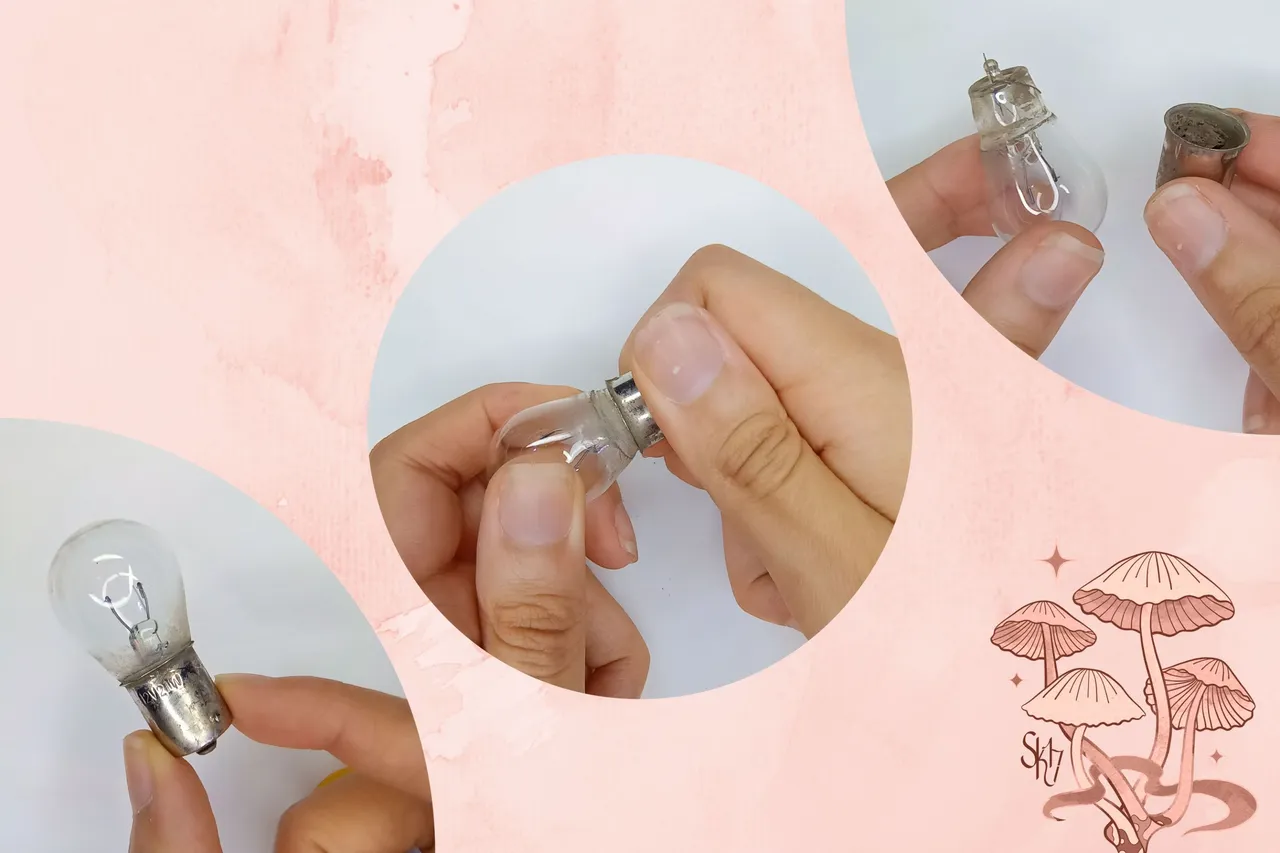
Luego empecé a retirar todo el interior del bombillo (como verán en las fotos) fui cambiando las herramientas. Primero usé unas pinzas y un destornillador para romper e ir quitando algunas piezas, las fui echando en el envase de plástico que les mencioné. Tomé otro tipo de pinza, para sacar los alambres del bombillo y finalmente, limpié muy bien el interior del mismo.
Then I started to remove all the inside of the bulb (as you will see in the photos) I was changing the tools. First I used tweezers and a screwdriver to break and remove some pieces, I was throwing them in the plastic container that I mentioned. I took another type of tweezers to remove the wires from the bulb and finally, I cleaned the inside of the bulb very well.
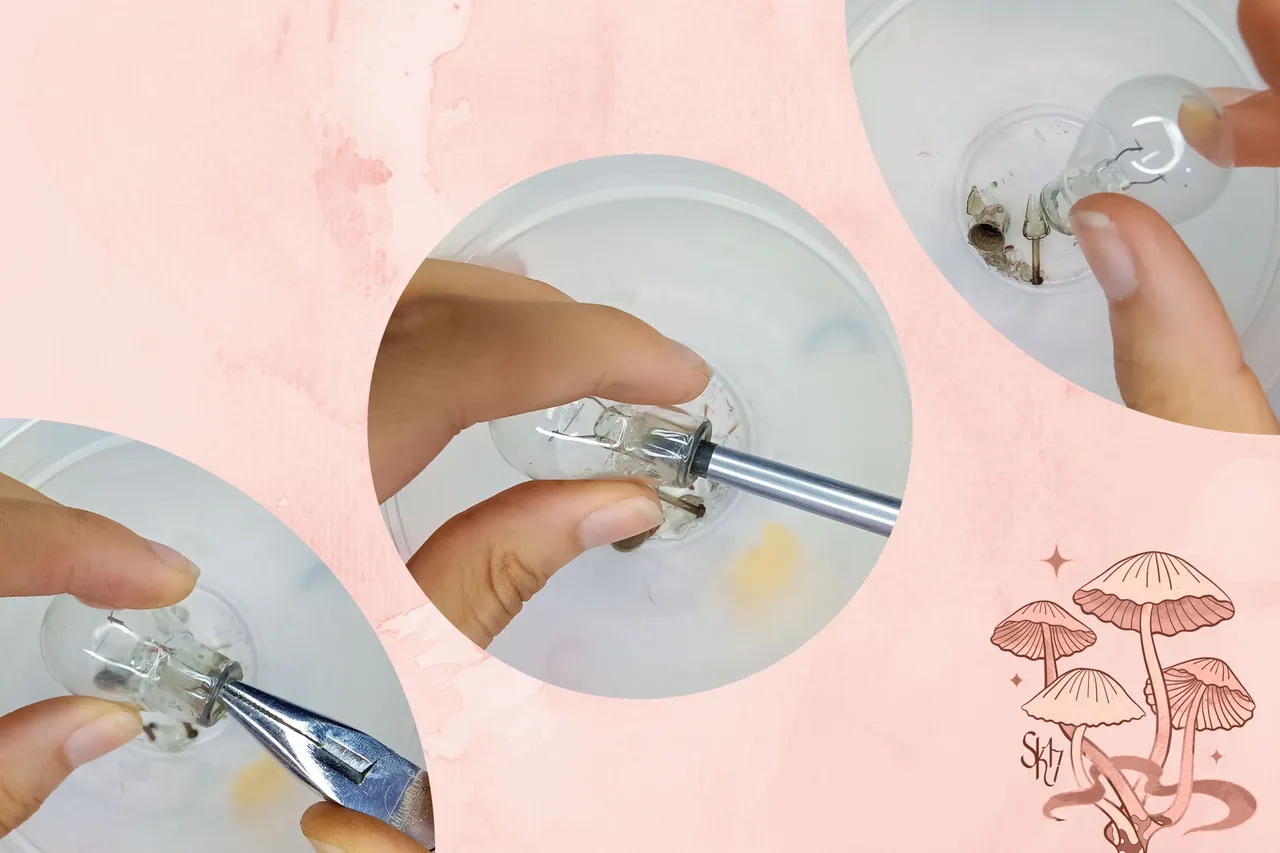
Esta parte puede ser un poquito tardada, porque la idea es ser lo más cuidadoso posible. Yo considero que vale la pena, el resultado es bastante chévere y es una actividad entretenida, diferente. Siempre y cuando estén dispuestos a seguir los pasos, de forma responsable... Realmente es algo que les recomiendo hacer.
This part can be a bit time consuming, because the idea is to be as careful as possible. I think it's worth it, the result is pretty cool and it's a fun, different activity. As long as you are willing to follow the steps, in a responsible way... It is really something I recommend you to do.

Para la decoración, empecé haciendo una tira de plastilina roja y la coloqué justo como pueden ver en las fotos. Luego empecé a hacer presión sobre la misma, para aplanarla y a su vez unirla al bombillo, fui estirando la plastilina hacia arriba.
For the decoration, I started by making a strip of red plasticine and placed it just as you can see in the photos. Then I started to put pressure on it, to flatten it and in turn attach it to the light bulb, I stretched the plasticine upwards.
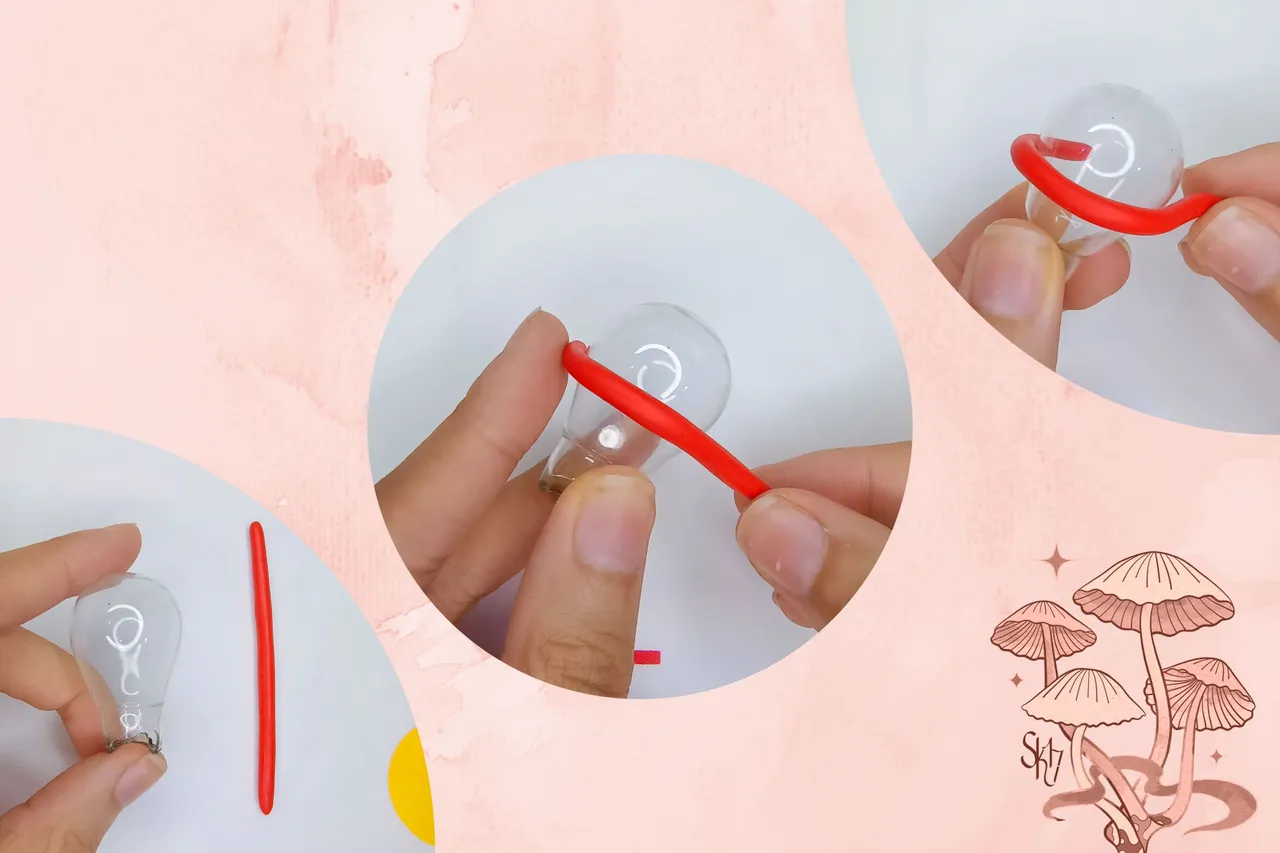
Agregué otro poco de plastilina en la parte superior del bombillo, después me encargué de integrar, moldear y emparejar bien la forma. Además de mis dedos, usé la palma de mi mano para obtener el acabado deseado.
I added another bit of plasticine on top of the bulb, then I took care of integrating, molding and matching the shape well. In addition to my fingers, I used the palm of my hand to get the desired finish.

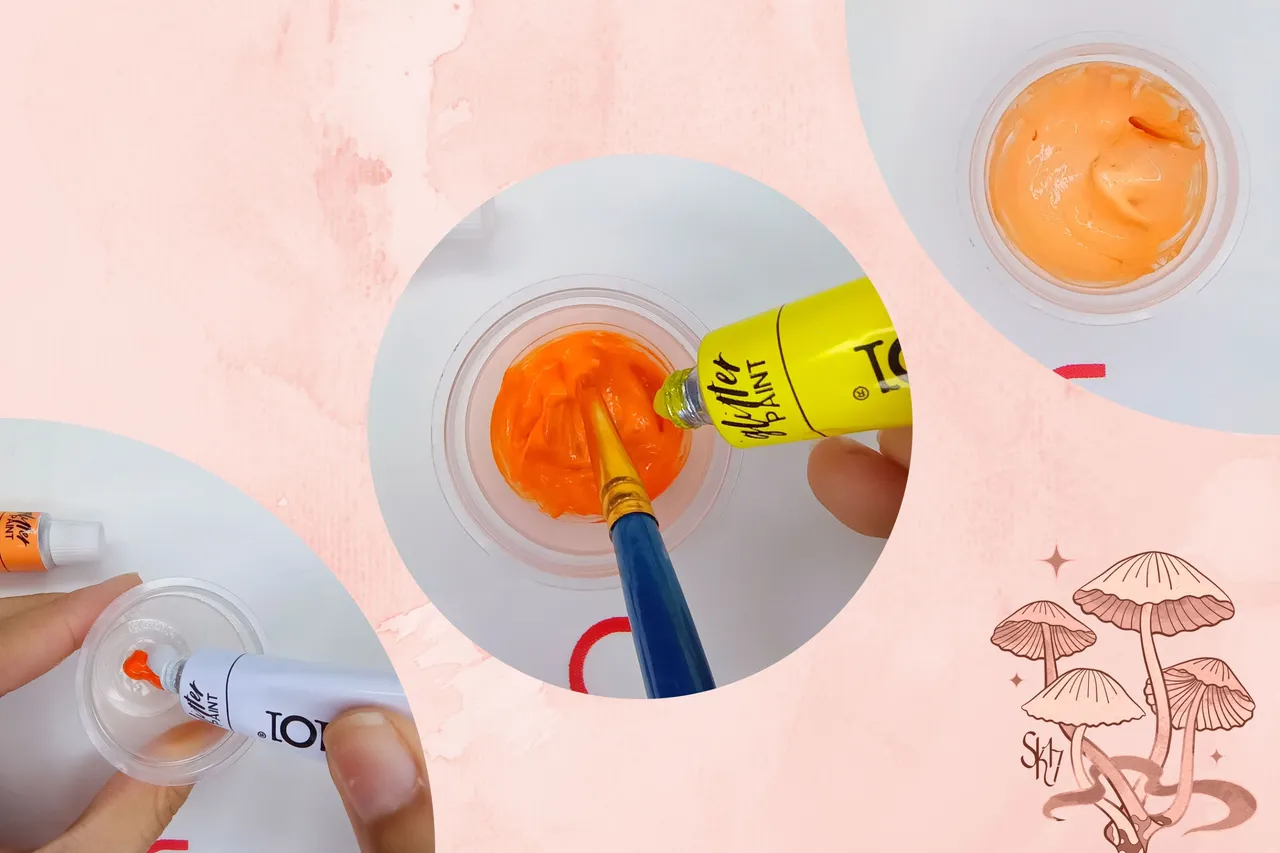
Mezclé pintura naranja, blanca y amarilla para obtener un color carne. Este nuevo tono, lo usé para pintar el interior del bombillo y la parte metálica.
I mixed orange, white and yellow paint to obtain a flesh color. This new shade, I used to paint the inside of the bulb and the metal part.
Luego tomé pintura roja y pinté toda la parte que modele en plastilina previamente, para a obtener un acabado vibrante y reluciente. Para lograr este efecto usé pintura acrílica escarchada, si no tienen, pueden usar otro tipo de pintura y luego aplicar una capa de barniz.
Then I took red paint and painted all the part that I previously modeled in plasticine, to obtain a vibrant and shiny finish. To achieve this effect I used glitter acrylic paint, if you don't have it, you can use another type of paint and then apply a coat of varnish.
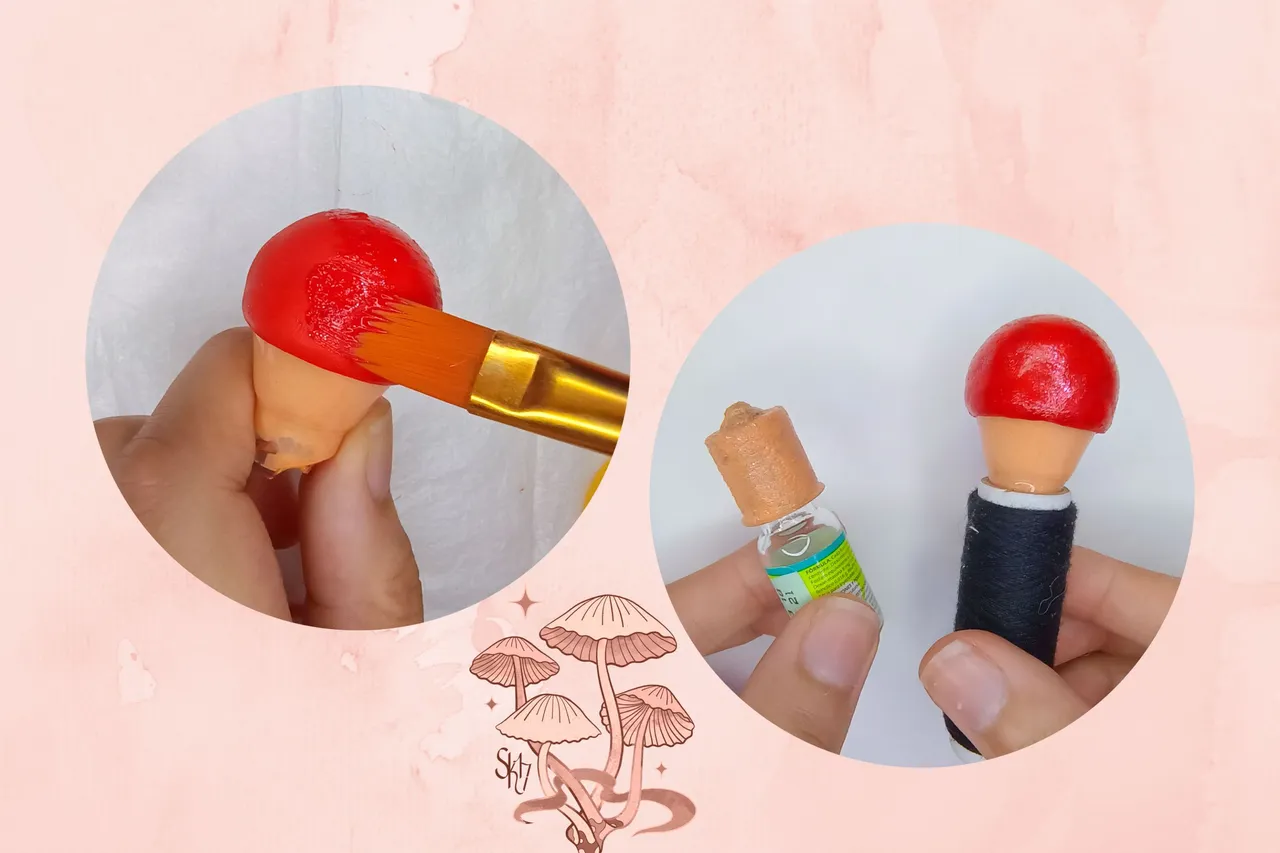
Usé un frasquito de Decobel para colocar la pieza de metal y la base de un hilo para sotener el bombillo. Esto con la idea de poder manipularlos mejor, también para dejarlos secar entre capas de forma segura y sencilla.
I used a Decobel bottle to place the metal piece and the base of a thread to hold the bulb. The idea was to be able to manipulate them better, also to let them dry between coats in a safe and easy way.
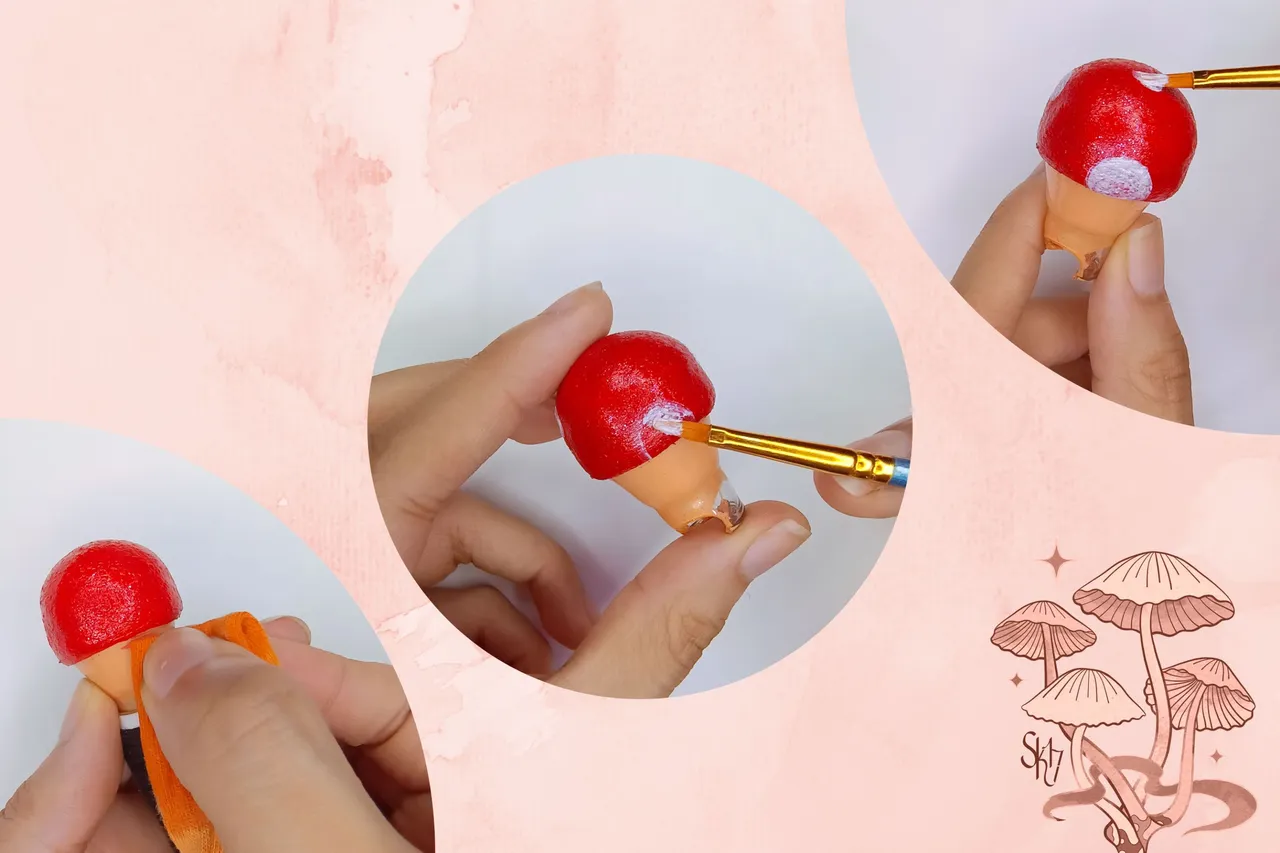
Dí todas las capas que fueron necesarias y limpié con un trapito húmedo, las partes del vidrio que manche con pintura. Luego agregué los detalles del hongo, con pintura acrílica blanca.
I applied as many coats as necessary and cleaned with a damp cloth the parts of the glass that I stained with paint. Then I added the details of the fungus with white acrylic paint.
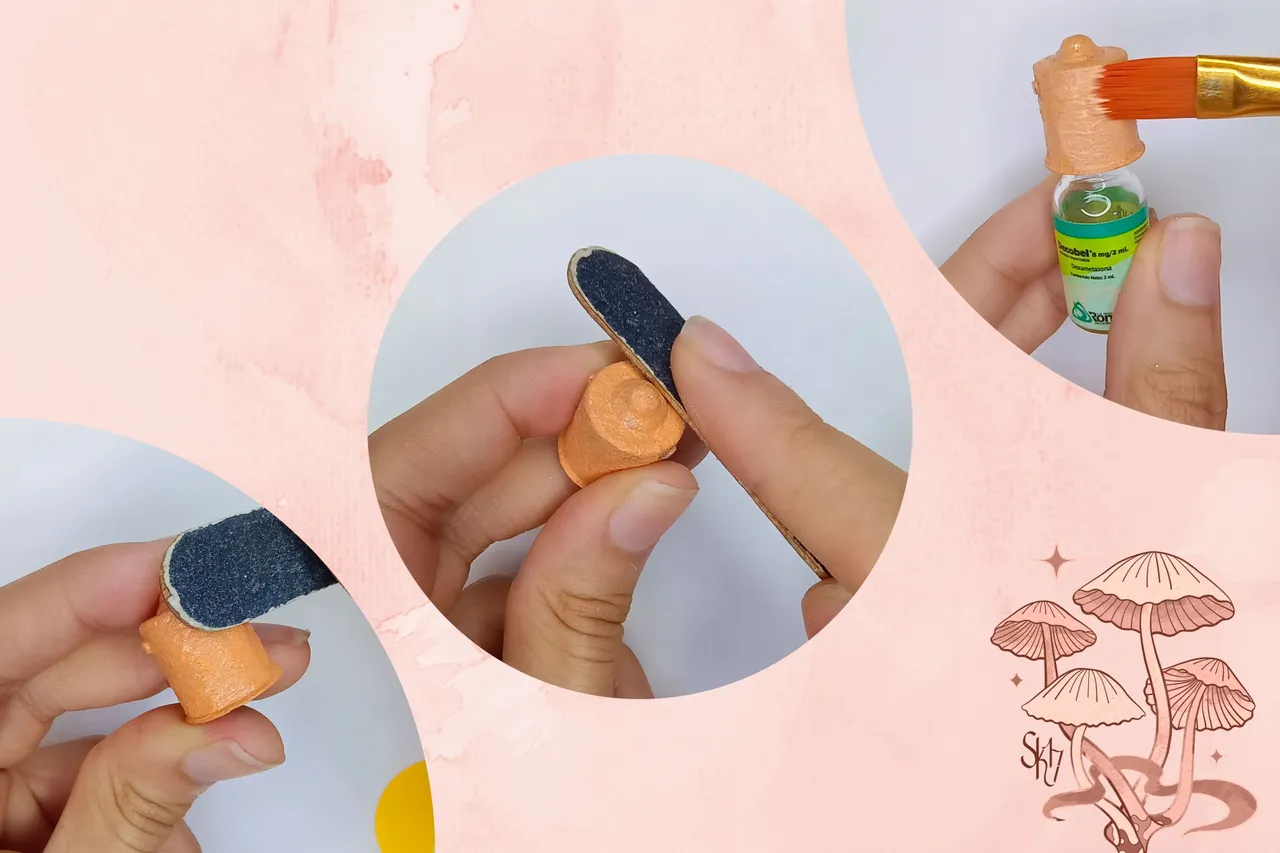
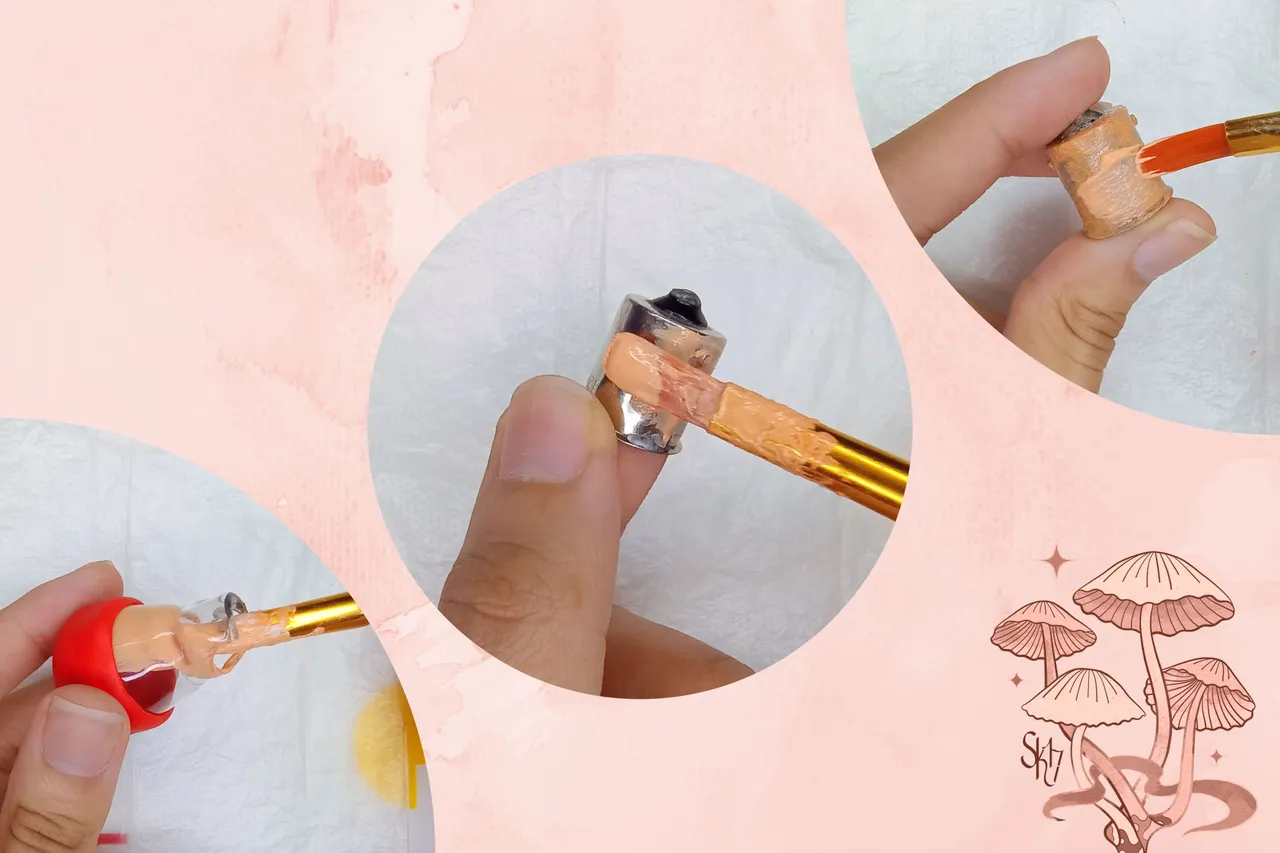
Para finalizar, tomé la pieza metálica pintada y le pasé una lima para las uñas, con la idea de emparejar la superficie y conseguir un acabado liso, prolijo. Por último, apliqué la capa final de pintura color carne y la dejé secar muy bien. Fue así como le devolví la viveza al tono y a su vez obtuve un acabado muy agradable a la vista y al tacto.
Finally, I took the painted metal piece and applied a nail file to even out the surface and get a smooth, neat finish. Finally, I applied the final coat of flesh-colored paint and let it dry very well. This is how I gave back the liveliness to the tone and at the same time I obtained a finish that was very pleasant to the eye and to the touch.
En este punto, pueden unir las piezas con el pegamento de su preferencia. Yo no tenía, por lo que solo encaje ambas partes y di por finalizada esta manualidad.
At this point, you can glue the pieces together with the glue of your choice. I didn't have any, so I just join both parts together and finished this craft.
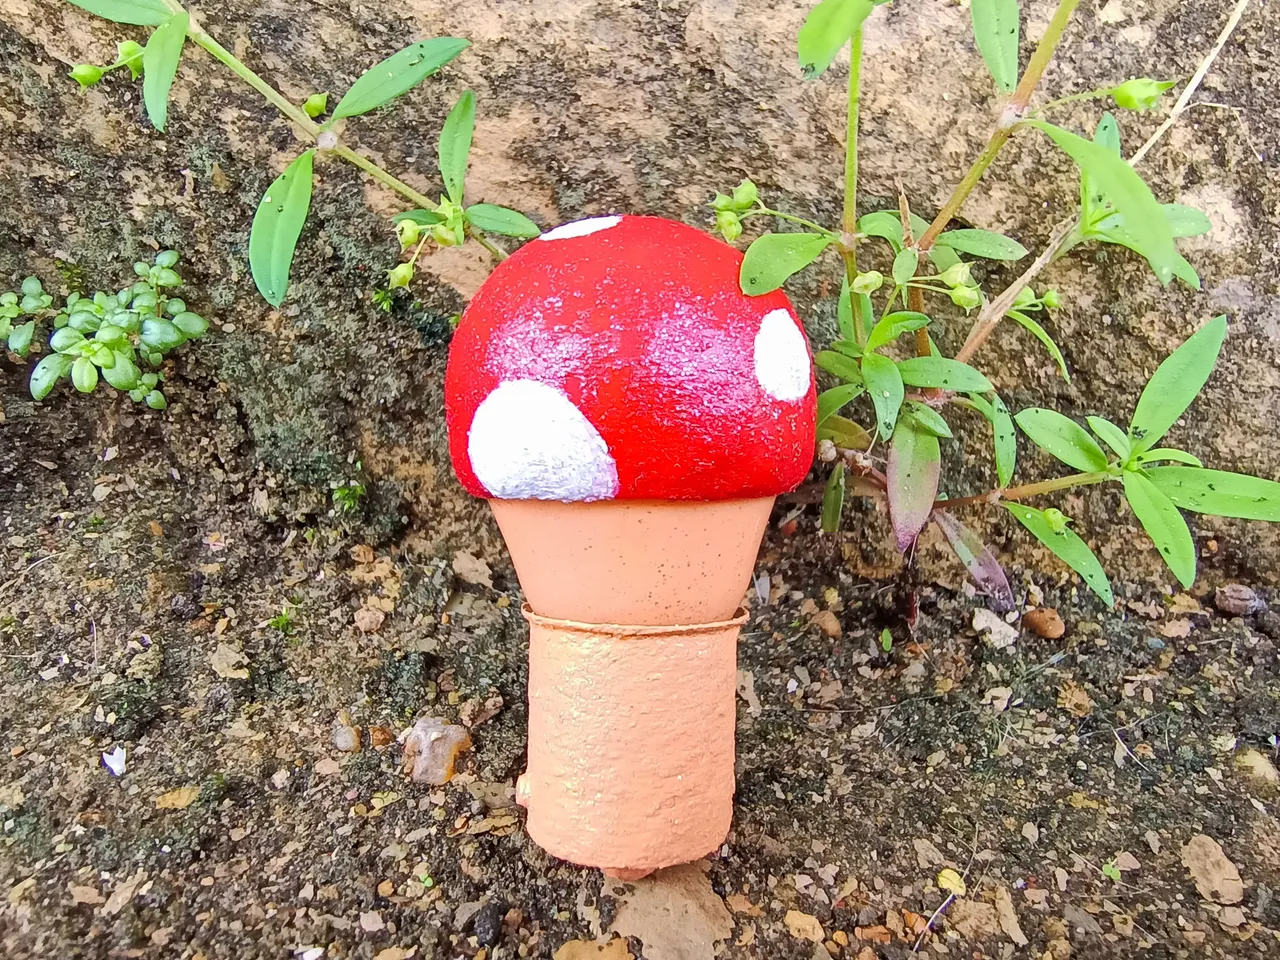
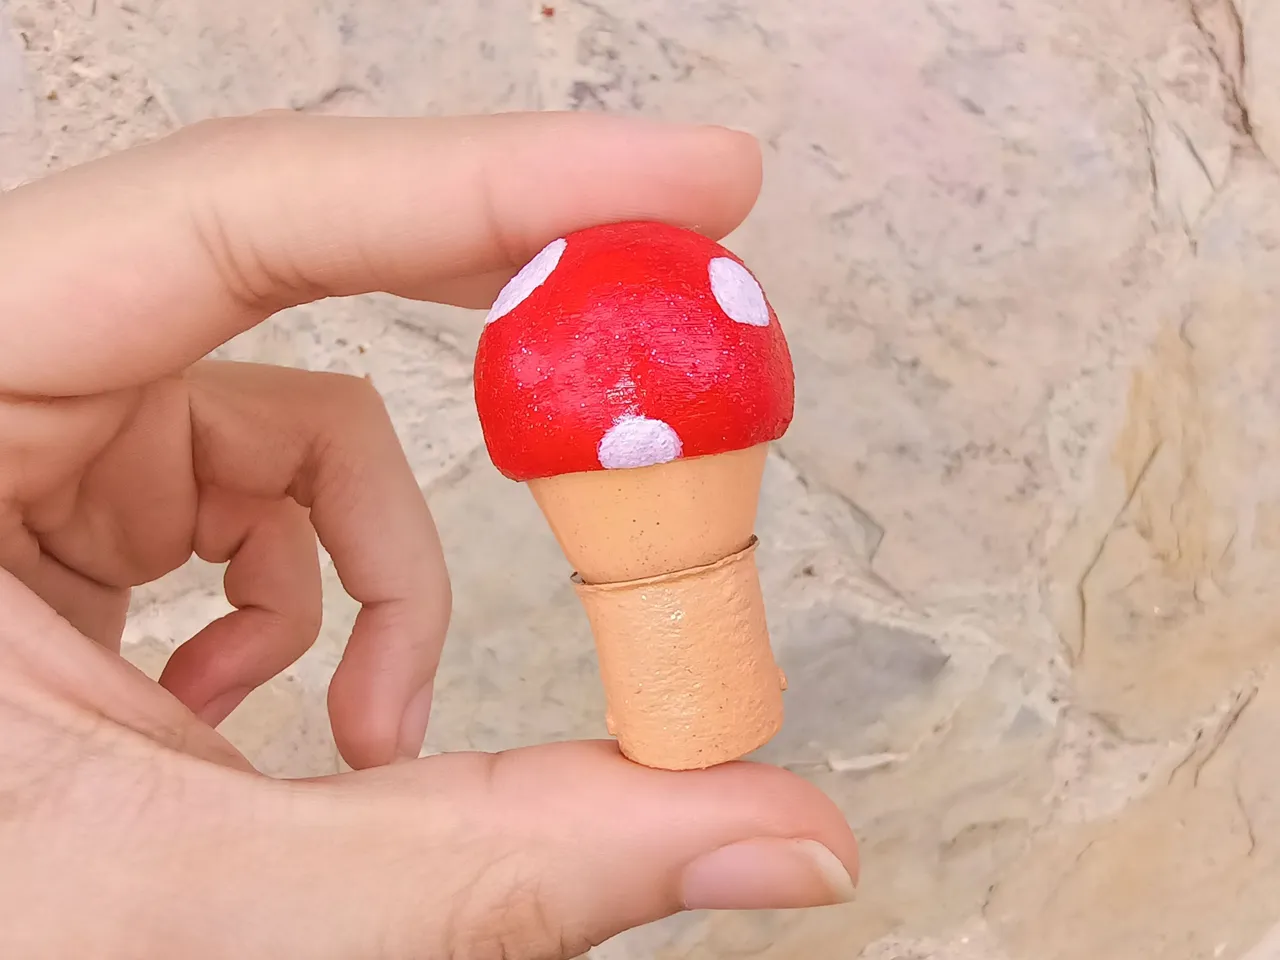
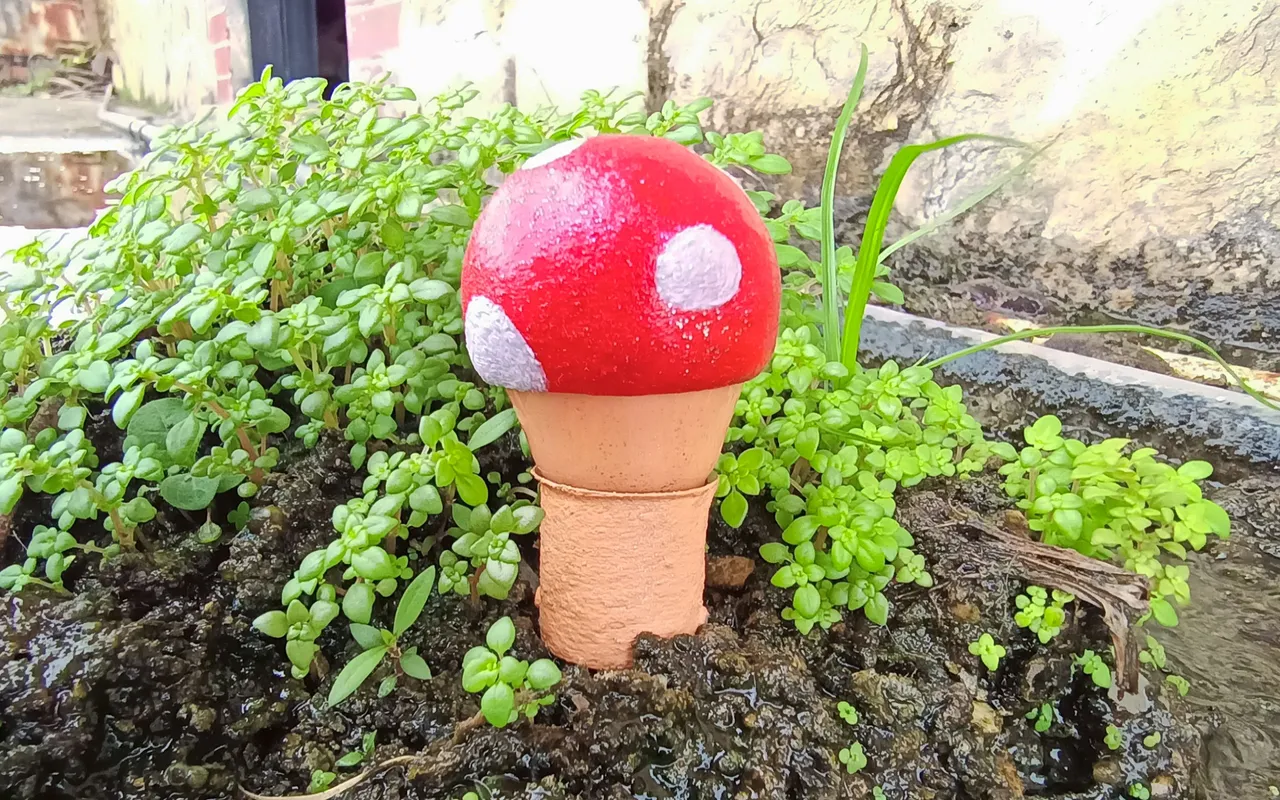
Realmente espero que les haya gustado, a mí me encantó. Es una forma chévere y diferente de reciclar. Es una actividad que, brinda la oportunidad de darle un toque único a los espacios verdes, este es ejemplo que yo les coloco pero es una manualidad sumamente versátil, fácilmente puede ser utilizada para ambientar otros espacios.
I really hope you liked it, I loved it. It is a cool and different way to recycle. It is an activity that gives the opportunity to give a unique touch to green spaces, this is an example that I give you but it is a very versatile craft, it can easily be used to decorate other spaces.
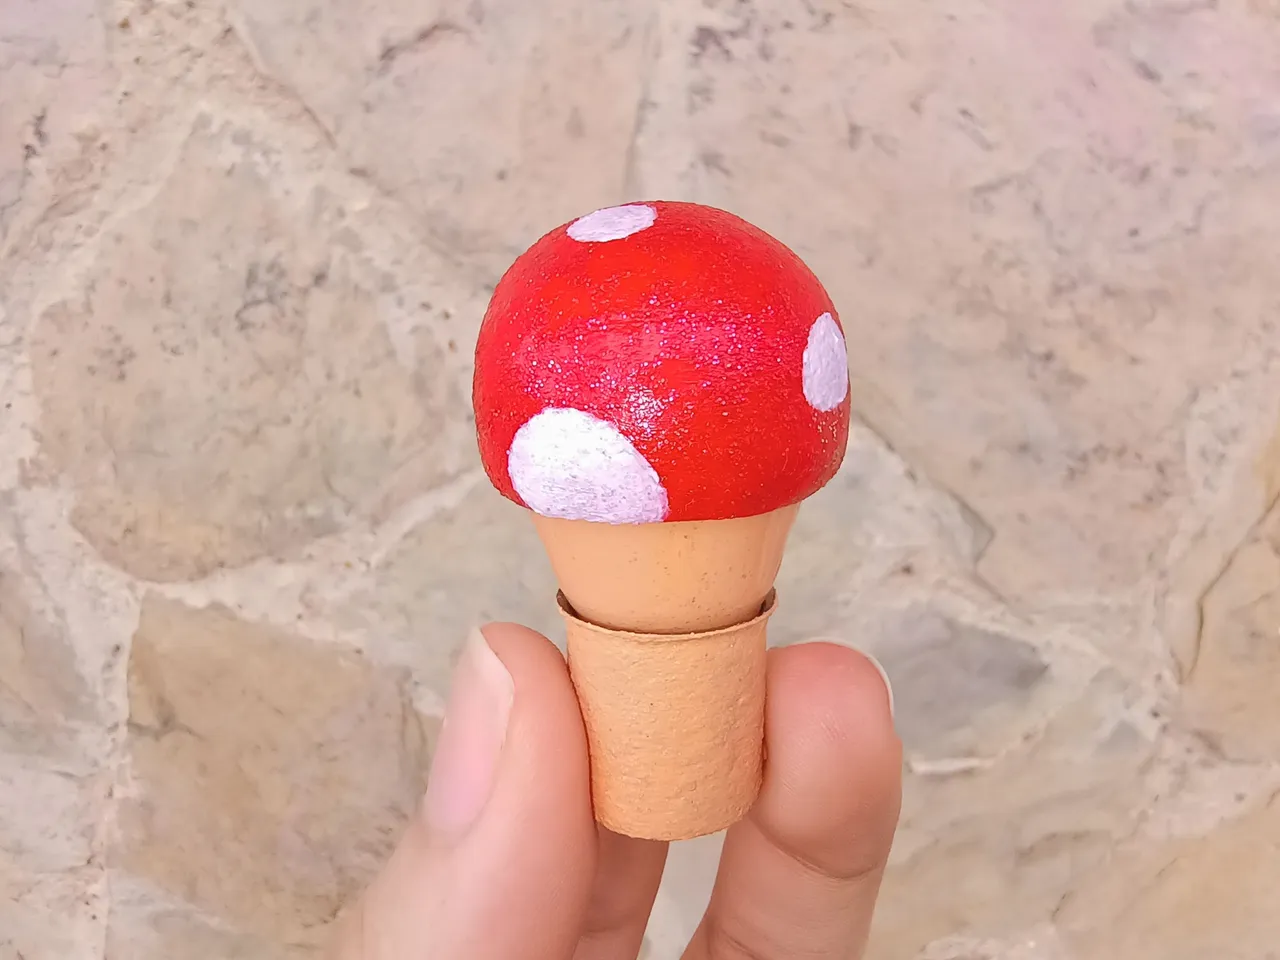
Si desean hacer varios, pueden jugar con los tamaños y colores. Yo solo hice uno y usé un bombillo bastante pequeño, obviamente es algo que queda de parte de cada uno. Lo genial de las manualidades es la gran libertad que brinda y siempre es bueno aprovechar esto.
If you want to make several, you can play with sizes and colors. I only made one and I used a very small light bulb, obviously it's up to you. The great thing about crafts is the great freedom they offer and it is always good to take advantage of this.

Por cierto, realicé las correcciones de color en Polarr. Hice tanto la imagen principal, como los pasos de este tutorial en Canva. Todas las fotos fueron tomadas por mí, con la cámara trasera de un Tecno Camon 17 Pro.
By the way, I made the color corrections in Polarr. Did both the main image and the steps of this tutorial in Canva. All the photos were taken by me, with the rear camera of a Tecno Camon 17 Pro.
 |  |
|---|---|
 |
|---|
| 🧚🏻♀️ stytchh |
| 🎨 sk17art |
| 🧸 stykawaii17 |
Poppins
Butler