
Hola, espero estén teniendo un maravilloso día. Hoy quiero compartir con ustedes, el proceso de creación de esta decoración, la cual fue relativamente fácil de hacer. Los pasos no son tan complicados pero toman bastante tiempo, dedicación y concentración (para que lo tomen en cuenta). Sería genial que les guste tanto como a mí, yo llevaba tiempo queriendo hacer algo como esto y admito que quedé encantada con el resultado.
Hi, I hope you are having a wonderful day. Today I want to share with you, the process of creating this decoration, which was relatively easy to do. The steps are not that complicated but they take a lot of time, dedication and concentration (just to keep in mind). It would be great if you like it as much as I do, I had been wanting to do something like this for a long time and I admit I was delighted with the result.
Con respecto a este DIY, tengo varias cosas que decir... Esta idea se me ocurrió hace un montón de tiempo pero no la hice en su momento, porque no tenía los materiales necesarios para llevarla a cabo. Por esta razón, pasé varios meses recolectando algunos bombillos y admito que, me costó un poco porque rara vez usamos esta clase de iluminación en casa pero en las pocas oportunidades en las que si, estuve muy pendiente de irlos guardando, a medida que se iban quemando.
Regarding this DIY, I have several things to say... This idea came to me a long time ago but I didn't do it at the time, because I didn't have the necessary materials to carry it out. For this reason, I spent several months collecting some bulbs and I admit that, it was a bit difficult because we rarely use this kind of lighting at home but in the few opportunities when we did, I was very careful to save them as they were burning.
Reuní varios bombillos y me hacía falta plastilina o alguna masa para modelar, pasó mucho más tiempo... Llegó el momento en el que tenía "todo lo que necesitaba" lo coloco así porque ya no tenía las ganas y bueno, los días seguían pasando. Hace dos o tres noches, volvió esta idea a mi cabeza y me dieron muchísimas ganas de hacerla pero me ahora me hacía falta algo más... Un diseño porque no recordaba como era el que tenía pensado hacer originalmente, ya que nunca hice un boceto ni nada por el estilo y eventualmente lo olvidé.
I gathered several light bulbs and I needed some plasticine or some dough to model, it took a lot more time... The time came when I had "everything I needed" I put it this way because I no longer had the desire and well, the days kept passing. Two or three nights ago, this idea came back to my head and I really wanted to do it but now I needed something more... A design because I didn't remember what the one I had originally intended to make looked like, since I never made a sketch or anything like that and eventually forgot about it.
En lugar de tratar de recordar dicho diseño, opté por realizar algo completamente diferente, desde cero y considero que fue la mejor decisión dadas las circunstancias. Yo no soy fan de la ranas ni nada por el estilo pero tampoco tengo nada en contra de ellas. Sin embargo, me he dado cuenta de que los dibujos kawaii de ranas me gustan y captan mi atención, en el mejor de los sentidos. Por eso me pareció chévere hacer una con plastilina, según yo, este tipo de ranas son súper fáciles de hacer.
Instead of trying to remember that design, I opted to make something completely different, from scratch, and I think it was the best decision under the circumstances. I'm not a fan of frogs or anything like that but I have nothing against them either. However, I have found that I like kawaii frog drawings and they capture my attention, in the best sense of the word. That's why I thought it was cool to make one with plasticine, according to me, this kind of frogs are super easy to make.
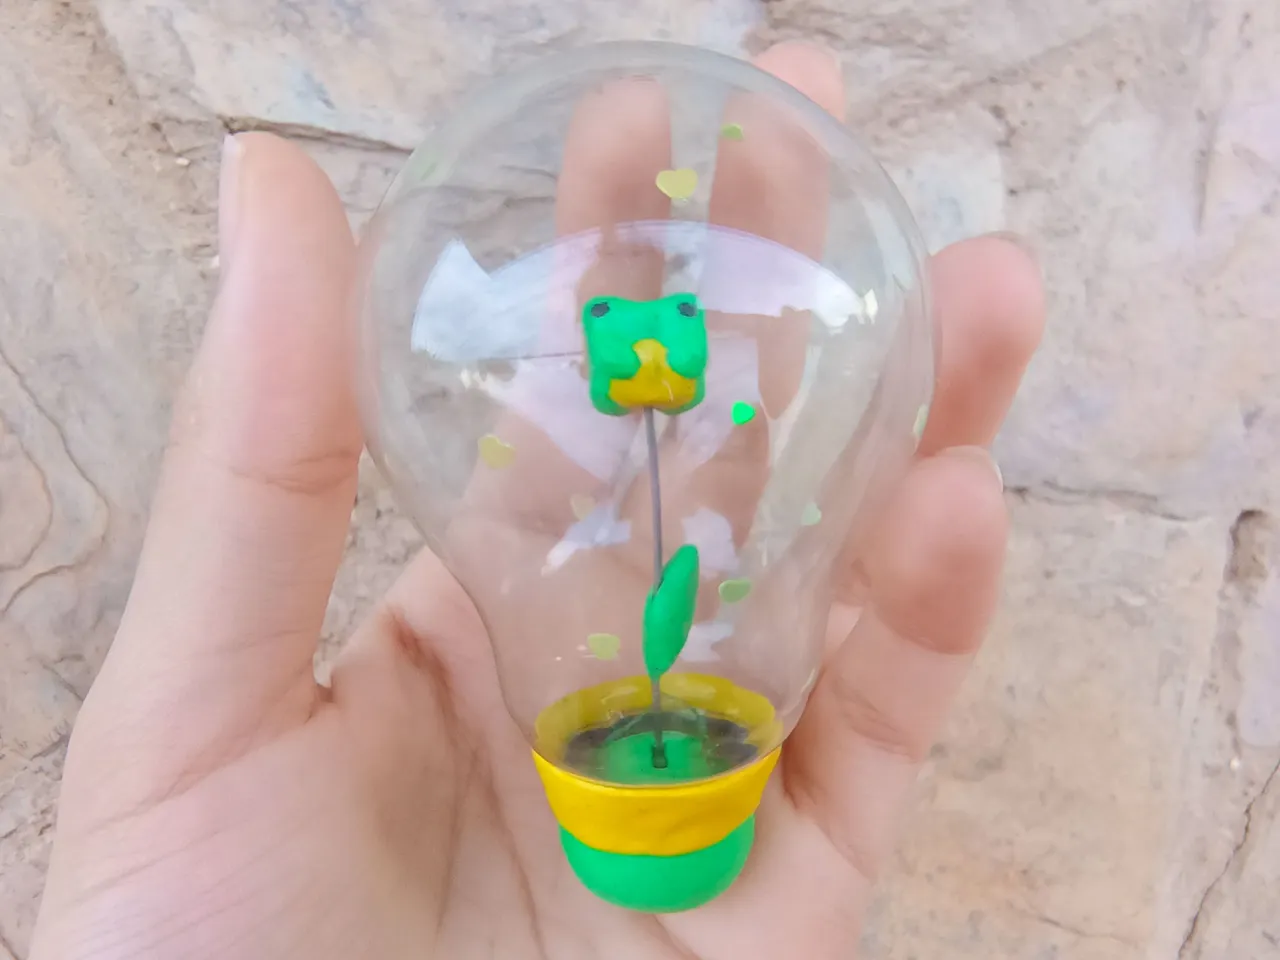
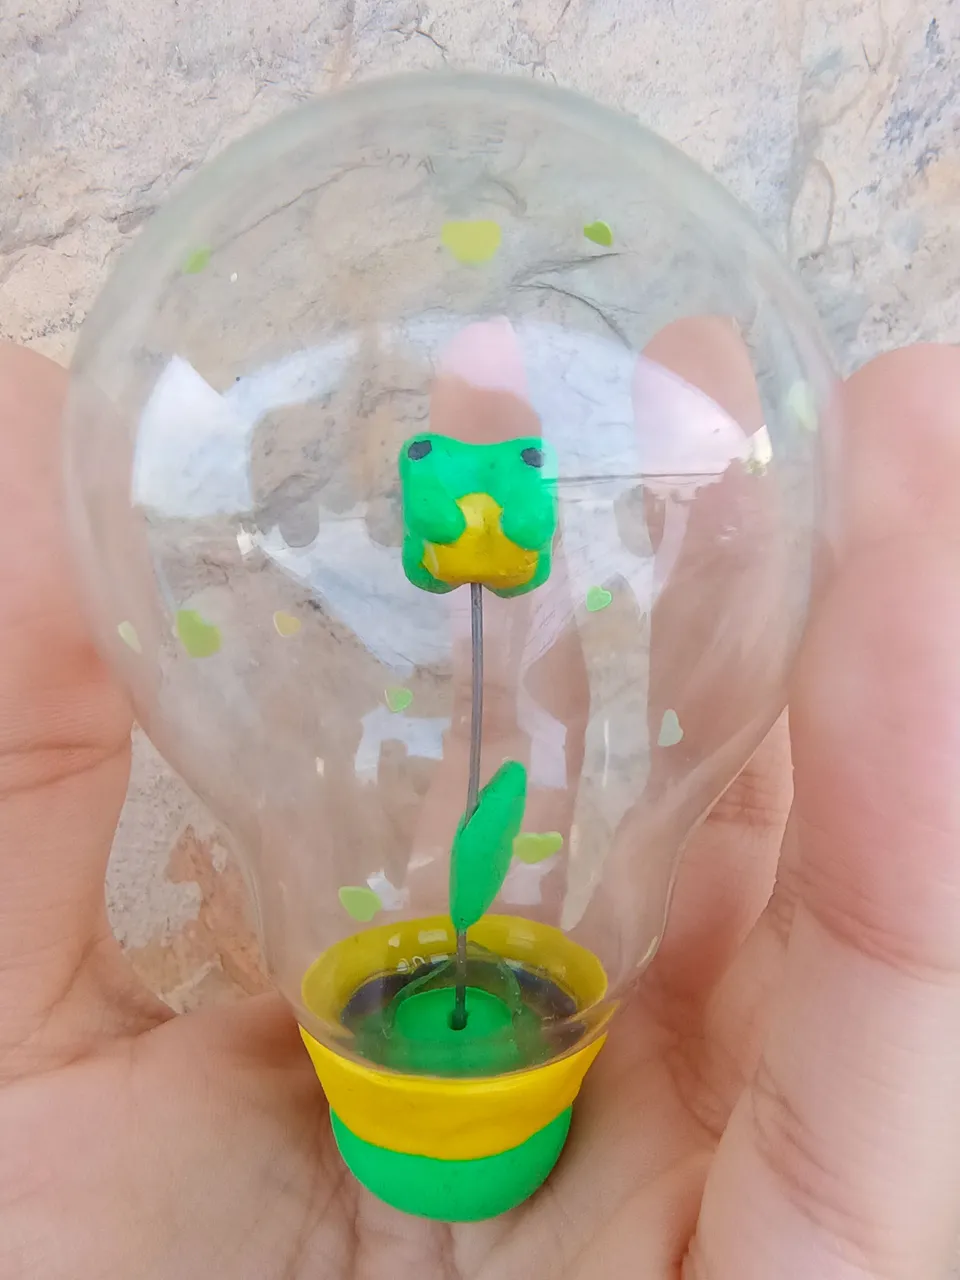
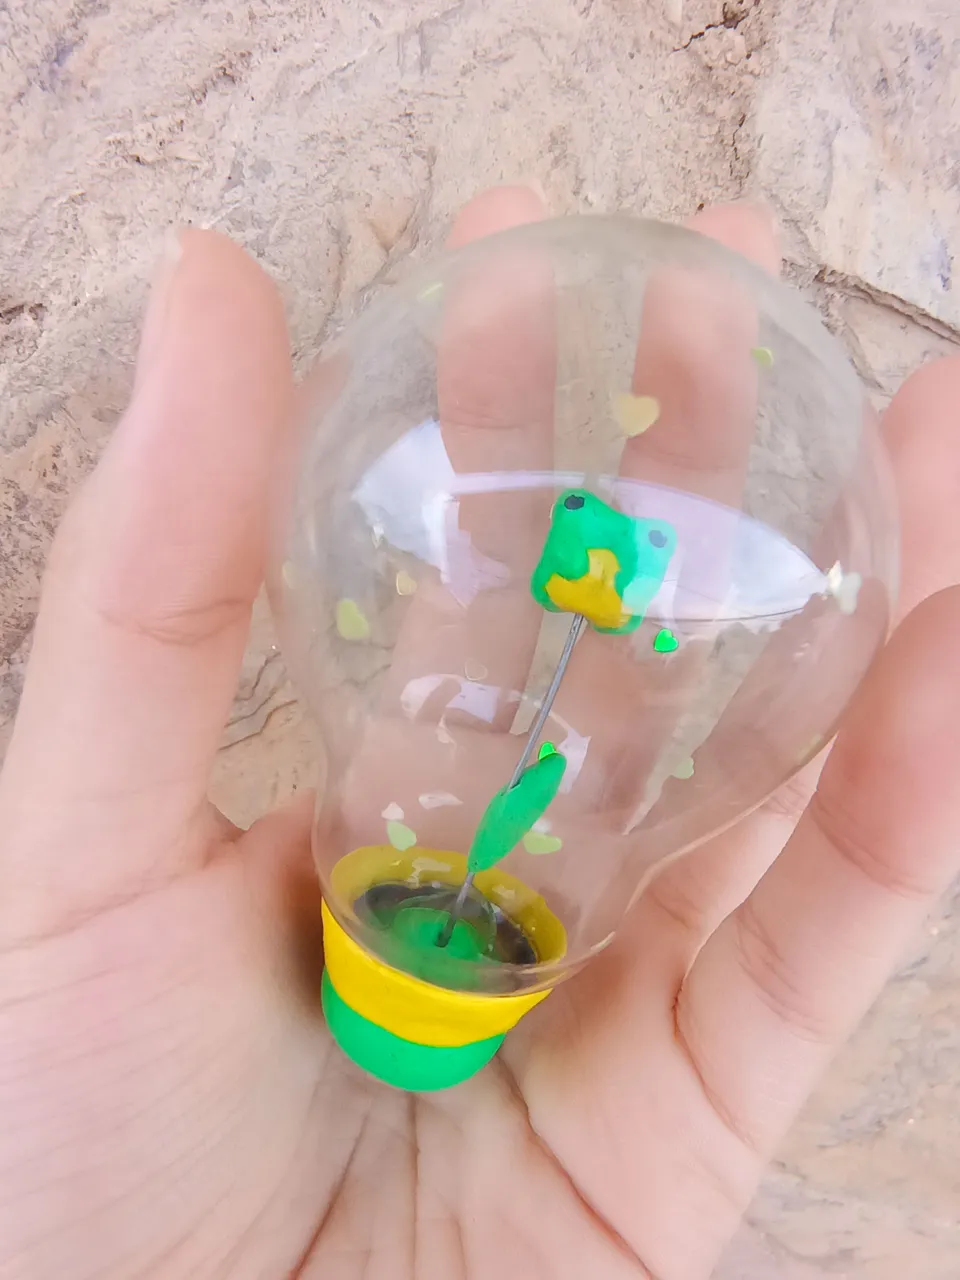
Aquí podrán ver cómo hice la mía, también verán todo el proceso de decoración del bombillo, un par de recomendaciones y cosas a tomar en cuenta. No se qué opinan ustedes pero a mí, me gustó mucho el diseño porque me hace pensar en los globos transparentes, que tienen globos adentro y papelillos. Siento que quedó en ese plan, de verdad, estoy súper feliz con el resultado. Además, tuve la oportunidad de terminar una tarea inconclusa, por así decirlo. Yo soy temática con las cosas que se me ocurren, puede que con el tiempo olvide los detalles específicos pero la esencia de la idea, se mantiene intacta más allá de los días, las horas y los años que pasan.
Here you can see how I made mine, you will also see the whole process of decorating the bulb, a couple of recommendations and things to take into account. I don't know what you think, but I really liked the design because it makes me think of the transparent balloons with balloons inside and confetti. I feel that it was in that plan, really, I'm very happy with the result. Besides, I had the opportunity to finish an unfinished task, so to speak. I am thematic with the things that come to my mind, I may forget the specific details with time, but the essence of the idea remains intact beyond the days, hours and years that pass.

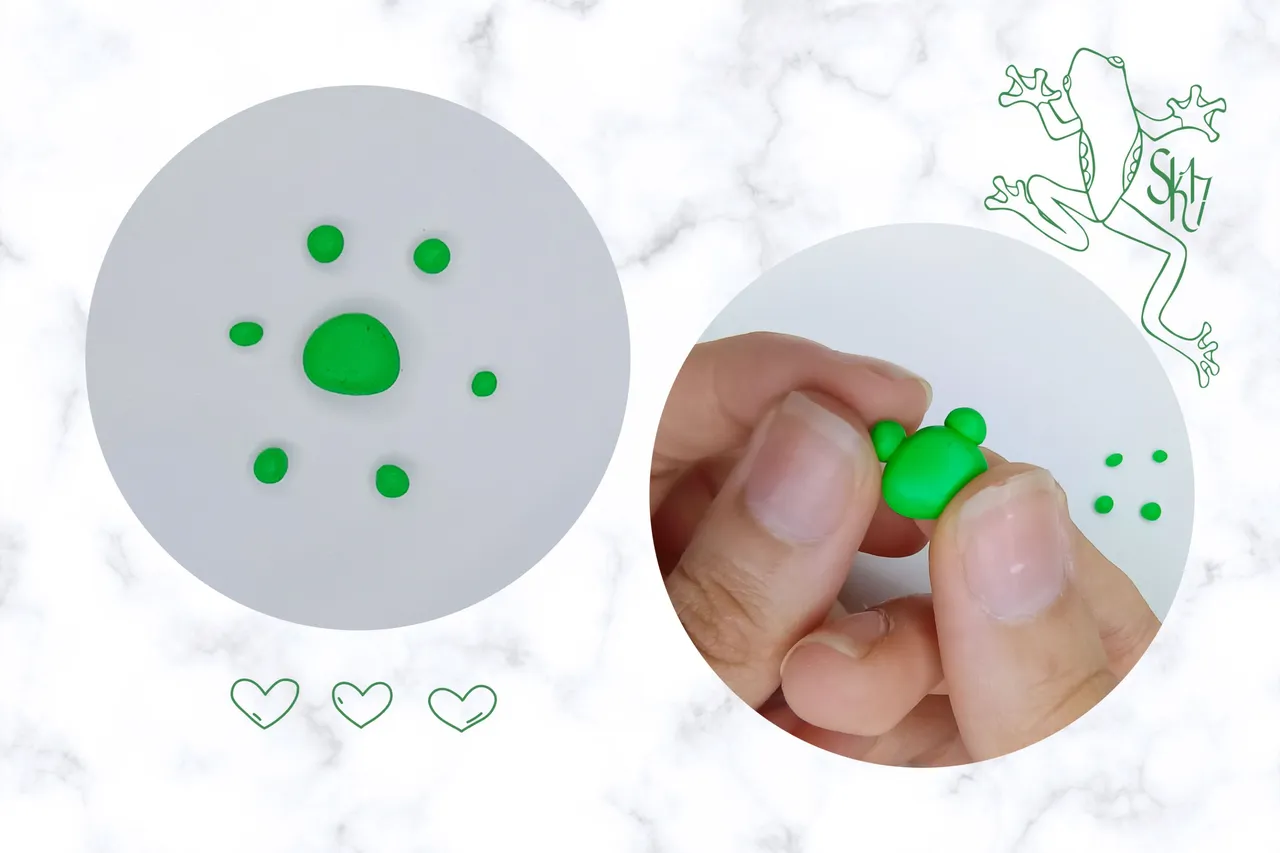
Para hacer la rana, empecé realizando un triángulo con las esquinas redondeadas. También hice dos bolitas pequeñas para la parte superior de la cabeza, dos más para las patas traseras y dos óvalos (un poco más pequeños que las demás piezas) para hacer las patas delanteras.
To make the frog, I started by making a triangle with rounded corners. I also made two small balls for the top of the head, two more for the back legs and two ovals (a little smaller than the other pieces) to make the front legs.
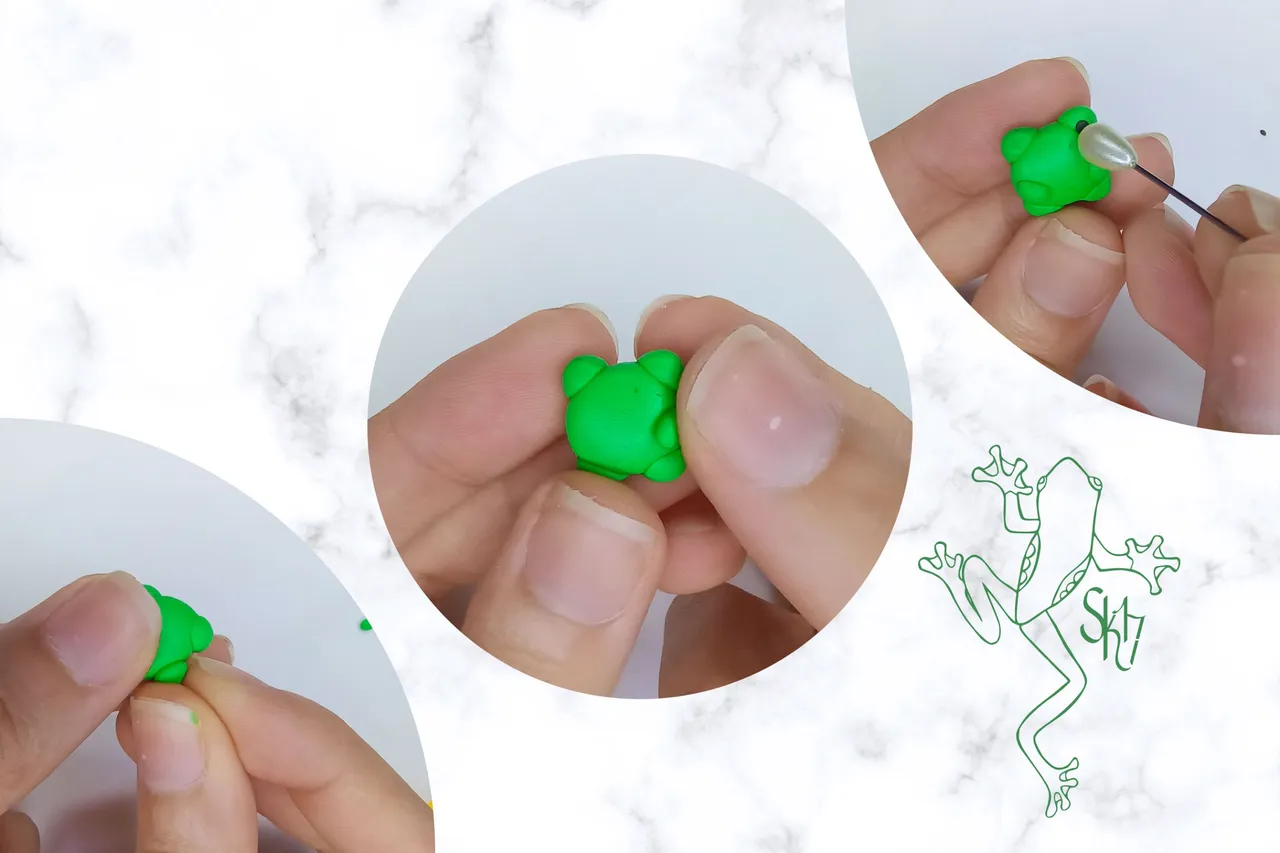
Tomé la pieza más grande y fui uniendo con cuidado las pequeñas, primera coloque la parte superior de la cabeza, luego las patas traseras y por último, las delanteras. Dejé la plastilina verde a un lado e hice dos bolitas muy pequeñas en negro para los ojos, usé la cabeza de un alfiler para hacer presión y fijar mejor.
I took the largest piece and carefully joined the small ones together, first I placed the top of the head, then the back legs and finally the front legs. I put the green plasticine aside and made two very small black balls for the eyes, I used the head of a pin to make pressure and fix them better.
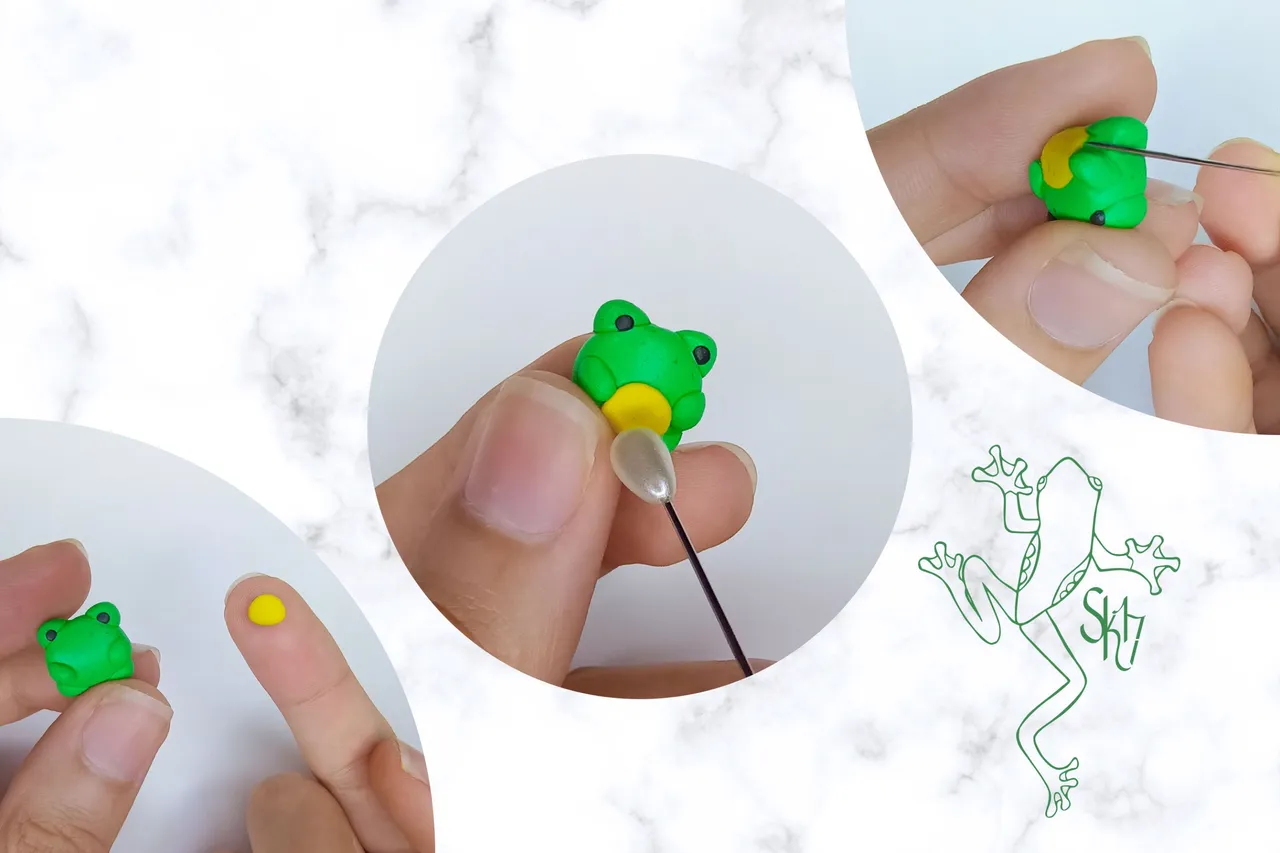
Luego hice una bolita amarilla para la panza de la rana e igual que en el paso anterior, uní las piezas haciendo presión con la parte superior de un alfiler. Con la punta del mismo alfiler, definí las patas de la rana y fui suavizando todas las uniones para que quedara lo más liso y parejo posible.
Then I made a yellow ball for the frog's belly and as in the previous step, I joined the pieces by pressing with the top of a pin. With the tip of the same pin, I defined the frog's legs and smoothed all the joints to make it as smooth and even as possible.
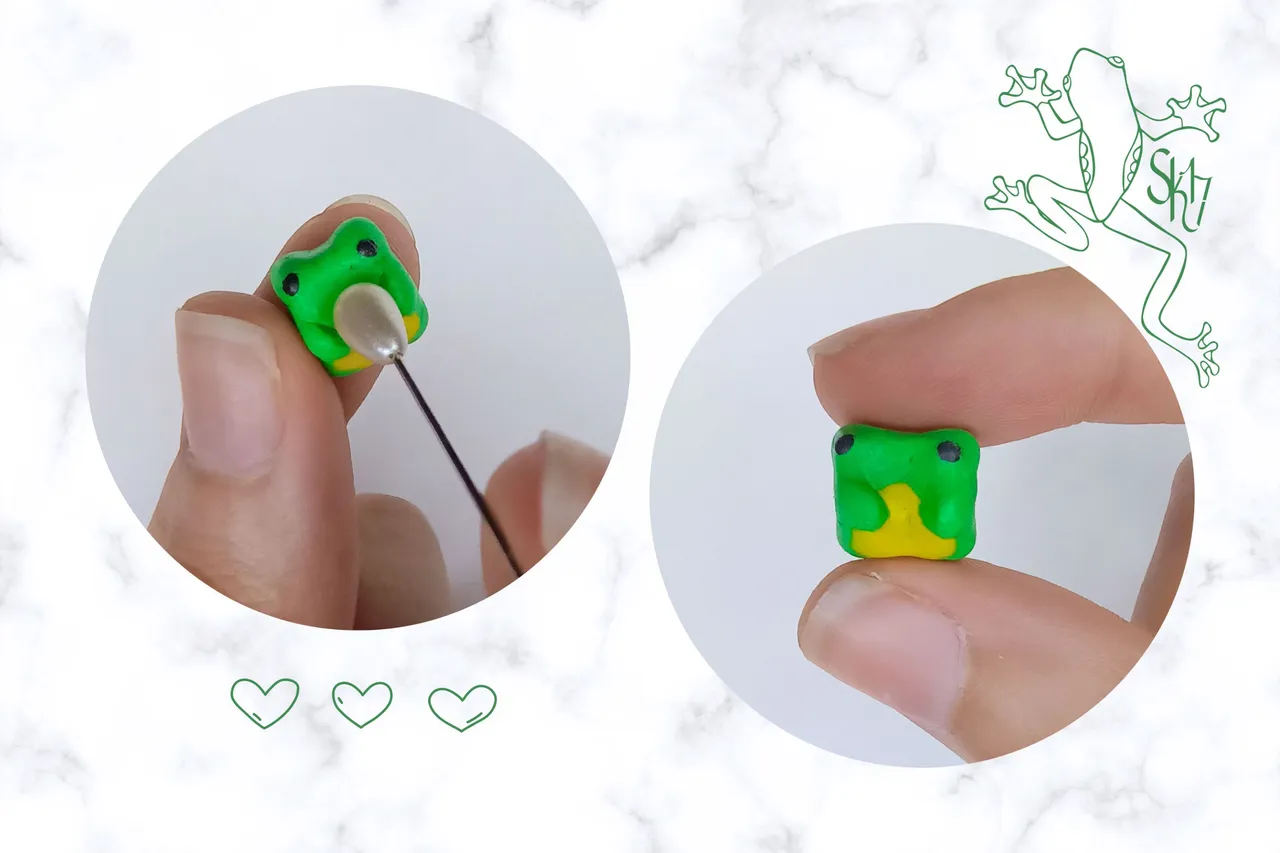
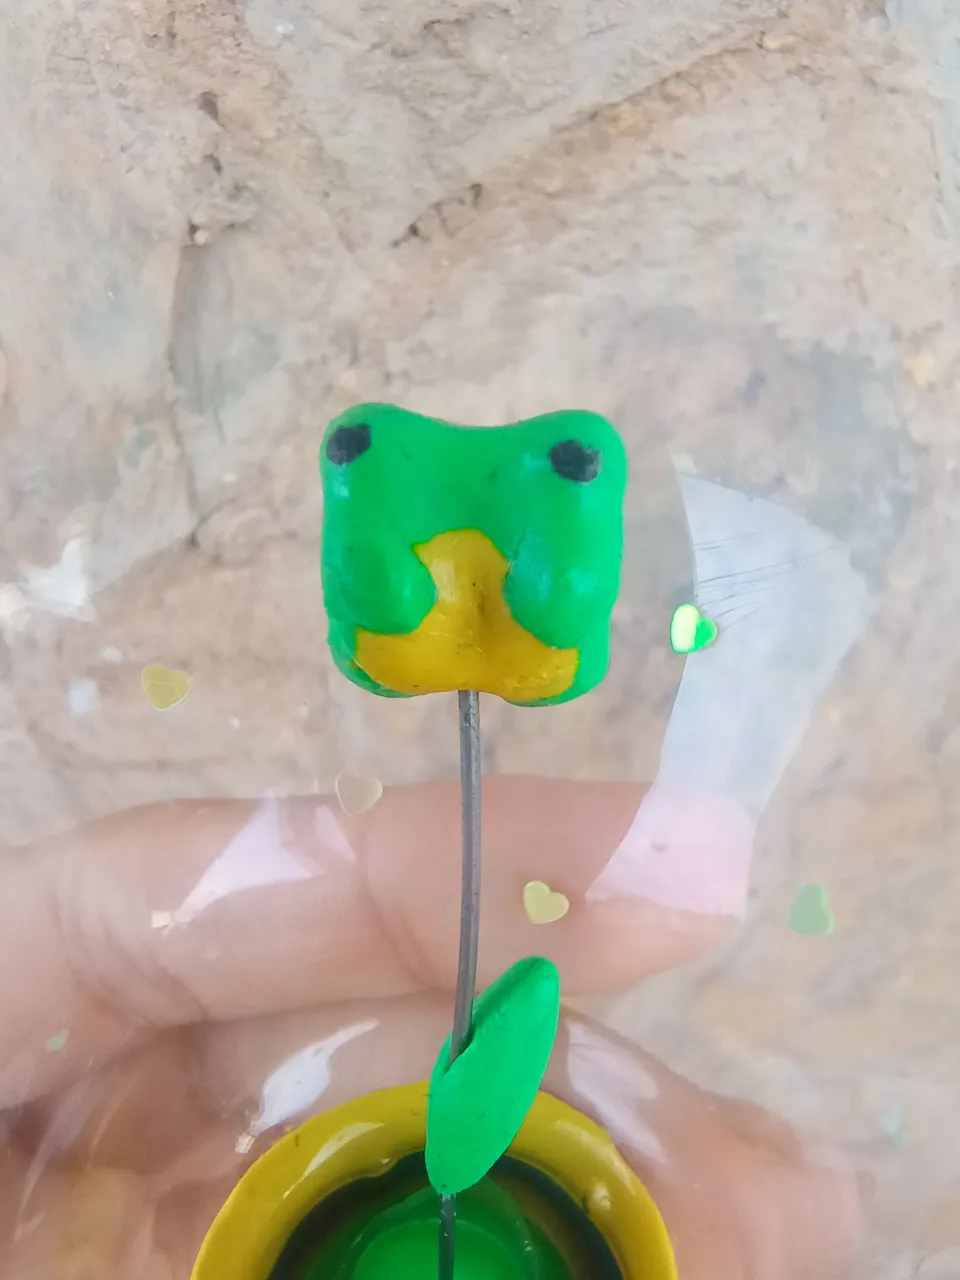
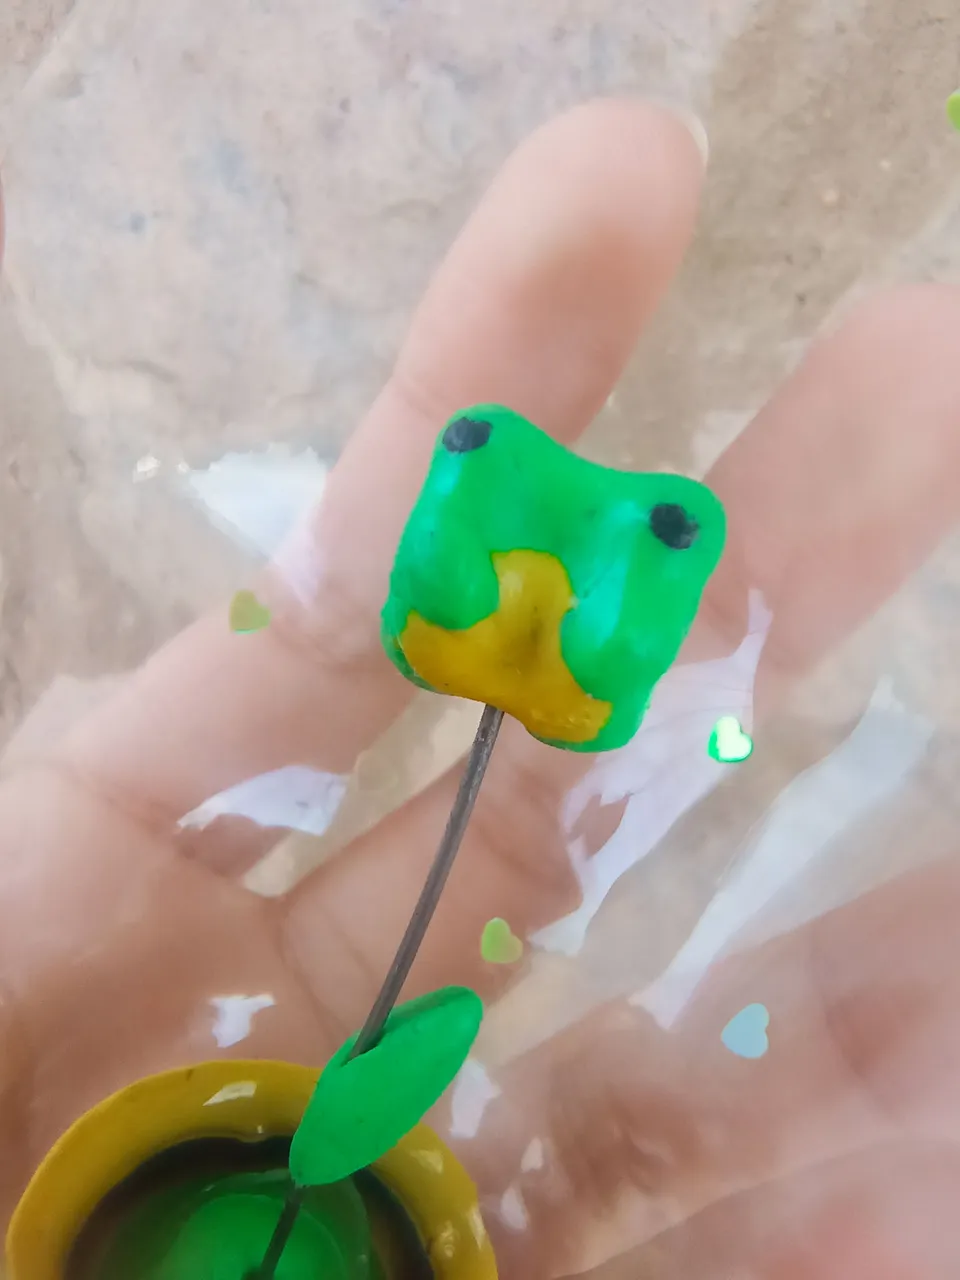
Para terminar, hice presión en la panza de la rana para hundirla un poco y que las patas delanteras resaltarán más. Esos son los pasos que yo realice y en general, me sirvieron bastante. Lo único que habría hecho diferente, sería colocar los ojos al final porque al ir modelando y definiendo las extremidades de la rana, los ojos se deformaron muchísimo y me costó hacer que volvieran a lucir bien.
To finish, I put pressure on the frog's belly to sink it a little and make the front legs stand out more. Those are the steps that I did and in general, they were quite useful. The only thing I would have done differently, would have been to place the eyes at the end because when I was modeling and defining the frog's extremities, the eyes were deformed very much and it was difficult to make them look good again.

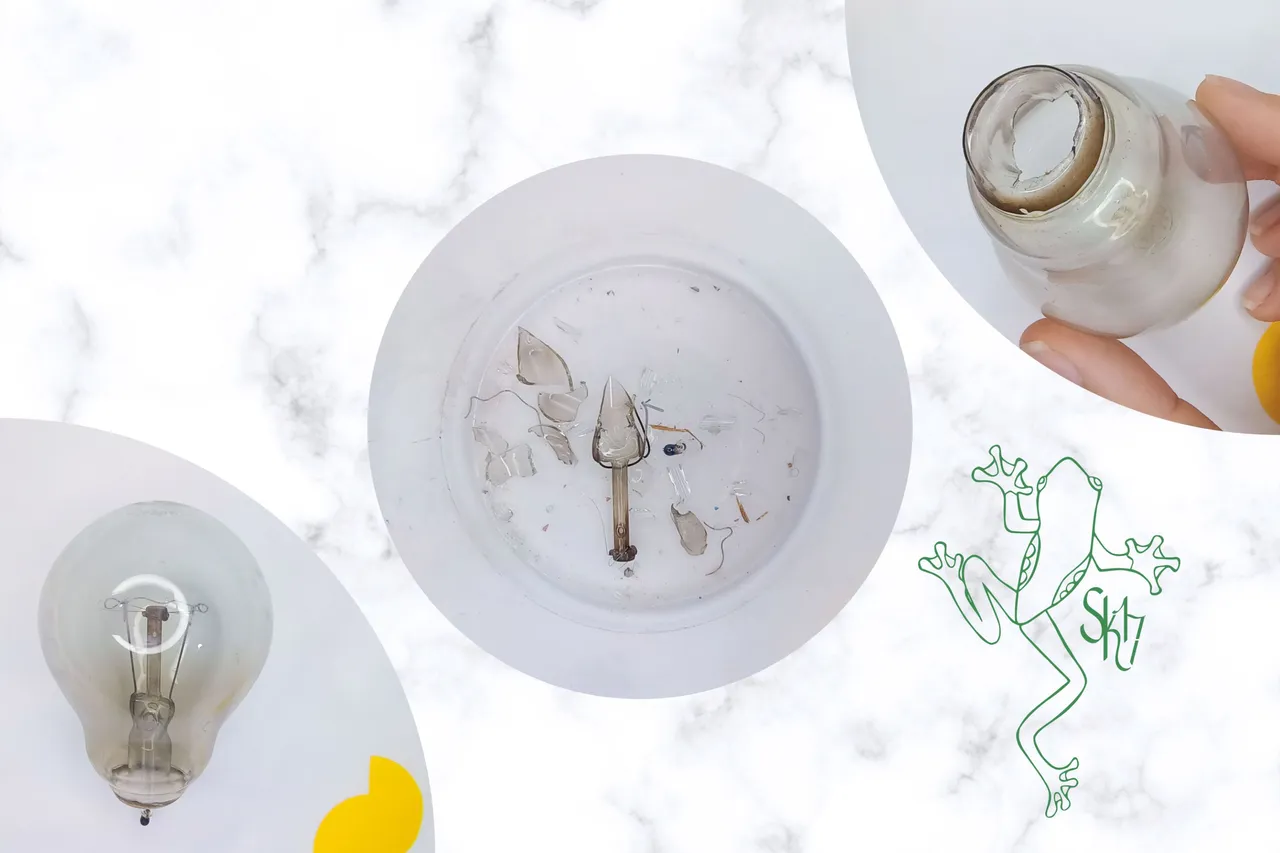
Como podrán notar, el bombillo que usé no tenía la parte inferior... Cuando lo encontré, estaba así. Esto me facilito el proceso porque no hizo falta que lo retirara por mí misma pero evidentemente y en condiciones normales, quitar esa parte sería el primer paso.
As you may notice, the bulb I used had no bottom part... When I found it, it was like this. This made the process easier for me because I didn't have to remove it myself, but obviously and under normal conditions, removing that part would be the first step.
Dicho eso, yo empecé retirando todas las piezas, que se encontraban en el interior del bombillo. Usé las tres pinzas básicas que se utilizan en bisutería y un destornillador. Con estas cuatro herramientas, fui quitando y rompiendo las partes innecesarias del bombillo, para dejar únicamente el vidrio. Yo utilicé un envase de plástico para que todas las partes que estaba retirando, cayeran en un solo lugar y así evitar posibles cortadas.
That said, I started by removing all the parts, which were inside the bulb. I used the three basic pliers used in jewelry and a screwdriver. With these four tools, I removed and broke the unnecessary parts of the bulb, leaving only the glass. I used a plastic container so that all the parts I was removing would fall in one place to avoid possible cuts.
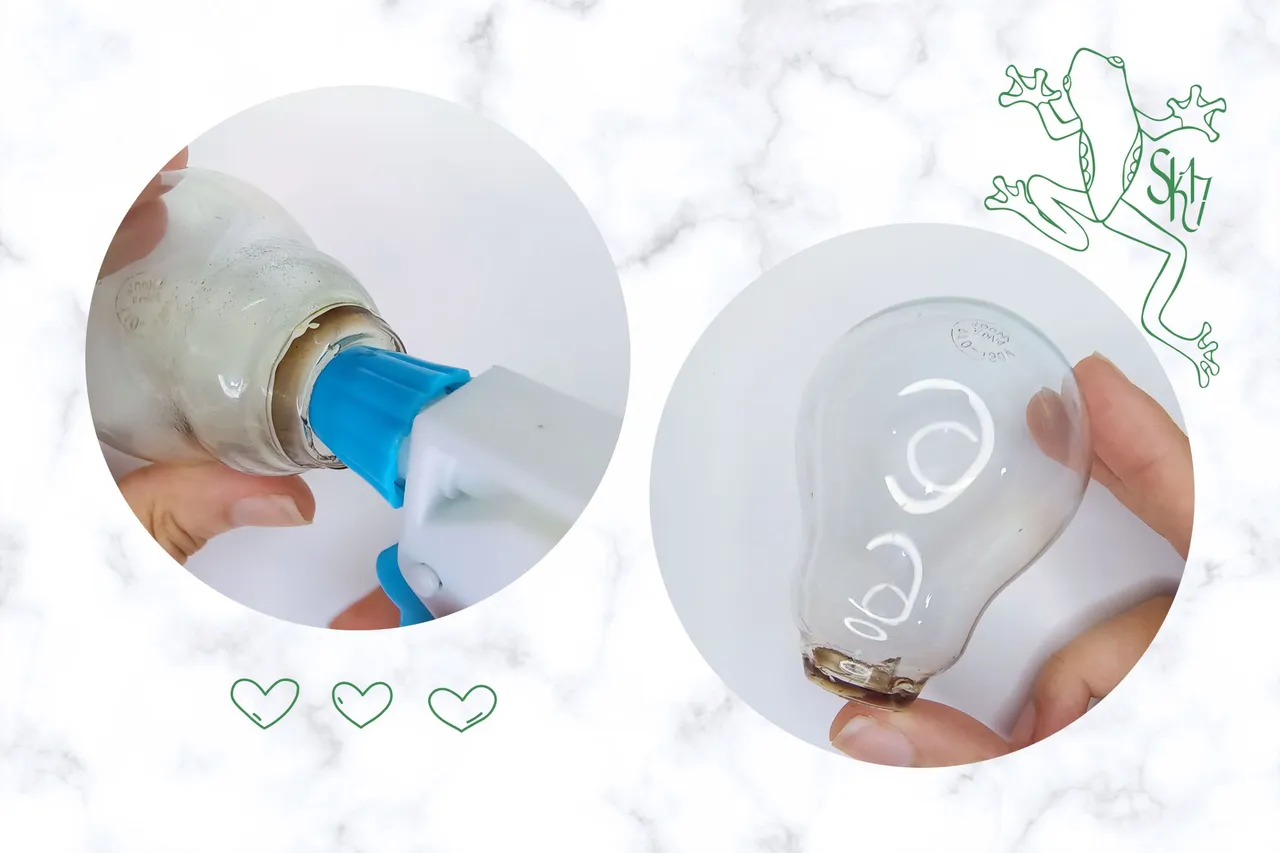
Con un atomizador de agua, rocíe el interior del bombillo todas las veces que fueron necesarias, para retirar los restos de vidrio. Fue así como me deshice, de todos los fragmentos casi imperceptibles que de vidrios rotos y funcionó de maravilla, en ningún momento me lastimé. Digamos que usé un método sencillo pero eficaz, en pro de mi seguridad. Si van a hacer algo como esto, tomen las medidas necesarias para evitar accidentes, por favor y gracias.
With a water atomizer, I sprayed the inside of the bulb as many times as necessary to remove the remains of the glass. That's how I got rid of all the almost imperceptible fragments of broken glass and it worked wonderfully, at no time I got hurt. Let's say I used a simple but effective method, for my safety. If you are going to do something like this, take the necessary measures to avoid accidents, please and thank you.
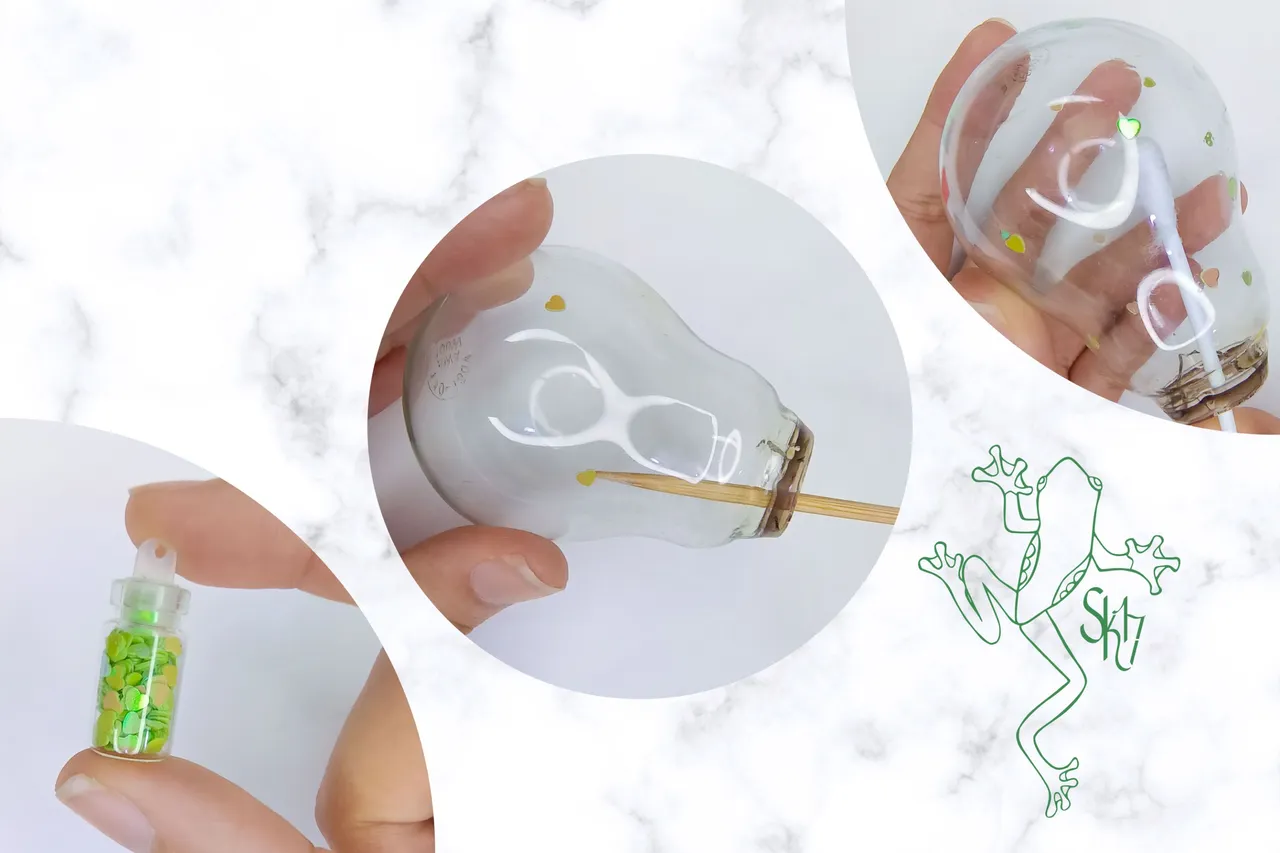
Inicié la decoración con unos apliques verdes en forma de corazón, estos habitualmente se usan para decorar las uñas. Tomé un poco de gel transparente para el cabello y con un palillo de altura, fui pegando los corazones al interior del bombillo, yo limpié los excesos de gel con un hisopo húmedo. No coloqué demasiados corazones y fui cuidadosa con las separaciones, ya que al trabajar en vidrio "menos es más" literal. Además el objetivo de este diseño, es poder ver a la rana perfectamente bien al colocarla dentro.
I started the decoration with some green heart-shaped appliques, these are usually used to decorate nails. I took some clear hair gel and with a tall stick, I glued the hearts to the inside of the bulb, I wiped off the excess gel with a wet swab. I didn't put too many hearts and I was careful with the separations, because when working on glass "less is more" literally. Also, the purpose of this design is to be able to see the frog perfectly well when placing it inside.
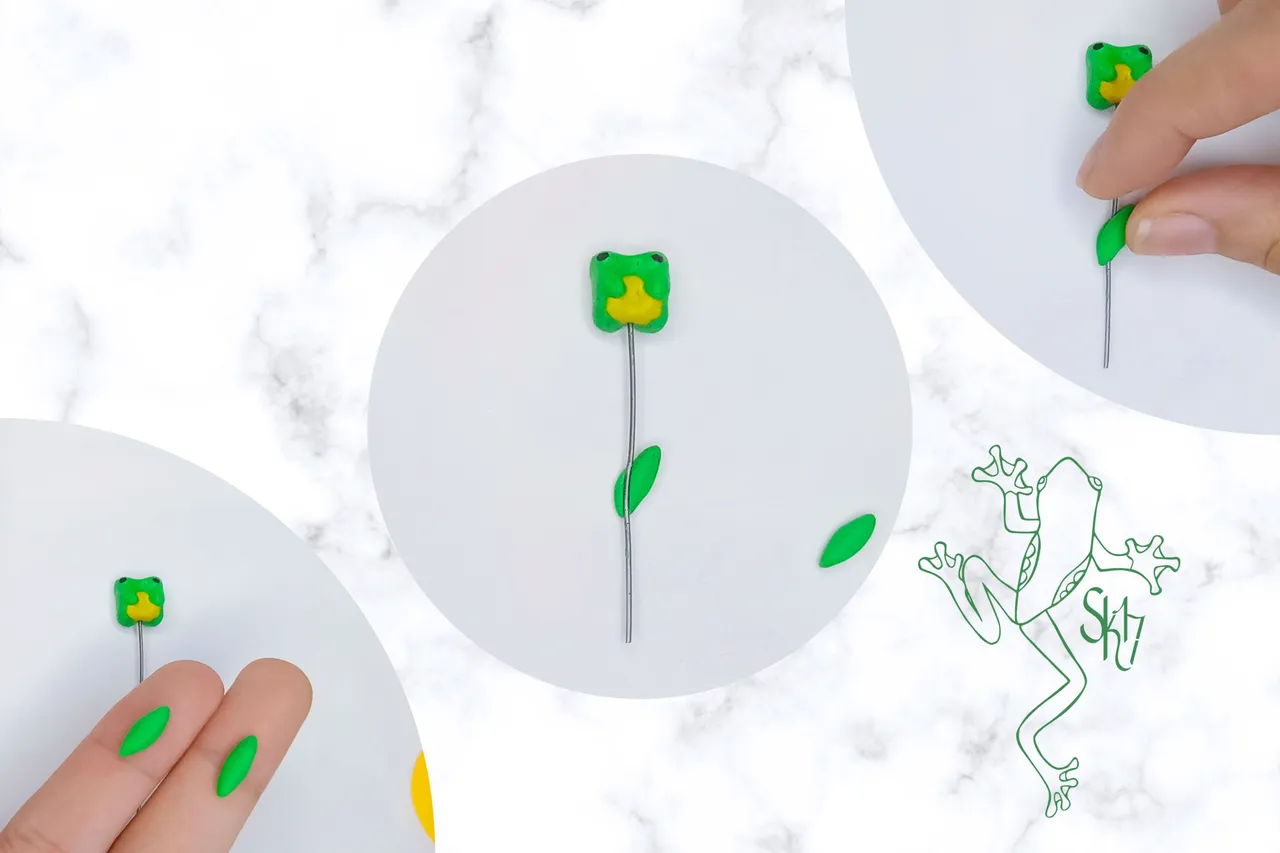
En esta parte, abrí un clip y corte la medida que quería darle a la rana. Luego hice dos pequeñas hojas con plastilina verde y las uní en el siguiente orden, hoja, alambre y hoja. Es importante, suavizar los bordes para que realmente parezca que solo es una hoja y no dos. La idea es para tapar el alambre y a su vez, reforzar la unión de las hojas, que al final, forman una sola.
In this part, I opened a paper clip and cut the size I wanted to give to the frog. Then I made two small leaves with green plasticine and joined them in the following order, leaf, wire and leaf. It is important to smooth the edges so that it really looks like it is only one leaf and not two. The idea is to cover the wire and at the same time, reinforce the union of the leaves, which in the end, form a single one.
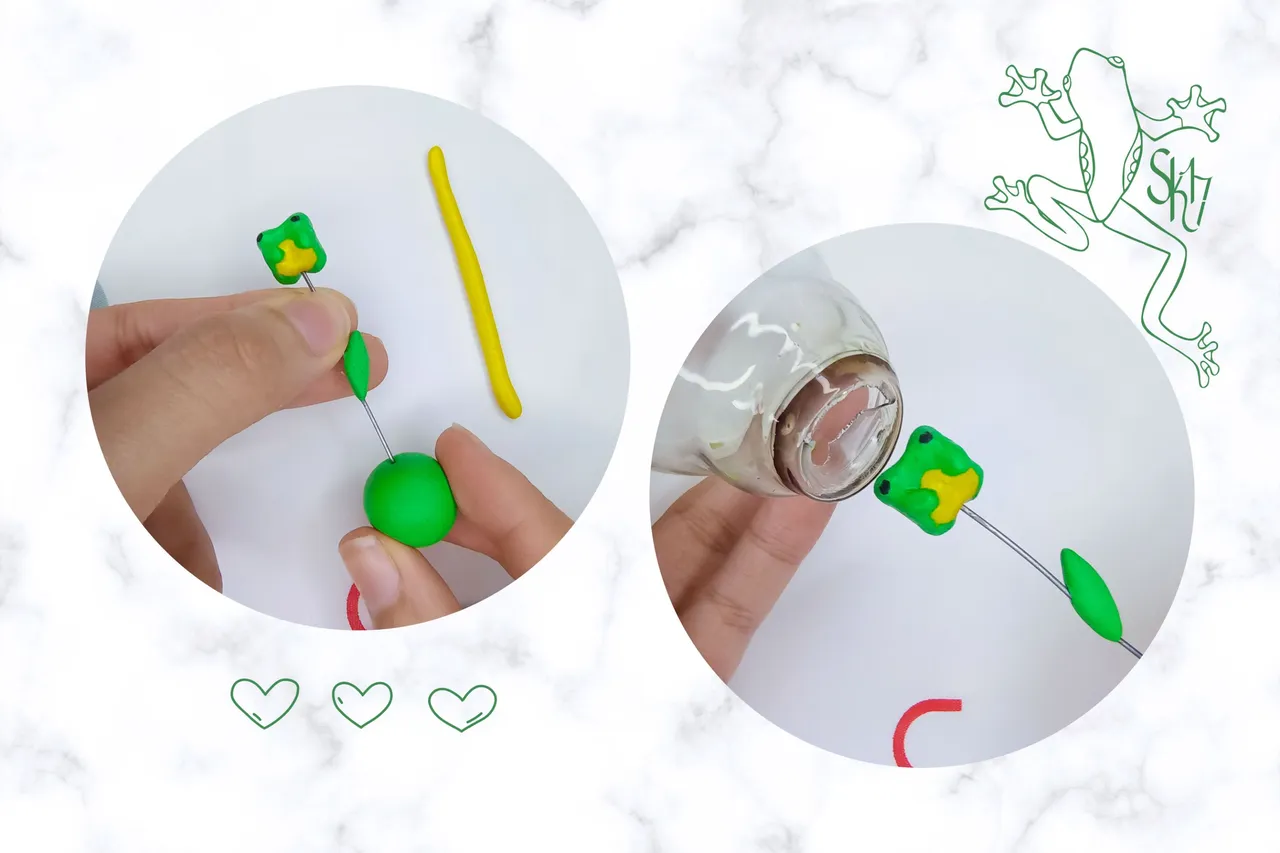
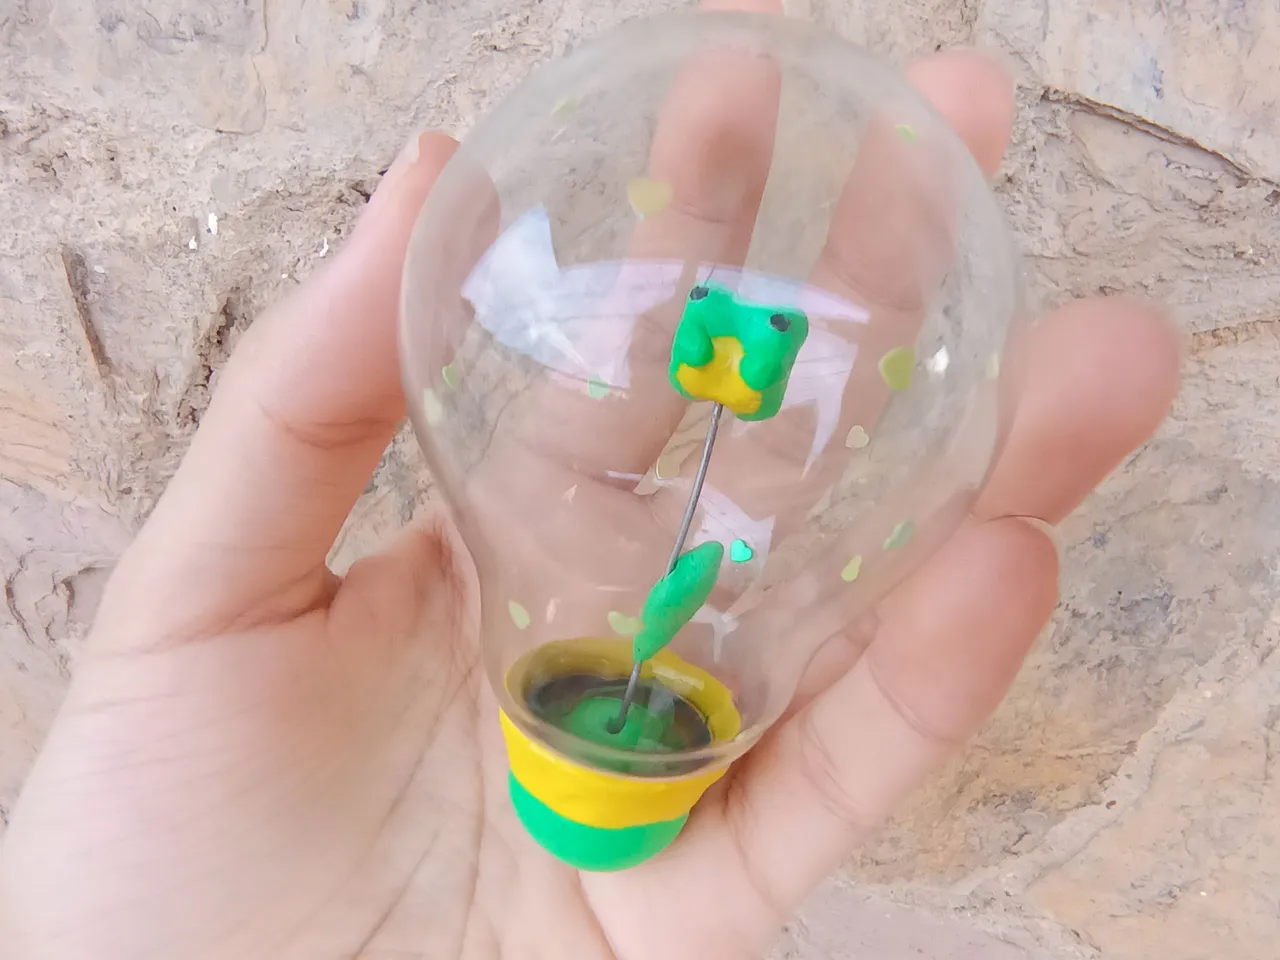
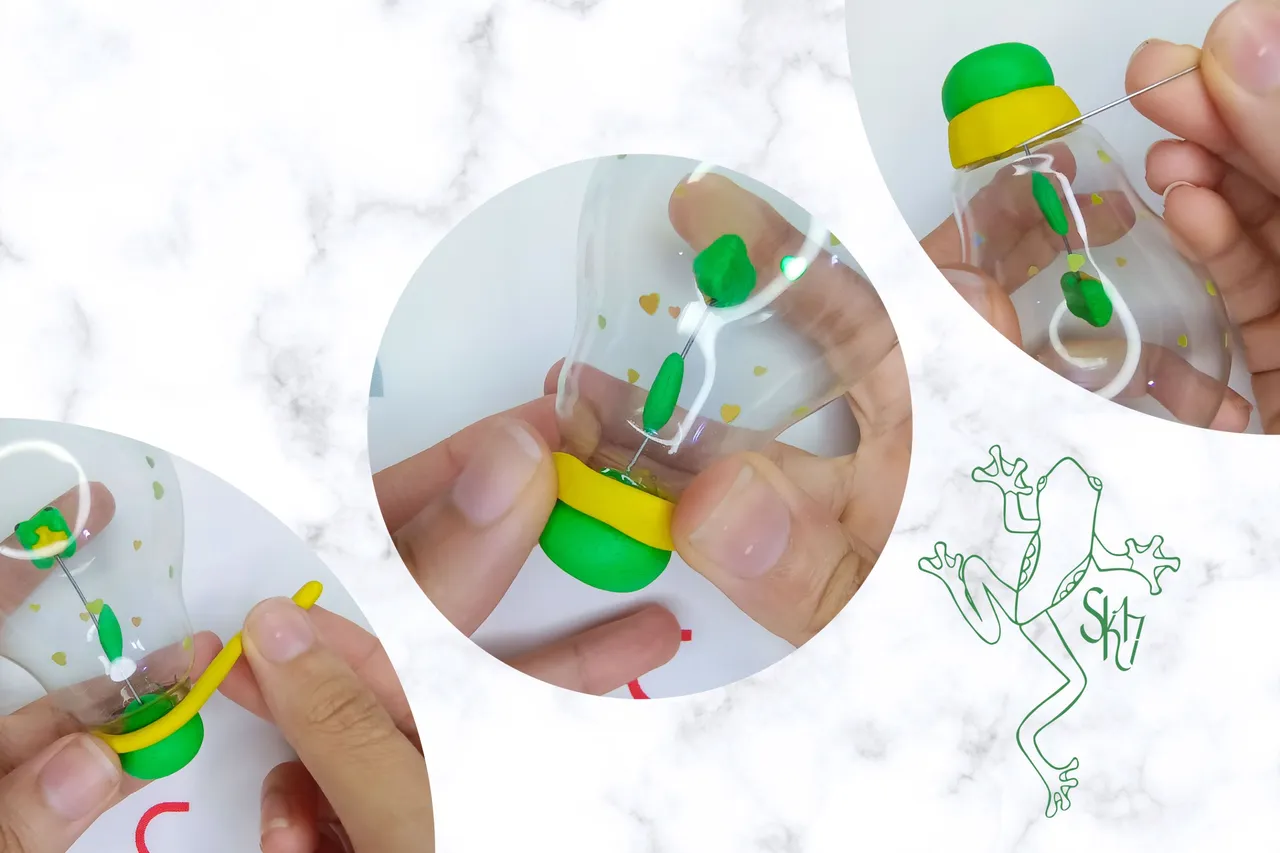
Añadí una bola de plastilina verde en el otro extremo del alambre (lo ideal sería aplicar pegamento súper fuerte en la punta para que quede estable y no se mueva pero yo no tenía). Introduje el alambre con todas las piezas y decoraciones. Fijé la plastilina a la boquilla, para cerrar todo muy bien. Después coloqué una tira de plastilina amarilla en la unión entre el vidrio y la plastilina verde. Hice presión a lo largo de la tira y definí el borde con un alfiler, para obtener un mejor acabado.
I added a ball of green plasticine on the other end of the wire (ideally I would apply super strong glue on the tip so that it is stable and does not move but I did not have any.) I inserted the wire with all the pieces and decorations. I attached the plasticine to the nozzle, to close everything very well. Then I placed a strip of yellow plasticine in the joint between the glass and the green plasticine. I put pressure along the strip and defined the edge with a pin, to get a better finish.
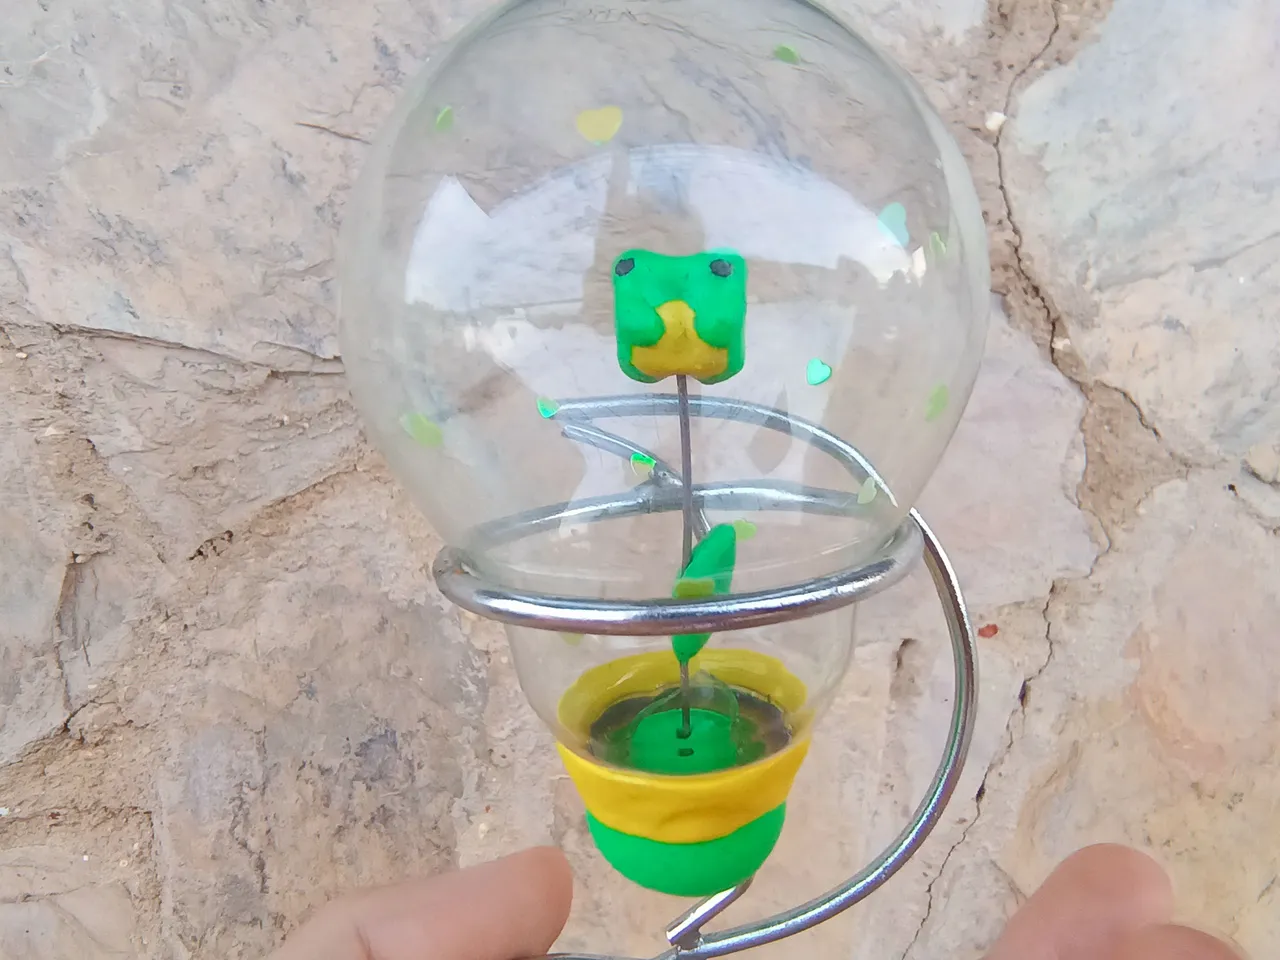
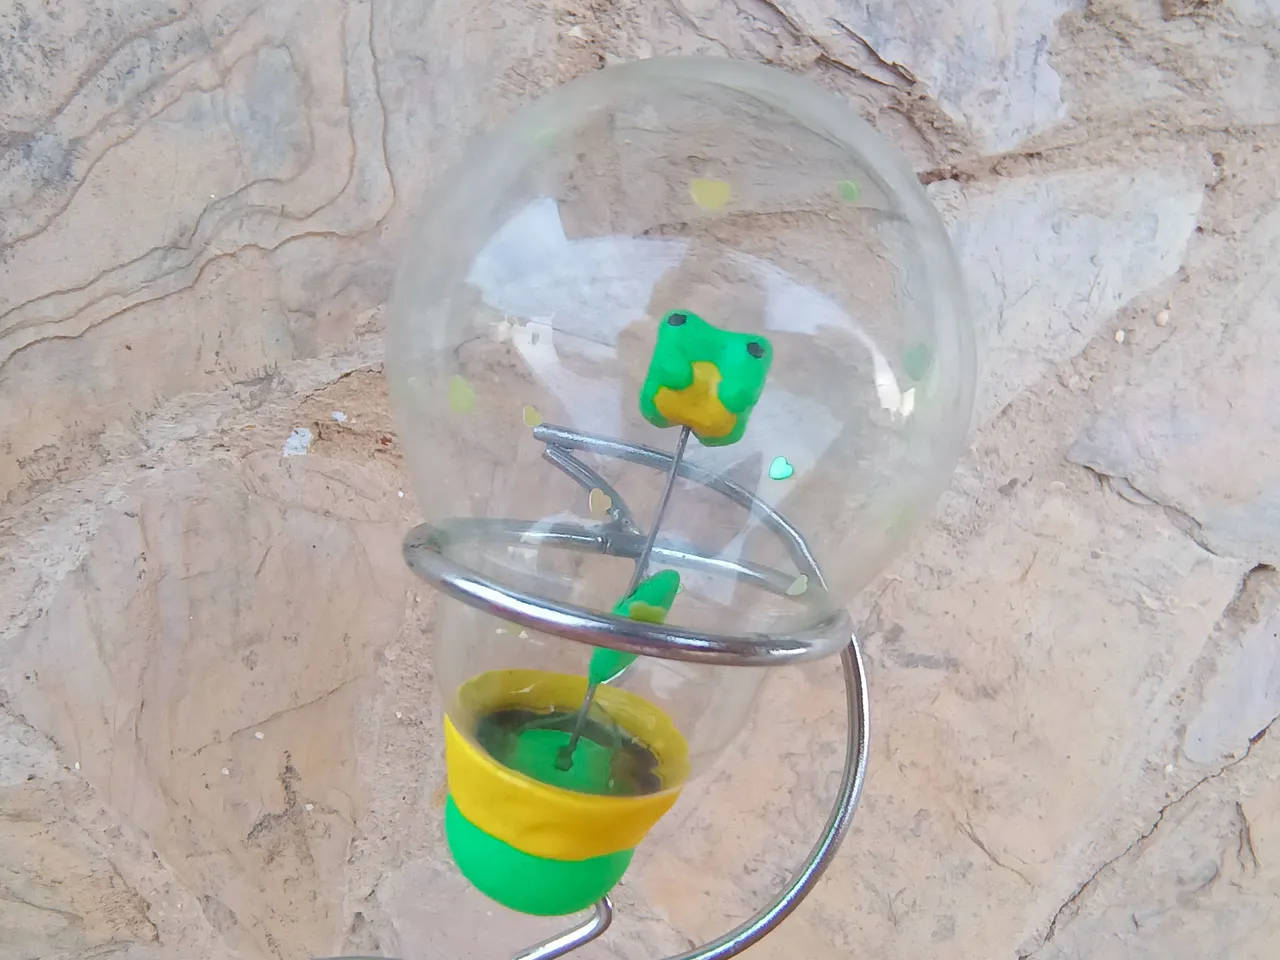
Y así culminé este hermoso proyecto, fue tardado pero valió la pena. Me encantaría ver sus resultados, si deciden hacerlo, yo hice este tutorial con mucho cariño. Como algunos sabrán, yo solía hacer muchos DIY y la verdad... Se sintió súper bien volver a hacer uno. No hay nada mejor, que darle vida a nuestras ideas mediante la creatividad. Es un proceso muy chévere y se siente demasiado bonito ver los resultados.
And so I finished this beautiful project, it took a while but it was worth it. I would love to see your results, if you decide to do it, I made this tutorial with a lot of love. As some of you may know, I used to do a lot of DIY's and the truth is... It felt super good to make one again. There's nothing better than bringing our ideas to life through creativity. It's a very cool process and it feels so nice to see the results.
Por si se lo preguntan, yo coloqué mi bombillo decorado en una base metálica que tengo desde hace un montón de años. Creo que originalmente era para colocar velas o algo así, el caso es que, que el bombillo quedó súper bien allí. Les voy a dejar una foto para que tengan una idea.
In case you are wondering, I placed my decorated bulb in a metal base that I have had for a lot of years. I think it was originally meant to hold candles or something, the thing is, the bulb looked great there. I'm going to leave you a picture to give you an idea.
Tomé las fotos con la cámara trasera de mi Tecno Camon 17 Pro, en la sección AI, con el lente Macro, para capturar los pasos coloqué el temporizador en 3 segundos y el resto de las tomas fueron manuales. Hice la corrección de color en Polarr y realicé las imágenes de los pasos en Canva. En este punto y sin mucho más que decir, me despido pero no sin antes darles las gracias por leer. Espero que podamos encontrarnos en un próximo post.
I took the photos with the rear camera of my Tecno Camon 17 Pro, in the AI section, with the Macro lens, to capture the steps I set the timer to 3 seconds and the rest of the shots were manual. I did the color correction in Polarr and made the images of the steps in Canva. At this point and without much more to say, I say goodbye but not before thanking you for reading. I hope we can meet in a future post.
 |  |
|---|---|
 |
|---|
| 💁🏻♀️ stytchh |
| 🎨 sk17art |
| 🧸 stykawaii17 |
Poppins
Butler