
Un saludo muy especial esta linda noche comunidad creativa!!! Algo que me entusiasma mucho estos últimos días es la idea de haber retomado la tarea de hacer joyas, ya que de pequeña me gustaba mucho hacerlas, me divertida y era mi pasa tiempo favorito, de hecho, recuerdo haber hecho también para venderlas en mi escuela y así poder tener dinero extra para mis dulces. Mi abuela siempre fue mi apoyo y me enseñó algunos diseños, los demás los aprendía de pulsera que compraba y desarmaba para aprender a hacerlas jeje.
A very special greeting this beautiful night creative community!!! Something that has excited me a lot these last few days is the idea of having resumed the task of making jewelry, since as a child I really liked making them, it was fun and it was my favorite hobby, in fact, I remember having also made them to sell at my school and so I can have extra money for my sweets. My grandmother was always my support and she taught me some designs, the rest I learned from bracelets that I bought and took apart to learn how to make them hehe.
A pasado el tiempo y aunque tenía mucho que no dedicaba tiempo tan seguido a esto, me sigue encantando crear accesorios; al igual que coser, emplear la bisutería me gusta mucho, siento que me entretiene y mantiene mi mente ocupada para no pensar los problemas que día a día nos embarcan, y es que pensándolo bien puede hasta resultar un buen emprendimiento, de verdad estoy muy feliz de estar nuevamente trabajando con bisutería... Hoy me encantaría presentarle la elaboración de una linda pulsera de flores creadas con delicadas perlas rojas y rosadas en alambre, no es un tarea difícil de hacer y se ve preciosa y elegante para lucir en ocasiones especiales. Acompáñame y mira el paso a paso de este bonito tutorial.
Time has passed and although I hadn't dedicated time to this for a long time, I still love creating accessories. As well as sewing, I like working on costume jewelery a lot, I feel that it entertains me and keeps my mind busy so I don't think about the problems that we face every day; and it is that, thinking about it, it can even be a good economic undertaking, I am really very happy to be working with costume jewelery again... Today I would love to present you the elaboration of a beautiful flower bracelet created with delicate red and pink pearls on wire, It is not a difficult task to do and it looks lovely and elegant to wear on special occasions. Join me and see the step by step of this beautiful tutorial.
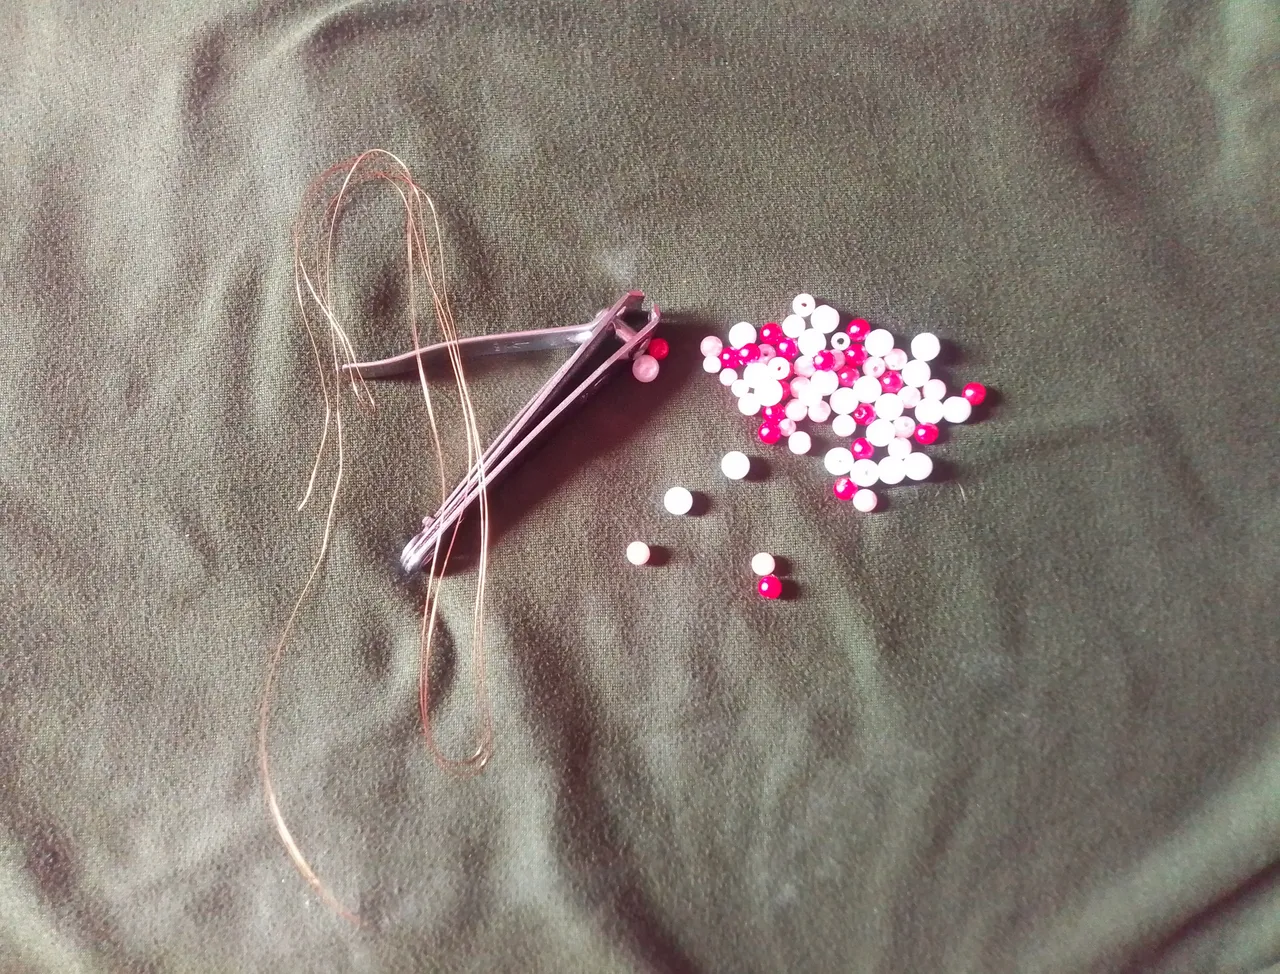
Materiales que necesitas:
- Perlas pequeñas y grandes.
- Alambre de bisutería fino.
- Pinzas.
- Sujetadores.
Materials you need:
- Small and large pearls.
- Fine jewelry wire.
- Tweezers.
- Bras.
(PROCEDIMIENTO)
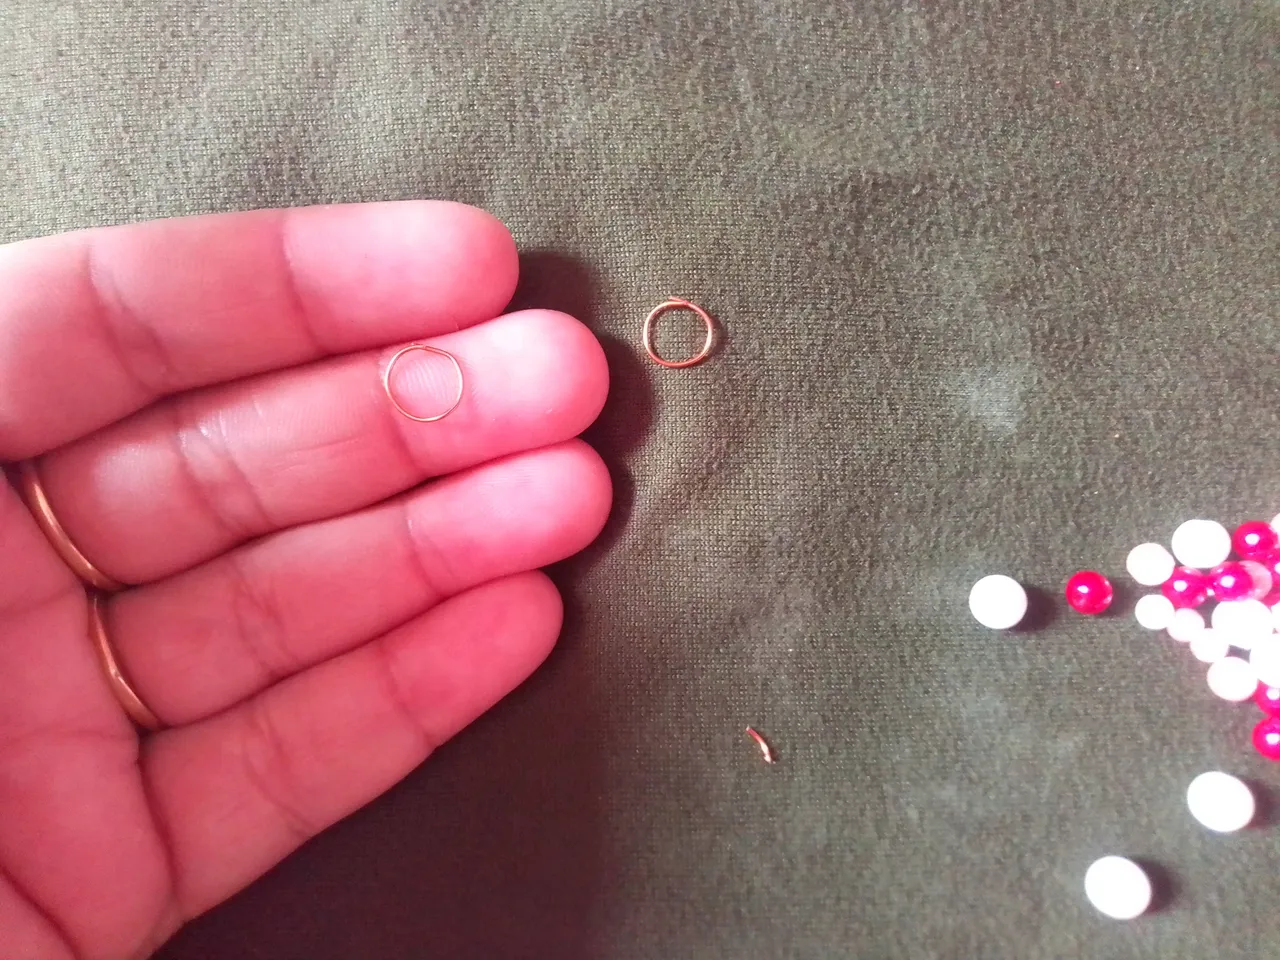
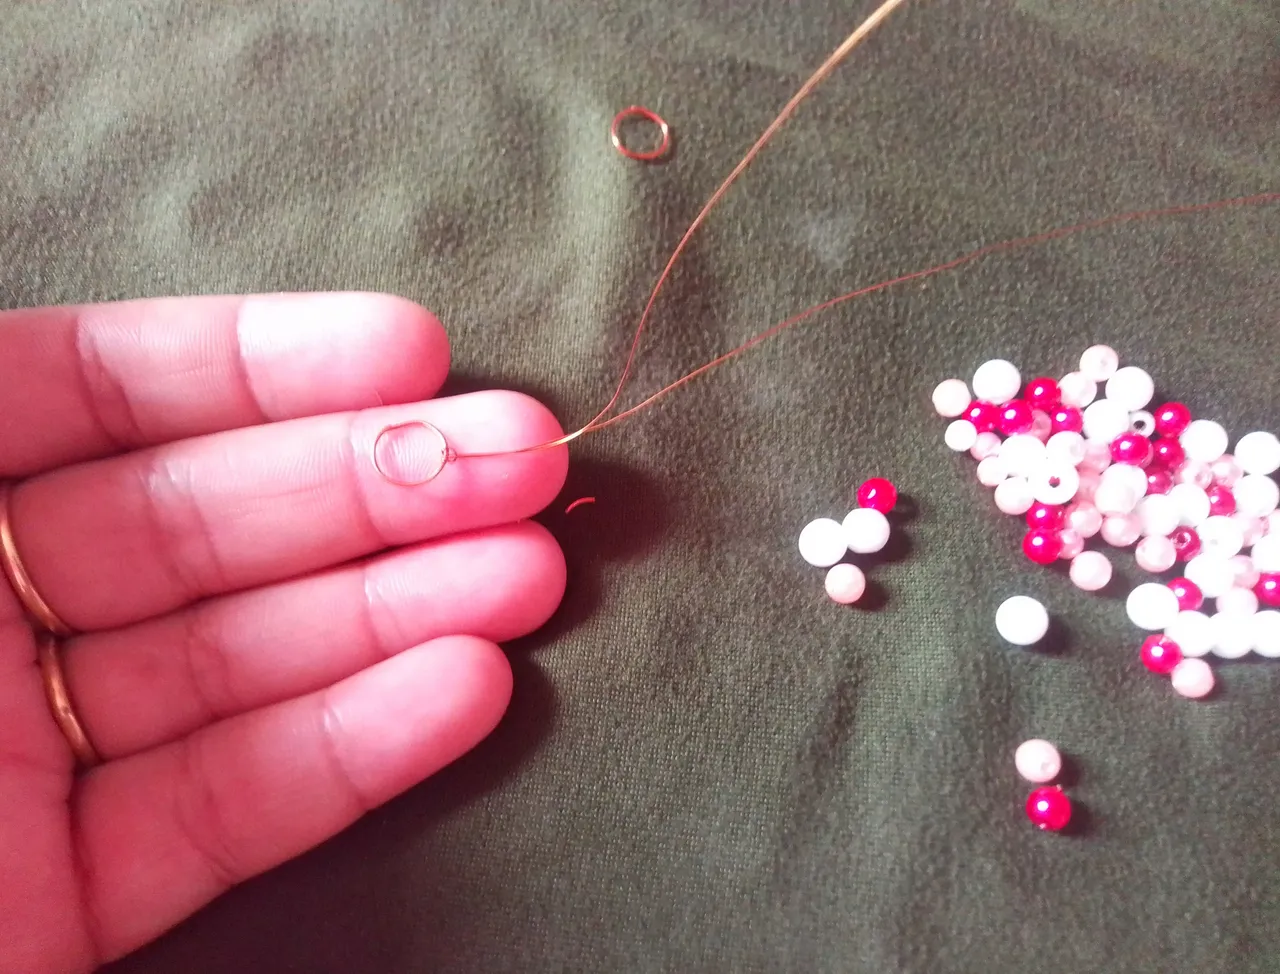
Paso 01
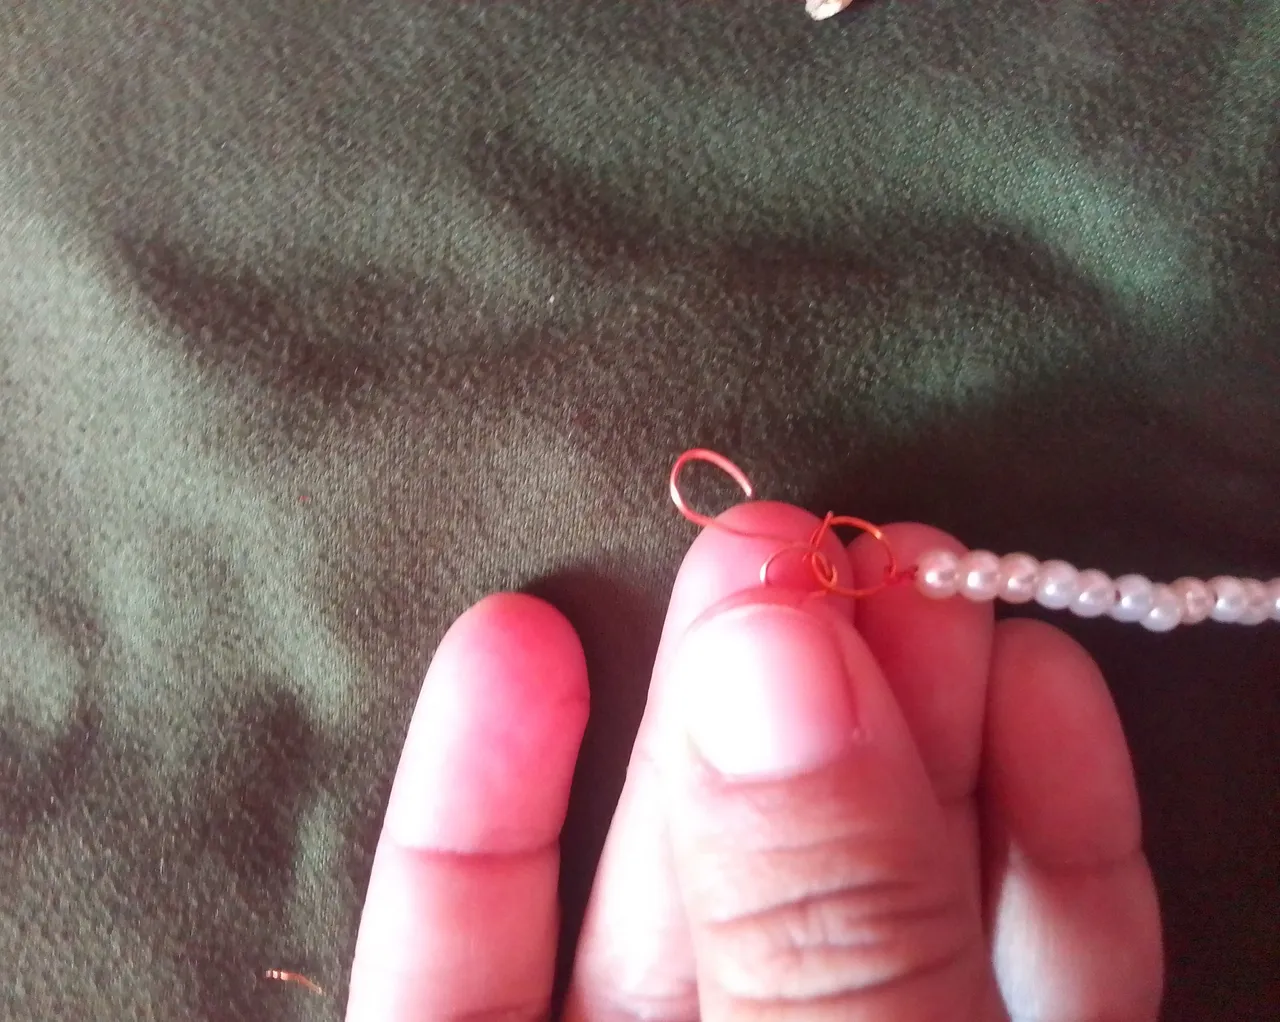
Ahora bien amigos, para comenzar tomas un trozo pequeño de alambre y con la pinza formas dos pequeñas argollas o aros, yo me ayudó mucho con un lapiz para hacerlas y me queden más redonditas. Estás argollas también las vendes, así que si las tienes mucho mejor. Toma medio metro de alambre de bisutería e introduce por la argolla dando un pequeña vuelta.
Step 01
Now friends, to start you take a small piece of wire and with the pliers you form two small rings or rings, I helped a lot with a pencil to make them and they are more rounded. You also sell these rings, so if you have them much better. Take half a meter of jewelry wire and introduce it through the ring giving a small turn.
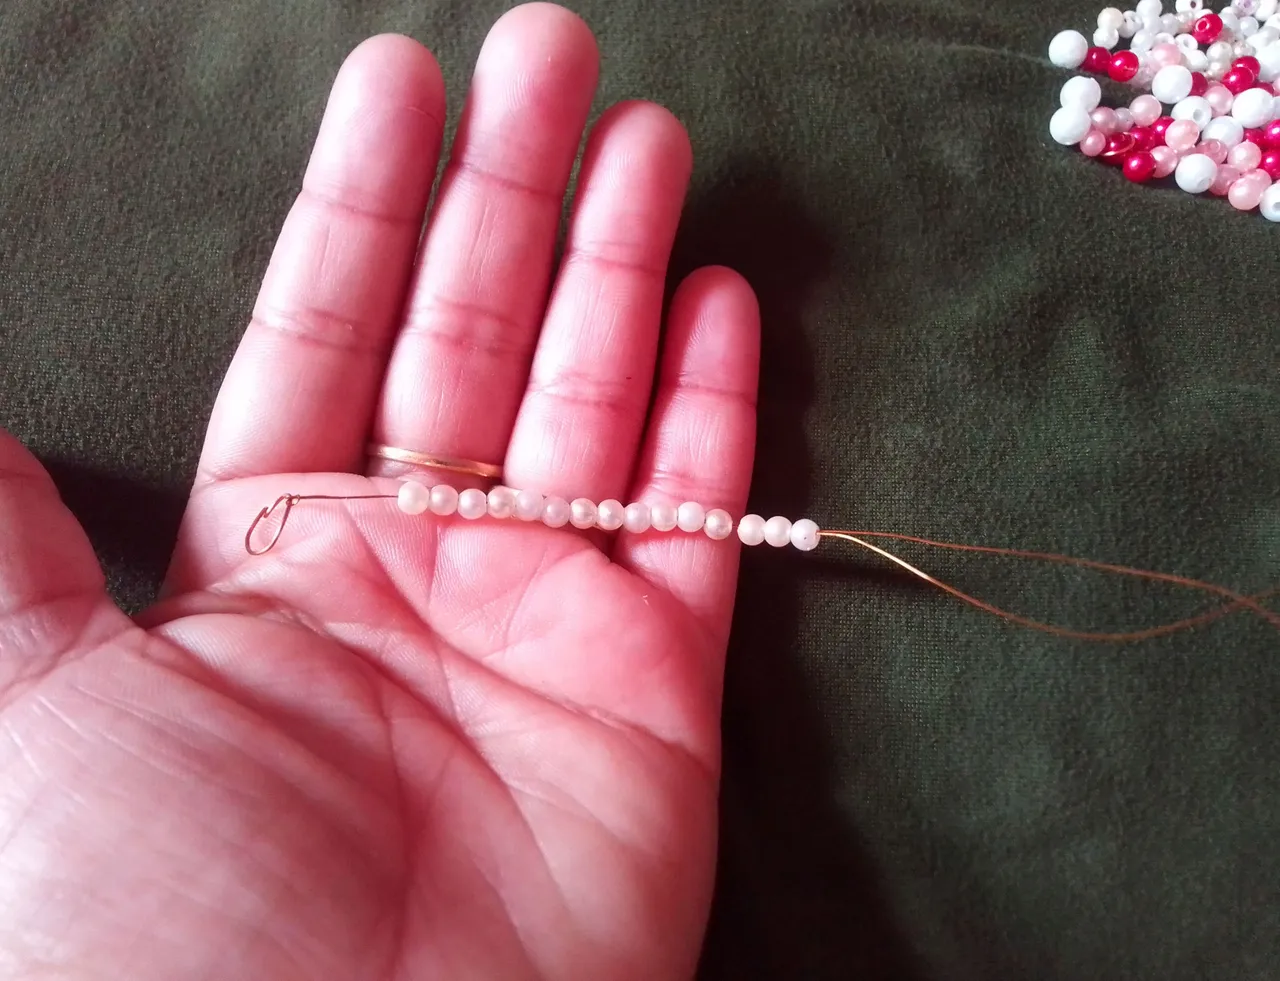
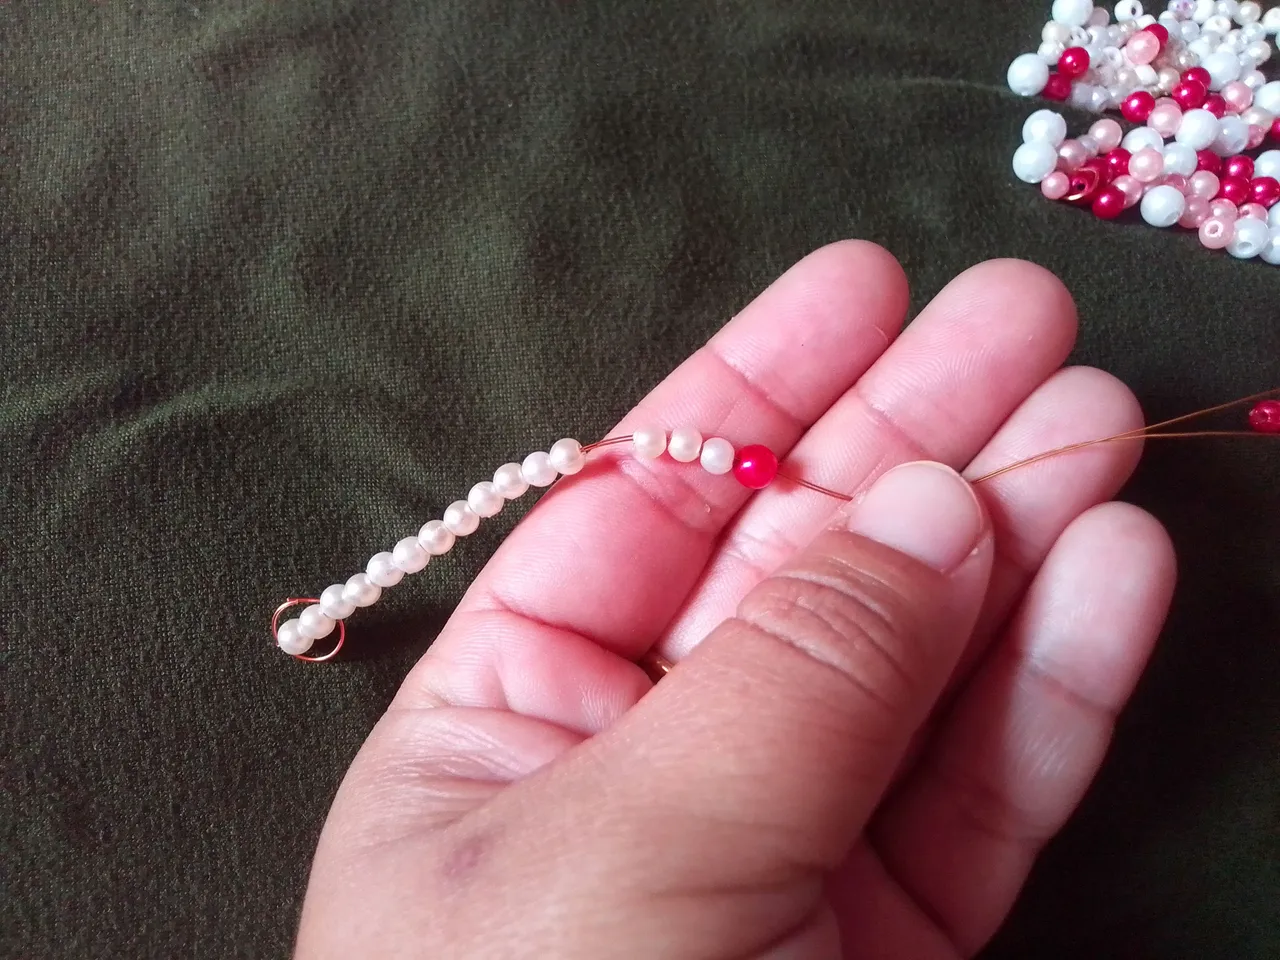
Paso 02
Luego de esto, comenzamos a introducir por ambos alambres las perlas blancas, introducimos de 10 a 15 perlas pequeñas dependiendo el tamaño de la muñeca para quien la vayas a hacer. Al llegar al final de las perlas blancas, introduzco una perla roja.
Step 02
After this, we begin to introduce the white pearls through both wires, we introduce 10 to 15 small pearls depending on the size of the hand for whom you will make it. When I get to the end of the white pearls, I insert a red pearl.
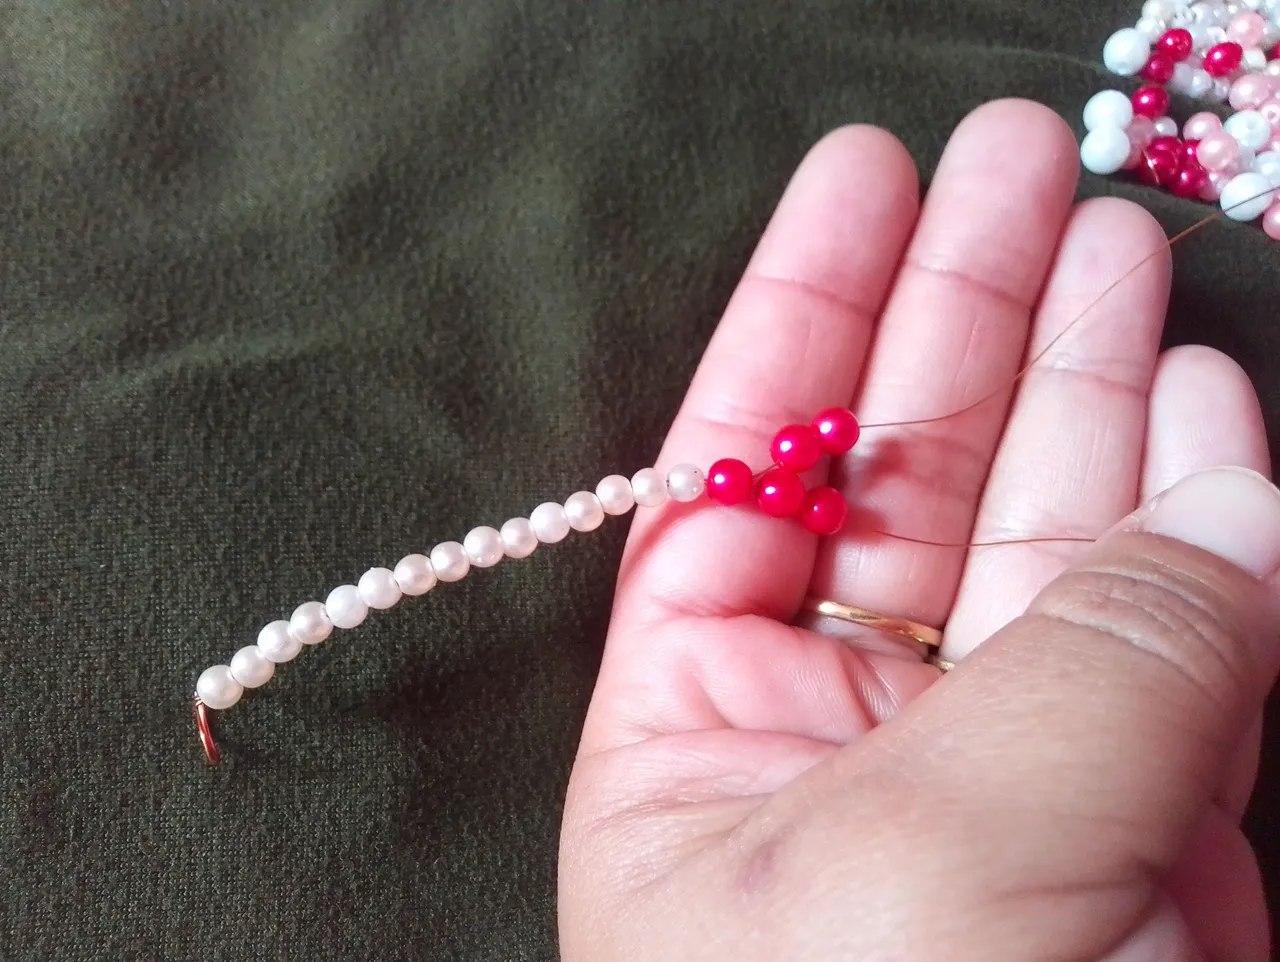
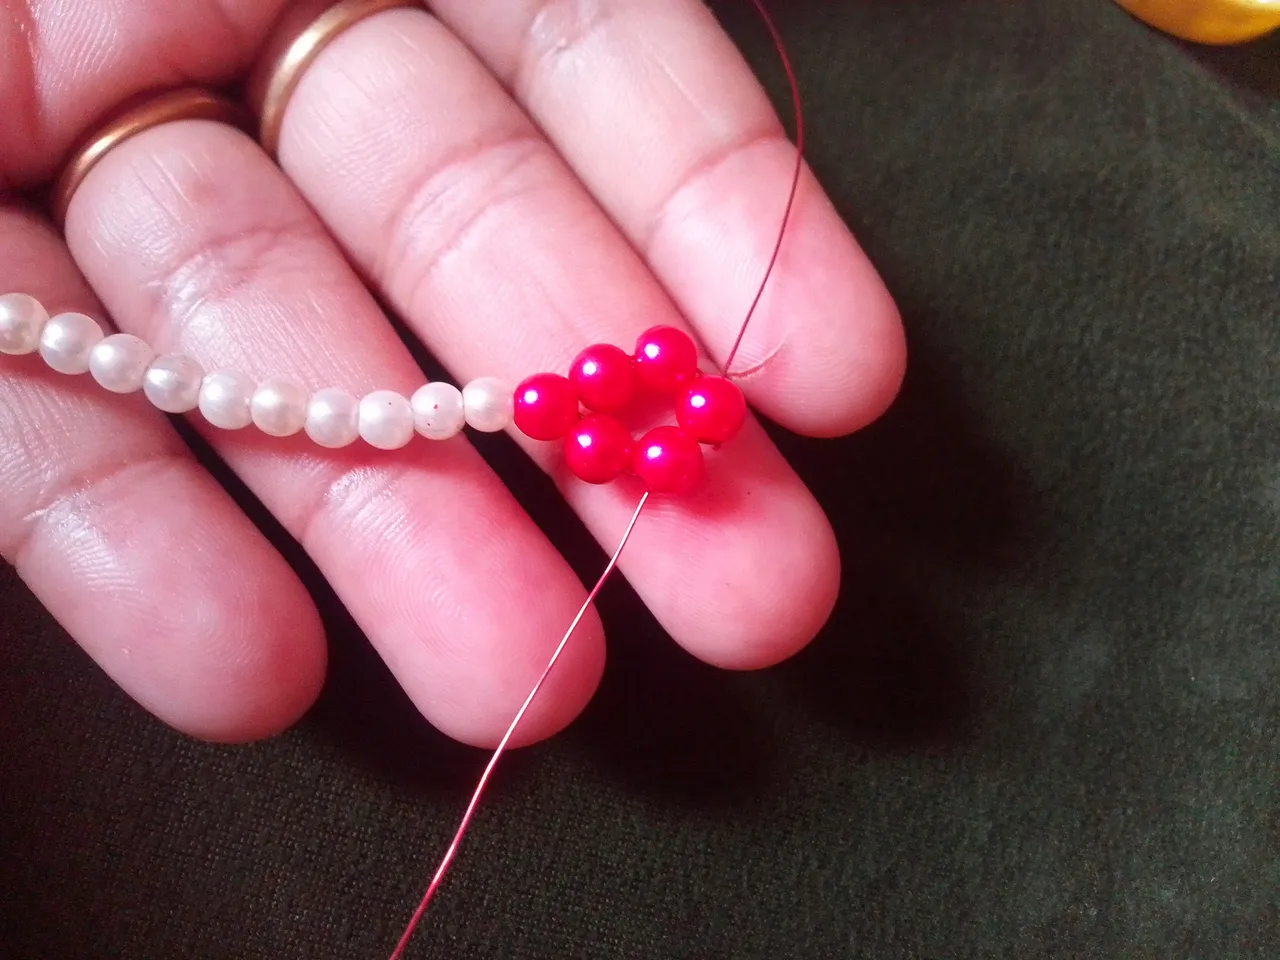
Paso 03
Ahora separó ambos alambres y continuo insertando dos perlas rojas de cada lado, introduzco una tercera perla para pasar ambos alambres y cerrar lo que sería la primera flor.
Step 03
Now I separate both wires and continue inserting two red pearls on each side, I introduce a third pearl to pass both wires and close what would be the first flower.
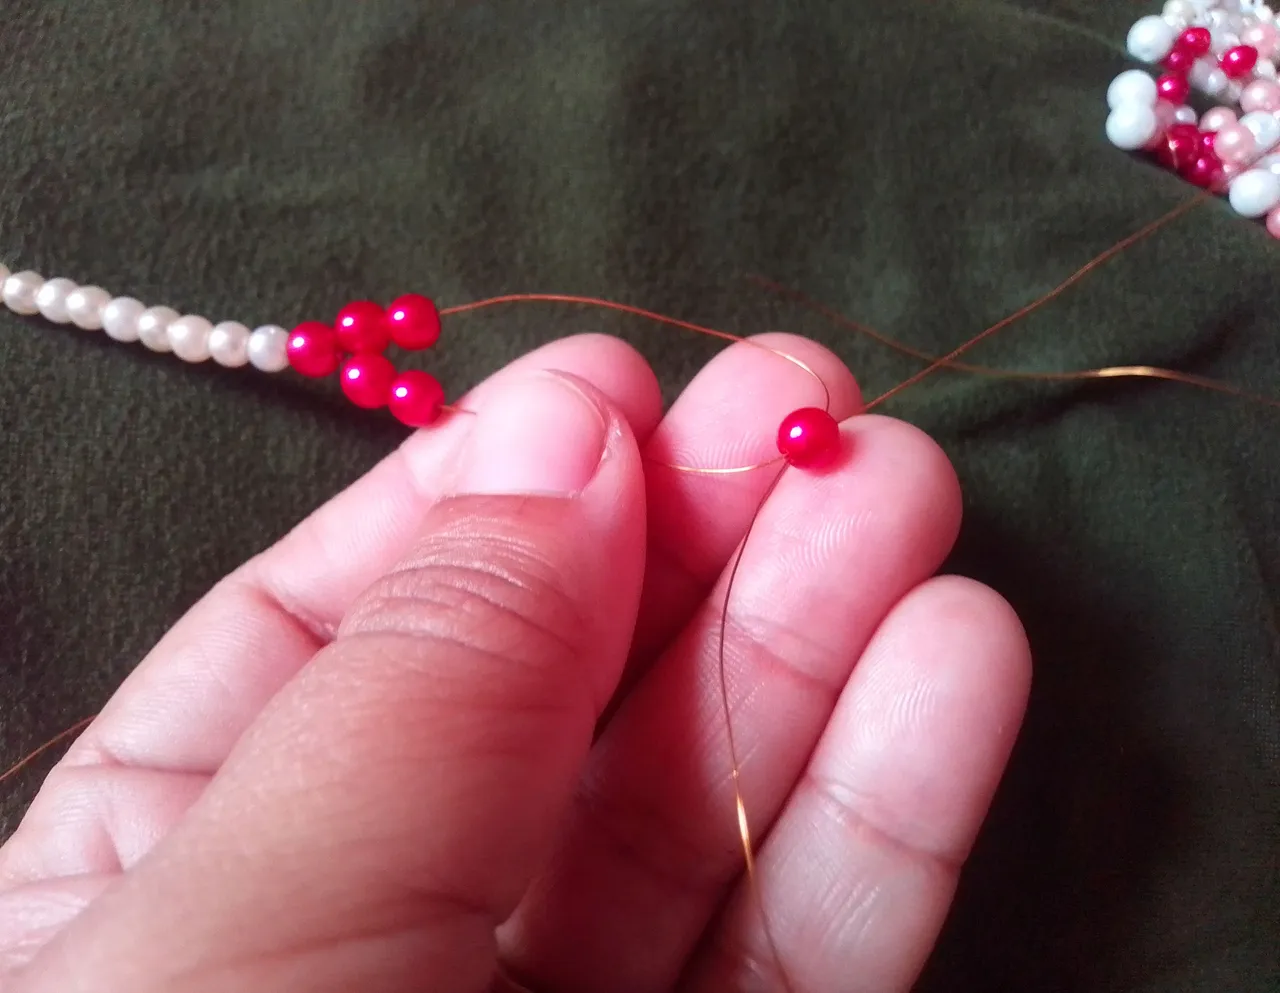
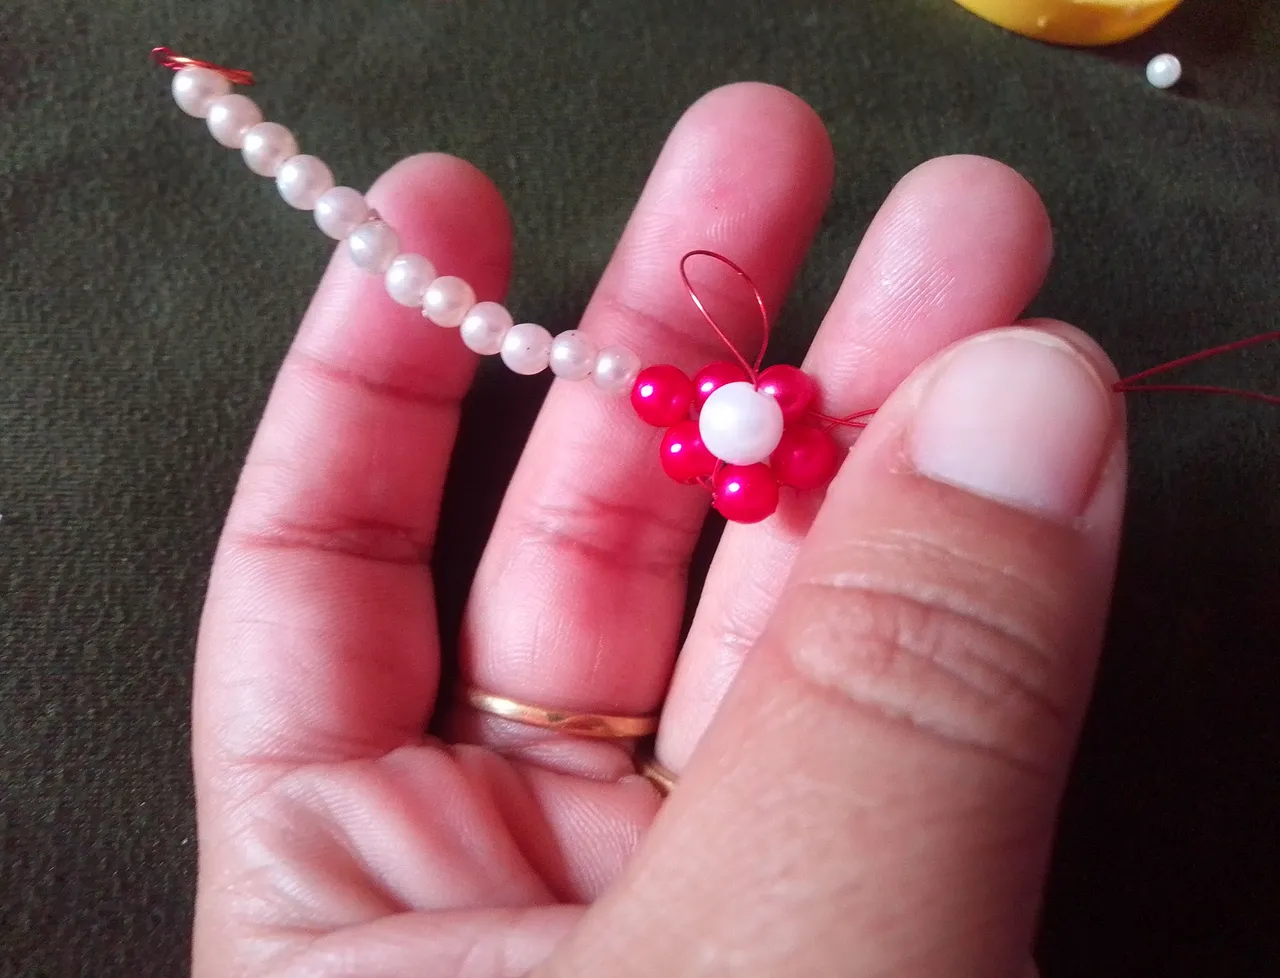
Paso 04
Luego apriento muy bien y regreso un de los almbres por la primera piedra. En este mis alambre inserto una perla blanca más grande que las demás y devuelvo el alambre por la primera perla del otro lado. Introduzco nuevamente por la perla que cierra la flor.
Step 04
Then I squeeze very well and return one of the wires for the first stone. In this my wire I insert a white pearl larger than the others and return the wire through the first pearl on the other side. Introduce again through the pearl that closes the flower.
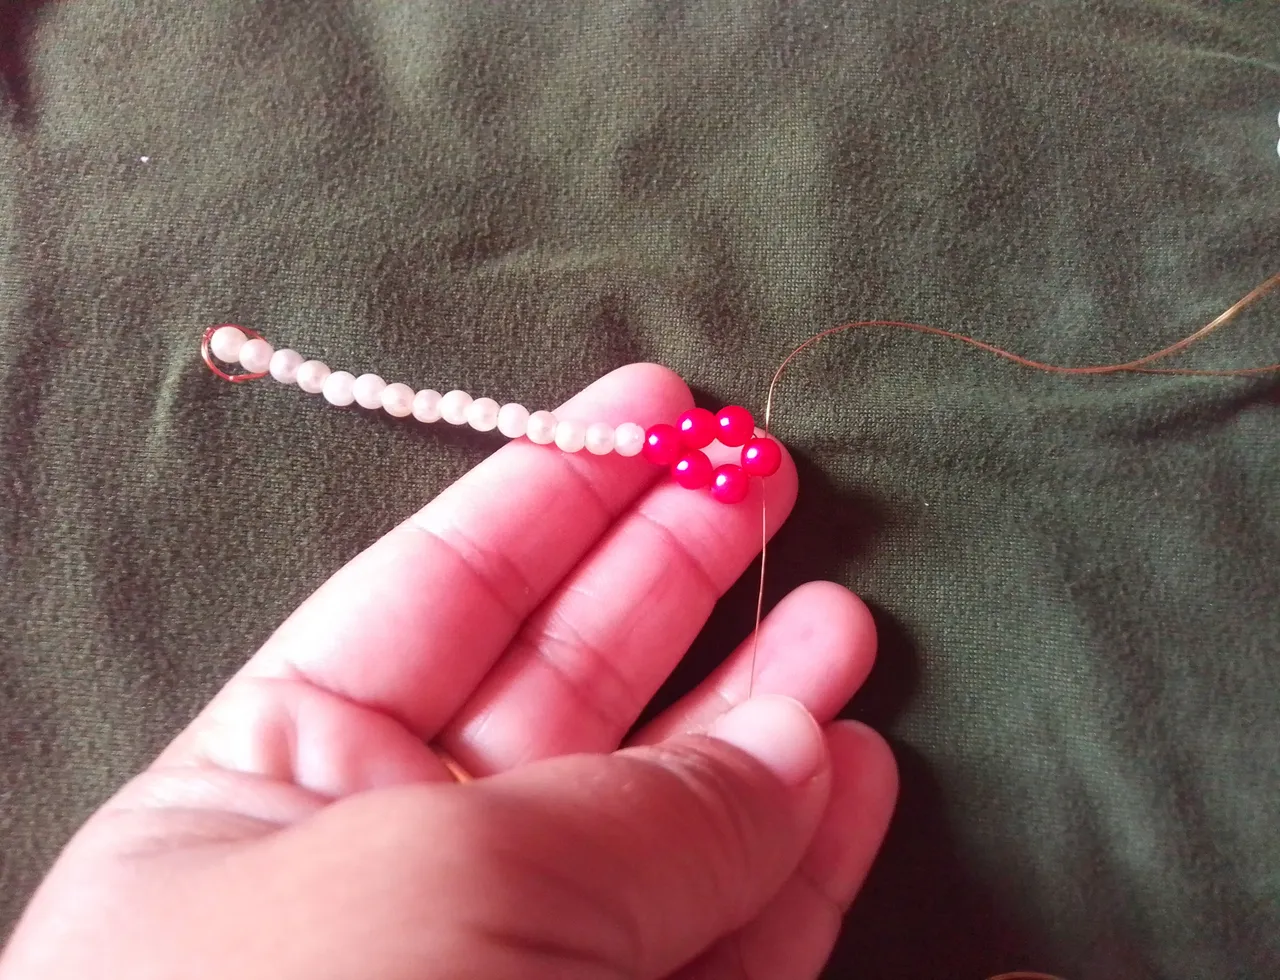

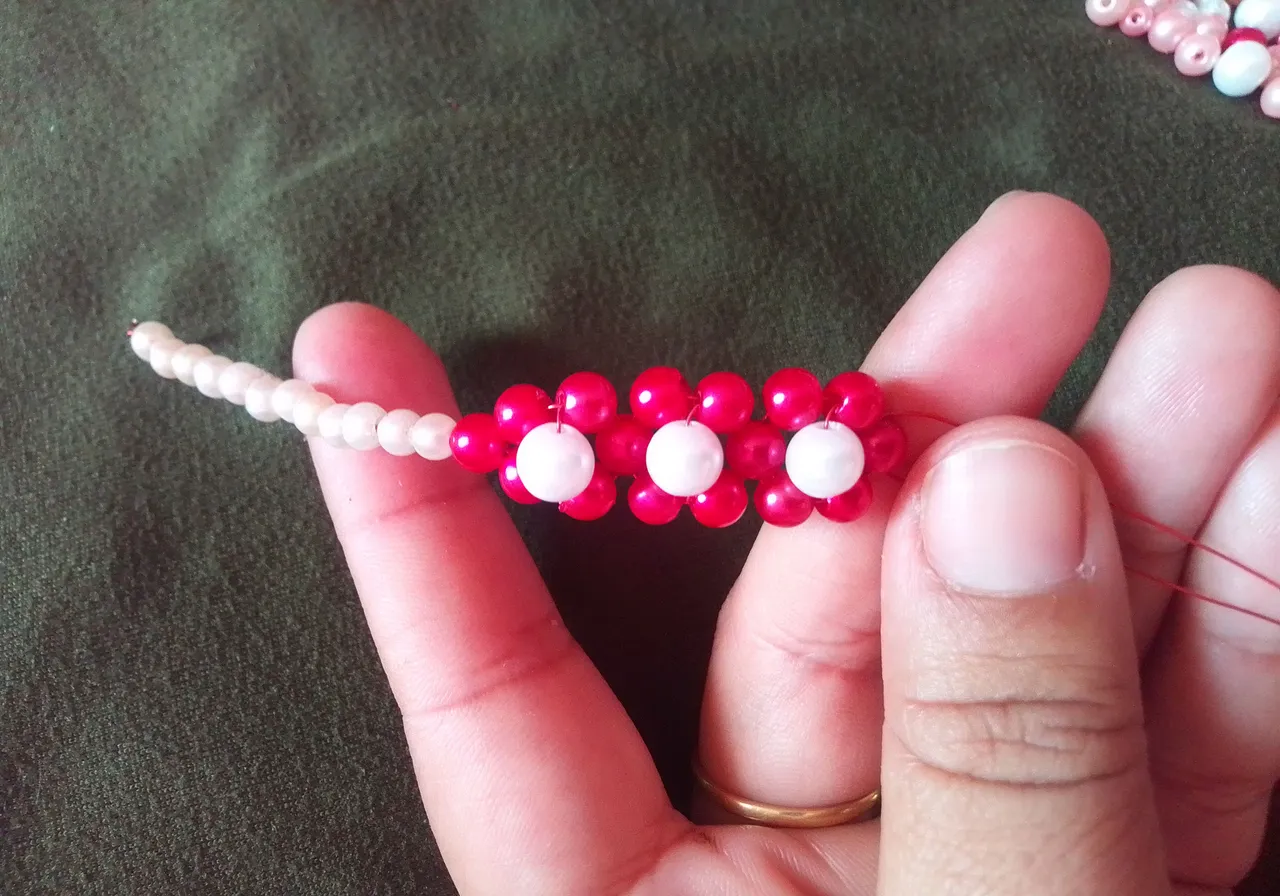
Paso 05
Repito el paso de introducir dos perlas por ambos lados y cerrar con una al final para hacer la segunda flor con su respectiva perla blanca en el centro. De la.misma manera haré una tercera flor. Al tener mis flores listas, cierro con una perla roja al final.
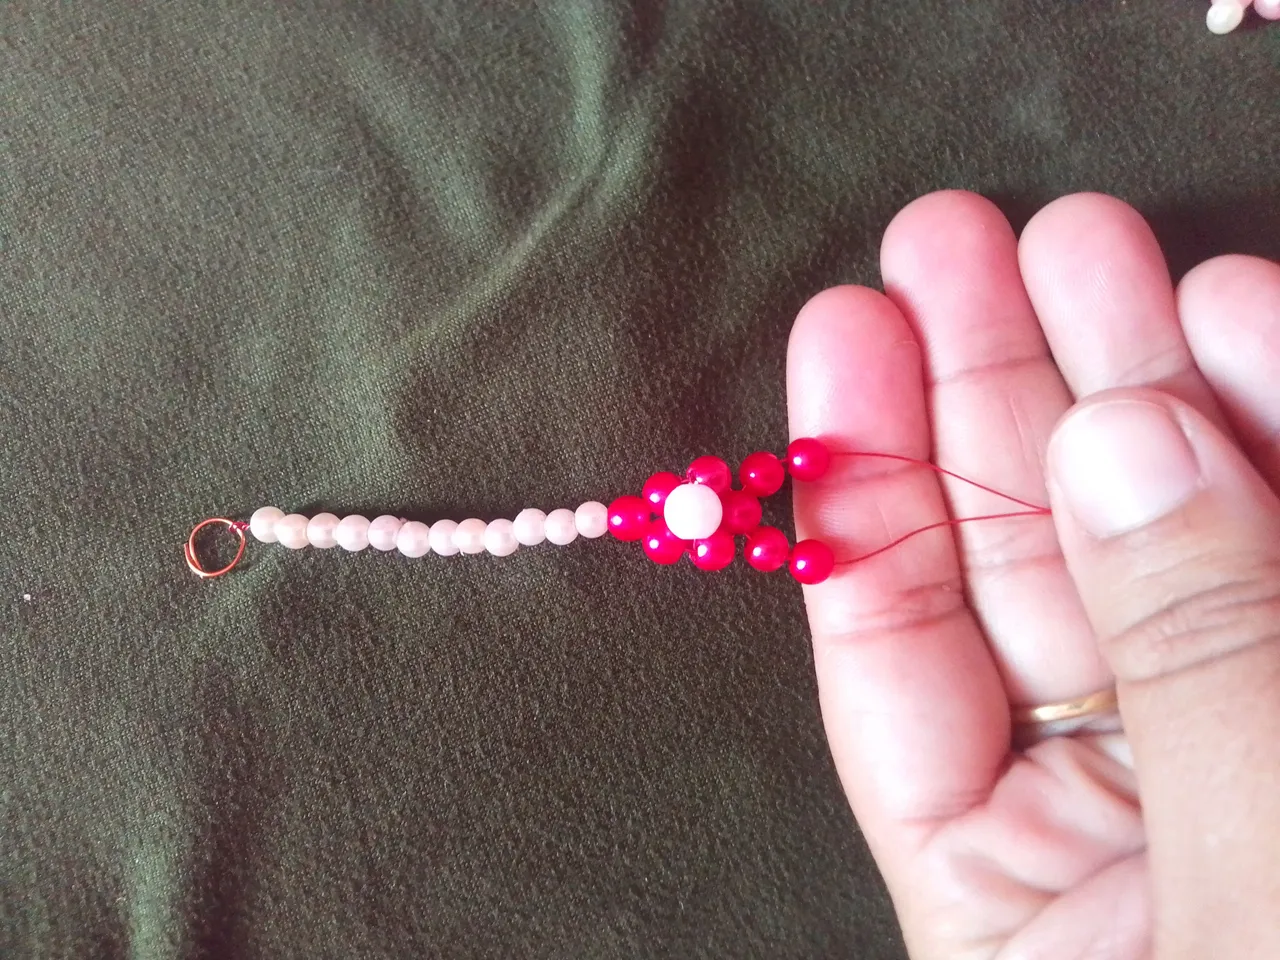
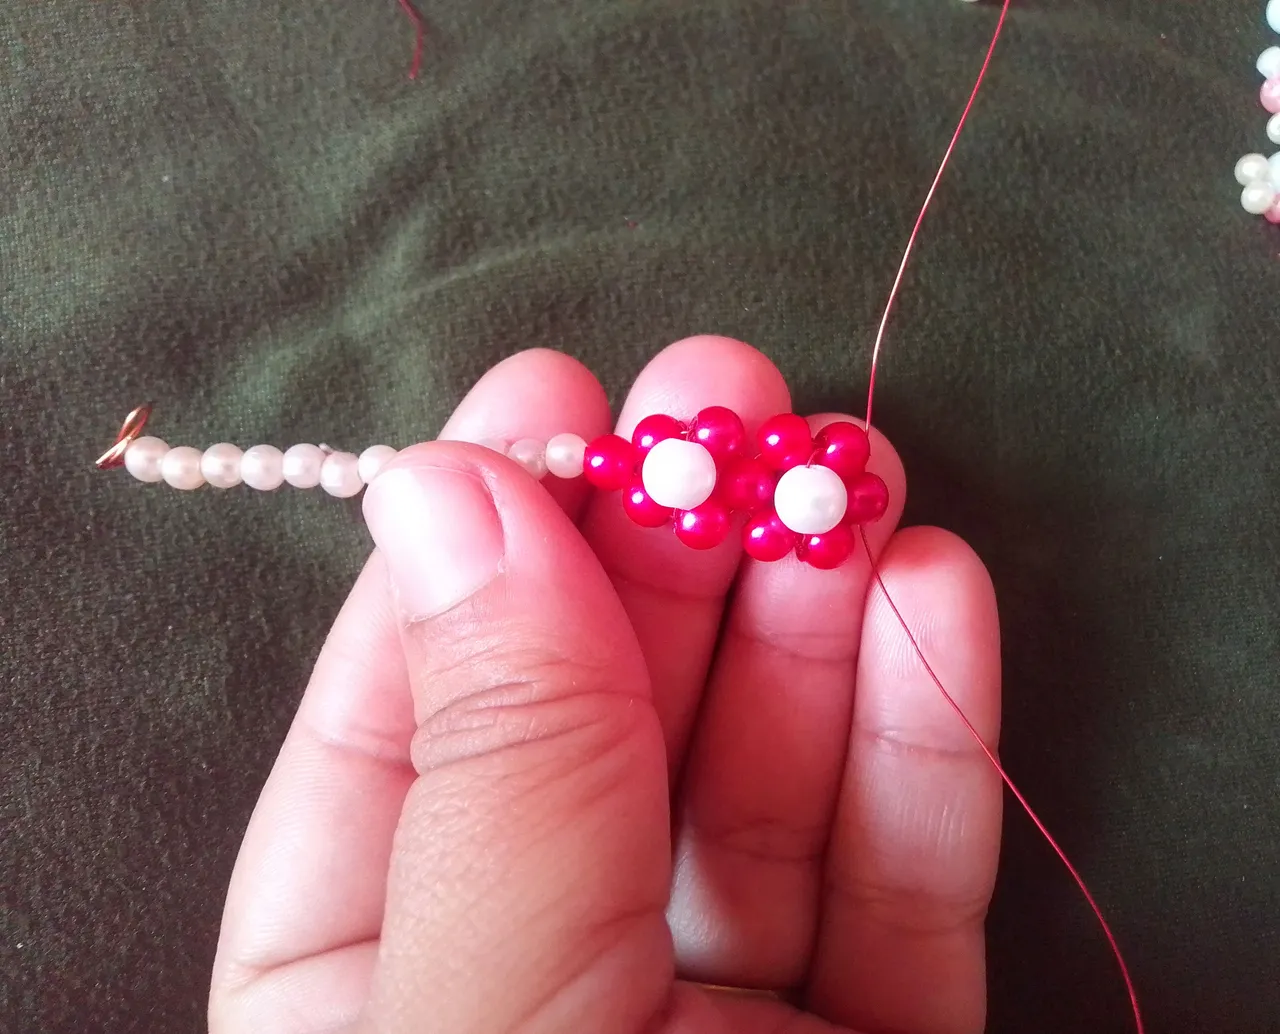
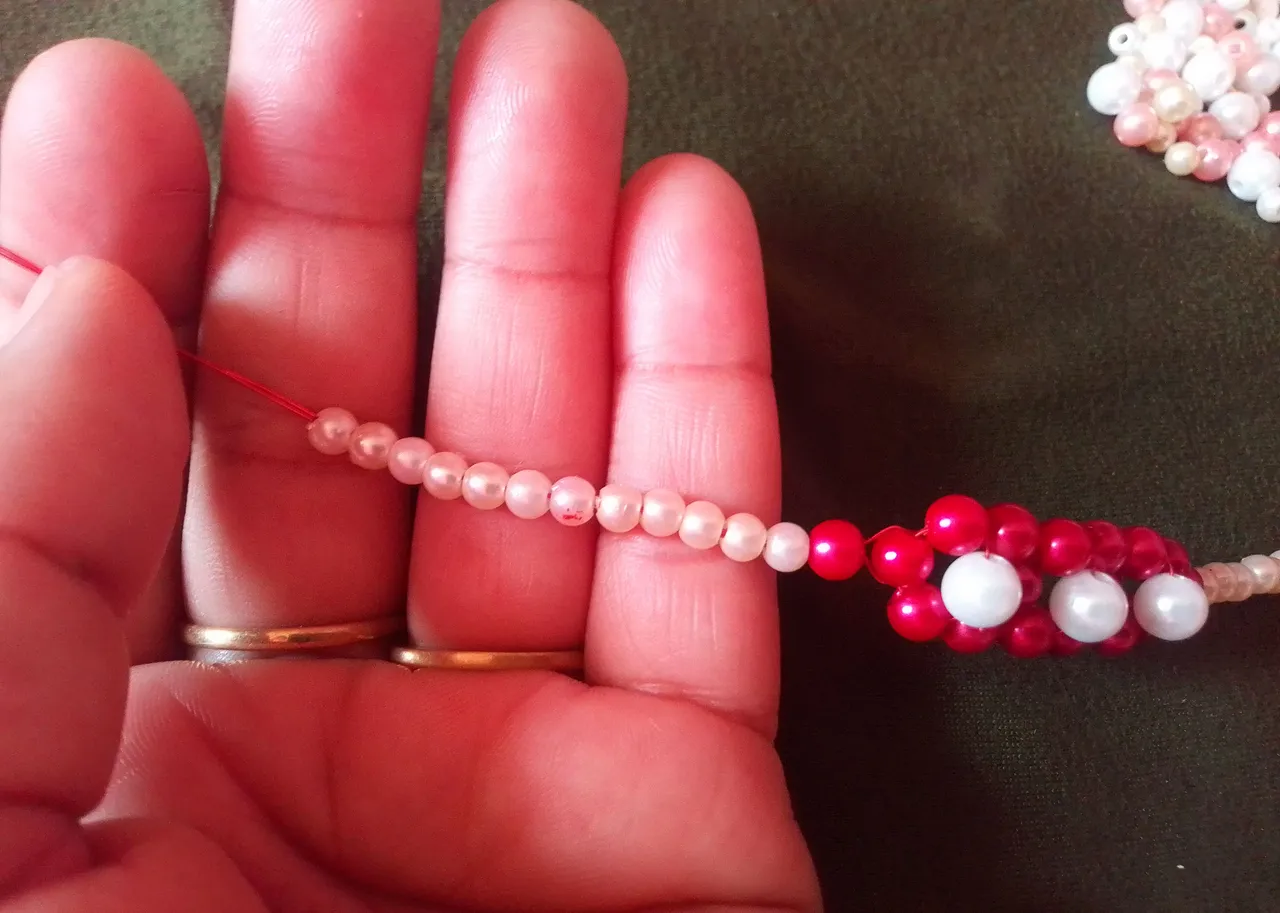
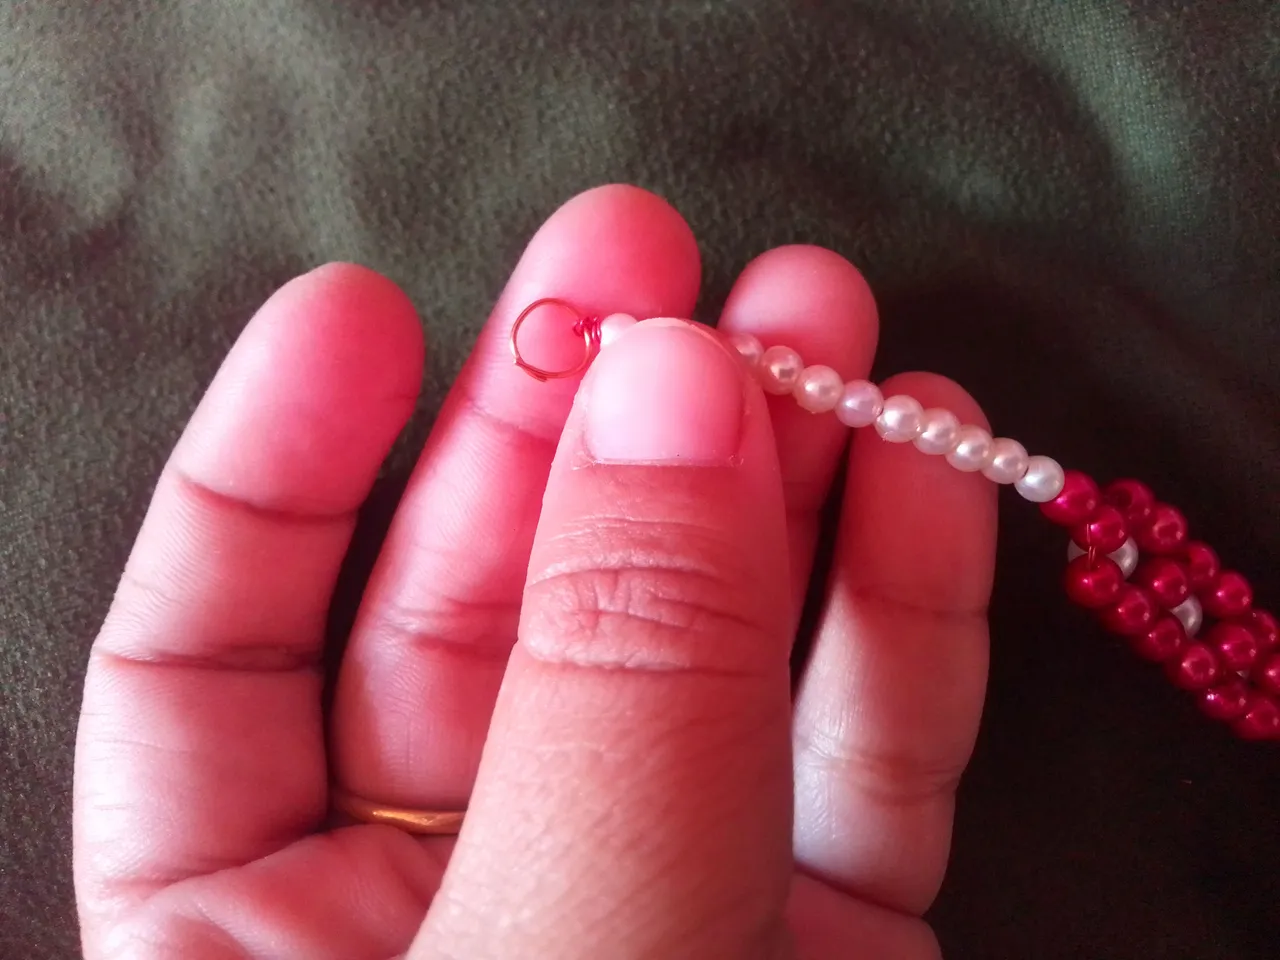
Paso 06
Continuamos insertando nuevamente 12 o 15 perlas blancas como al principio. Al final coloco la otra argolla que realizamos al inicio. Finalmente coloco los sujetadores en cada extremo.
Step 06
We continue inserting again 12 or 15 white pearls as at the beginning. At the end I place the other ring that we made at the beginning. Finally I put the fasteners on each end.
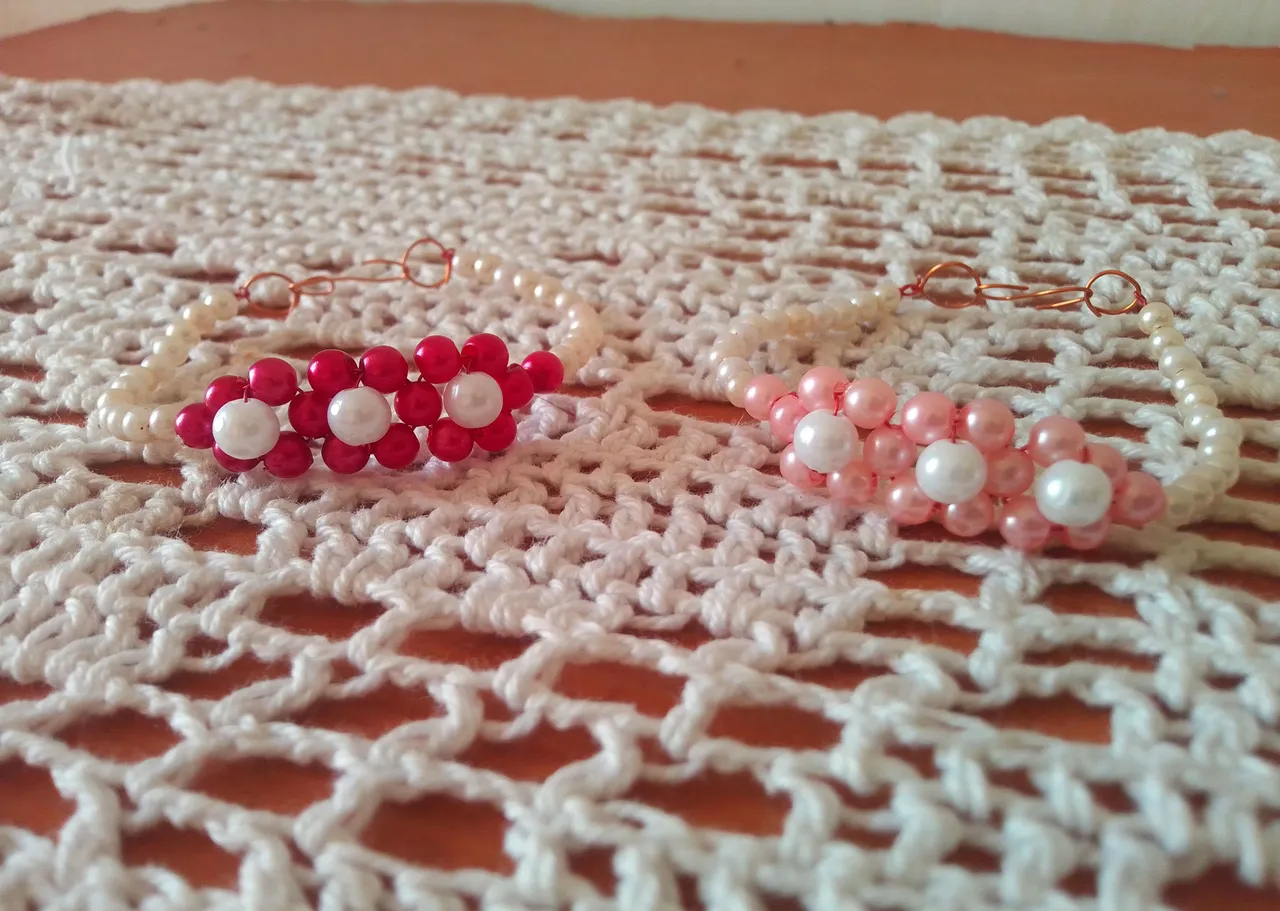
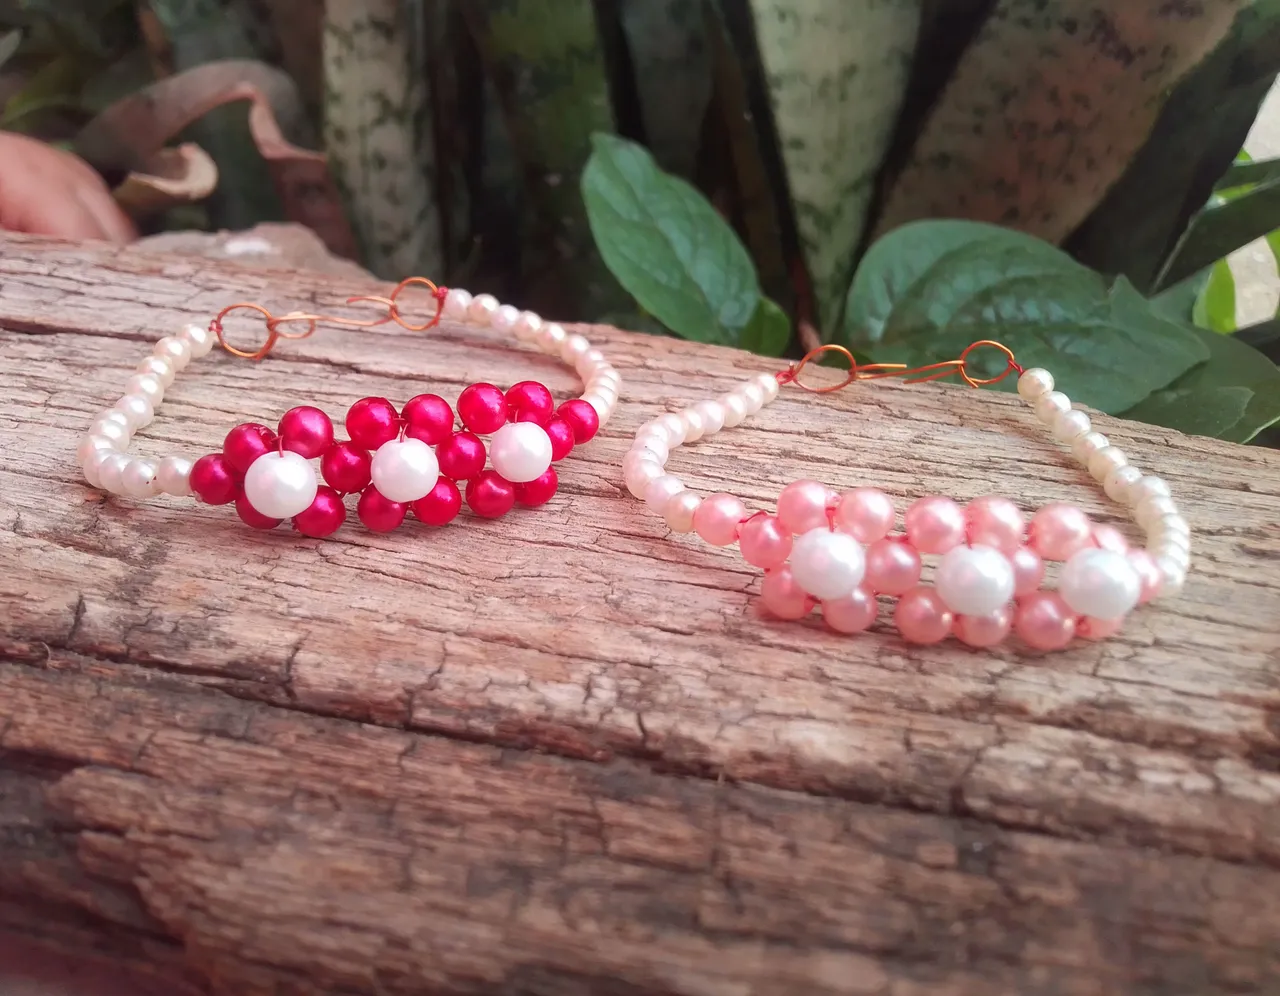
💞Resultado! 💞
Es importante mencionarles algo que al principio no les dije es que está técnica también podemos hacerla con hilo en caso de no tener alambre. Se verá igual de linda y quizás más flexible. Me encanto mucho este resultado y me alegra agregar una dos pulsera más a mi estante de accesorios. Puedes variar los colores y crear estas hermosas pulseras para combinar con tus atuendos.
It is important to mention something that I did not tell you at first is that we can also do this technique with thread if we do not have wire. It will look just as cute and perhaps more flexible. I really loved this result and I'm glad to add another two bracelet to my accessory shelf. You can vary the colors and create these beautiful bracelets to match your outfits.


Espero les haya gustado y este tutorial le sea de beneficio en algún momento, es muy bueno cuando estás comenzando en este arte. Les deseo una bella noche y que Dios siempre me los bendiga!
I hope you liked it and this tutorial will be of benefit to you at some point, it is very good when you are starting in this art. I wish you a beautiful night and may God always bless you!