HELLO EVERYONE!
Today I want to share a step by step progress shot of a portrait of this wonderful lady. This portrait is actually a Commissioned work and I'm done with it's delivery. Please visit my Instagram @official_uroga and my Facebook @officialuroga for more.
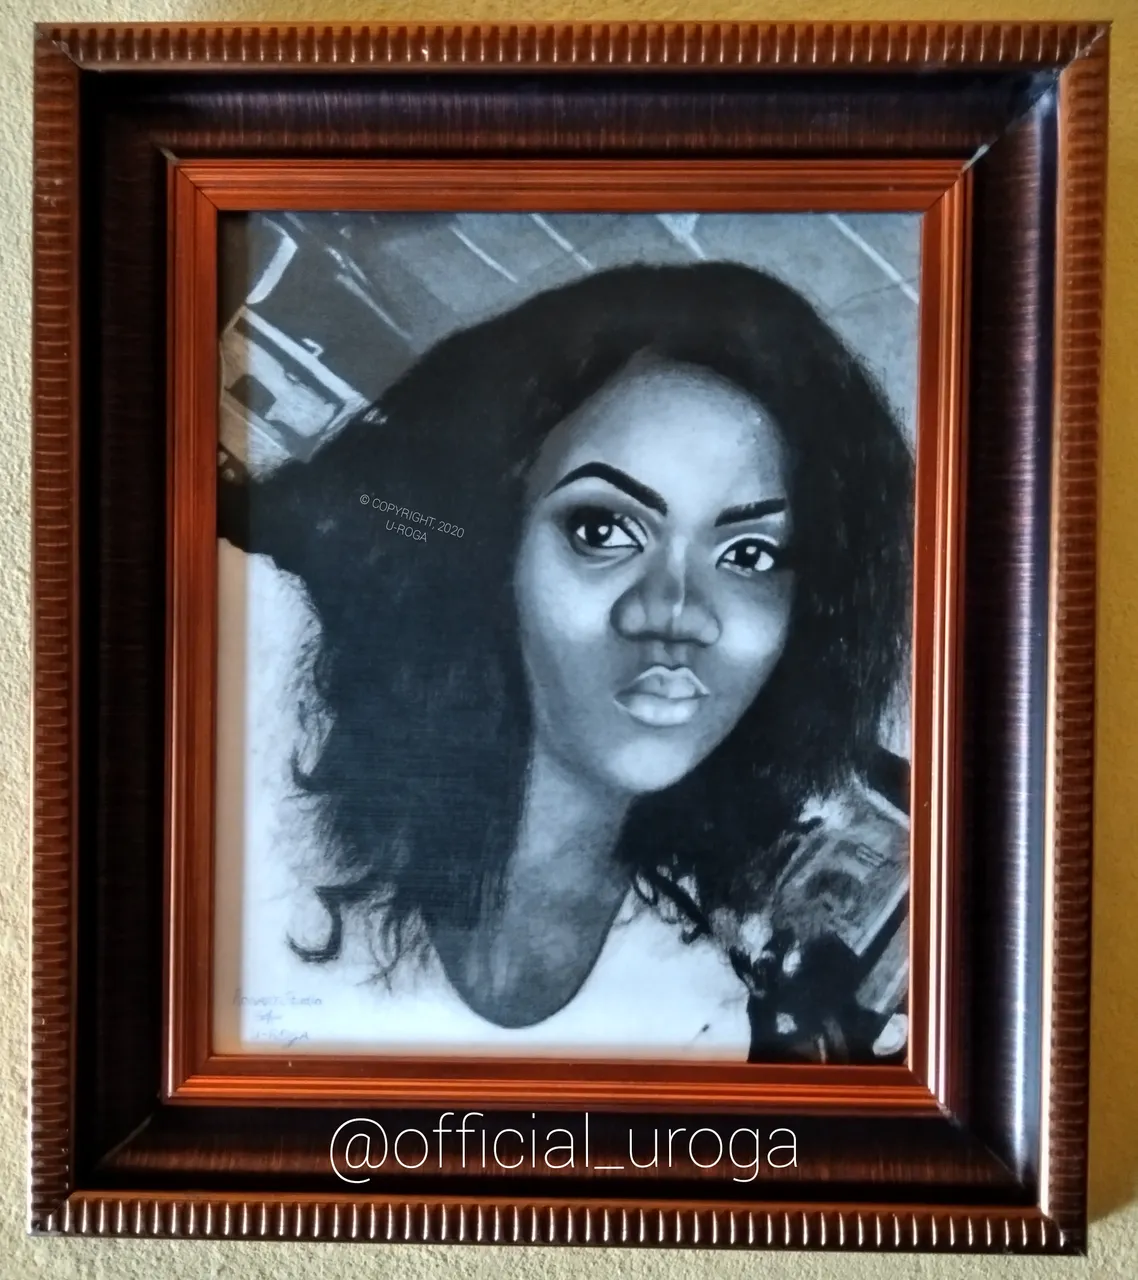
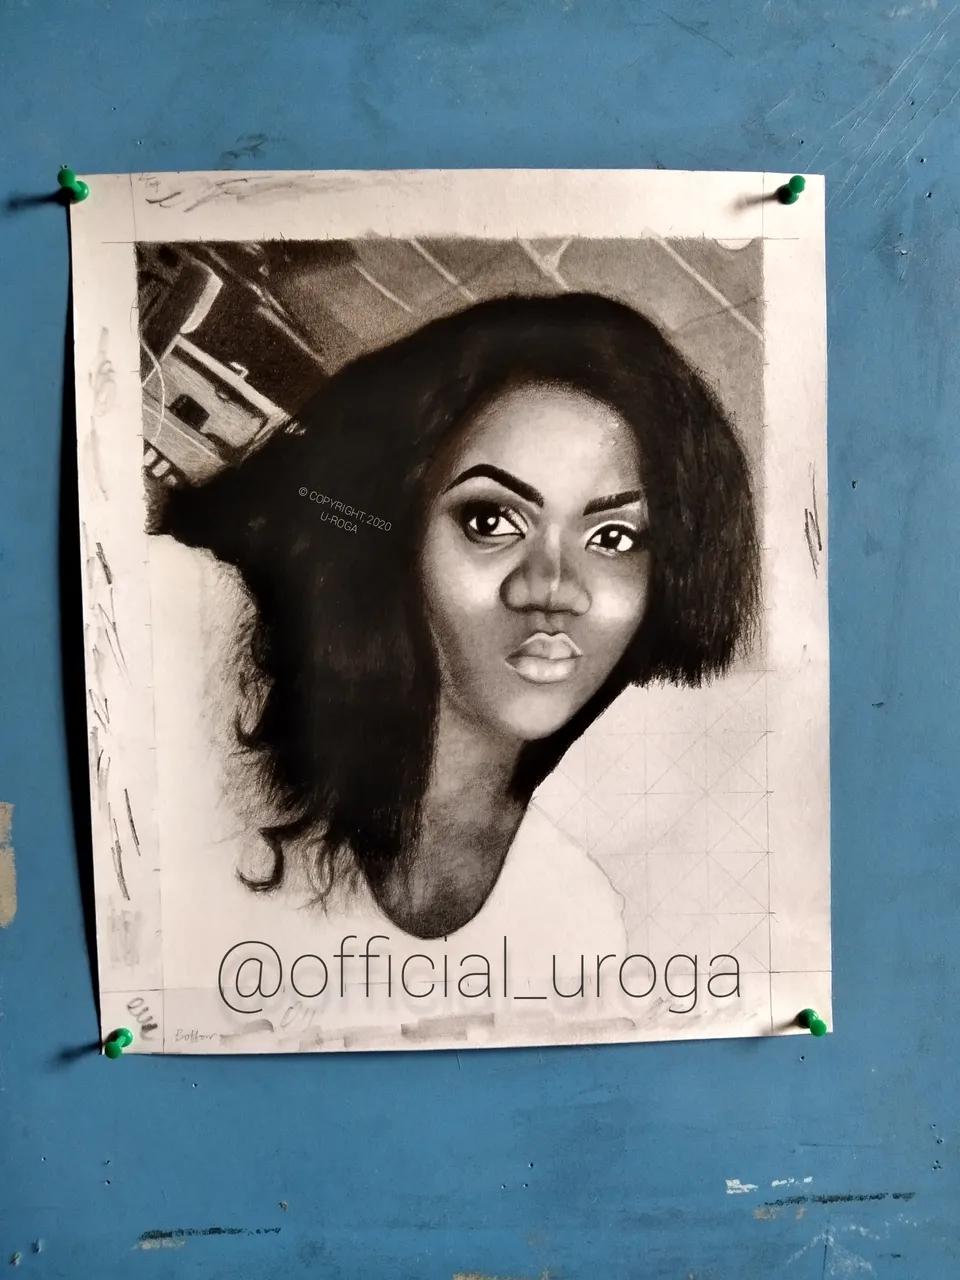
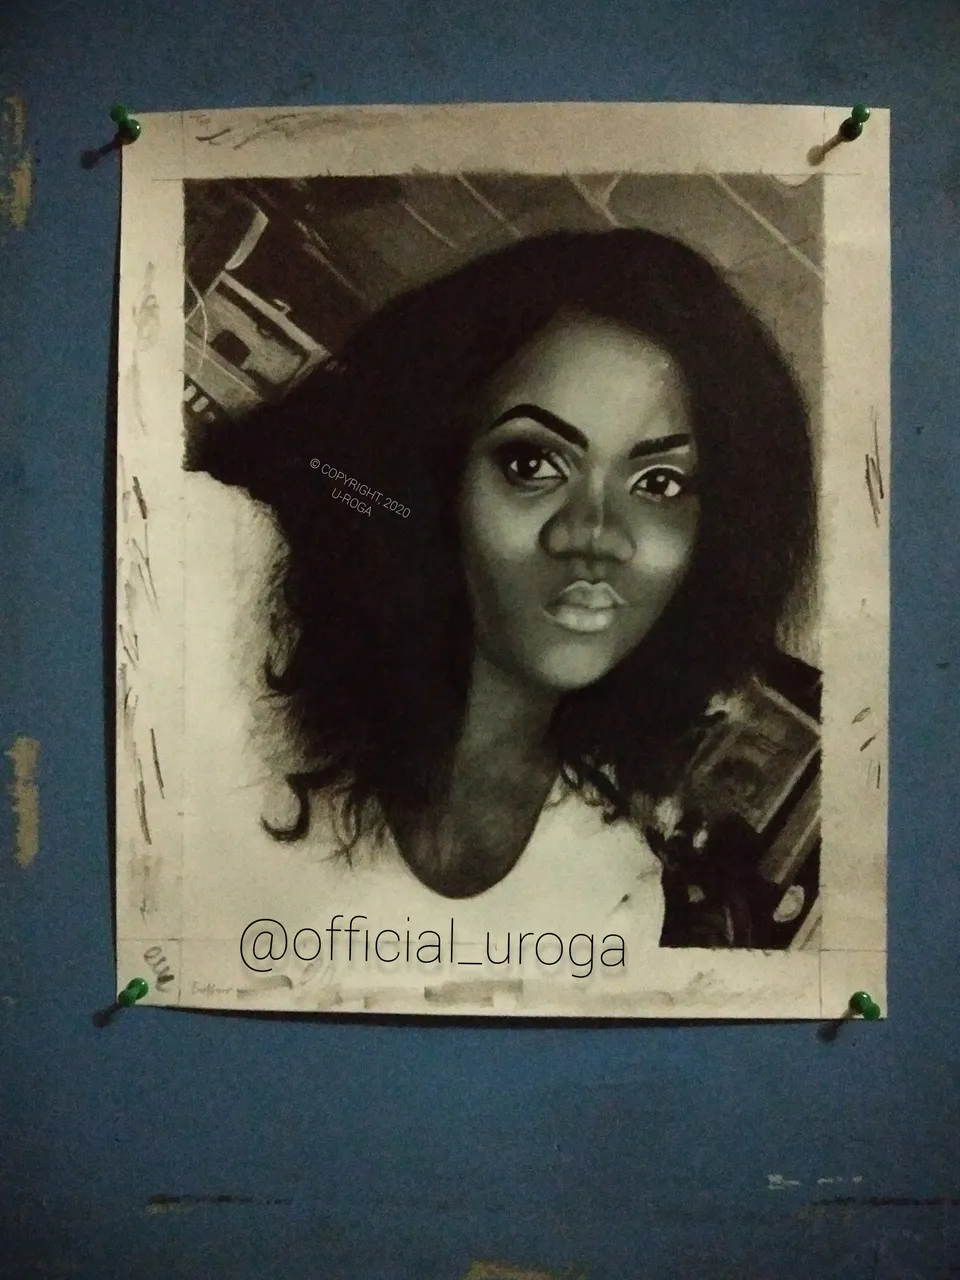
I did this work with Charcoal and Graphite pencils on a smooth Glossy Art Card paper. This work was challenging to me because of the nose, at some point of the drawing, I decided to get creative to restructure the nose but I noticed the resemblance with the original image changes when I did that. So, I had to fall back to the original pattern of the nose in the original picture, I'm glad it came out well. This was an ASAP work, so I had little time to finish, meaning it was less rest for me, if you check the final shot, you'd notice the difference, because I took that shot at midnight after completing the drawing. Before I started drawing, I told myself I'm recreating the whole image using it's original background, I really like making background art, it's fun and challenging at the same time.
The materials used in making this work include;
Graphite Pencil
Charcoal Pencil
White pastel Pencil
Blending stump
Kneaded Eraser
Below are the different steps taken why making the piece, do share your thoughts on what you think.
Progress Shot
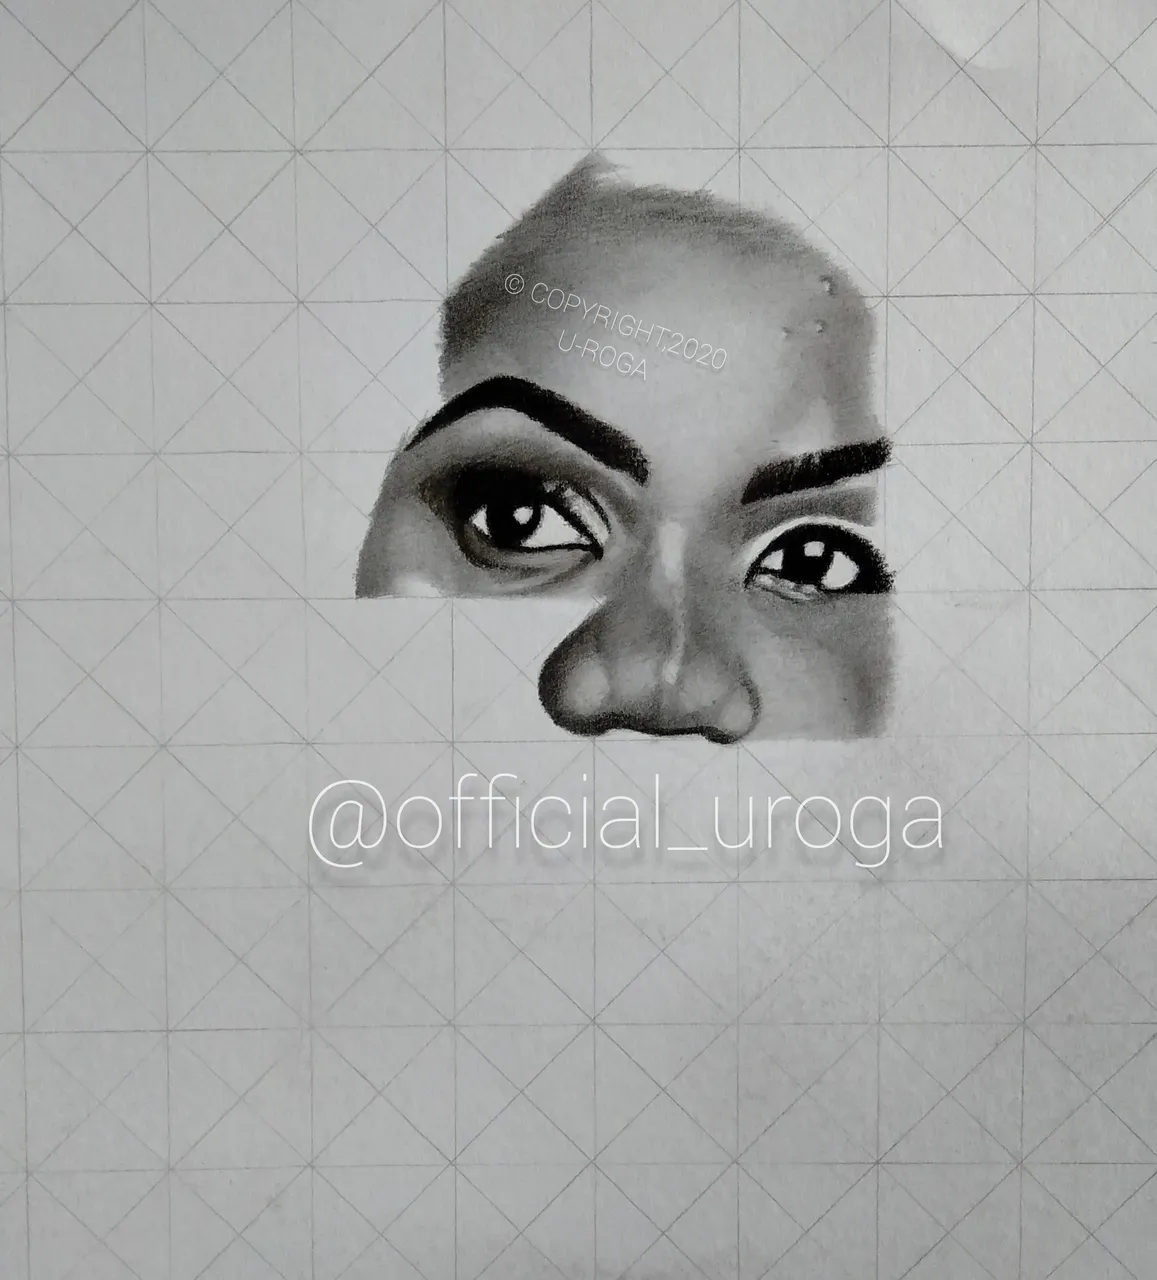
Progress Shot
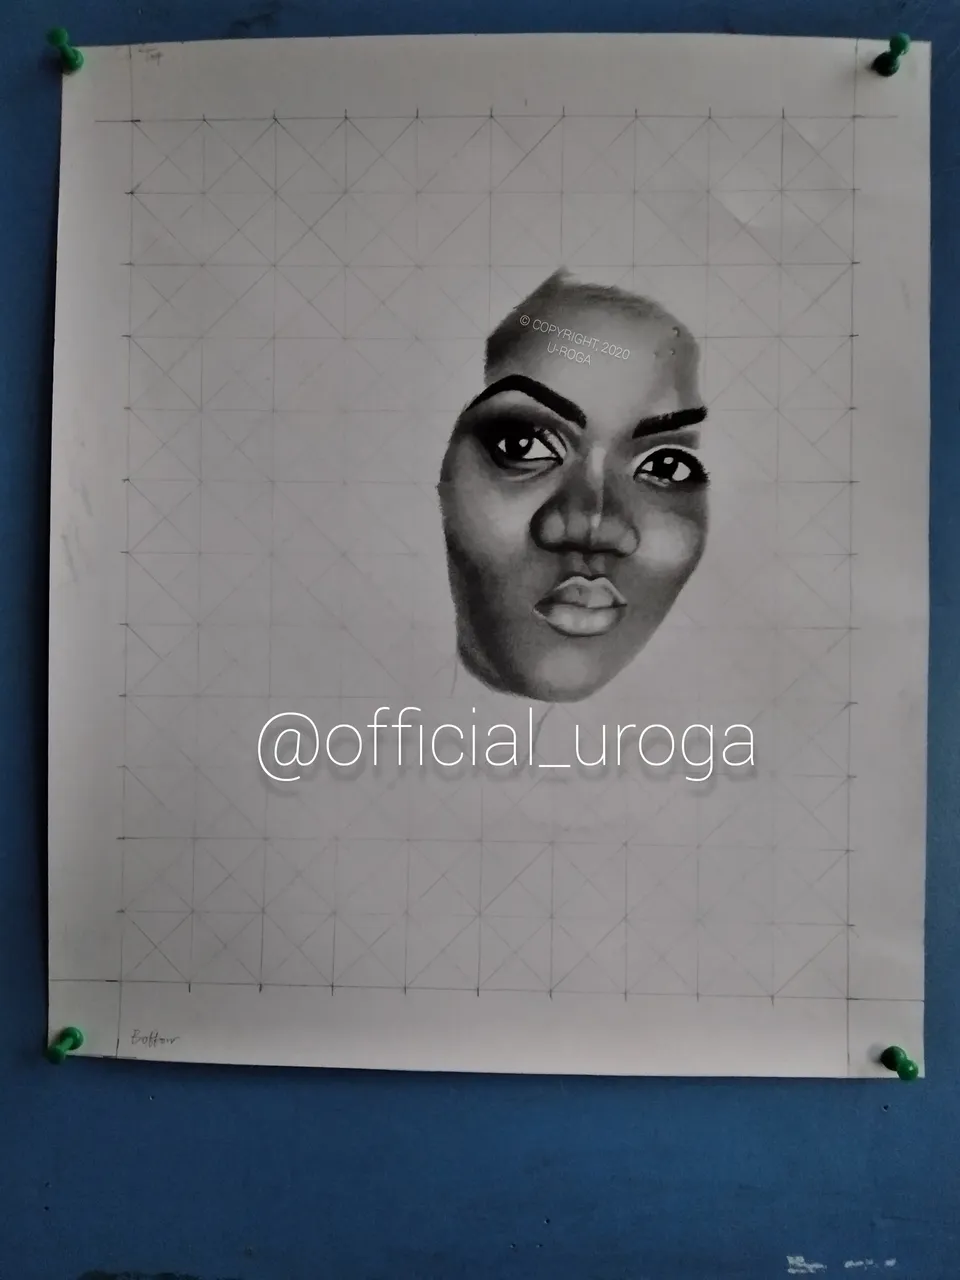
Progress Shot

Progress Shot
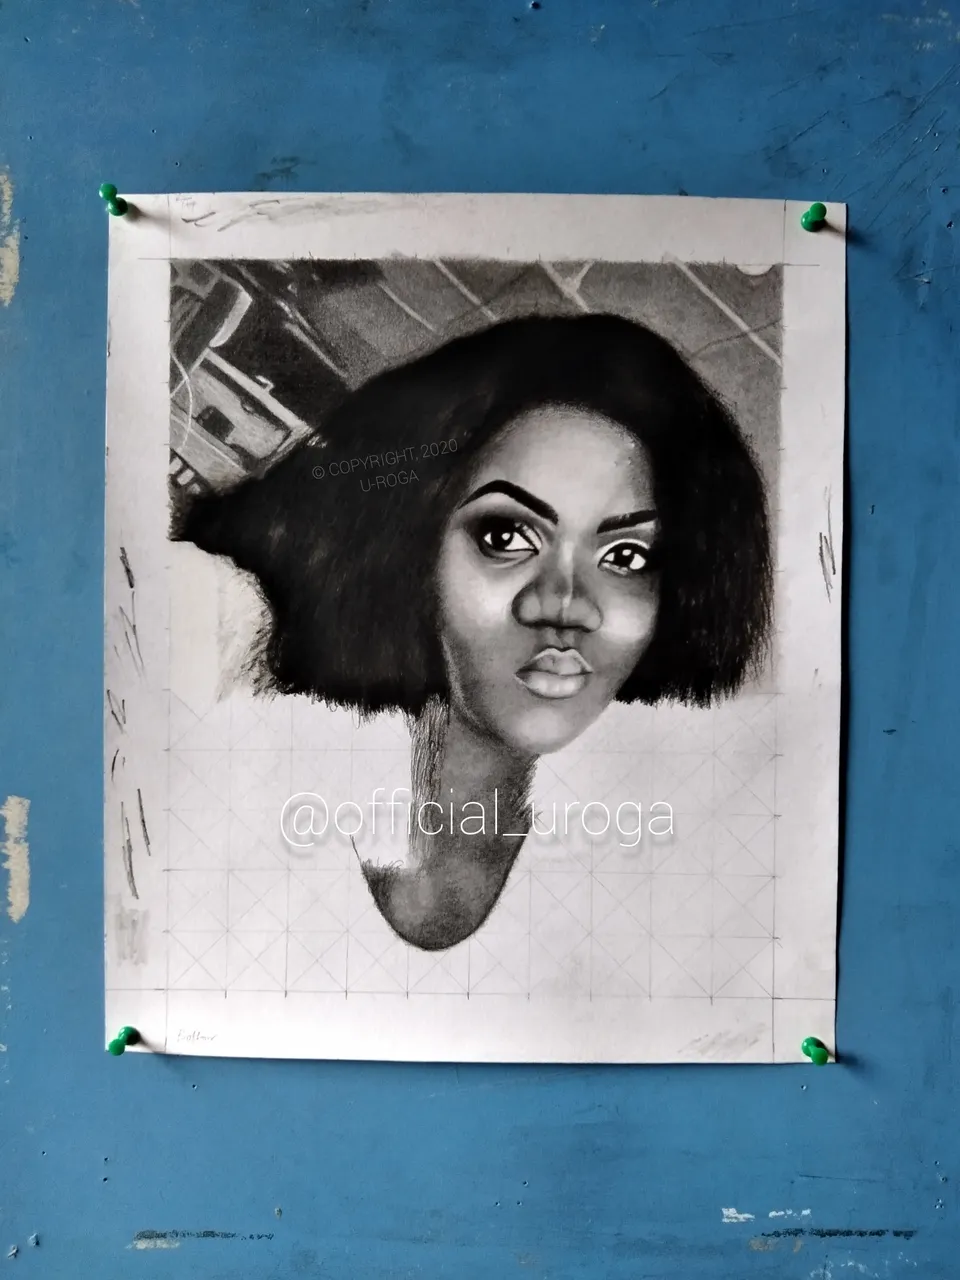
Progress Shot
Final Shot
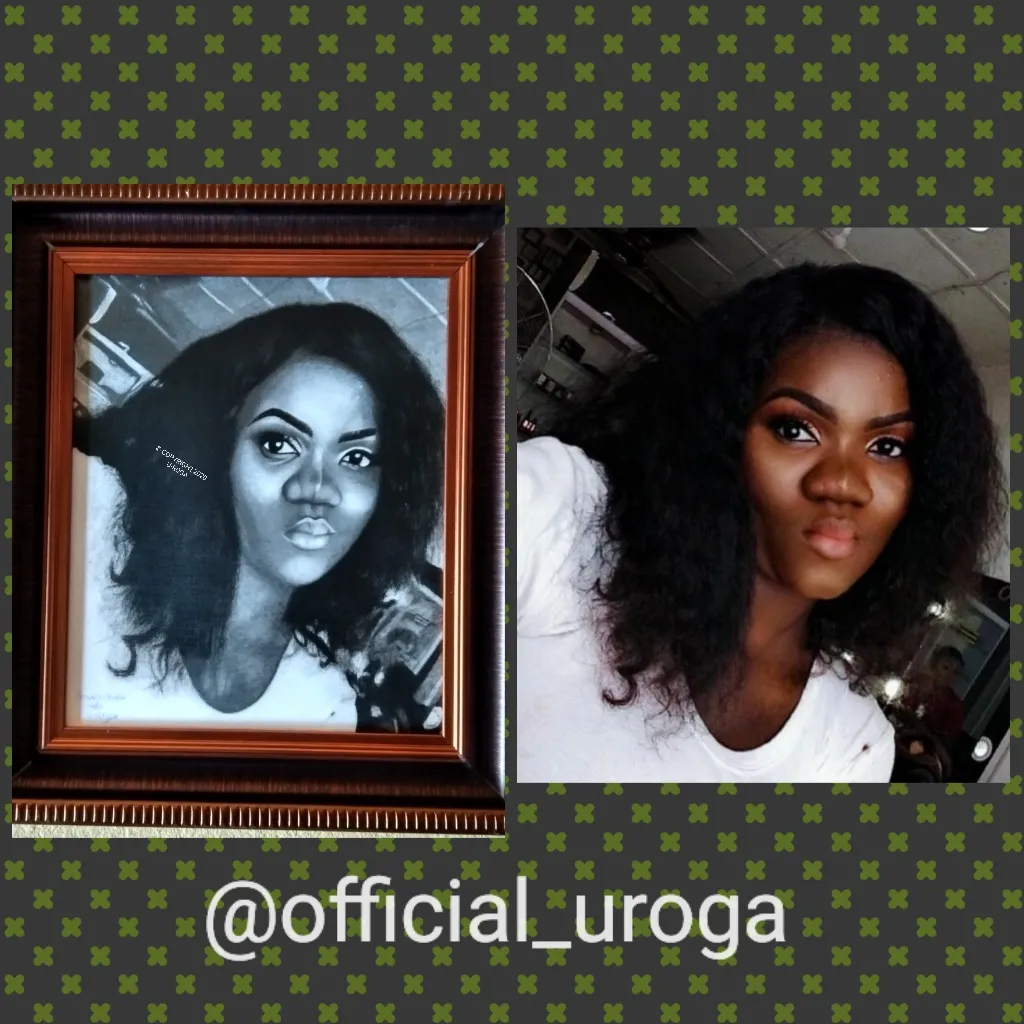
Original Image Versus Pencil Drawing
Check out some of my previous post below
- @officialuroga/insect-ballpoint-pen-sketch-drawing
- @officialuroga/daily-drawing-challenge-day-23-dangerous
- @officialuroga/portrait-drawing-commissioned