Hola hijitos como me les va, yo estoy bien aunque hay días en los que me siento un poco enferma con la tensión, pero igual me levanta el ánimo trabajar aquí en #hive.
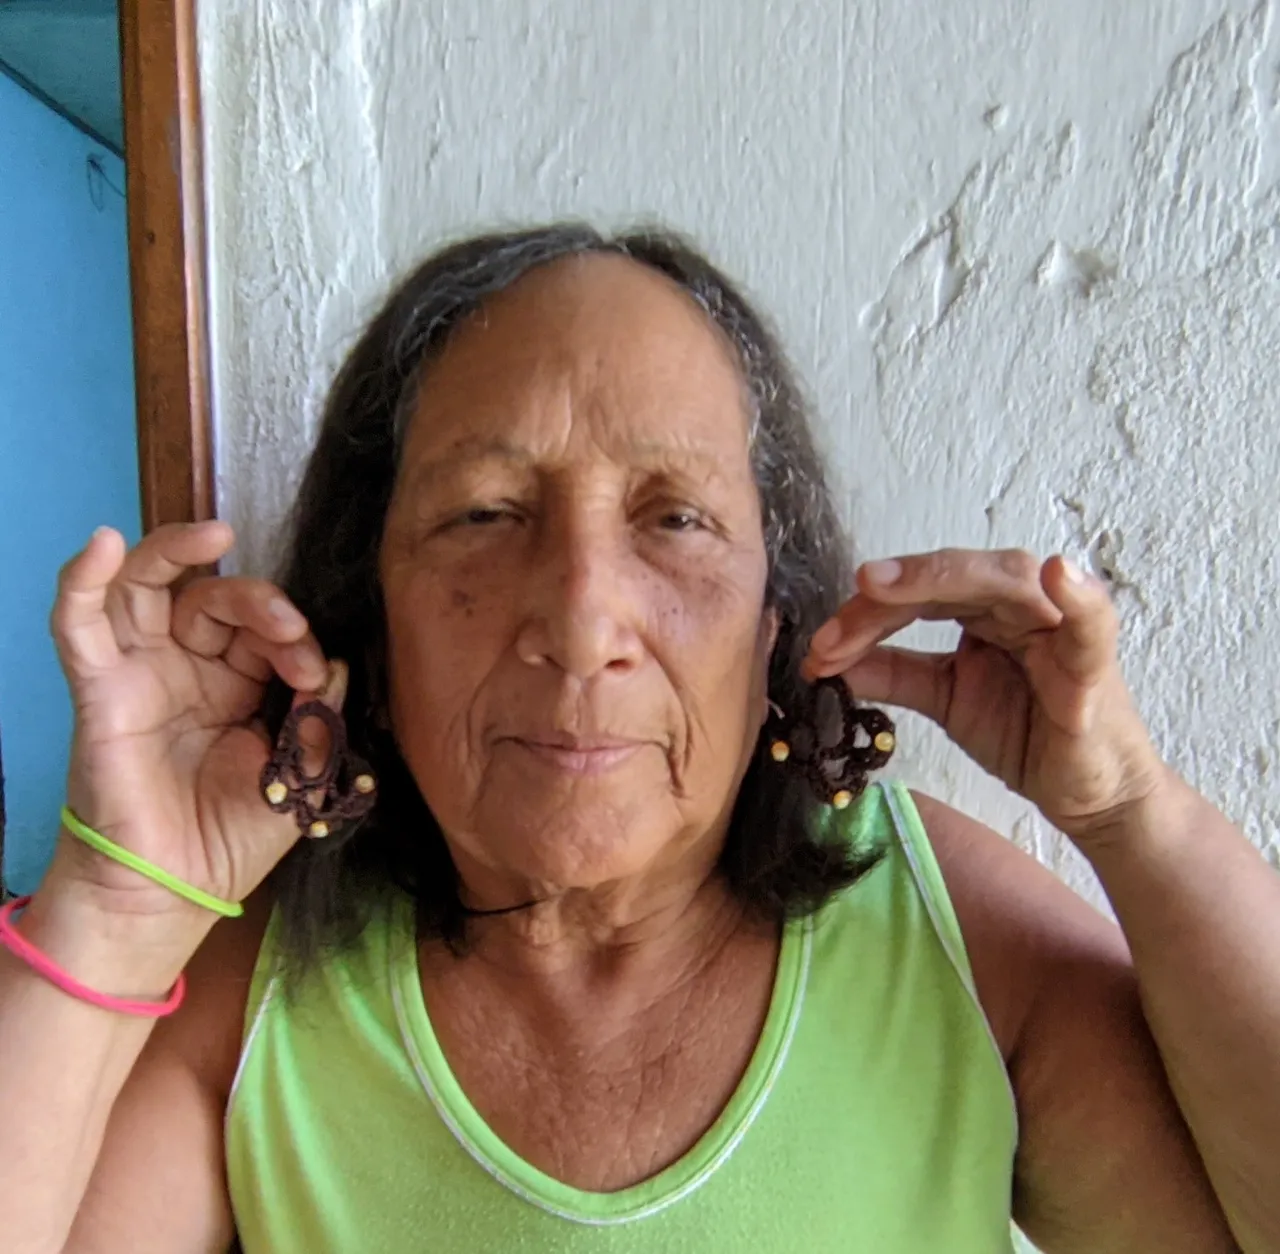
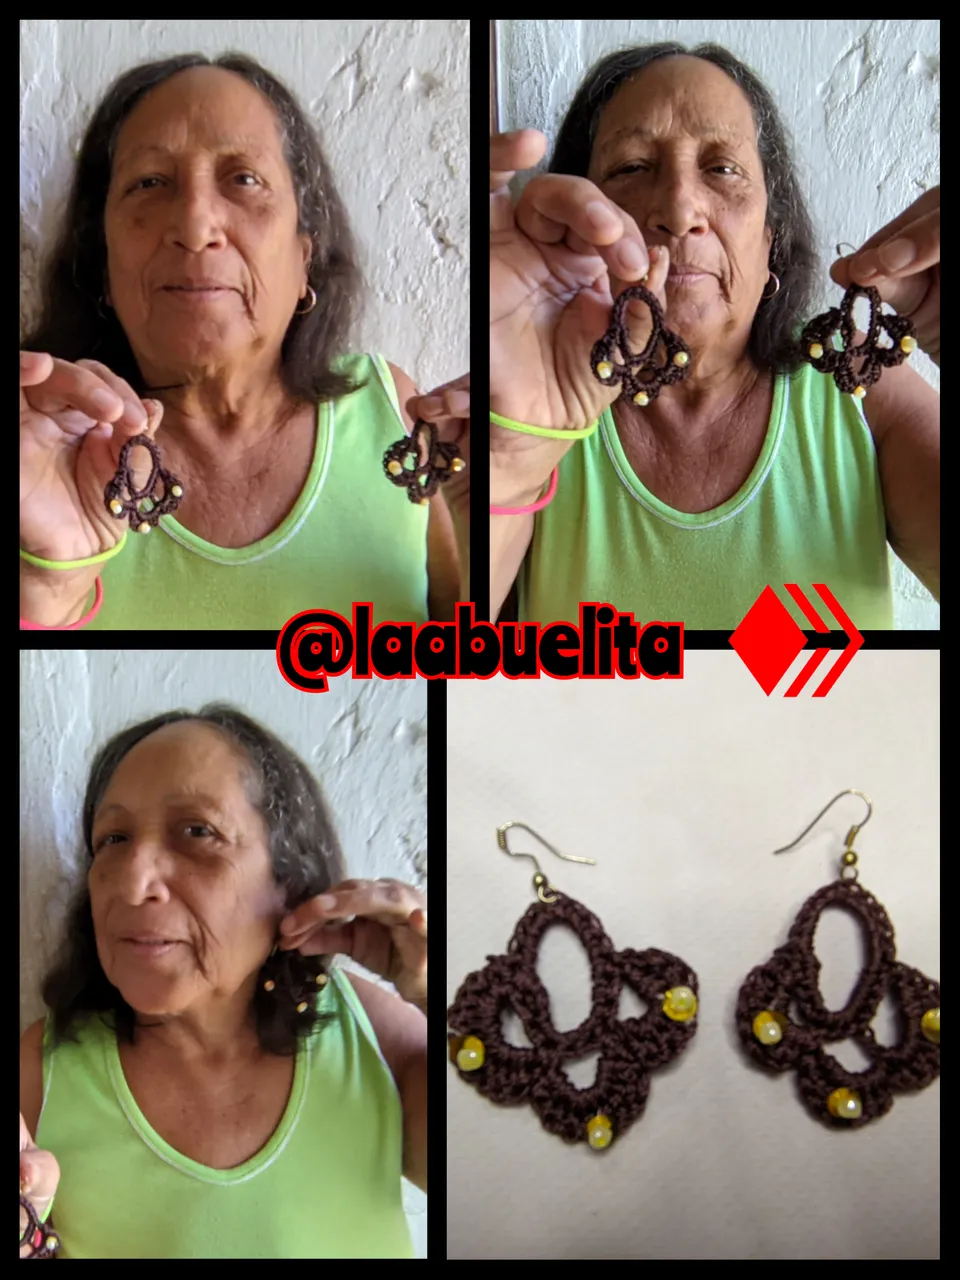
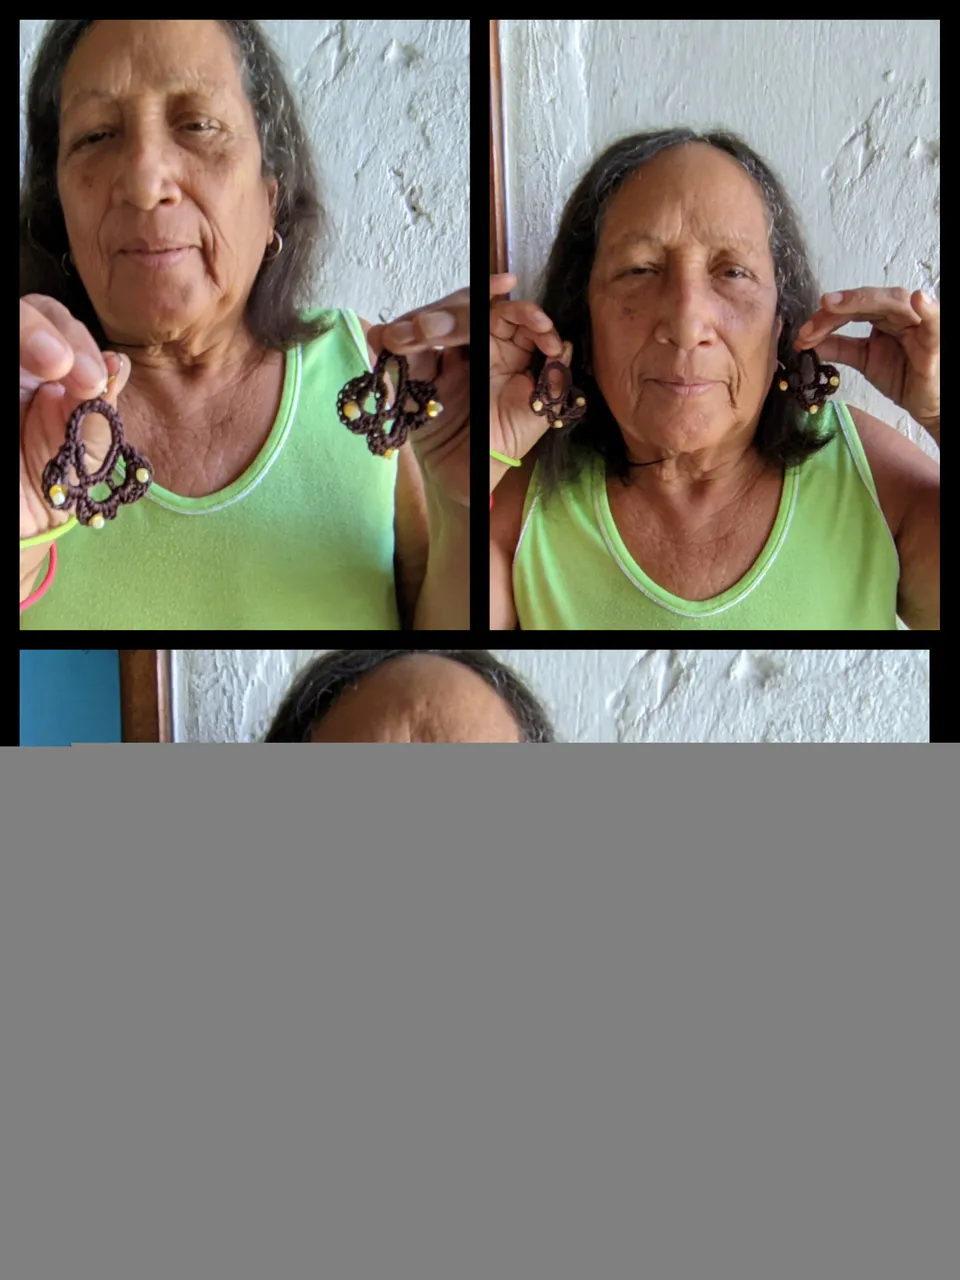
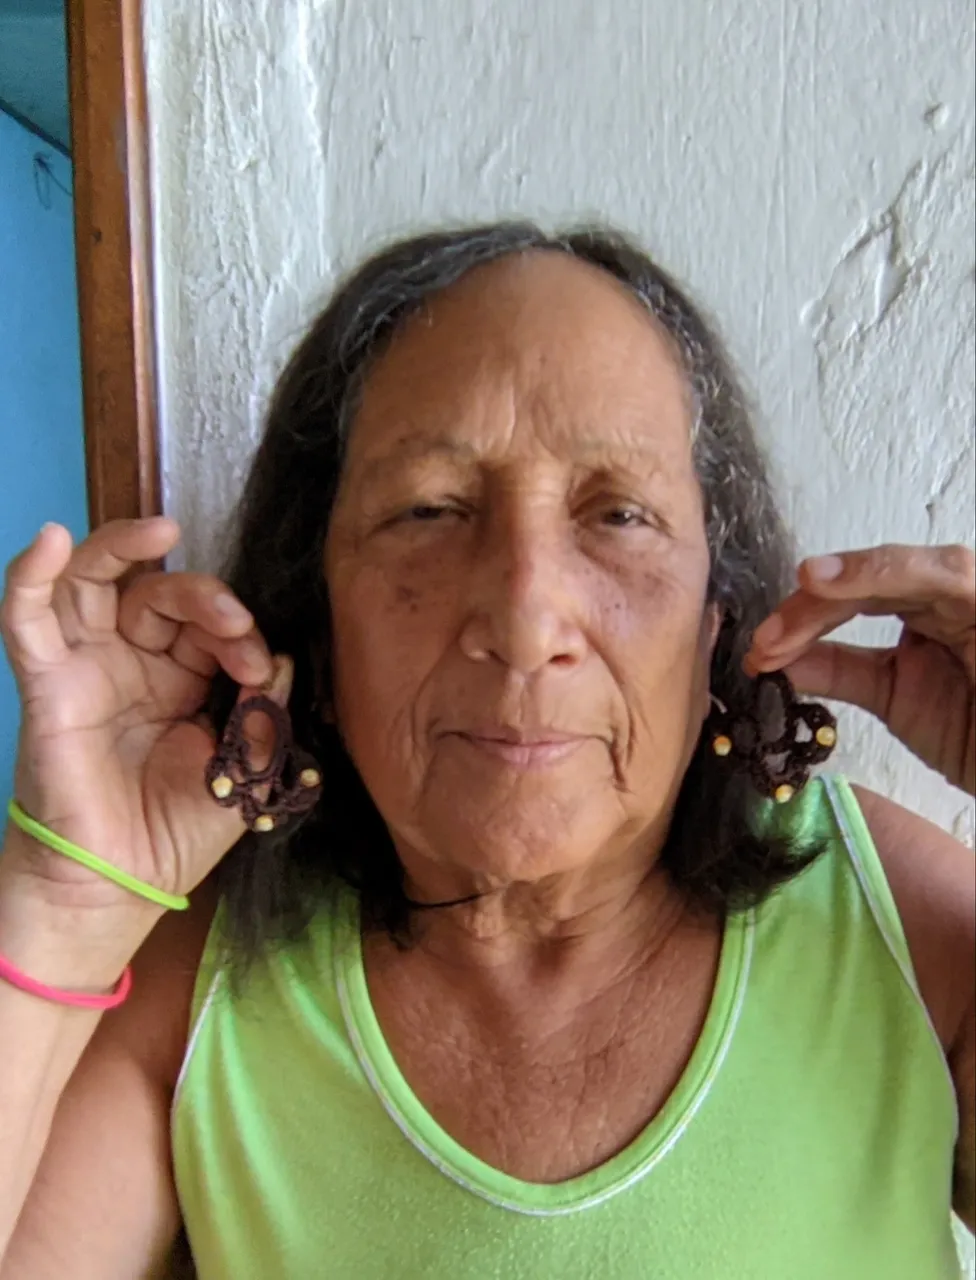
Hoy queridos hijitos les traigo otro modelo de zarcillos que hice, está vez use hilo de color marrón, y trabaje con el color marrón y el dorado porque hacen una buena combinación, o al menos que a mí me gusta.
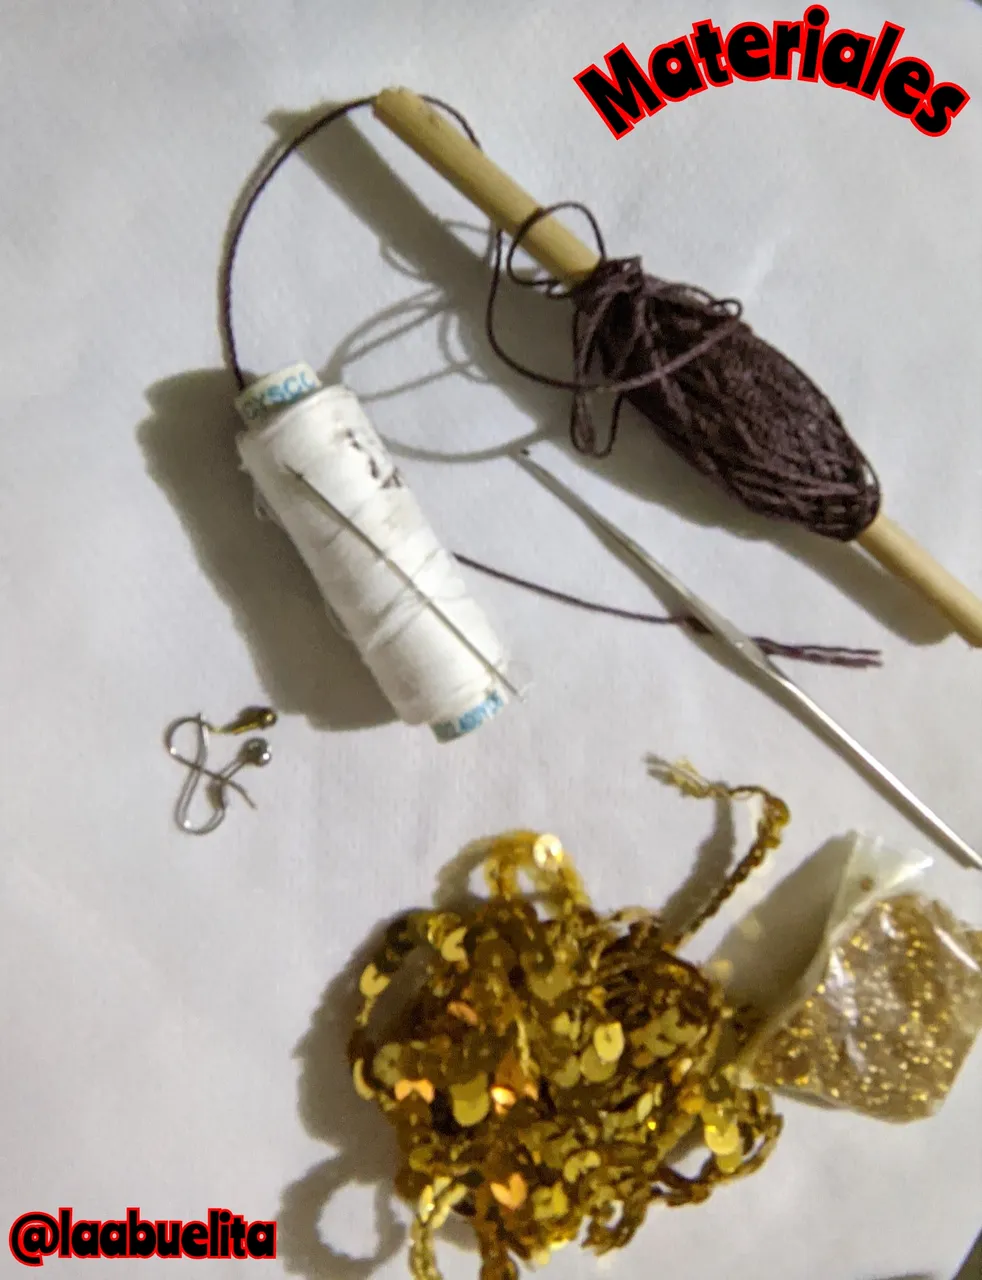
🪡🧵 MATERIALES 🪡🧵
🪡 Hilo de nylon número 18.
🧵 Aguja de tejer.
🪡 Lentejas doradas.
🧵 Mostacilla nacar.
🪡 Argolla para zarcillos.
🧵 Hilo de coser.
🪡 Aguja de coser.
🪡🧵 Paso a paso. 🪡🧵
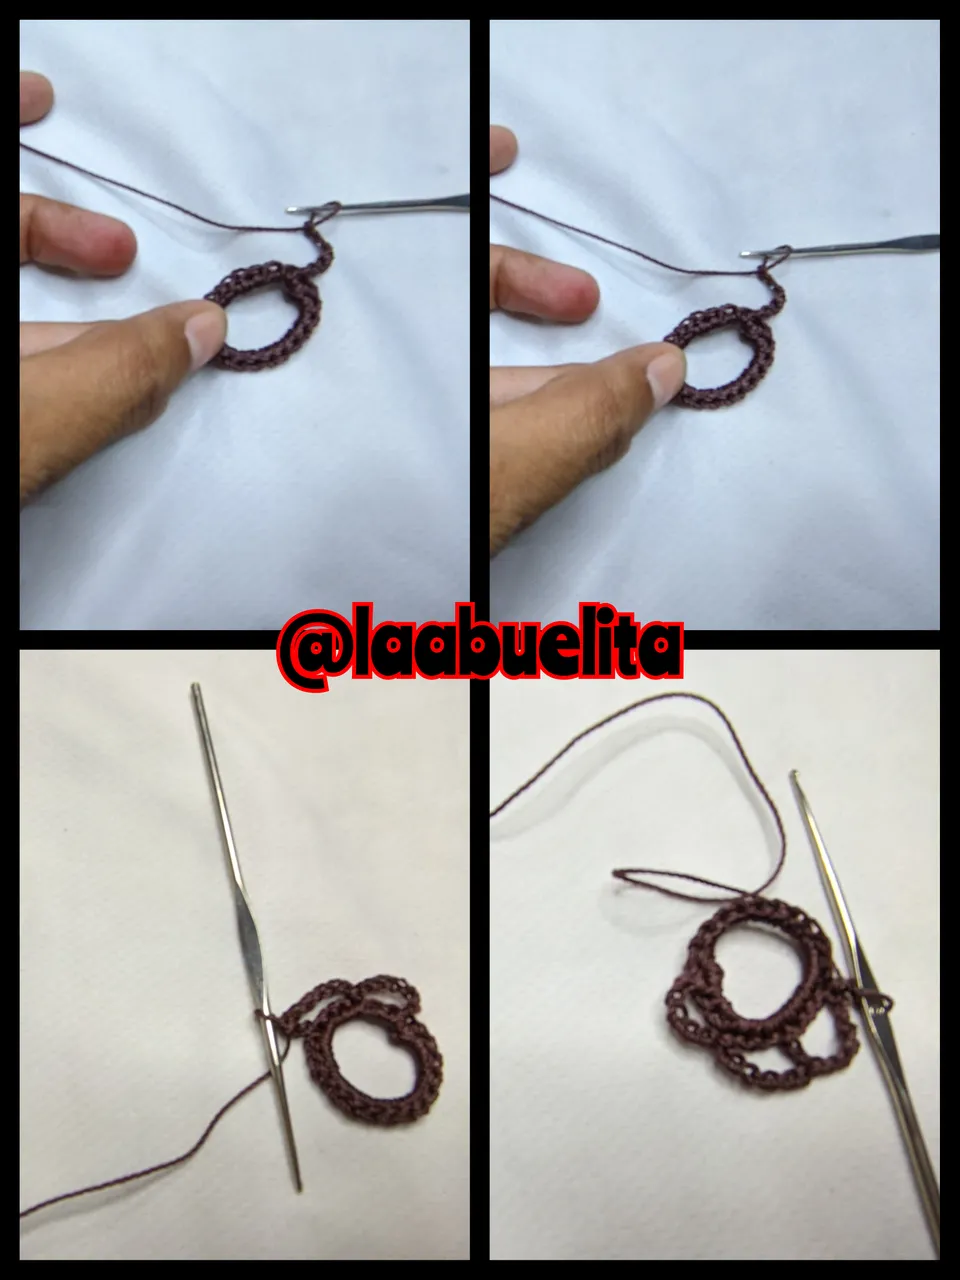
🪡Paso 1:
Realizamos una cadeneta de 16 puntos y la cerré con un punto raso, y de esta manera forme un círculo, aunque después le vamos a dar la forma ovalada, pero eso será más adelante.
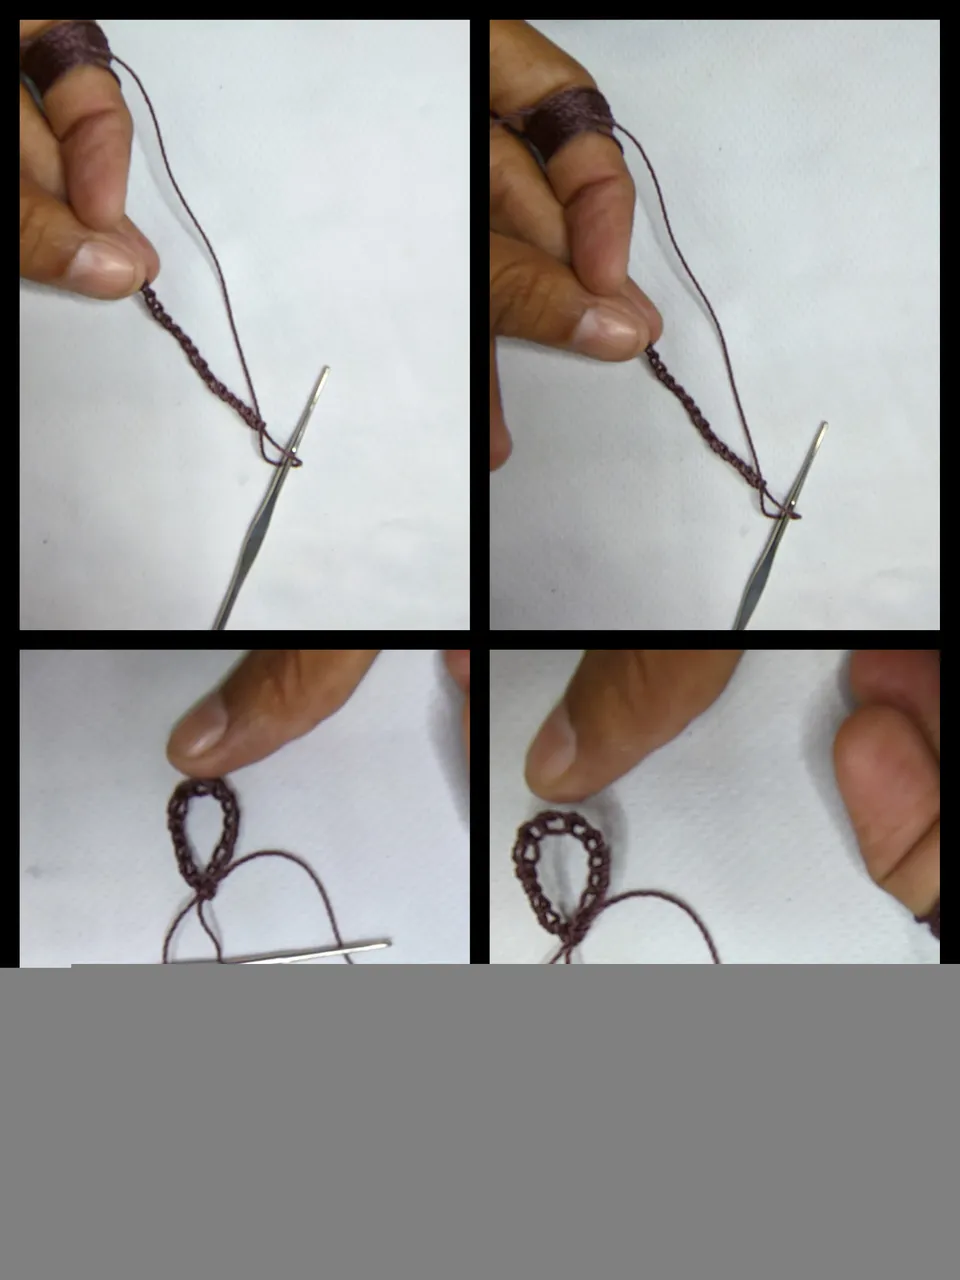
🧵Paso 2:
Para darle fuerza a la base del zarcillo, le hice un tejido de solo puntos rasos en todo el círculo, para lograr darle más firmeza a nuestro zarcillo, además de que le da un mejor aspecto y presencia.
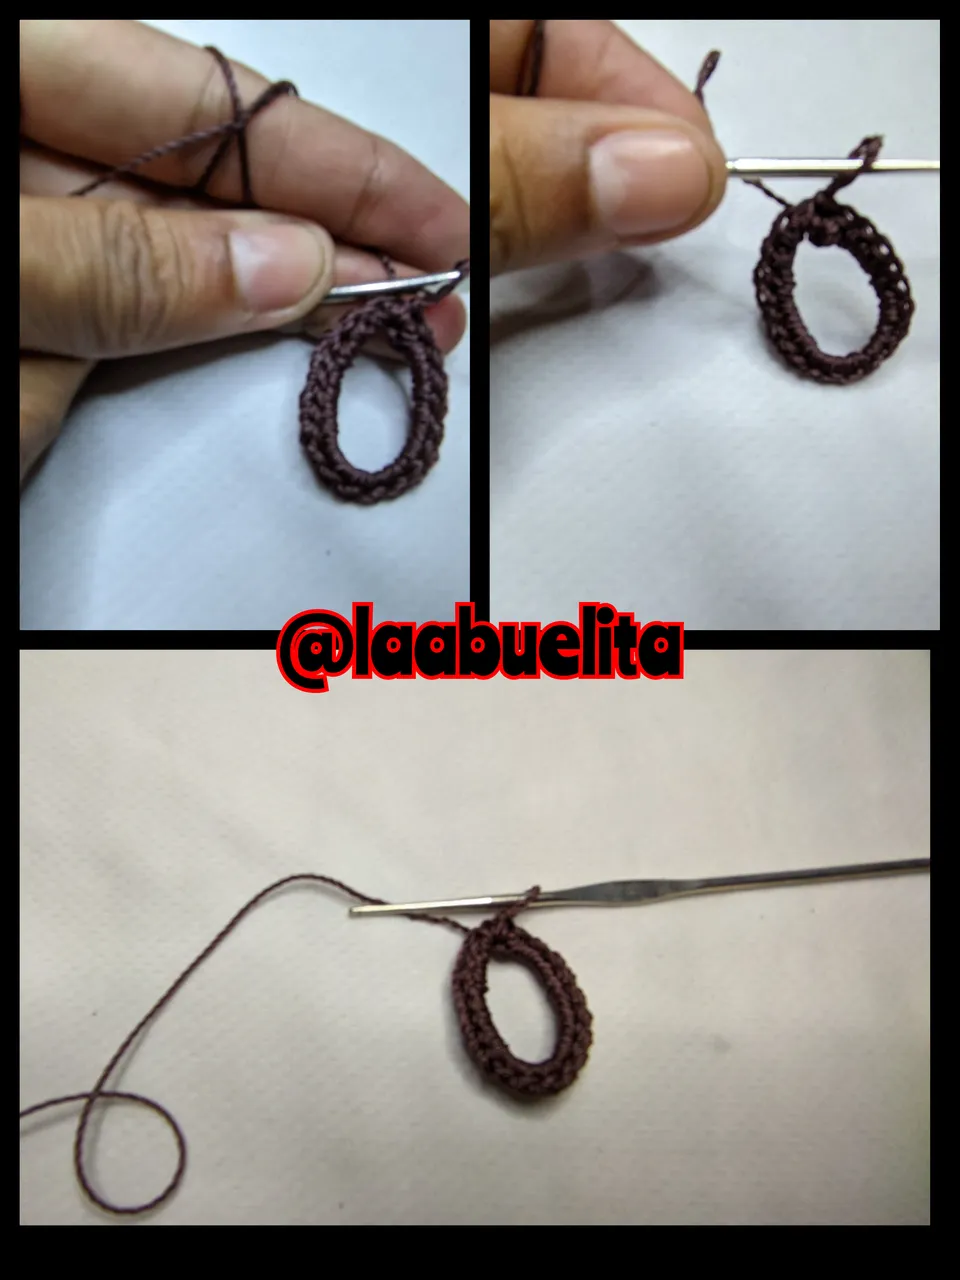
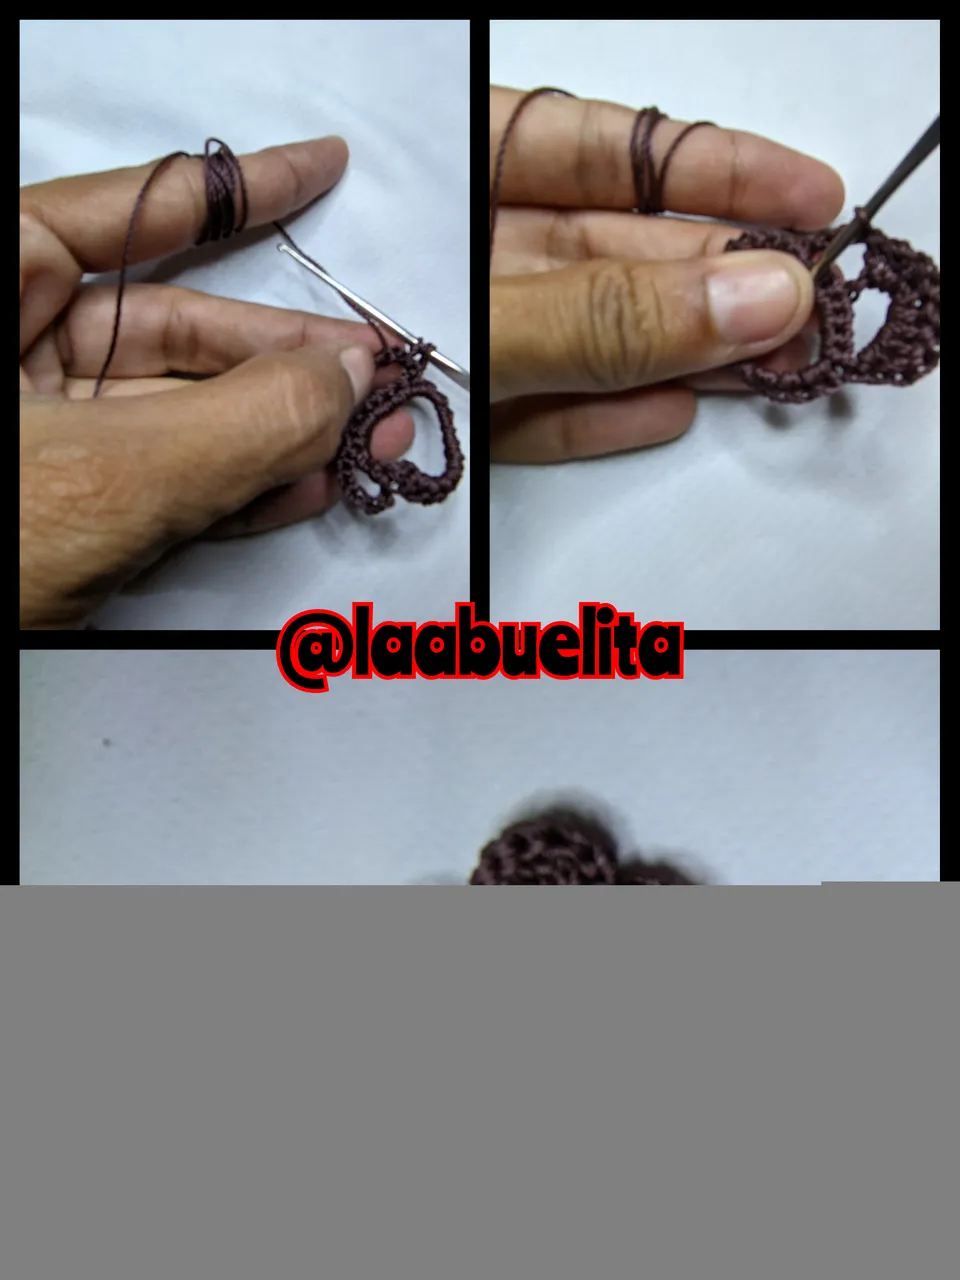
🪡 paso 3:
Después hice una cadeneta de seis (6) puntos y lo ancle a la base con un punto raso, luego volví a realizar este mismo paso, lo hice tres veces en total, como se ve en las fotos, y quedan como unas especies de orejitas.
🧵 Paso 4:
Ahora comencé a tejer unos puntos medio alto, en cada orejita que forme antes, las llene con aproximadamente unos diez (10) puntos medio alto, pero al final de cada orejita lo cerré con un punto raso, y volvía a repetir la operación en la siguiente orejita, hasta lograr llenar las tres.
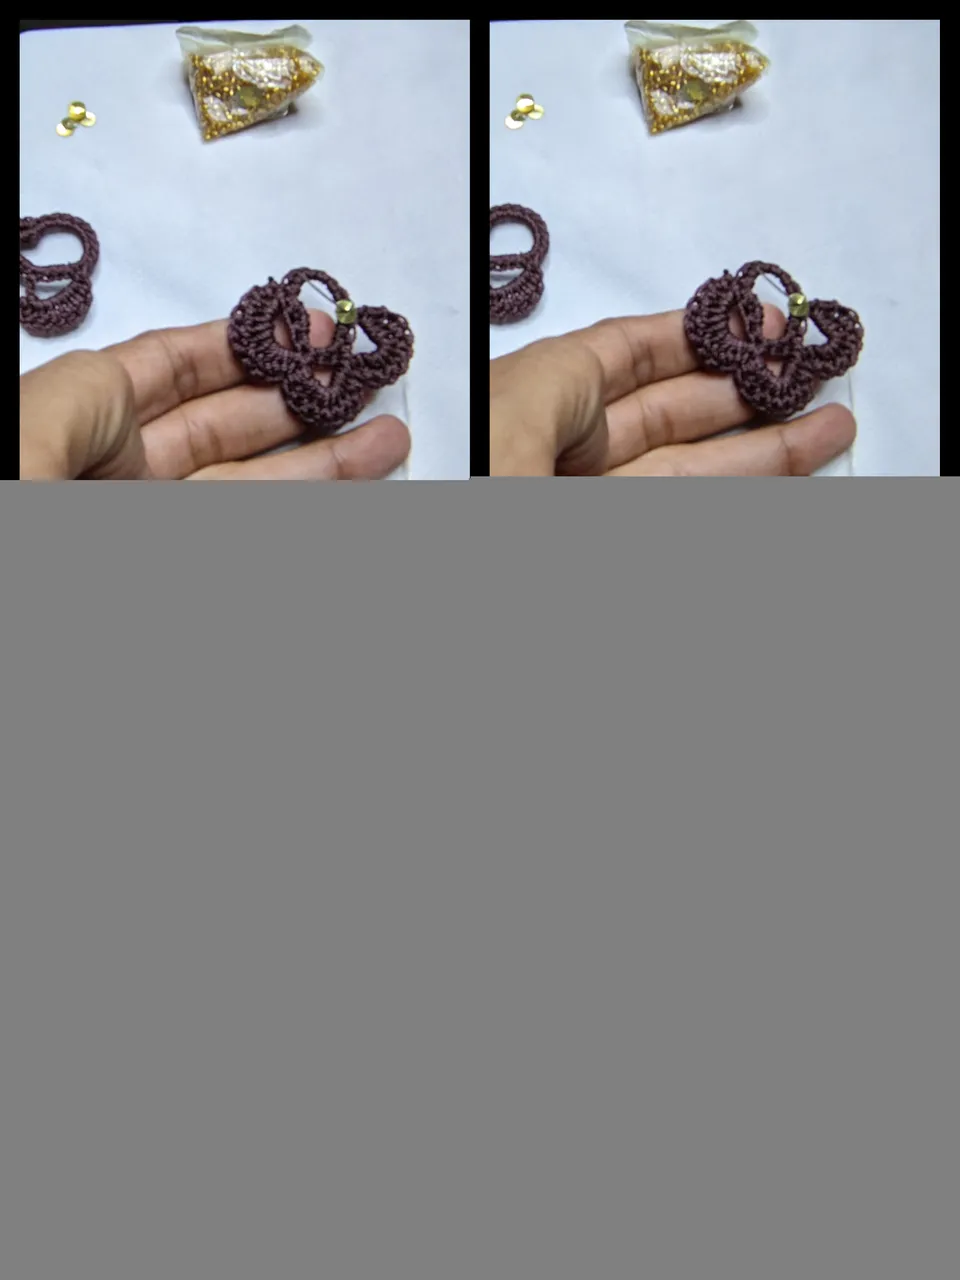
🪡 Paso 5:
Cómo ya terminé la parte tejida del zarcillo, ahora voy a pasar a la parte de decoración, para eso tome la aguja e hilo y pegamos la lentejuela unida con la mostacilla, y sellamos, este procedimiento lo repetí tres veces en cada zarcillo y listo.
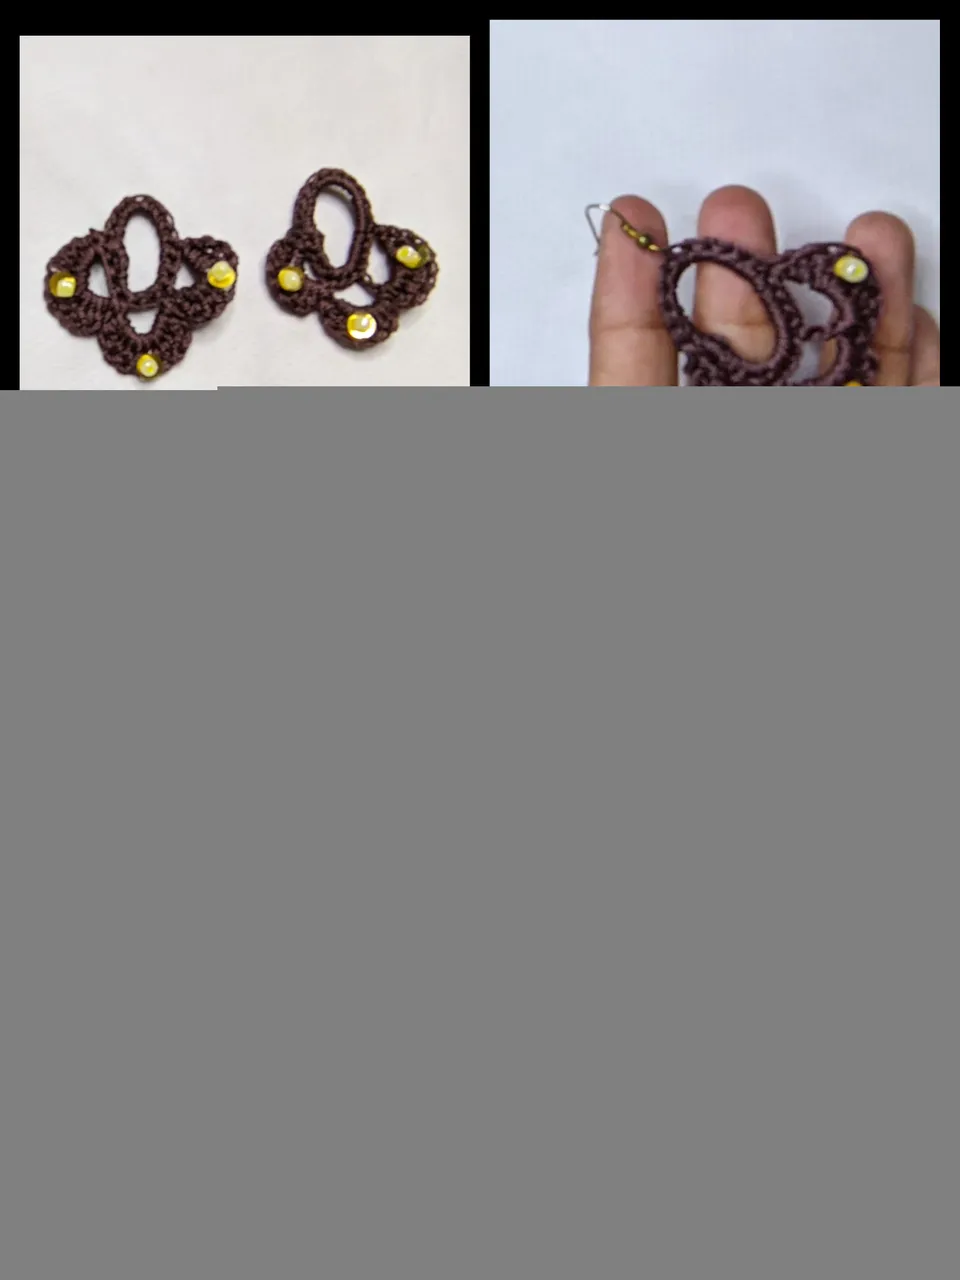
🧵 Paso 6:
Cómo ya terminamos de tejer y decorar, solo queda pegar la argolla para terminar con la elaboración de nuestro zarcillo artesanal.
🧵🪡Fotos del trabajo🧵🪡
Cómo pueden darse cuenta, este trabajo es bastante fácil y rápido de realizar, los materiales son fáciles de conseguir, no me gusta hacer trabajos tan complicados para que puedan ser puesto en práctica por todos, porque la idea es que sea reproducido los trabajos que se comparten.
Yo disfruto haciendo este trabajo y les recomiendo a todos que ocupen su tiempo en realizar este tipo de trabajos que sin duda alguna son de provecho y nos ayudan a relajarnos y a mantenernos activos.
🧵Las fotos de este post la tomé con mi teléfono Xiaomi y son mías.
🪡 Use el traductor deepl la versión gratis y el programa polish para hacer la edición de las fotos.
🧵🪡🧵🪡🧵🪡🧵🪡🧵🪡🧵🪡🧵🪡
ENGLISH
Hello hi hijitos how's it going, I'm doing well although there are days when I feel a little sick with the stress, but I still get a lift working here at #hive.
Today dear children I bring you another model of tendrils that I made, this time I used brown thread, and I worked with brown and gold because they make a good combination, or at least that I like.
🪡🧵 MATERIALS 🪡🧵
🪡 Nylon thread number 18.
🧵 Knitting needle.
🪡 Golden lentils.
🧵 Pearly mustard.
🧵 Mother-of-pearl bead.
🧵 Sewing thread.
🪡 Sewing needle.
🪡🧵 Step by step. 🪡🧵
🪡Step 1:
We make a chain stitch of 16 stitches and close it with a single crochet, and in this way form a circle, although later we are going to give it the oval shape, but that will be later.
🧵Step 2:
In order to give strength to the base of the tendril, I knitted a plain stitch only around the circle, to give more strength to our tendril, and it also gives it a better look and presence.
🧵 Step 3:
Now I started to knit some medium high stitches, in each ear that I formed before, I filled them with approximately ten (10) medium high stitches, but at the end of each ear I closed it with a satin stitch, and I repeated the operation again in the next ear, until I filled all three.
🪡 Step 4:
As I already finished the woven part of the tendril, now I'm going to move on to the decoration part, for that I took the needle and thread and we glued the sequin together with the mustard, and we sealed, I repeated this procedure three times in each tendril and that was it.
🧵 Step 5:
As we have finished weaving and decorating, all that remains is to glue the ring to finish with the elaboration of our handmade tendril.
🧵🪡🧵Photos of the work🧵🪡🧵
As you can see, this work is quite easy and quick to do, the materials are easy to get, I don't like to make such complicated works so that they can be put into practice by everyone, because the idea is that the works that are shared are reproduced.
I enjoy doing this work and I recommend everyone to spend their time doing this type of work that without a doubt are of benefit and help us to relax and stay active.
🧵The photos in this post were taken with my Xiaomi phone and are mine.
🪡 Use deepl translator the free version and polish program to do the editing of the photos.