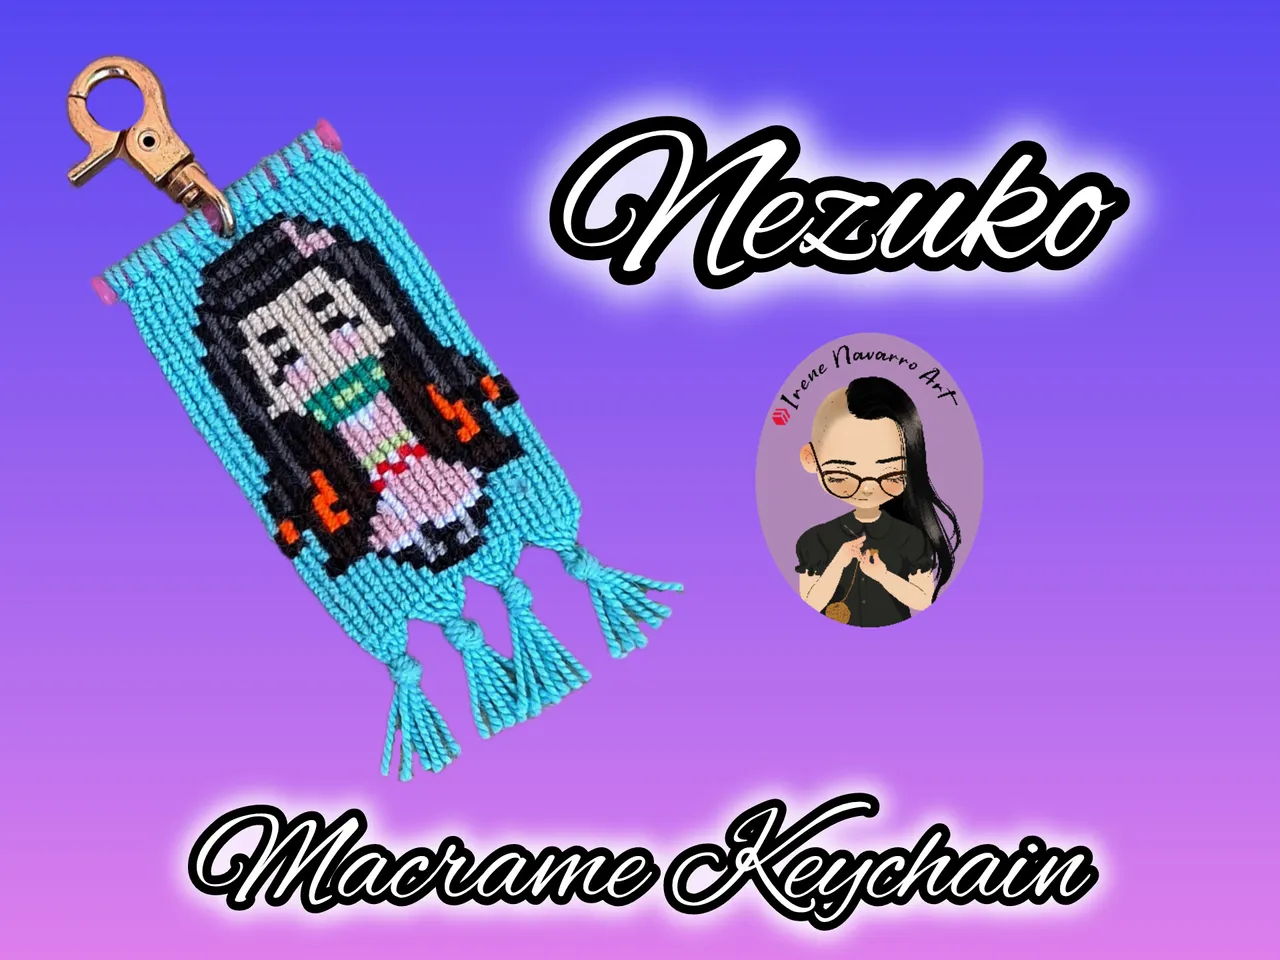
Saludos querida comunidad Hive DIY, el día de mañana es el cumpleaños de mi amiga @Yetsimar y por tal motivo decidí hacer algo para ella, se trata de un llavero en la técnica macramé con la figura de Nezuko Kamado quien es uno de los personajes principales del anime y manga Kimetsu no Yaiba (Demon Slayer), fue gracias a ella que conocí esta maravillosa historia, a ella le gusta tanto como a mi así que espero que le guste el regalo, por otro lado comparto con ustedes el tutorial por si desean hacer uno igual 🥰
Greetings dear Hive DIY community, tomorrow is my friend @Yetsimar’s birthday and for that reason I decided to make something for her, it is a keychain in the macramé technique with the figure of Nezuko Kamado who is one of the main characters of the anime and manga Kimetsu no Yaiba (Demon Slayer), it was thanks to her that I learned about this wonderful story, she likes it as much as I do so I hope she likes the gift, on the other hand I share with you the tutorial in case you want to make one too 🥰

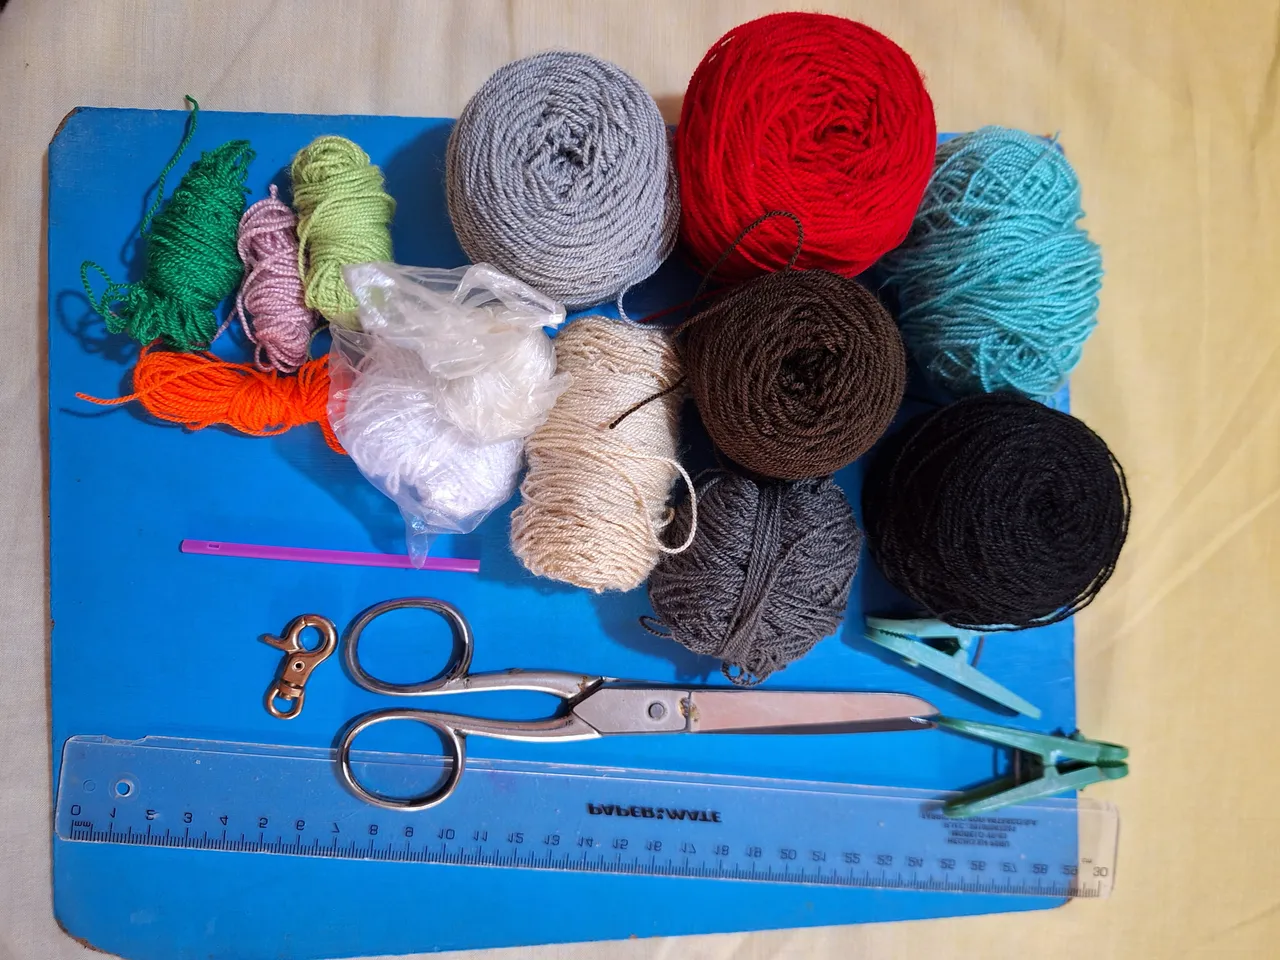
Materiales / Materials
- Hilo acrílico para crochet: azul claro, negro, gris oscuro gris claro, rosado, naranja, verde claro, beige, verde oscuro, rojo y blanco.
- Palito de plástico
- Retazo de tela
- Silicón liquido
- Encendedor
- Garfio para llavero
- Tijera
- Regla
- Tabla
- 2 pinzas para ropa
- Patrón
- Acrylic crochet thread: light blue, black, dark grey, light grey, pink, beige, orange, light green, dark green, red and white.
- Plastic stick
- Fabric scrap
- Liquid silicone
- Lighter
- Key ring hook
- Scissors
- Ruler
- Board
- 2 clothespins
- Pattern
Proceso / Process
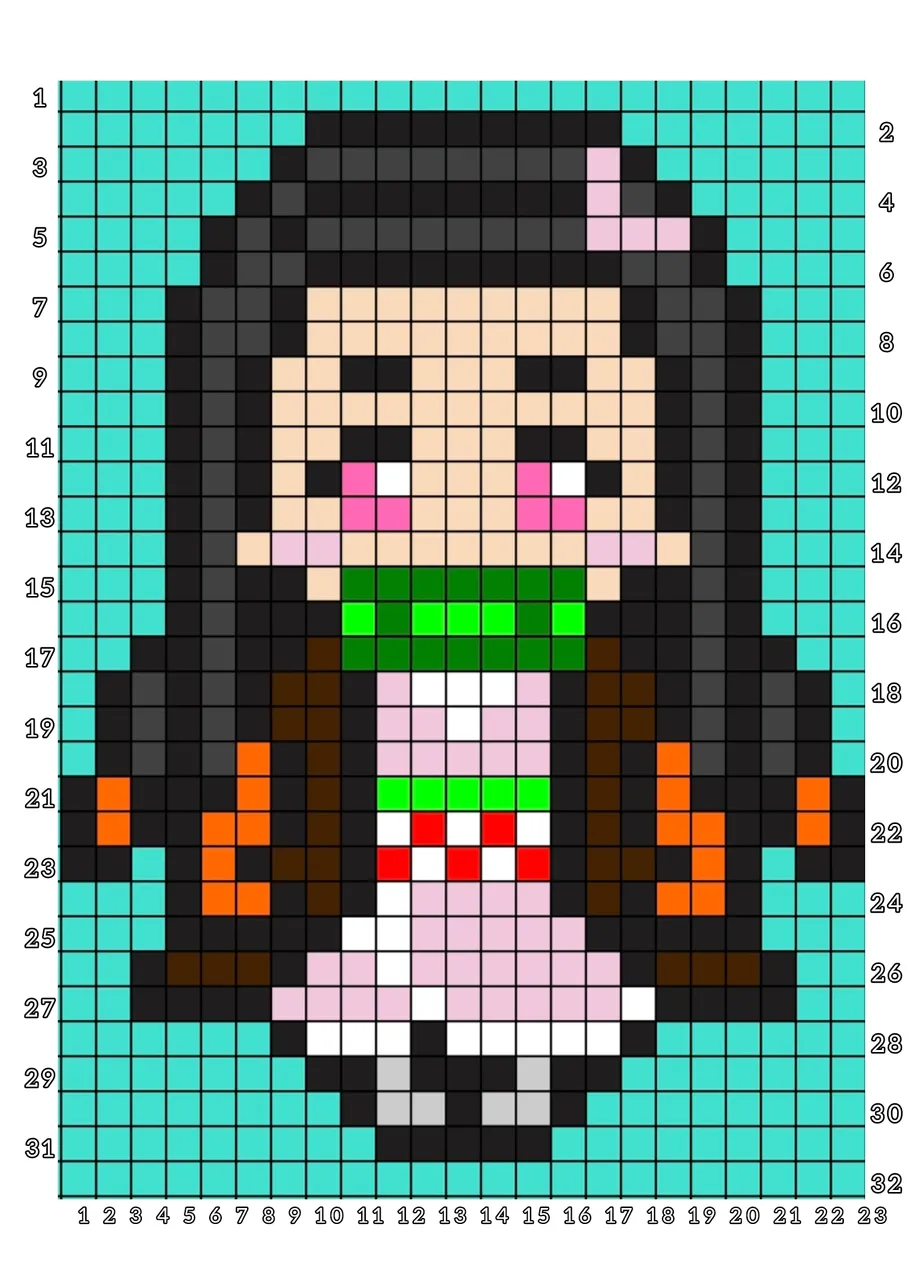
Para hacer el llavero primero hay que hacer el patrón, para esto busqué una imagen de referencia, luego con la aplicación Pixel Station creé un lienzo de 23 cuadros de ancho por 32 cuadros de alto, con la herramienta bote de pintura y el selector de color, pinté cada uno de los cuadros. Posterior en la aplicación Inshot coloque la numeración correspondiente a 23 hilos guía y 32 hileras de nudos, pues cada cuadro representa a un nudo.
To make the keychain you first have to make the pattern, for this I looked for a reference image, then with the Pixel Station application I created a canvas of 23 squares wide by 32 squares high, with the paint bucket tool and the color selector, I painted each of the squares. Later in the Inshot application I placed the numbering corresponding to 23 guide threads and 32 rows of knots, since each square represents a knot.
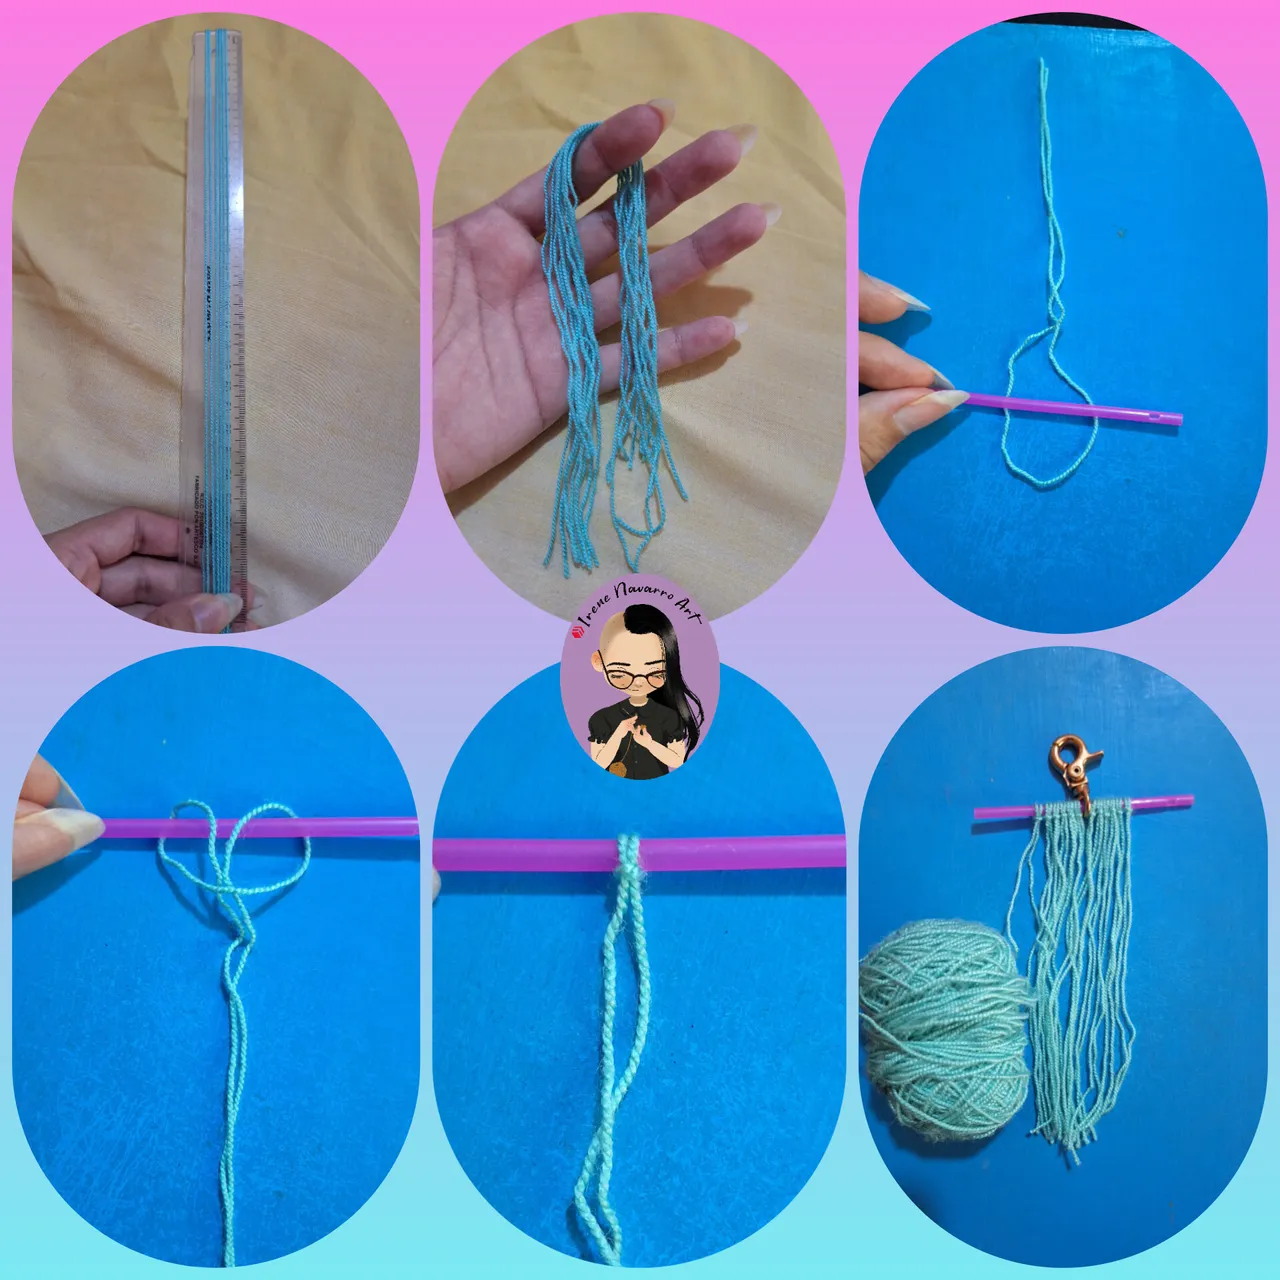
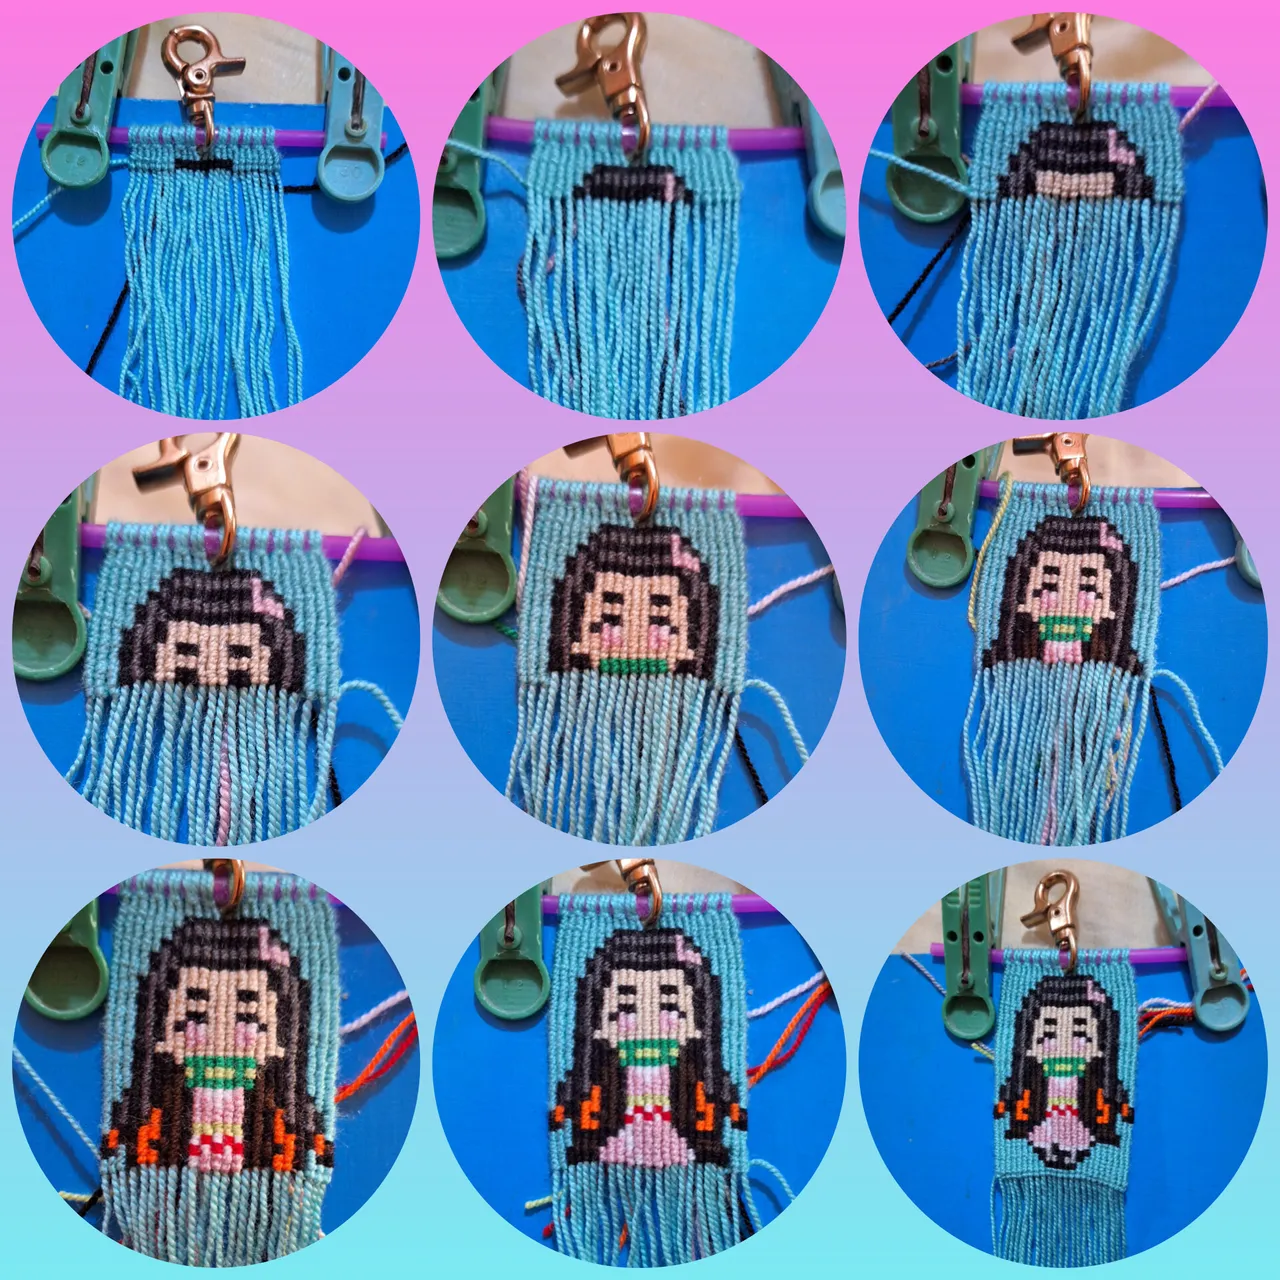
Con el hilo azul corté 11 hebras de 30 cm y una hebra adicional unida al ovillo, tomé las hebras por la mitad y las anudé al palito de plástico, colocando el garfio para llavero en el centro del palito, la hebra unida al ovillo queda de primera a la izquierda y esta será el hilo anudador de color de fondo, mientras que las demás hebras corresponden a los hilos guía. Sujetar el palito en la tabla con ayuda de dos pinzas para ropa.
With the blue thread I cut 11 strands of 30 cm and an additional strand attached to the ball, I took the strands in half and tied them to the plastic stick, placing the keychain hook in the center of the stick, the strand attached to the ball is first on the left and this will be the background colored knotting thread, while the other strands correspond to the guide threads. Hold the stick to the board with the help of two clothespins.
En esta técnica el hilo anudador envuelve dos veces cada uno de los hilos guía, de izquierda a derecha en las hileras impares y de derecha a izquierda en las hileras pares, en la primera hilera tal como indica el patrón solo se usará el hilo anudador azul, a partir de la segunda hilera se agrega el hilo negro y los demás colores según corresponda, los cambio de color de hilo anudador se hacen cruzando las hebras por detrás.
In this technique, the knotting thread wraps around each of the guide threads twice, from left to right in the odd rows and from right to left in the even rows. In the first row, as indicated in the pattern, only the blue knotting thread will be used. From the second row onwards, the black thread is added and the other colours as appropriate. Changes in the colour of the knotting thread are made by crossing the strands from behind.
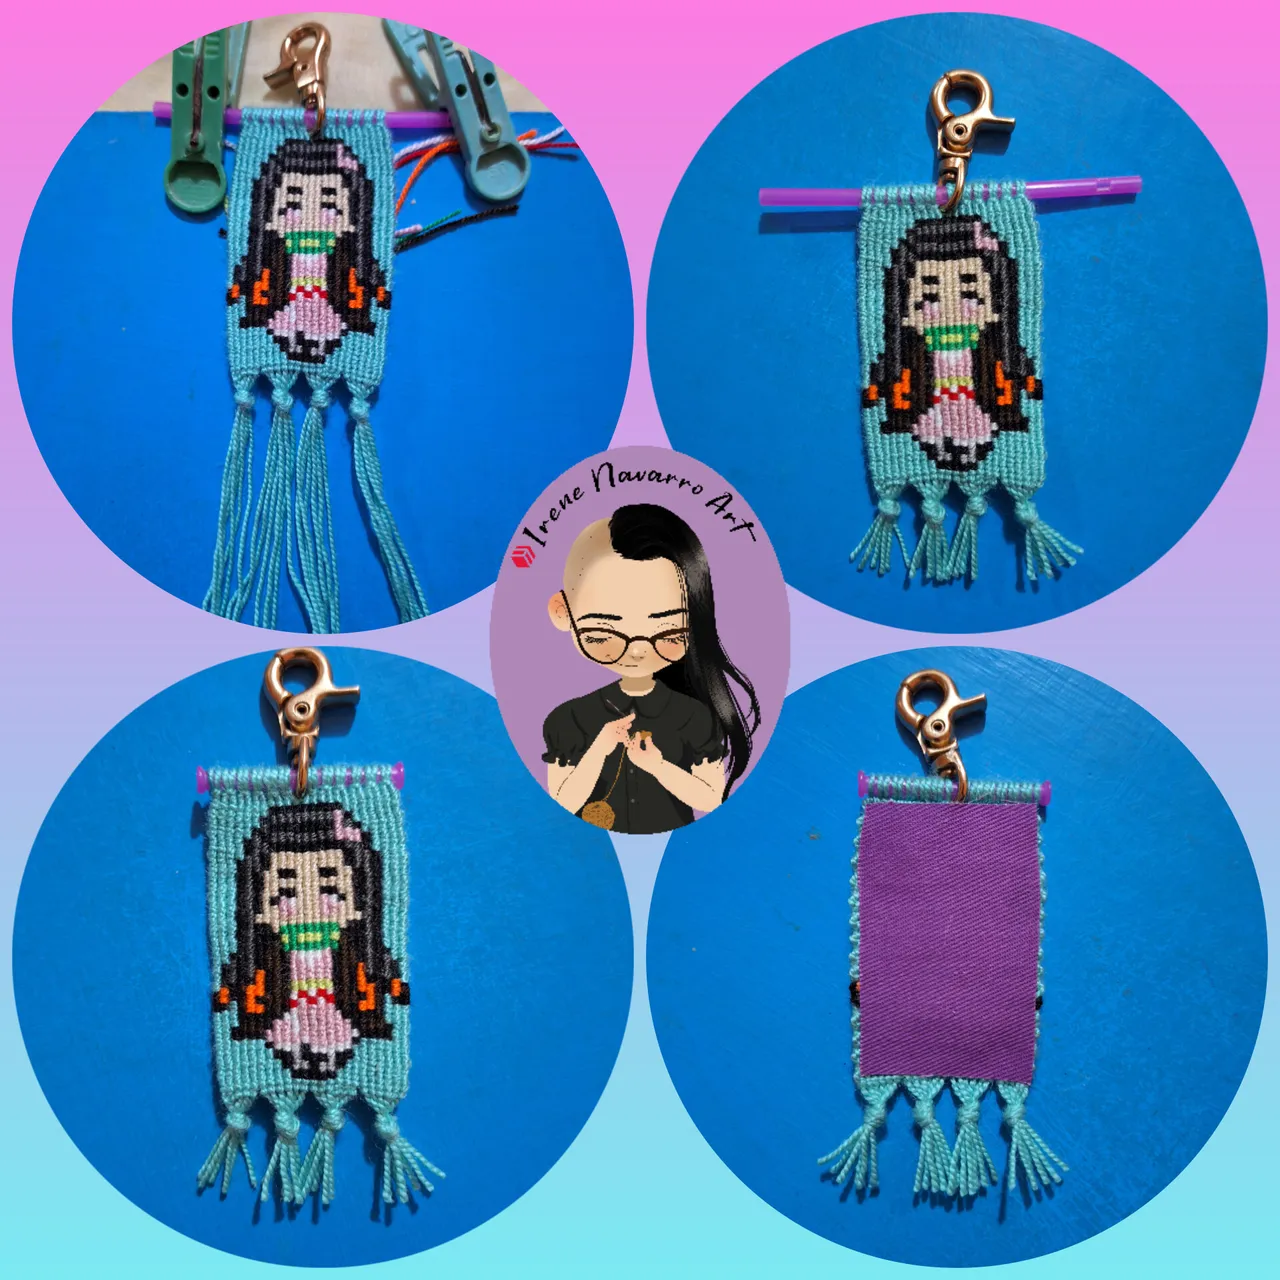
Al finalizar las 32 hileras de nudos, separar las hilos en 4 partes, hacer nudos y cortar las hebras para formar flecos, cortar los extremos del palito de plástico y quemar con un encendedor, por la parte posterior pegar un trozo de tela con silicón para dar un mejor acabado.
After finishing the 32 rows of knots, separate the threads into 4 parts, tie knots and cut the strands to form fringes, cut the ends of the plastic stick and burn with a lighter, on the back stick a piece of fabric with silicone to give a better finish.
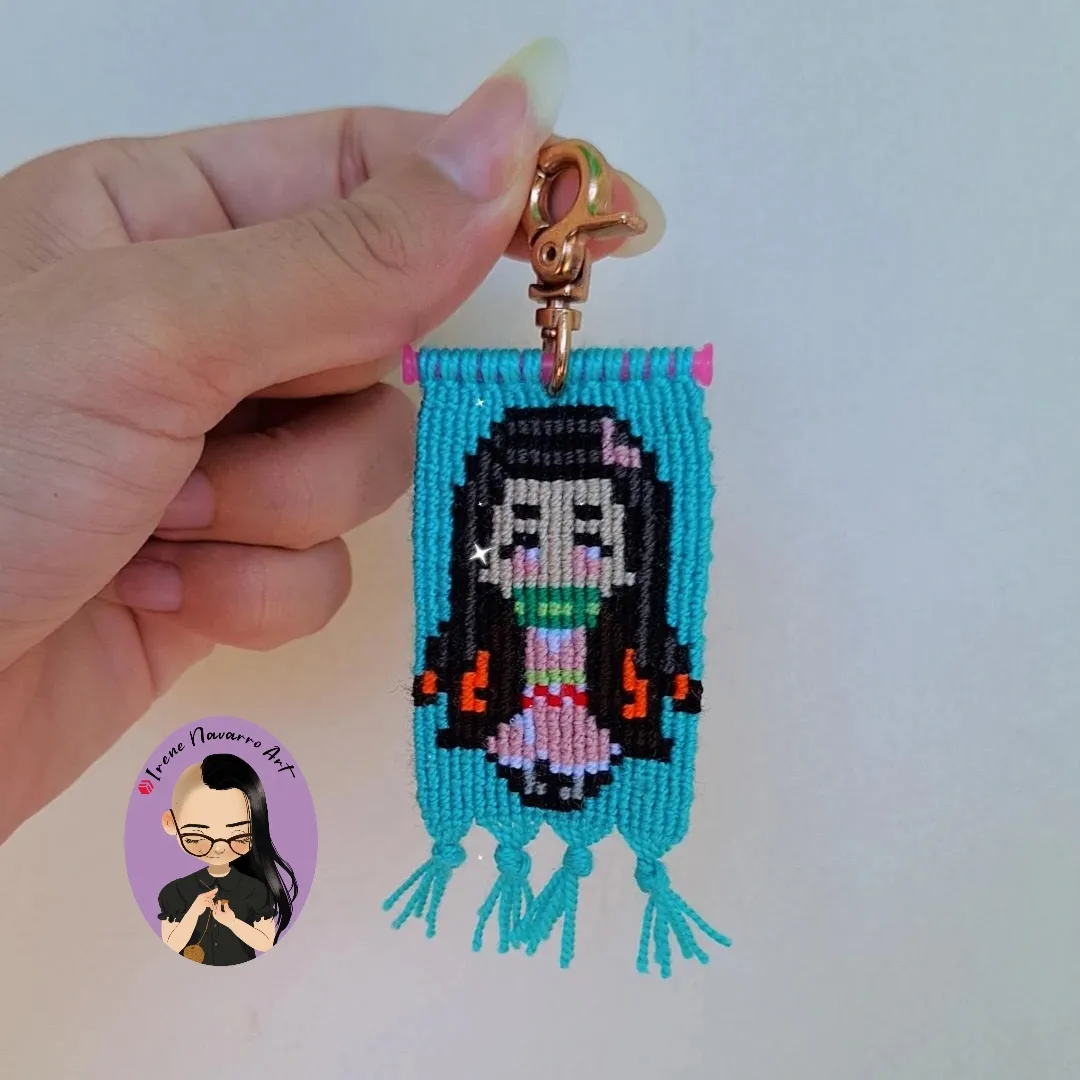
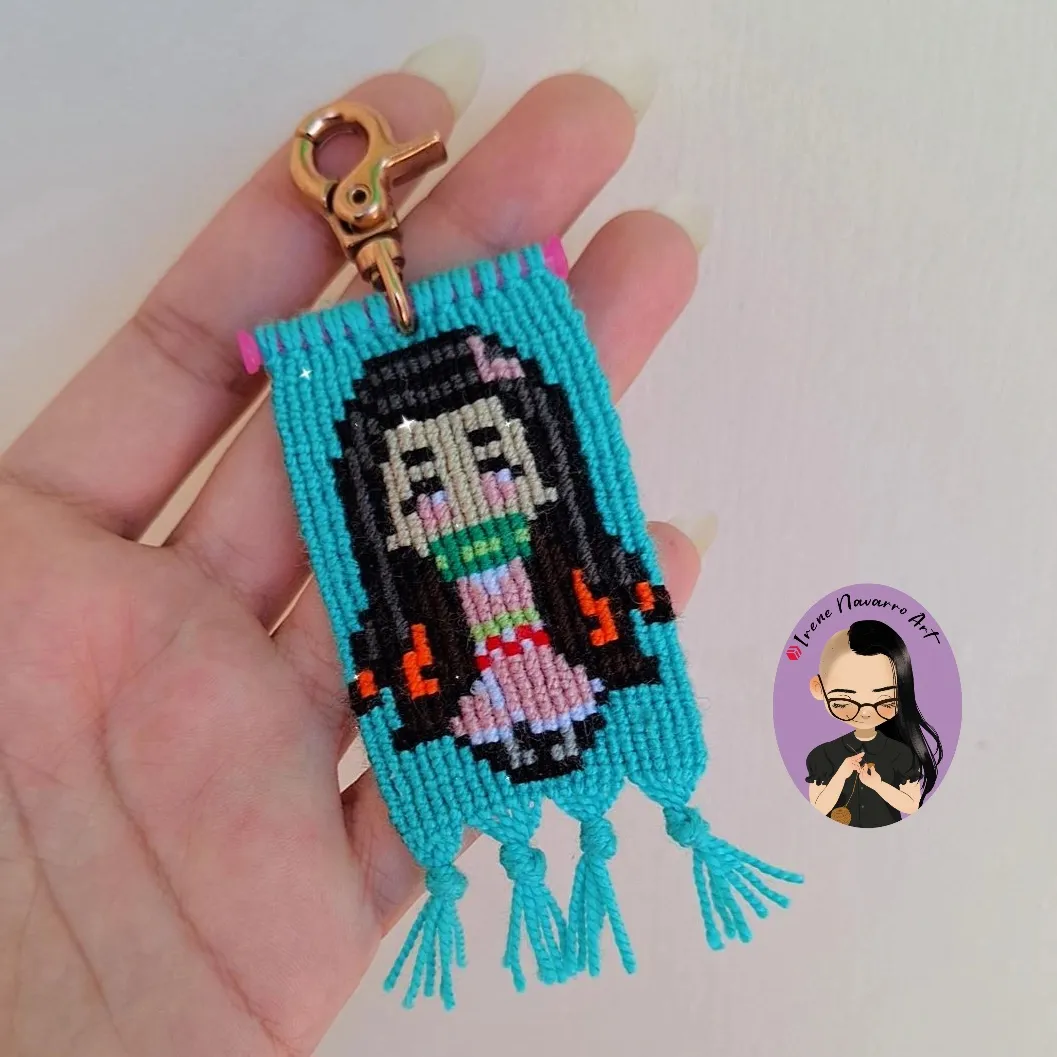
Resultado / Result

Imágenes tomadas con dispositivo Samsung A54. Portada editada en Inshot
Pictures taken with Samsung A54 device. Cover edited in Inshot

Espero les haya gustado. Les invito a leer mis próximas publicaciones y siempre estaré dispuesta a responder sus preguntas y comentarios, también pueden seguirme y contactarme en cualquiera de mis redes sociales. ¡Muchas gracias!
I hope you liked it. I invite you to read my next publications and I will always be willing to answer your questions and comments, you can also follow me and contact me on any of my social networks. Thank you!
Facebook
Twitter
Instagram
Ko-Fi
Discord: irenenavarroart#0361