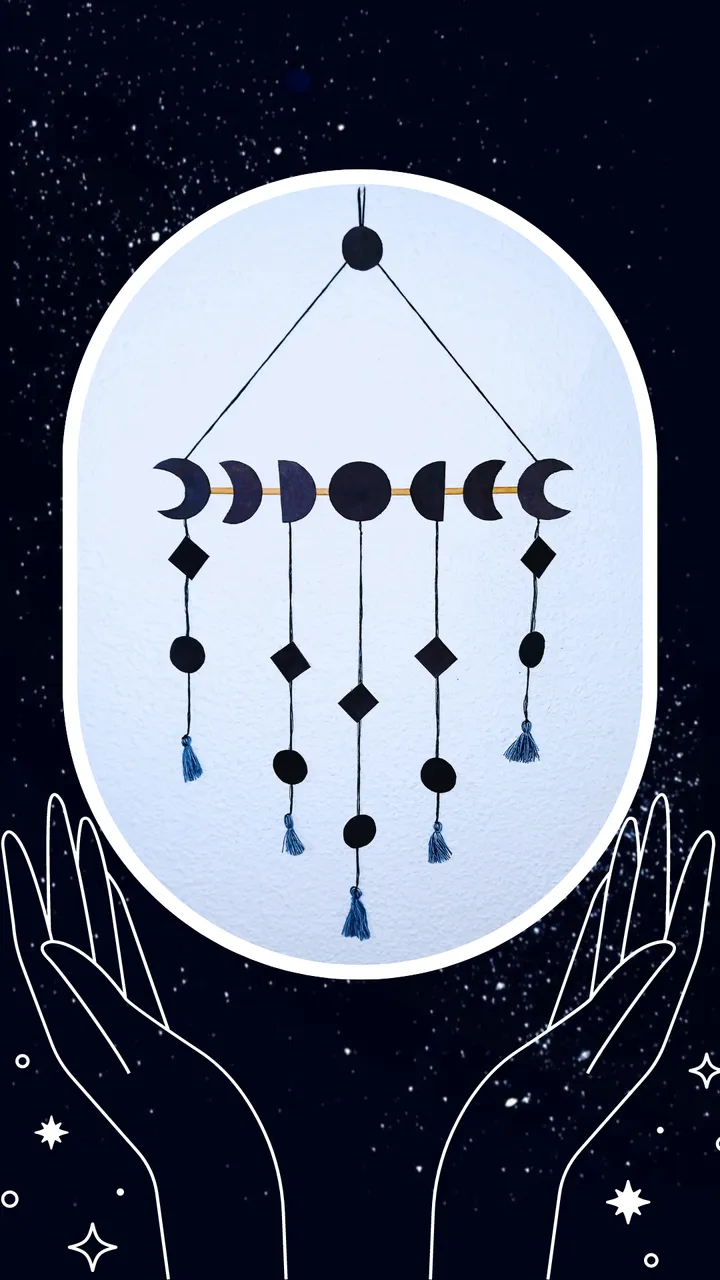
Hello Community. Today I want to share with you a very simple creation. It didn't take me long to make it and it turned out wonderful. I think most people like the moon very much, I personally am fascinated by it and I love to admire all its phases. My partner and I, when we have time and the sky is clear, we look out on the patio of the house where we live and enjoy its beauty. Those little moments fill us with peace and tranquility.
Hola Comunidad. Hoy quiero compartir con ustedes una creación muy simple. No me tomó mucho hacerla y quedó maravillosa. Creo que a la mayoría de las personas les gusta mucho la luna, a mí en lo personal me fascina y me encanta admirar todas sus fases. Mi pareja y yo cuando tenemos tiempo y el cielo está despejado nos asomamos en el patio de la casa donde vivimos alquilados y nos deleitamos con su belleza. Esos pequeños momentos nos llenan de paz y tranquilidad.
I want to clarify that the process was simple, also comment that as many know I am a mom and most of the time my baby needs me. I say this because I didn't take some pictures that I had to include, just to be able to take care of my baby girl.
Quiero aclarar que el proceso fue sencillo, también comentar que como muchos saben soy mamá y la mayoría del tiempo mi bebé necesita de mi. Esto lo digo porque no tomé algunas fotos que debía incluir, sólo para poder atender a mi niña.
Materials:
A skewer stick.
Scissors.
Threads.
Cardboard.
Marker or paint.
Silicone.
Pen or pencil.

Materiales:
Un palito de pinchos.
Tijeras.
Hilos.
Cartón.
Marcador o pintura.
Silicón.
Bolígrafo o lápiz.
Step 1:
Draw 7 circles, leave 1 for the full moon and with the remaining circles we will make the pattern as in the photo. Paint the moons and glue them to the stick.
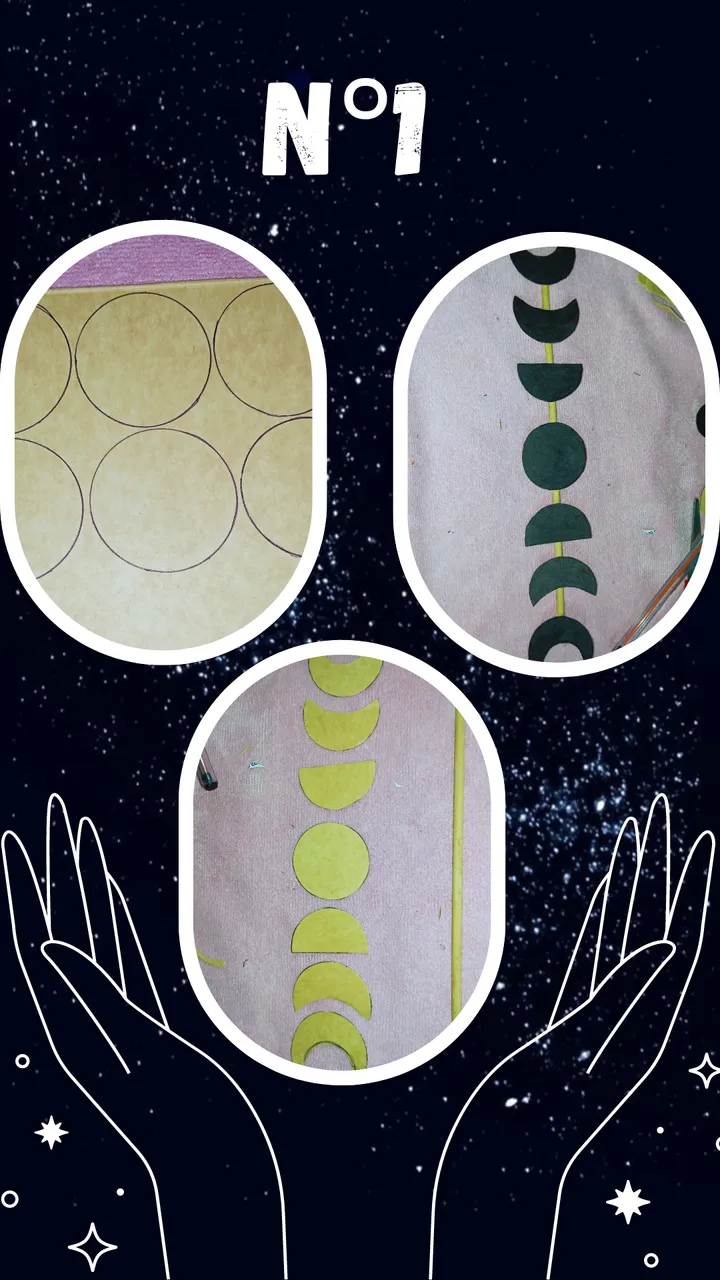
Paso 1:
Dibujamos 7 círculos, dejamos 1 para la luna llena y con los círculos restantes haremos el patrón tal cual como en la foto. Pintamos las lunas y las pegamos al palito.
Step 2:
With several strands of thread we will make the pendant and cut 5 threads that will be glued to the moons to make the details. We will place a long one in the center, another medium one at the side and finally a shorter one at the ends.

Paso 2:
Con varias hebras de hilo haremos el colgante y cortaremos 5 hilos que irán pegados a las lunas para hacer los detalles. Colocaremos uno largo en el centro, otro mediano al lado y por último más corto en las puntas.
Step 3:
We wind threads and when we have enough volume we cut in several buns to make the tassels, we tie these with the threads that we glued to the moons, just at the tip. With another thread of the same color as the tassel, we will give it shape and level the ends with the scissors. We place small details and that's it.

Paso 3:
Enrollamos hilos y cuando tengamos bastante volumen cortamos en varios moños para hacer las borlas, amarramos estas con los hilos que pegamos a las lunas, justo en la punta. Con otro hilo del mismo color de la borla, le daremos forma y nivelamos las puntas con la tijera. Colocamos pequeños detallles y listo.
As I said at the beginning I lacked more photos to make the tutorial more explicit, I hope you can understand me.
Cómo comentaba al principio me faltaron más fotos para que el tutorial fuera más explícito, espero puedan entenderme.
A hug from afar and take care of yourselves guys, see you soon with another tutorial!
Un abrazo desde la distancia y cuídense mucho chicos. Hasta pronto con otro tutorial!!!

Translation with DeepL
Photos taken with Redmi 12
Editing done in Canva
Traducción con DeepL
Fotos tomadas con Redmi 12
Edición realizada en Canva