En mi paso a paso te enseñaré como hacer un Cuadro Infantil con Dimensión, hecho con materiales económicos, fáciles de conseguir y con el mejor propósito de que aprendas como se hace y que lo "HAGAS TU MISMO", claro está que esto es solo una guía pero, a medida que practiques aprenderás!
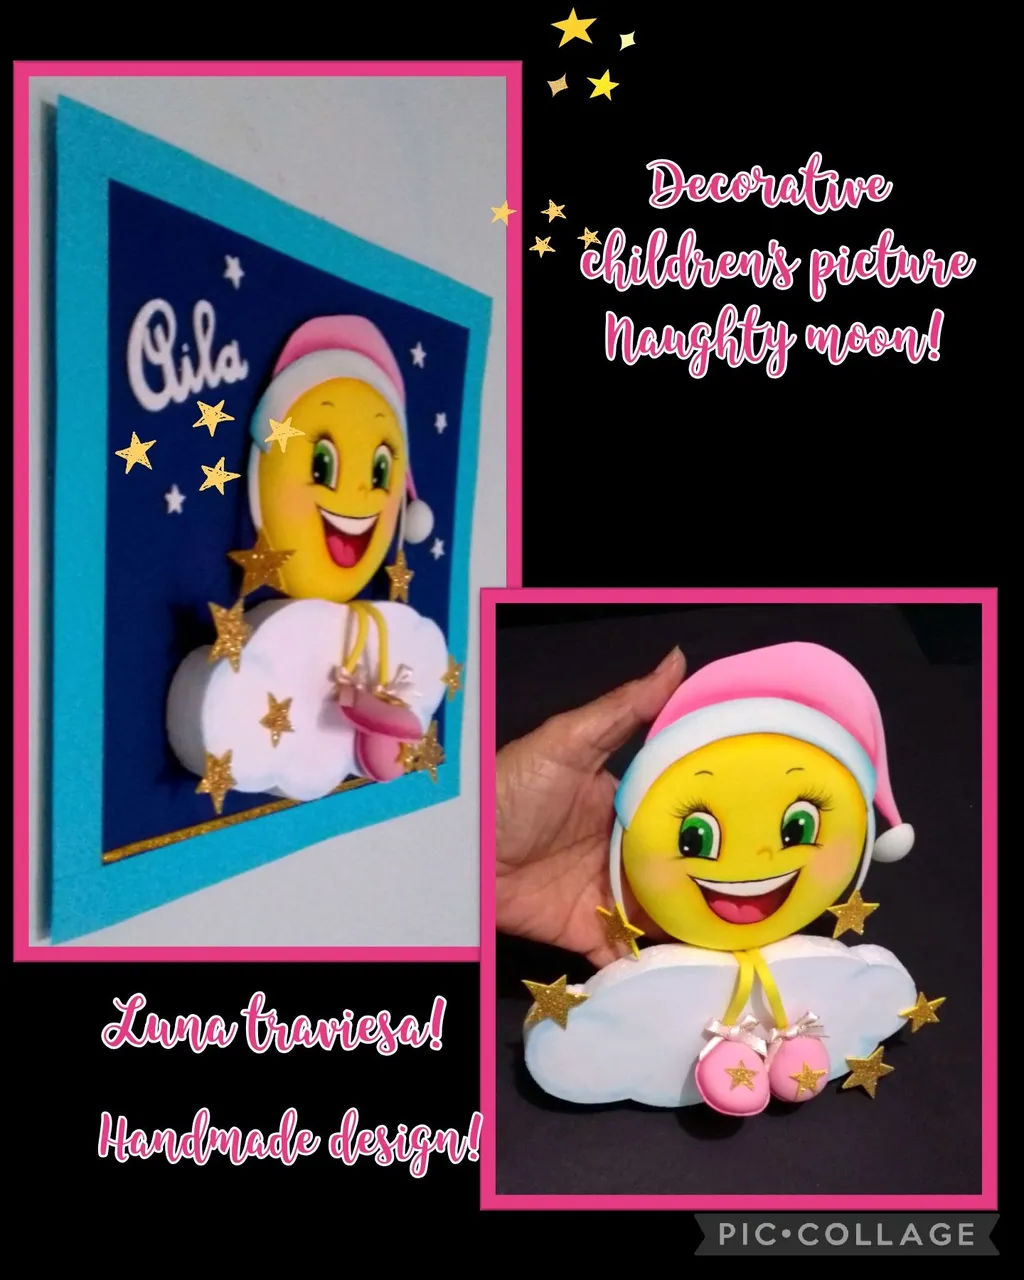
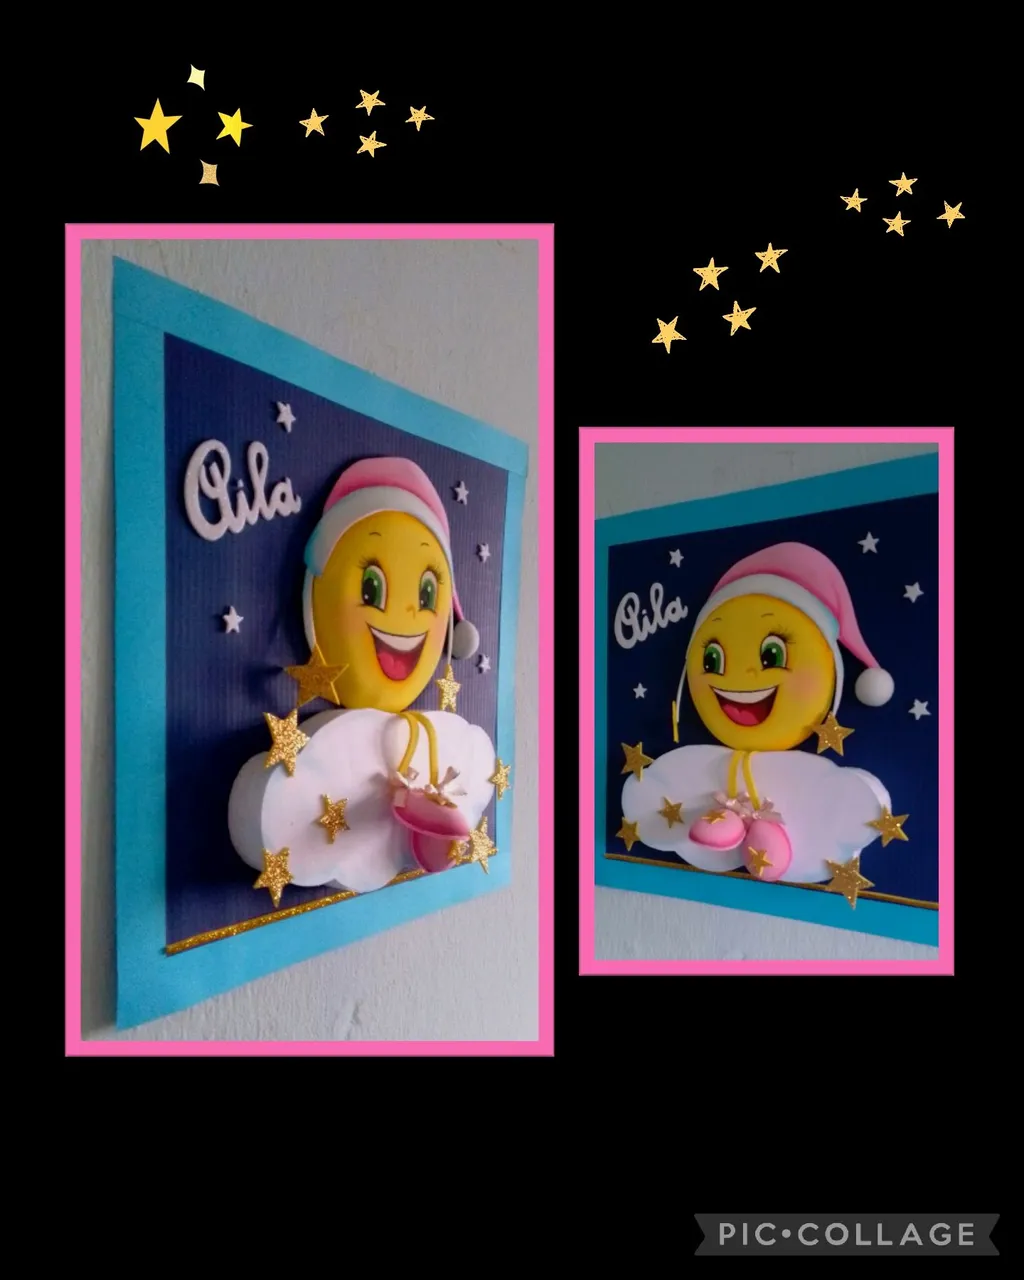
Entonces comenzaré a mostrarte como diseñé y realicé mi Cuadro de "Luna Traviesa" le puse ese nombre por su cara, jajajaja..
Ahora te dejo aqui una pequeña lista:

| Foami mate y escarchado | Cartulinas |
|---|---|
| Pinturas y pinceles | Tijera |
| Lápiz | Cuchilla |
| Goma espuma | Acocador |
| Dibujo | Plancha eléctrica |
| Silicón | Cinta de tela y papel |
| Tiza |
Empecemos el paso a paso:
Paso 1:

- Haz, imprime o calca un dibujo de una carita de luna, pon un gorrito, piernitas y zapaticos a tu gusto, luego remarca el dibujo con lápiz de mina blanda (Esto es para que al momento de transferir suelte el color la mina y se marque el dibujo en el foami.
- Desglosa el dibujo y marca un círculo sobre el foami amarillo(lo hice marcando el borde de un plato) del tamaño de la luna, luego marca dos pequeños en rosado para los zapatos y uno en blanco para el gorrito y después saca todas las piezas de la luna.
- Ahora coloca el dibujo sobre el foami y frota con la tijera para transferir el dibujo.
Así ya está todo listo para comenzar!
Paso 2:

- Calienta la plancha a temperatura media y vé colocando el círculo para calentarlo por partes, coloca sobre la goma espuma y frota haciendo un poco de presión para ir dando volúmen a la pieza, así harás hasta dar la vuelta completa.
(Esto se hace cuando la pieza es más grande que la base de la plancha) - Luego coloca los círculos rosados y déjalos que vayan tomando forma, si los quieres con bastante volúmen puedes frotar con un acocador sobre la goma espuma.
- Aplica silicón, pega sobre un pedazo de foami y recorta dejando 1 o 2 milímetros de borde.
Paso 3:

- Comienza a pintar los dientes y deja secar, luego pega el gorrito.
- Sigue pintando, rellena los ojos y luego moja la punta del pincel con pintura amarillo fuerte y pasa por el borde de los ojos, nariz y boca, ahora rellena ojos con pinruta verde y deja secar.
- Ahora toca rellenar la boca, comienza pintando la lengua en rosado y el centro de la boca con rojo y sin dejar profundiza aplicando color negro en los extremos y deja secar.
Recomendación: para matizar o degradar un color, siempre es bueno hacerlo con la pintura húmeda ya que así se unen con mayor facilidad. - Ahora moja la punta trasera del pincel en pintura negra y haz el círculo frotando en forma circular el pincel hasta rellenar al tamaño deseado.
Con un pincel 00 ó marcador punta fina dibuja el borde de ojos, boca y pinta también pestañas, cejas y pon dos puntos de luz en cada ojo. - Luego pinta el borde del gorro con fucsia.
Paso 4:

- Dibuja en cartulina una nube y recorta, luego pega sobre un pedazo de anime o icopor y recorta con una cuchilla o exacto por todo el borde.
- Después con tiza azul pasa por el borde de la nube, luego pega las dos tiras (piernas)a los zapatos, aplica silicón en la parte superior de la nube y pega.
- Aparte haz dos lacitos en cinta de tela, recorta estrellas doradas y pega a las tiras del gorrito.
Paso 5:

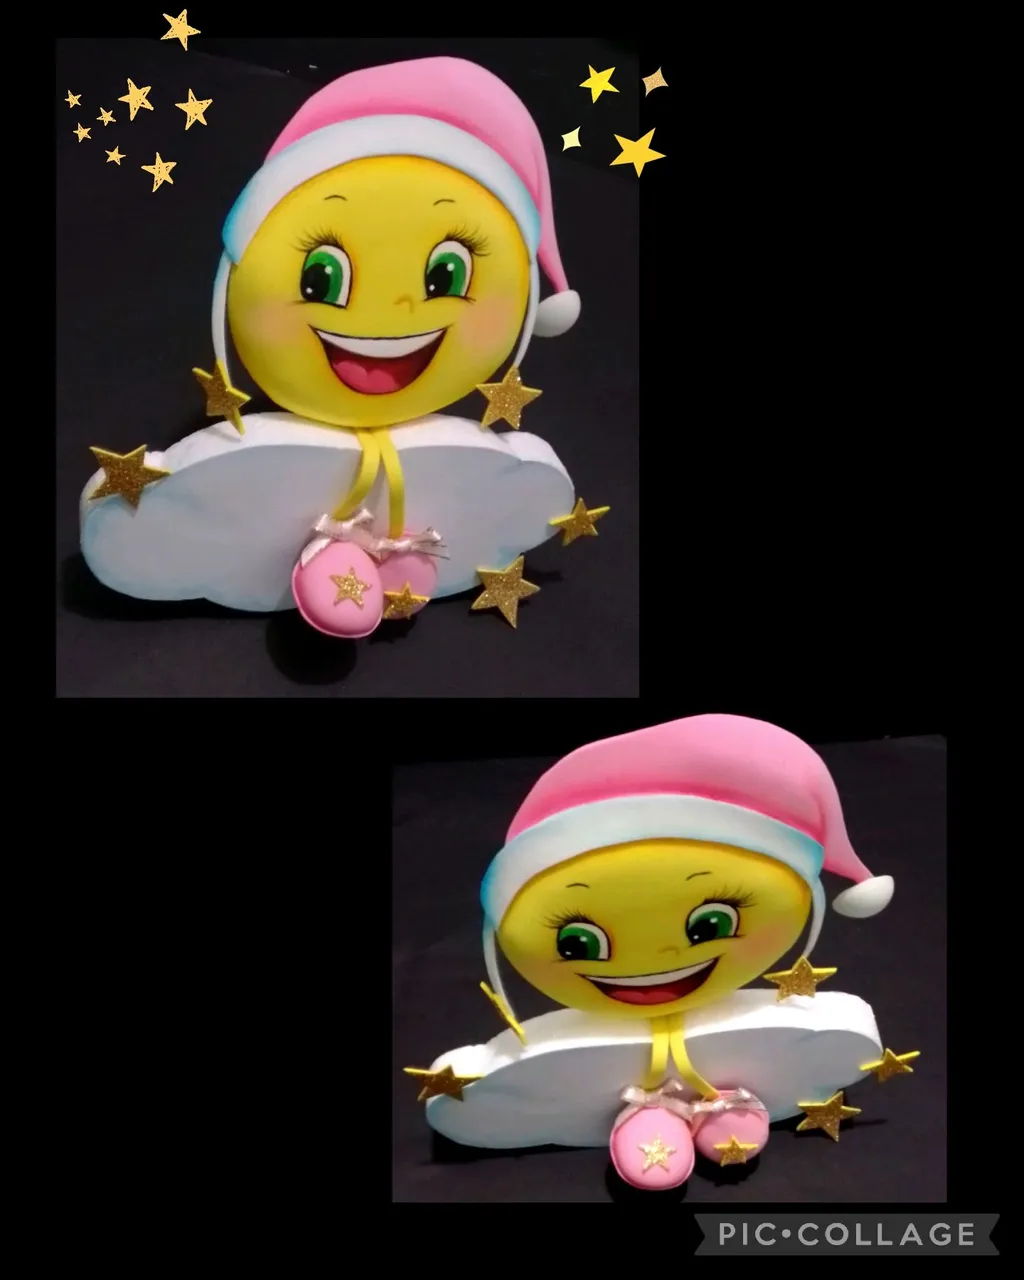
- Pega también la bolita del gorrito y las estrellitas a la nube, puedes pegar en los zapaticos los lacitos y unas estrellitas, también puedes pegar los zapaticos a la nube o dejarlos colgar y cruzar sus piernas.
Y así ya tenemos lista a esta Linda y traviesa Luna que puedes usar y colocar como un lindo adorno para una repisa o mesita de noche!
Paso 6:
- Ahora haremos la base del cuadro y si lo quieres per
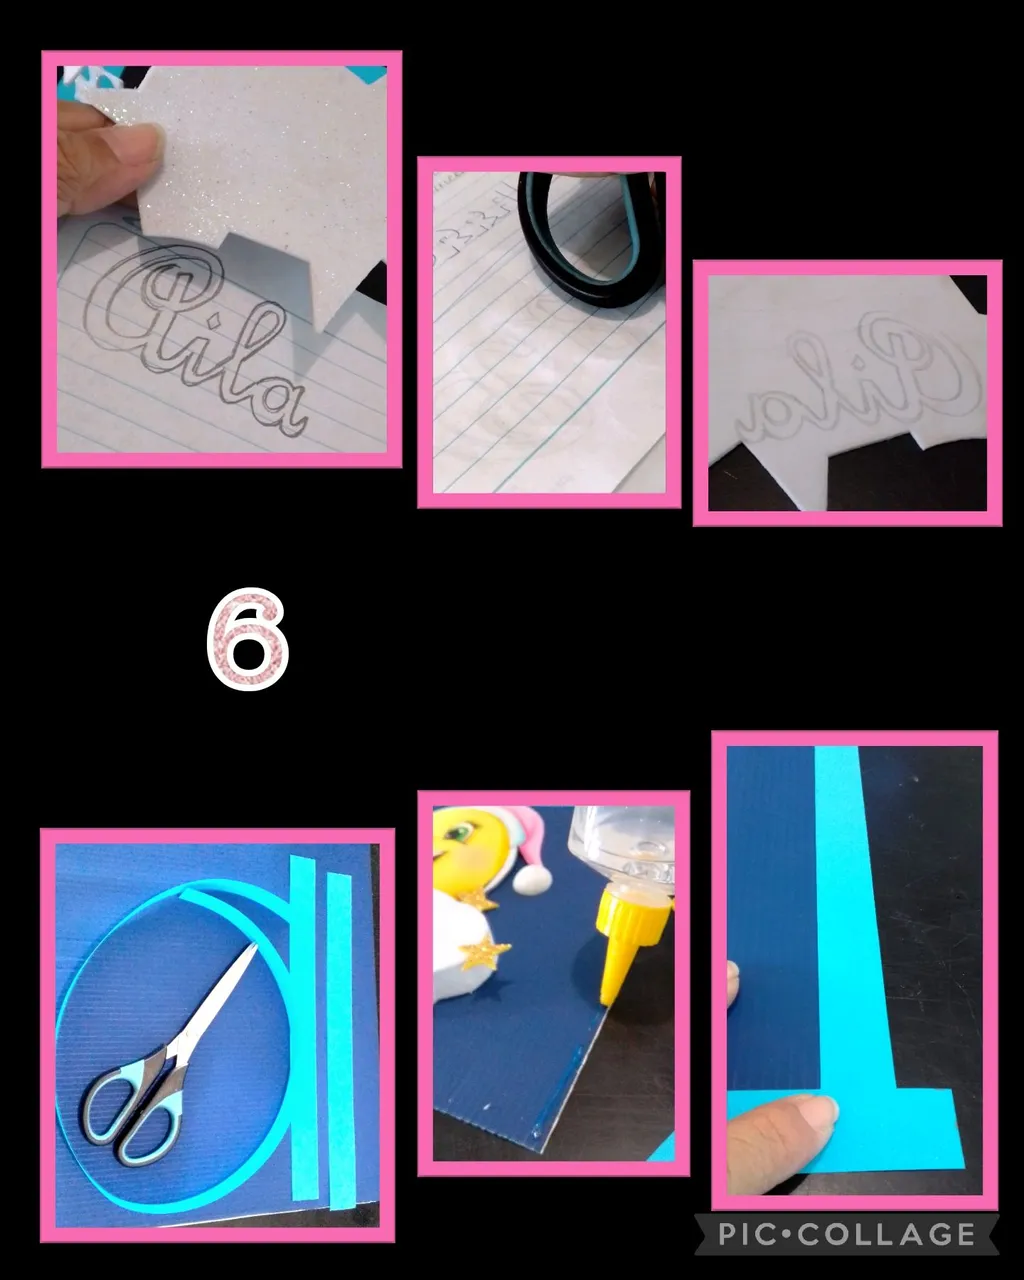
sonalizar, puedes dibujar o calcar el nombre que quieras, repetiras el mismo paso para transferir y luego recorta. - Recorta un cuadrado o rectángulo en cartulina del tamaño y color que necesites y 2 tiras largas de 2cm de ancho para los lados, aplica silicón y pega dos lados horizontales o verticales, deja secar, pega los dos restantes y recorta el sobrante.
Paso 7:
Armar el cuadro.

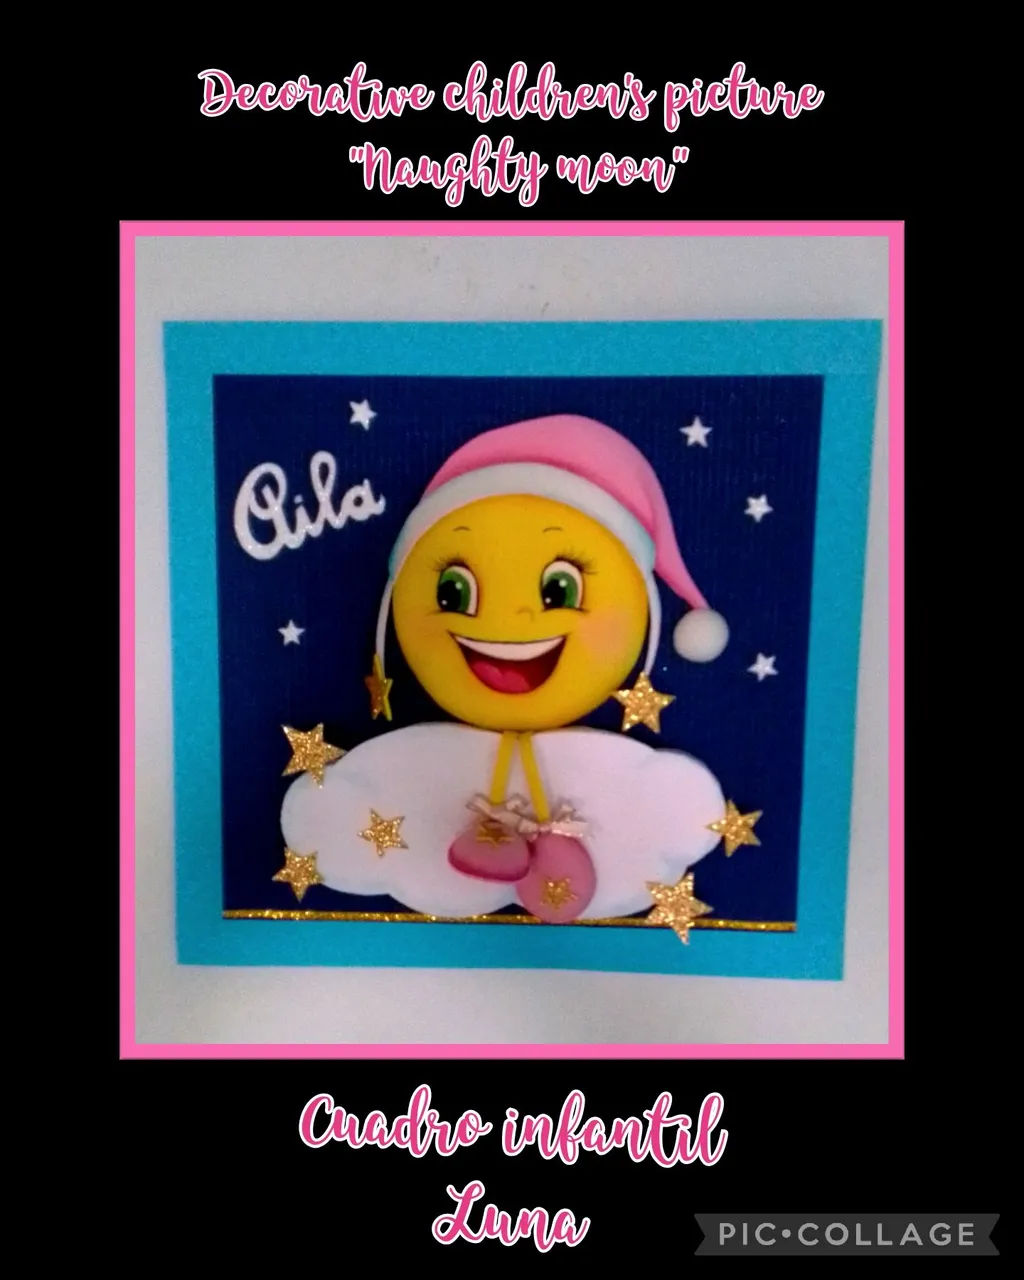
- Ya vamos terminando, aplica silicón en la parte posterior de la nube y pega en el centro del cuadro, pega también el nombre, dibuja otras estrellitas en foami blanco escarchado, recorta y para decorar pega en el fondo del cuadro.
Paso 8:

- Por último, recorta un cuadrito de cartulina, haz una lazada con la cinta de papel y pega justo en el centro de la parte superior trasera, deja secar y cuelga a la pared para lucir.
Ahora te mostraré mis fotos!
Etiquetas HTML
Teléfono: BLU G5
Editor de fotos: PicCollage.
Ahora llego la hora de despedirme, muy feliz de poder mostrarles mi tutorial.
Muchas gracias por tu visita, apoyo y si es tu gusto comentar, será para mí un placer contestar!
Suerte para todos.
English:
Good evening dear friends visitors and participants of this great contest that is making the Community of @DiyHub with the collaboration of @3Speak and that made us think what to do to participate, in my case, many projects went through my mind, but today almost to close the contest I will show you my tutorial because I thought to publish in the morning because I thought it would close at 12 pm, but it was impossible to make the video and I decided to make it written and although I know I will not have time to participate I will show you my publication.
In my step by step I will show you how to make a Children's Picture with Dimension, made with inexpensive materials, easy to get and with the best purpose that you learn how to do it and "MAKE IT YOURSELF", of course this is only a guide but, as you practice you will learn!
Then I will begin to show you how I designed and made my "Naughty Moon" picture, I named it after her face, hahahaha....
Now I leave you here a little list:
| Foami matte and frosted | Cardboards |
|---|---|
| Paints and paintbrushes | Scissors |
| Pencil | Blade |
| Foam glue | Stencil |
| Drawing pencil | Electric iron |
| Silicone | Cloth and paper tape |
| Chalk |
Let's start the step by step:
Step 1:
- Make, print or trace a drawing of a moon face, put a hat, legs and slippers to your liking, then outline the drawing with a soft lead pencil (This is so that when transferring the color will release the lead and the drawing will be marked on the foami.
- Break down the drawing and mark a circle on the yellow foami (I did it by marking the edge of a plate) the size of the moon, then mark two small ones in pink for the shoes and one in white for the hat and then remove all the pieces of the moon.
- Now place the drawing on the foami and rub with the scissors to transfer the drawing.
Now you are ready to go!
Step 2:
- Heat the iron to medium temperature and place the circle to heat it in parts, place it on the foam rubber and rub with a little pressure to give volume to the piece, so you will do it until you make a complete turn.
(This is done when the piece is larger than the base of the iron). - Then place the pink circles and let them take shape, if you want them with enough volume you can rub them with an applicator on the foam rubber.
- Apply silicone, glue on a piece of foami and cut leaving 1 or 2 millimeters of border.
Step 3:
- Start painting the teeth and let dry, then glue the hat.
- Continue painting, fill in the eyes and then wet the tip of the brush with strong yellow paint and go around the edge of the eyes, nose and mouth, now fill in the eyes with green paint and let dry.
- Now it's time to fill the mouth, start painting the tongue in pink and the center of the mouth with red and without leaving it deepen applying black color at the ends and let it dry.
Recommendation: to shade or degrade a color, it is always good to do it with the paint wet because this way they unite more easily. - Now dip the back tip of the brush in black paint and make the circle by rubbing the brush in a circular motion until it is filled to the desired size.
With a 00 brush or fine tip marker draw the edge of the eyes, mouth and also paint eyelashes, eyebrows and put two points of light in each eye. - Then paint the rim of the cap with fuchsia.
Step 4:
- Draw a cloud on cardboard and cut it out, then glue it on a piece of anime or styrofoam and cut with a razor blade or exacto around the edge.
- Then with blue chalk go around the edge of the cloud, then glue the two strips (legs) to the shoes, apply silicone on the top of the cloud and glue.
- Separately, make two little ribbons out of fabric ribbon, cut out gold stars and glue them to the strips of the beanie.
Step 5:
- Glue the beanie ball and the stars to the cloud, you can also glue the bows and stars to the slippers, you can also glue the slippers to the cloud or let them hang and cross their legs.
And so we have ready this cute and mischievous Moon that you can use and place as a nice decoration for a mantelpiece or bedside table!
Step 6:
- Now we will make the base of the picture and if you want to per
If you want to customize it, you can draw or trace the name you want, repeat the same step to transfer and then cut it out. - Cut a square or rectangle in cardboard of the size and color you need and 2 long strips of 2cm wide for the sides, apply silicone and glue two horizontal or vertical sides, let dry, glue the remaining two and trim the excess.
Step 7:
Assemble the frame.
- Now we are finishing, apply silicone on the back of the cloud and glue in the center of the frame, also glue the name, draw other stars in frosted white foami, cut out and decorate by gluing on the bottom of the frame.
Step 8:
- Finally, cut out a small square of cardboard, make a loop with the paper ribbon and glue it right in the center of the top back, let it dry and hang it on the wall to show it off.
Now I'll show you my photos!
HTML tags
Phone: BLU G5
Photo Editor: PicCollage.
Now it's time to say goodbye, very happy to be able to show you my tutorial.
Thank you very much for your visit, support and if you like to comment, it will be my pleasure to answer!
Good luck to all of you.