Hello everyone... ✨
Hello to my dear Hivers and the dear community of artists #HiveDIY, as always very pleased and excited to be here again, showing you my work especially for you.
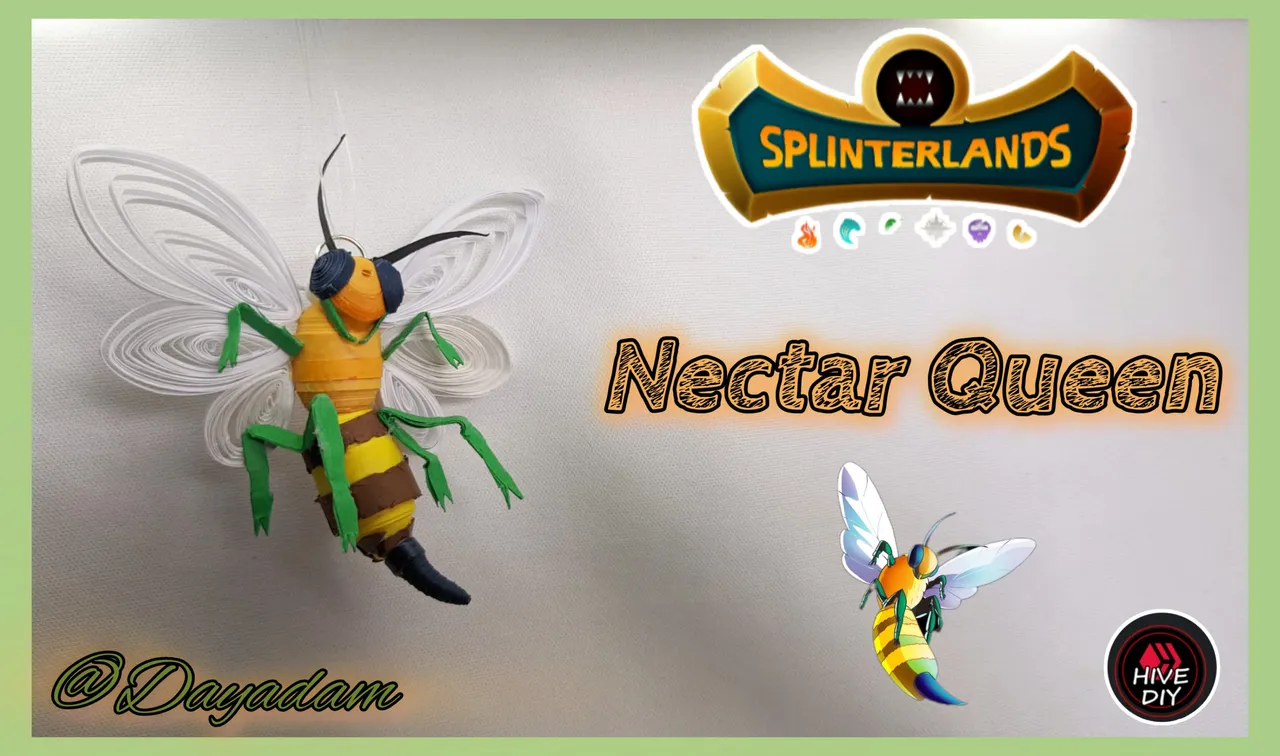
Greetings to the Splinterlands community, and everyone who lives there, I am pleased to be here to participate in the Splinterlands Art Contest Week 313.
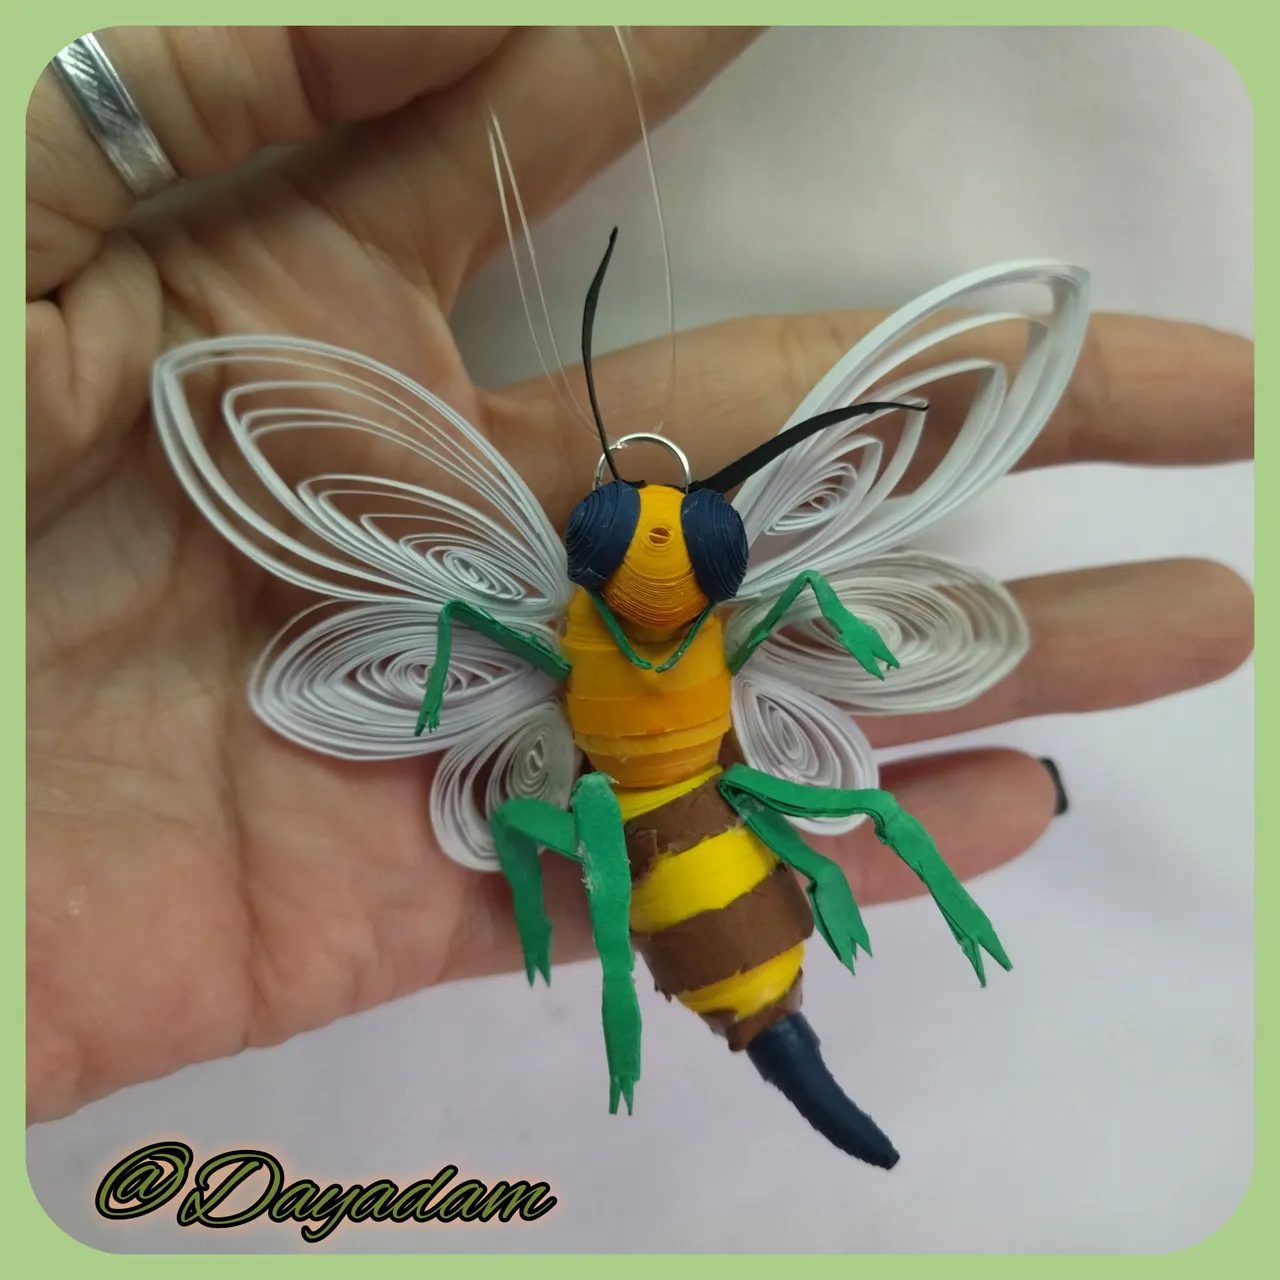
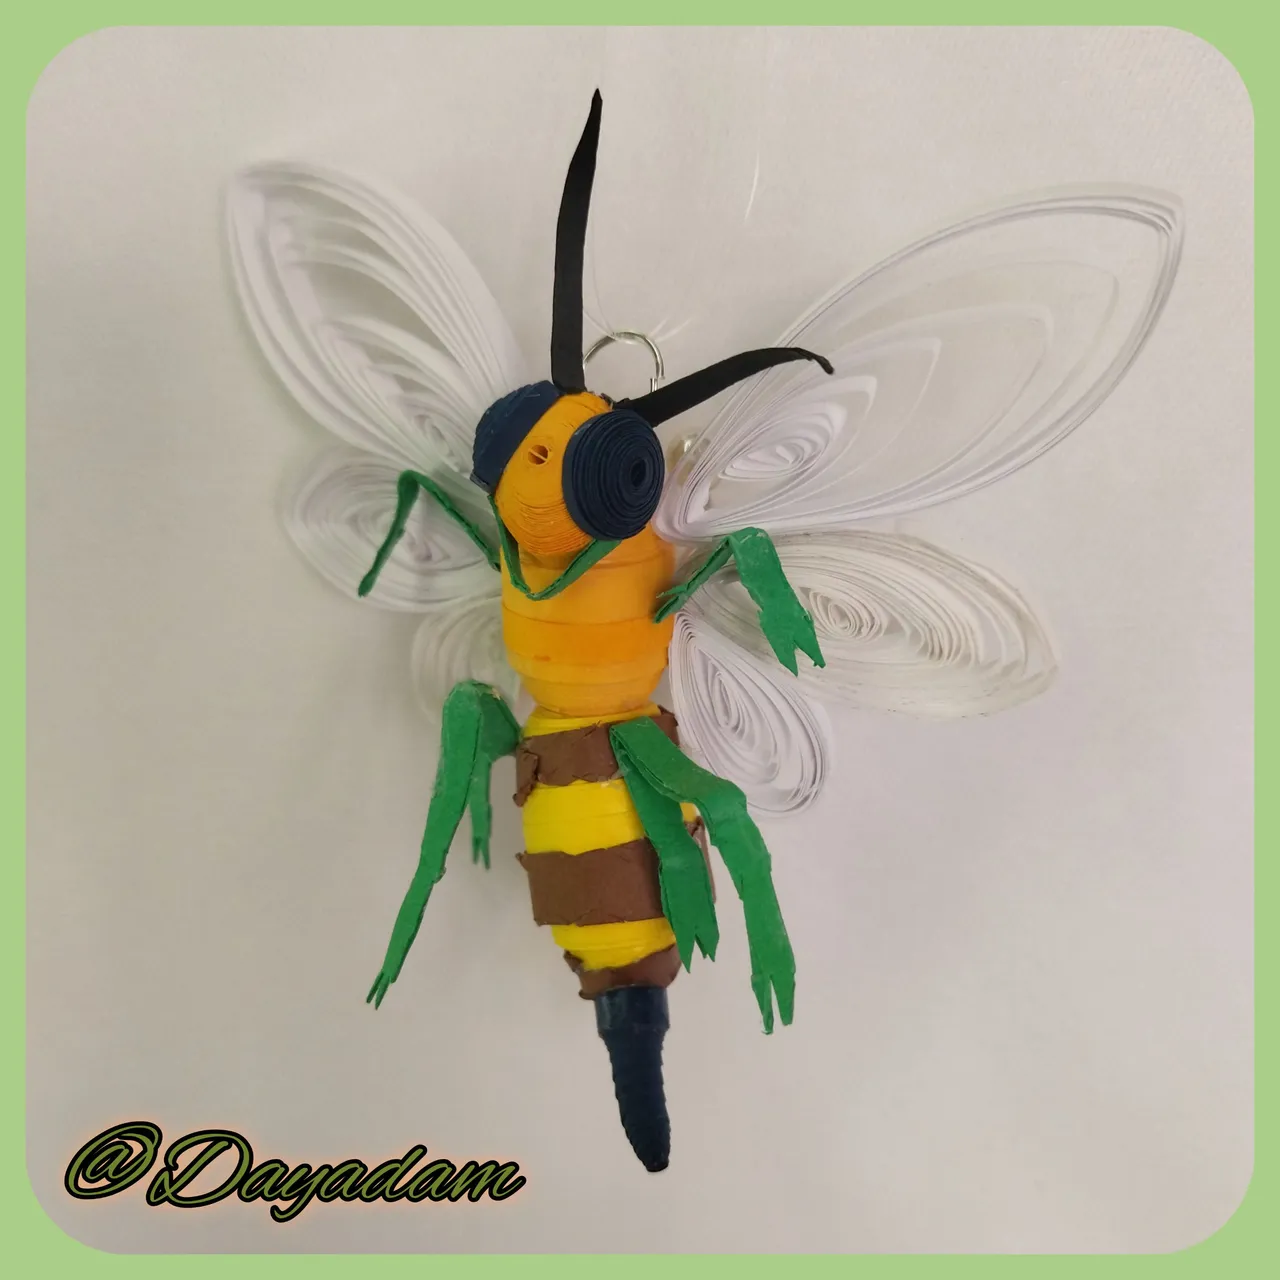
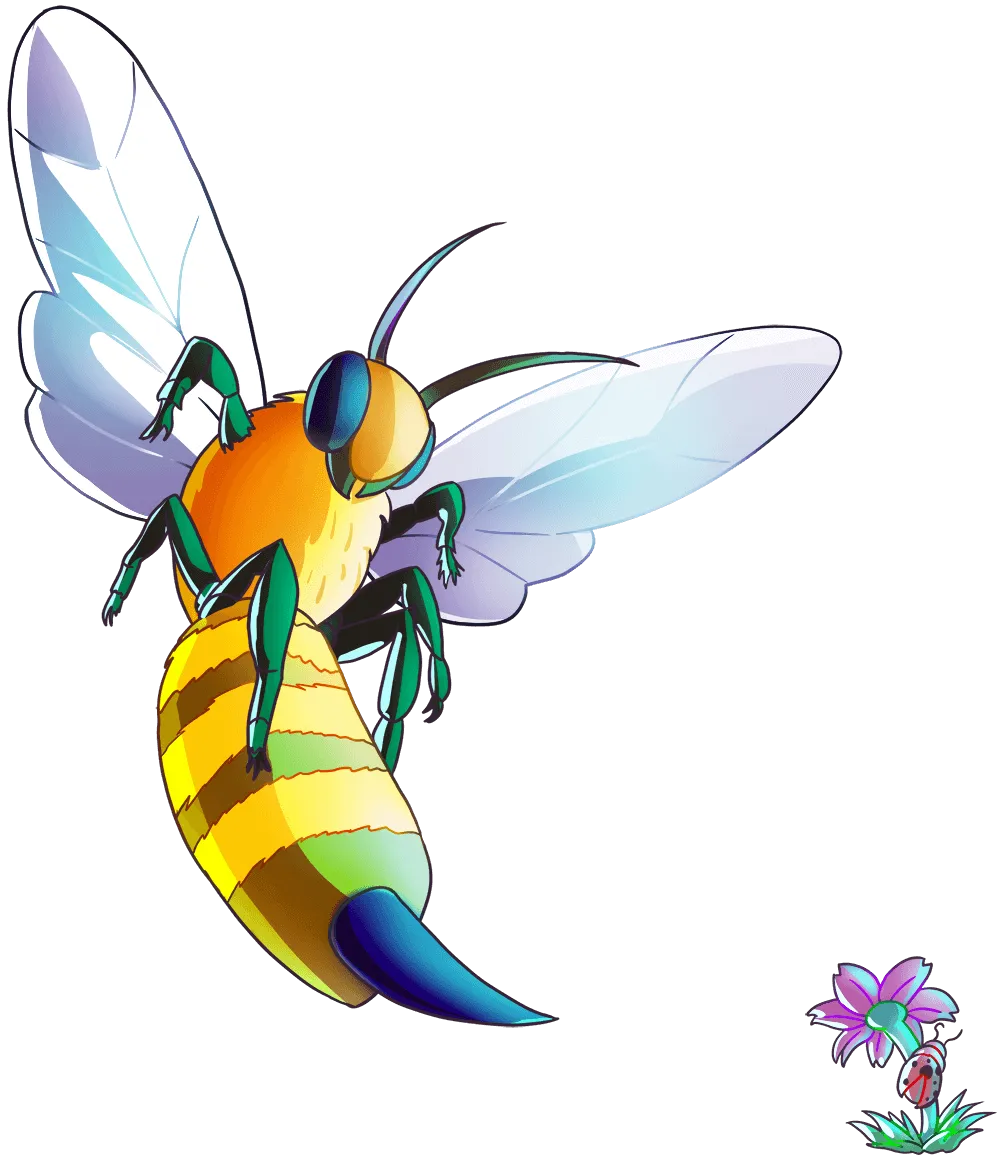
For today I bring you a 3D decorative pendant, in the quilling technique, inspired by the character of the letter, Nectar Queen, once I made it in a small 2D decorative frame. If you want to see my previous work here is the link to the publication: @dayadam/nectar-queen-quilling-technique-splinterlands.
If you want to know more about the game, I leave you my reference link to enter it and navigate through this wonderful world: https://splinterlands.com?ref=dayadam
Hoping you like my work, without further ado, I leave you with my creative process.
Let's start:😃

Hola a Todos...✨
Hola a mis queridos Hivers y a la querida comunidad de artistas #HiveDIY, como siempre muy complacida y emocionada de encontrarme por acá nuevamente, mostrándole mi trabajo hecho especialmente para ustedes.
Un saludo para la comunidad de Splinterlands, y todos los que hacen vida por allí, me gratifica estar por acá para participar en el Splinterlands Art Contest Week 313.
Para hoy les traigo un colgante decorativo en 3D, en la tecnica de quilling, inspirado en el personaje de la carta, Nectar Queen, en una oportunidad la lleve a cabo en un pequeño cuadro decorativo en 2D. Si desean ver mi trabajo anterior por acá les dejo el link de la publicación: @dayadam/nectar-queen-quilling-technique-splinterlands.
Si quieren saber más con respecto al juego les dejo mi enlace de referencia para que ingresen en él, y naveguen por este maravilloso mundo: https://splinterlands.com?ref=dayadam
Esperando les guste mi trabajo, sin más preámbulos, les dejo mi proceso creativo.
Comencemos:😃

• Cintas de quilling de diversos colores y medidas.
• Aguja para quilling.
• Plantilla para moldear círculos.
• Repujador.
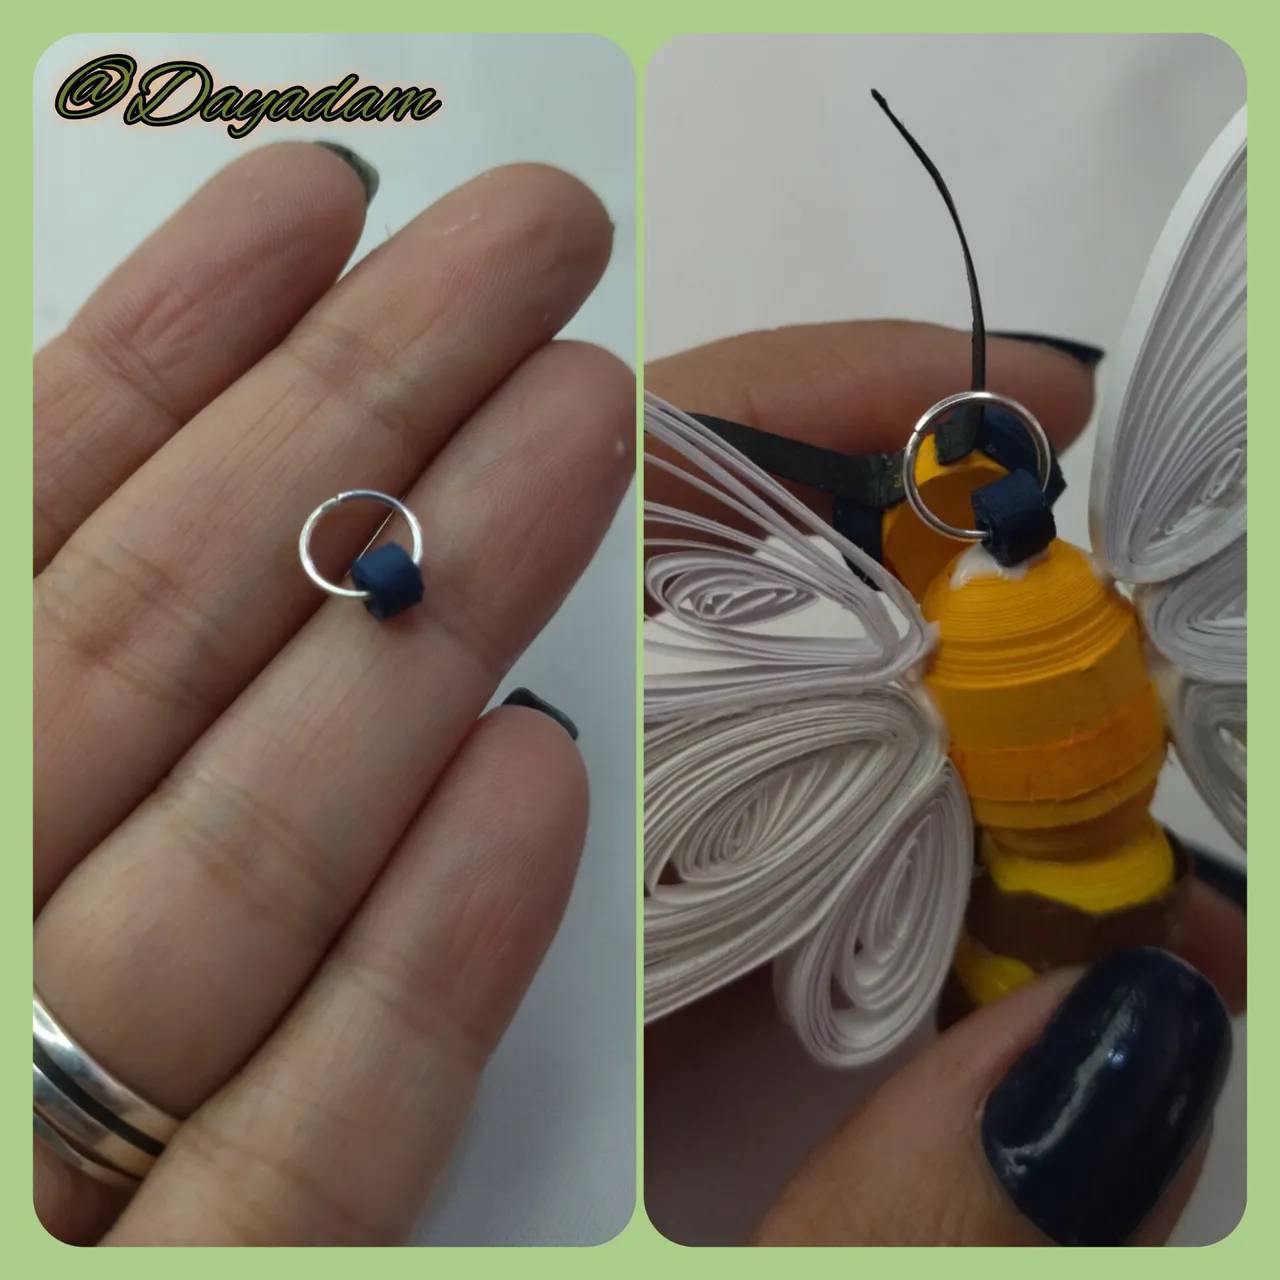
• Argolla mediana de bisutería.
• Pega blanca extra fuerte (de carpintería).
• Tijera.
• Pincel.
- Quilling ribbons of different colors and sizes.
- Quilling needle.
- Template to mold circles.
- Pusher.
- Medium size costume jewelry ring.
- Extra strong white glue (carpentry glue).
- Scissors.
- Paintbrush.

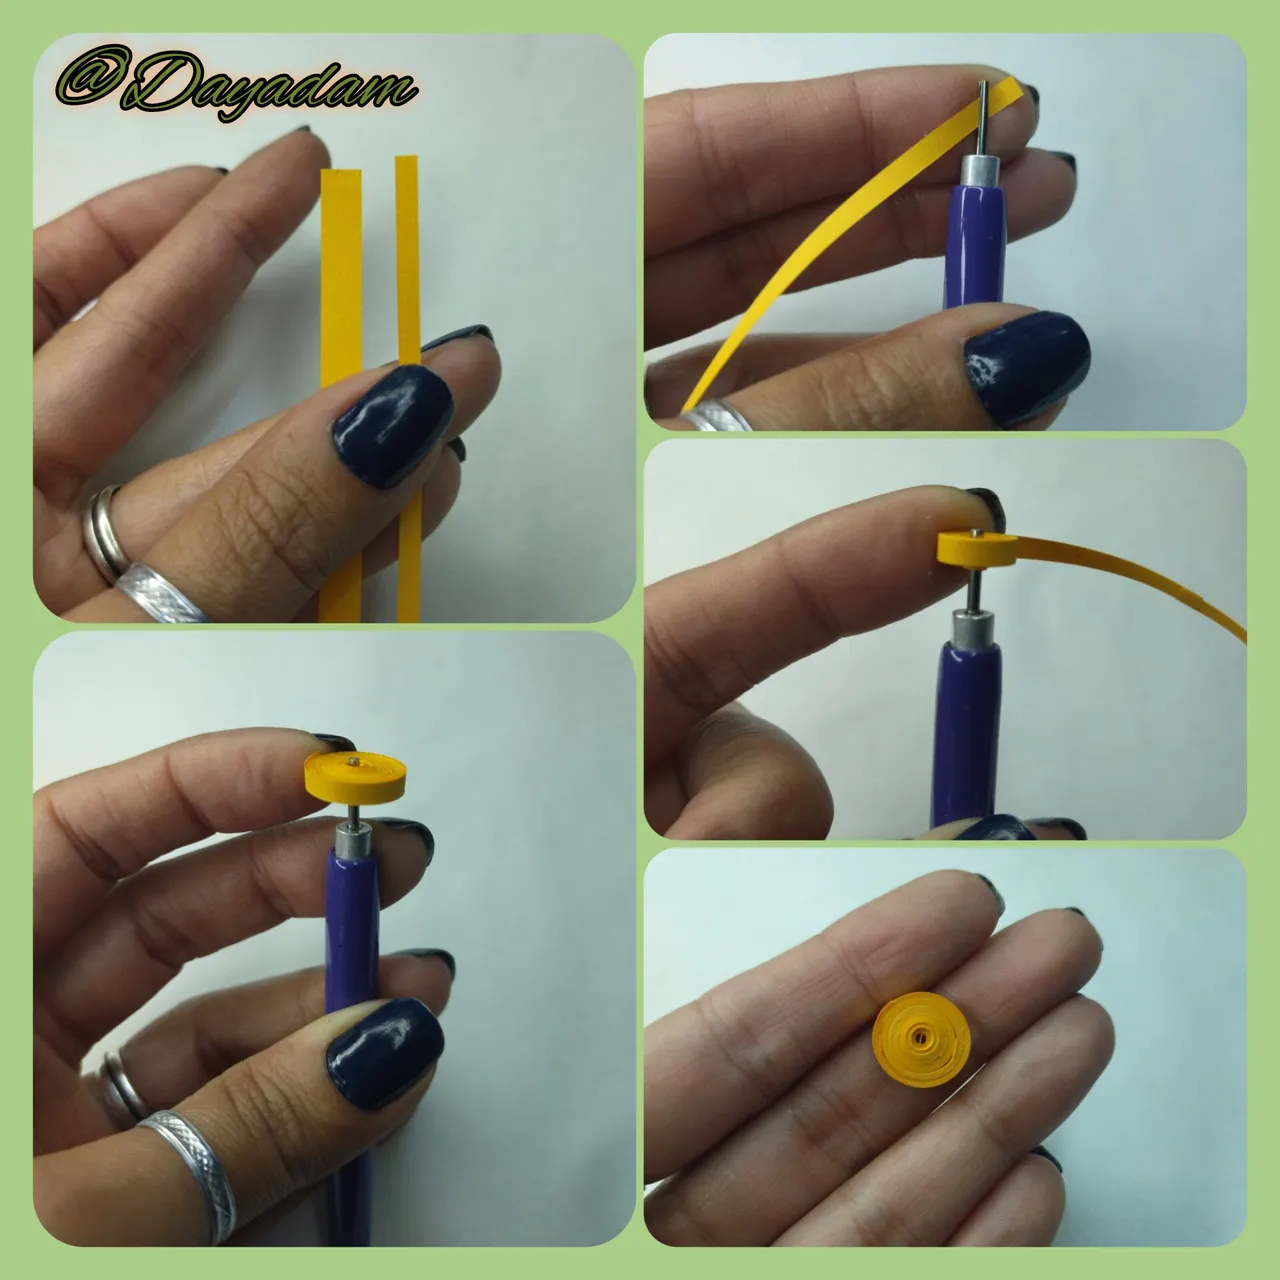
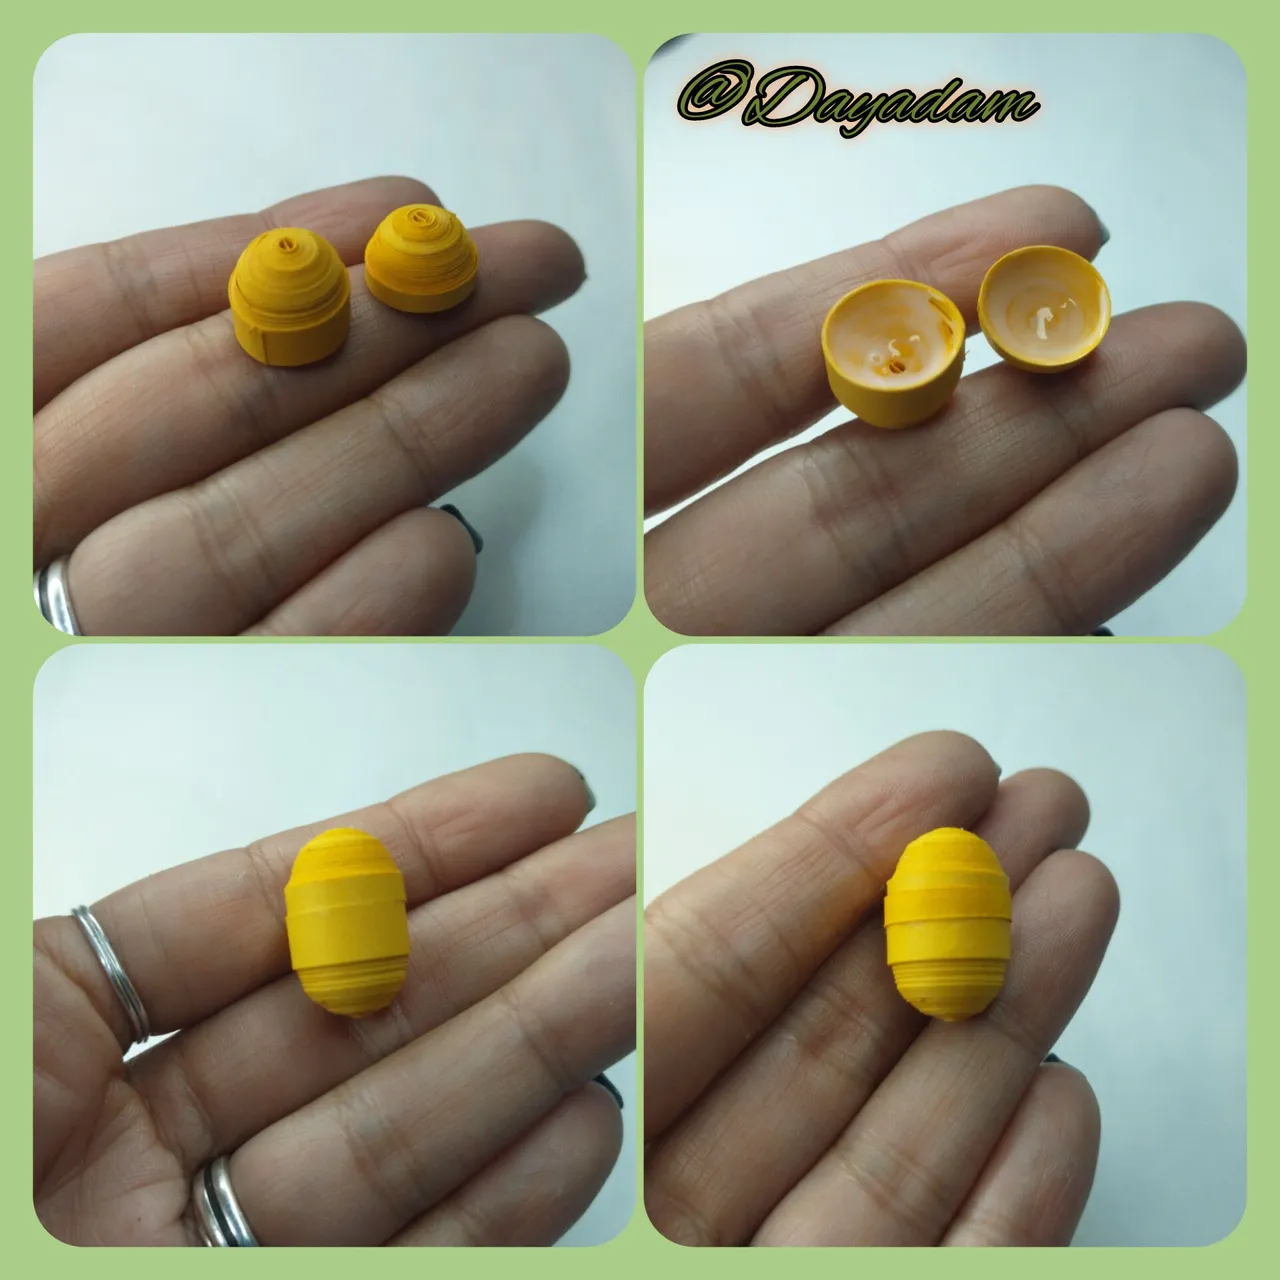
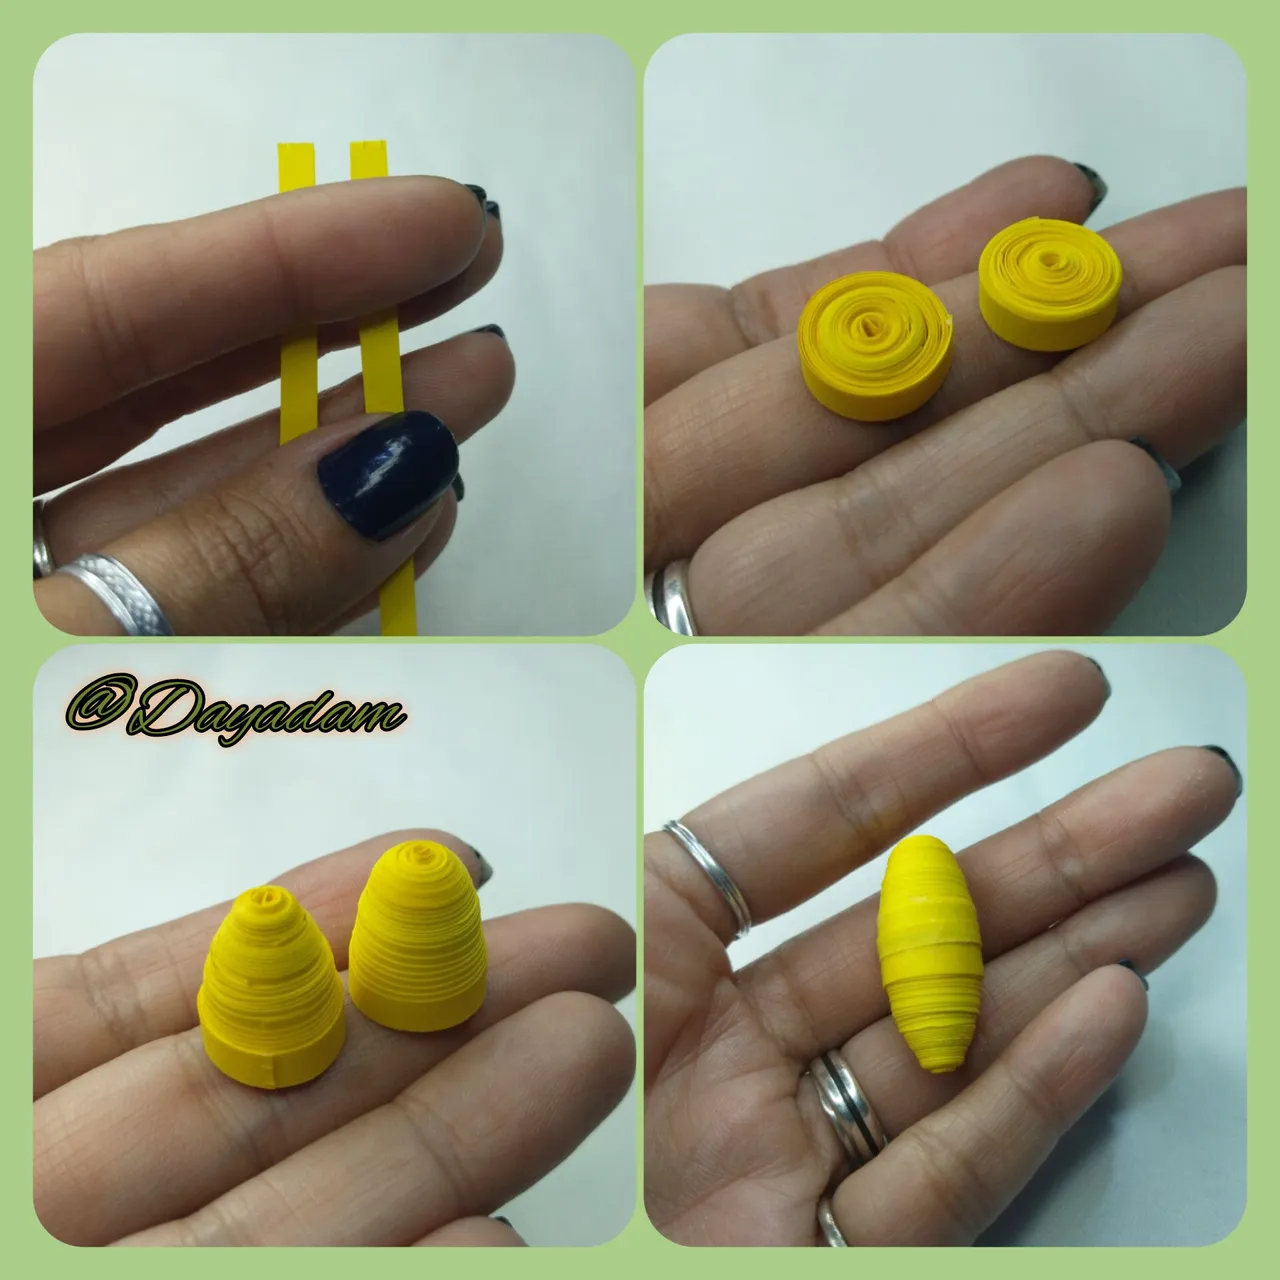
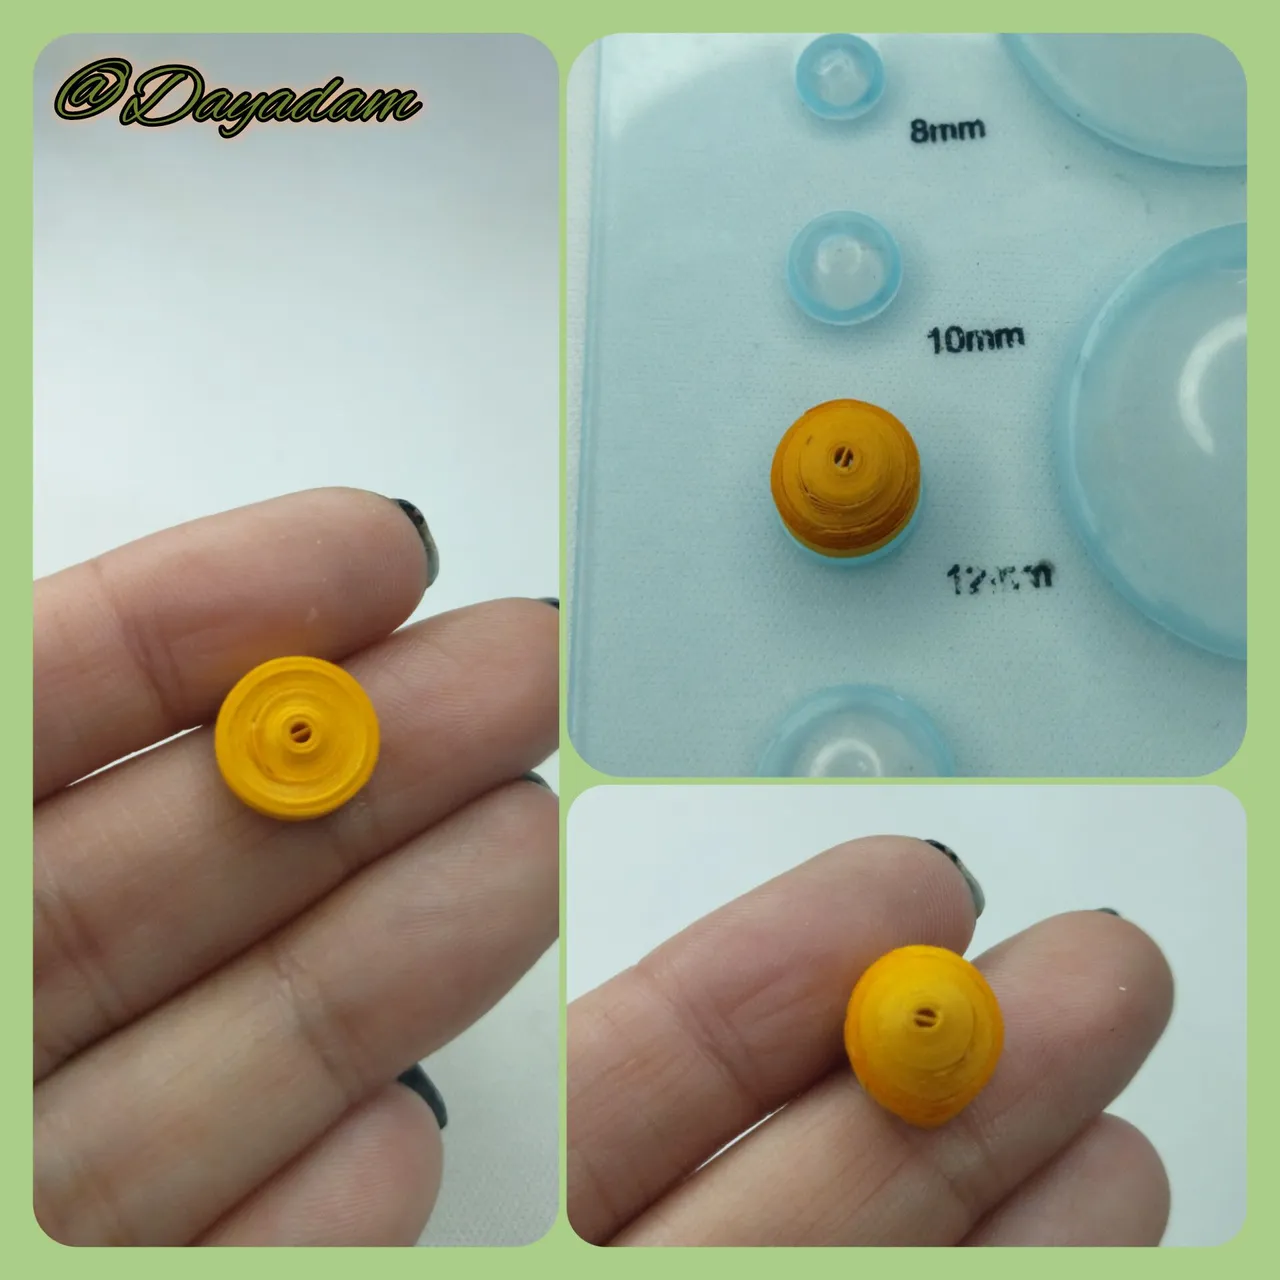
- We begin by taking 3mm wide and 5mm wide toasted yellow quilling tape, we are going to make 2 closed circles with each of the tapes, rolling with the quilling needle until we reach the end of the tape, removing it and sealing with extra strong white glue.
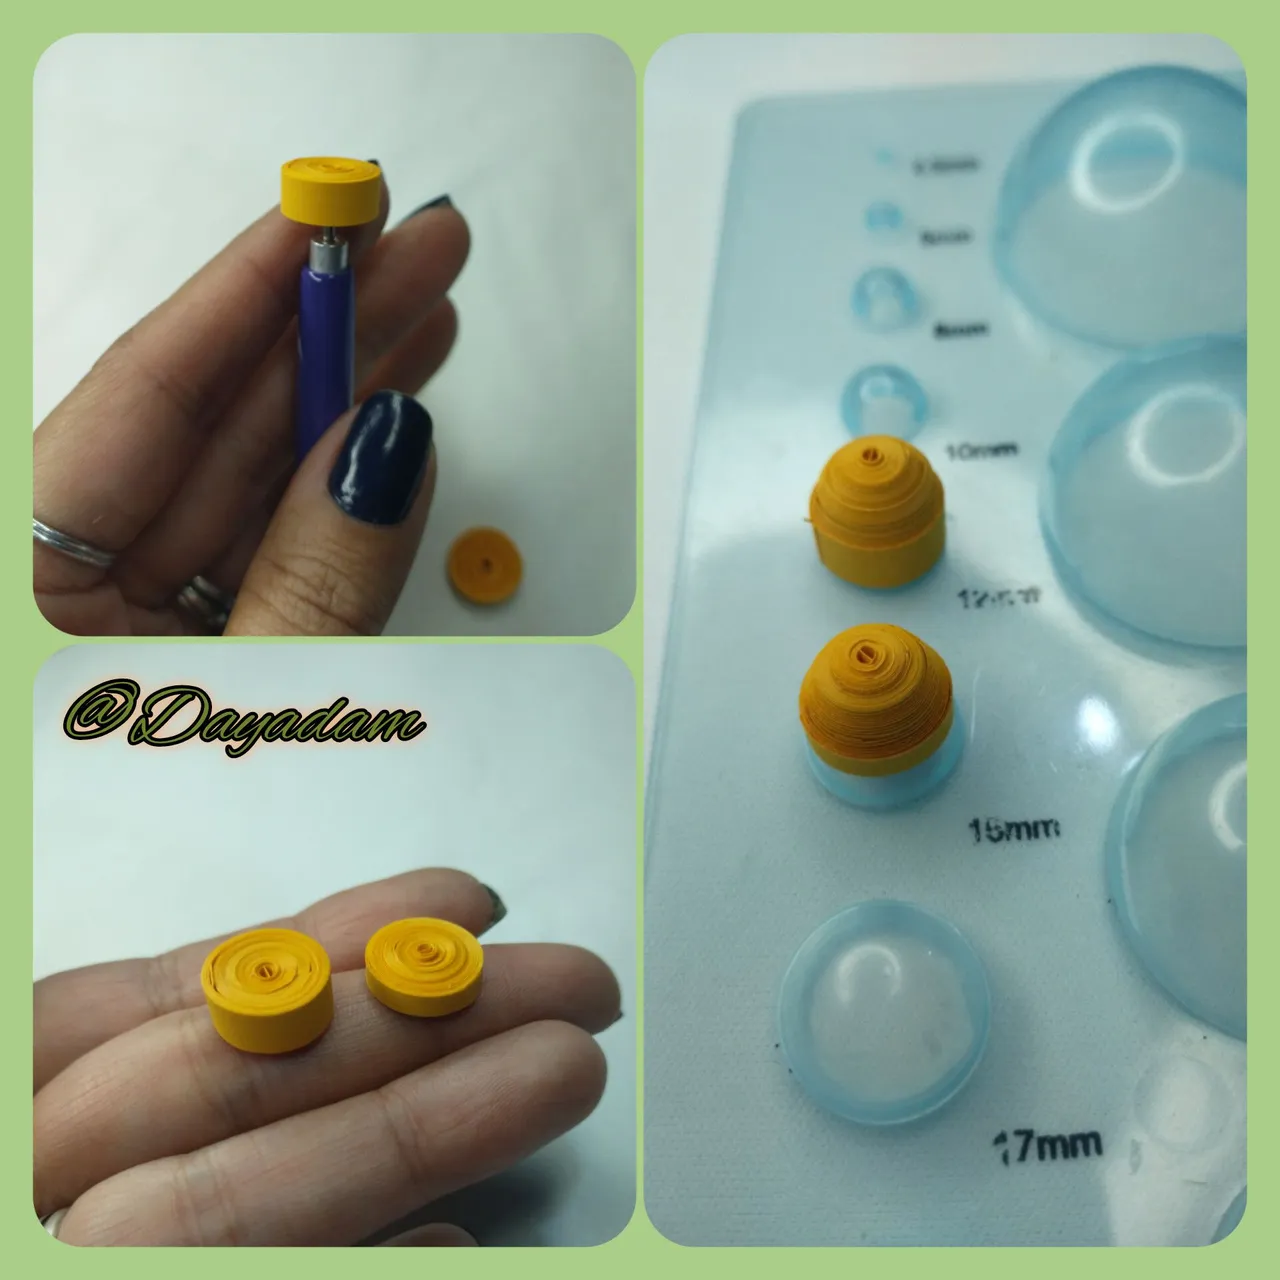
- Once the circles are ready, we will mold the 5mm circle in the 12.5mm size and the 3mm circle in the 12.5mm size, we take them out of the mold, apply glue on the inside and let them dry very well to prevent them from deforming, then we join them both applying white glue and passing a piece of 3mm ribbon around them.
- Under the same parameters as above but this time with 5mm wide yellow tape, we will make 2 closed circles, we will mold them as a kind of flattened cones, we will join both.

• Comenzamos tomando cinta para quilling de color amarillo tostado de 3mm de ancho y 5mm de ancho vamos a realizar 2 círculos cerrados con cada una de las cintas, enrollando con la aguja para quilling hasta llegar al fina de la cinta, sacando de la misma y sellando con pega blanca extra fuerte.
• Listos los círculos moldearemos en la plantilla,el de 5mm en la medida 12,5mm y el de 3mm en la medida numero 12,5mm, sacamos de molde aplicamos pega por la parte interna y dejamos secar muy bien para evitar que los mismos se deformen, luego unimos ambos aplicando pega blanca y pasando un trozo de cinta de 3mm alrededor de los mismos.
• Bajos los mismos parámetros anteriores pero esta vez con cinta amarilla de 5mm de ancho, realizaremos 2 círculos cerrados, moldearemos los mismos como una especie de conos aplanados, uniremos ambos.
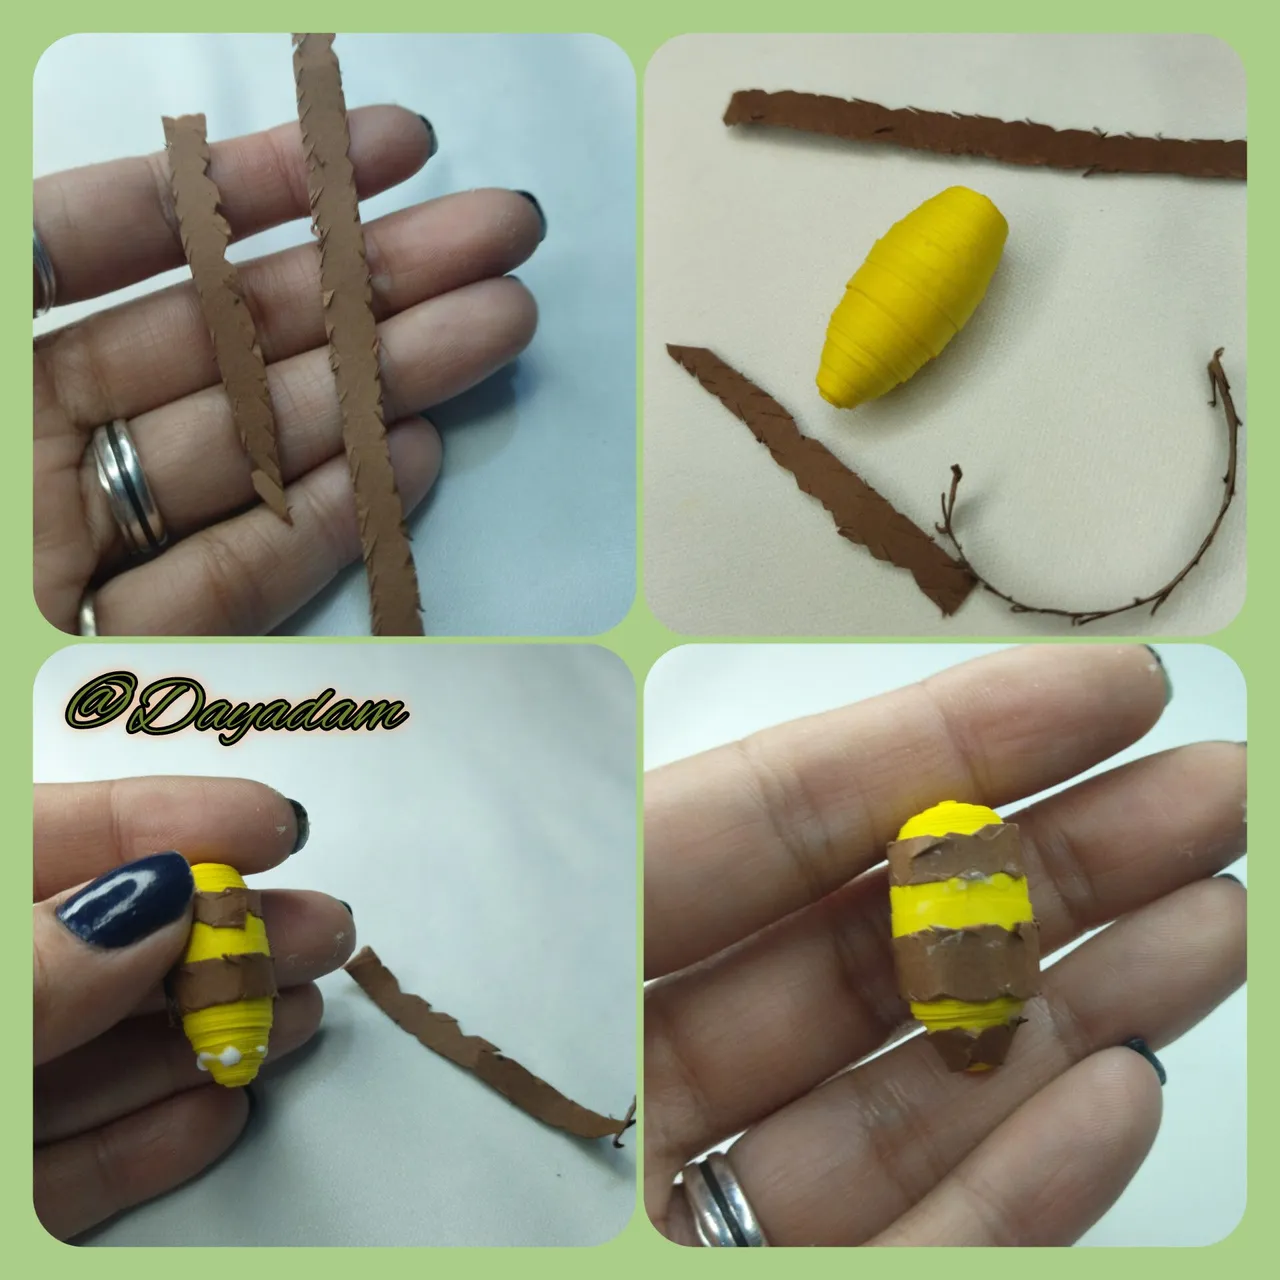
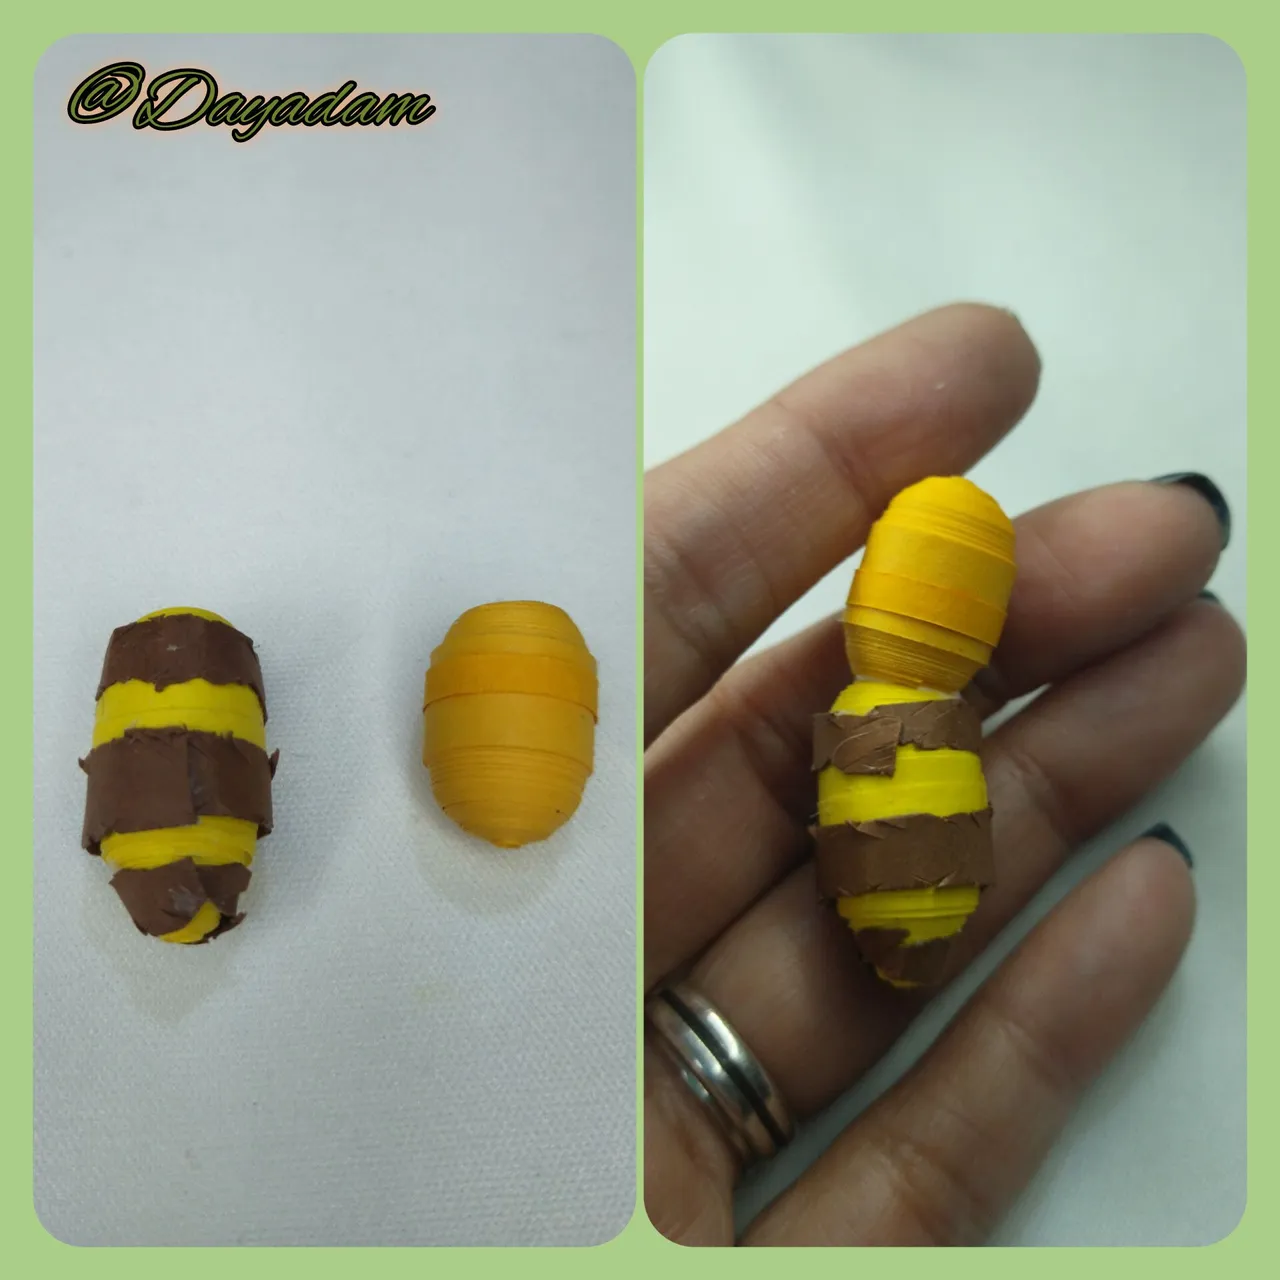
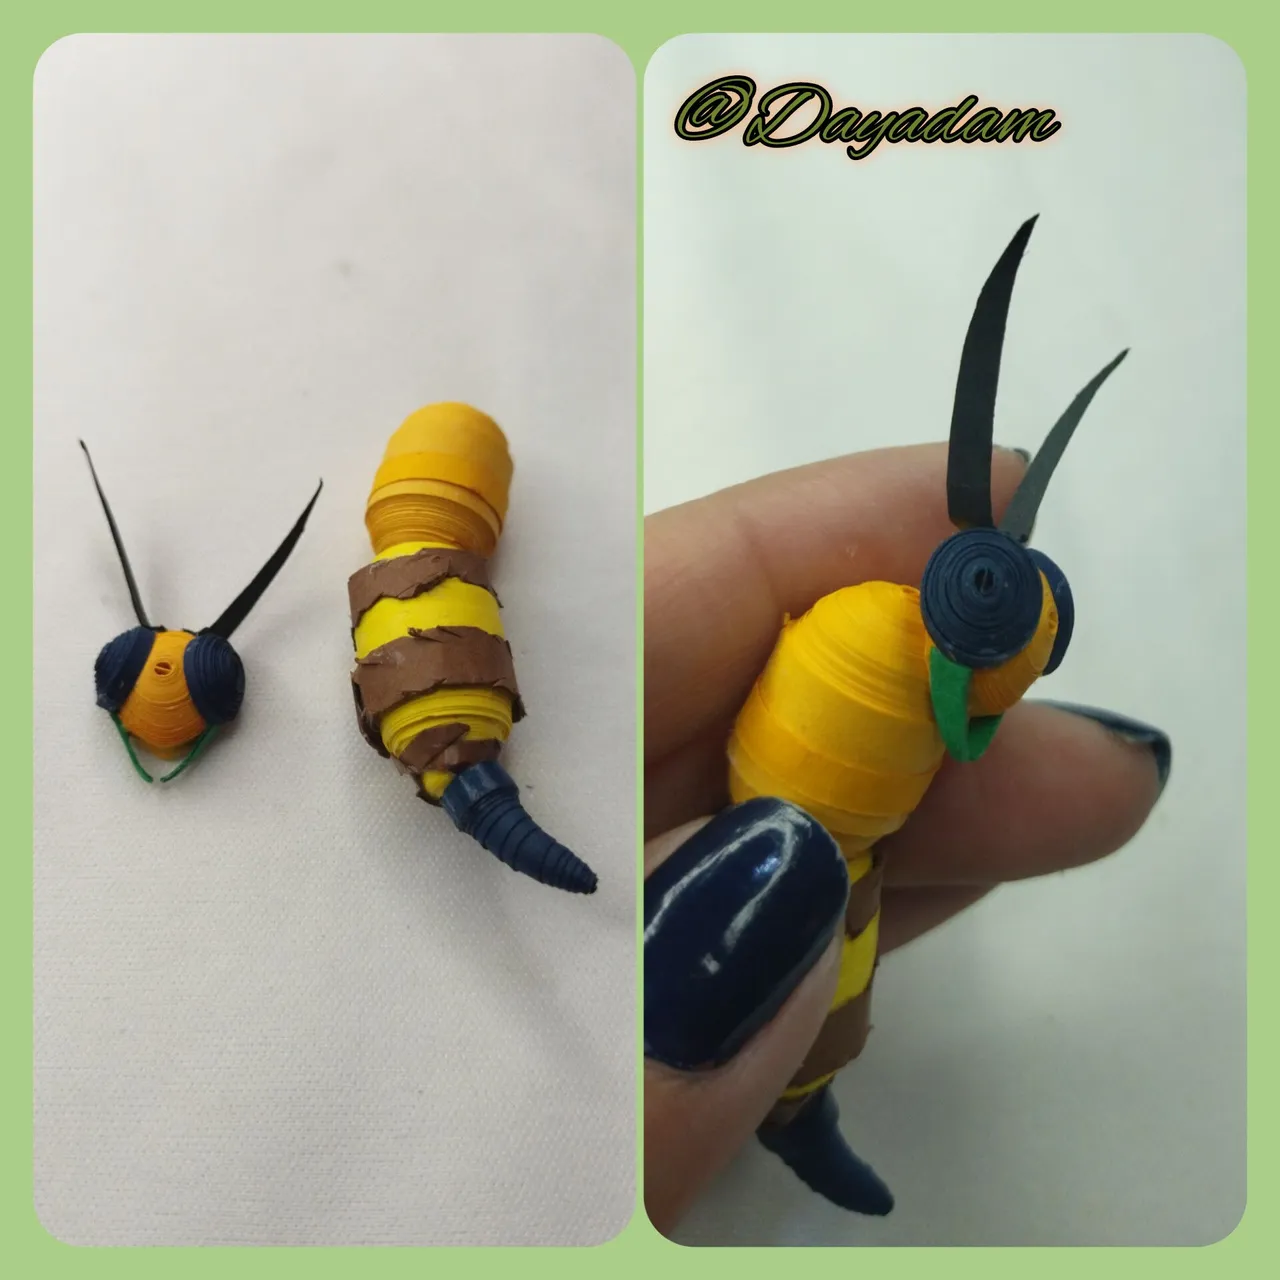
- To make the stripes of the bee, take several pieces of brown cardboard, make spikes with the scissors and glue around the longer yellow piece.
- Ready the 2 pieces and glue them together.
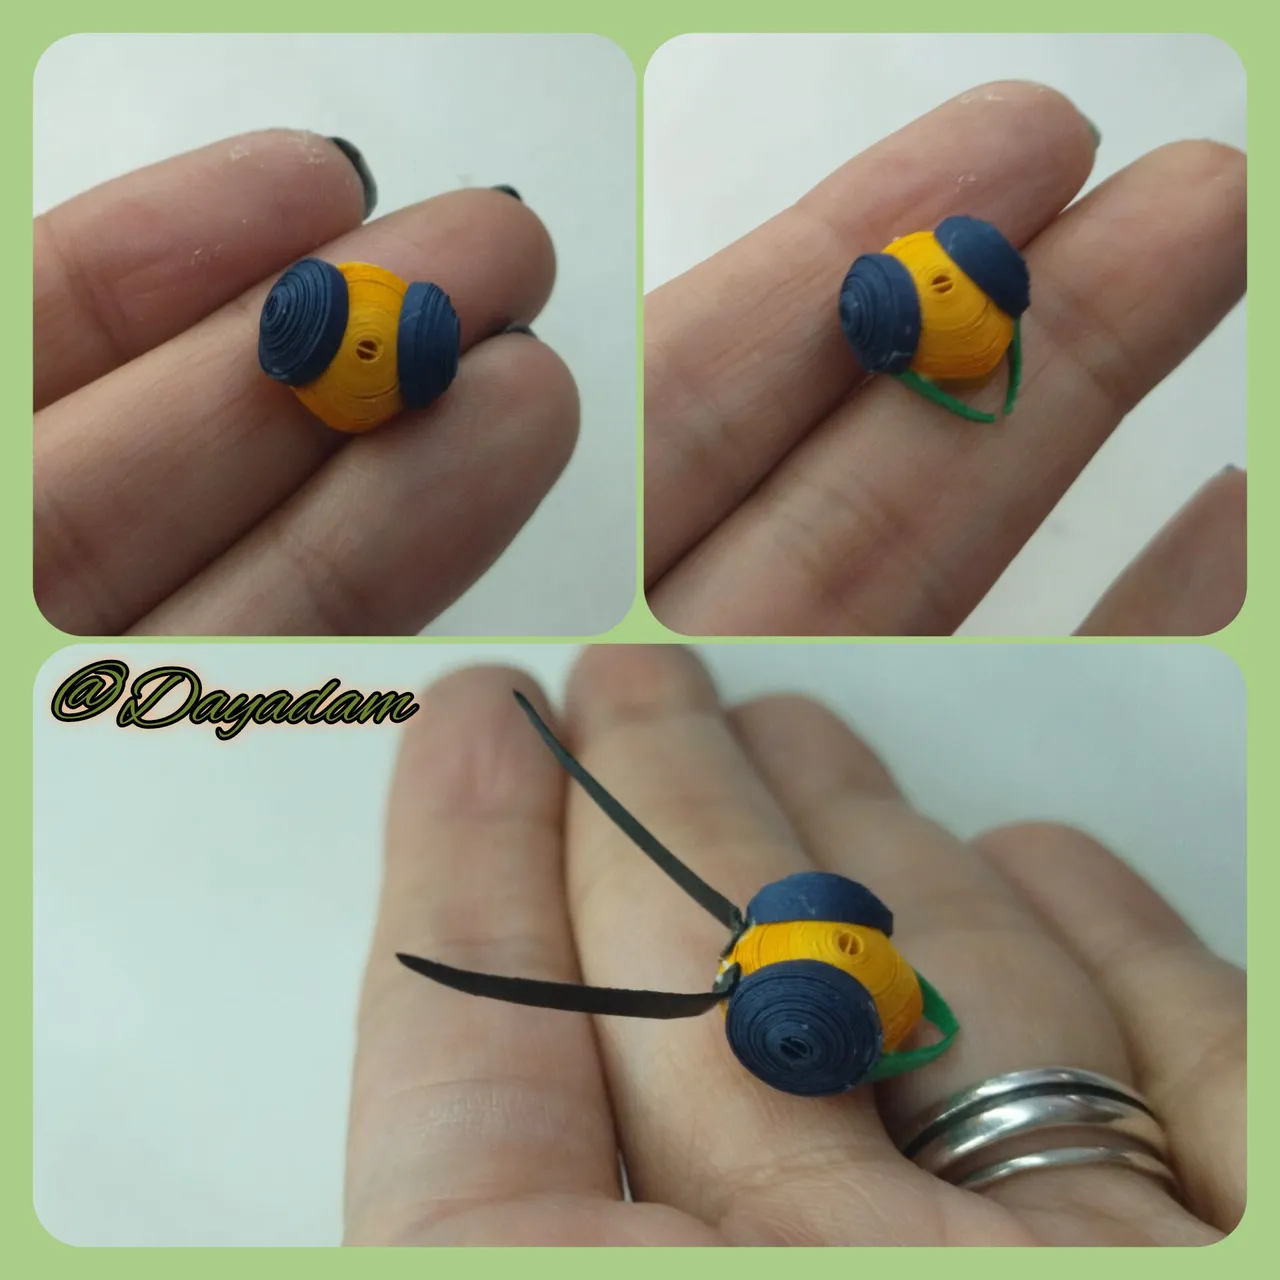
- To make the bee's stinger, we will make a closed circle with 3mm wide dark blue ribbon, which we will push out with an embosser, bending the tip to one side. Glue it to the bottom of the bee's body.
- Let's go with the head, for this we will take a 2mm wide yellow tape, we will make a closed circle which we will mold in the template for circles in the measure number 12.5mm.
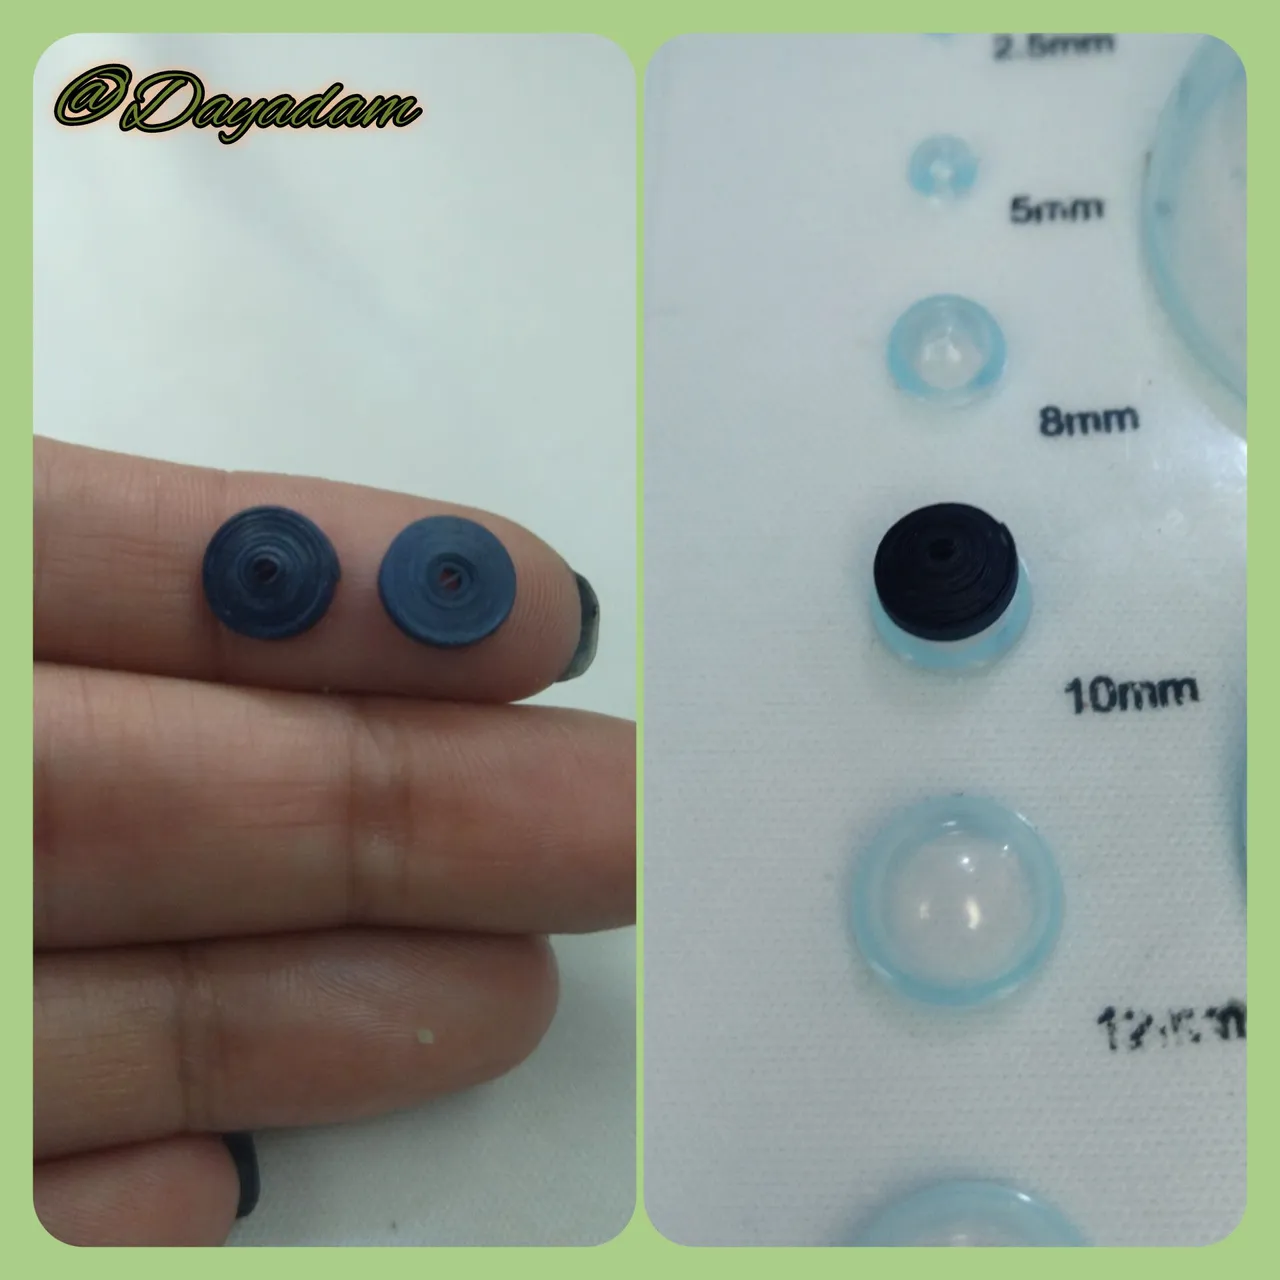
- We will carry out the eyes making 2 closed circles of dark blue color, and we will mold in the template in the measure 10mm.
• Para realizar las rayas de la abeja tome varios trozos de cartulina marrón, realice picos con la tijera y pegue alrededor de la pieza amarilla mas alargada.
• Listas las 2 piezas las uniremos con pega.
• Para hacer el aguijón de la abeja, realizaremos con cinta azul oscuro de 3mm de ancho un circulo cerrado el cual empujaremos hacia afuera con un repujador doblando la punta hacia un lado. Pegaremos en la parte de abajo del cuerpo de la abeja.
• Vamos con la cabeza, para esta tomaremos cinta de color amarillo tostado de 2mm de ancho, realizaremos un circulo cerrado el cual moldearemos en la plantilla para círculos en la medida numero 12.5mm.
• Llevaremos a cabo los ojos haciendo 2 círculos cerrados de color azul oscuro, y moldearemos en la plantilla en la medida 10mm.

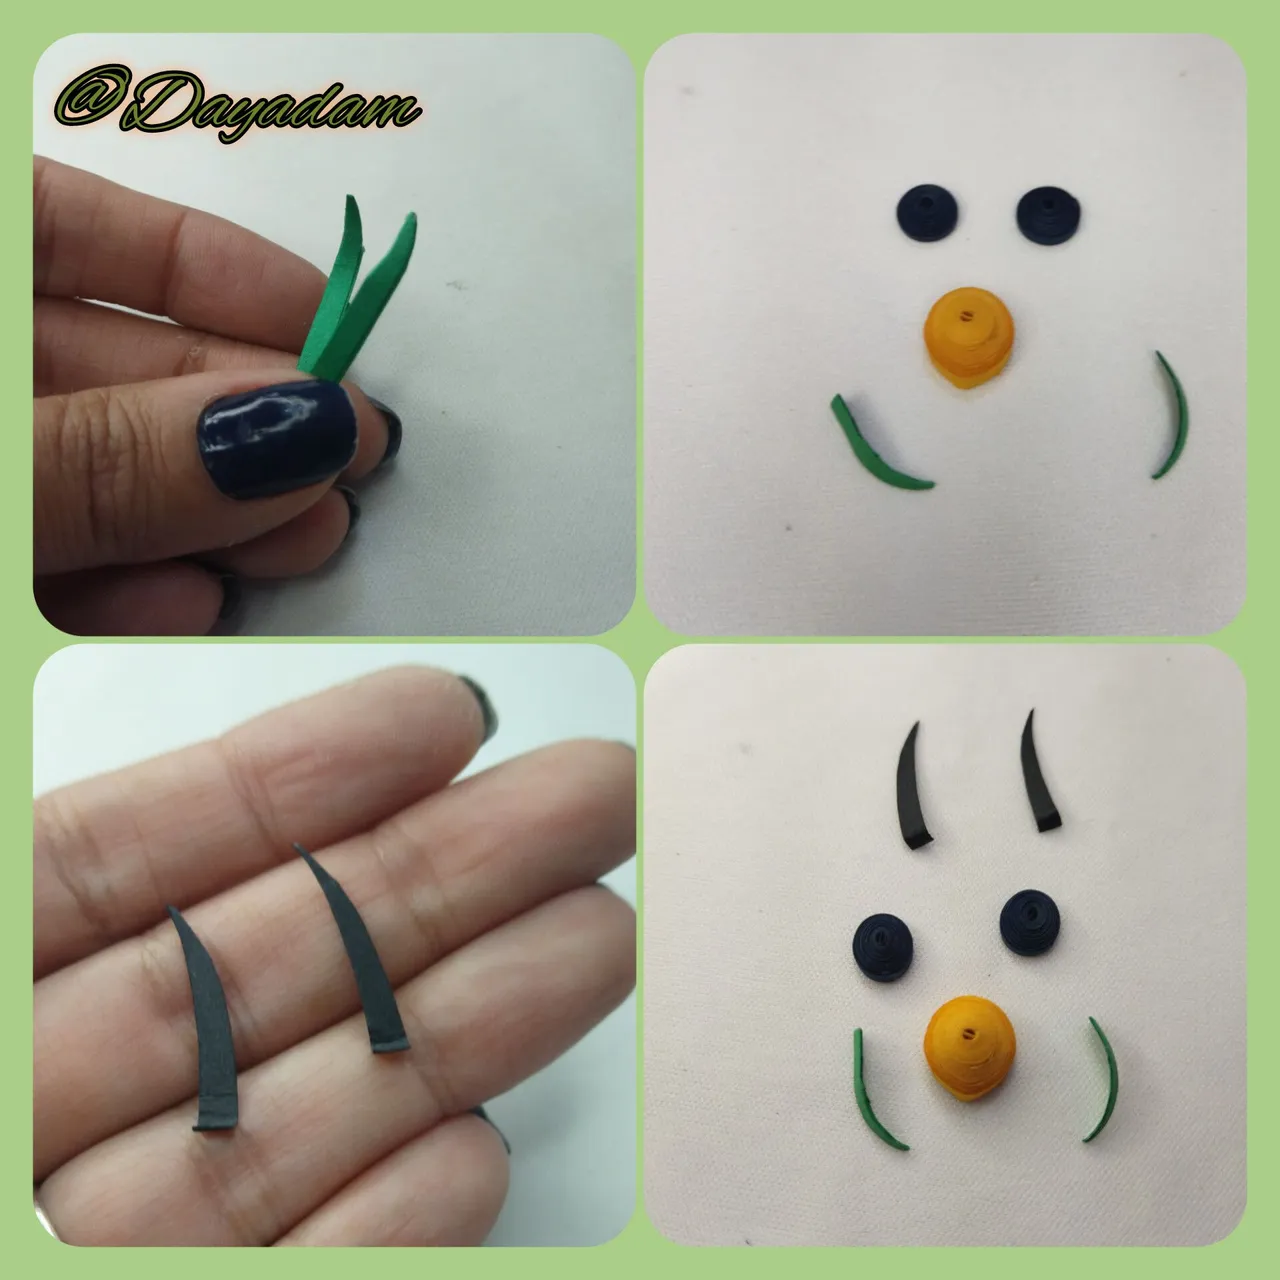
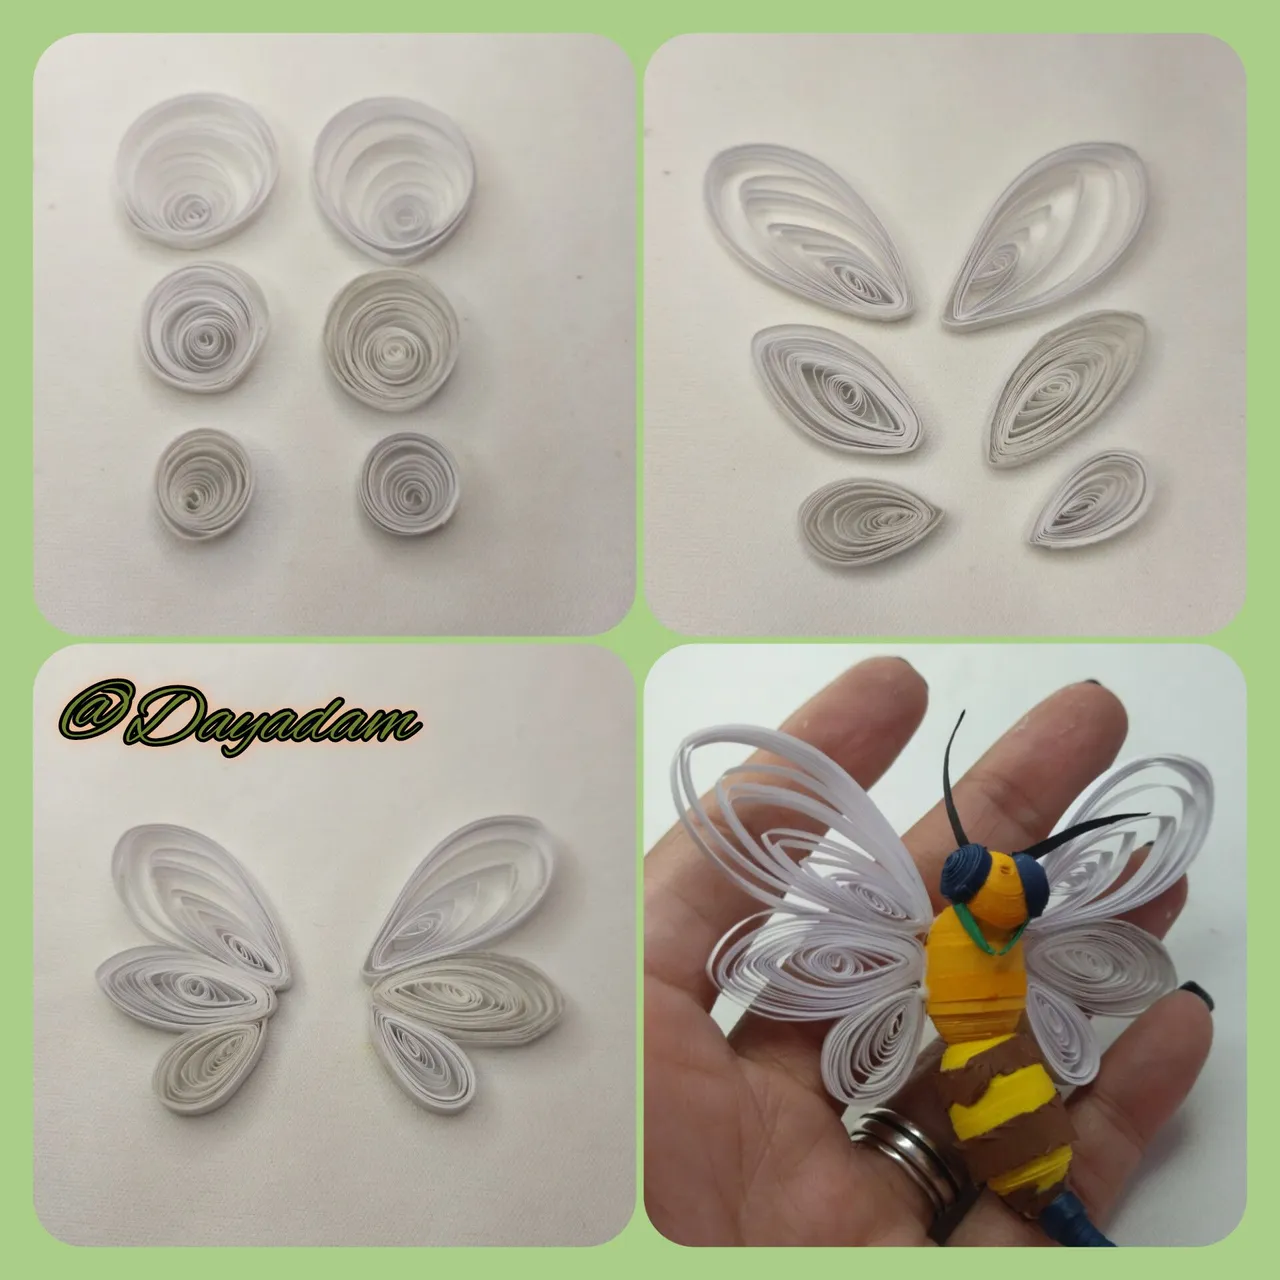
- For the antennae and the front part of the bee's face we will cut out the appropriate figure from a piece of black and green quilling respectively.
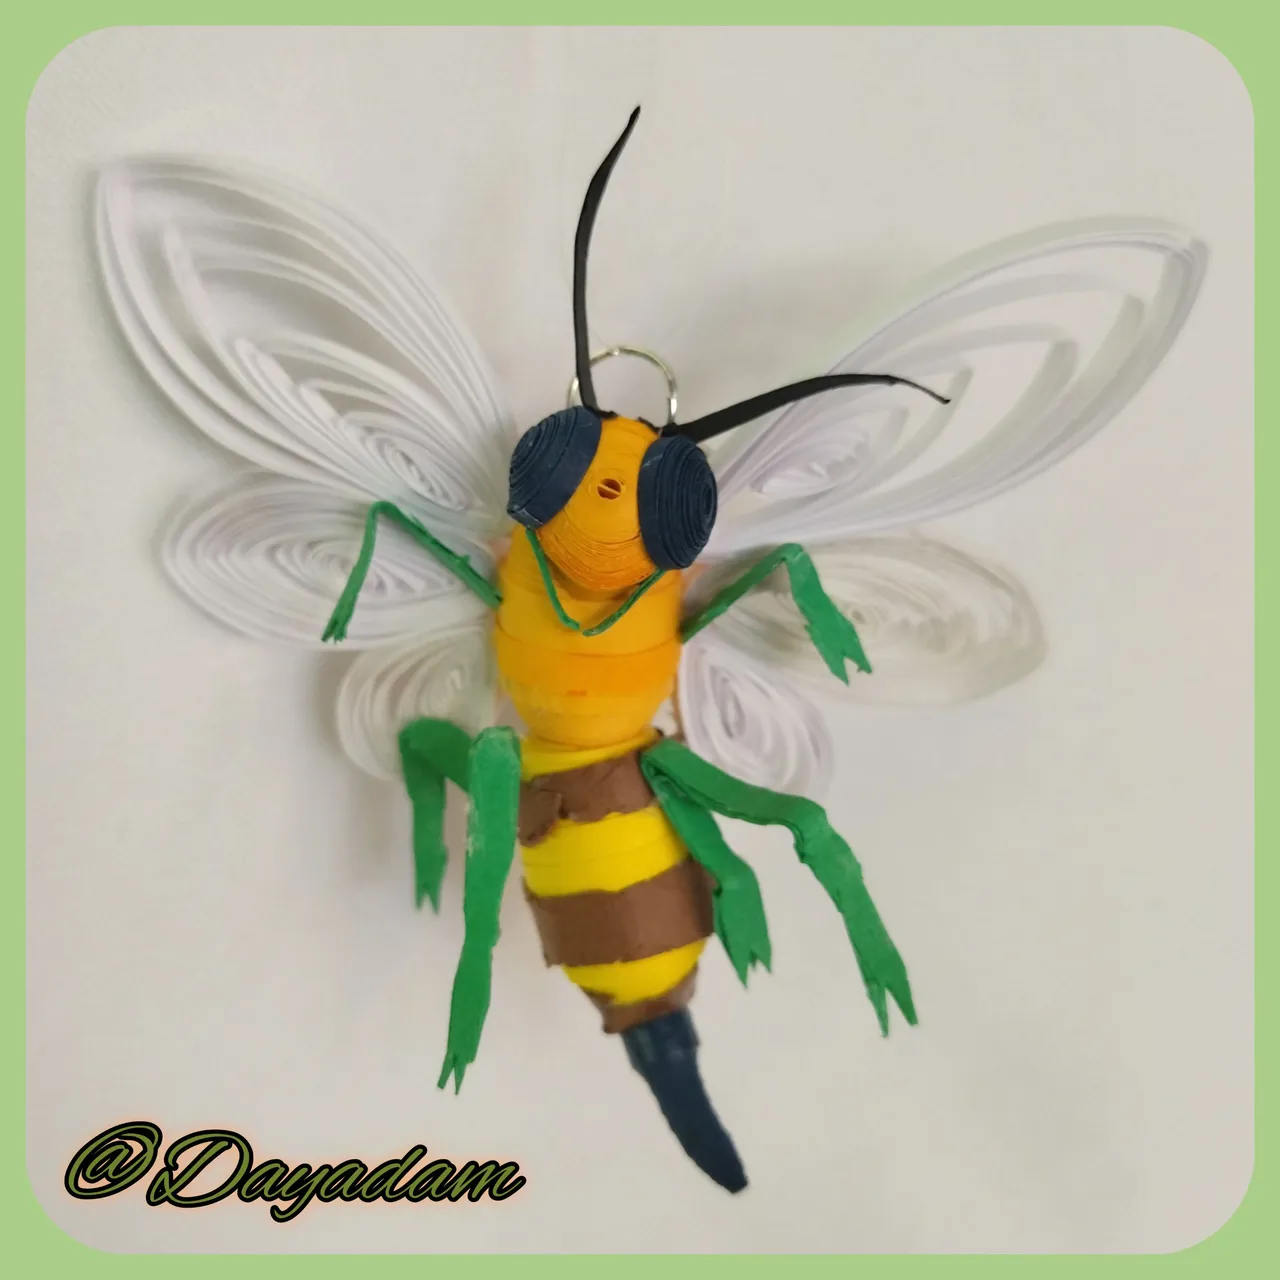
- We will take all the pieces that we made for the face of the bee, and we will glue them in the place that corresponds as you can see in the images, once assembled we will glue the bee's body.
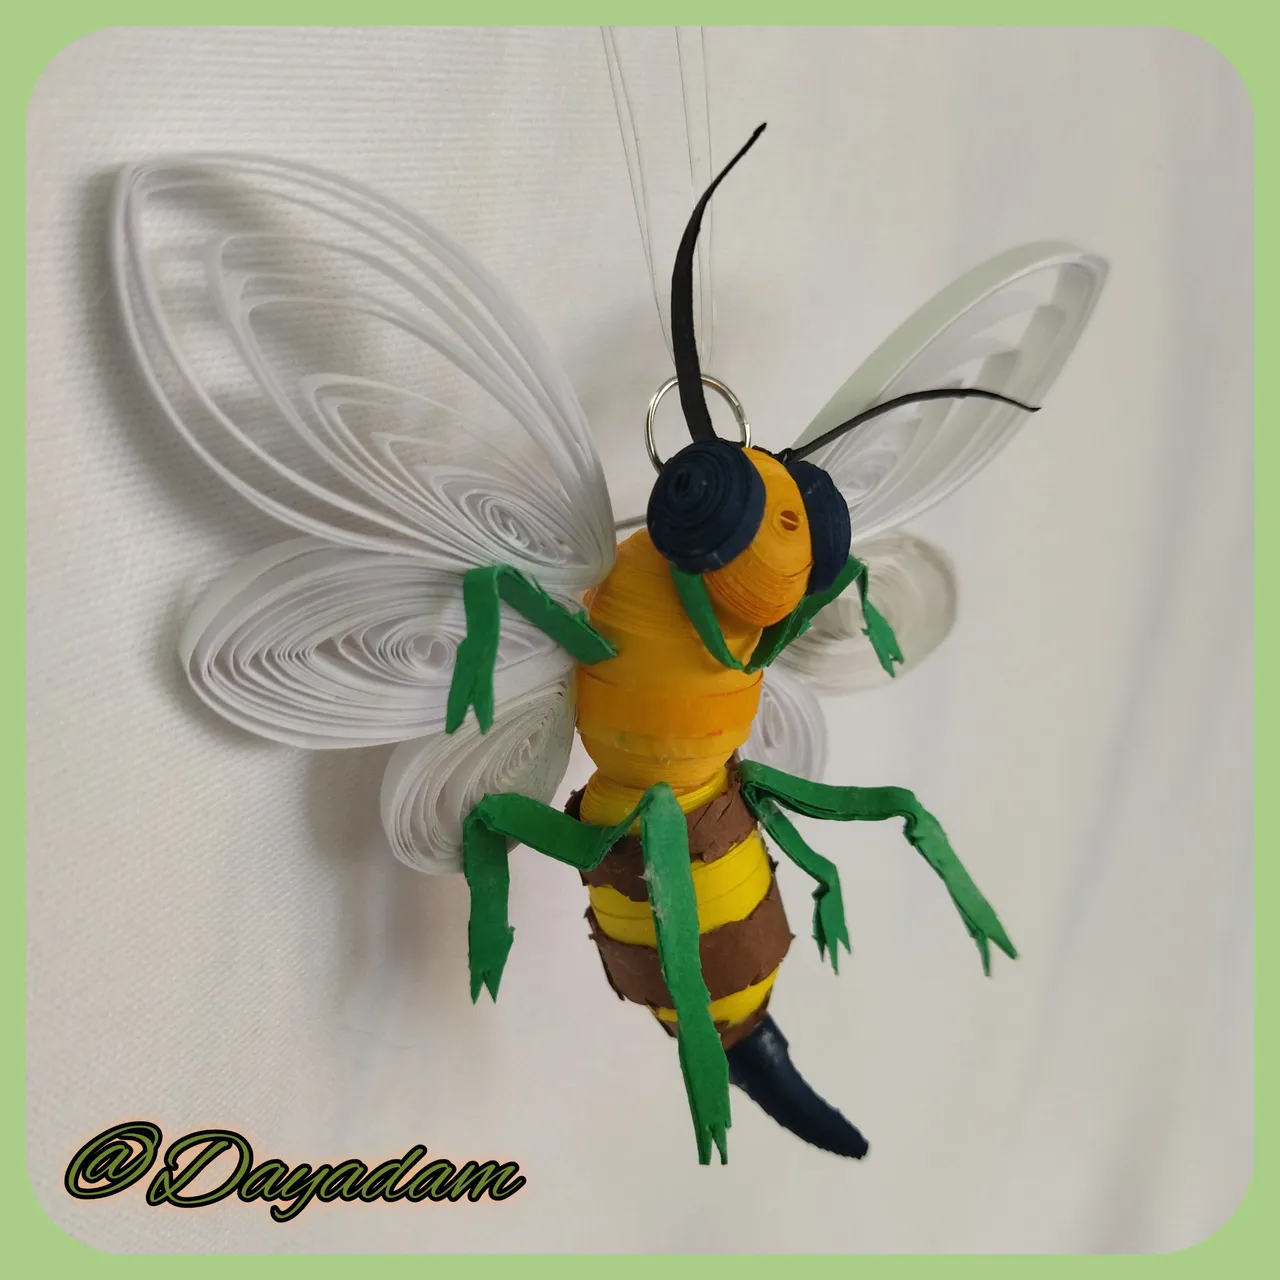
- To make the wings we will proceed to elaborate 6 open circles of different sizes, in scale from bigger to smaller, 2 by 2, ready we will mold them in the shape of a drop and we will join them in groups of three, we will glue them to the sides of the bee's body.
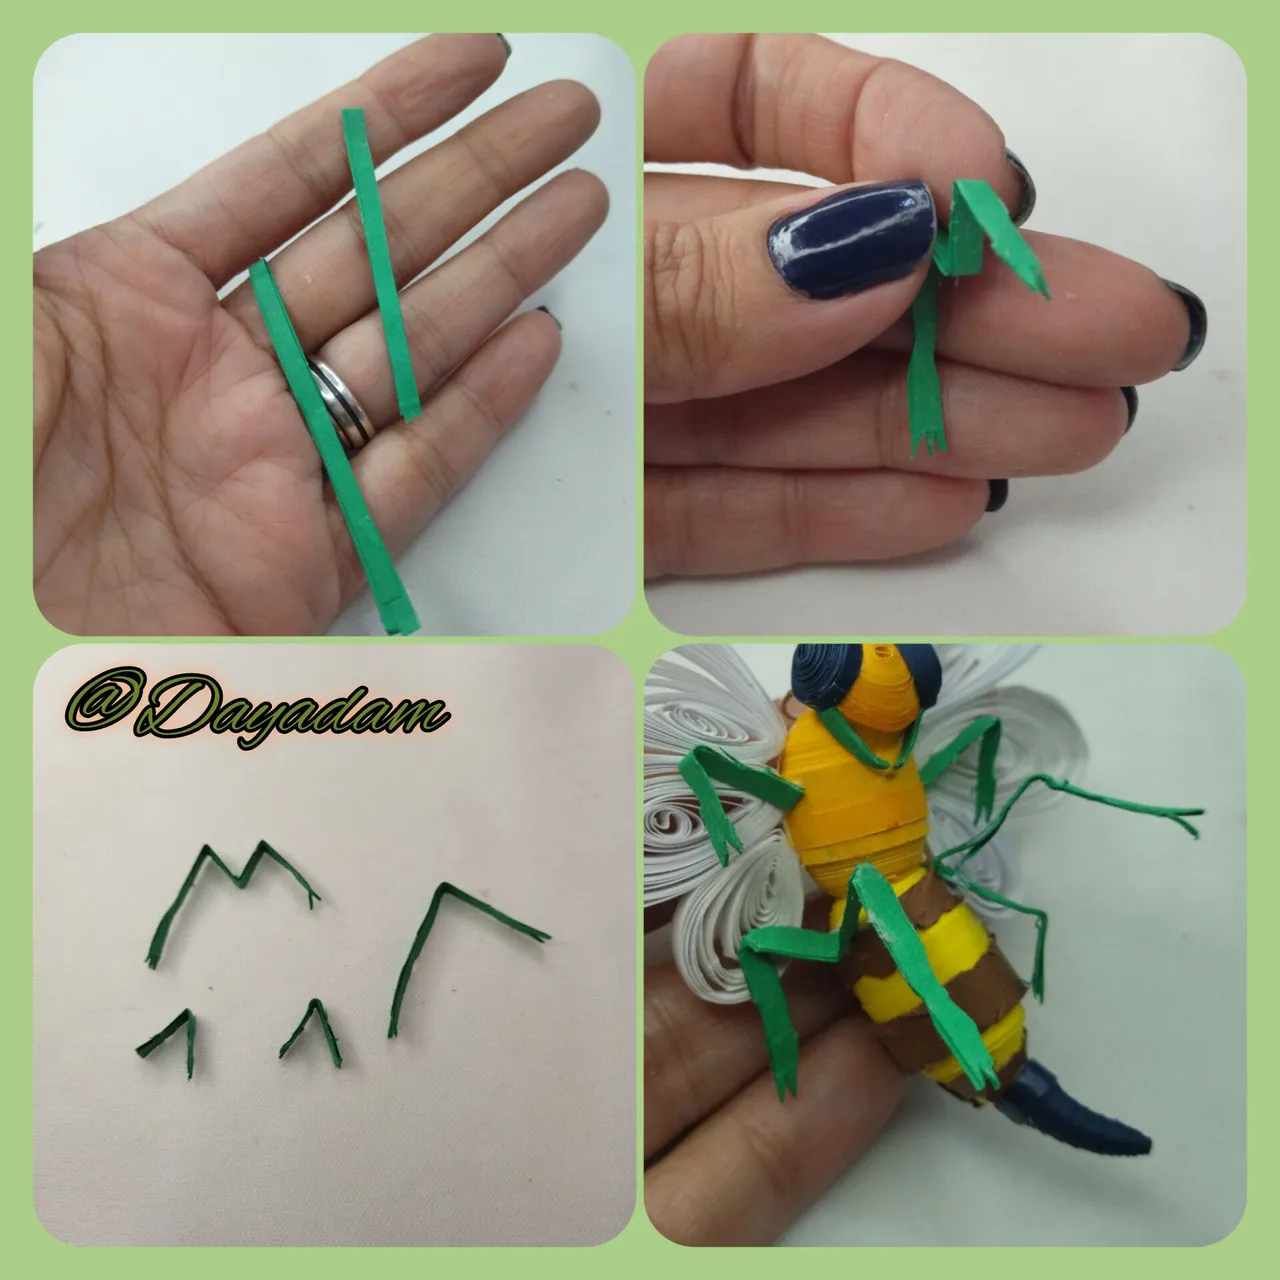
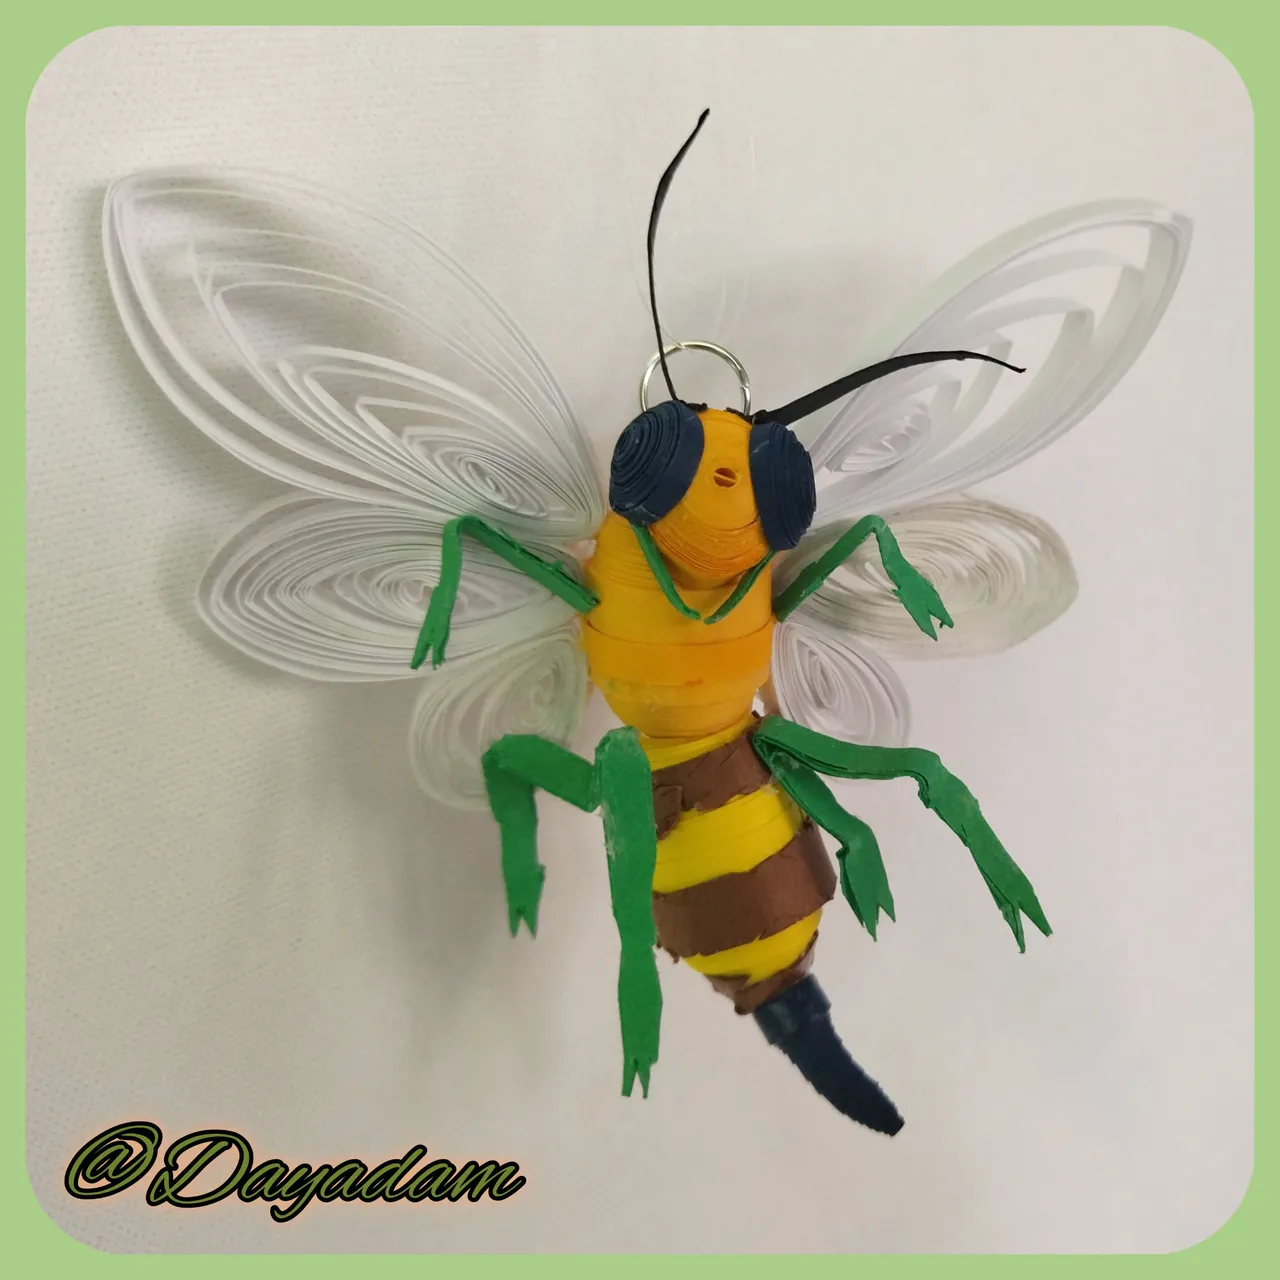
- Finally we will make the legs of the bee, cutting and making the respective folds with green tape, we will glue where it corresponds.
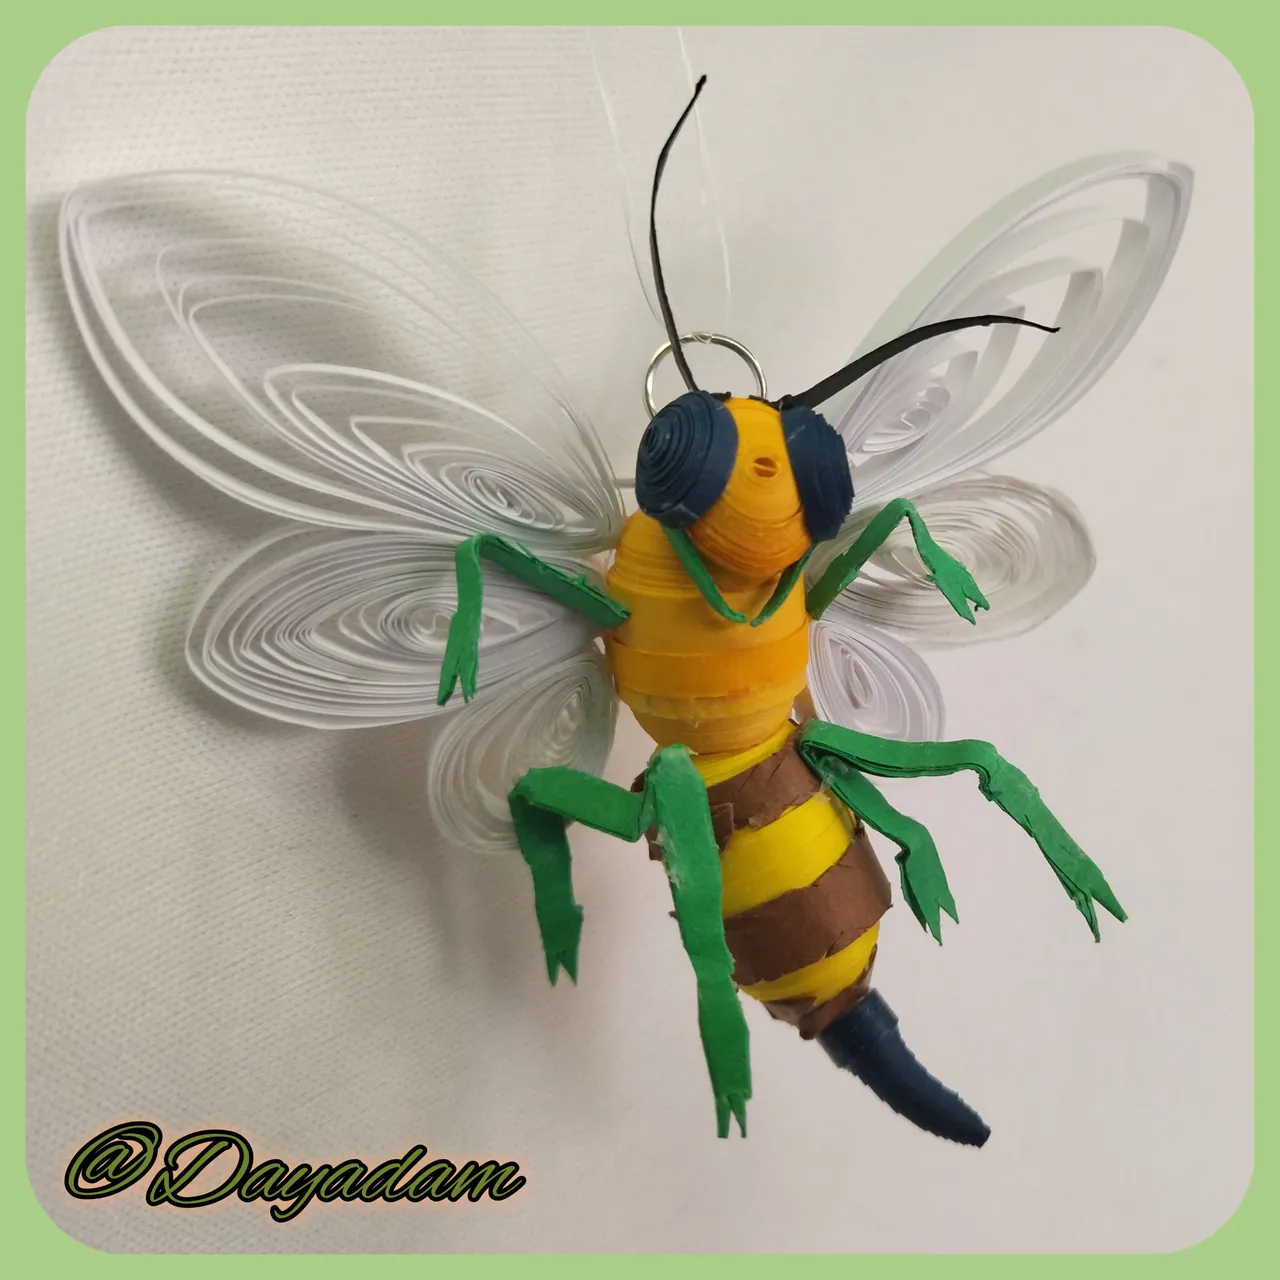
- In this way we have ready this 3D pendant that materializes inspired in the letter, "Nectar Queen ”.
• Para las antenas y parte delantera de la cara de la abeja recortaremos la figura adecuada de un trozo de quilling negro y verde respectivamente.
• Tomaremos todas las piezas que elaboramos para la cara de la abeja, y las pegaremos en el sitio que corresponde tal como pueden ver en las imágenes, una vez ensamblada la pegaremos del curpo de la abeja.
• Para realizar las alas procederemos a elaborar 6 círculos abiertos de diversos tamaños, en escala de mayor a menos, de 2 en 2, listos los mismos los moldearemos en forma de gota y los uniremos en grupos de tres, pegaremos a los lados del cuerpo de la abeja.
• Para finalizar realizaremos las patas de la abeja, recortando y haciendo los respectivos dobleces con cinta verde, pegaremos donde corresponde.
• De esta manera tenemos listo este colgante en 3D que materialice inspirada en la carta, "Nectar Queen".


What did you think, did you like it?
I hope you did, I hope you liked my explanation, procedure and photos, I made them with love for you.
"Let out that muse that inspires you, and let your imagination fly".
Thank you all, see you next time.
¿Que les pareció, les gustó?
Espero que sí, que les haya gustado mi explicación, procedimiento y fotos, los hice con mucho cariño por y para ustedes.
"Deja salir esa musa que te inspira, y deja volar tu imaginación".
Gracias a todos, nos vemos en la próxima.
