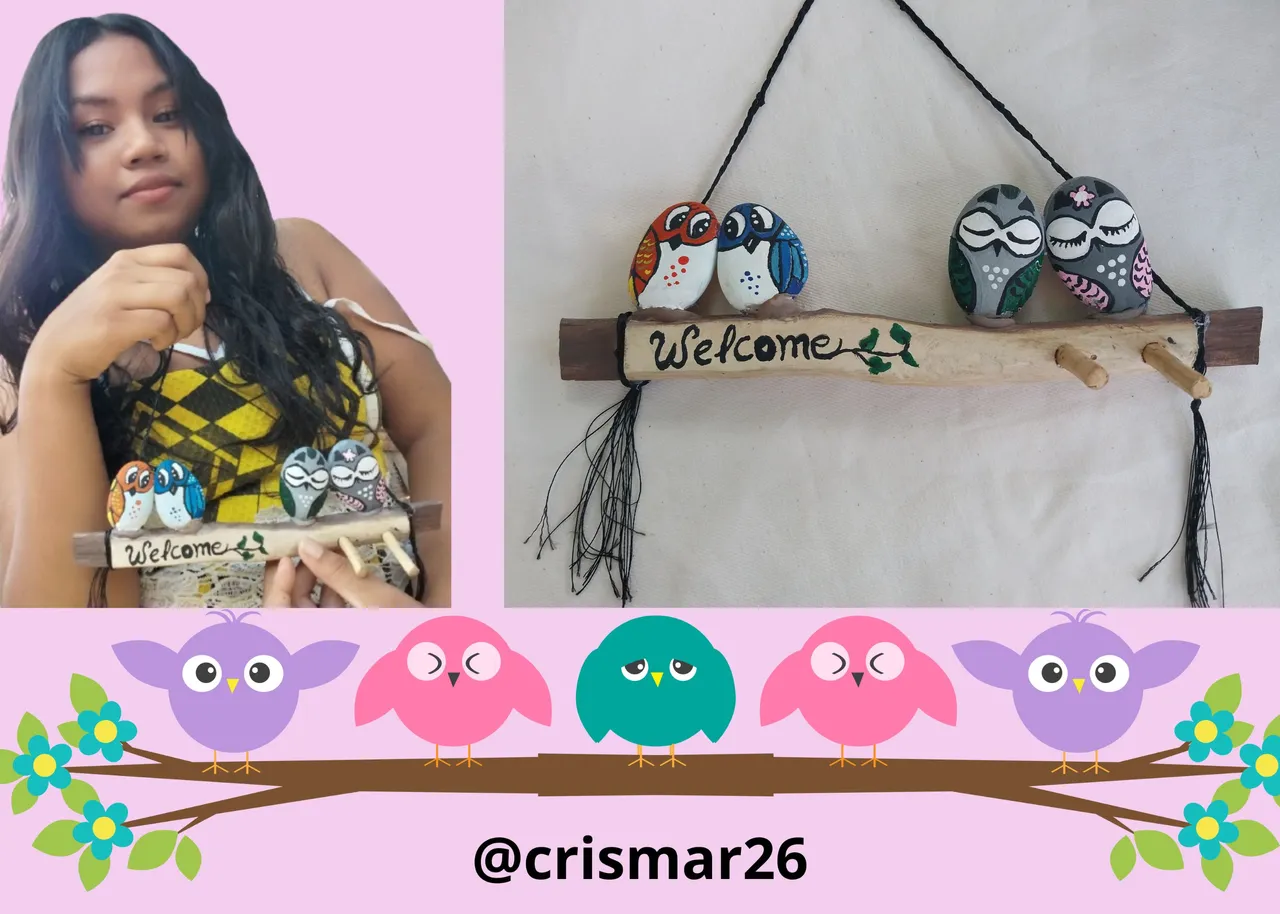
Hello friends of Hive. My name is Angelica Tocuyo I am from Anzoategui. And I am a girl who loves the art of creating. I was able to get to Hive thanks to Lice known on this platform as @divergente1.
Little by little these days she has taught me a little bit what Hive means, how to use it and above all we have focused on how to create the posts, although I still have many doubts because Hive is a bit complex, I am very happy and I hope little by little to grow and develop my ideas in Hive.
One of those ideas that I want to share is this nice Organizer that I created from a branch and using stones. Sometimes I have some strange ideas combining certain materials, but I like it because I can improvise and at the same time have a nice result.
Materials.
- A branch
- 4 stones
- silicon
- Cold paints
- Brushes
- Thread
- nail
- small sticks
- white glue
Step by Step
1
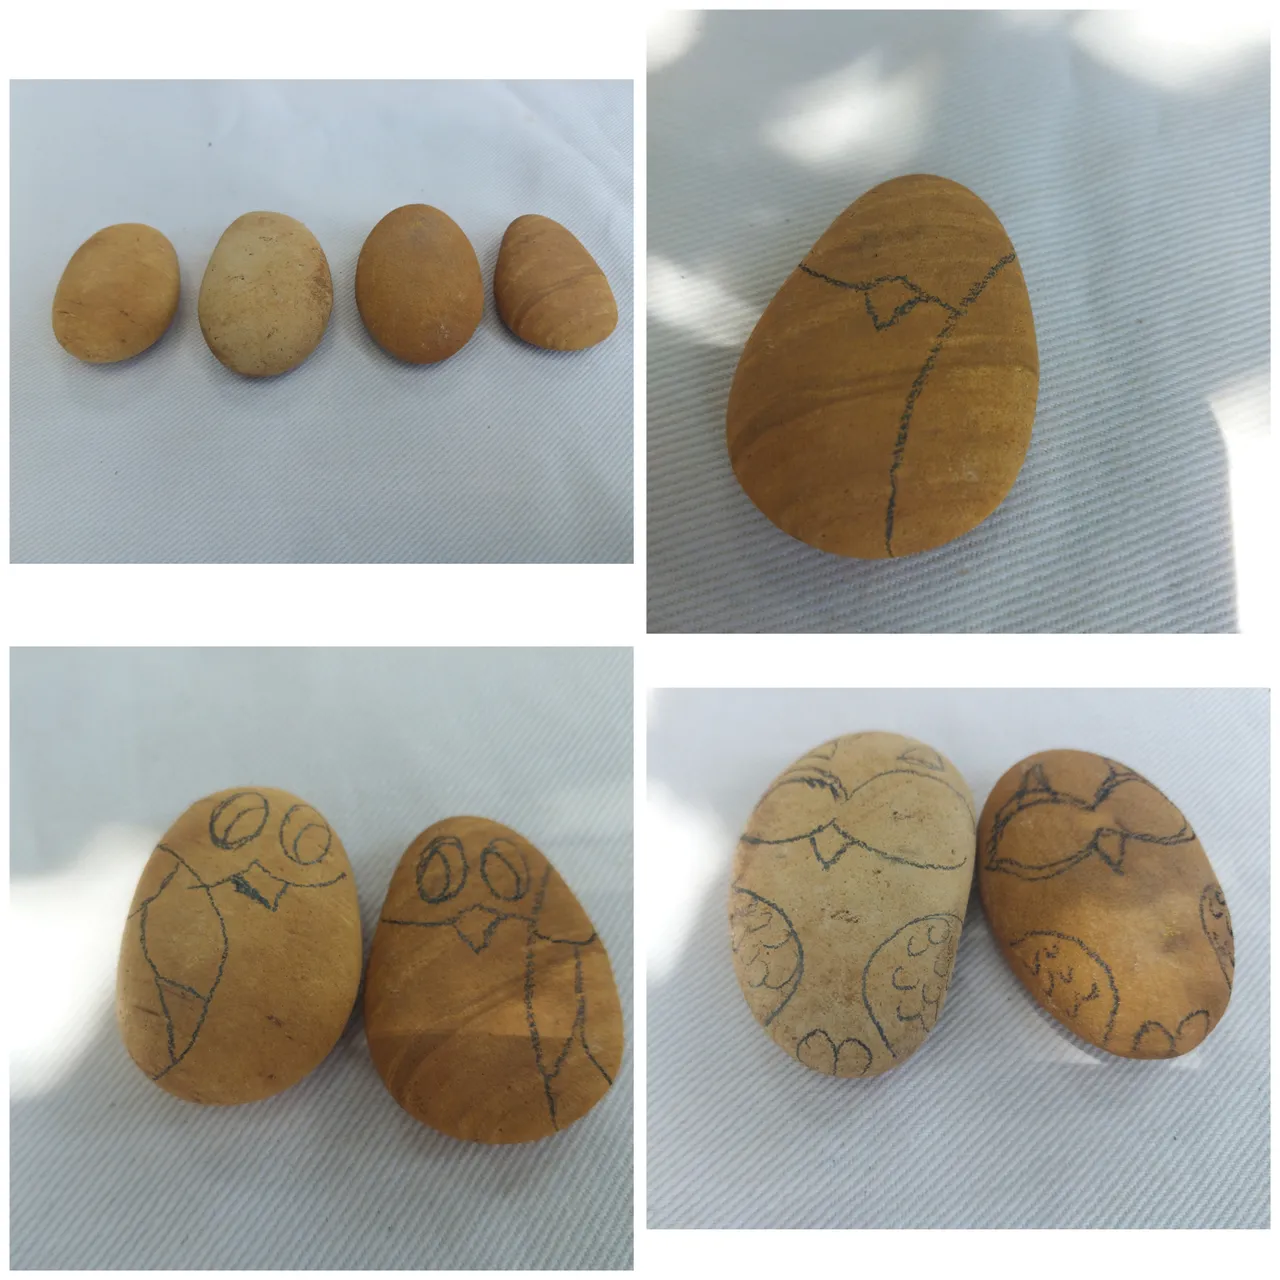
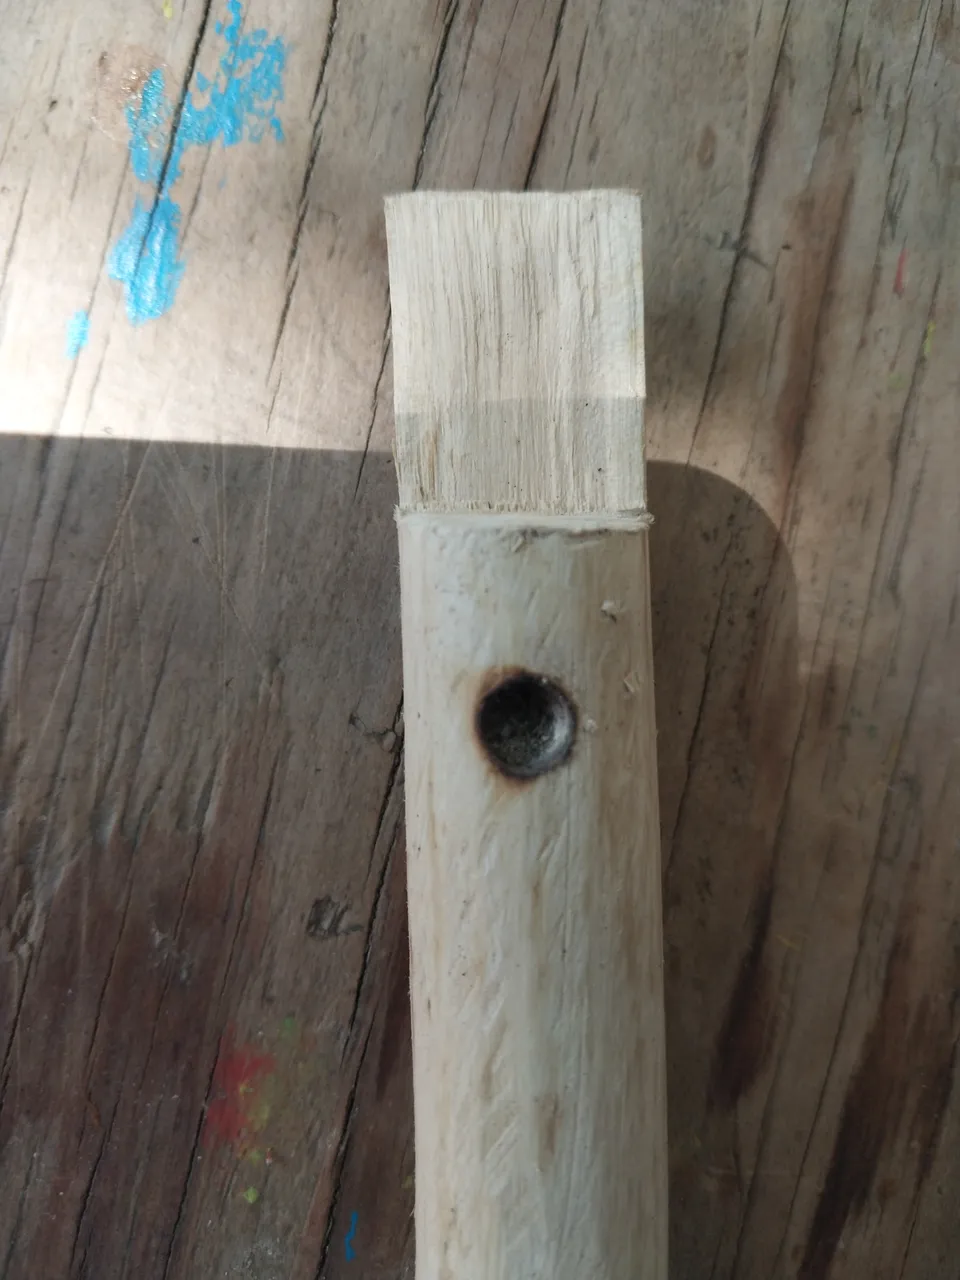
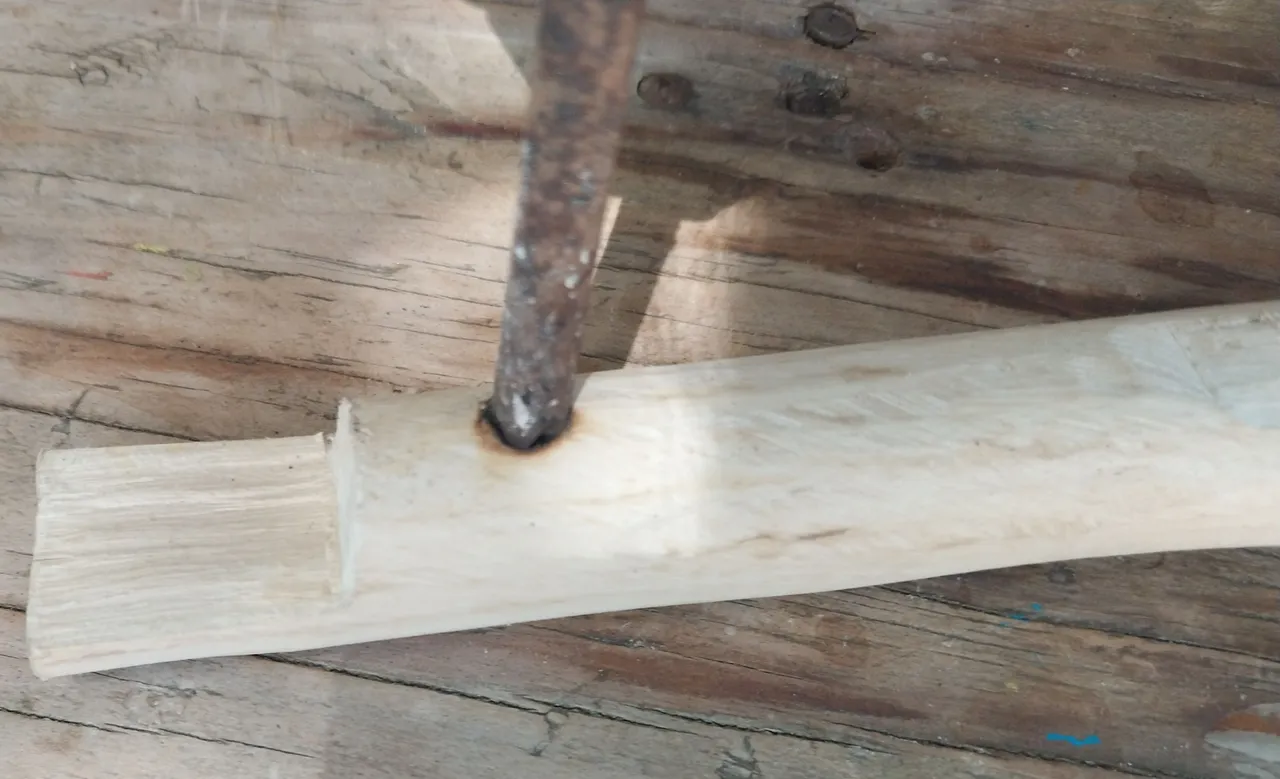
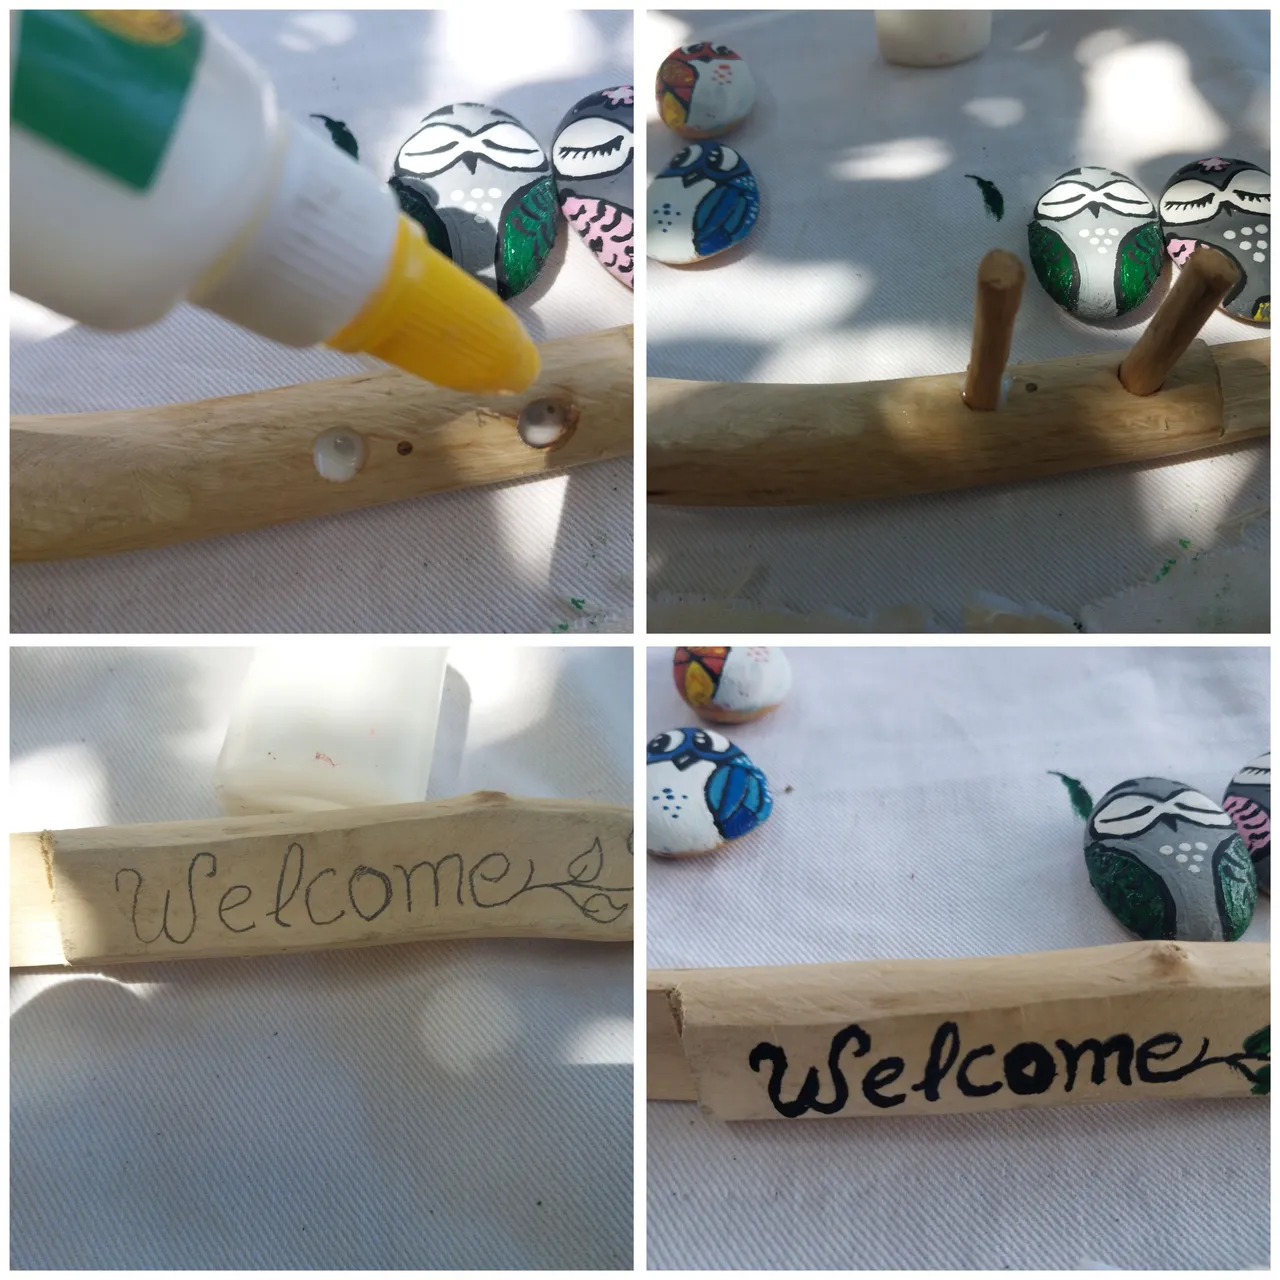
We start by drawing the stones, with the help of the pencil I make the basic shape of a bird its eyes and wings.
I also make two owls. And it remains a pair of two birds and two owls.
2
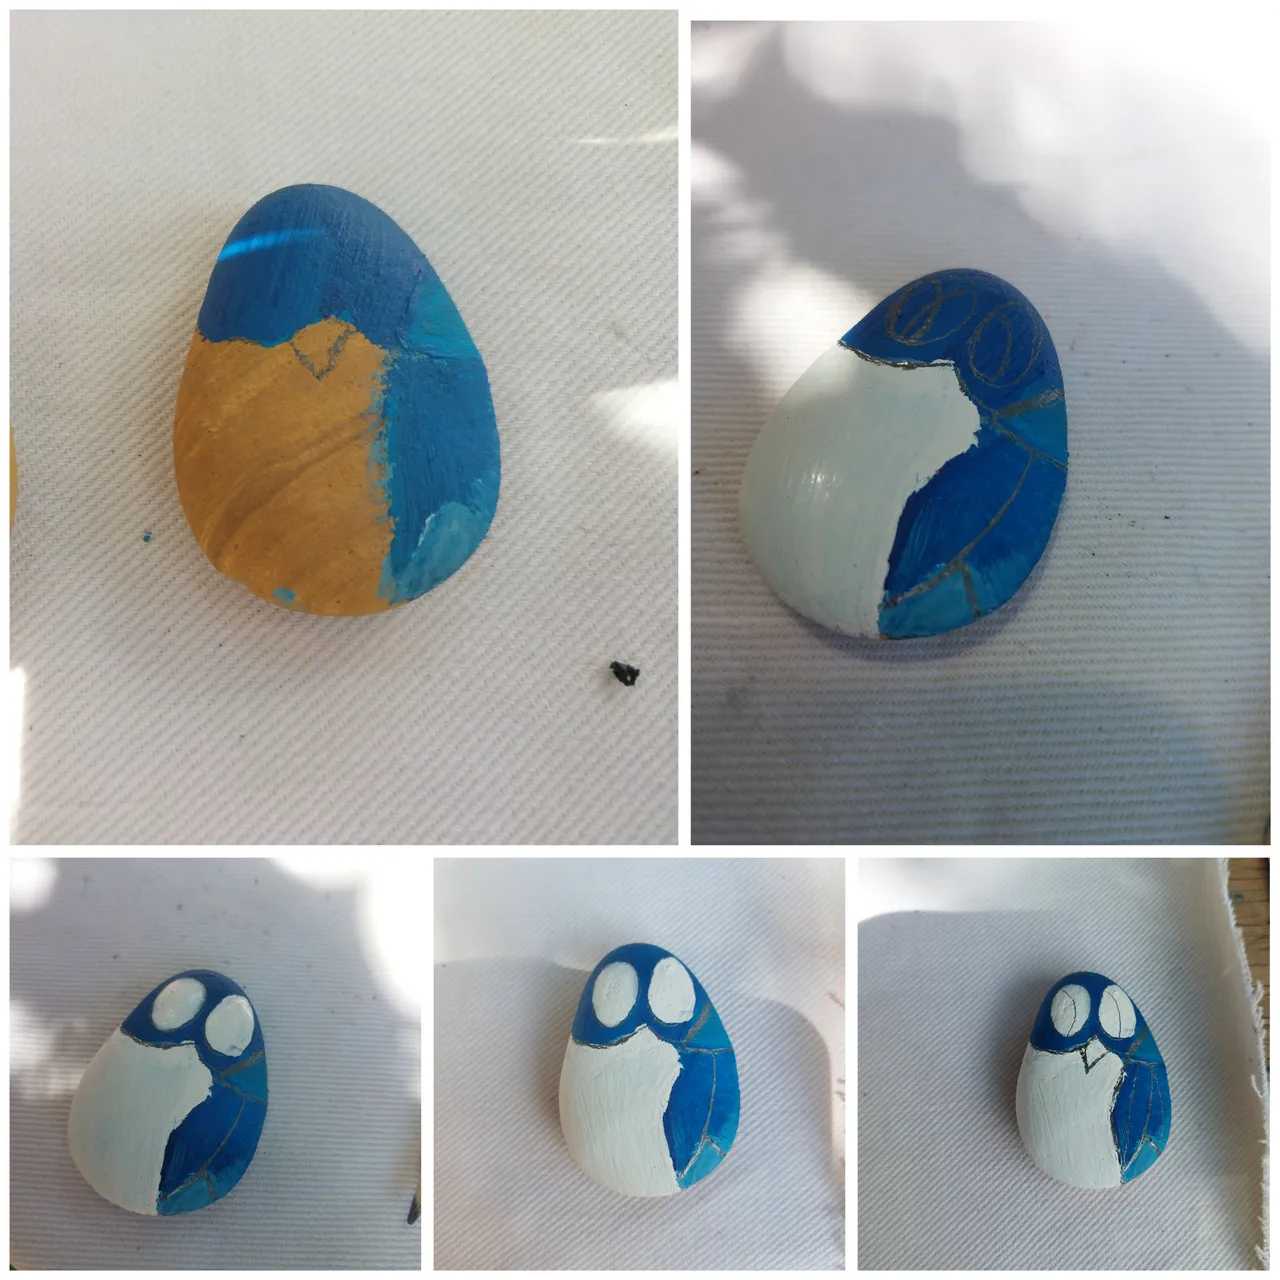
I proceed to paint with the blue color the face and wings of the bird. Leaving the belly to paint it in white, I also mark the wings, the eyes and the pencil with the pencil.
3
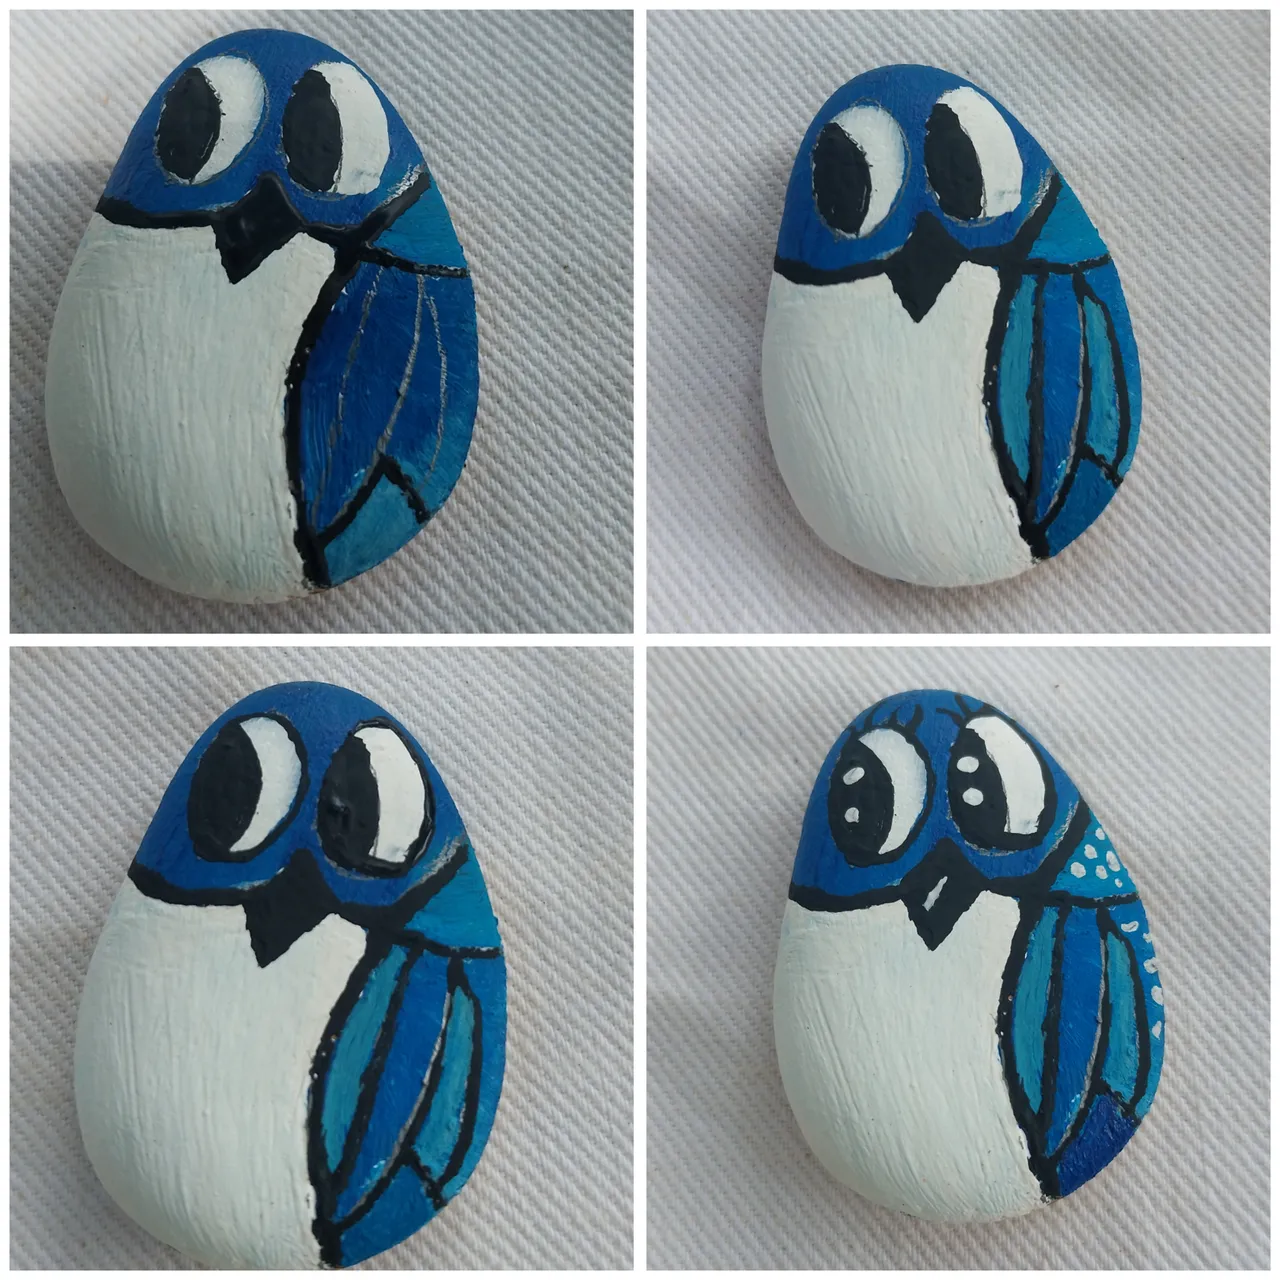
Then we paint the eyes black and with the black paint we draw the lines of the wings. We also paint white the inner part of the eye.
4
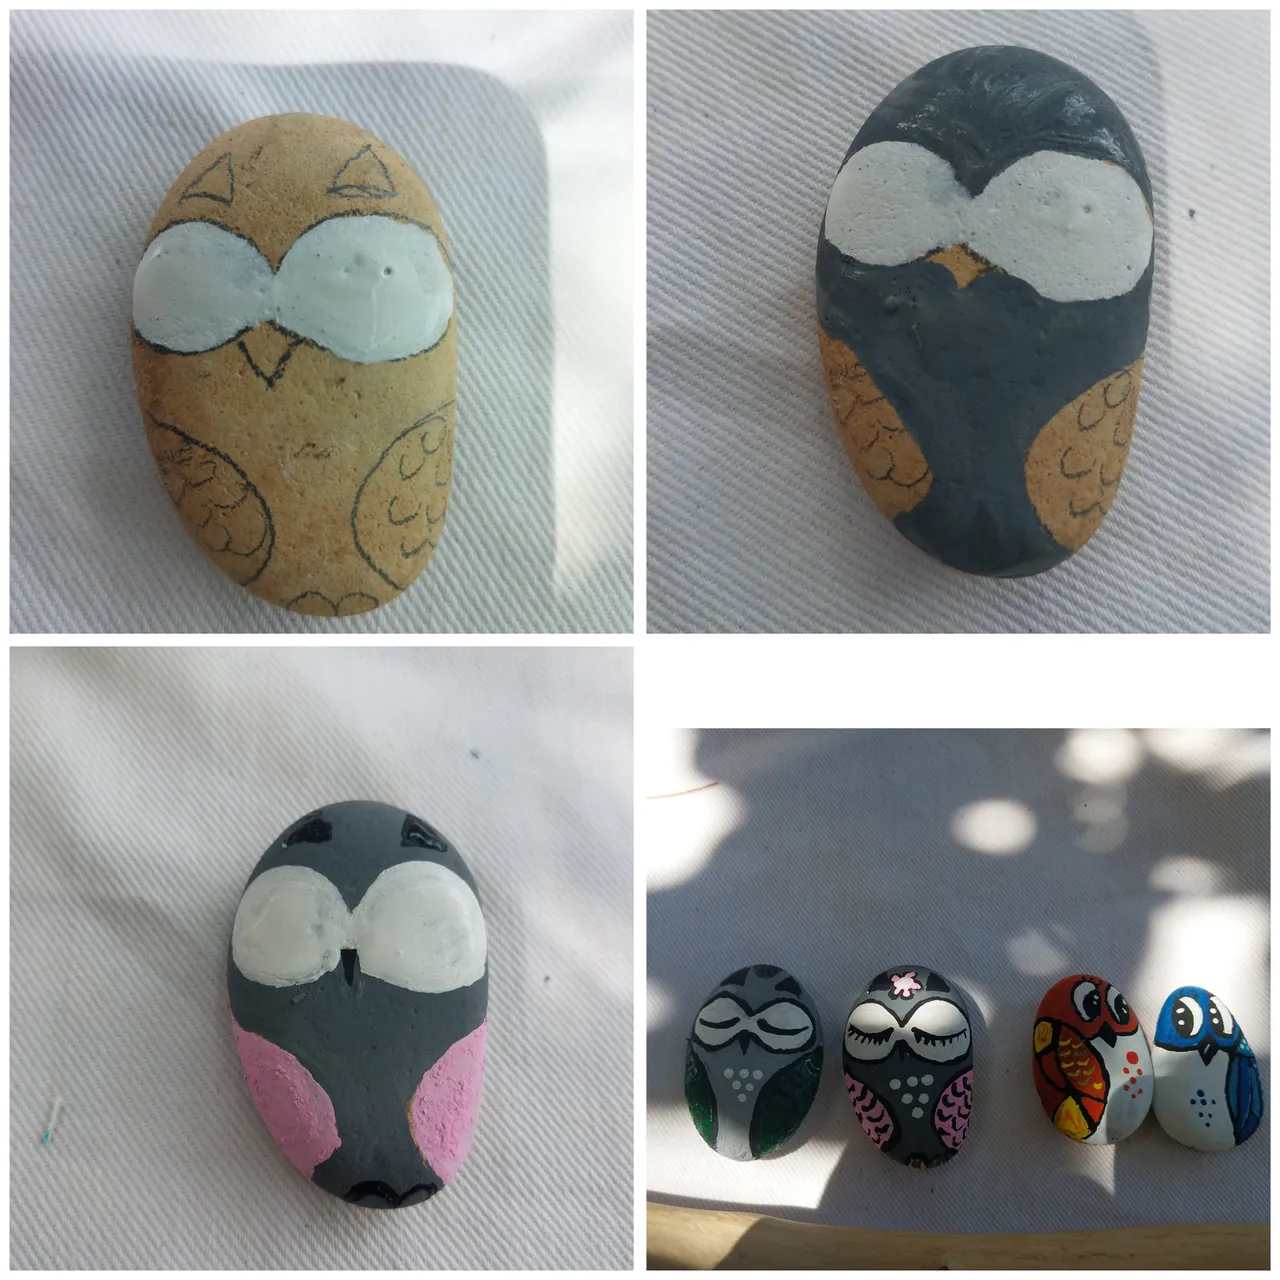
Then we paint the owl, for this we paint the body in gray and the wings in pink. We paint in white the circular eyes and we pass a line to simulate that the eyes are closed.
We draw their partners in a similar way but we can change the colors of the wings.
This is what I have done
Then I take the branch and mark and make a concavity in the wood and two holes using a hot screwdriver. Here my dad helped me.
5
In the two holes I add white glue and then the two small sticks by pressing them together.
6
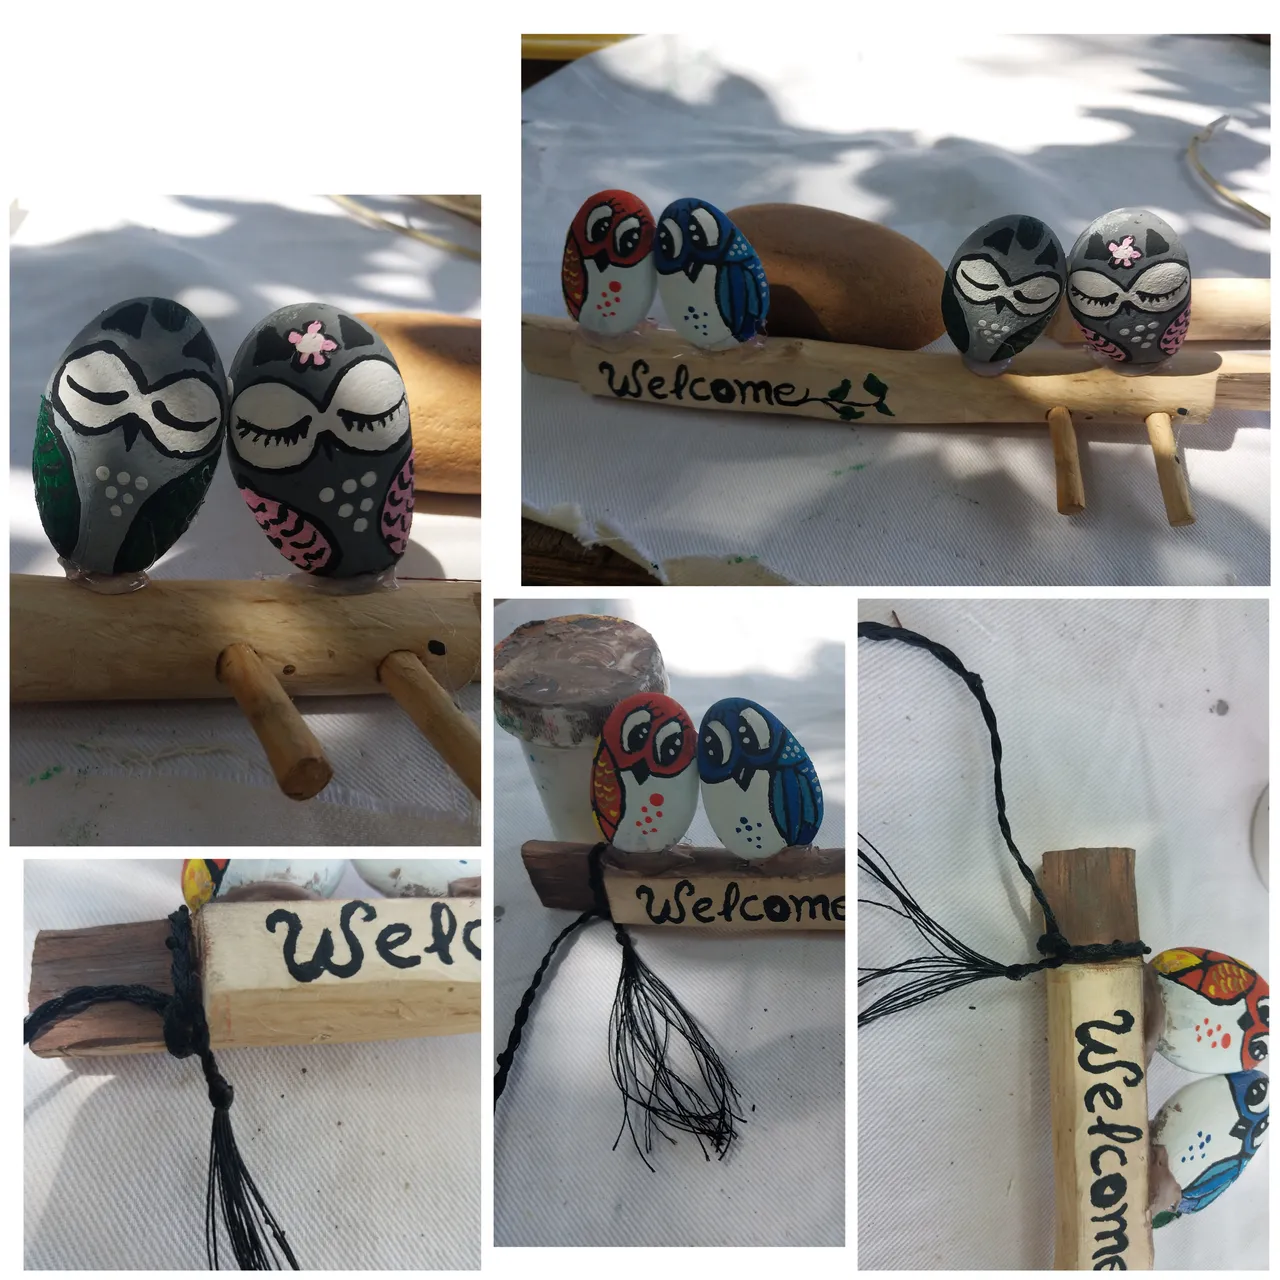
Then we must glue the stones in their pair form. And then at both ends we tie the string that we have made with thread.
7

I hope you like this process, thank you very much for your attention and also to the person who has been my onboarding @divergente1
Greetings
- Images belong to me
- Translator: Deepl Traslator
- Editing: Canva
Hola amigos de Hive. Mi nombre es Angélica Tocuyo soy de Anzoategui. Y soy una chica que le encanta el arte de crear. Pude llegar a Hive gracias a Lice conocida en esta plataforma como @divergente1.
Poco a poco estos días ella me ha enseñado un poco lo que significa Hive, como utilizarlo y sobre todo nos hemos enfocado en como crear los post, aunque aún tengo muchas dudas porque Hive es un poco complejo, estoy muy feliz y espero poco a poco ir creciendo y desarrollando mis ideas en Hive.
Una de esas ideas que quiero compartir es este bonito Organizador que he creado desde una rama y utilizando piedras. A veces tengo algunas ideas extrañas combinando ciertos materiales, pero me da gusto porque puedo improvisar y a la vez tener un bonito resultado.
Materiales.
- Una rama
- 4 piedras
- silicon
- Pinturas al frío
- Pinceles
- Hilo
- clavo
- palos pequeños
- pega blanca
Paso a Paso
1
Iniciamos dibujando las piedras, con la ayuda del lápiz hago la forma básica de un pájaro sus ojos y sus alas.
También hago dos búhos. Y queda una pareja de dos pájaros y dos búhos.
2
Procedo a pintar con el color azul la cara y las alas del pájaro. Dejando la barriga para pintarla de blanco, también se marca las alas los ojos y el pi o con el lapiz.
3
Después pintamos de negro los ojos y con la pintura negra trazamos las líneas de las alas. También pintamos de blanco la parte interna del ojo.
4
Luego pintamos el búho, para esto partamos el cuerpo de gris y las alas de rosado. Pintamos de blanco los ojos circulares y pasamos una línea para simular que están cerrados los ojos.
Dibujamos a sus parejas de forma parecida pero podemos cambiar los colores de las alas.
Eso es lo que he hecho
Luego tomo la rama y marco y hago una concavidad en la madera y dos huecos utilizando un destornillador caliente. Aquí me ha ayudado mi papá.
5
En los dos huecos agrego pega blanca y luego los dos palitos pequeños a presión.
6
Luego debemos pegar las piedras en su forma de pareja. Y luego en ambos extremo amarramos la cuerda que hemos hecho con hilo.
7
Espero que les guste este proceso, muchas gracias por su atención y también a la persona que ha sido mi onboarding @divergente1
Saludos amigos.
- Las imágenes me pertenecen
- Traductor: Deelp traslator
- Edicion: Canva