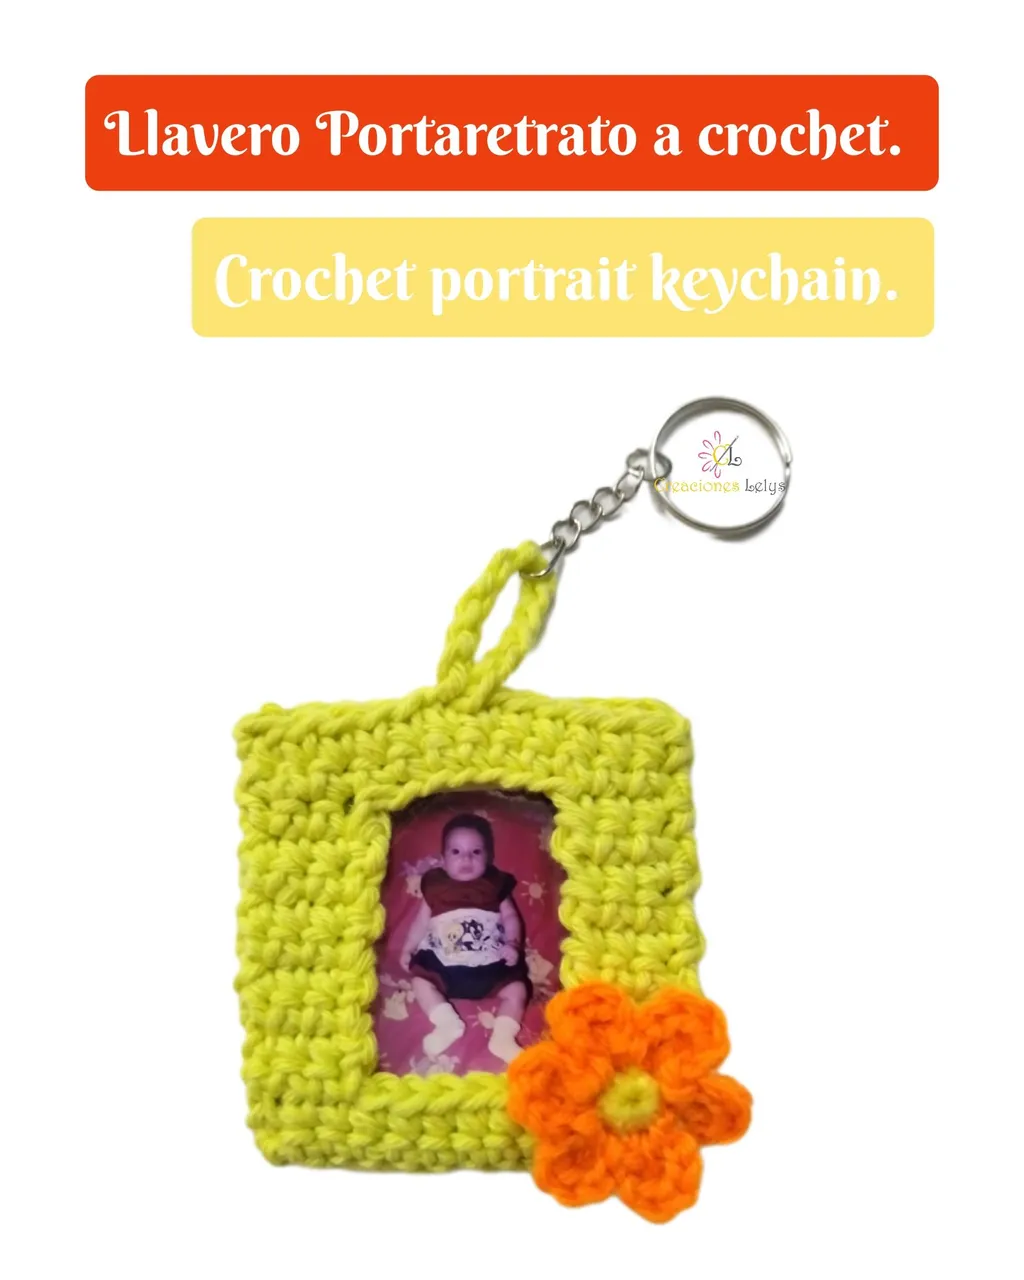
Hola amigos, espero que estén muy bien. El día de hoy quiero compartir con ustedes el proceso para la elaboración de un lindo portarretratos tejido a Crochet. Me parece que es un lindo presente para entregar a los invitados en un bautizo, comunión, cumpleaños o nacimiento. Sería un muy bonito recuerdo para llevar siempre con nosotros a los seres que amamos.
Hello friends, I hope you are doing well. Today I want to share with you the process for making a beautiful crochet picture frame. I think it is a nice present to give to the guests at a baptism, communion, birthday or birth. It would be a very nice souvenir to take always with us to the ones we love.
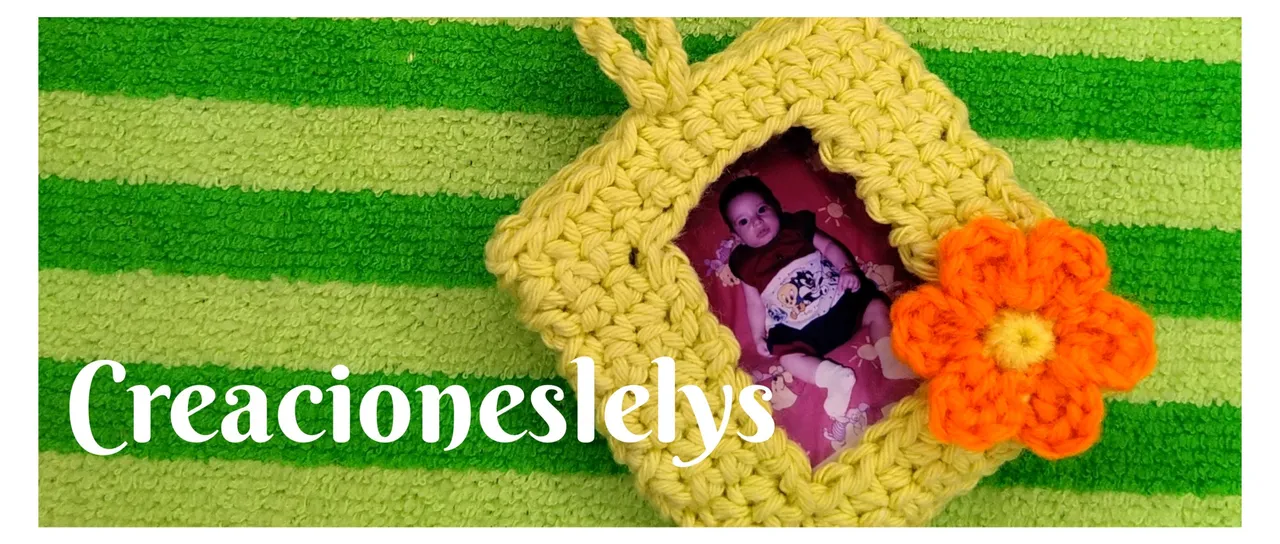
He estado haciendo algunos diseños para llaveros ya que al parecer es uno de los productos que más se venden en ferias y exposiciones artesanales. En realidad no tengo invitación ni planes próximos de asistir a alguno de esos eventos, pero siempre es bueno ir aprendiendo y estar preparado por si se presenta la ocasión. Es difícil vender este tipo de artesanía por el sector donde vivo, sin embargo sigo tejiendo porque me da mucha satisfacción, tranquilidad y calma. Además puedo compartir con ustedes y eso me motiva mucho.
I have been making some designs for keychains since it seems to be one of the most sold products in craft fairs and exhibitions. Actually I have no invitation or plans to attend any of these events, but it is always good to learn and be prepared in case the occasion arises. It is difficult to sell this type of handicraft because of the area where I live, however I continue weaving because it gives me a lot of satisfaction, tranquility and calm. Besides, I can share with you and that motivates me a lot.
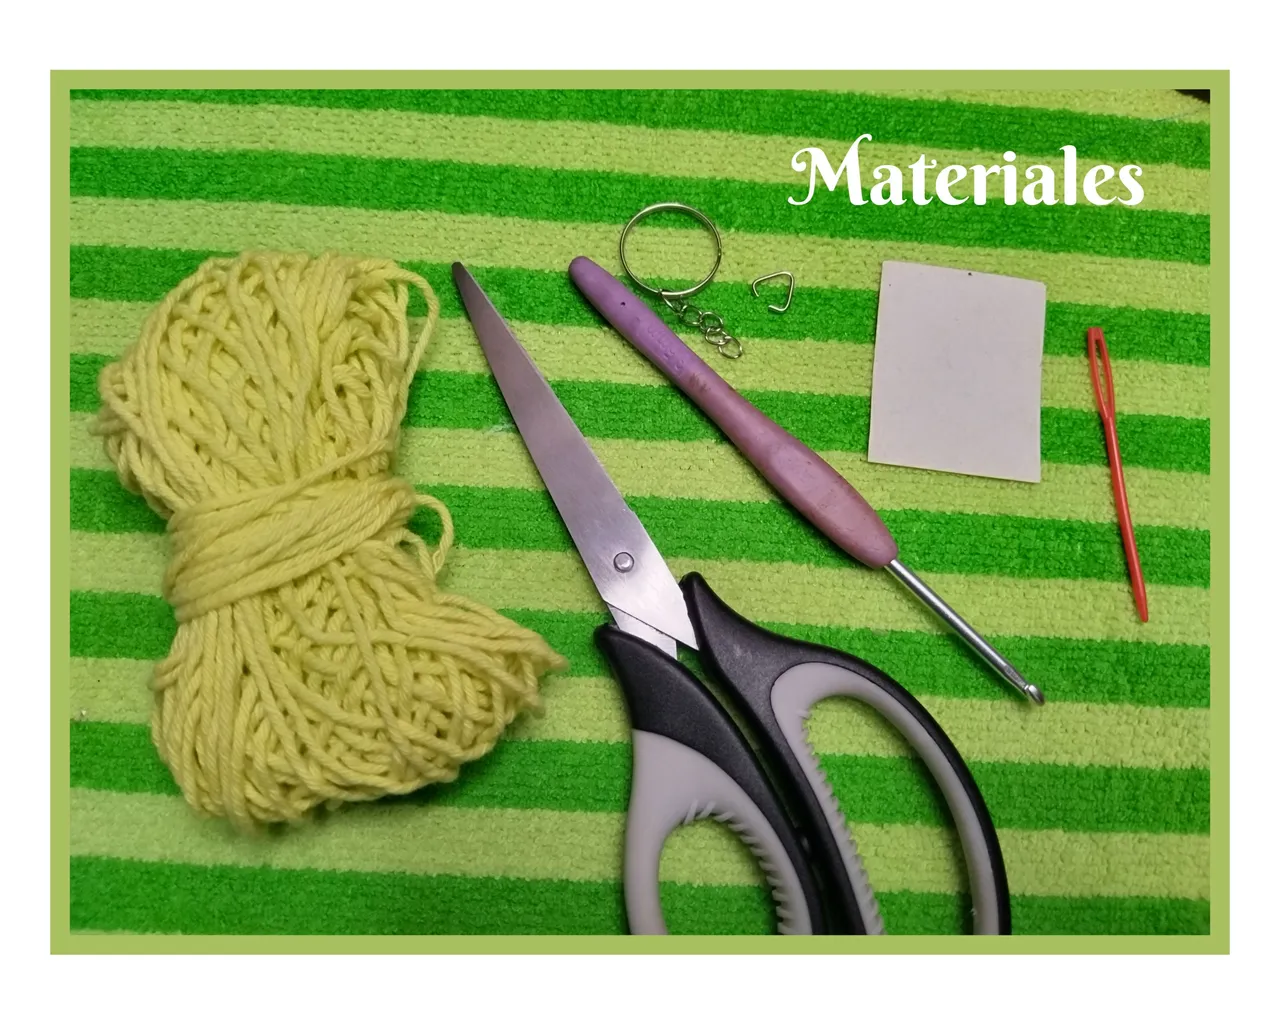
MATERIALES:
- Hilo de algodón de 3mm.
- Aguja de crochet de 3,5mm.
- Tijeras.
- Aguja lanera.
- Fotografía tamaño carnet.
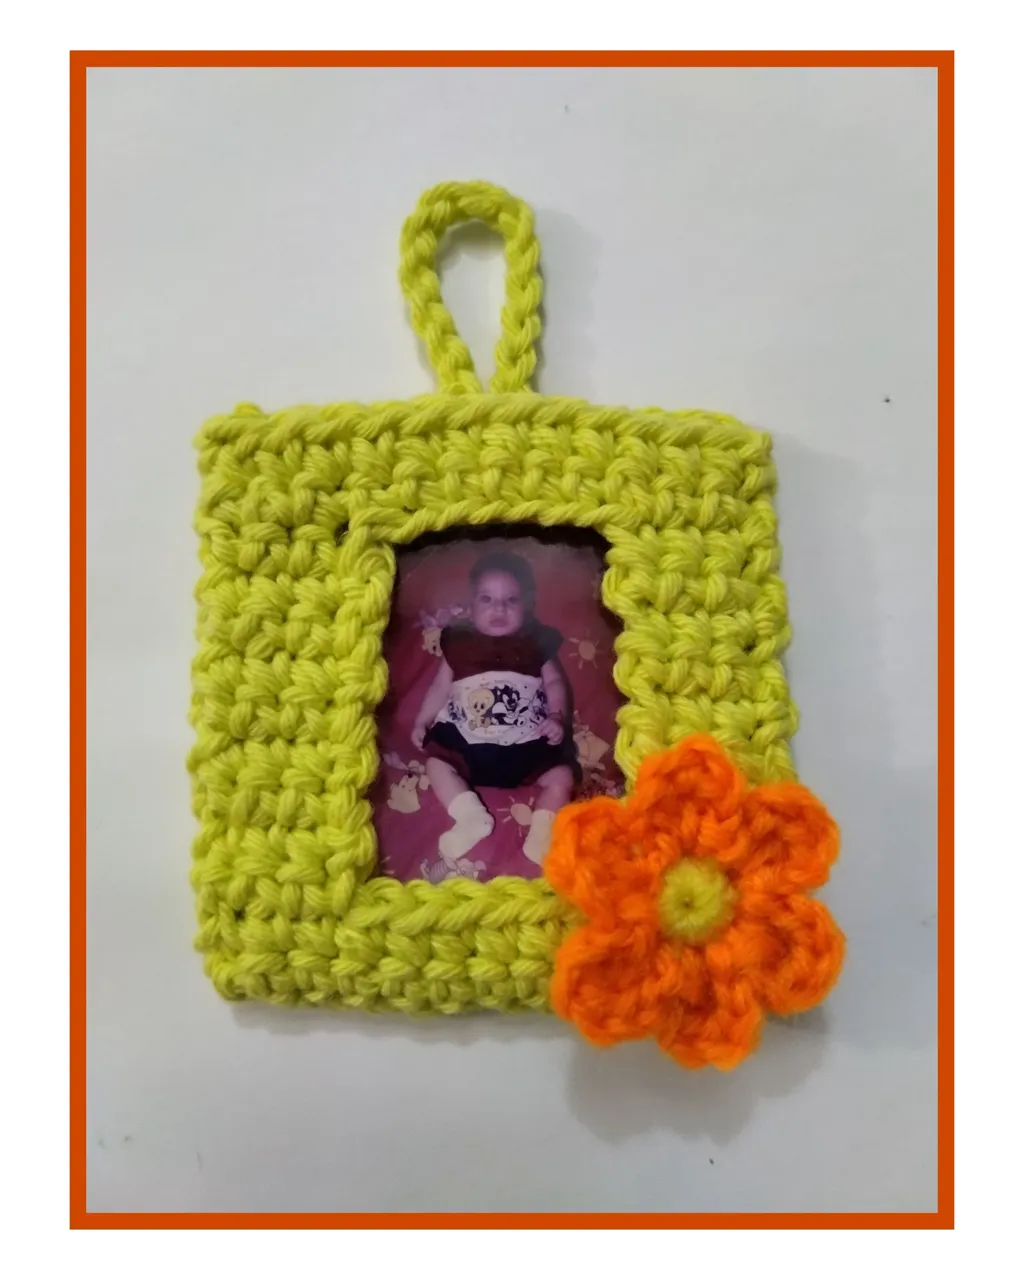
- Flor tejida previamente.
- Herraje para llaveros: aros, cadena y triángulo.
MATERIALS:
- 3mm cotton yarn.
- 3.5mm crochet needle.
- Scissors.
- Wool needle.
- ID size photograph.
- Pre-knitted flower.
- Hardware for key rings: rings, chain and triangle.
ELABORACIÓN:
- Empecé tomando la medida de la fotografía visualmente. Tejí 13 cadenas. Sobre ellas tejí dos vueltas de 12 puntos bajos. Siempre tomando en cuenta la medida de la foto.
ELABORATION:
- I started by taking the measurement of the photograph visually. I knit 13 chains. On them I knit two rows of 12 single crochet stitches. Always taking into account the measurement of the photo.
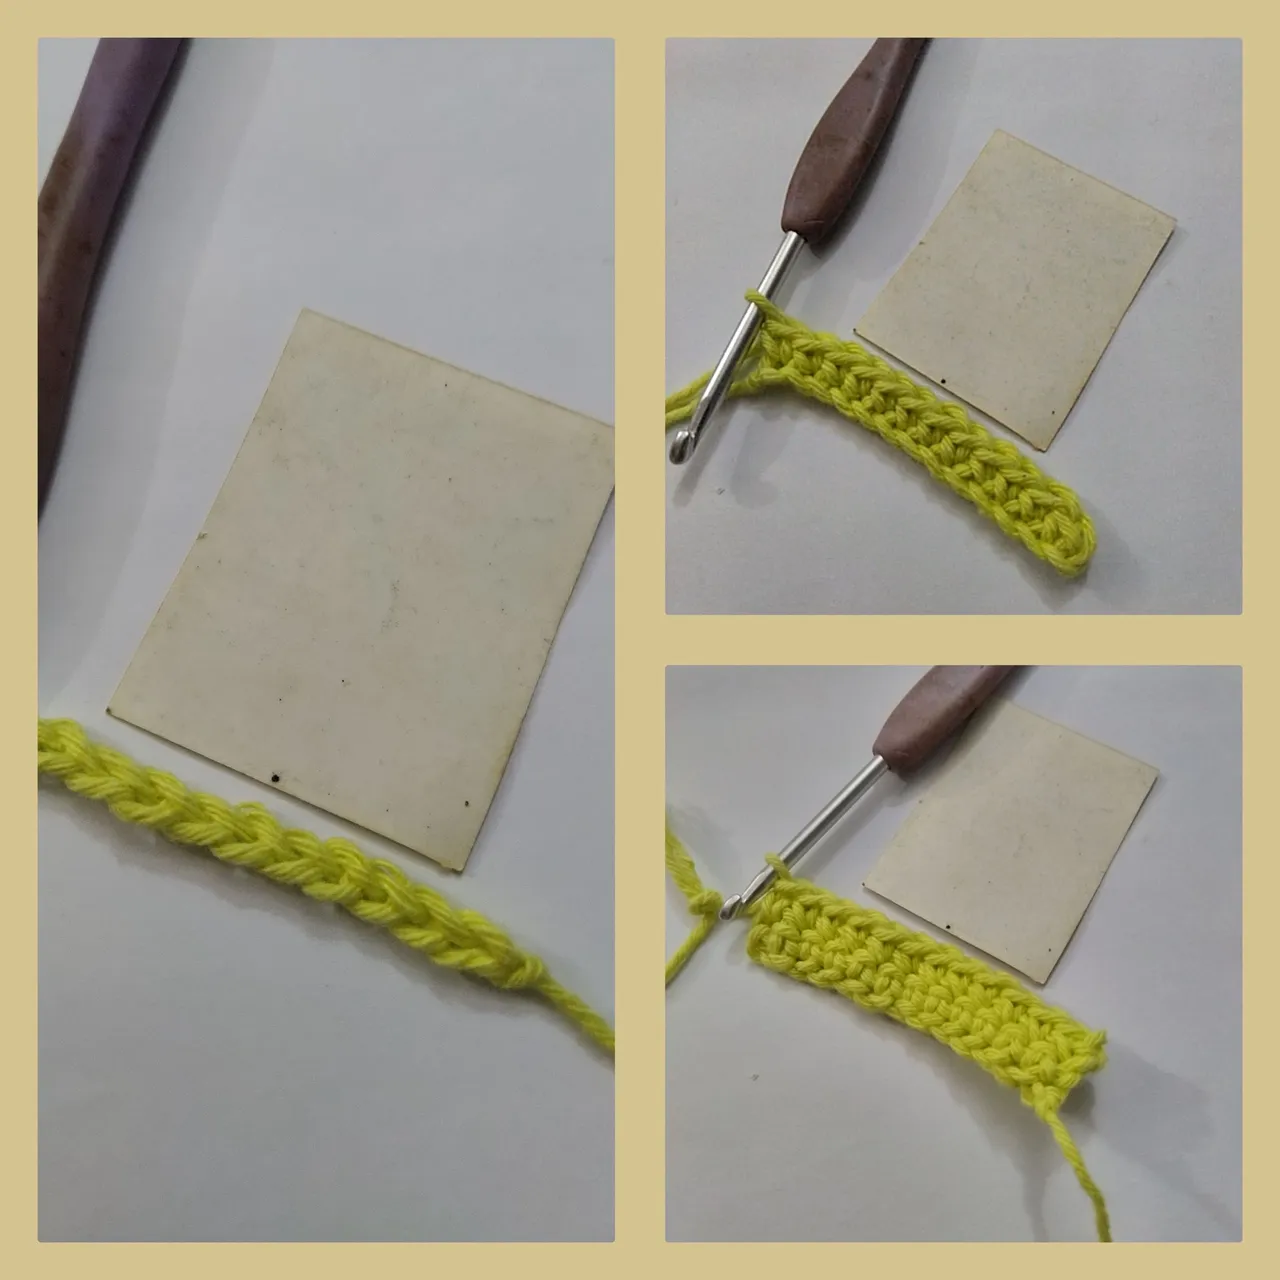
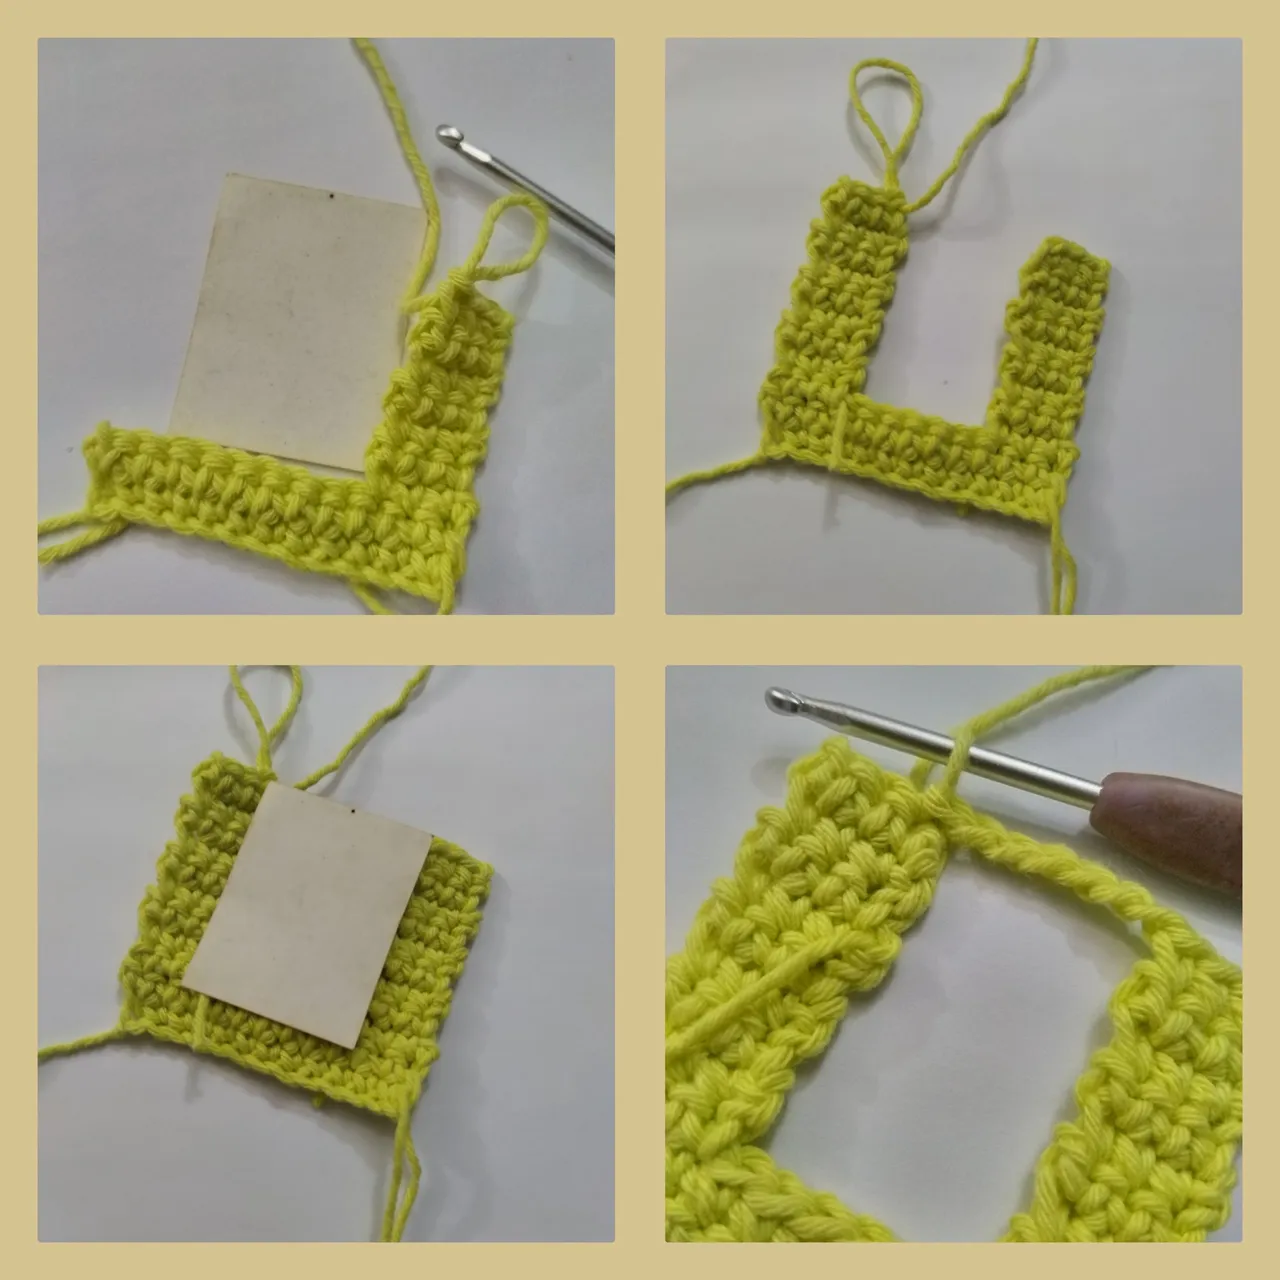
- Luego de las dos vueltas, conté y dividí los 12 puntos en tres partes: 3 puntos bajos, 6 puntos bajos, 3 puntos bajos. En los espacios de 3 puntos bajos subí ocho vueltas de 3 puntos bajos, tejiendo 1 cadena antes de girar el tejido para comenzar la siguiente vuelta.
- Tejí primero un lateral, cerré con punto deslizado y escondí la hebra.
- Tomé hilo nuevamente y empecé a tejer el otro lateral. Al finalizar la octava vuelta tejí 6 cadenas y la uní al primer punto del otro lateral con punto deslizado. Corté la hebra y la escondí entre los puntos.
- After the two rounds, I counted and divided the 12 stitches into three parts: 3 single crochets, 6 single crochets, 3 single crochets. In the spaces of 3 single crochets I went up eight rows of 3 single crochets, knitting 1 chain before turning the knitting to start the next row.
- I knit one side first, closed with slip stitch and hid the yarn.
- I picked up yarn again and started knitting the other side. At the end of the eighth row I knit 6 chains and joined it to the first stitch of the other side with slip stitch. I cut the yarn and hid it between the stitches.
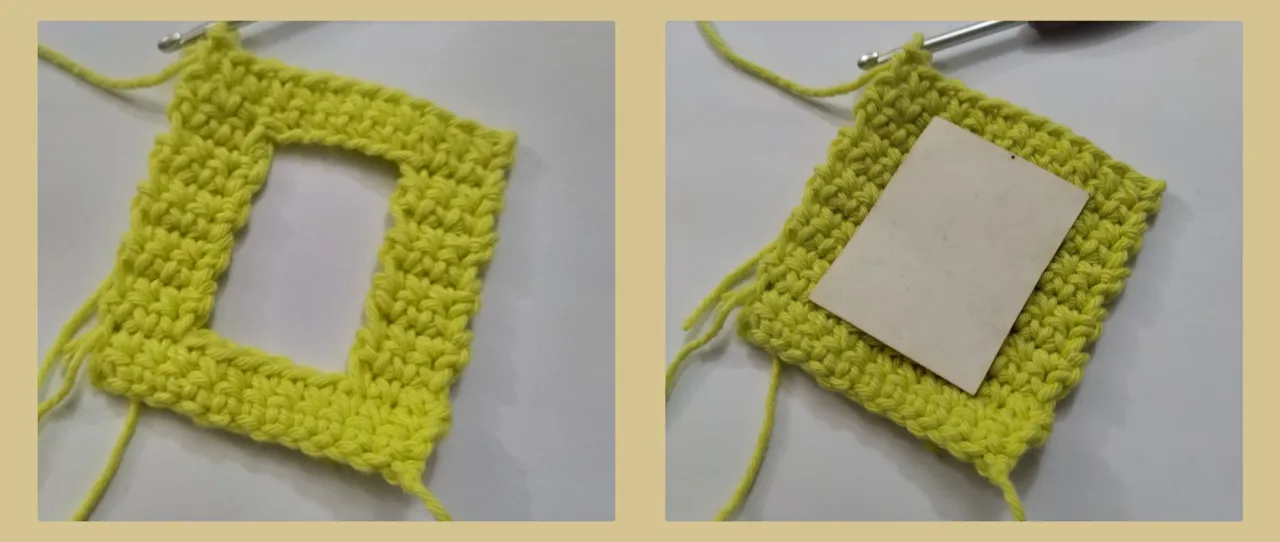
- Tomé hilo de nuevo y desde una esquina del tejido levanté dos vueltas de 12 puntos bajos. Al finalizar cerré con punto deslizado, corté la hebra y la escondí.
- I picked up yarn again and from one corner of the fabric I picked up two rows of 12 single crochet stitches. At the end I closed with slip stitch, cut the yarn and hid it.
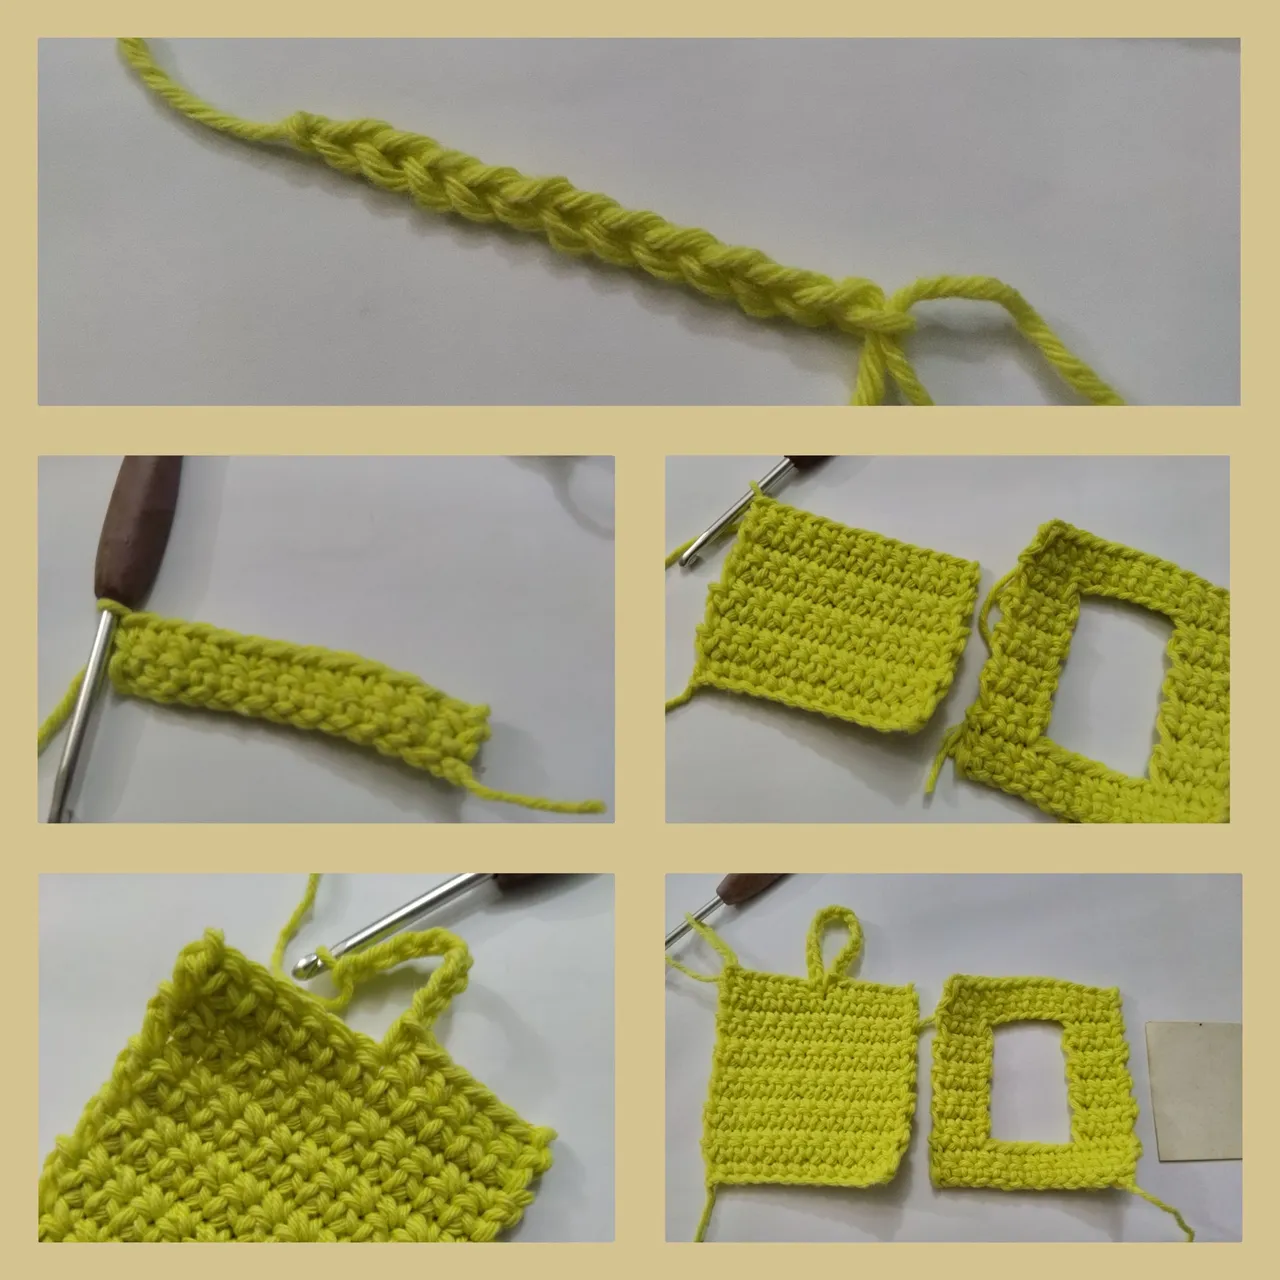
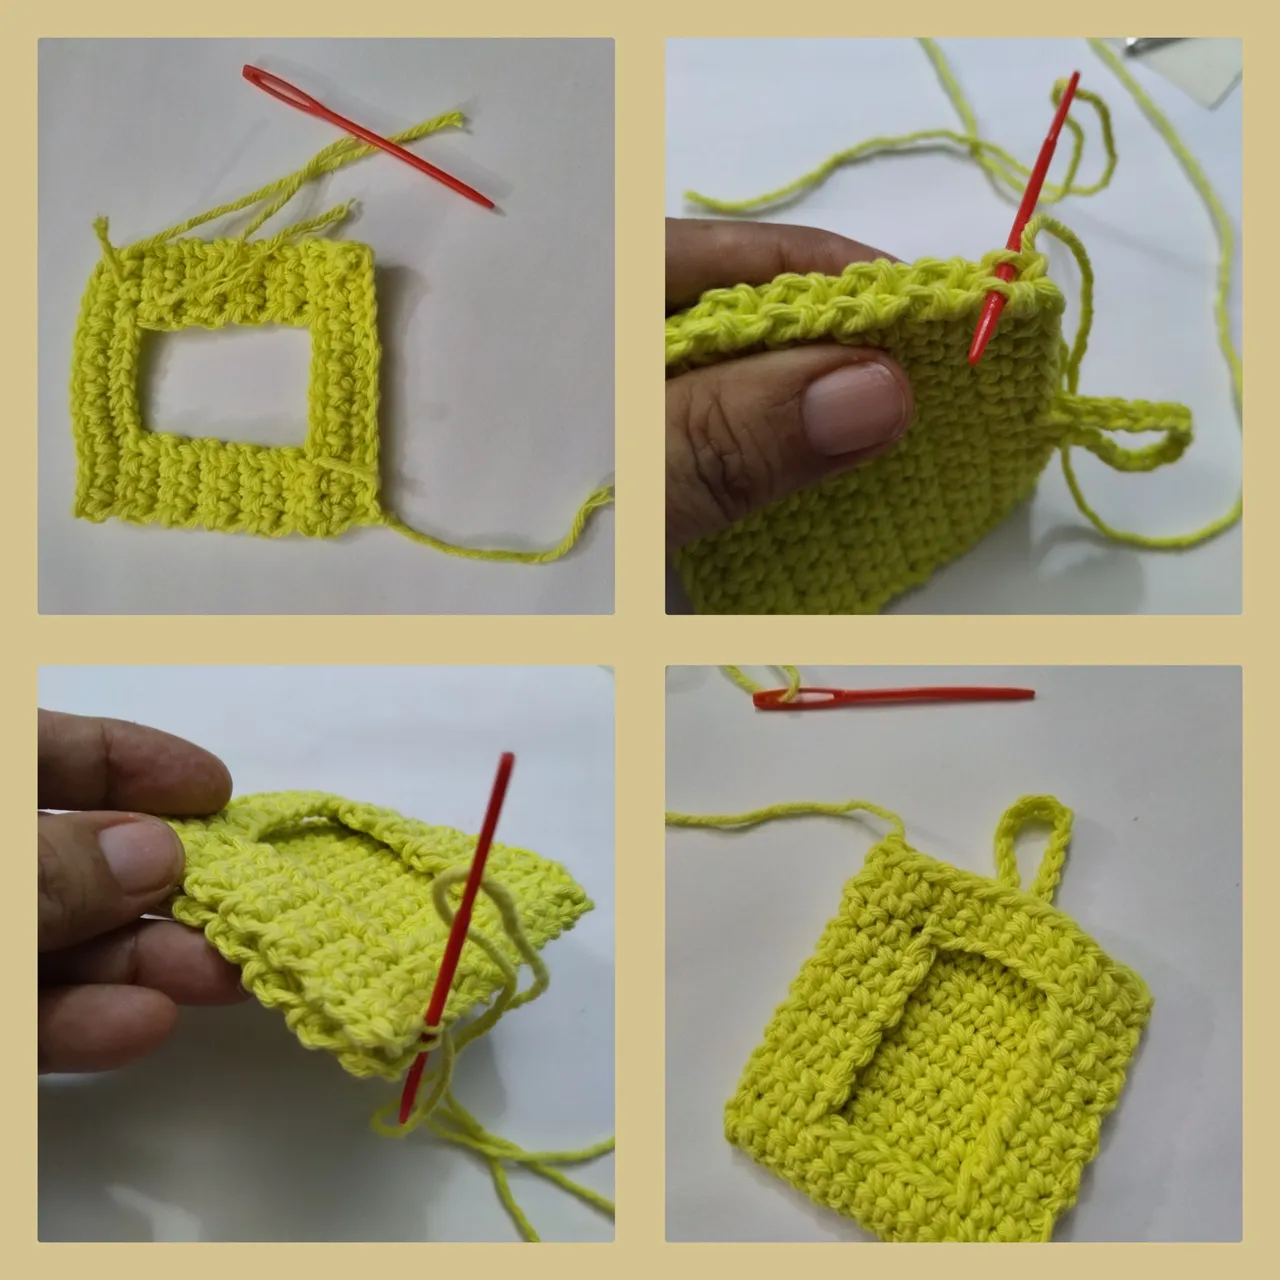
- Usando los mismos materiales; aguja e hilo empecé a tejer los que sería la tapa del portarretrato. Inicié igualmente con 13 cadenas, sobre ellas subí 12 vueltas de puntos bajos, siempre comparando y midiendo con el primer tejido elaborado.
- En la última vuelta tejí justo en el punto seis 15 cadenas que luego fijé con punto deslizado en ese mismo punto y continué tejiendo los puntos bajos restantes. Al finalizar cerré con punto deslizado y dejé la hebra larga antes de cortarla.
- Using the same materials; needle and thread, I began to knit what would be the cover of the picture frame. I also started with 13 chains, over them I knitted 12 rows of low stitches, always comparing and measuring with the first knitted fabric.
- In the last row I knitted 15 chains right in the sixth stitch, which I then fixed with slip stitch in that same stitch and continued knitting the remaining single crochet. At the end I closed with slip stitch and left the long strand before cutting it off.
- Usando la aguja lanera uní ambos tejidos pasando el hilo por cada uno de los puntos de los laterales y la parte inferior del portarretrato. Dejando sin unir la parte donde realicé el asa de las quince cadenas.
- Al terminar cerré con punto deslizado, corté y escondí la hebra.
- Using the wool needle I joined both fabrics passing the thread through each of the stitches of the sides and the lower part of the picture frame. Leaving without joining the part where I made the handle of the fifteen chains.
- When I finished I closed with slipped stitch, cut and hid the yarn.
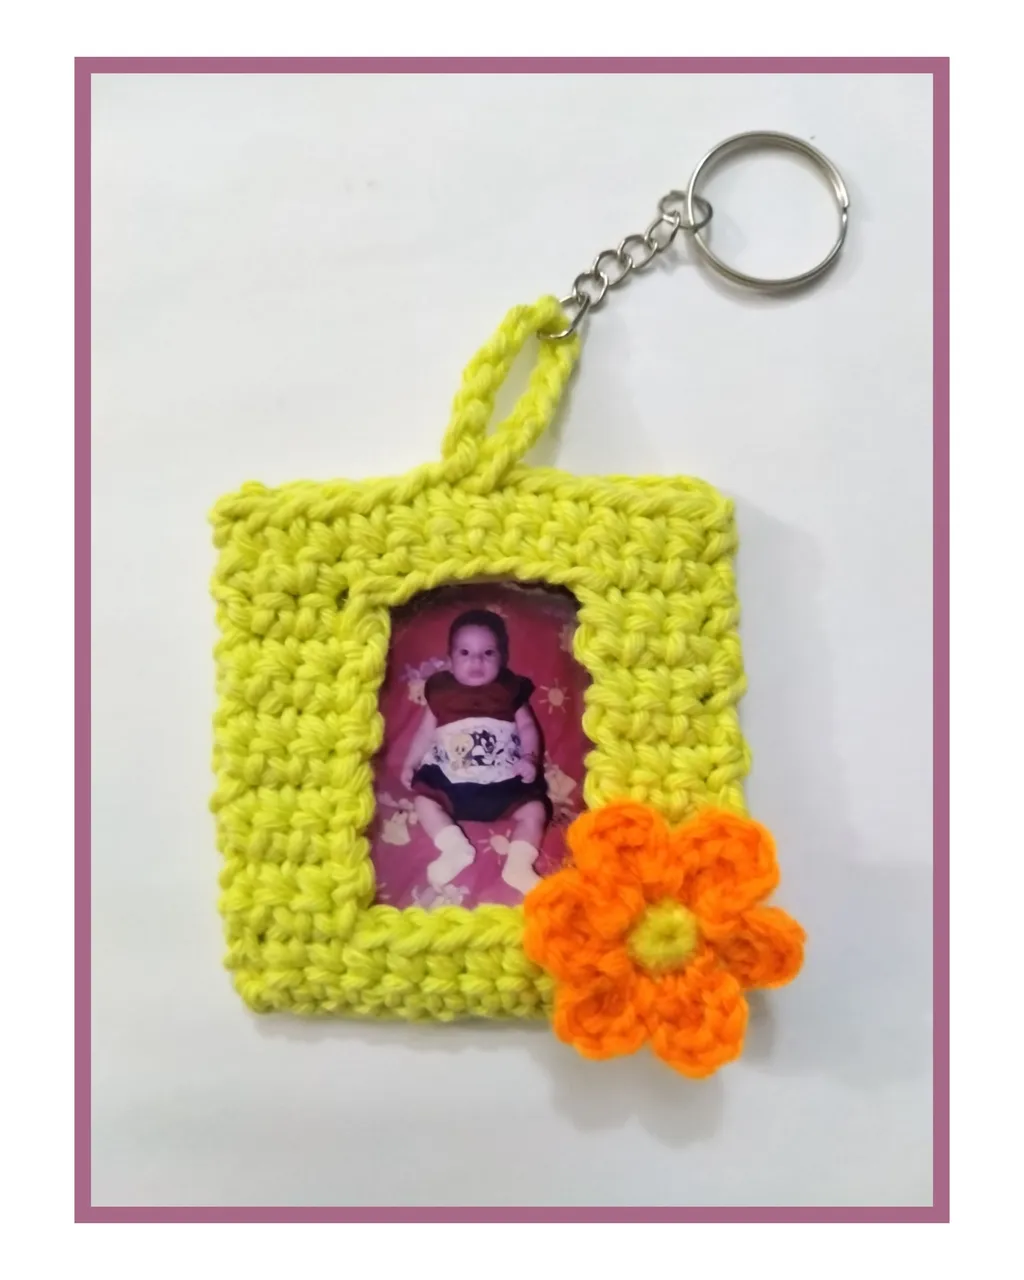
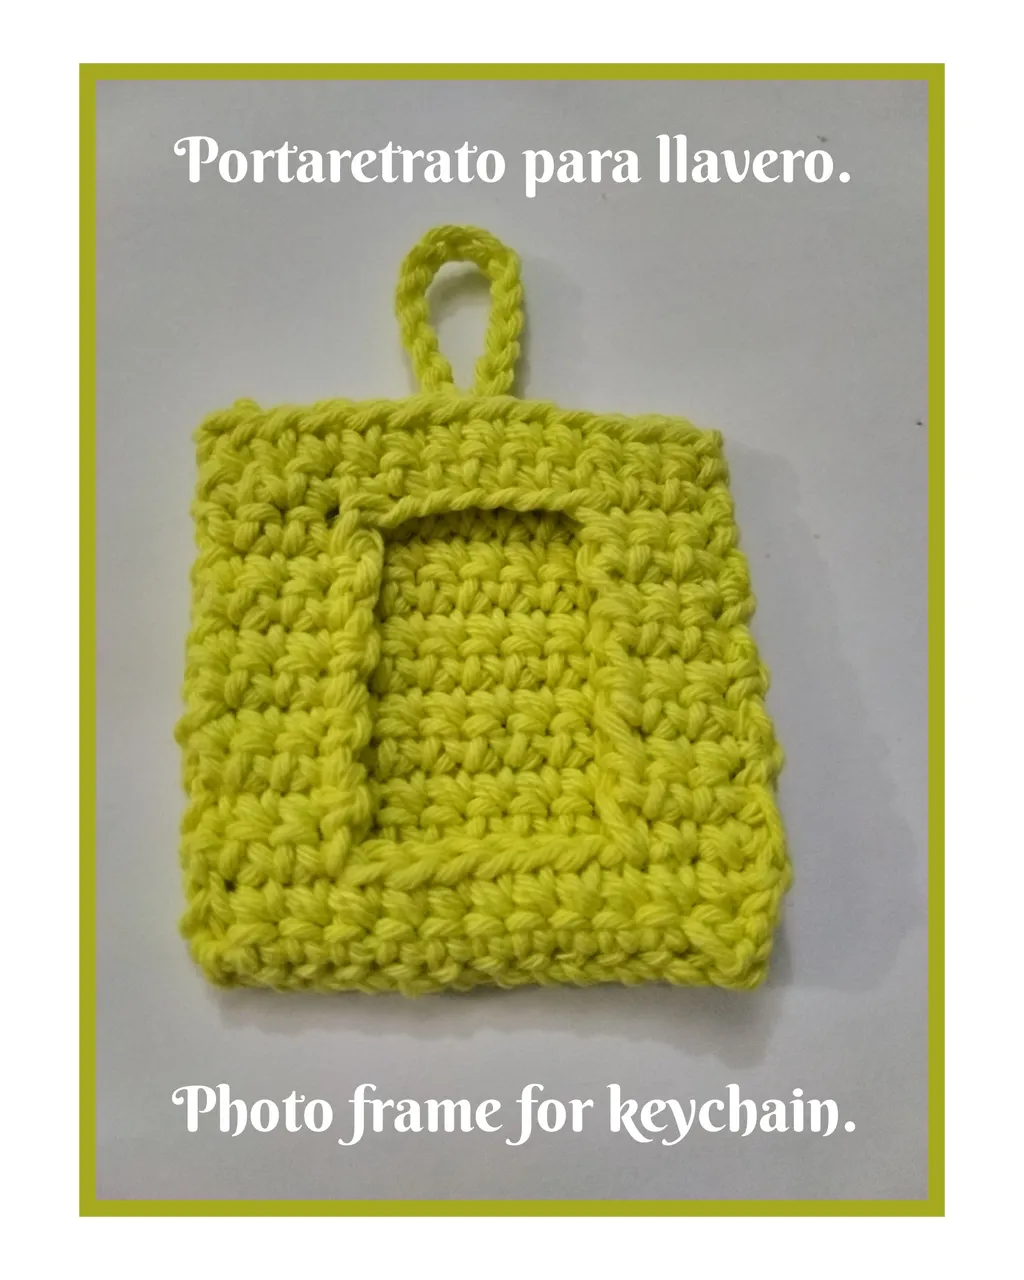
- El portarretrato ya está listo para ser usado. Siempre será importante tener a la mano la fotografía que se va a usar ya que puede ser de tamaños diferentes y no encajar en él. ¡Me encantó el resultado!
- The picture frame is now ready to be used. It will always be important to have the picture you are going to use on hand as it may be of different sizes and not fit in it. I loved the result!
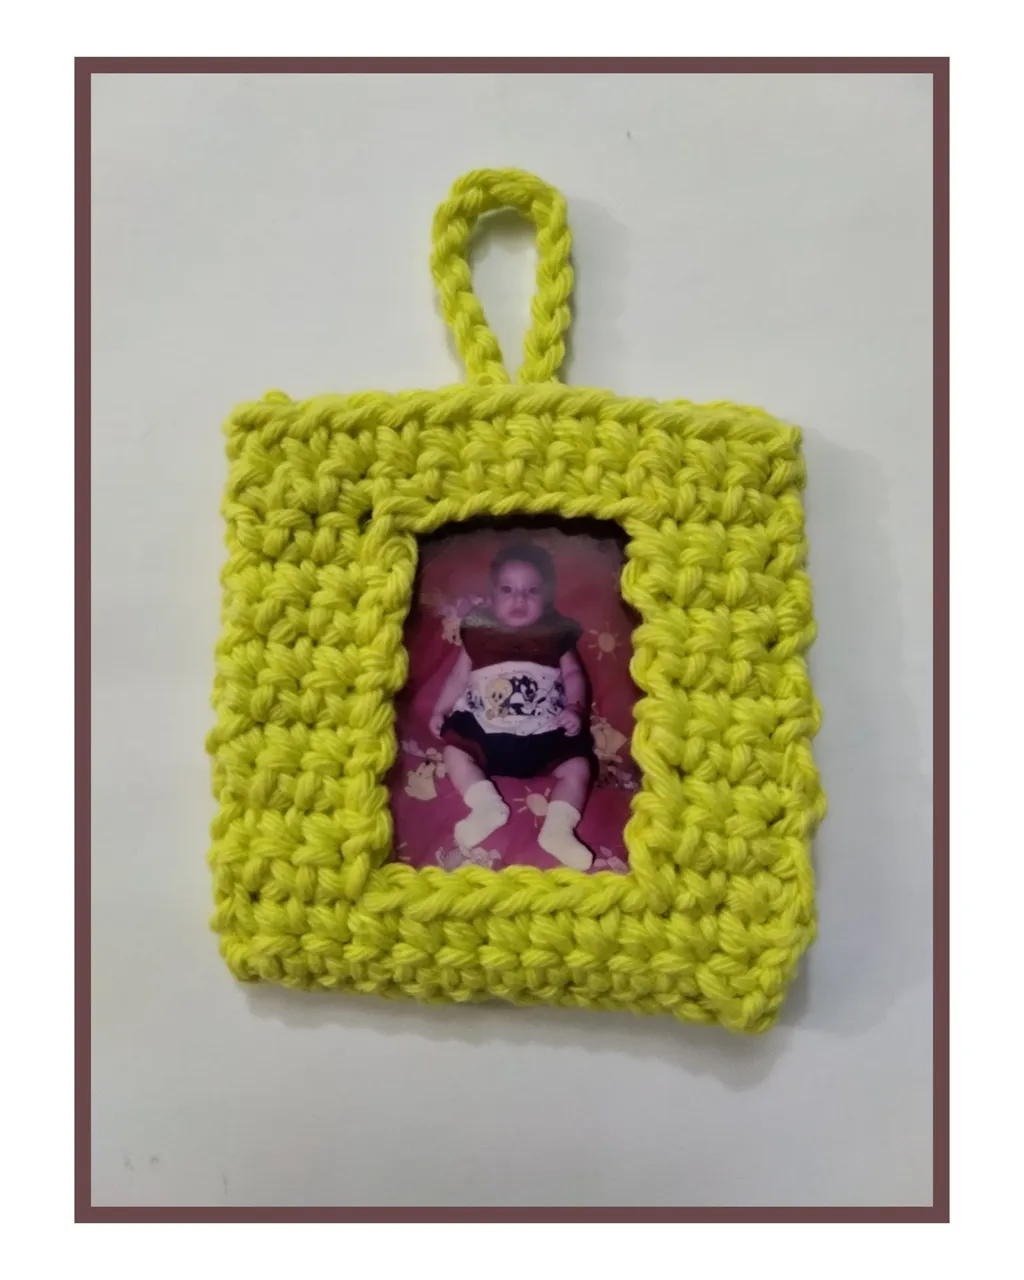
- Con o sin decoración el portarretrato se ve muy bonito. Solo hay que colocarle el aro para llaveros y disfrutarlo. Espero que les haya gustado esta propuesta.
- With or without decoration the picture frame looks very nice. Just put the key ring on it and enjoy it. I hope you liked this proposal.
🙋🏽♀️ Muchísimas gracias por el apoyo. Todas las fotos son de mi propiedad. Edité con Polish. Usé el traductor de Deelp. Bendiciones. Hasta pronto 🫂
🙋🏽♀️ Thank you very much for your support. All photos are my property. I edited with Polish. I used Deelp translator. Blessings. See you soon 🫂