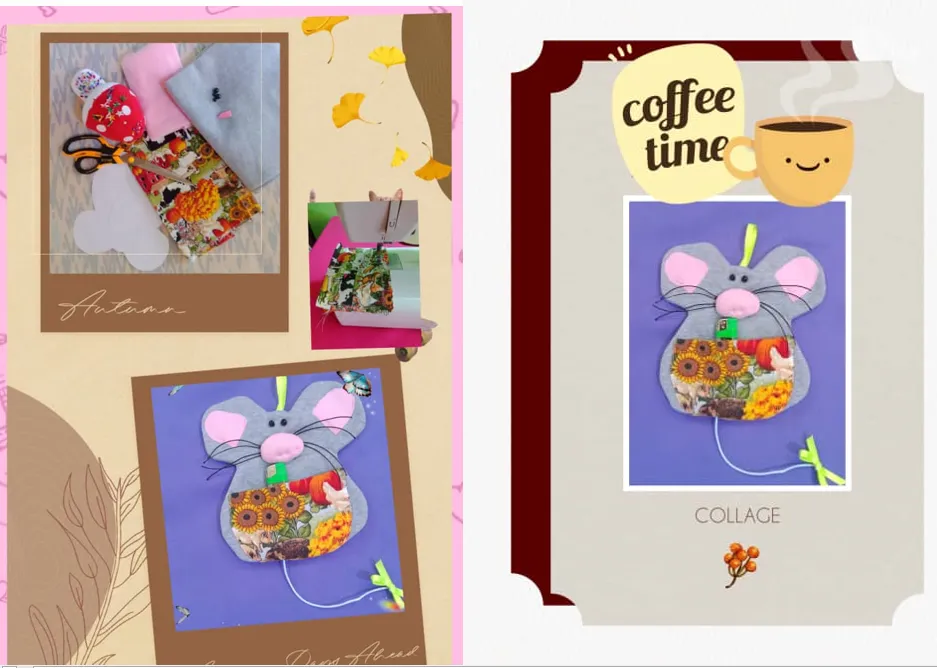

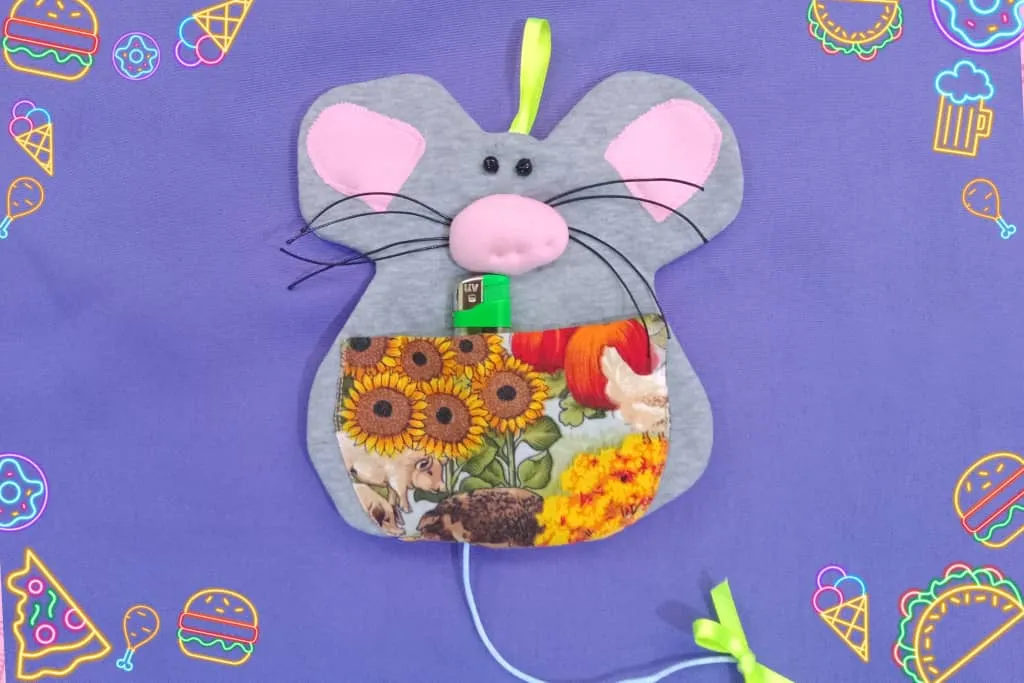
Greetings @diyhub community and crafter friends, it is a pleasure to greet you and share a new creative project; this is a tinder holder, ideal for use in the kitchen and keep the lighters organized, it is a nice mouse that will help us to keep them in place and have them at hand when preparing food.

Saludos comunidad @diyhub y amigos crafteros, es un placer saludarles y compartir un nuevo proyecto creativo; se trata de un porta yesquero, ideal para usar en la cocina y mantener los encendedores organizados, es un simpático ratón que nos ayudará a mantenerlos en su lugar y tenerlos a mano al momento de preparar los alimentos.


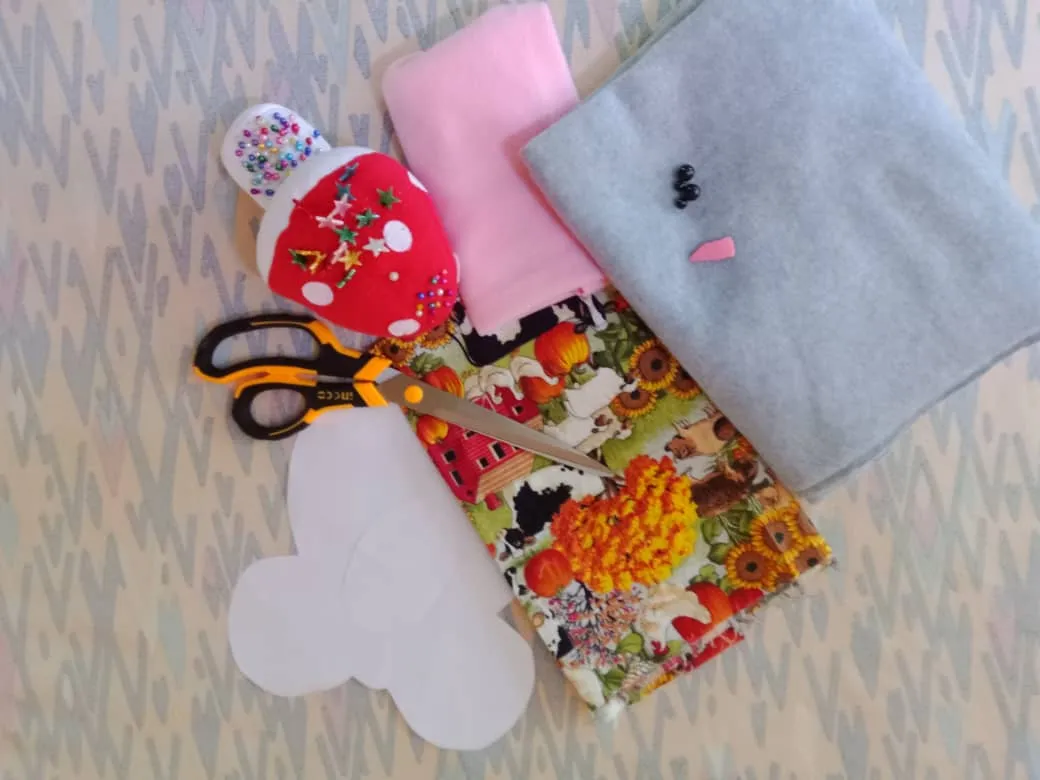
The materials used were:
Monkey fabric (gray and pink)
Dacron (printed)
Mold
Scissors
Soap
Pins
Thread
Needle
Sewing machine
Ribbon (black and blue)
Wadding
Pearls
Los materiales usados fueron:
Tela de mono (gris y rosa)
Dacrón (estampado)
Molde
Tijera
Jaboncillo
Alfileres
Hilo
Aguja
Máquina de coser
Cinta (negra y azul)
Guata
Perlas
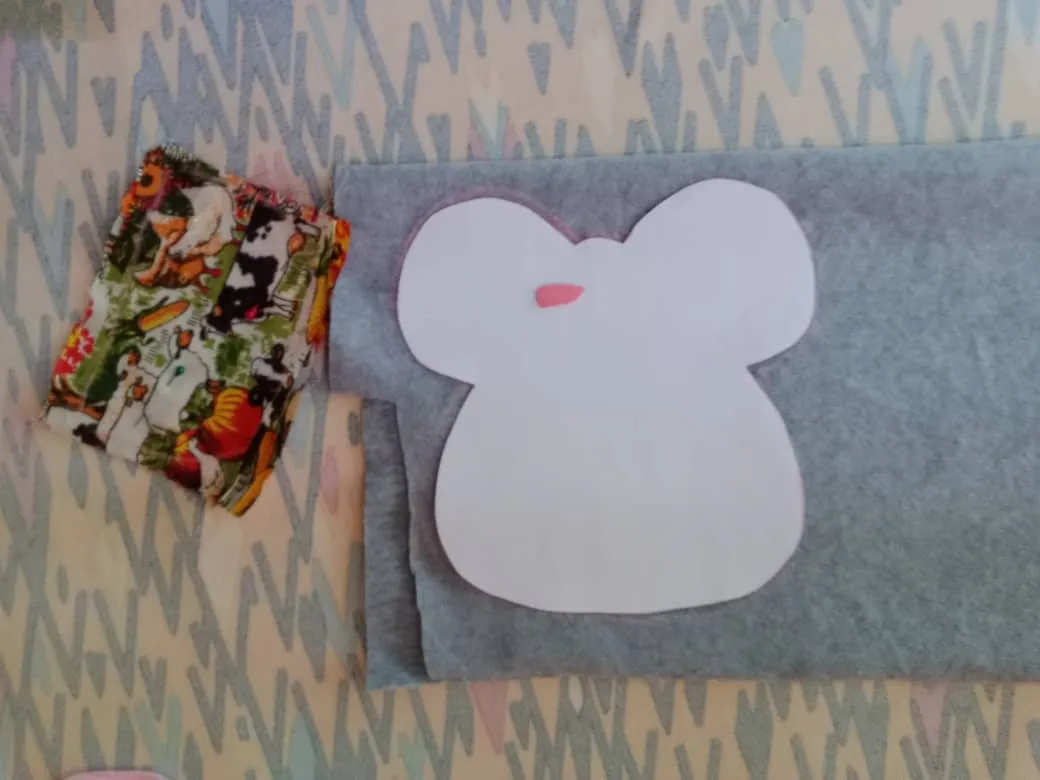
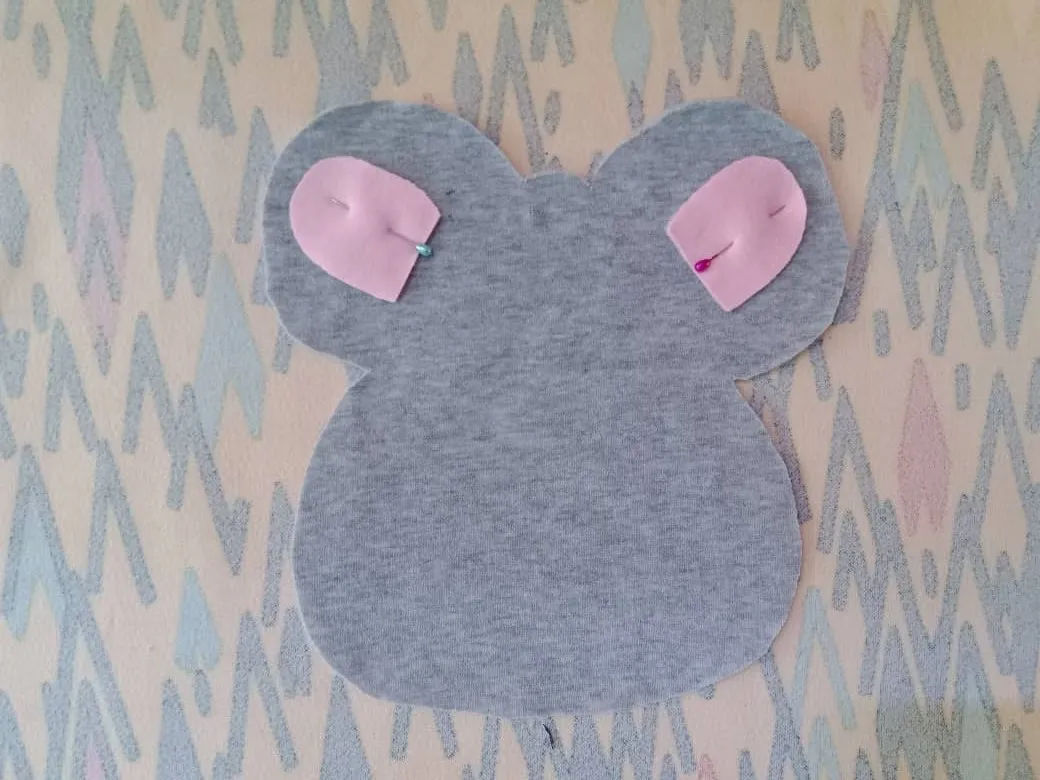
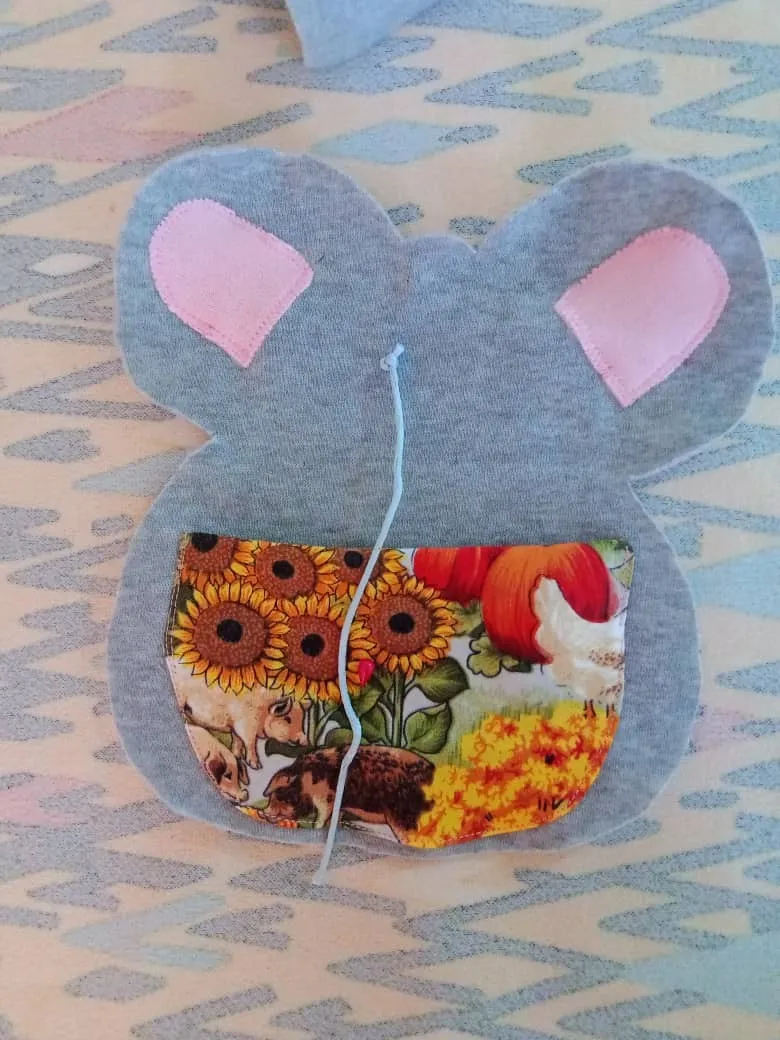
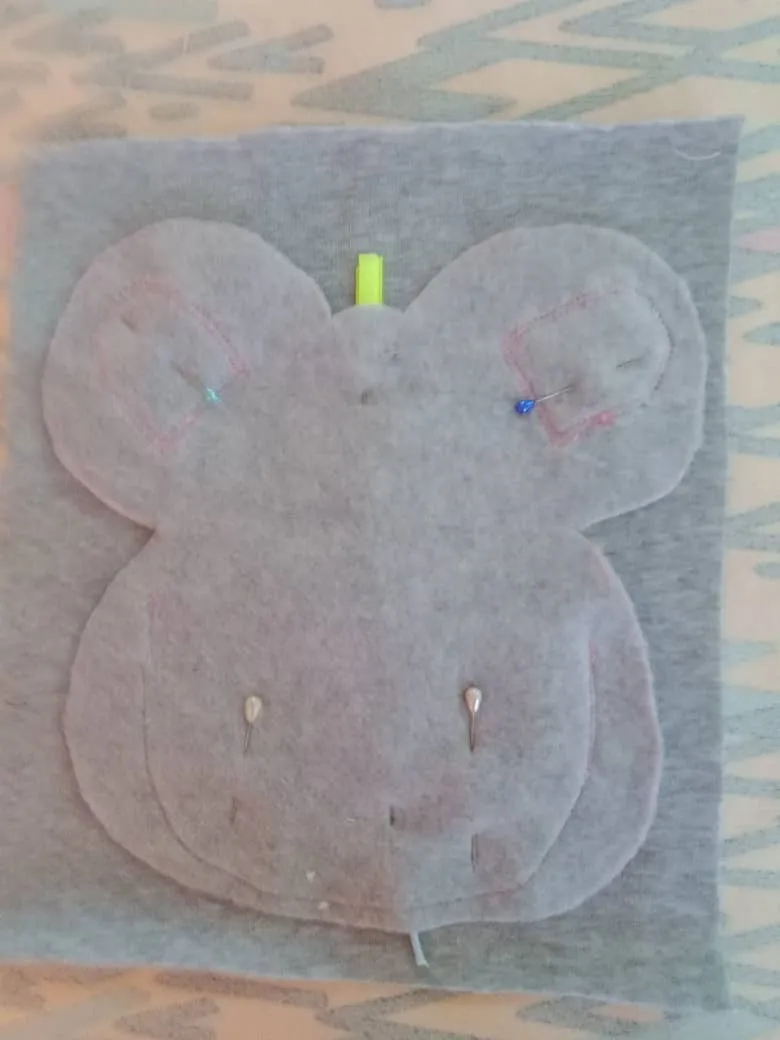
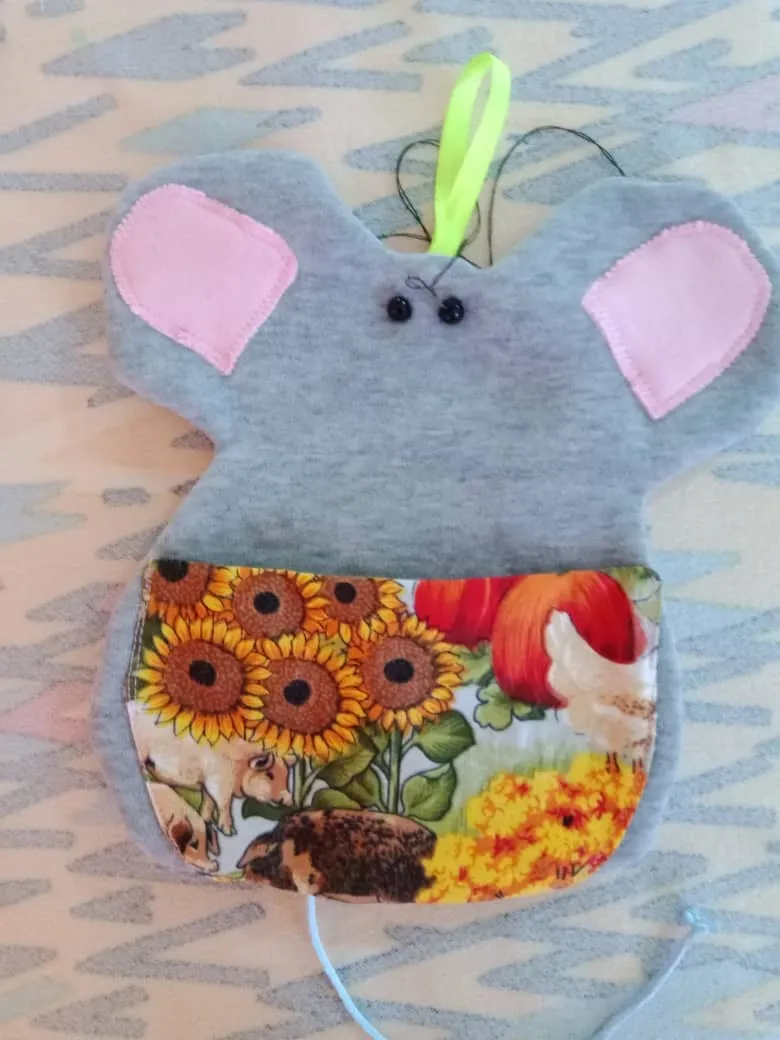
I started by marking the mouse on the fabric I also marked a pocket that will go on the front where the tinder will be placed, then I cut the silhouette of the mouse, the ears and snout.
Inicié marcando el ratón en la tela también marqué un bolsillo que irá en la parte delantera donde se colocará el yesquero, luego corté la silueta del ratón, las orejas y hocico.
I pinned the ears and sewed with zigzag stitch.
Sujeté con alfileres las orejas y cosí con puntada de zigzag.
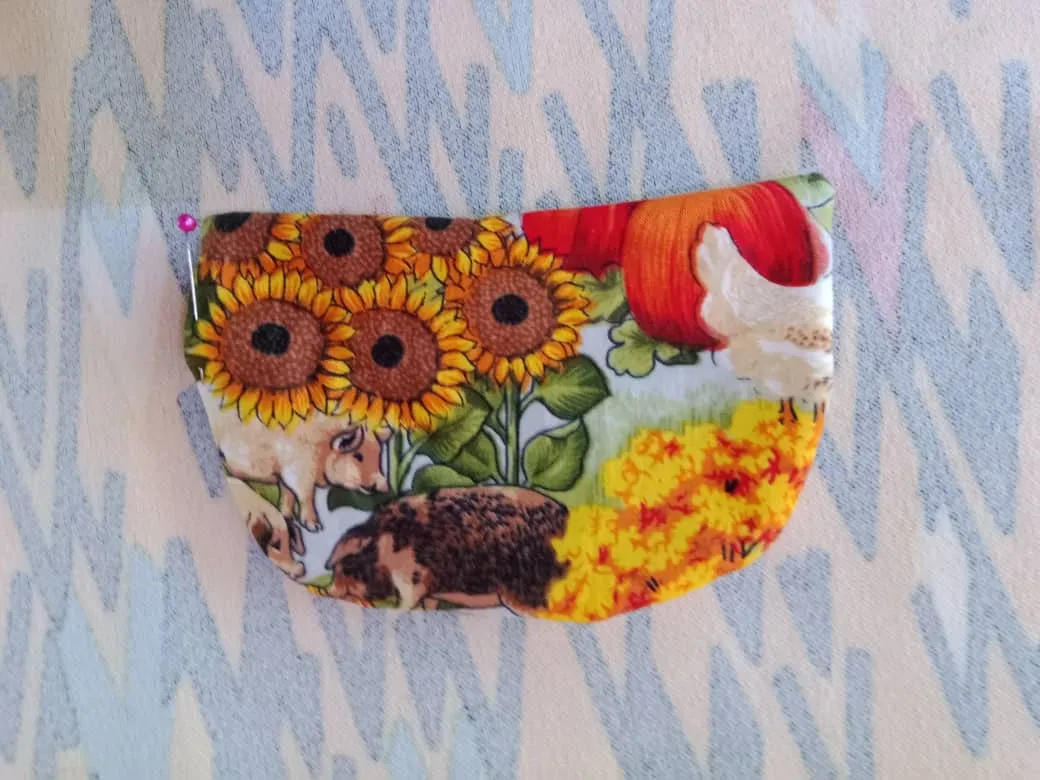
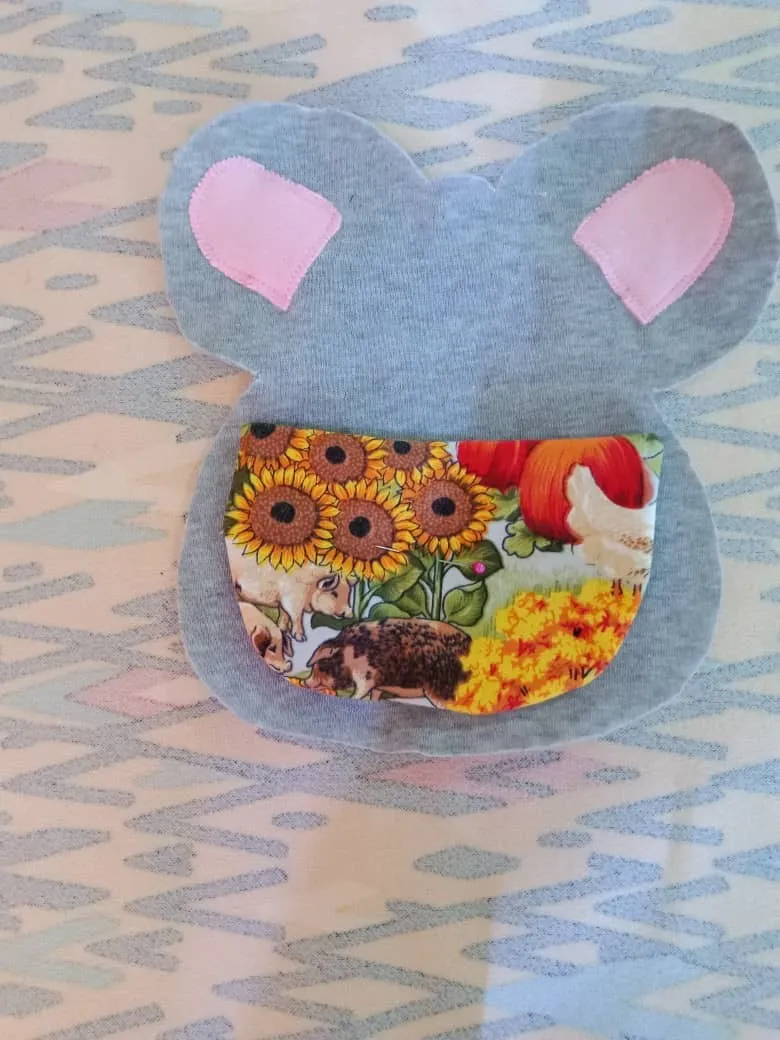
To make the pocket, I sewed all the way around, facing the fabrics on the right side and leaving an opening, removed the excess fabric and turned over.
Then I glued the pocket on the front using straight stitch.
Para hacer el bosillo cosí por todo el contorno enfrentando las telas por el derecho y dejando una abertura, retiré el exceso de tela y volteé.
Luego pegué el bolsillo en la parte delantera usando puntada recta.

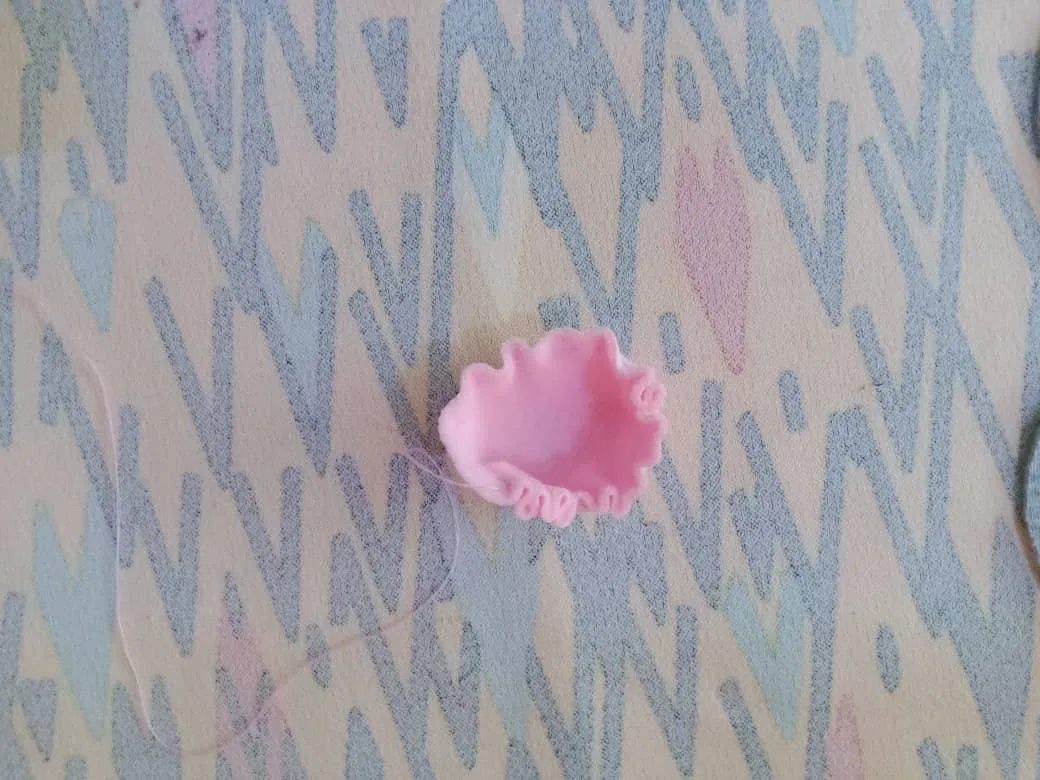
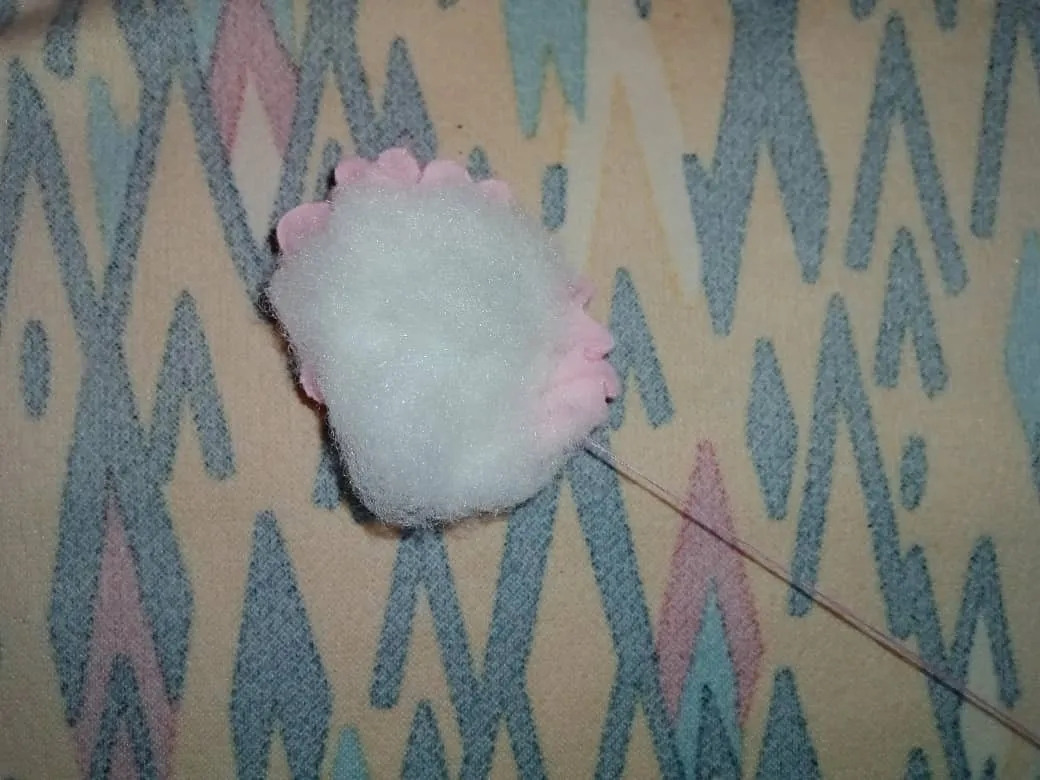
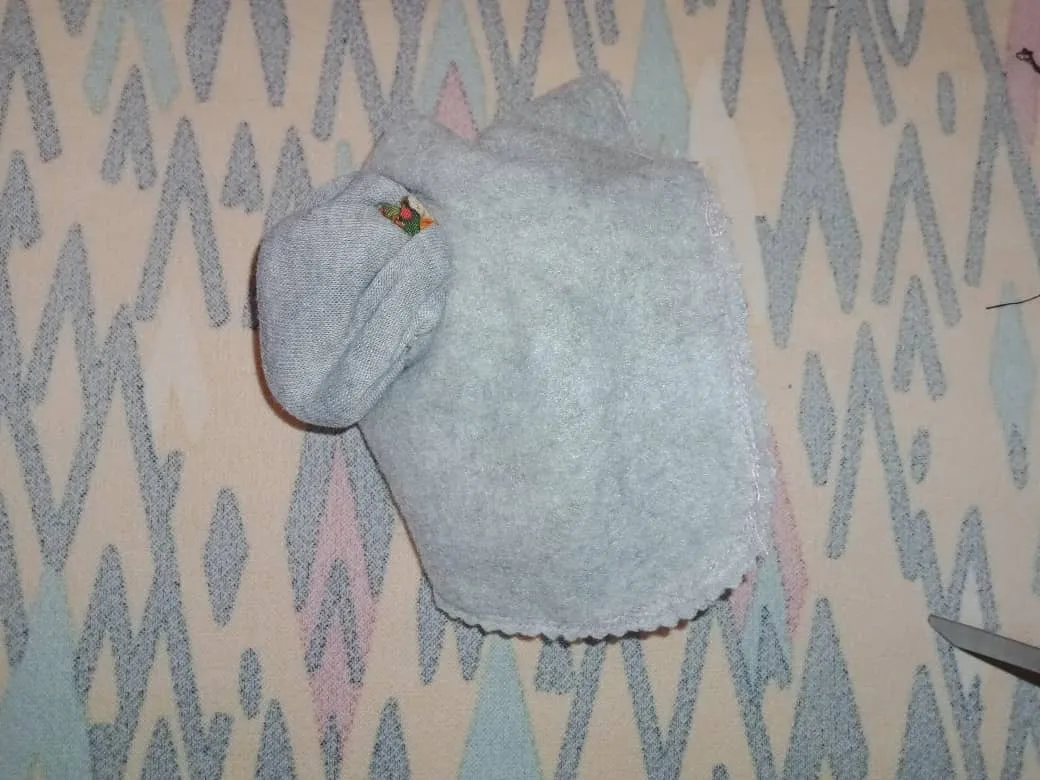
The next step was to assemble the muzzle, for this I sewed the oval on the edge with hand stitch, filled with wadding and closed, I also made the whiskers by tying four strands of black ribbon and glued them on the back of the oval.
El siguiente paso fue armar el hocico, para ello cosí el óvalo por el borde con puntada a mano, rellené con guata y cerré, también hice los bigotes amarrando cuatro hilos de cinta negra y los pegué en la parte trasera del óvalo.
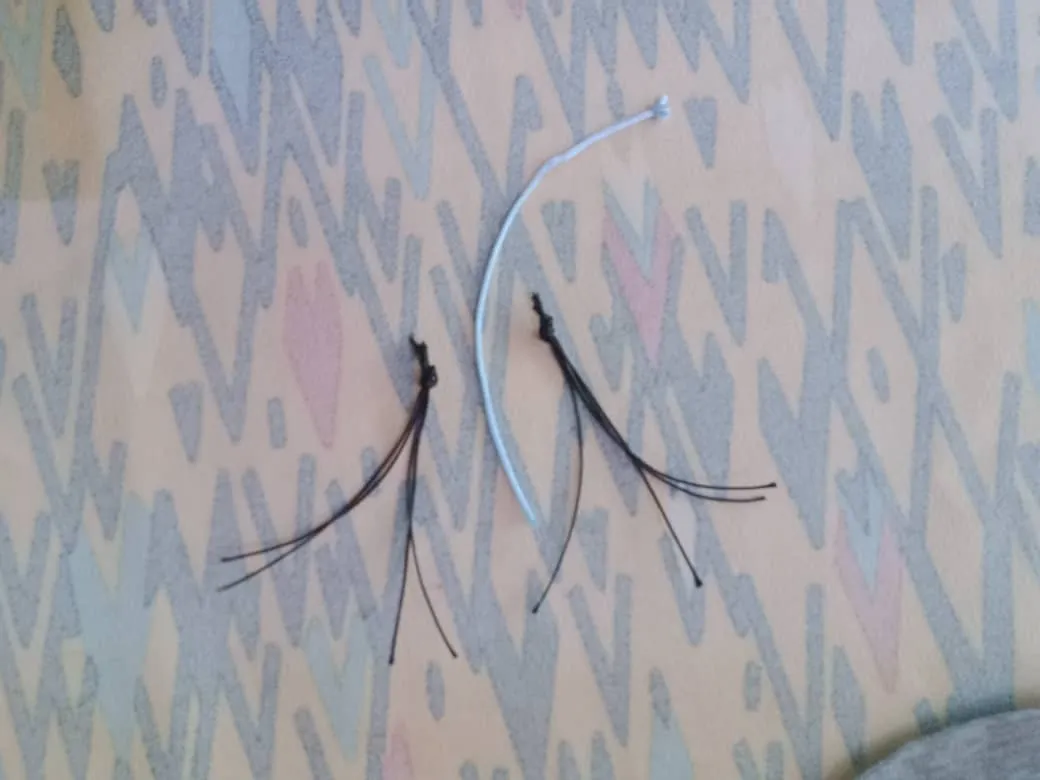

Once the muzzle was assembled, I placed a blue ribbon, which will be the tail, on the bottom, also a ribbon for the hanger, I faced the front part with the back, sewed leaving an opening and turned it over.
Ensamblado el hocico, coloqué una cinta azul, que será la cola, en la parte inferior, también una cinta para el colgadero, enfrenté la parte delantera con la trasera, cosí dejando una abertura y volteé.
To finish, I glued the eyes and the snout and the cute tinderbox-carrying mouse is ready.
Para finalizar pegué los ojos y el hocico y así está listo el simpático ratón porta yesqueros.
This project is easy to do, and is also very useful in the kitchen; I am happy with the result, Tommy the mouse will now keep the tinder boxes organized in a fixed place, I hope this idea is useful to organize the tinder boxes and decorate the kitchen.
Este proyecto es sencillo de hacer, además muy útil en la cocina; me siento feliz con el resultado, el ratón Tommy ahora mantendrá los yesqueros organizados en un lugar fijo, espero esta idea les sea de utilidad para organizar los yesqueros y adornar la cocina.
Blessings!
Bendiciones!
Hasta luego!

Translated with https://www.deepl.com/translator
              All images are my own, captured by a Síragon LC-3000 camera. Dividers courtesy of @kattycrochet.


   Todas las imágenes son de mi autoría, capturadas por una cámara Síragon LC-3000. Divisores cortesía de @kattycrochet.