Hola amigos de hive 👋🏻 especialmente a la comunidad de #makeuppower espero se encuentren muy bien, me alegra estar por acá de nuevo con ustedes, en esta oportunidad les comparto el tutorial de este hermoso maquillaje, que es perfecto para una ocasión especial, espero sea de su agrado y puedan realizarlo.
Hello friends of hive 👋🏻 especially to the #makeuppower community, I hope you are very well, I am glad to be here again with you, this time I share with you the tutorial of this beautiful makeup, which is perfect for a special occasion, I hope be to your liking and you can do it.
Mateteriales que utilicé:
✓Base
✓Paleta de sombras
✓Polvo suelto
✓Serum hidratante
✓Primer
✓Brochas
✓pestañas postizas
✓Lapiz de ojo negro
✓paleta de contorno
✓Rizador de pestañas
✓Rubor
✓Brillo labial.
✓Laminado de cejas.
Materials I used:
✓Base
✓Shadow Palette
✓Loose powder
✓Moisturizing serum
✓First
✓Brushes
✓false eyelashes
✓Black eye pencil
✓contour palette
✓Eyelash curler
✓Blush
✓Lip gloss.
✓Laminate eyebrows.
Pasos:
Steps:
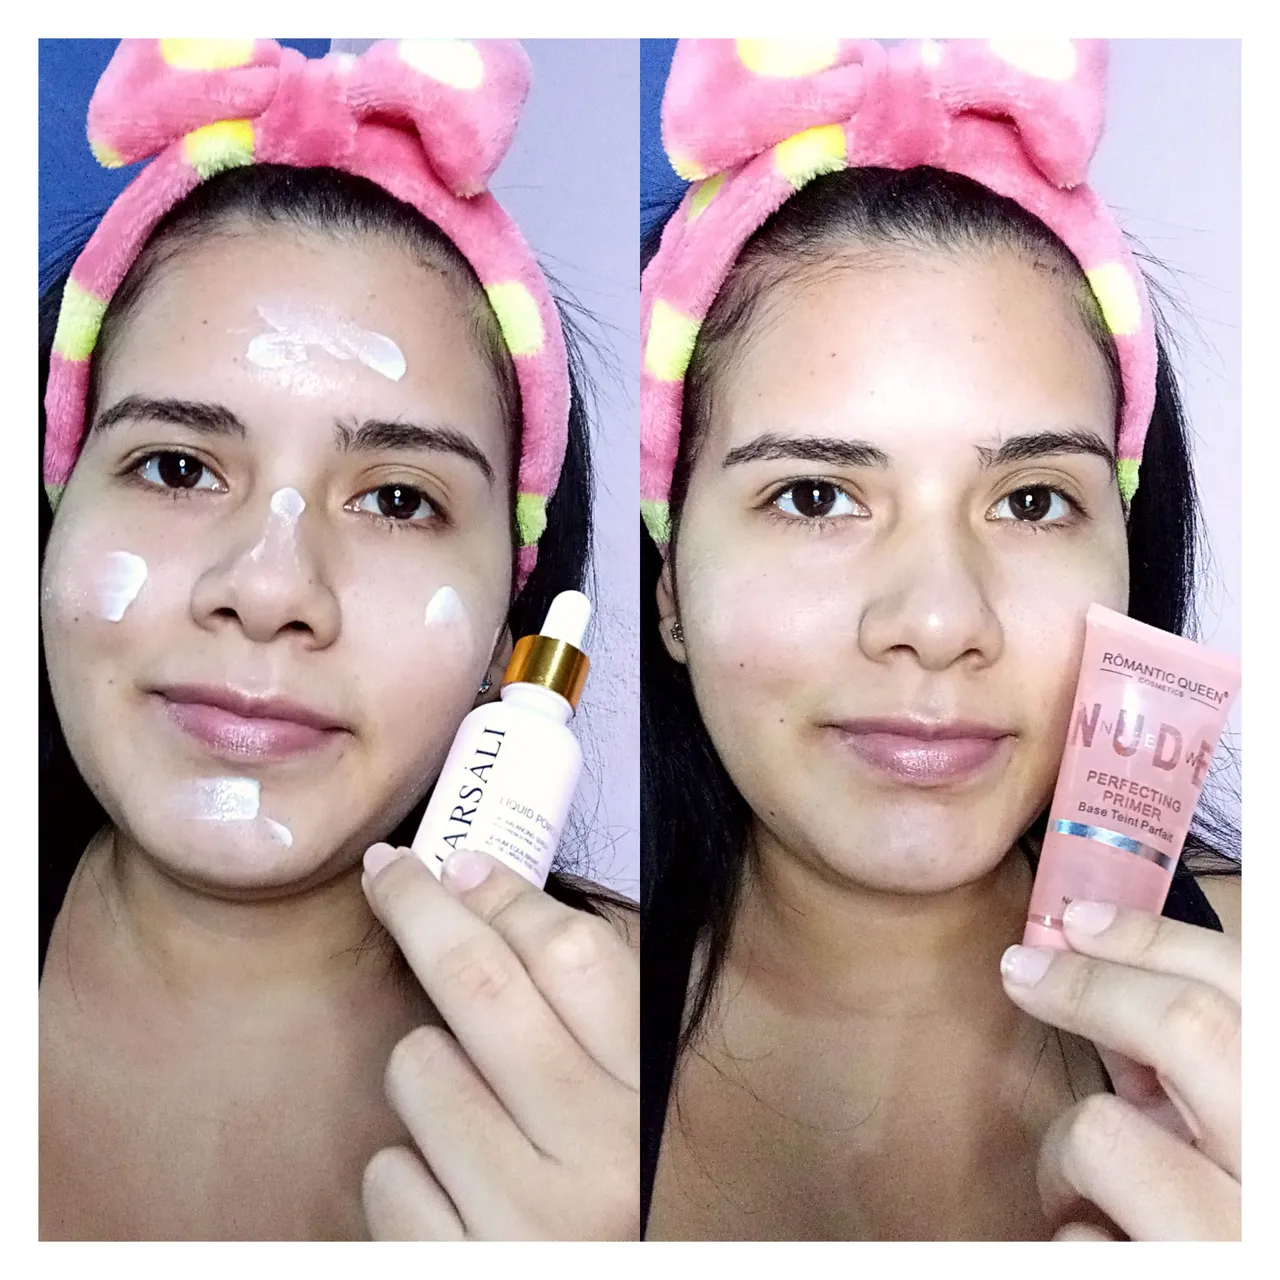
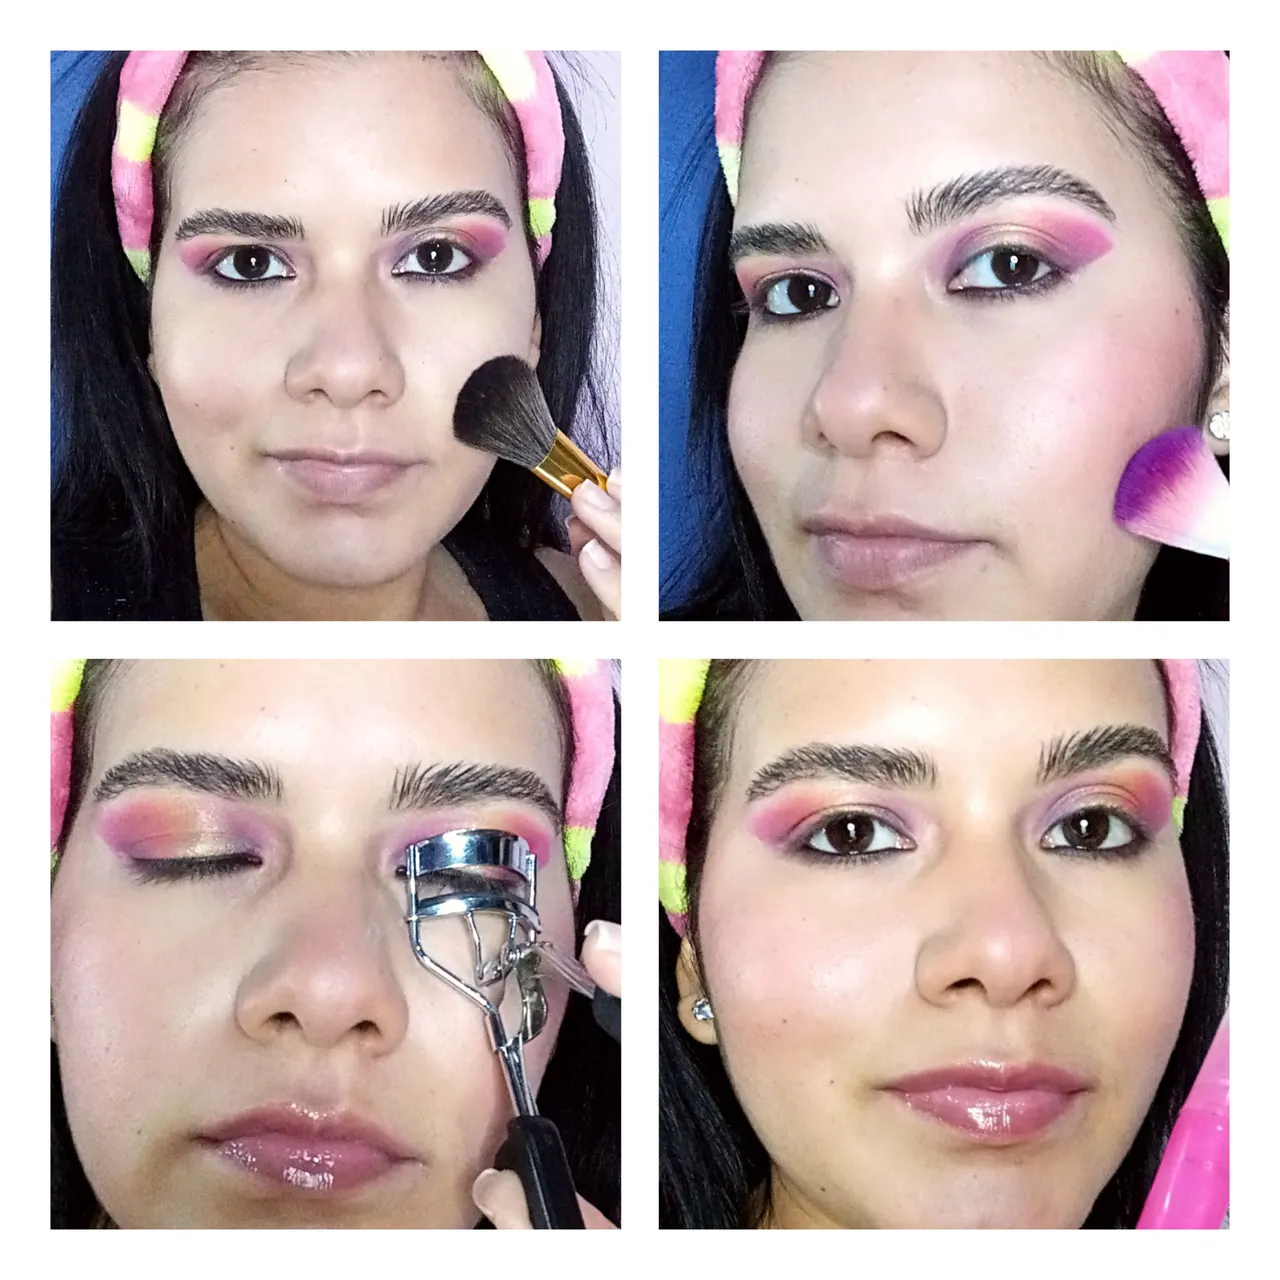
Paso 1: Lo primero que hice fue aplicar el serum hidratante por mi rostro, este paso es muy importante ya que debemos cuidar nuestra piel, dejó secar y aplicó el primer, en pequeños toques para minimizar los poros.
Step 1: The first thing I did was apply the moisturizing serum on my face, this step is very important since we must take care of our skin, let it dry and applied the primer, in small touches to minimize the pores.
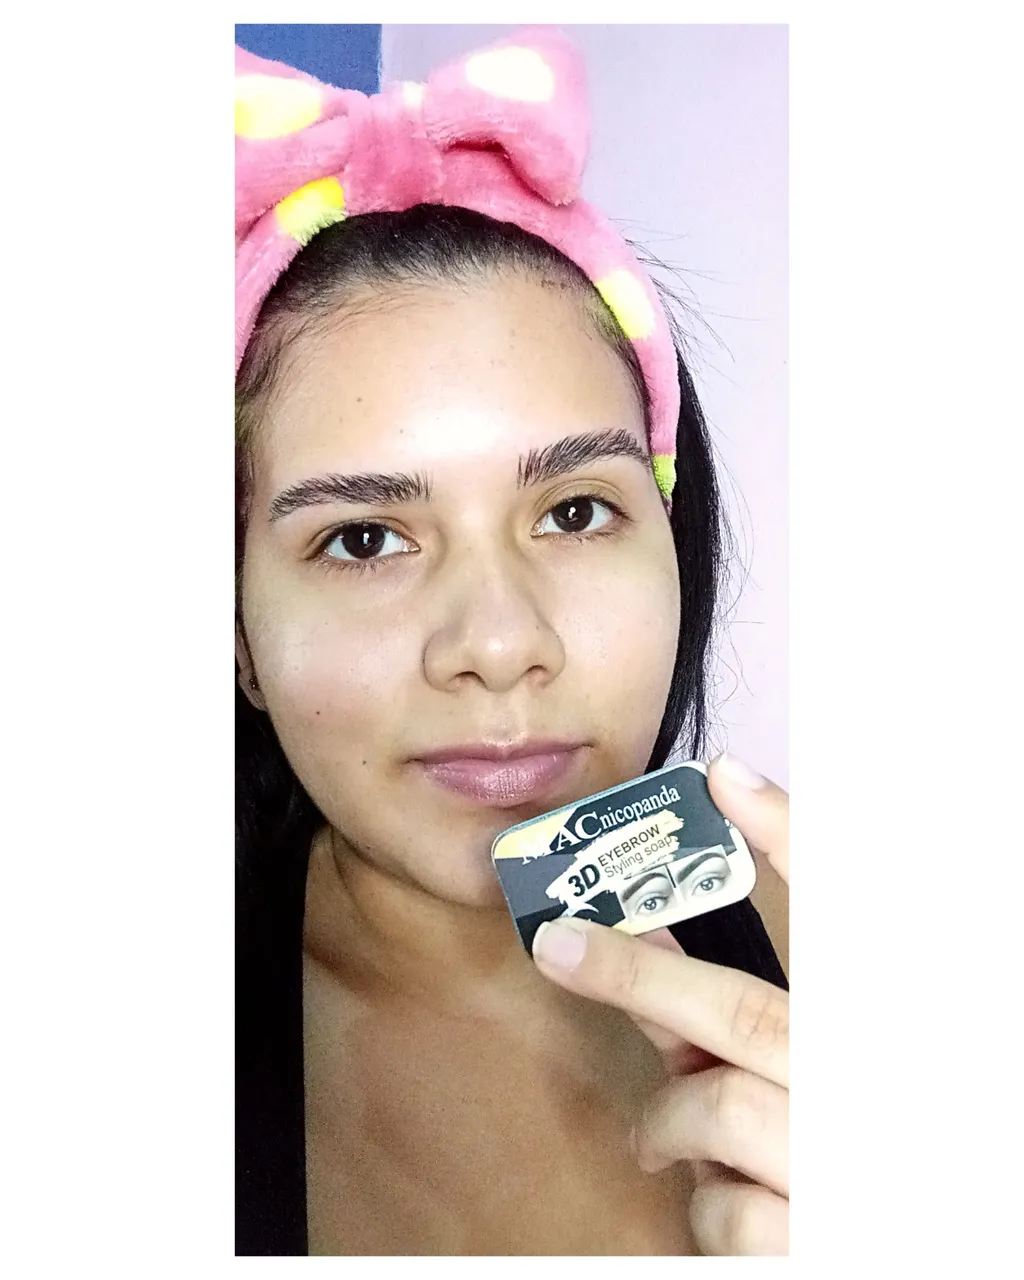
Paso 2: Seguidamente realizó las cejas con el laminado, que desde que empecé a usarlo, me encantó porque le da un aspecto natural, lo que hago es humedecer el producto y con el cepillo le voy dando forma a la ceja, luego con una brocha angular relleno espacios con poca sombra oscura.
Step 2: Next, she made the eyebrows with the laminate, which since I started using it, I loved it because it gives it a natural look, what I do is moisten the product and with the brush I shape the eyebrow, then with a brush angular fill spaces with little dark shadow.
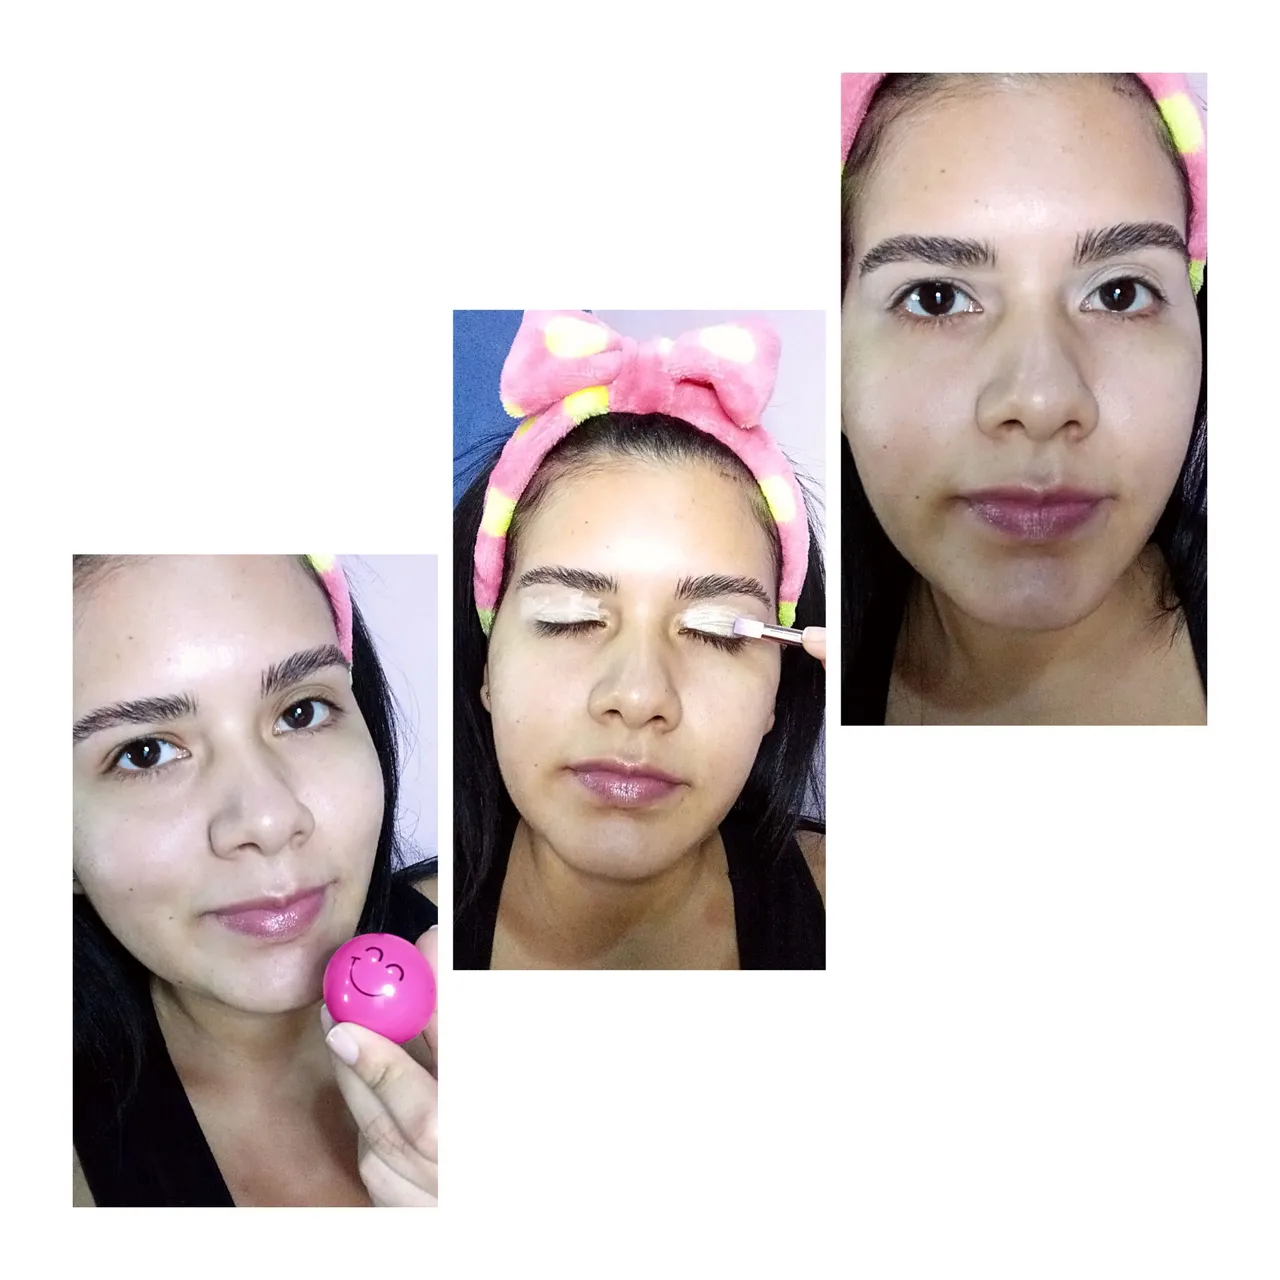
Paso 3: Luego para mis labios utilicé el Hidratante, que ayuda mucho a qué no estén resecos, continuó aplicando el corrector para definir las cejas y extiendo por todo el párpado, para que las sombras tengan mayor pigmentación.
Step 3: Then for my lips I used the Moisturizer, which helps a lot so that they are not dry, I continued applying the concealer to define the eyebrows and spread it over the entire eyelid, so that the shadows have more pigmentation.
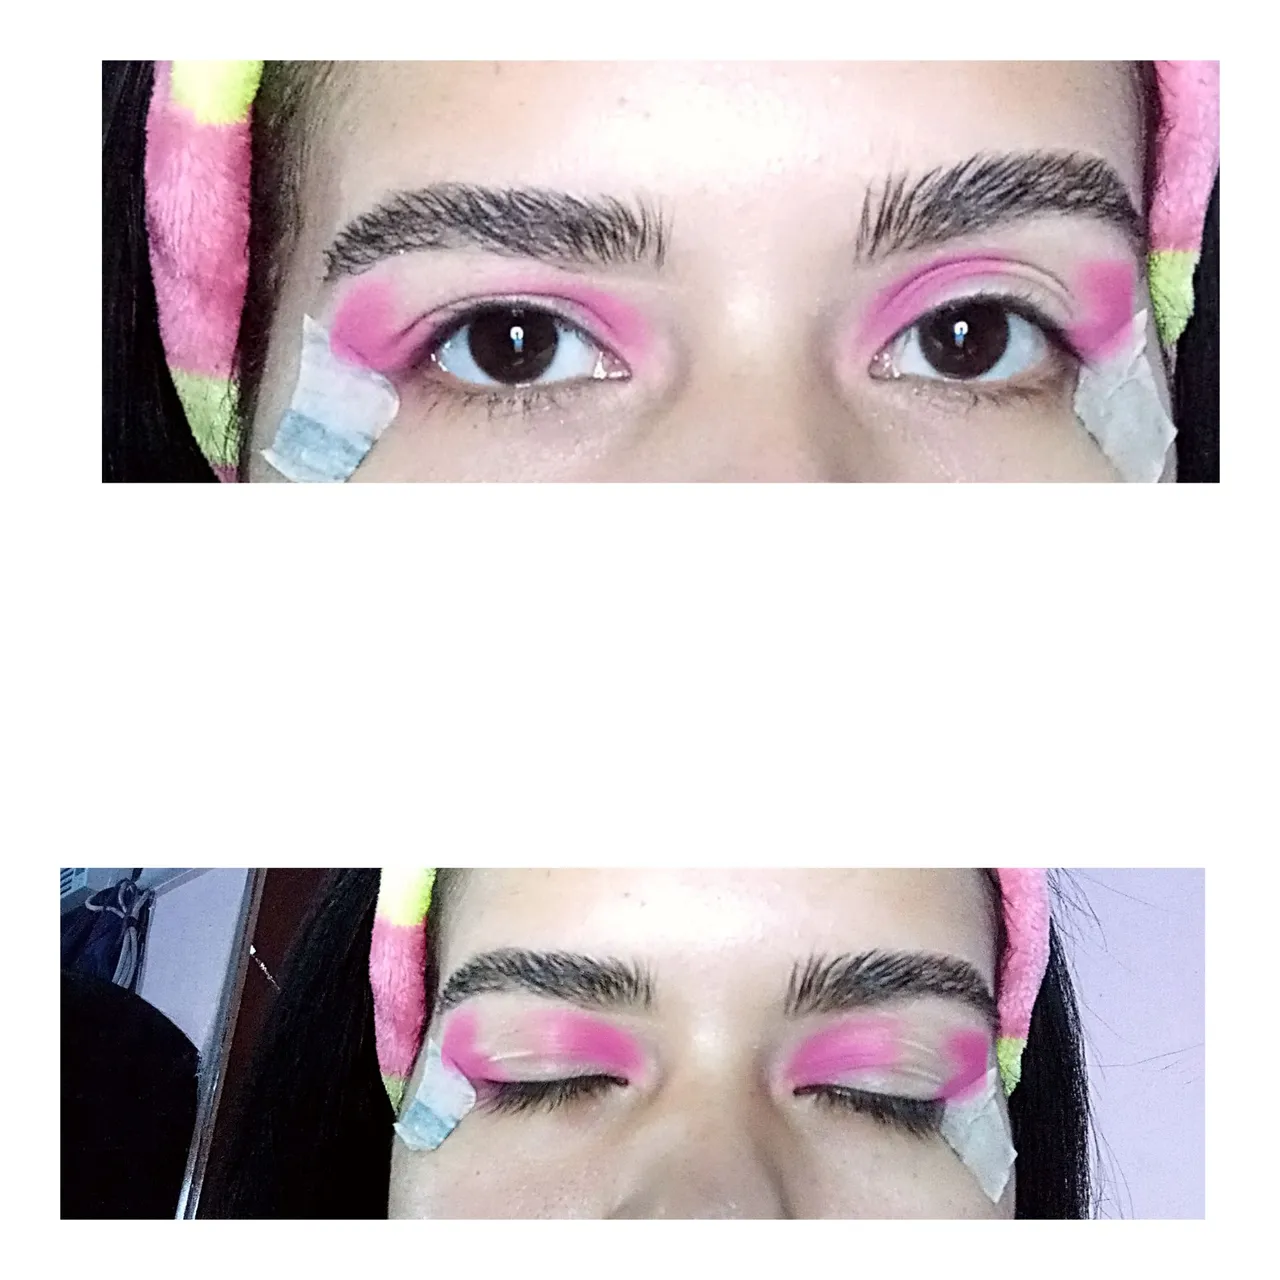
Paso 4: Procedo aplicando el tono rosado y difumino en la esquina externa y en la interna, a nivel de la cuenca, difuminado hacía arriba, sin unir en el centro, dejamos un pequeño espacio.
Step 4: I proceed by applying the pink tone and blend it in the outer corner and in the inner corner, at the level of the basin, blending upwards, without joining in the center, leaving a small space.
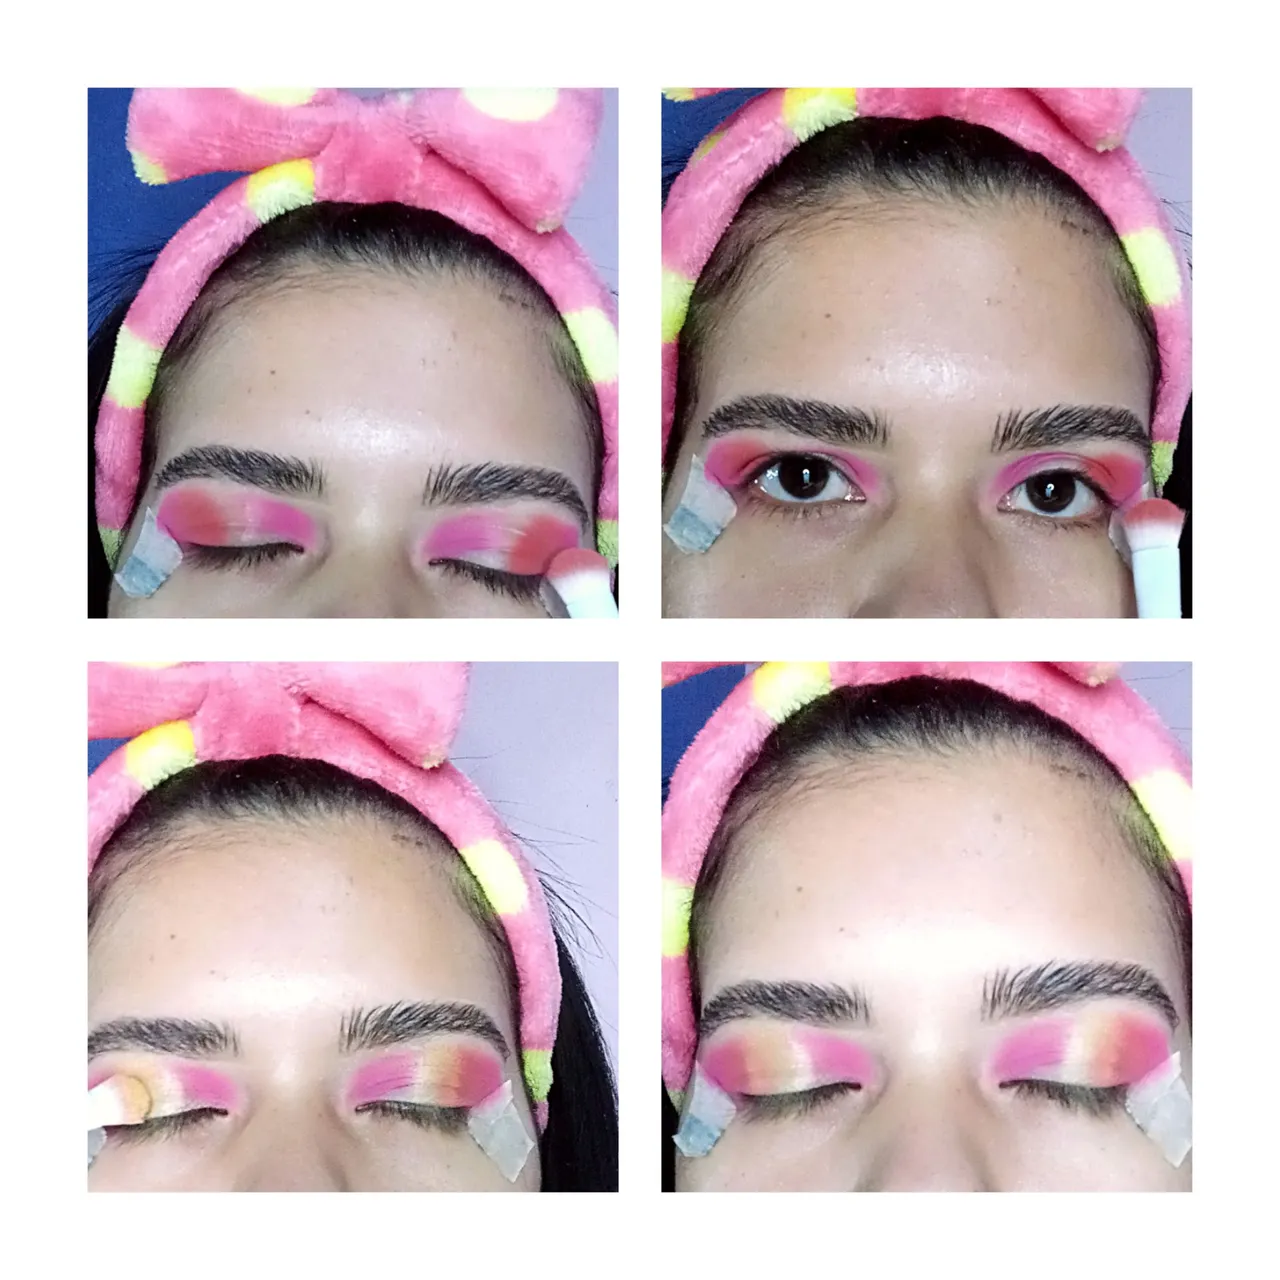
Paso 5: Luego en ambos bordes internos, difumino un tono naranja suave, después en el centro aplicó sombra amarilla y difumino muy bien.
Step 5: Then on both inner edges, I blend a soft orange shade, then in the center I apply yellow shadow and blend nicely.
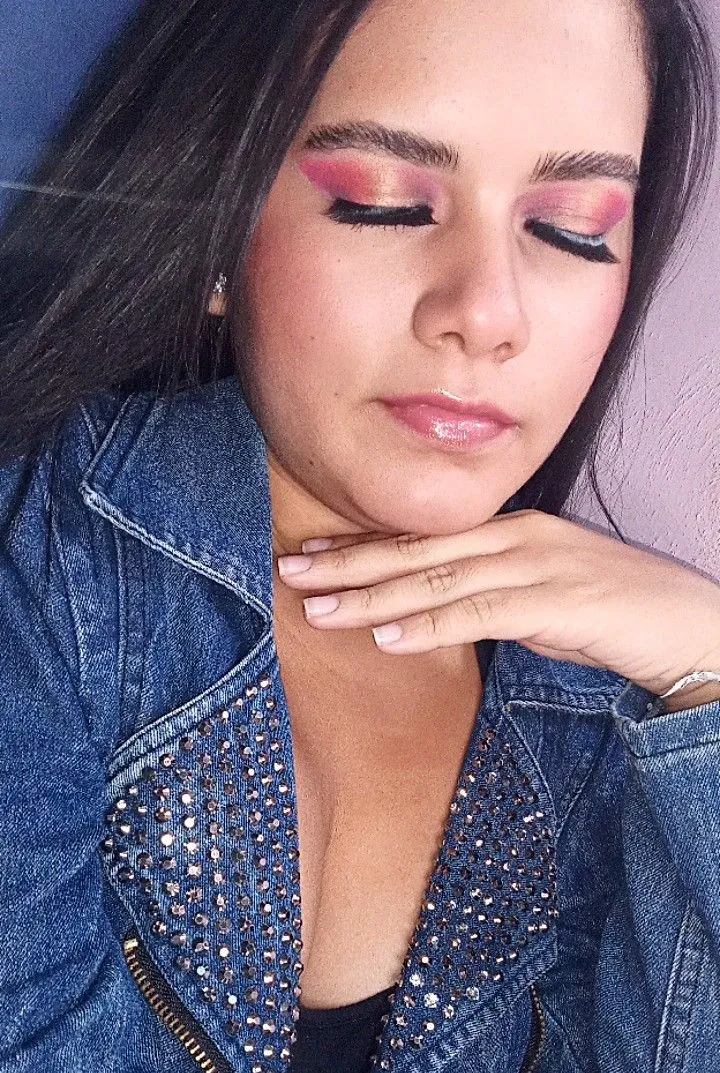
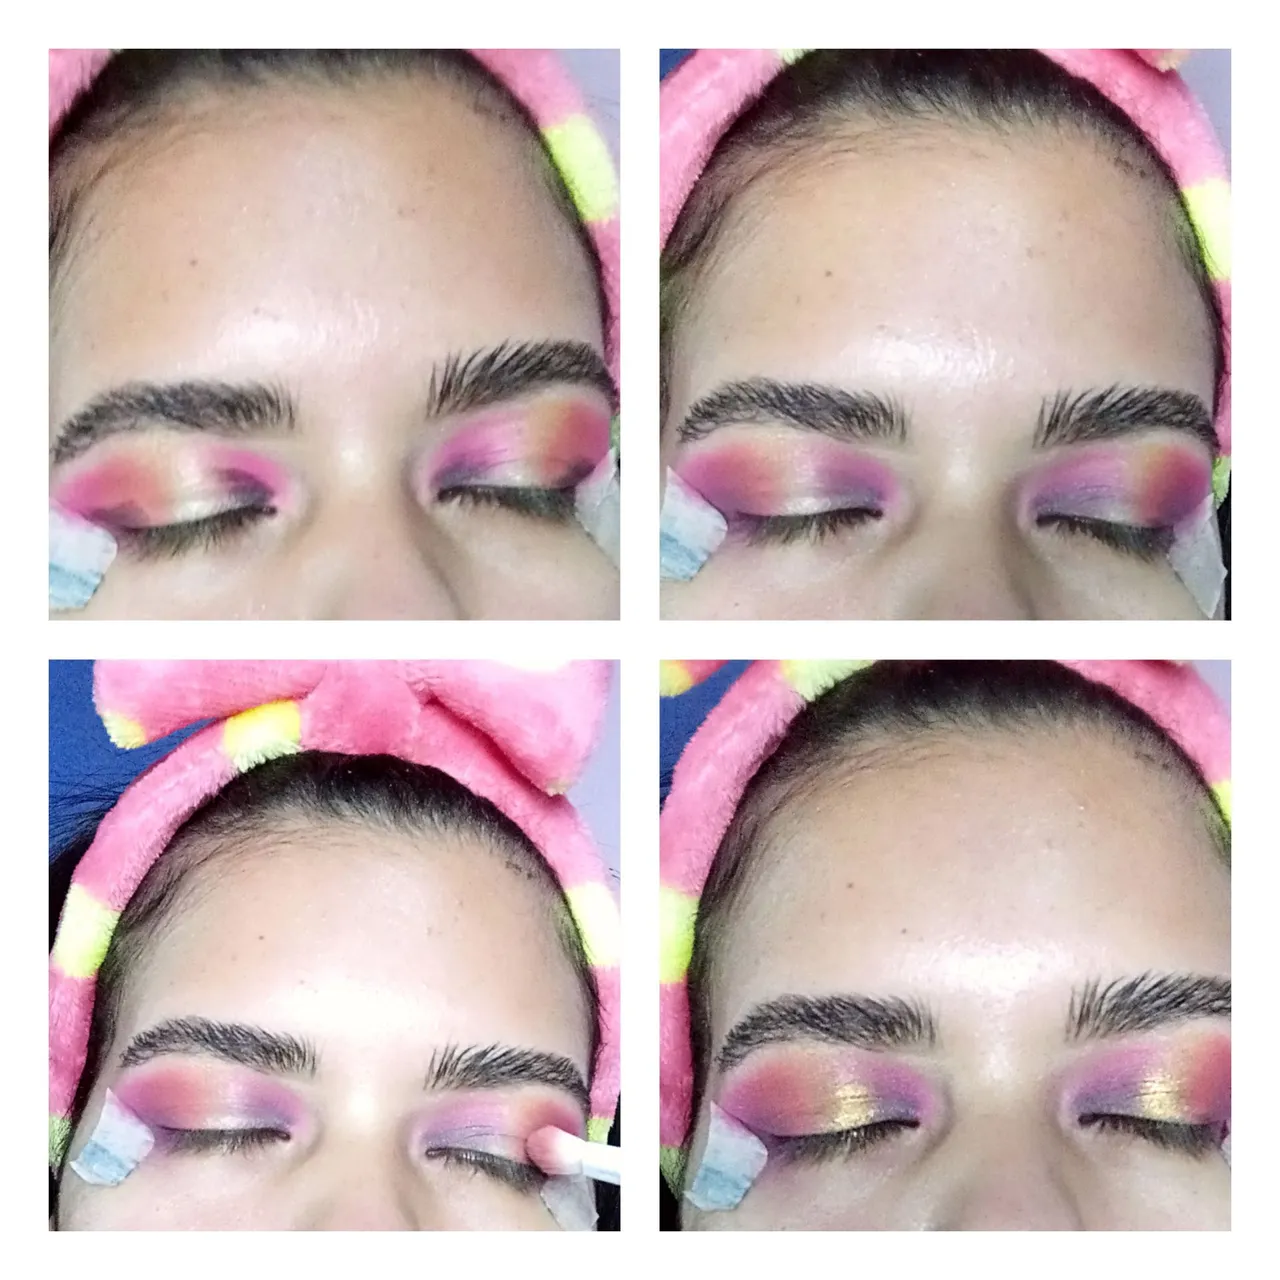
Paso 6: Después aplicó sombra negra en ambos extremos, luego sellamos con sombra morada y se difumina para integrar con el rosado, y para darle profundidad a la mirada delineó los ojos con negro en la parte inferior de las pestañas y sello con un poco de sombra rosada y morada.
Step 6: Then she applied black shadow on both ends, then we sealed with purple shadow and it blends to integrate with the pink, and to give depth to the look she outlined the eyes with black on the lower part of the lashes and sealed with a little pink and purple shade.
Paso 7: Para terminar la piel, aplicó la base con la brocha, de manera uniforme, aplicó corrector y realizó el contorno.
Step 7: To finish the skin, he applied the foundation with the brush, evenly, applied concealer and contoured.
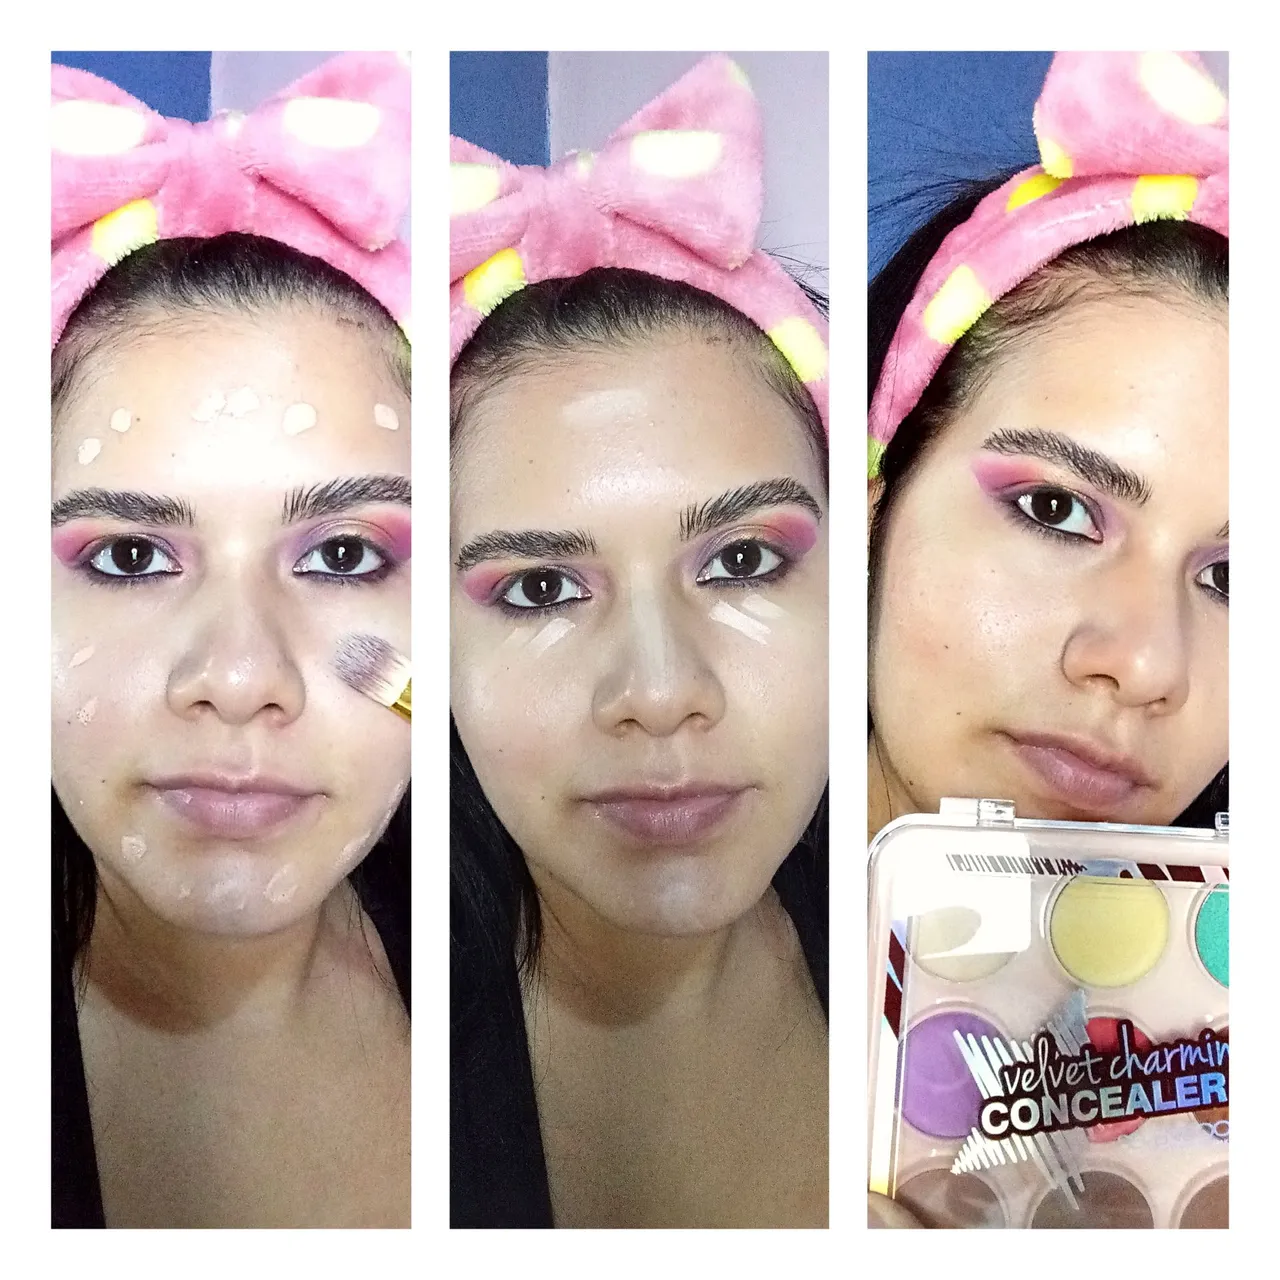
Paso 8: Ya para finalizar, sello con polvo suelto, el rubor pero deslizando hacia arriba, y para que la mirada quedará más expresiva, utilicé el rizador, apliqué máscara y pegué las pestañas postizas, y ya por último en mis labios un brillo labial rosa.
Step 8: To finish, I seal with loose powder, the blush but sliding upwards, and so that the look will be more expressive, I used the curler, applied mascara and glued the false eyelashes, and finally on my lips a lip gloss rose.
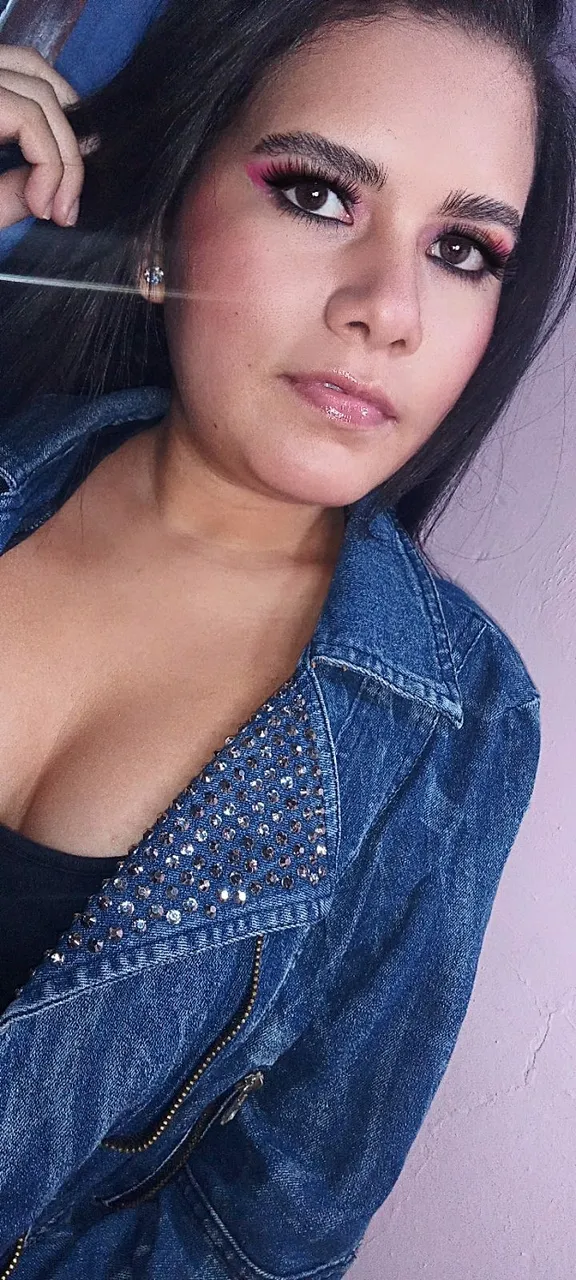
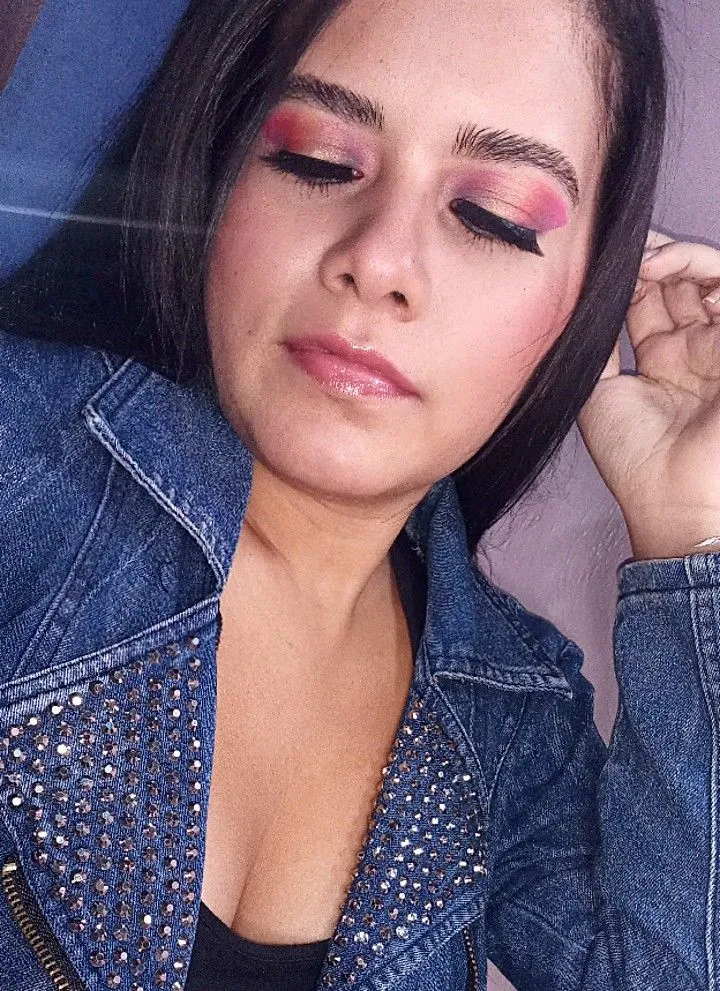
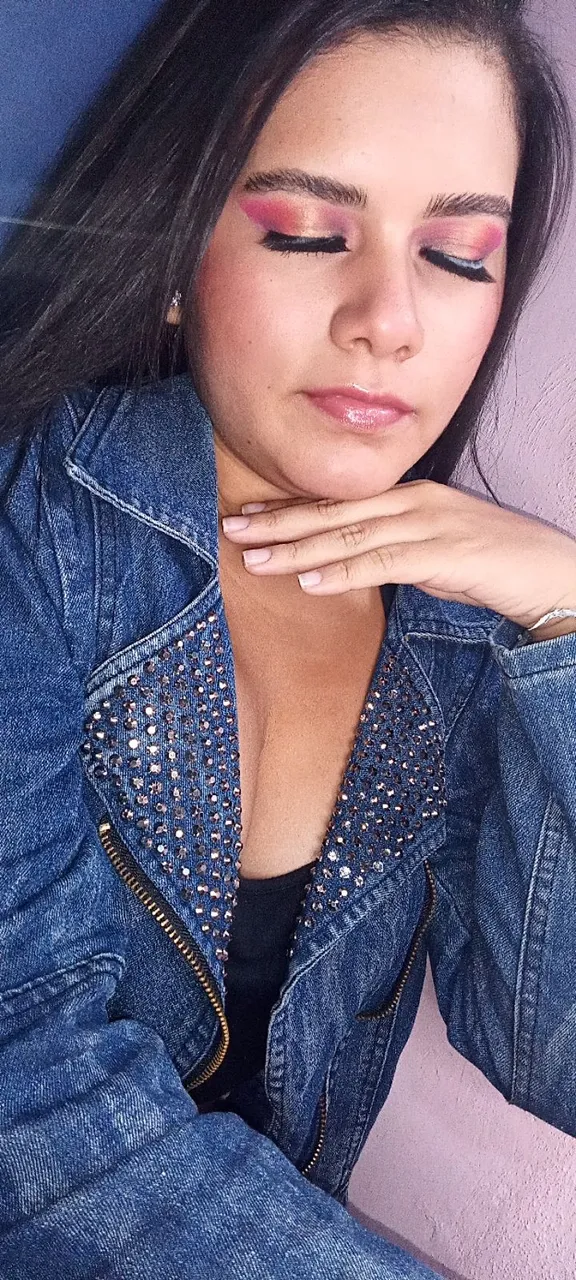
De esta manera culminó el maquillaje amigos, espero les haya gustado tanto como a mí 😊 y muchas gracias por haber leído mi post 🙏🏻éxitos y bendiciones para todos.. hasta la próxima!! ❤️
This is how the makeup ended, friends, I hope you liked it as much as I did 😊 and thank you very much for reading my post 🙏🏻 success and blessings to all... until next time!! ❤️

Todas las fotos son de mi autoría, editadas en EPIK
All photos are my own, edited in EPIK
