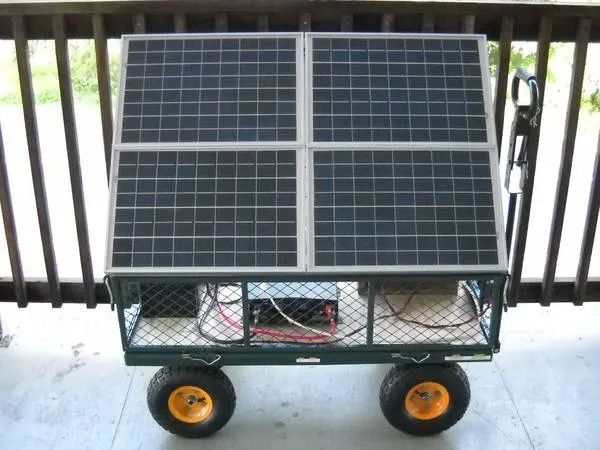
This is the Garden Cart 1 (GC-1). Born out of necessity in Hawai'i the GC-1 has become a reality in Idaho because Hawai'i became too expensive to live alone.
 %20Portable%20Solar%20Power%20(Front).jpg)
Initially all the twenty watt panels were placed in a window facing west because they fit and there was no place else to put them. As a result the sun would start to hit the panels at about 12:30 pm every day. Being that I lived Hawai'i the solar production lasted to around 6:00 pm everyday then dropped off dramatically as was expected.
 %20Portable%20Solar%20Power%20(Back).jpg)
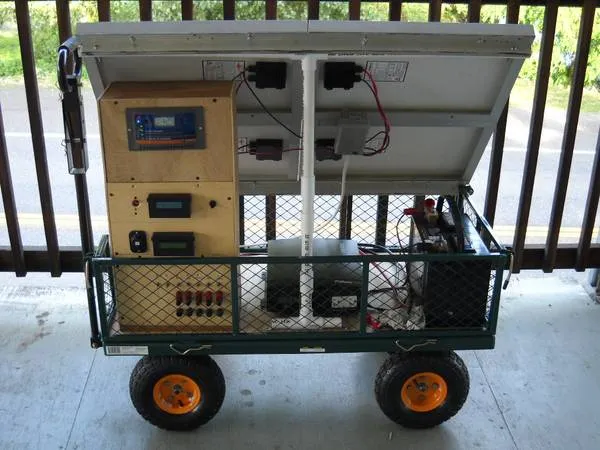
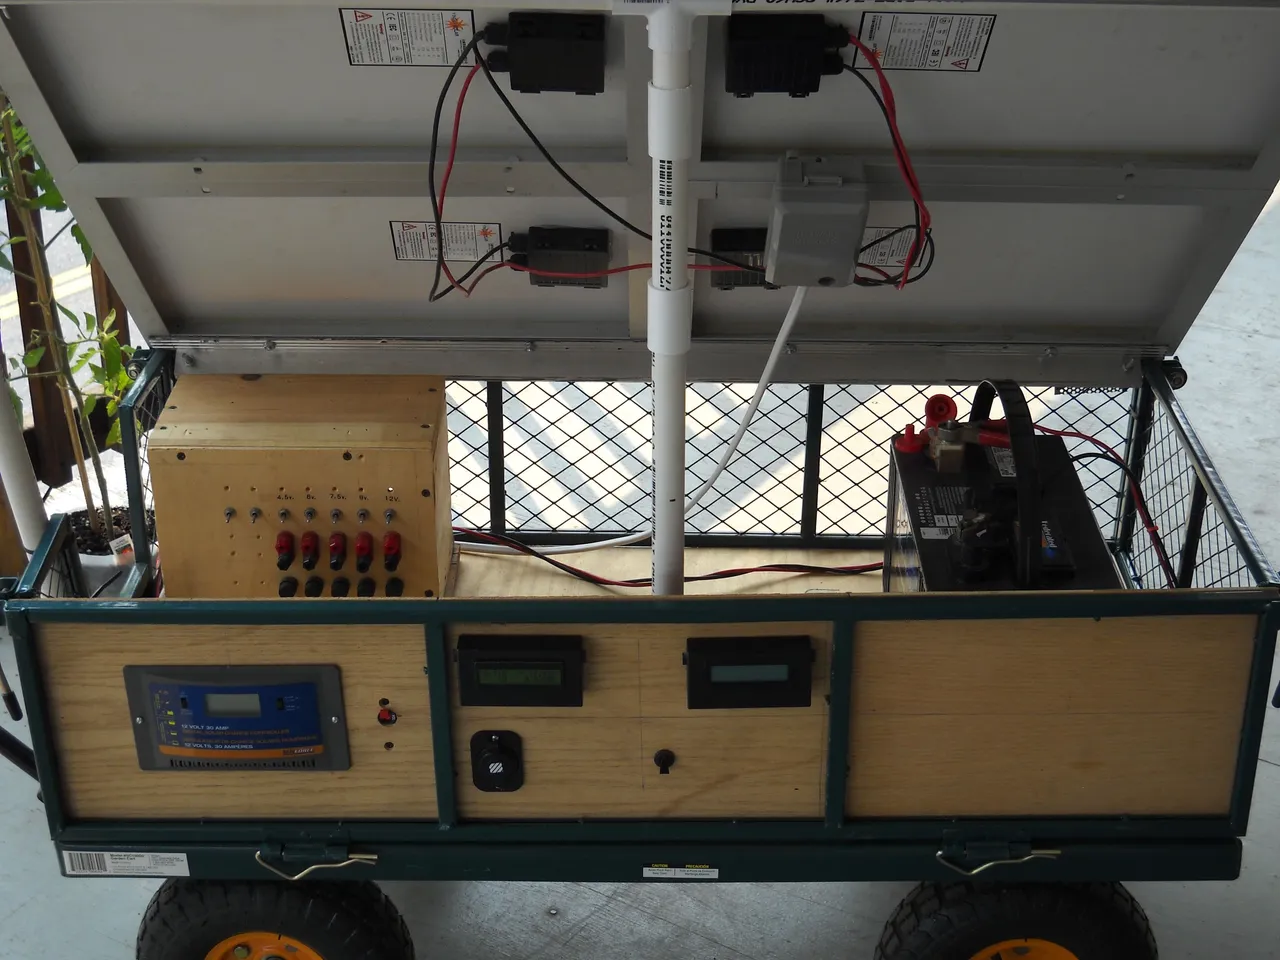
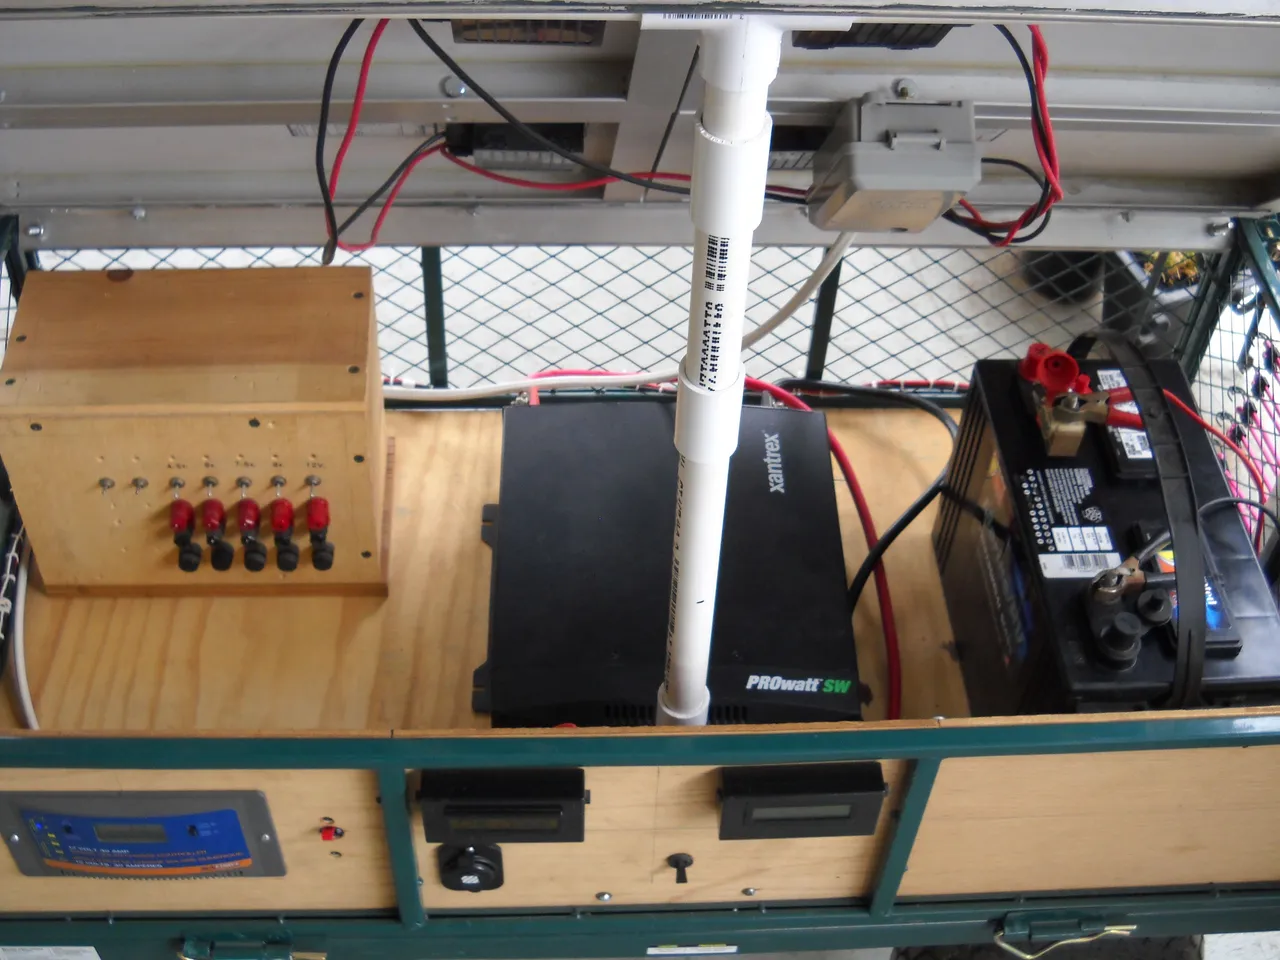
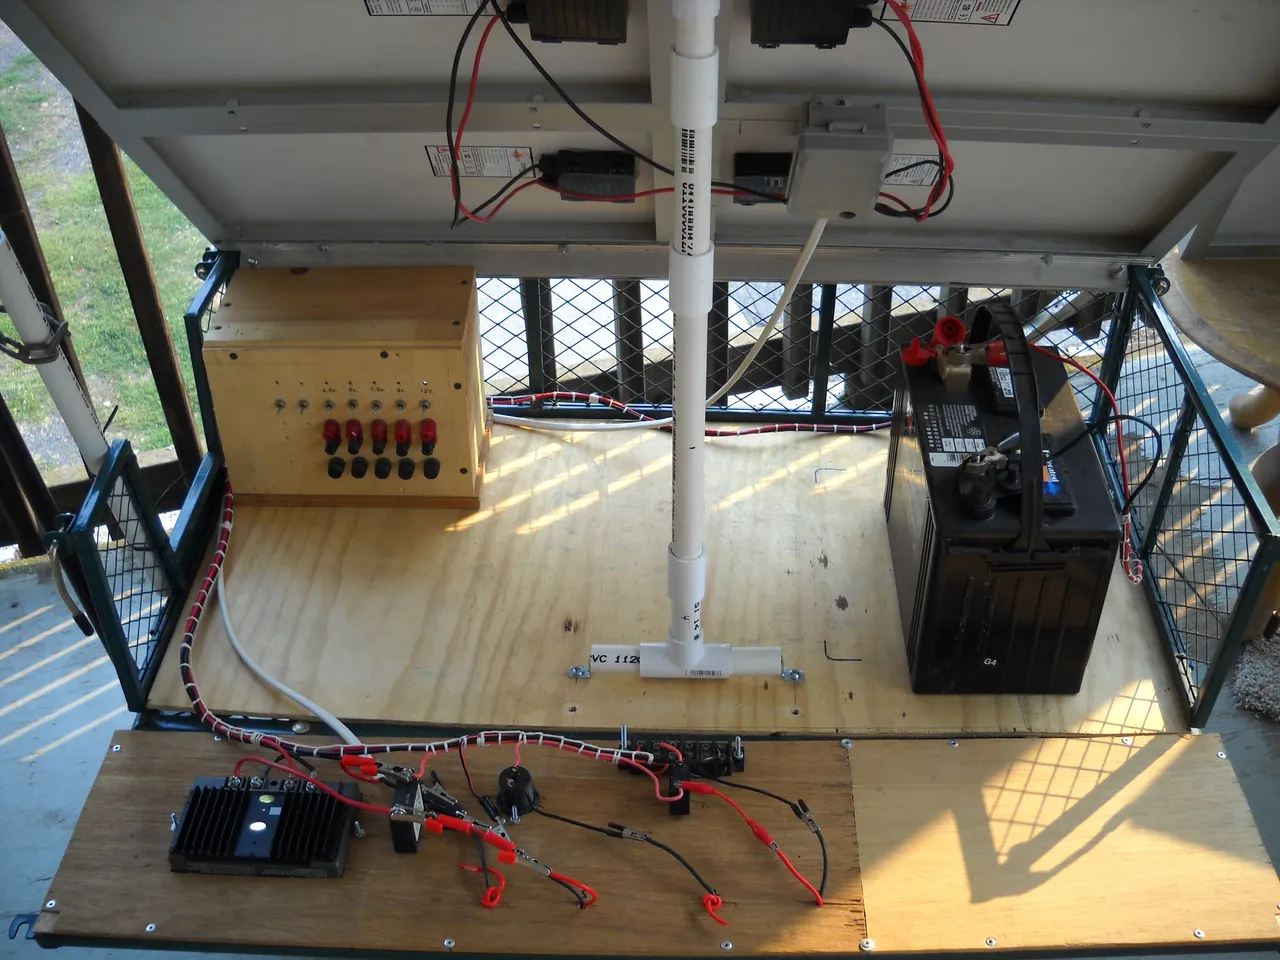
This was the basic setup here in Idaho. I had just gotten the garden cart from Home Depot a week earlier. Notice the black box behind the PVC pipe. That is an Xantrex 2000 Watt Pure Sine Inverter I scored in Hawai'i from West Marine for $320!
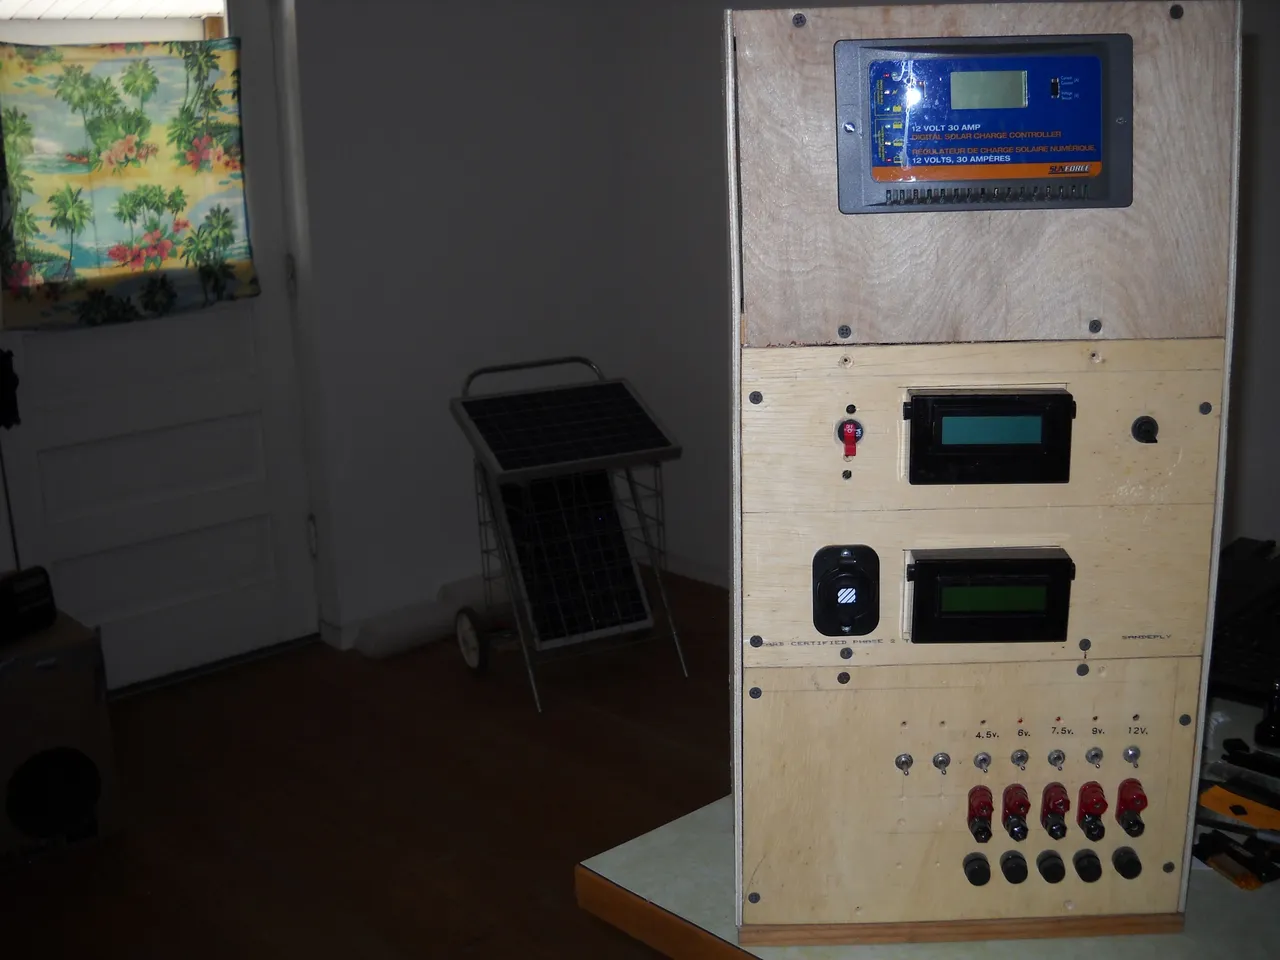
Old Power Panel
This is the power panel for the Hawaiian Window System. The way you see it now is not the way it was in the old system. The panel has morphed several times over the years and I expect it will continue to be 'Refined' with better equipment upgrades.
From the top of the panel you see a SunForce 30 Amp Charge Controller.
Next section down from Left to Right a 10 Amp Blue Sea Circuit Breaker. A WattsUp Meter from Hobietat in Honolulu. Finally a 1/2 Amp Magnetic Breaker from the junk box to protect the 12 Volt outlet.
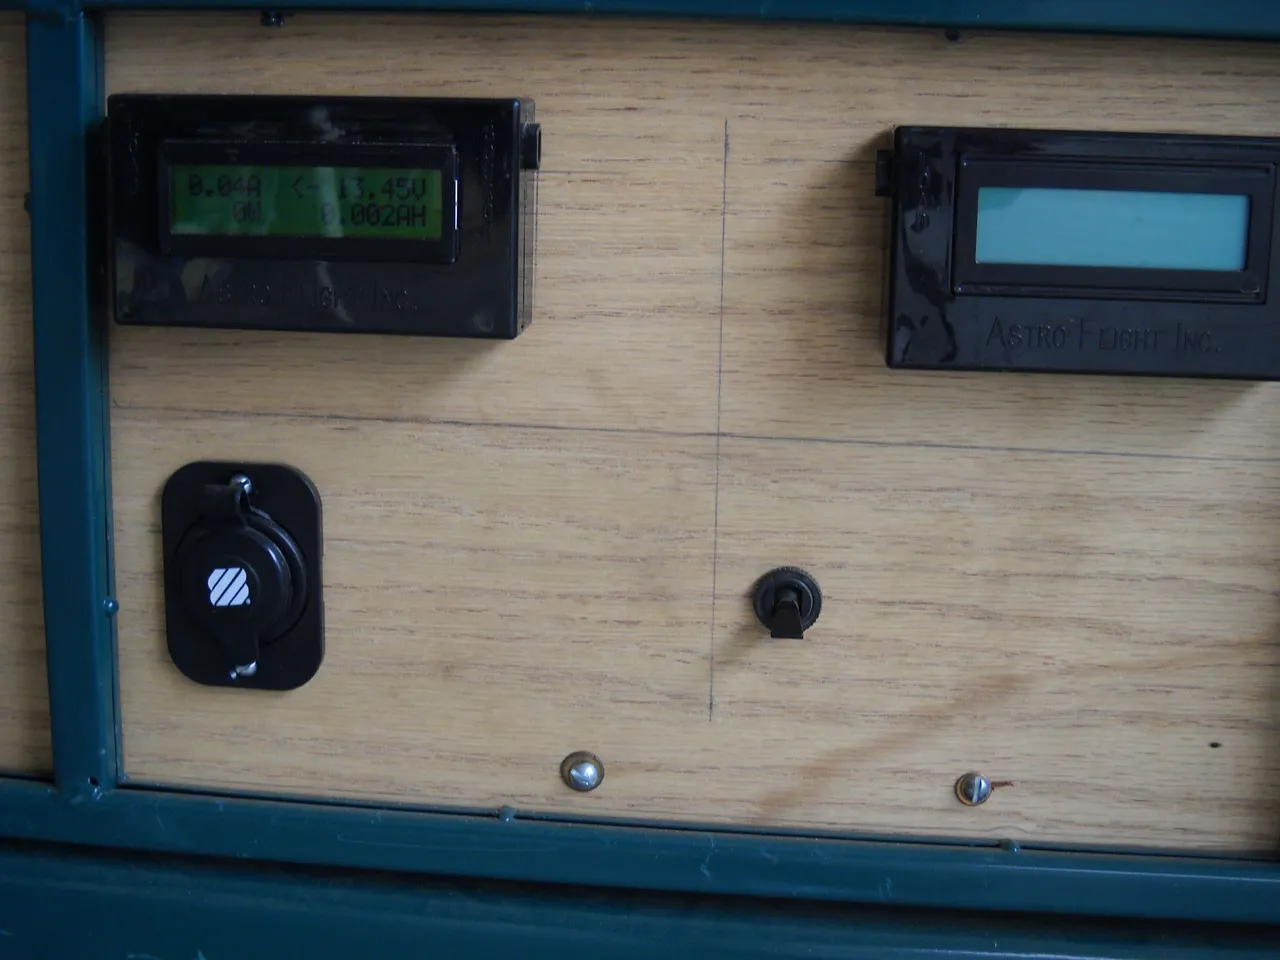
Next section down see the 12 Volt Outlet from West Marine and another WattsUp Meter from Hobietat in Honolulu.
The first WattsUp Meter tells us how much electricity the panels are producing in ways only a WattsUp Meter can.
The second WattsUp Meter tells us how much power is being used by the outlets below.
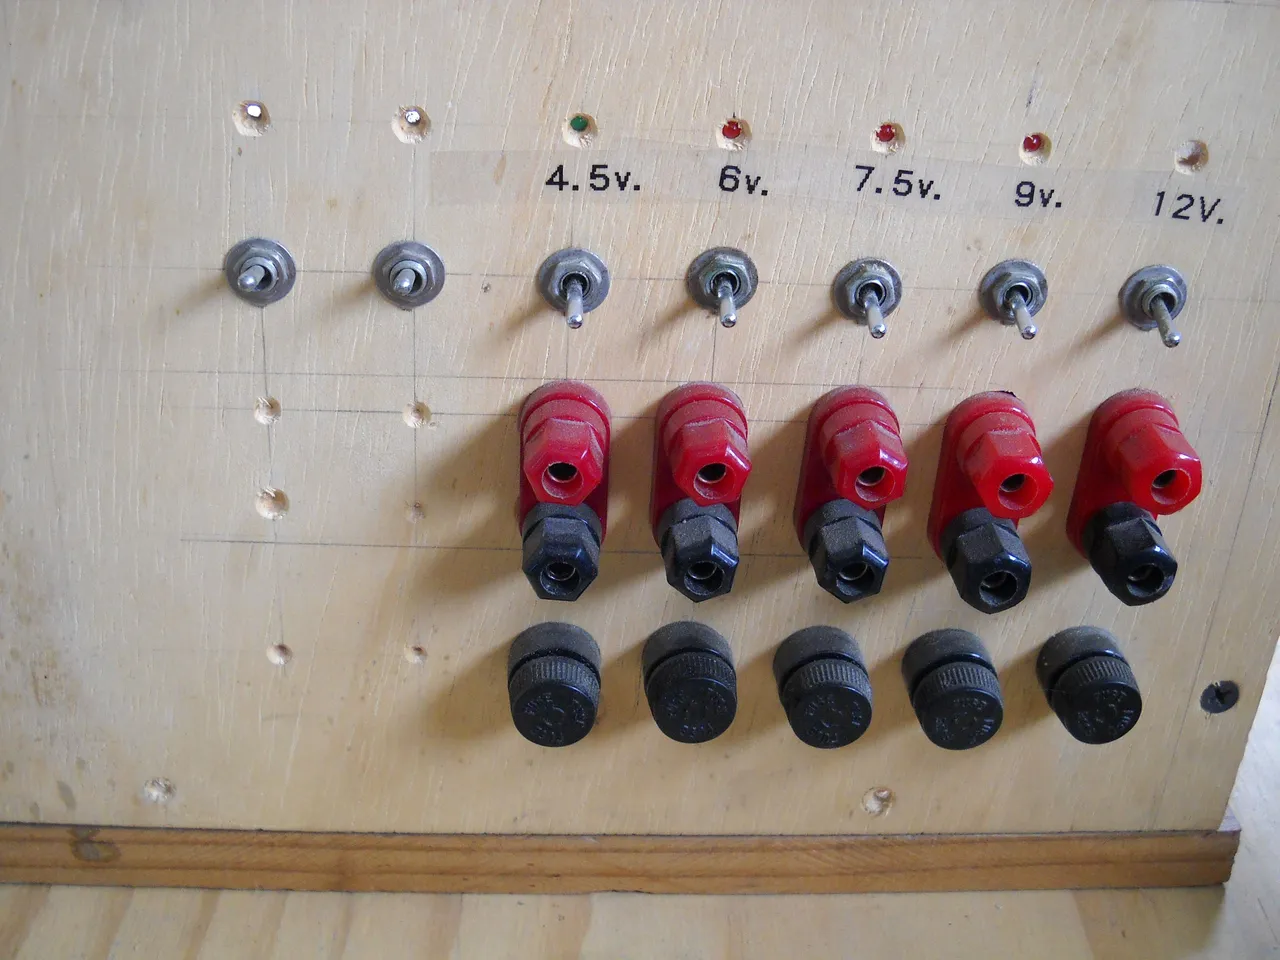
Next section down see 7 mini DC Switches. Left to Right first 2 are not used yet. Continuing across find 5 switches for fractional voltages, 4.5,6,7.5,9 and 12 Volts. The outlets below the switches are from the now defunct Radio Shack as are the corresponding plugs I use attached to various electrical devices. (more on all that later) Below the outlets are 5 panel mount fuse holders to protect the AH55 DC to DC Converters inside the panel.
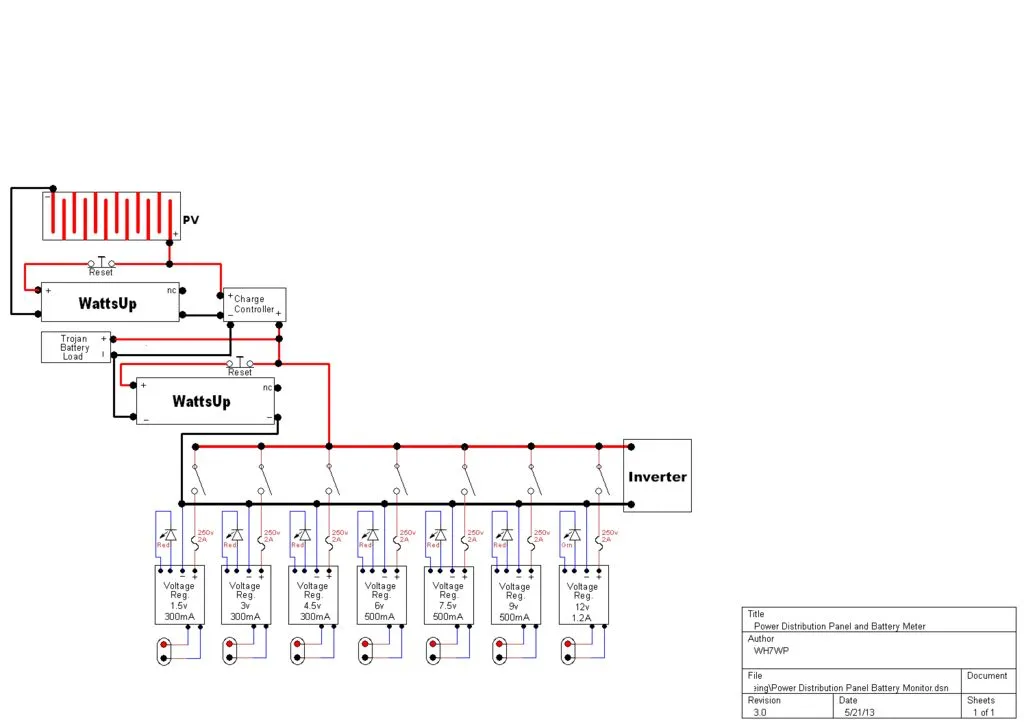
Schematic For The Old Power Panel
Schematic for the old power panel is drawn on a free version of TinyCad available from SourceForge.com go for the 2.60.01 version. It works best.
 %20Morphed%20Again.JPG)
I removed the one side (showing the mounted equipment) and cut the wire diamond screen out of its frame. Next I cut 3 squares of 3/16" plywood, cut the holes for the equipment to be installed and Pop Riveted each piece to the back side of the frame.

SunForce 12 Volt 30 Amp Charge Controller With 10 Amp Circuit Breaker
Two WattsUp Meters, 12 Volt Outlet and Magnetic Circuit Breaker from the junk box.
Fractional Voltage Part Of The Power Panel Now Outlet Box
GC-1 Now Cleaner
You would think I would take the fractional power panel and install it into the third section of the gate mount. I like the idea of being able to remove the fractional power panel and install it into a Camper Van making it portable for what and where I need it. Besides the GC-1 is due to morph again any second now.
 %20Gate%20Mount.JPG)
Gate Mounted Power Panel With Lacing
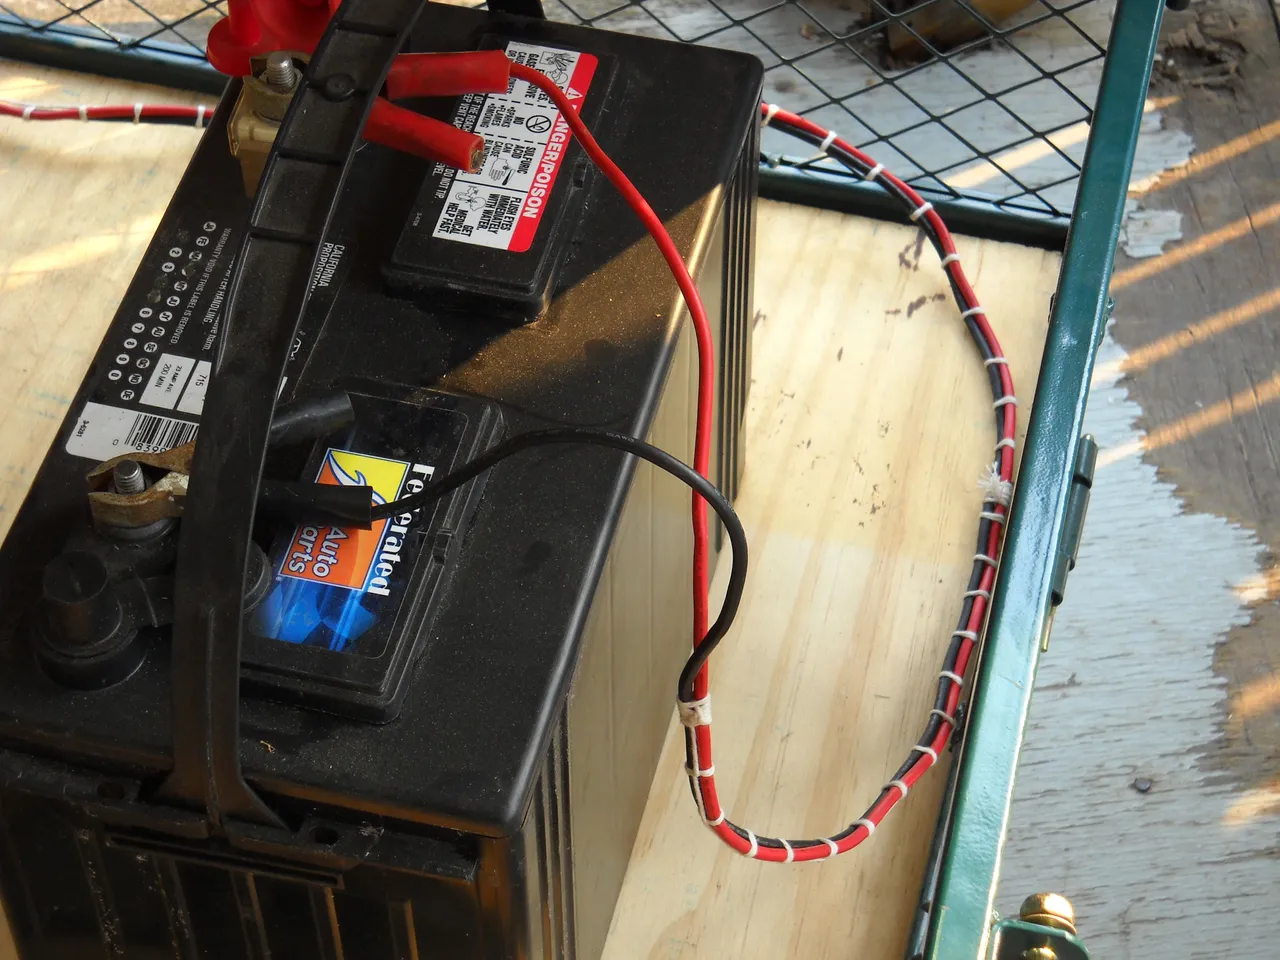
This is very old school but I like the way 'Lacing' looks on a wire harness.
 %20Lacing.JPG)
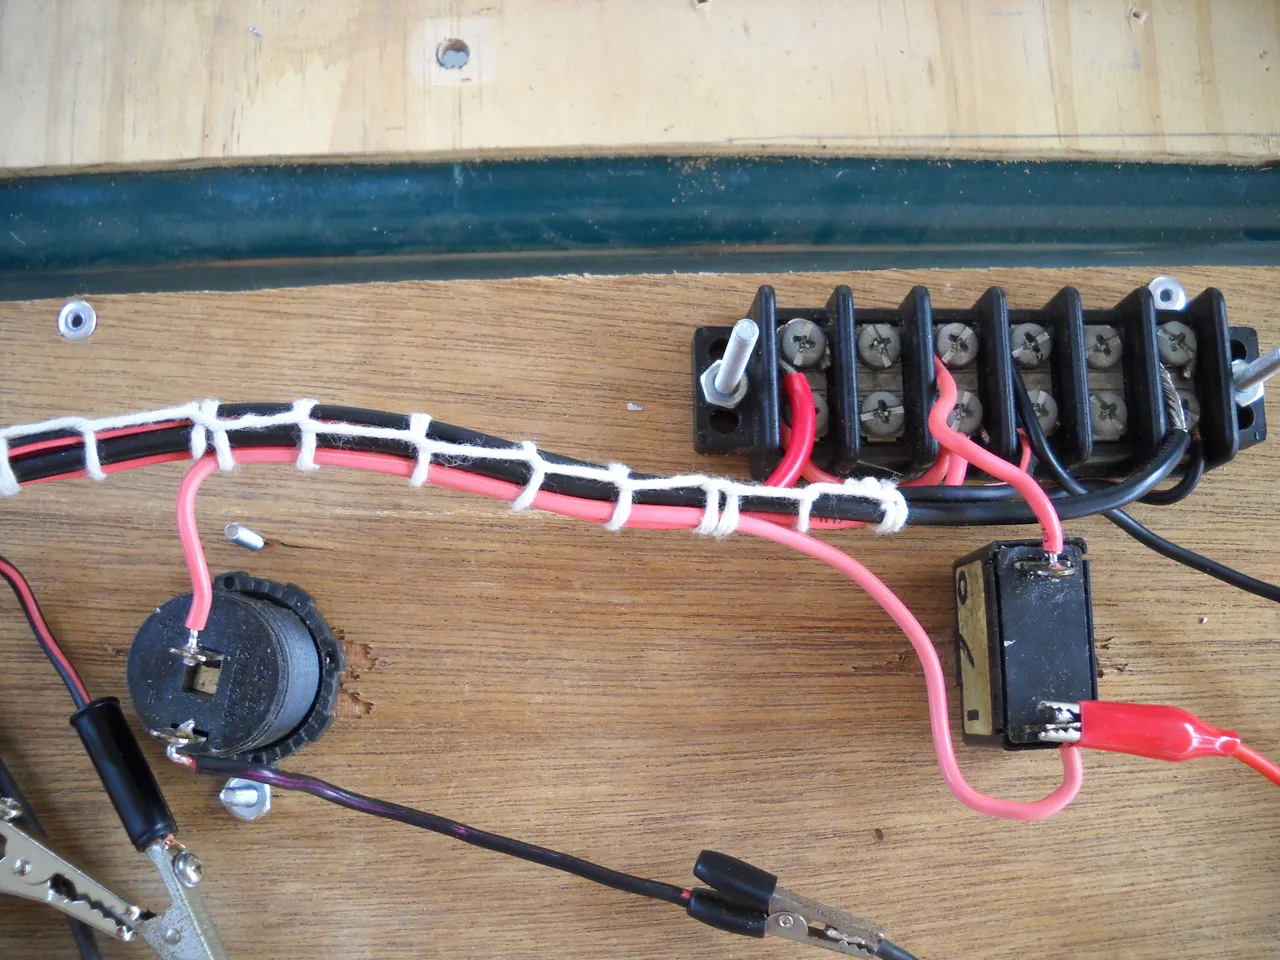
Lacing Keeps Things Neat And Clean
 %20Lacing.JPG)
NASA Still Demands Lacing In Their Wiring Specs And They Have Very Specific Knots They Want Used In Specific Places.
If you want to see more I can be found at https://www.instructables.com/member/Dr.Bill/
Please Like Comment And Share With Your Friends