designs in Photoshop, Real Madrid Stars, Human Machines
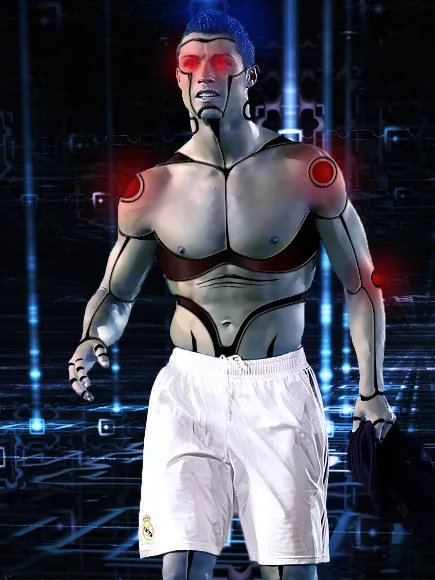
here we are designing the manipulation to appreciate the team of lovers of this soccer lovers. Well, let me be more fit, we use the Madrid football star as an object. Who else if not Cristiano Ronaldo. Already familiar to this one. The action is like a machine in the field. Anyway there is a ball that comes ready to deh goalkeeper trembling opponent.
15 Step Manipulation The Madrid Star:
Prepare the picture
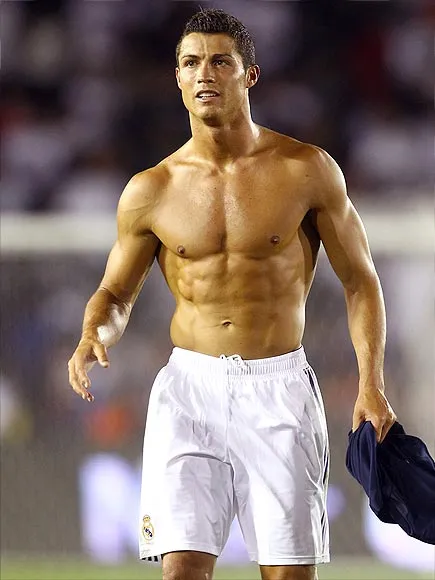

Selection of images. Then press [Ctrl] + [J] followed by [Ctrl] + [D]

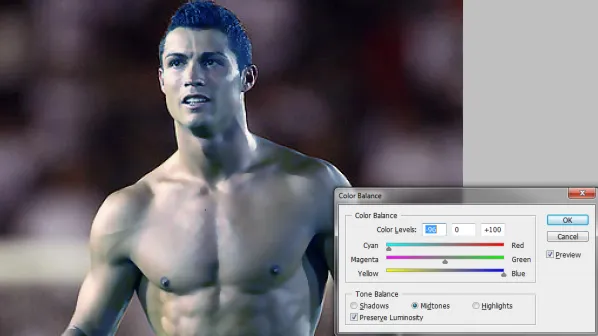
Select [Filter] - [Blur] - [Surface Blur] and set the value as below

Set Color Balance
Create a new layer above Layer 2 and create a line on the arm using the Pen Tool

When done, right click on the created line and select [Stroke Path] - select [Brush] and [OK]

Right click on the line again and select [Delete Path]

Repeat this step on the other body parts

The result is more or less like this

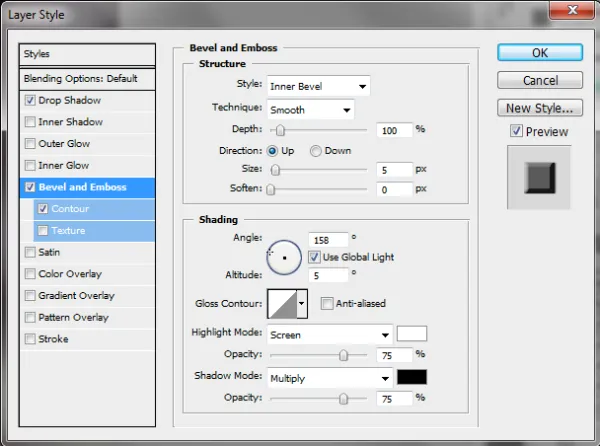
Now select [Layer] - [Layer Style] - [Beveal and Emboss] and set it in such a way
Stay in Layer 3 position, now press [Ctrl] and click on Layer 2 box
Select [Select] - [Inverse] and press Delete on the keyboard, followed by [Ctrl] + [D]. Then the result is like this

Create a selection like the picture below and color with black

Add light to eyes and shoulders using brush with 10% opacity. Click repeatedly and also change the brush ukurna until the image becomes like this
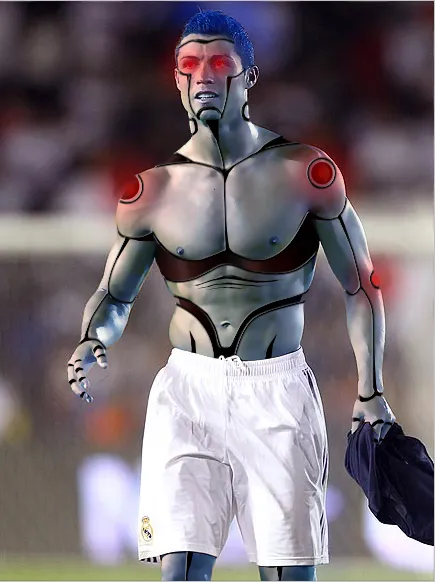
The final step is to change the background and be like this