One question that I keep getting asked…. What GoPro settings do you use!
So for everyone wondering, here are my GoPro settings.
I use slightly different settings for both my photos and videos.
So I will show you my photo settings first and then my video settings.
Photo Settings
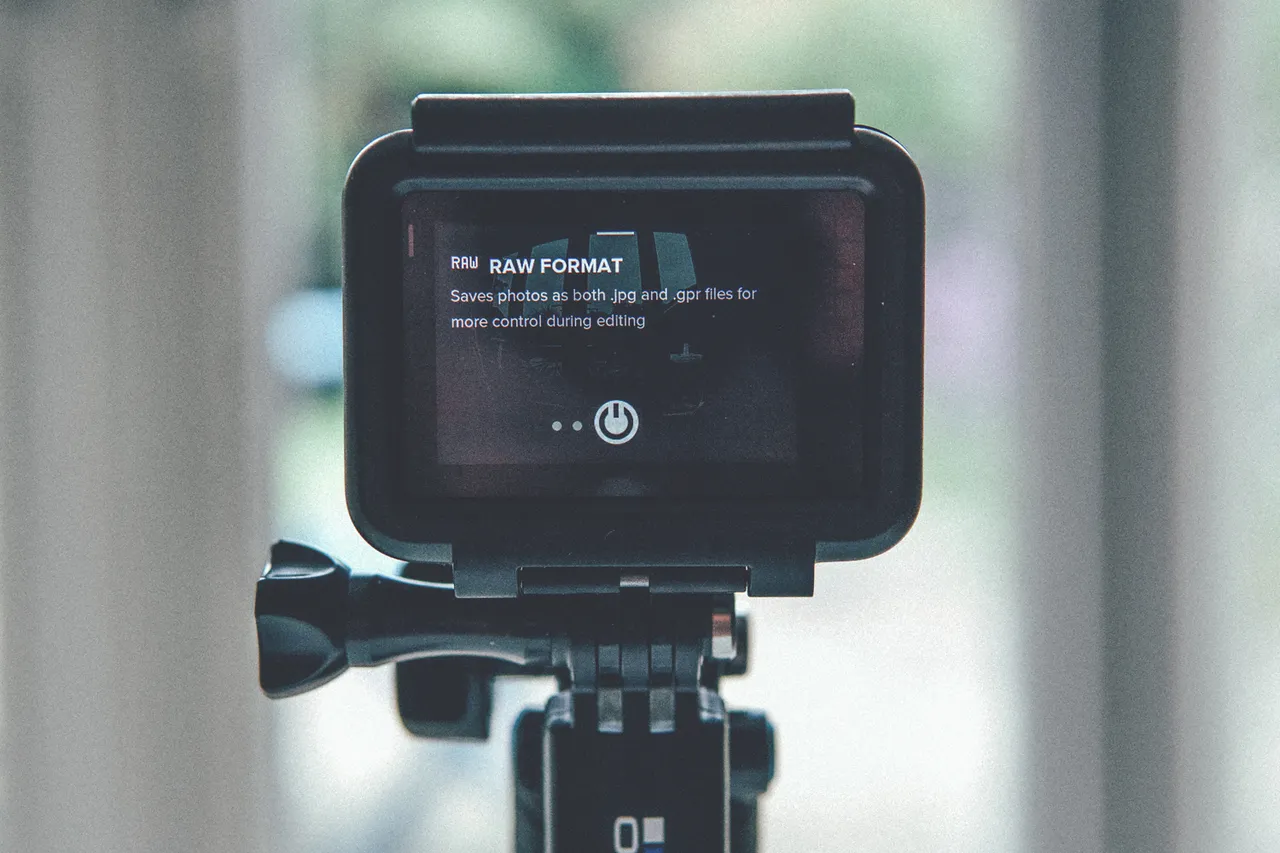
If you don’t already, you need to enable Protune. On the right hand side of the screen, in the middle, swipe left where it will give you the option to enable Protune.

It also has a couple of other options here, including enabling shooting in RAW format (which I have enabled). But if you dont touch it, it will natively shoot in JPG.
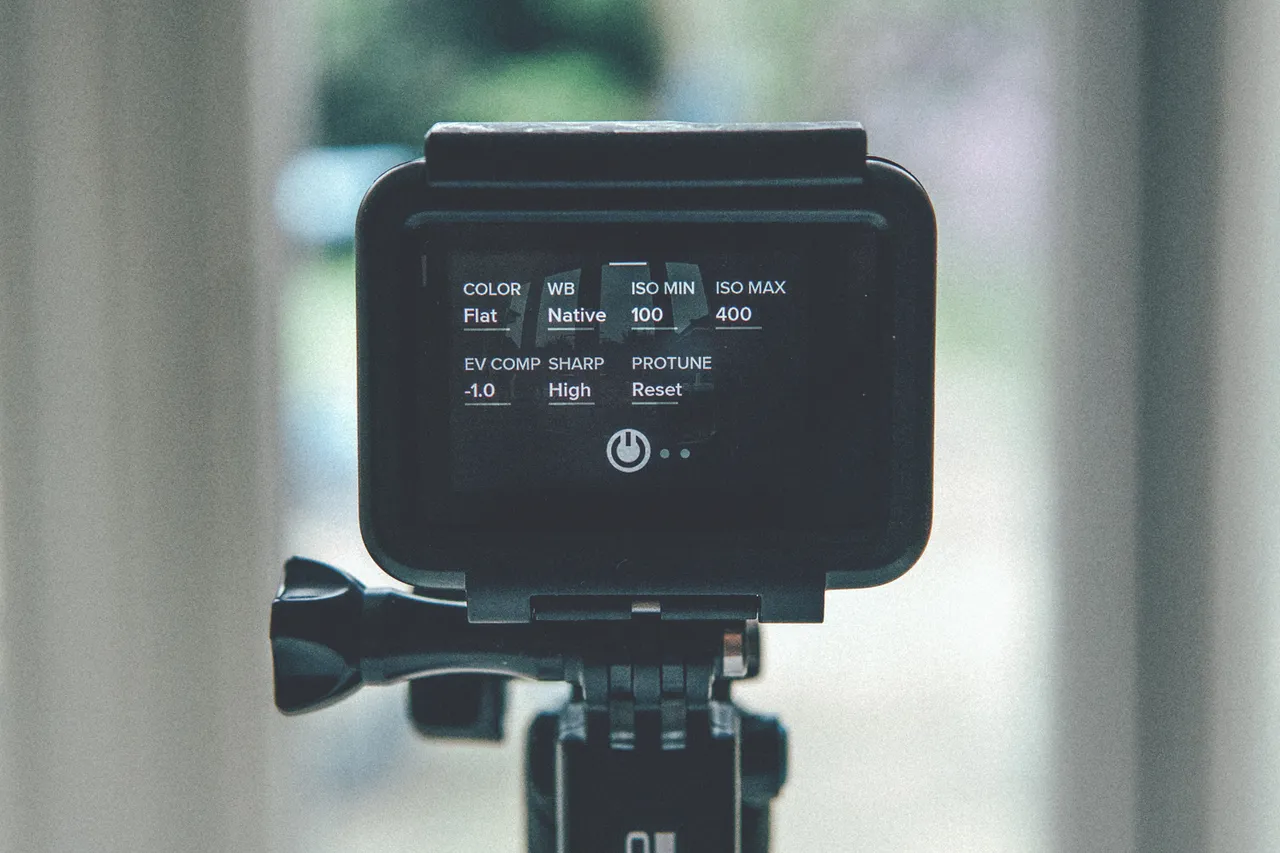
My Protune settings for Photos
For Protune settings, on the whole I leave these alone once they have been set, there are only a couple of things I change.
Color – Flat (I shoot flat as it allows me to easily match photos I shoot with my other camera. If you aren’t worried about this then GoPro colour is ok)
WB – Native (never change this as it’s easier to match photos in post)
ISO Min – 100
ISO Max – 400 (unless it’s in a really dark environment, then bump this up a bit)
EV Comp – -0.5 or -1 (doing this will save your highlights, especially outdoors on really bright days)
Sharp – High (I have found if you set it to low or medium and then add sharpness in post, it looks awful. If you leave it set to high then if you want to add any sharpness in post, only add small amounts)
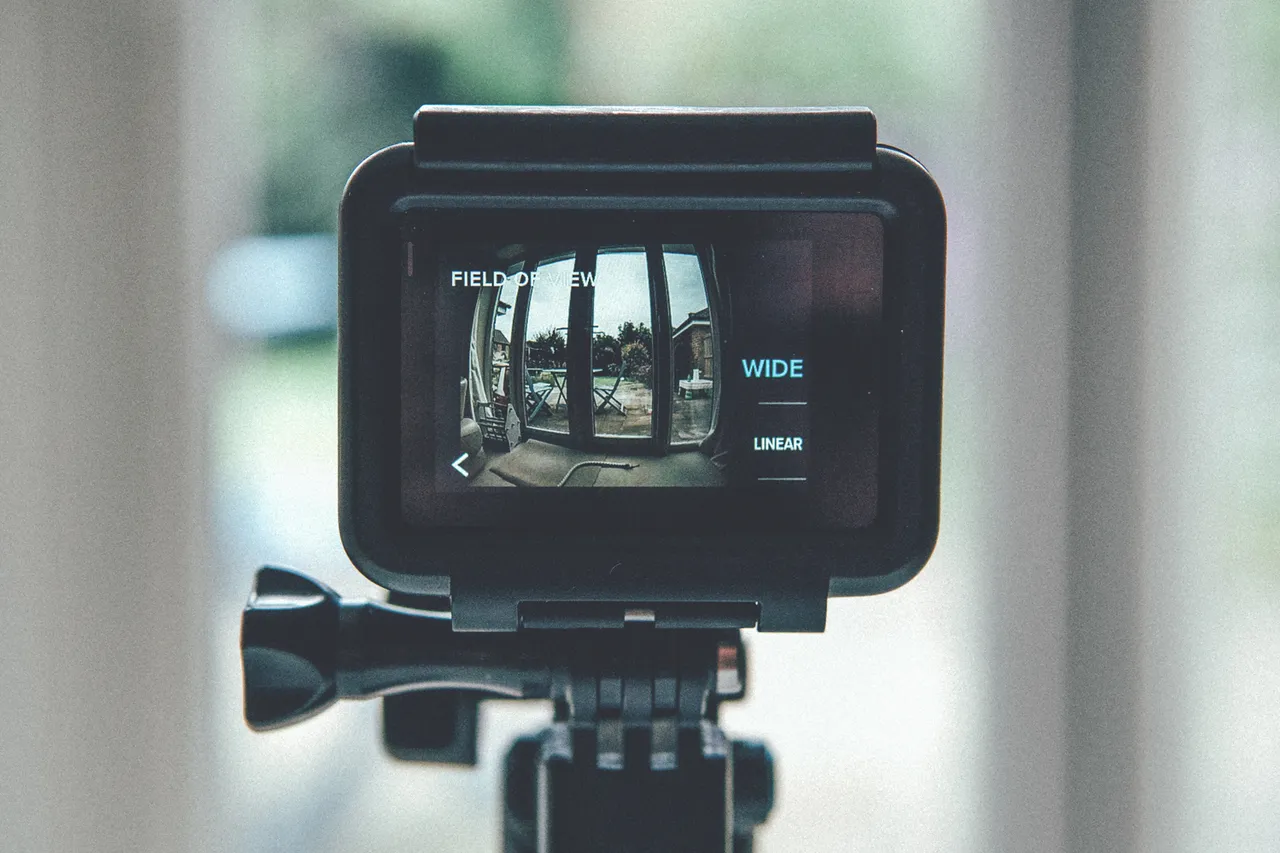
When it comes to photos on the GoPro Hero 5, you now have have the option of removing the ‘Fisheye’ look from your photos.
I personally prefer the ‘Fisheye’ look so I leave it set to FOV – Wide, but if you want to remove the ‘Fisheye’ look then set it to FOV – Linear.
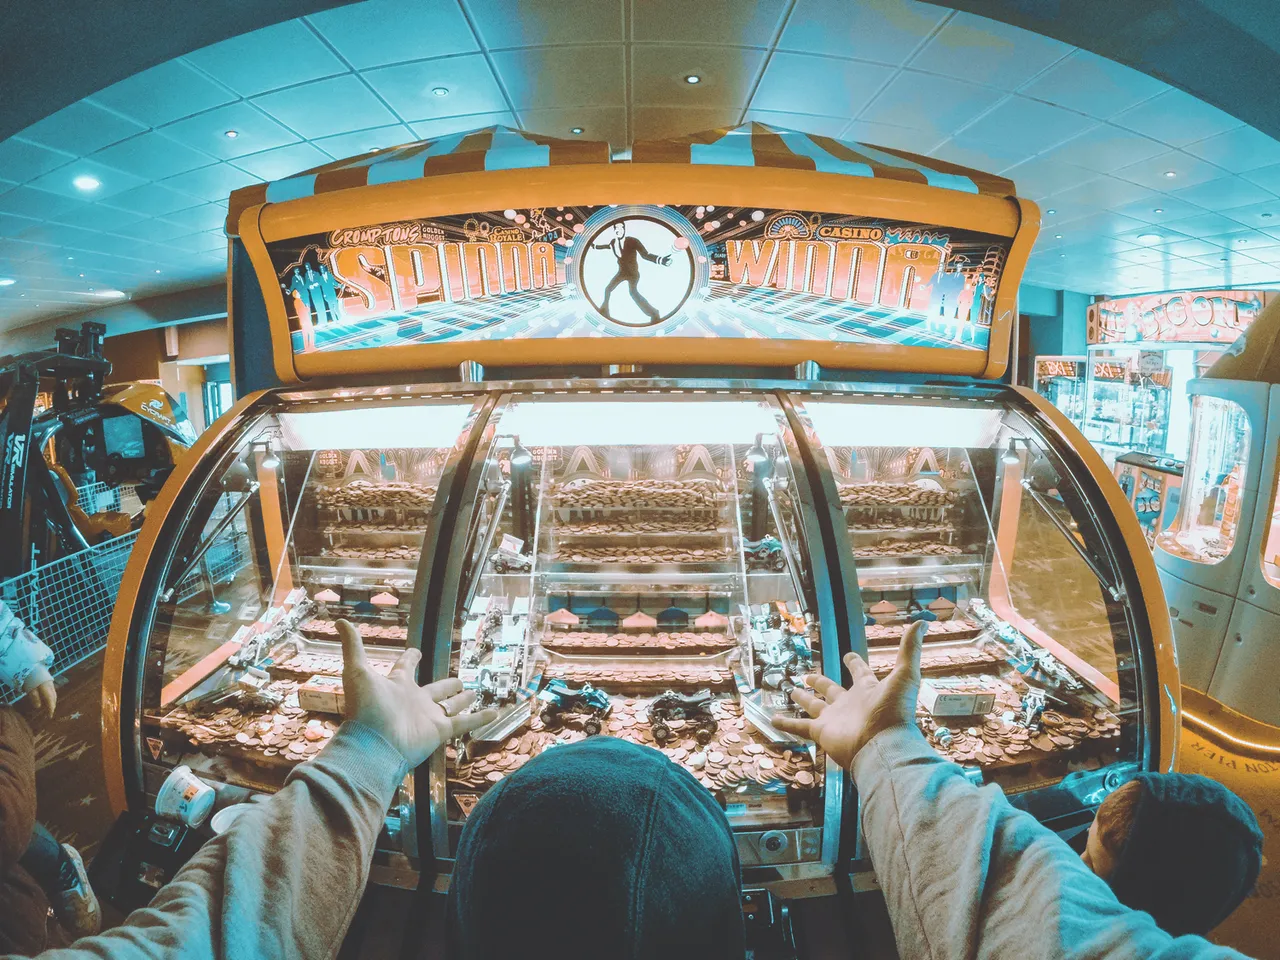
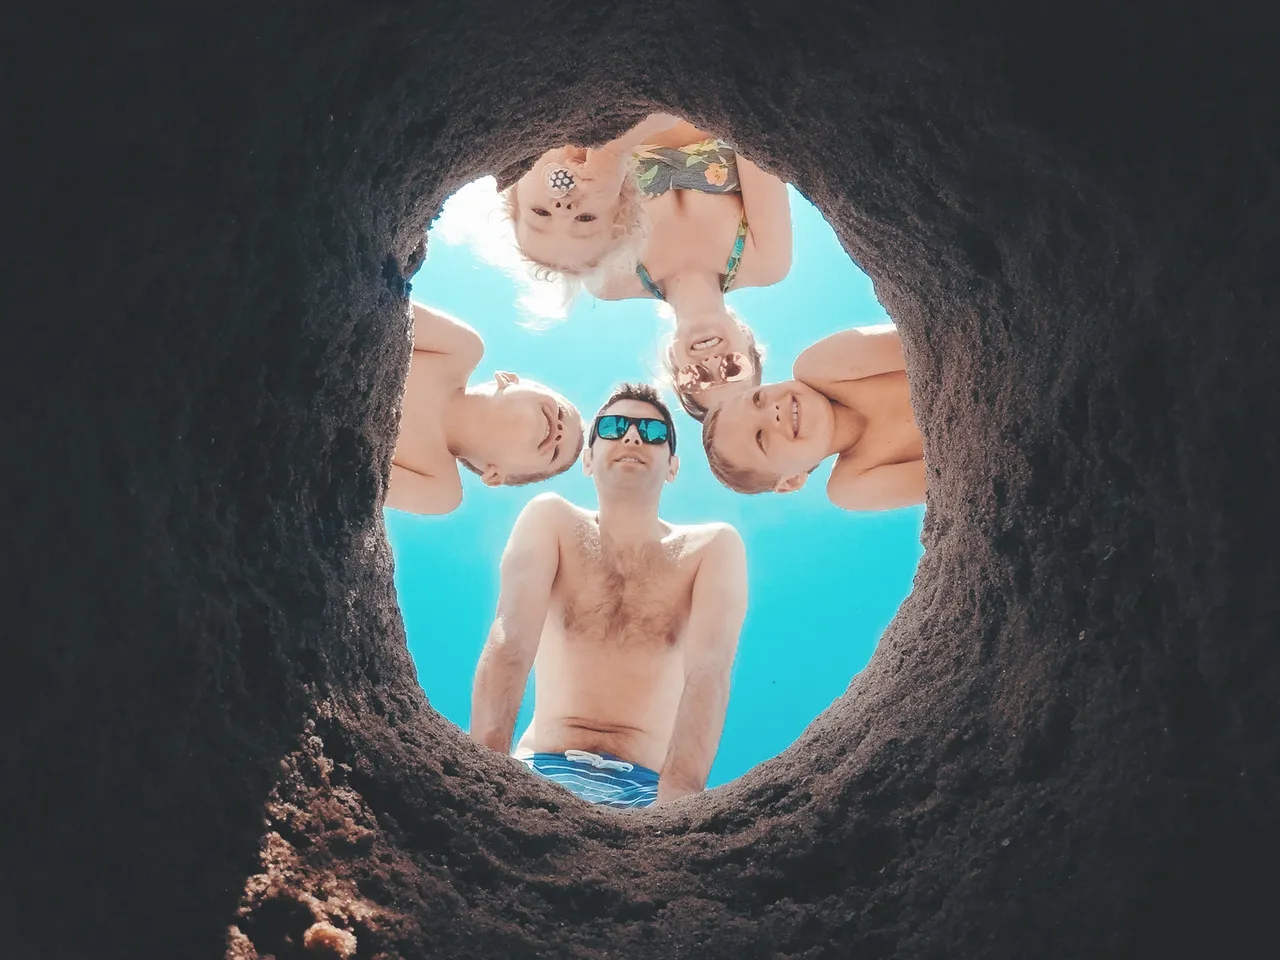
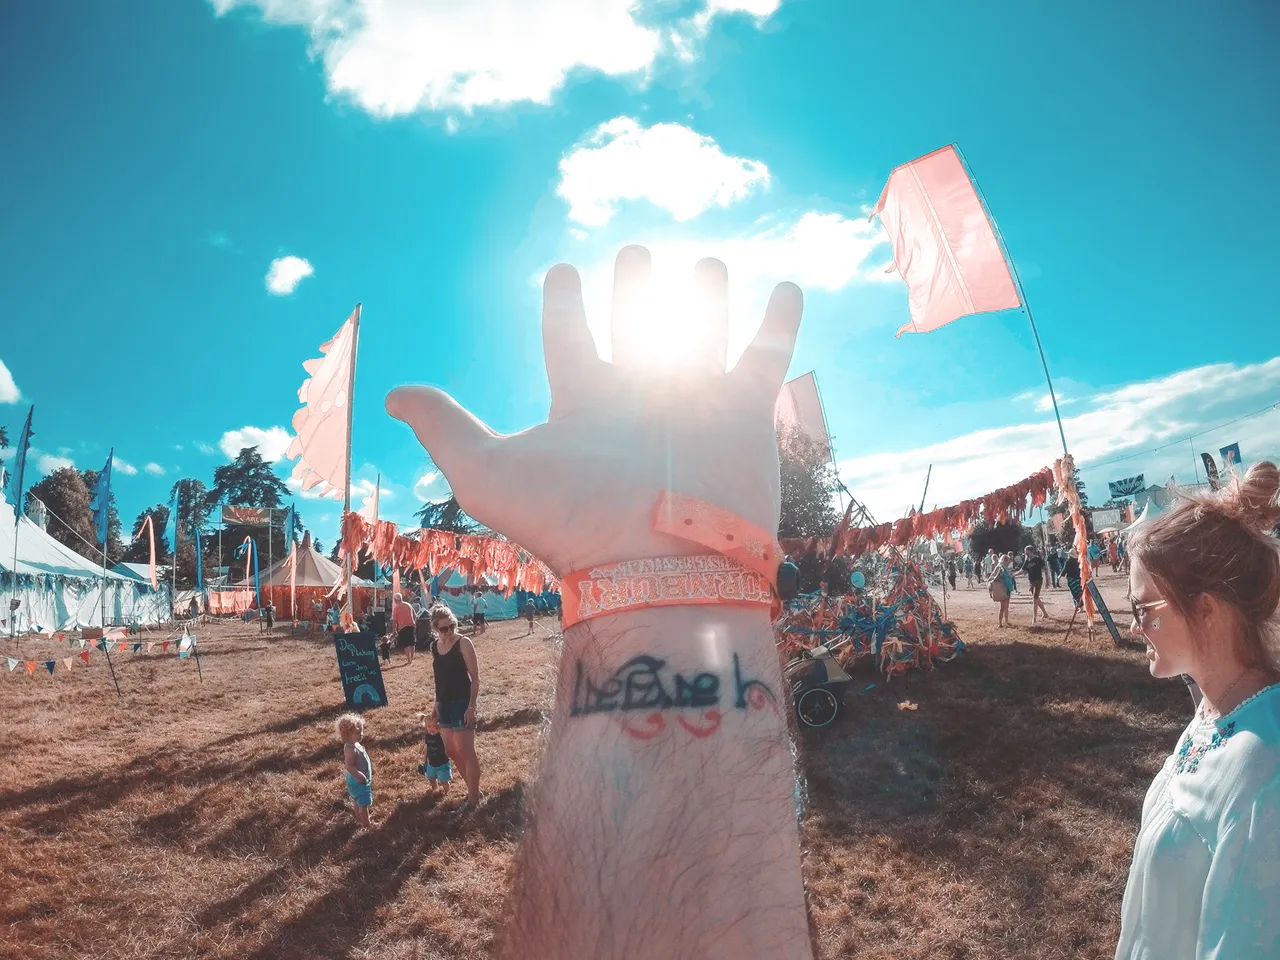
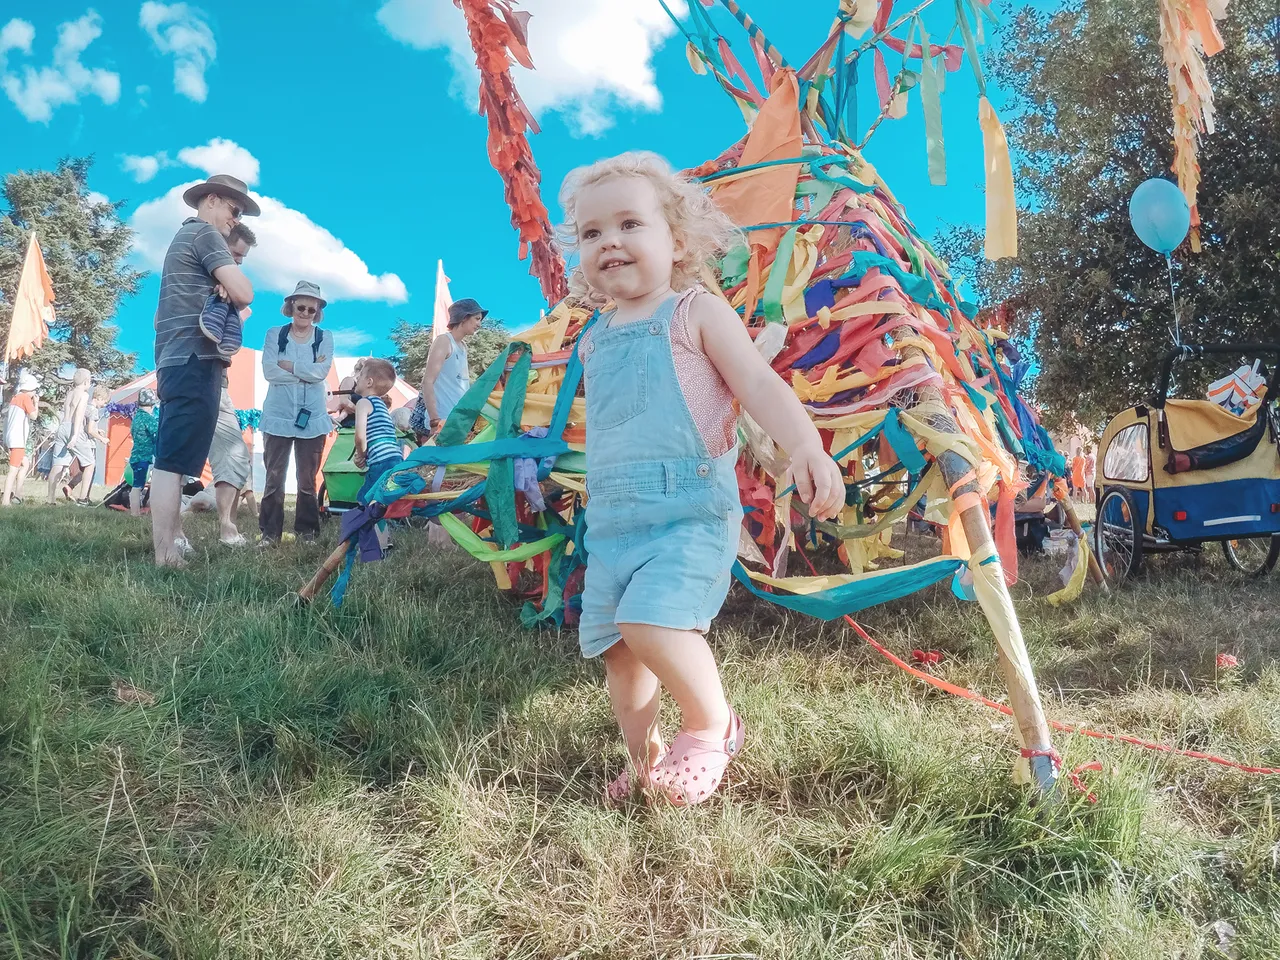
Here are some pics I have taken with my GoPro Hero 5.


Video Settings
Same as for photos, if you don’t already, you need to enable Protune. On the right hand side of the screen, in the middle, swipe left where it will give you the option to enable Protune.
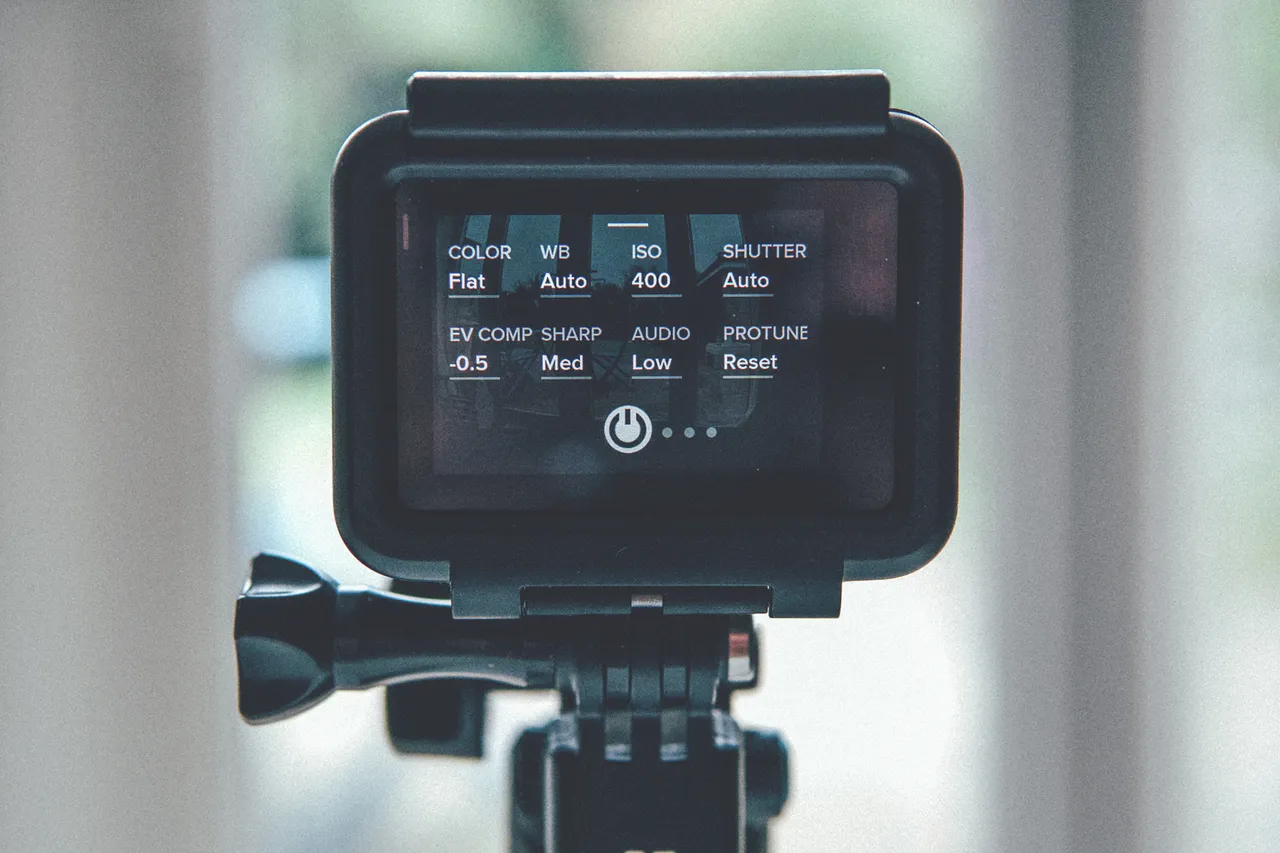
My Protune settings for Videos
For Protune settings, on the whole I leave these alone once they have been set, there are only a couple of things I change.
Color – Flat (I never ever use GoPro colour for video, this is so that I can match it to other footage in post)
WB – Native (never change this as its easier to match footage in post)
ISO – 400
Shutter – Auto
EV Comp – -0.5 or -1 (doing this will save your highlights, especially outdoors on really bright days)
Sharp – Medium or Low (I add sharpness in post)
Audio – I keep mine on Low as I never use the audio from GoPro
Video Stabilisation I have turned off as you can’t use this feature if you film over 60fps or in 4k. I also don’t worry about the in camera stabilisation as I have a stabiliser. But if you shoot in 1080 24fps you can enable this.

Because I usually always shoot over 24fps, I enable Auto Low Light as this helps out when filming in dark places, or places with lots of shadowy areas.

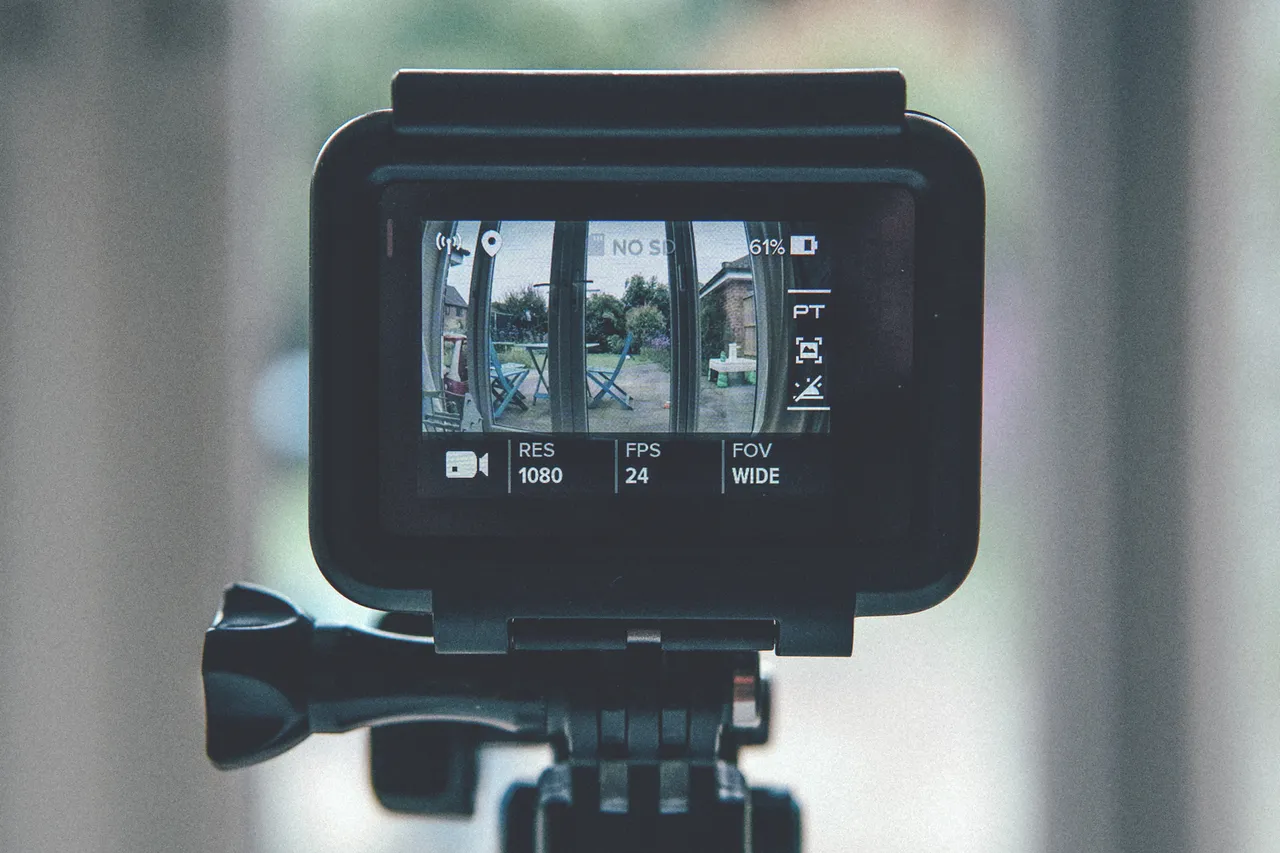
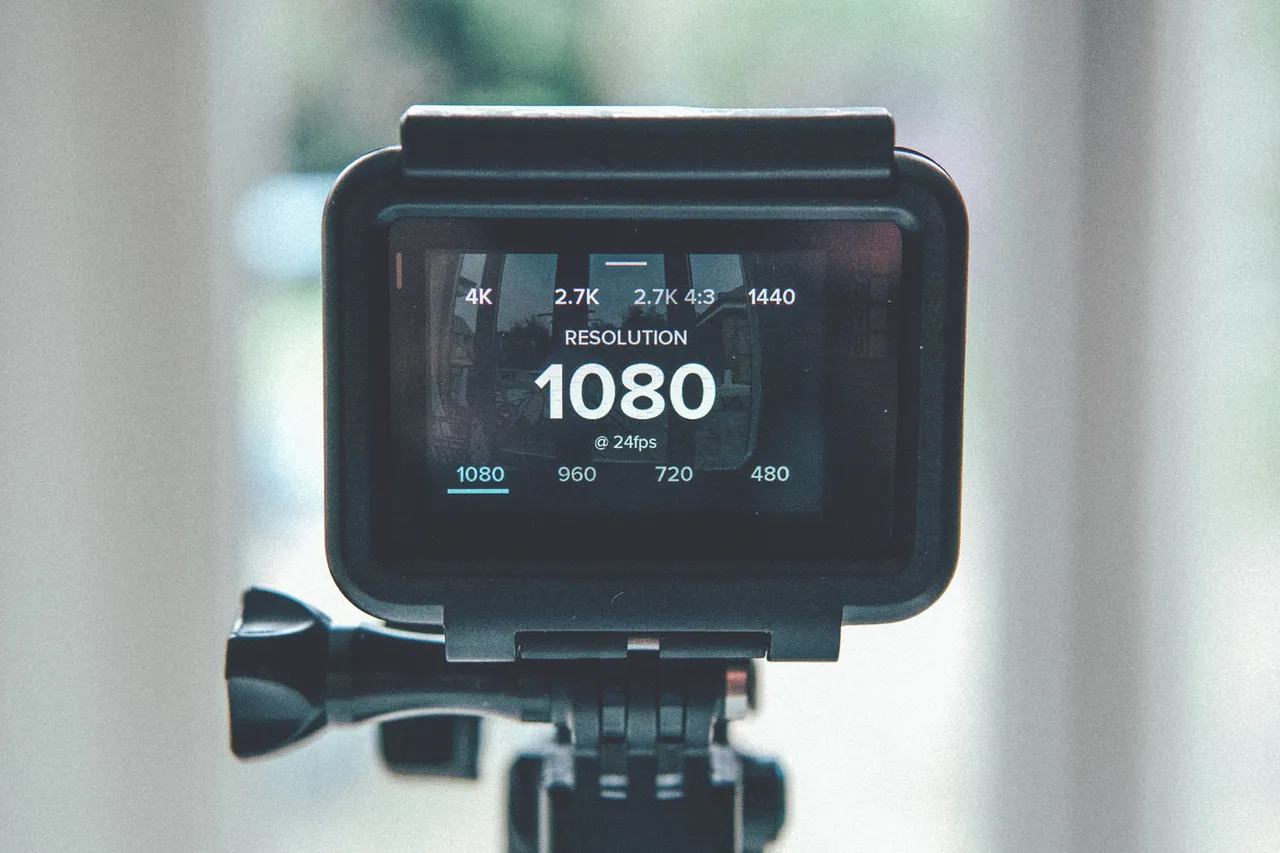
As I mentioned earlier, whenever it comes to shooting anything I never shoot in 4k, for soooo many reasons! Instead I always shoot in 1080.
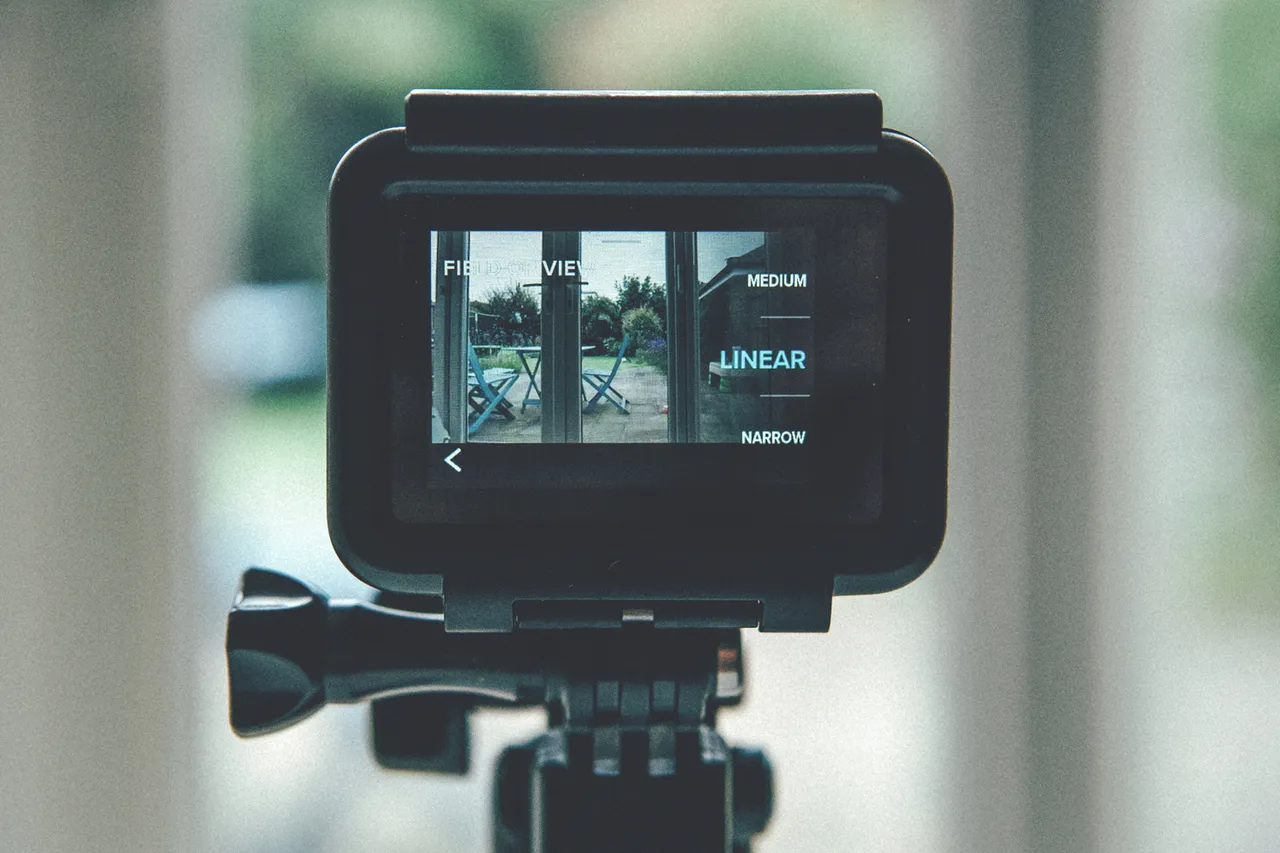
Same as with photos on the GoPro Hero 5, you now have have the option of removing the ‘Fisheye’ look from your video.
As I mentioned earlier, I personally prefer the ‘Fisheye’ look so I leave it set to FOV – Wide, but if you want to remove the ‘Fisheye’ look then set it to FOV – Linear.
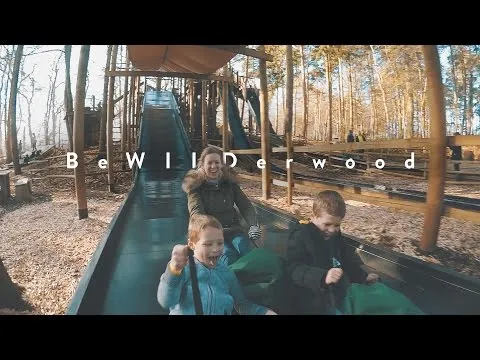
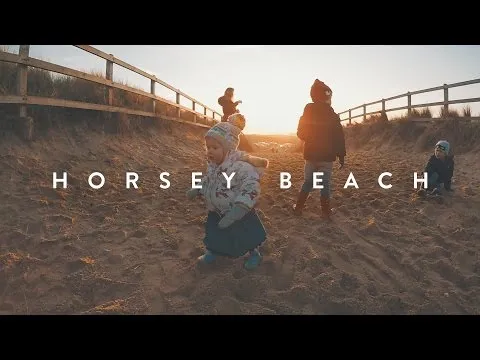
Some example videos using my GoPro Hero 5.

If you have made it this far, thank you for reading…. You now know the exact settings I use with GoPro Hero 5. Well you know all apart from one!
I will be doing a whole other post on frame rates as I don’t use 24fps for anything!
See you next time 🙂