Recently I added a photo on my Instagram of a tiny planet inspired photo that I took with my GoPro.
Afterwards across all my social platforms, I got so many questions asking how I did it.
So let me show how I achieved it... It's easier than you think!
First off, if you have a 360 camera use that instead!
But, like me, if you don't this is what I did to achieve my results using my GoPro.
For starters you will need 2 things:
• A GoPro (doesn't matter what flavour)
• Photoshop
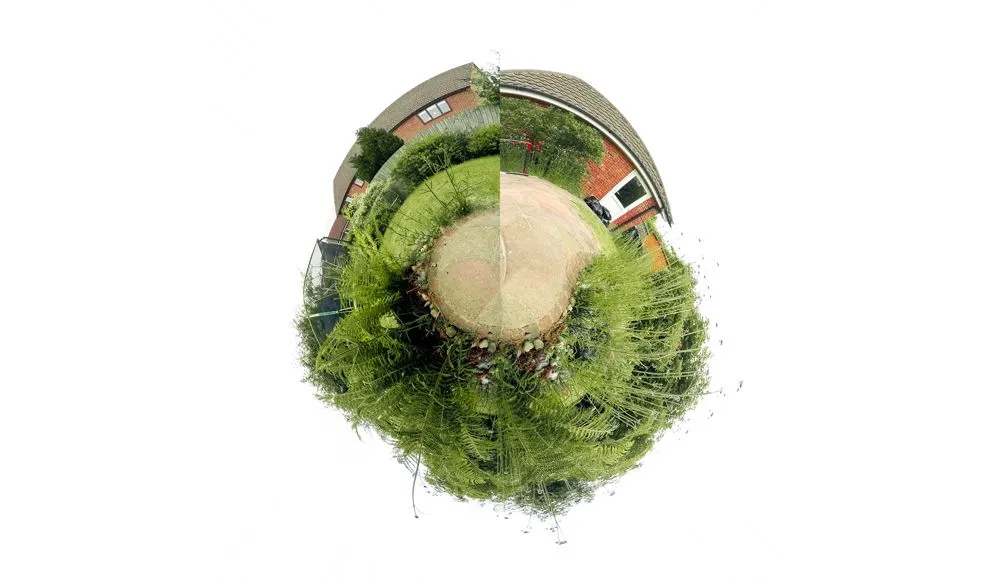
• 1. To start with I took 2 photos of my garden and stitched them together in Photoshop. The GoPro shoots wide, but it wasn't
quite wide enough which is why I had to stitch 2 together.
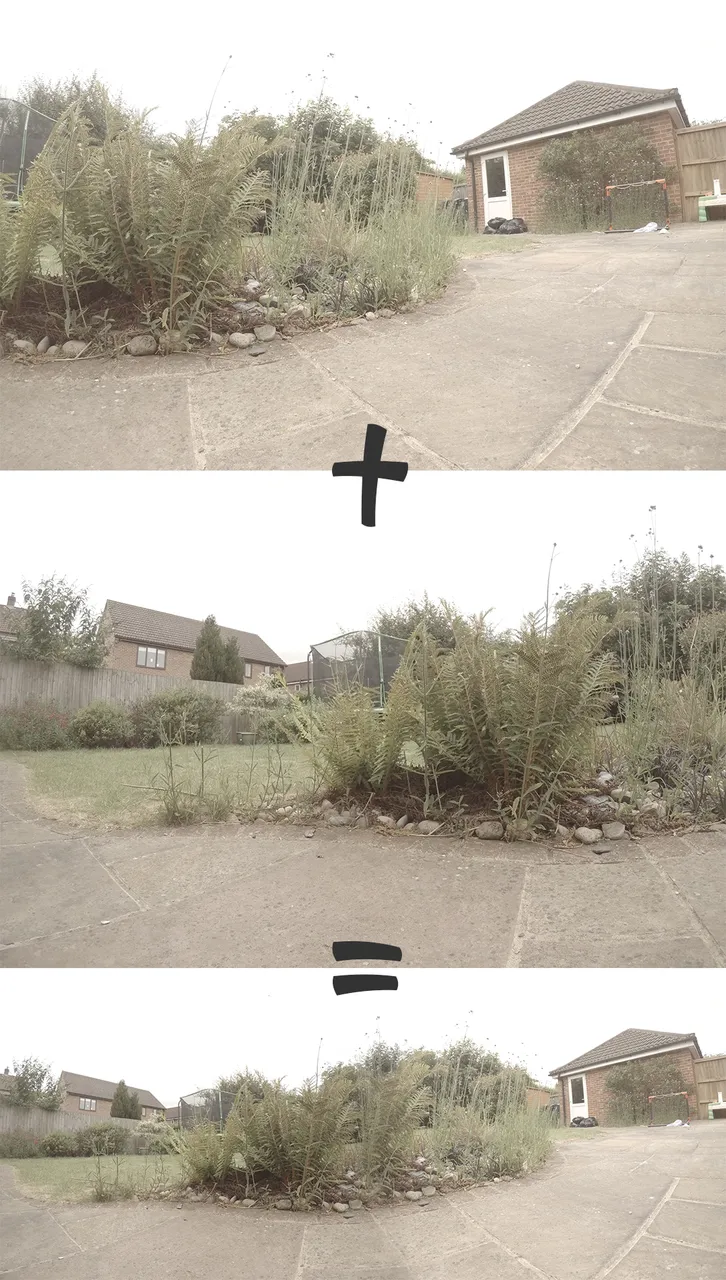
• 2. Once you have your main background ready, edit it how you would normally edit a photo. Here is what I did to mine.

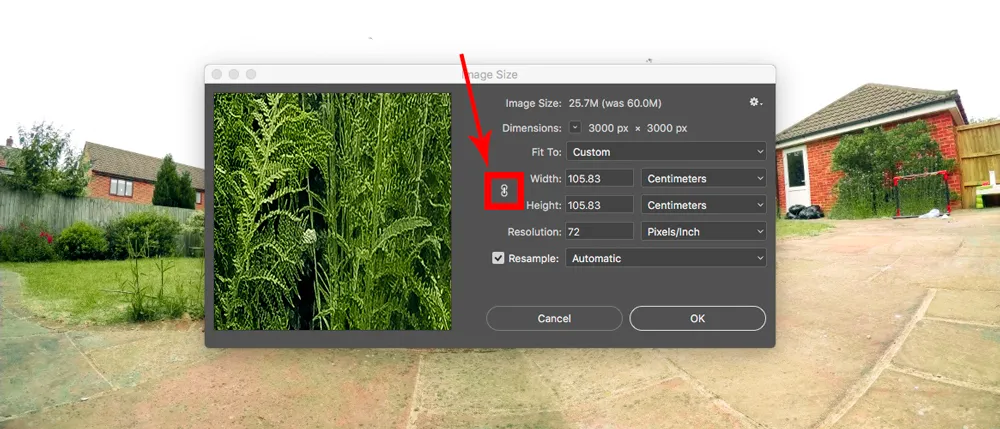
• 3. Now the fun part begins. Go to image --> image size and if the constrain proportions option is selected then uncheck it. Here you need to change the width to match whatever the height of your image is and then select ok.
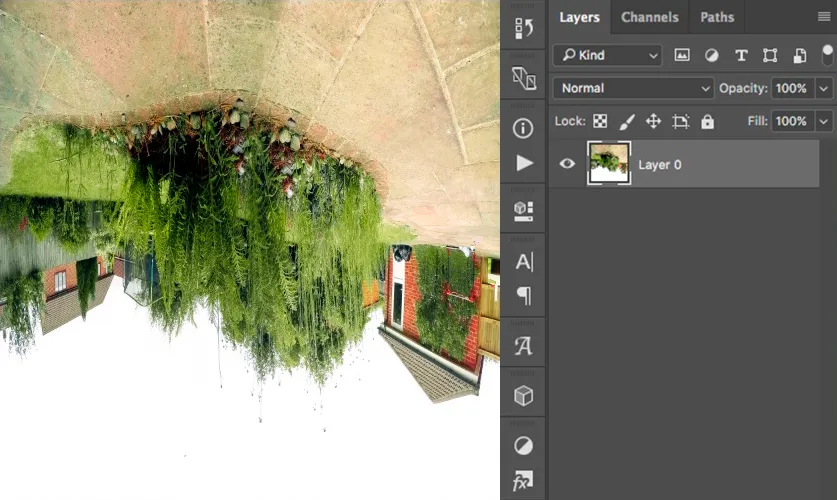
• 4. Unlock your background layer and then go to edit ---> transform ---> flip vertical. Your image should now resemble something like this.
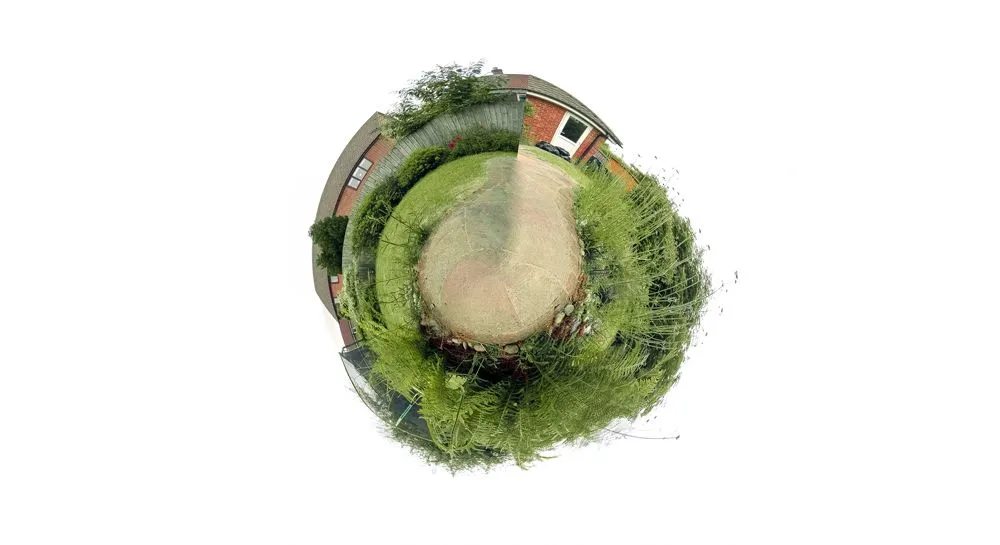
• 5. Now go to filter ---> distort ---> polar coordinates and make sure 'rectangular to polar' is checked, then select ok. Leaving you with this.
• 6. Depending on your image you may need to tidy it up a little. This is the stage that frustrates me the most, as I always end up going back and re-cropping the image. Each image will be different and this stage is especially hard if you have skylines/buildings in. Don't worry too much though, as in the next steps I like to hide the join so you don't notice it.
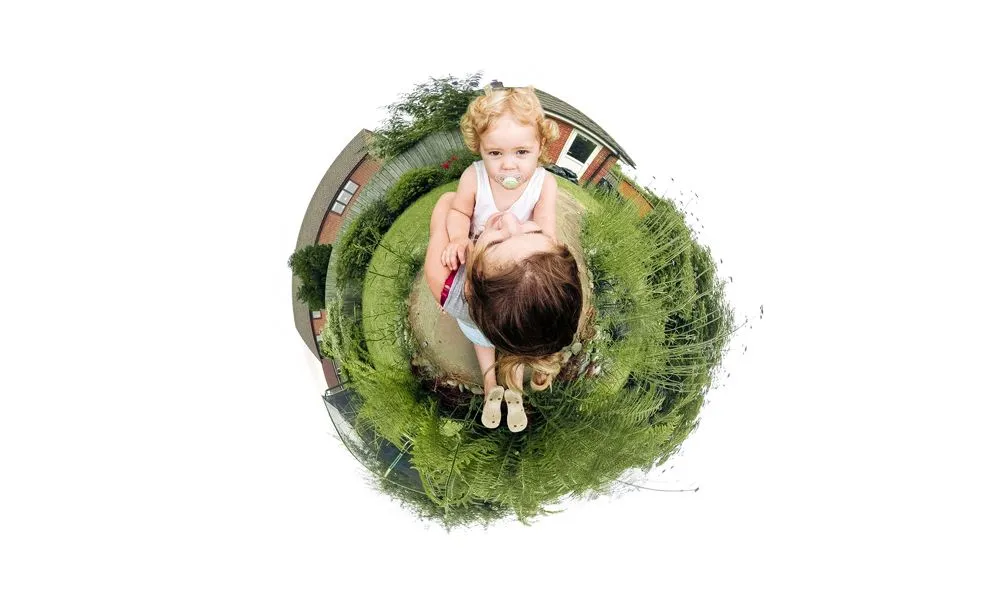
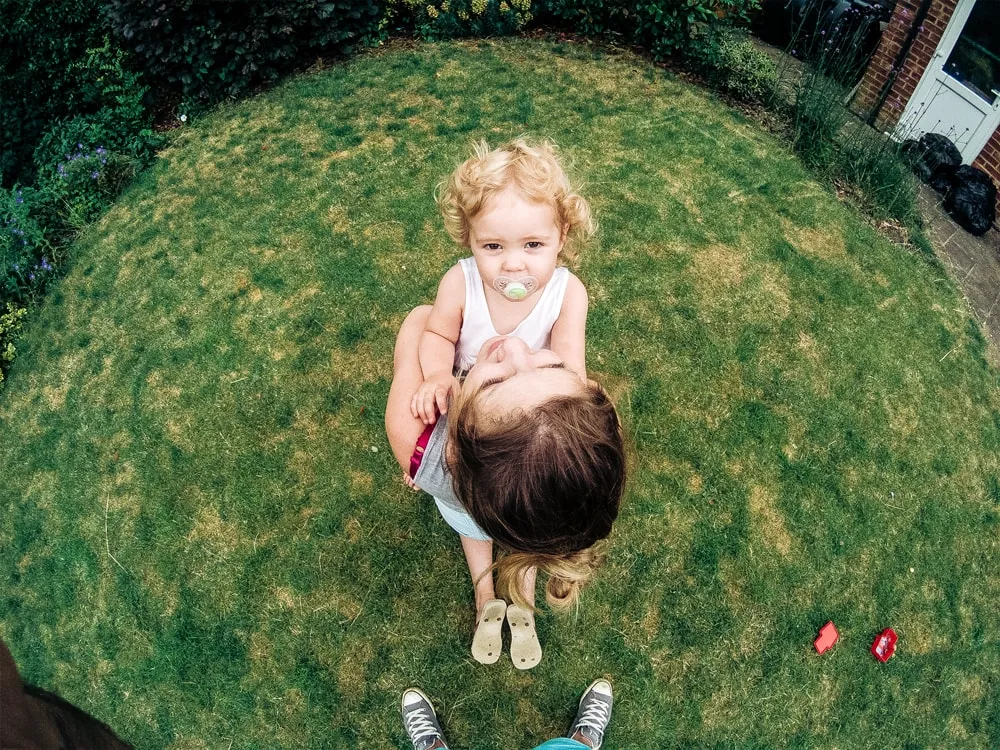
• 7. This is the cheat part.... For this step, take your GoPro and find a subject to get a photo of. For this one I got my wife and daughter and stood as high above them as I could, pointing my GoPro straight down. Once you have your photo, take it into photoshop and edit it to match as closely as you can to the main background image.
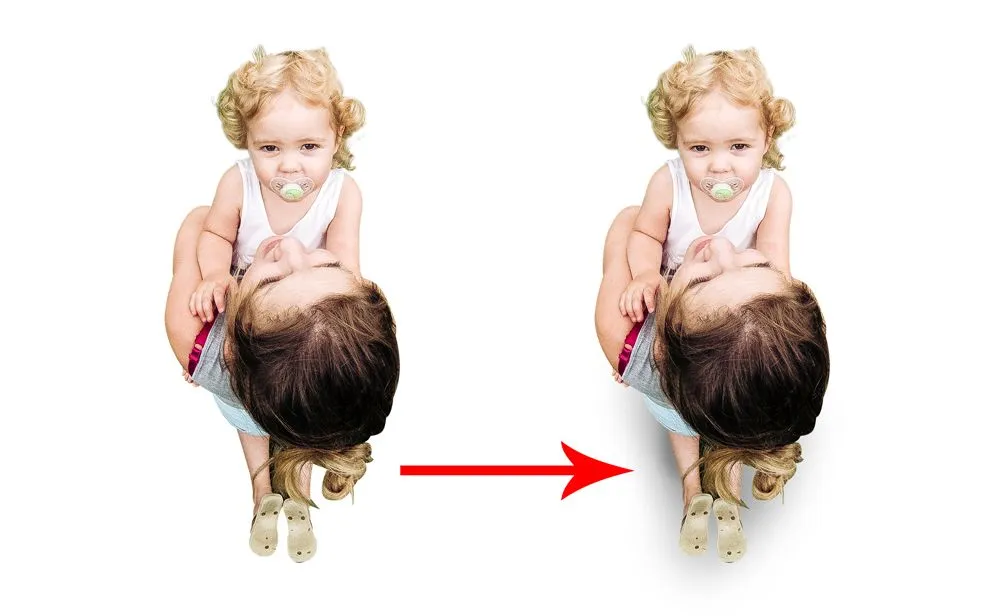
• 8. Now if you are like me, this is the trickiest part! You need to cut out/isolate your subject from its background. I also like to add a bit of realistic shadow underneath, just to make the effect more believable.
• 9. As I mentioned in point 6, this is the part where you can hide the join. Compose your image and cover it up :)
That's it, now stand back and marvel at your awesomeness.... told you it was easier than it looks!