
Welcome
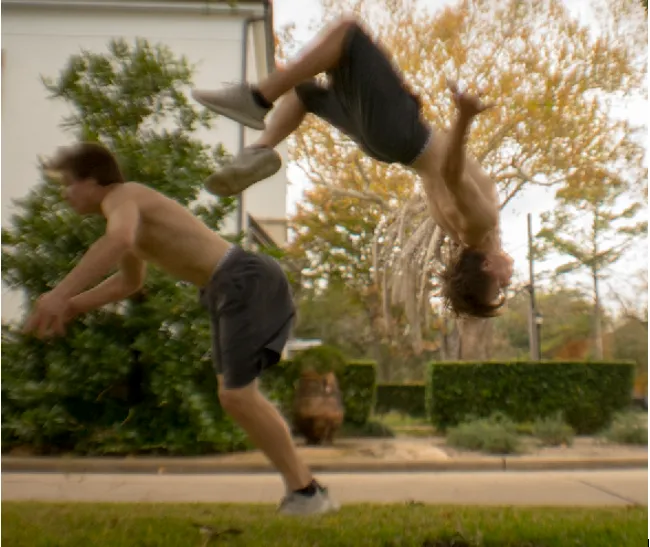
Have you ever wondered how photographers are able to capture and portray multiple images from an action sequence in a single image? I'm going to show you how that can be done using Photoshop CC and a sequence of 4 old pictures I have of a back-flip being performed. I was trying to find a guide online for this that used photoshop CC a little while ago and was unable to so I decided to try and fill that void. Pictures will be included for fun's sake, please excuse the lack of clarity in the pictures. Anyways...
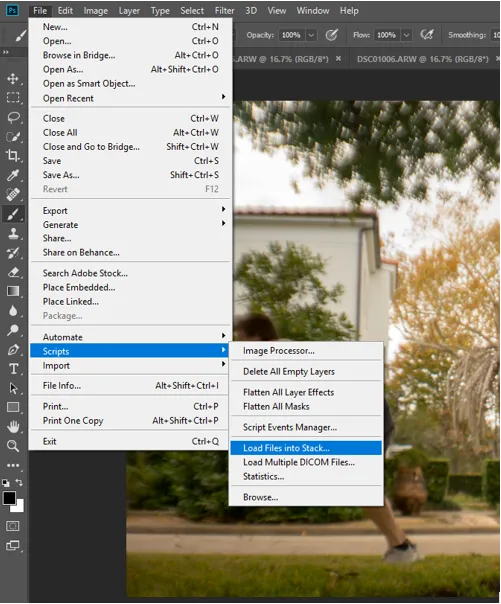
Once you have all of your photos that you want to merge, open them in Photoshop.
File -> Scripts -> "Load files into stack" -> "Add open files" (provided all of the photos are already open in photoshop)
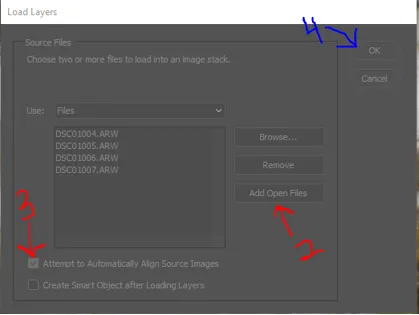
Select "Attempt to Automatically Align Source Images" to try to line the images up. Great for if you did not have anything stabilizing your camera.
Press "OK"
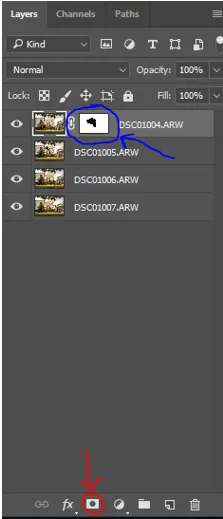
After this you will see each image on its own layer on the right hand side of the screen. If you select the eyeball symbols next to each layer, you should be able to go through and see any change in position of any of the objects in the photo.
Use layer masking in order to show designated parts of each layer on the first layer.
Make sure the top layer is selected and click on the camera shaped button on the bottom right of the window. When you hover over the symbol with the mouse it should say "Add vector mask" (red arrow). This will add a white box to the right of the image in the layers window (blue arrow).
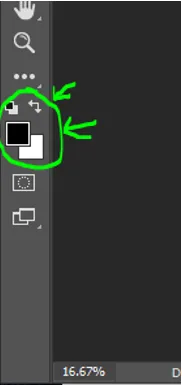
~very important step~ you want the foreground color to be black or this will not work. To do this you want to look on the left side of the window, where there will be a white and black square overlapping each other. You want the color on top to be black, if it is white, then click on the arrow or press X to switch the foreground and background colors (see image).
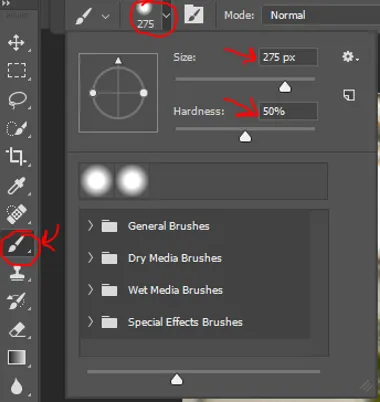
Select the paintbrush tool on the left hand side of the screen. Set an appropriate size for your image based on how large is the object that is the subject of the photo. Set the hardness to around 40-60%.
Now you can use the paintbrush on your top layer wherever the object is located on the second layer, and you should be able to paint in the object like so.
Once the object is painted in, repeat the steps starting with the "Add Vector Mask" down until all of the objects are in place.
Once you have finished painting in the final layer, you're all done. I hope this helped!
If for any reason you want to erase the layer you just painted in, simply change the foreground color back from black to white, and you will be able to paint back in the top layer with the paintbrush tool.
Consider how you want to handle any overlaps. I try to stay consistent throughout the layers. In my case, I chose to have the newer pictures on top of the older ones to show the progression of time. Again this comes down to stylistic preference. Something else you could mess around with is clicking on each layer and changing the opacity of that layer (found in the layers settings above the layers).
Thanks for checking out my basic tutorial. I hope that this post inspires you to go take some awesome pictures. If you have any similar ideas or constructive feedback for me - please share them in the comments, and if you enjoyed or feel inspired by this post toss me the upvote!