Photography 101 - #1 - The Basics (Aperture, Exposure and Camera Settings)
Anyone who follows my blog will probably have realised by now that I have a passion not just for making photographs, but for PHOTOGRAPHY. From Tech to Technique, I just love everything this industry has to offer. I bought my first DSLR a little under 14 years ago, since then I’ve spent the 3 years at Film School and 8 years working as a full time professional photographer. I’ve spent more than my 10,000 hours making images and countless more learning about the equipment, history and technique that shapes the industry. Essentially, I’ve been fully immersed in Film and Photography for over a decade, more than a third of my life in fact.
When I think about what to write about for articles like this one I’m immediately drawn to certain subjects, generally speaking ‘The Basics’ isn’t really one of those. On one of my camera guides someone asked where to start for someone looking for a real beginner’s introduction to photography and I was stumped. I’d got a heap of emails to get back to and clients to contact so I suggested the reader head to Amazon and get one of the no doubt countless books on offer. It wasn’t the most helpful answer, but it was exactly what I’d do if I was in their situation. I’m not exactly sure why but the question stuck with me and I thought hey, why not make that guide for Steemit and keep the link at the bottom of my posts. Even better, why not make a series of posts to address any issues readers bring up and any more I can think of along the way.
Those Who Can, Do
I’ve been involved with sports for as long as I can remember, although it’s taken a back seat to Photography for quite some time now. One thing I’ve always noticed in the sporting world is the way the best, most qualified, teachers – more often than not – end up teaching the best athletes. It makes sense really, they get the better paid jobs and the acclaim that comes with working with the best in the world. It’s not just sports of course, it happens across the board and the people that end up teaching beginners are often little more than enthusiasts themselves. As usual, I’m getting away from the point here. The point is I’ve seen so many ‘beginners guides’ over the years that have all of the info without any substance, or worse, incorrect information. I’ve come across plenty of professionals who, like me, bought all of the books they could as beginners and struggled to filter through the information to find out what they REALLY needed.
The aim of this series will be to form a complete beginners guide to photography. For the experienced among you it may be a bit of a refresher course – I’m sure some of you will even pull me up on a few things from time to time! As always, this is all based on my experience as a photographer. You may find your experience differs and what works for me may not work for you. That’s fine too! The thing about photography, is that it has the ability to totally immerse you if you let it. Part of that is taking in as much information as you can, as many perspectives and viewpoints as you can find to make your own choices and sculpt your own identity as a photographer.
Photography 101 – Part One
As this is the first in the series I want to talk a little about camera settings and features. Where you take your photography will be highly dependent on your camera setting choices, so it seems a logical starting point as well as being a source of endless frustration for beginners everywhere. Let’s demystify it a little before we look at the first of the three main camera controls. Namely, Aperture, Shutter Speed and ISO – todays blog looking at Aperture in depth (come on, hands up the nerds out there that spotted the pun!)
So what do we need?
Looking through the specs sheet for the Canon EOS 1300D, Canon’s cheapest DSLR at the moment (here in the UK anyway) you’ll see plenty of incredible features for such a budget camera. It’s not just Canon, most of the major brands have competing products that are equally impressive. Each have their own USPs but expect to see things like 1080 or maybe even 4K video capabilities, dozens of art filters and colour profiles, Wifi, Bluetooth, GPS, NFC….I’m out of acronyms. You get the idea.
The funny thing is that when I looked at the specs sheet for the aforementioned 1300D the first thing I noticed was the 18MP Digic 4+ APS-C Sensor. 8 years ago I was starting out shooting weddings I was using an entry level Canon 550D. The sensor? An 18MP Digic 4 APS-C Sensor. Honestly, over the last 10 years everything has changed. And nothing at all. The truth is camera’s are just incredible now, I mean really awesome. The tech in your smartphone kicks the crap out of some DSLRs from the early 2000’s. Camera manufacturers know that, that’s why cameras are filled with every feature under the sun because why the hell not! There’s not a lot of point spending that R&D on image quality when 99.9% of people – myself included – have absolutely no need for higher quality images!
So I ask the question again, what DO we need?
Full Manual
If you’re in a situation where you HAVE to get the shot, the chances are the quality of the camera doesn’t really matter. I’m thinking parties, events you go to, basically anything that’s fairly fast moving. One of the most important things for Verity and myself is Photo Albums. We have loads. Plenty of them are from almost a decade ago back when we were at University, often slightly out of focus, under or over exposed…generally low quality images. But they are still just as important to us as the professionally taken portraits we’ve had over the years. So if you’re in a situation like that, just use your phone!
Ok, I’ll let you use Full Auto just this once, but seriously, your phone will do just as good of a job when it comes to preserving memories. It’s also lighter and a hell of a lot more convenient than even the smallest mirrorless camera.
The point is if you’re looking to improve your photography you don’t need to alter that dial on top of your camera. Leave it on Full Manual (usually denoted by the letter M) and experiment. You have the luxury of a playback screen right there, that’s all you need to figure out how to take the shot!
Seriously, Stay Away From Auto!
Don’t worry, this guide isn’t done. In fact it’s barely started, but my number one rule is that you should always use Full Manual mode on your camera. It’s radical I know, and contrary to what many books, guides and photographers may tell you. It’s certainly not the only way, but it is, without any shadow of a doubt – the best way. And I’ll make no apologies for being arrogant enough to say that.
Look at it like this, in any kind of automatic mode you’re letting the camera do the thinking. I know we’ve got Siri, Alexa, Cortana and a number of other disembodied omniscient voices everywhere we look, but they still haven’t cracked the ‘mind reading’ side of things just yet. The camera will do what it thinks it should do, which is generally somewhat beige. Somewhere in the middle. What about if you WANT a darker shot? Or if you WANT to blur your subjects? It doesn’t stop there, there’s another crucially important reason why you should keep away from those auto settings – the CAMERA is doing the thinking.
Not you
You want to be a photographer? A Better photographer? Maybe you just want to take better pictures? If you’re going to the effort of reading this, you’re not one to shy away from thinking.
So don’t let a computer chip do it for you
This is one thing I say to everyone that asks me about photography, and something no amount of incredible photographers using various auto modes will ever convince me is wrong. The fact is that manual will always give you more control, and the more you do it, the faster you get. I know plenty of Pro’s who tell me that Aperture or Shutter Priority (Either automatic Aperture selection, or Automatic shutter speed selection – don’t worry we’ll get on to Shutter Speed and Aperture very soon!) are the most reliable way to capture things in a fast paced environment. It’s just not true, if you teach yourself to respond to changing light and to adapt to your environment you will become just as fast, and far MORE reliable than the automated alternative. The only reason so many people preach part auto is that they didn’t take the time to get familiar with Manual early enough!
Back to Those Basics – Exposure
Before you can learn about the ins and outs of Aperture, Shutter Speed and ISO we need to talk about Exposure.
Exposure : The quantity of light reaching a photographic film or sensor, as determined by shutter speed and lens aperture
In other words, exposure is the measure of how much light reaches a camera sensor (Of photographic film, but we’ll stick with digital for the sake of this article!). The amount of light is DETERMINED by; Aperture, Shutter Speed and ISO. So you see, the four are inextricably linked. You can’t possibly master one without understanding the others.
So when we talk about Exposure it’s important to realise that there is no ‘correct’ exposure. Exposure isn’t a pass or fail test, it’s a MEASURE.
‘Under Exposure’ refers to a dark image, it’s ‘under’ because less light has reached the sensor. The opposite is true for ‘Over Exposure’ – a bright image. Under exposure leads to a darker image losing detail in the shadows. Modern cameras are able to ‘recover’ some of the detail from shadows, however there is a [ever increasing] limit to just how much detail can be recovered. In an Over Exposed image the brightest parts of the image will start to lose detail, again these can sometimes – but not always – be ‘recovered’.
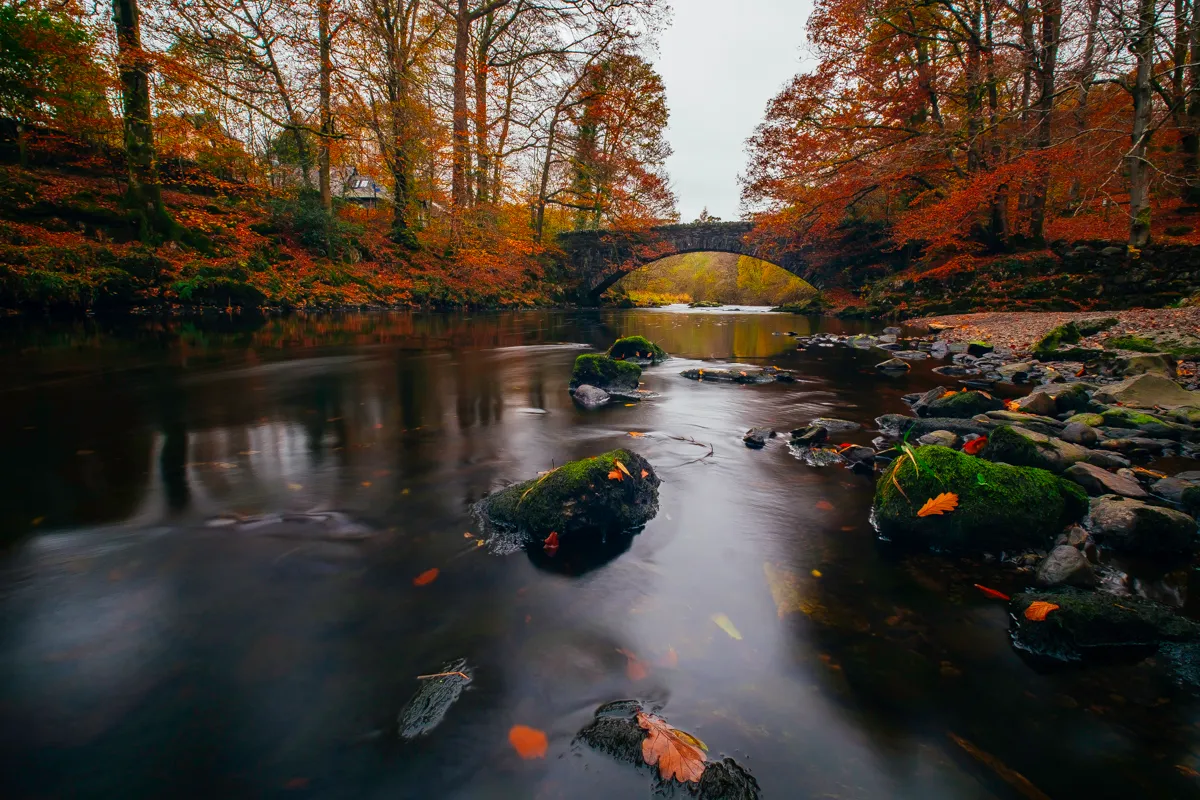
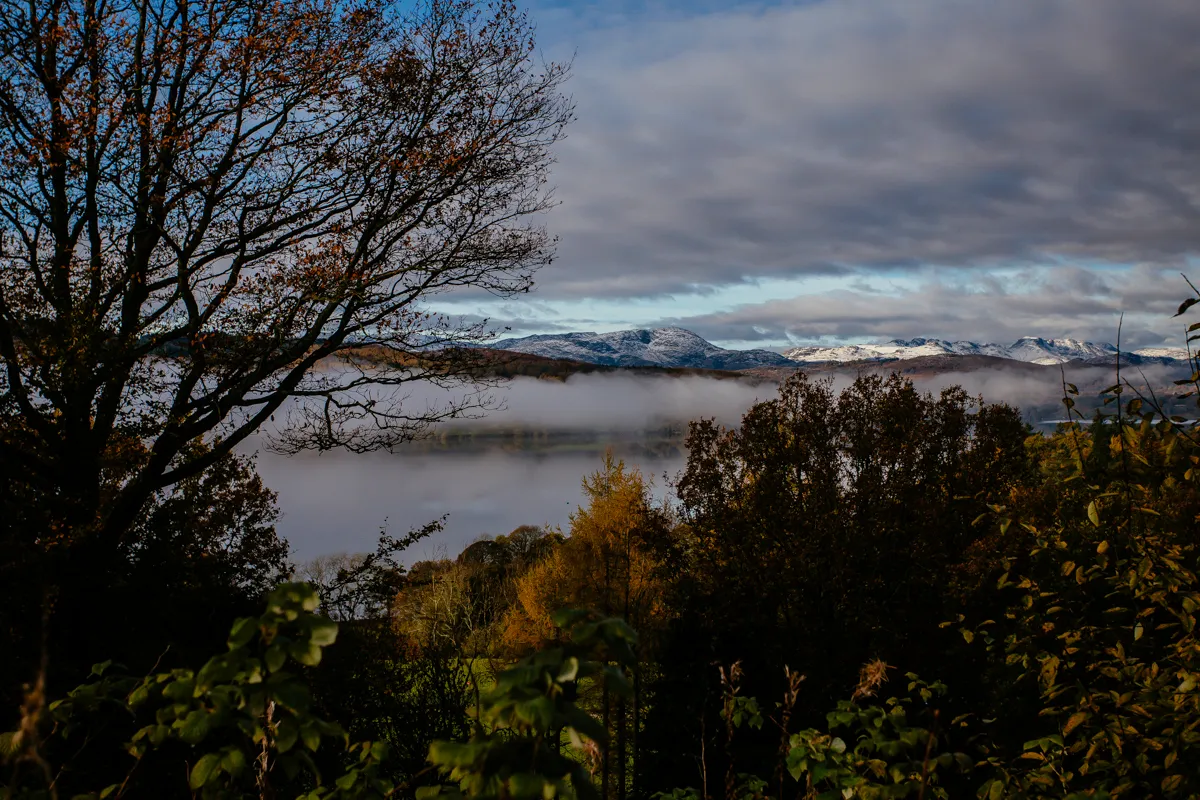
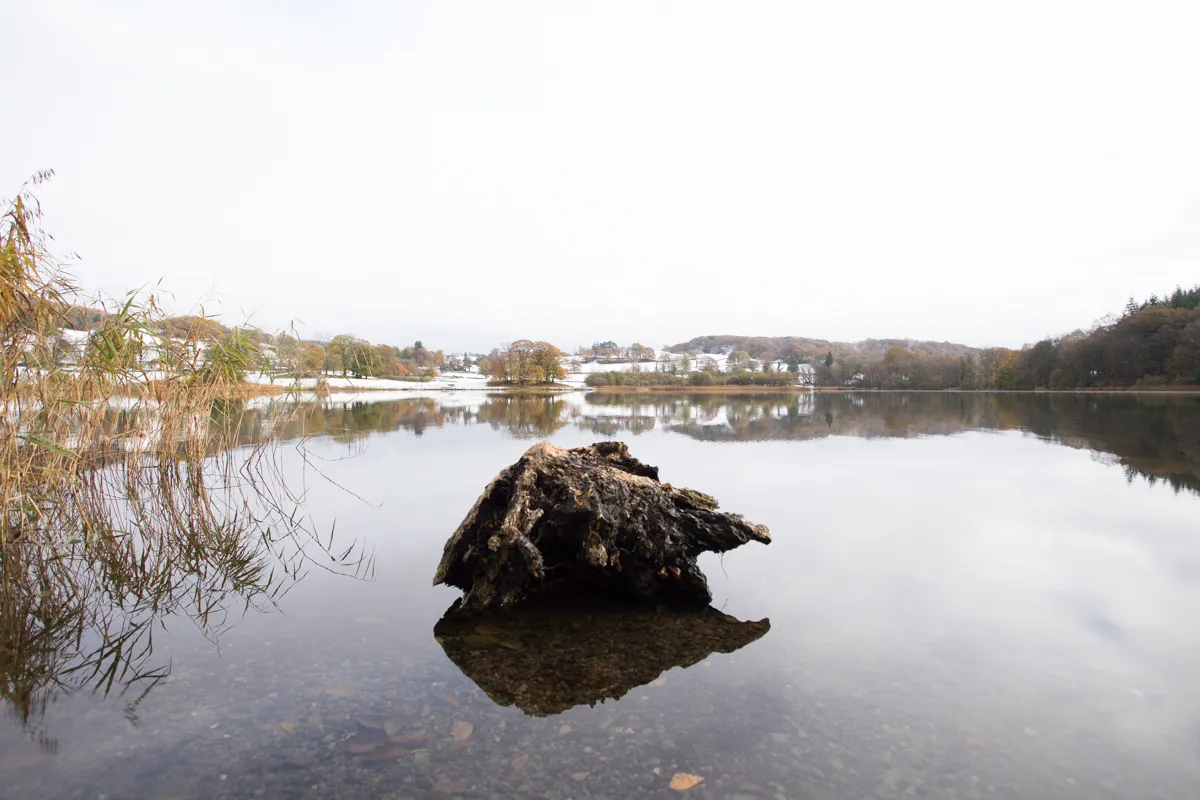
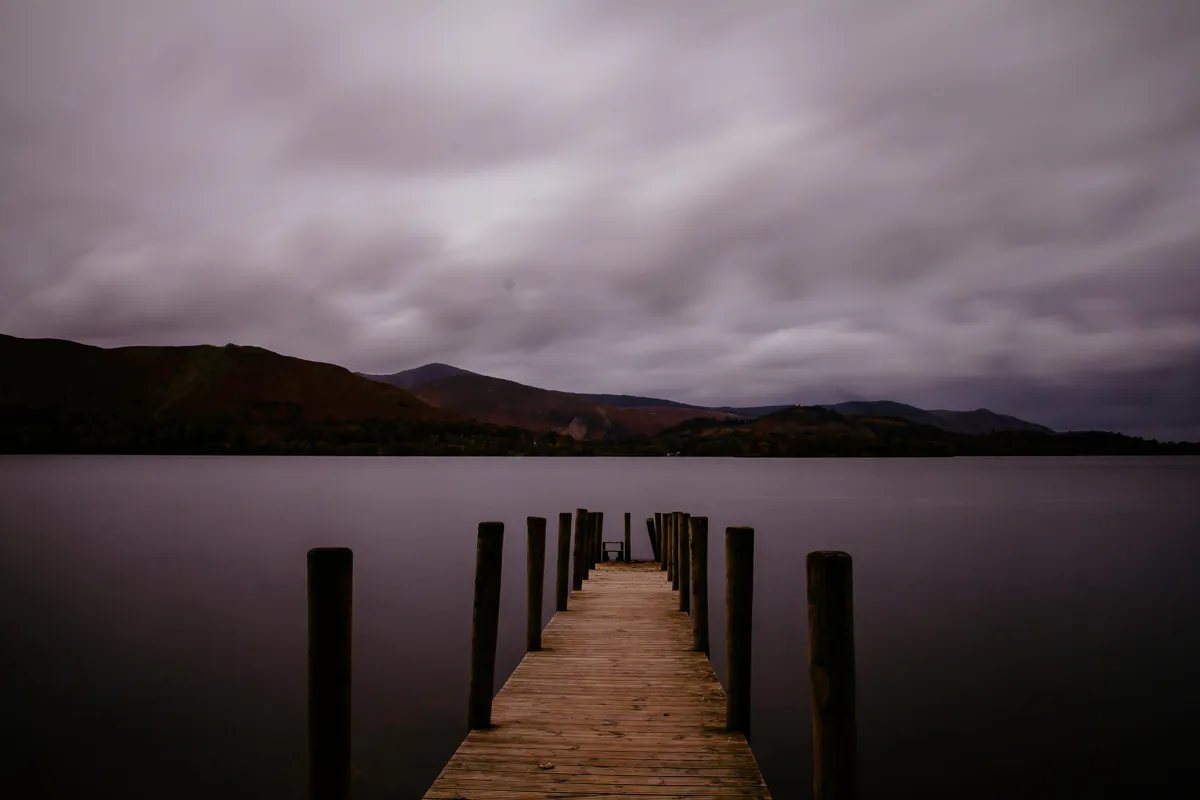
Ok, let’s illustrate all of this with some images. The shot below was taken during a landscape shoot a couple of years back. I actually wanted another image to illustrate this point but I just couldn’t find it in my collection. Alas, this one will still work just fine. Below is the image straight out of camera:
As you can see, there’s not much detail in the clouds – we can’t really make out much in terms of cloud formation. We also can’t see much in the shadows around the tree roots. This shot is under exposed in areas, and over exposed in areas. It’s somewhere in the middle! Most situations are like this, we want contrast in our images – darks and lights that create an interesting composition.
Let’s Under Expose it :
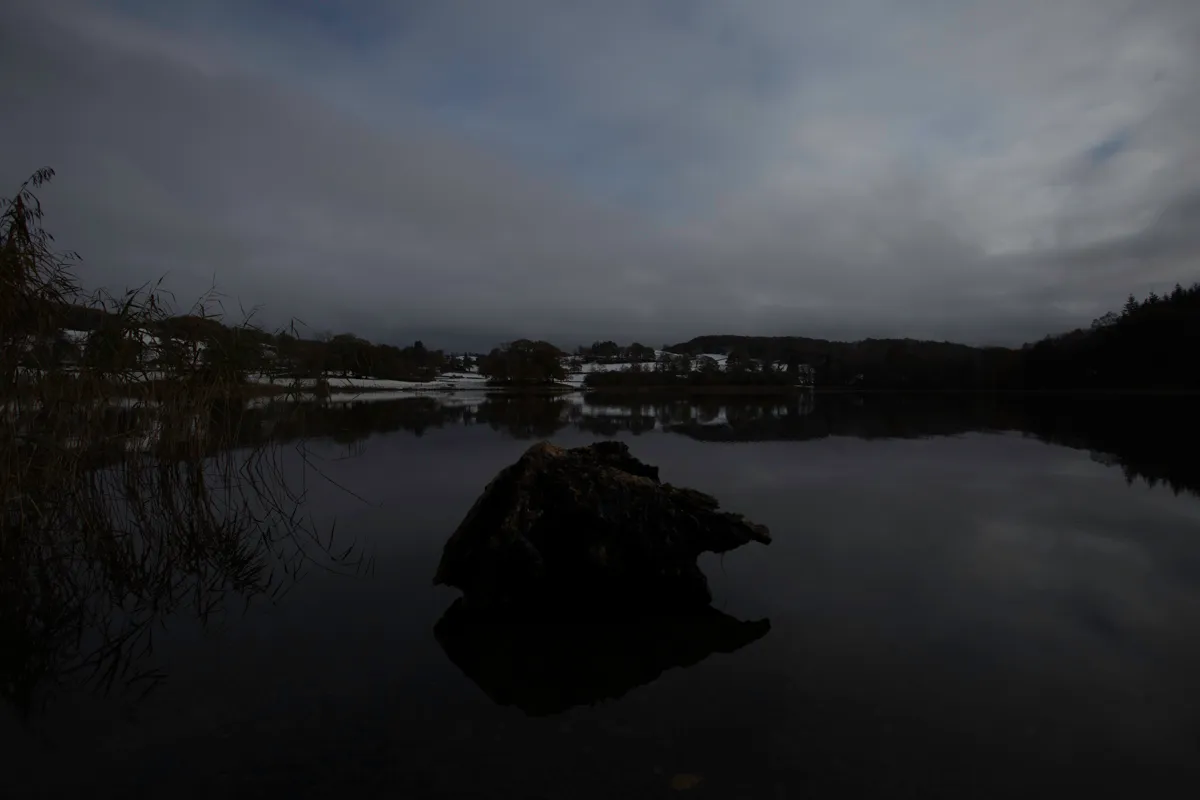
I’ve simply pulled down the ‘exposure’ slider in Lightroom here. As you can see, we now have lots more detail in the sky, but we can’t see the roots at all. This is an ‘under exposed’ image, it’s not right or wrong, there’s no rule that says you can’t make a photograph like this!
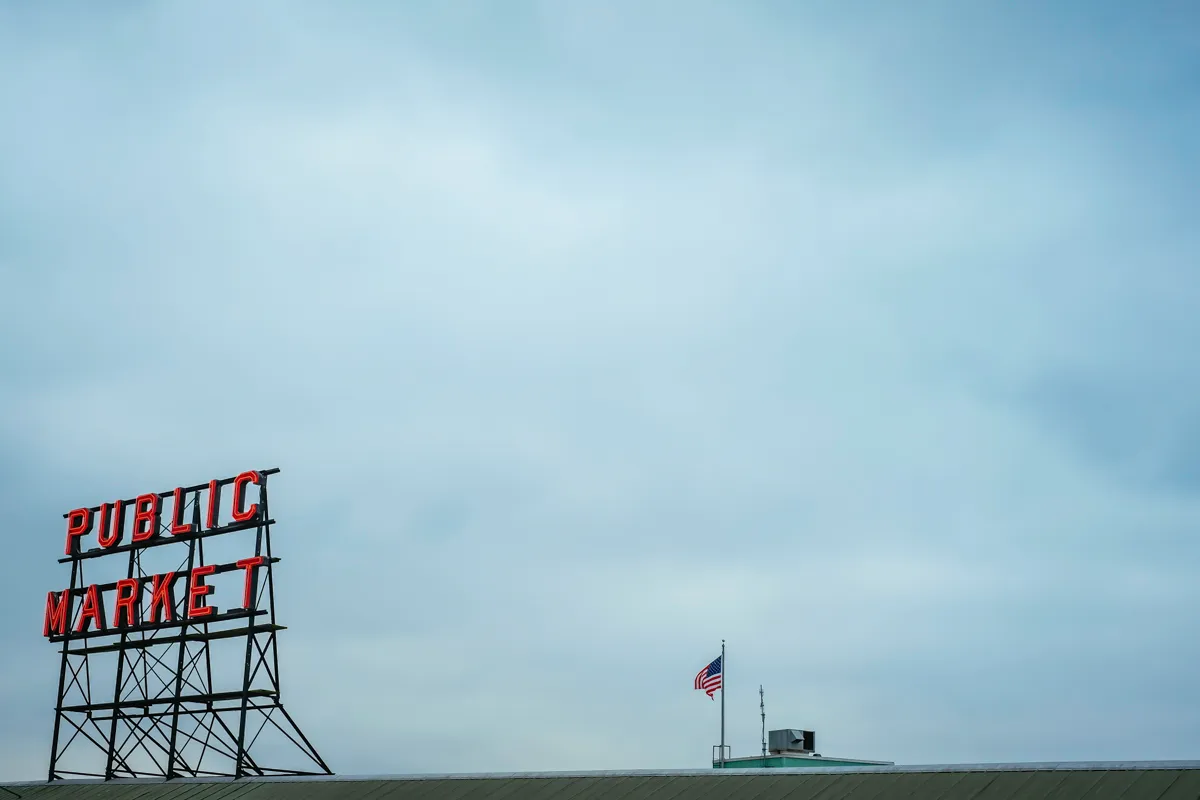
And here’s what happen if we Over Expose it:
Again, I’ve just moved the ‘exposure’ slider in Lightroom, this time in the opposite direction. We can now see far more detail in the darkest areas but the brightest area’s have lost all detail, we can’t make out any clouds at all, or even colour in the sky.
With a bit of editing, we can find a balance, pulling out detail in the shadows and pushing back the highlights to reveal detail there as well. We’ll get onto the edit in another instalment, but for now that’s the basics of Exposure. Now we’re ready to delve into Aperture.
Oh, and in case you were wondering, here’s how the shot looked with a little care and attention:
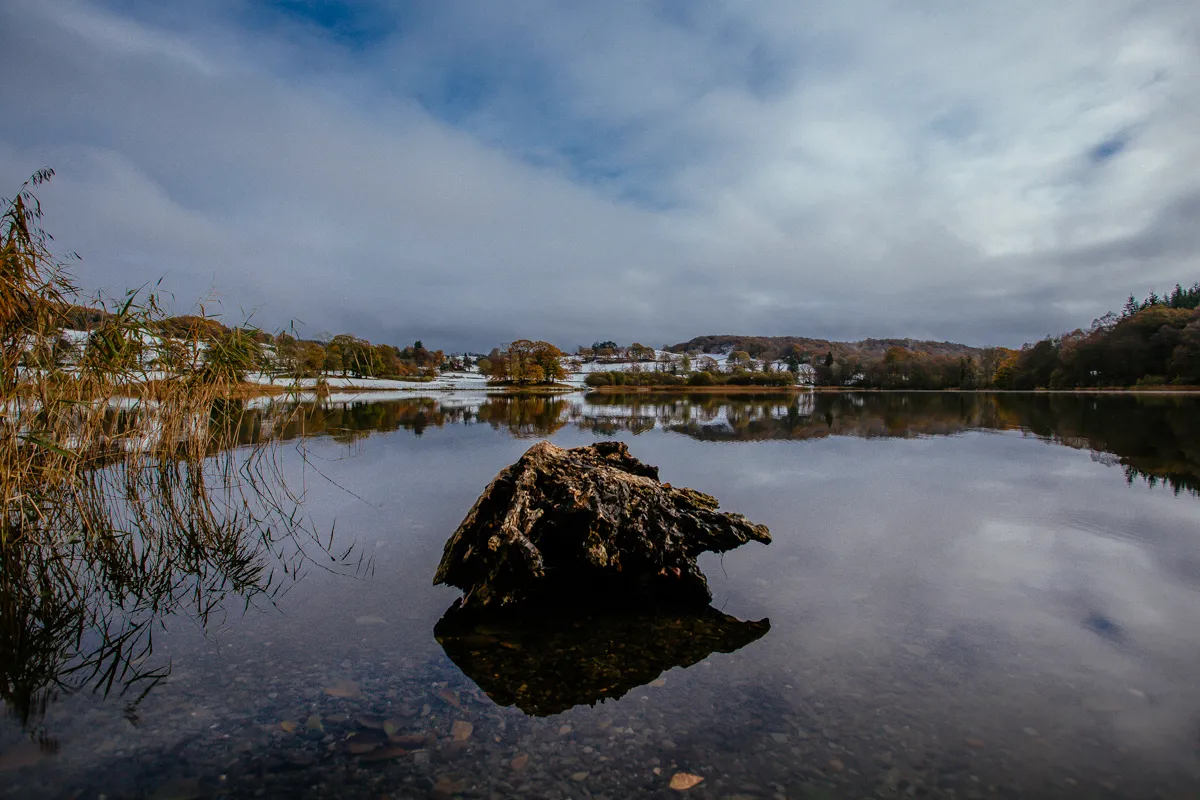
Much better, if I do say so myself!
Aperture
Aperture, like shutter speed, has the ability not only to affect the amount of light that reaches the camera sensor, but also the ability to radically change the look of an image.
Ok, let’s do this properly. Your camera has a lens, it might be a huge professional lens, it might be a tiny plastic one on the back of your phone, but it has a lens. That lens lets light through it and focusses that light onto your sensor. Inside that lens are ‘Aperture Blades’, these blades fold together to form a circle through which the light travels, this circle can be expanded and contracted at will, allowing more, or less light onto the sensor as needed.
If we’re at a ‘wide’ aperture, it means the circle created by the Aperture Blades is relatively large. If we’re at a narrow aperture the circle is…well…Narrow! A wider aperture – that is to say, a larger circle, lets more light onto the sensor than a narrow aperture (smaller circle). That much is pretty easy right? So if we’re shooting in the dark, we’ll want to use a wider aperture to allow more light onto the sensor. If we’re shooting in bright light, we’ll want a narrow aperture to let in LESS light.
Kind of.
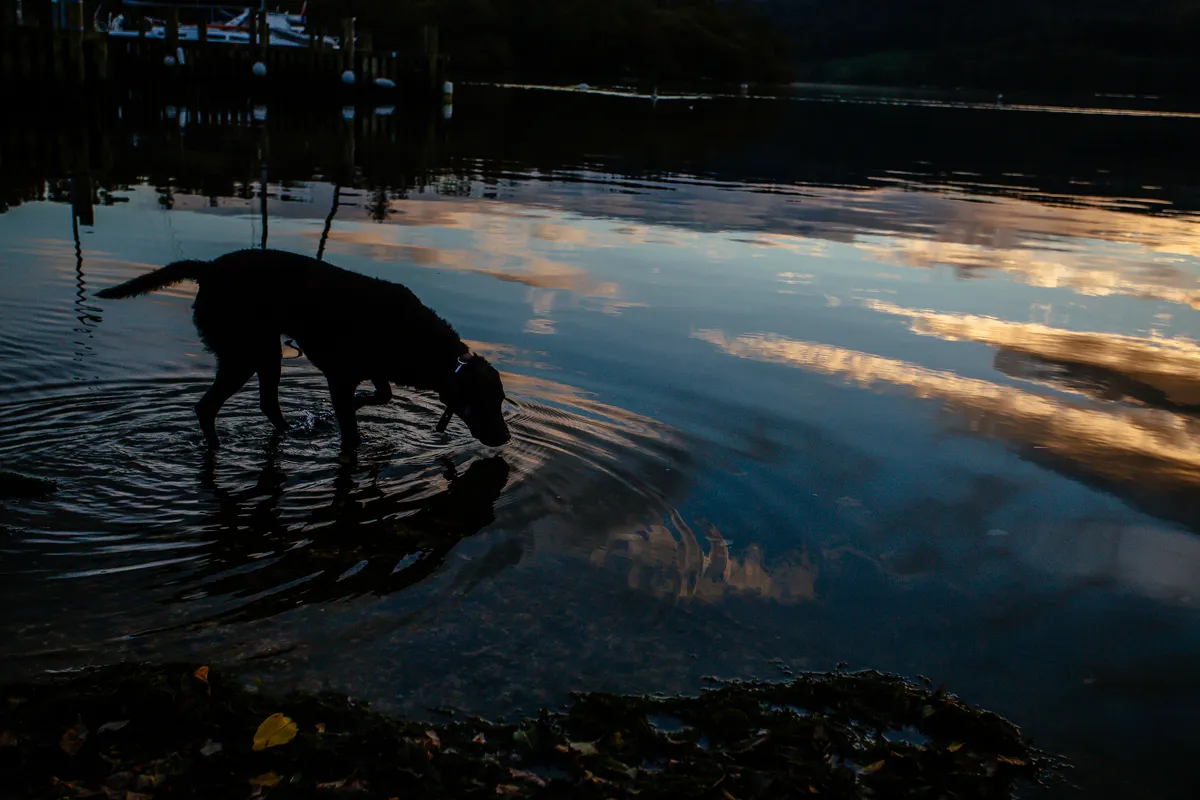
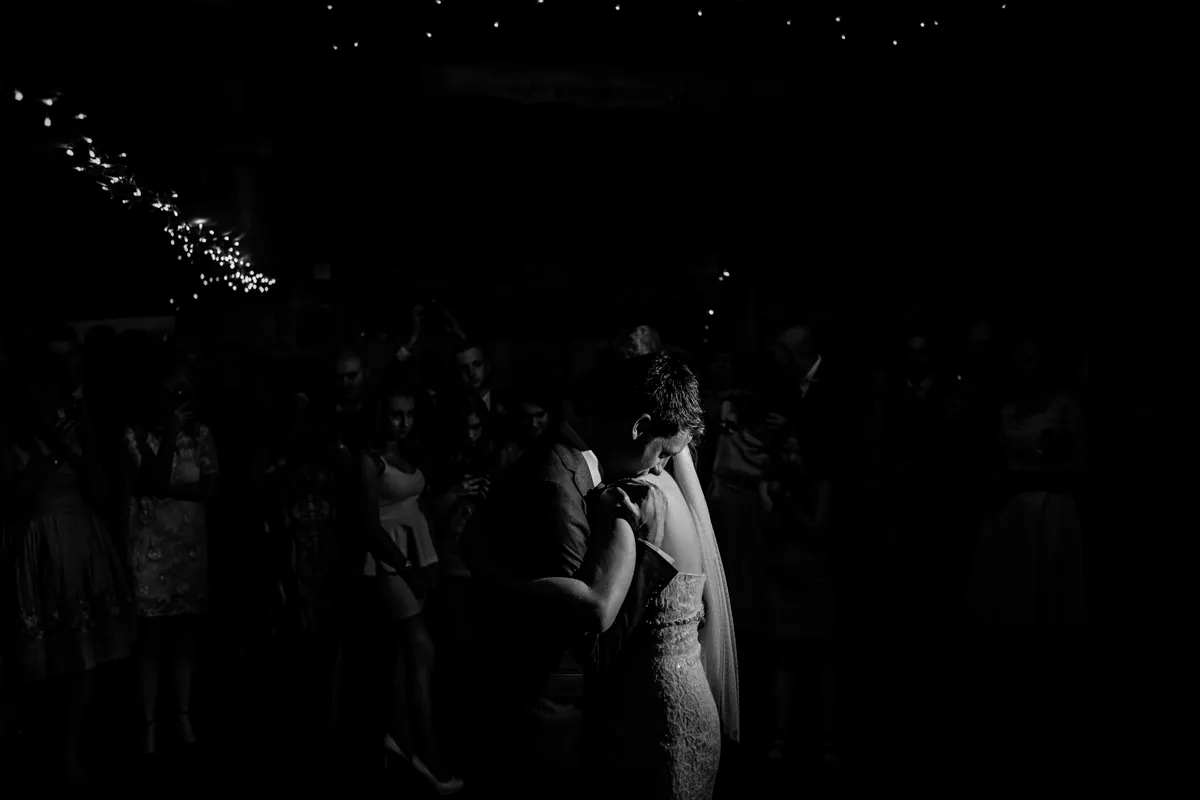
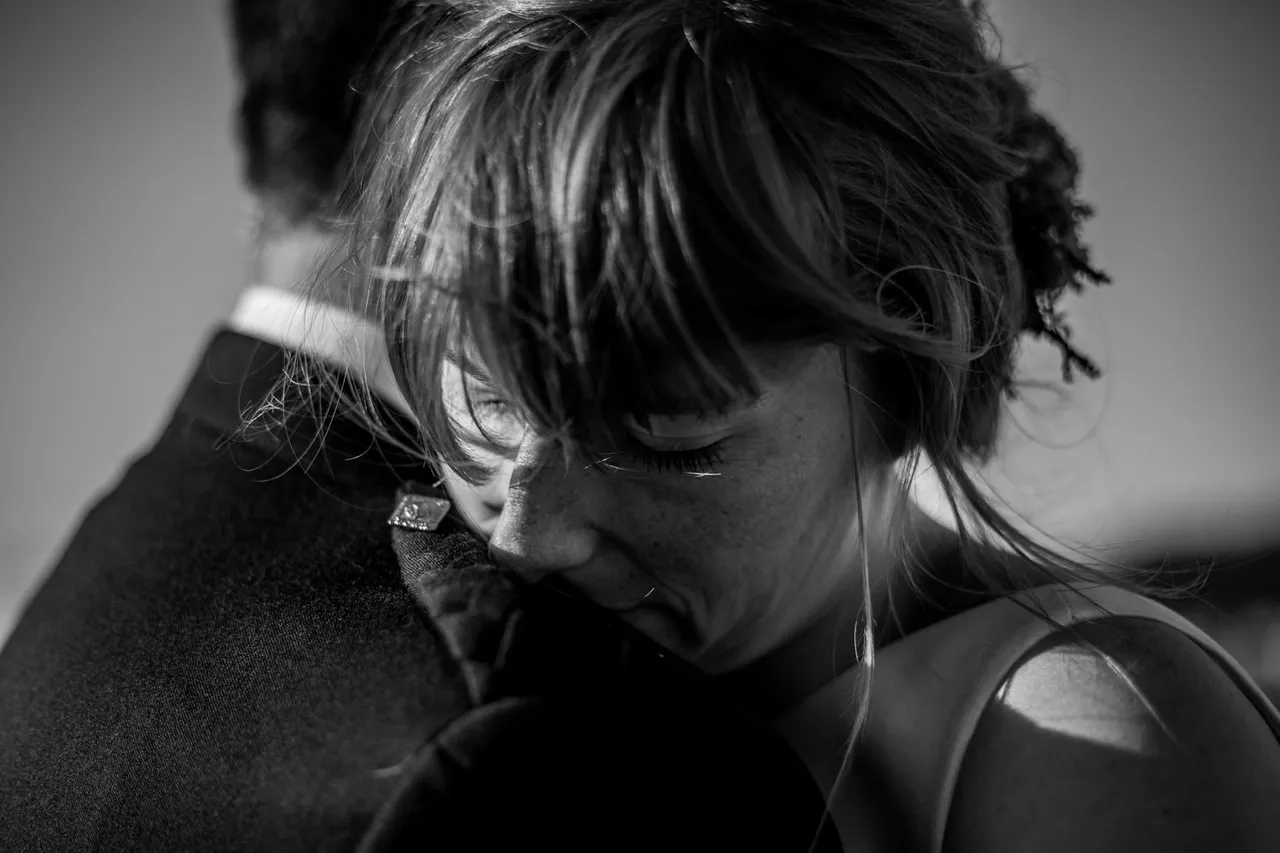
Here’s the interesting bit about aperture; the way it affects the LOOK of an image. Take a shot like this one for example:
You see how the climbers hand is in focus, and the background is really quite blurry. Just look at the mans body, it’s very blurry even though it’s only an arm’s length away. That’s because this shot was taken at a ‘Wide’ aperture. Essentially when we use a wide aperture we give the light less room to focus on the camera’s sensor, the opposite is true when we use a narrow aperture, helping us to focus the light onto the sensor.
We call this ‘Depth of Field’. The ‘Field’ would be the in focus part of the image, with the depth being the distance between the nearest ‘in focus’ part of the shot and the farthest ‘in focus’ part. The image above has what we call a ‘shallow’ depth of field, that is to say the distance between the nearest and farthest ‘in focus’ part of the shot is extremely small. In other words, only a little bit of the shot is in focus! The further away from the subject, the larger your depth of field will become (you’re allowing the light more ROOM to focus on the sensor!)
I know, it’s a lot all at once, but we now know that a Wide Aperture allows more light onto a sensor allowing you to see details in darker environments or parts of an image. We also know that a Wide Aperture also creates a Shallow Depth of Field, especially if the subject is close to the camera – narrowing the amount of space the light has to focus.
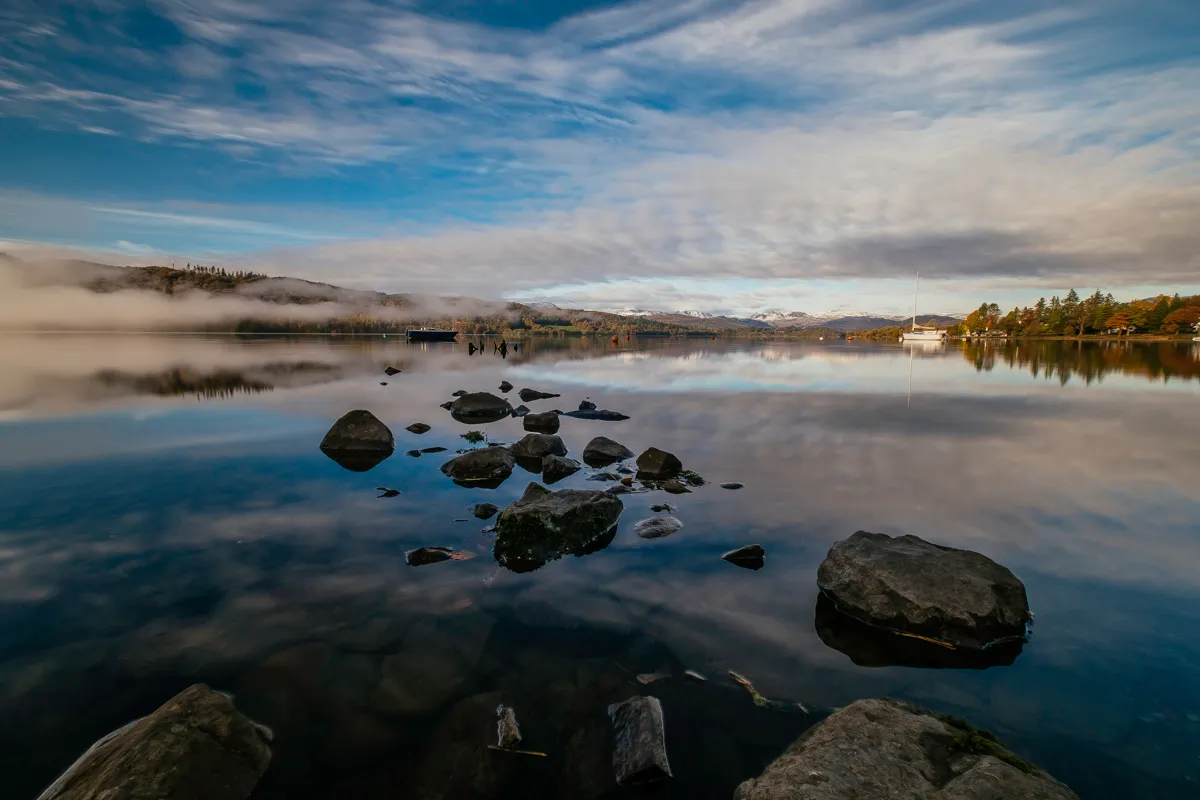
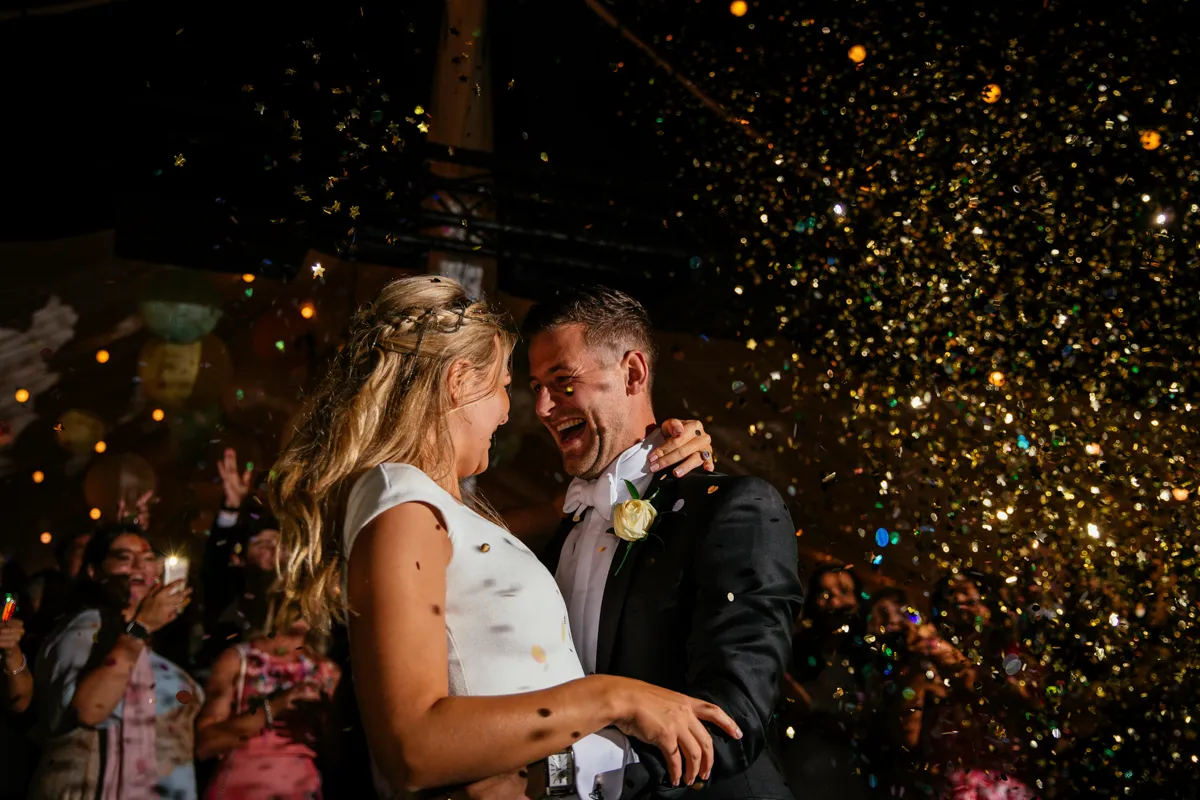
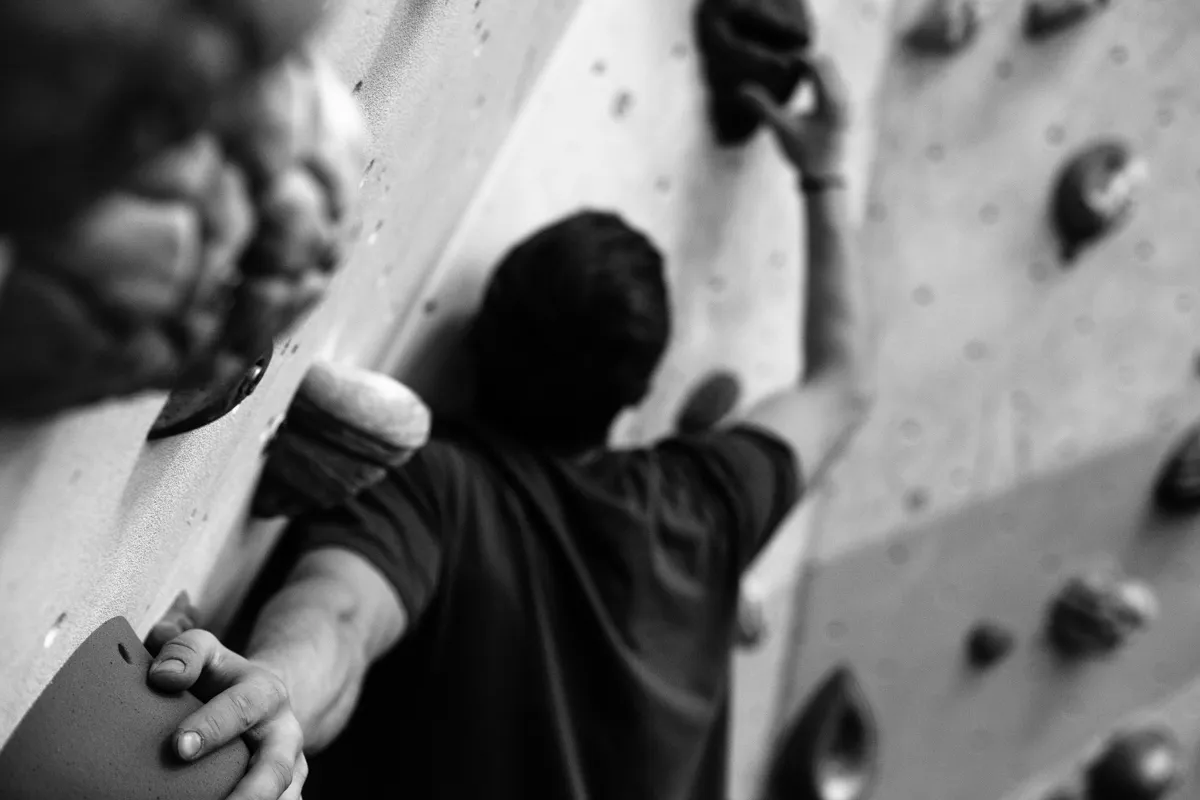
Let’s look at Narrow Apertures using the shot below -

(Photograph by my lovely wife @vtravels)
You’ll notice how in this shot the fountain is in focus, as is the couple and even the silhouetted people in the foreground. This is the product of a Narrow Aperture. We’ve extended our depth of field. If you remember the shot of the climber, you might have noticed that the Wide Aperture made things look further away, it kind of exaggerated distance. Well the opposite is true for a Narrow Aperture. Notice how it’s almost difficult to judge how far the couple are from the fountain, and how far away each of the silhouettes are?
So we also know about Narrow Apertures. We know that Narrow Apertures allow LESS light onto the sensor, allowing us to capture detail in bright subjects. We also know that a Narrow Aperture gives us a larger depth of field, especially if the subject is further away from the subject.
See, you’re feeling like a pro already aren’t you?
One last note on Aperture before you get out there to shoot. You may notice the ‘AV’ setting on your camera. This is known as ‘Aperture Priority’, it’s a part automatic mode that most DSLRs and Mirrorless cameras offer. The idea is that you tell the camera what aperture you want to shoot at, and it works out the Shutter Speed and ISO for you. We’ll be talking about ISO and Shutter speed in forthcoming blog posts but…
And I can’t quite believe I’m going to say this …
You have my full permission to use AV – Aperture Priority – to refine your control of aperture. Just for now of course, until you start to get to grips with how your aperture choice will affect the LOOK of your image. And until I’ve published the next article of course!
Ok, Get Out There And Shoot!
My customary send off, this time with a fairly clear and definite goal, head out there and really think about aperture. AV will see to the other settings for you while you explore what Aperture can do to your images. Most importantly [hopefully!] you understand HOW aperture works. I realise photography is a creative endeavour, but it’s based in science and the more you understand that science, the more you will be able to use it to realise your creative vision.
As always, practise makes perfect. Or at least, practise makes BETTER. The more you shoot, the better you get. Even if it’s just with your iPhone on a night out!
Thanks for reading! As always, any questions, or any topics you’d like me to address, please let me know!
All images are mine and copyright me!

Please RESTEEM if you like my work.
Please Upvote my work to help support my content on Steemit