Nerd Mode Activated
宅男的攝影模式
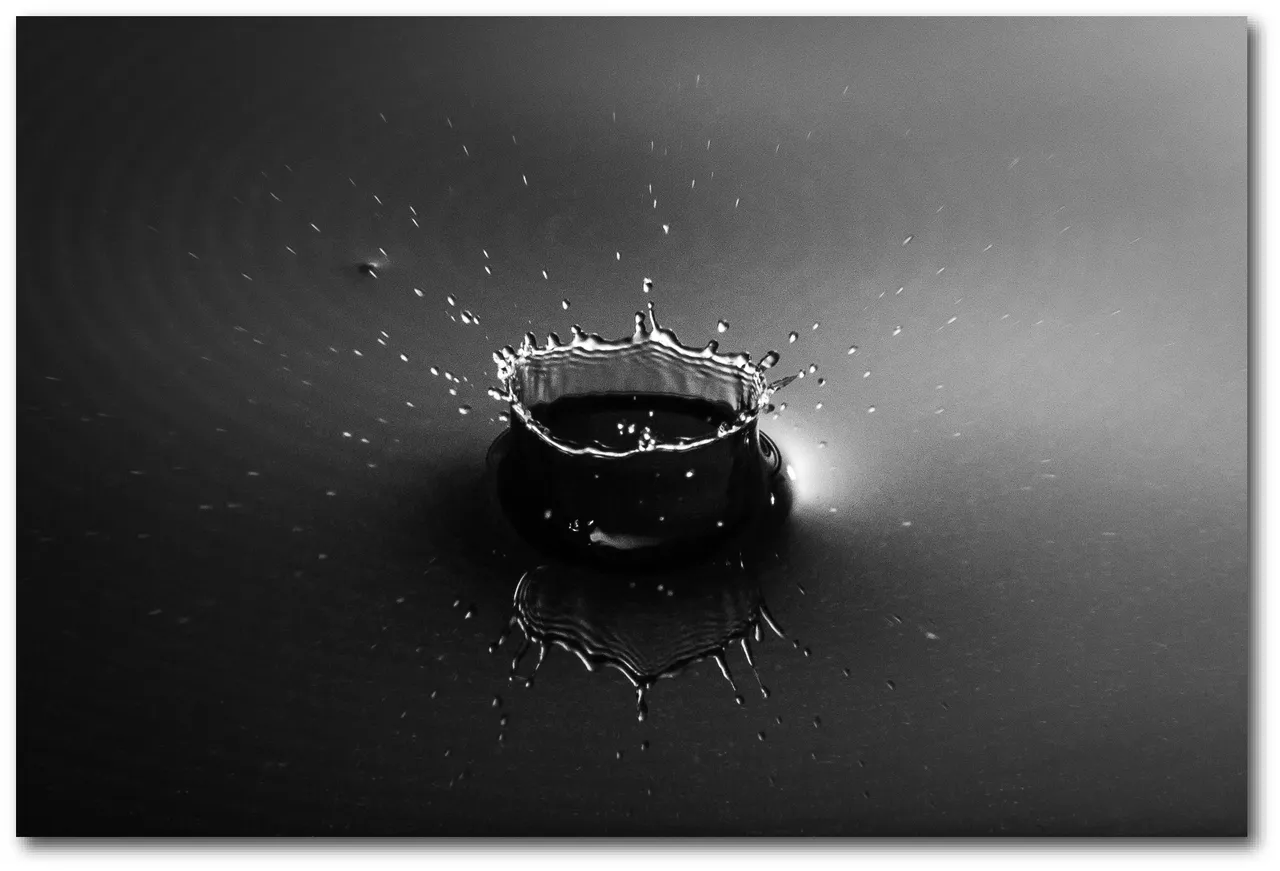
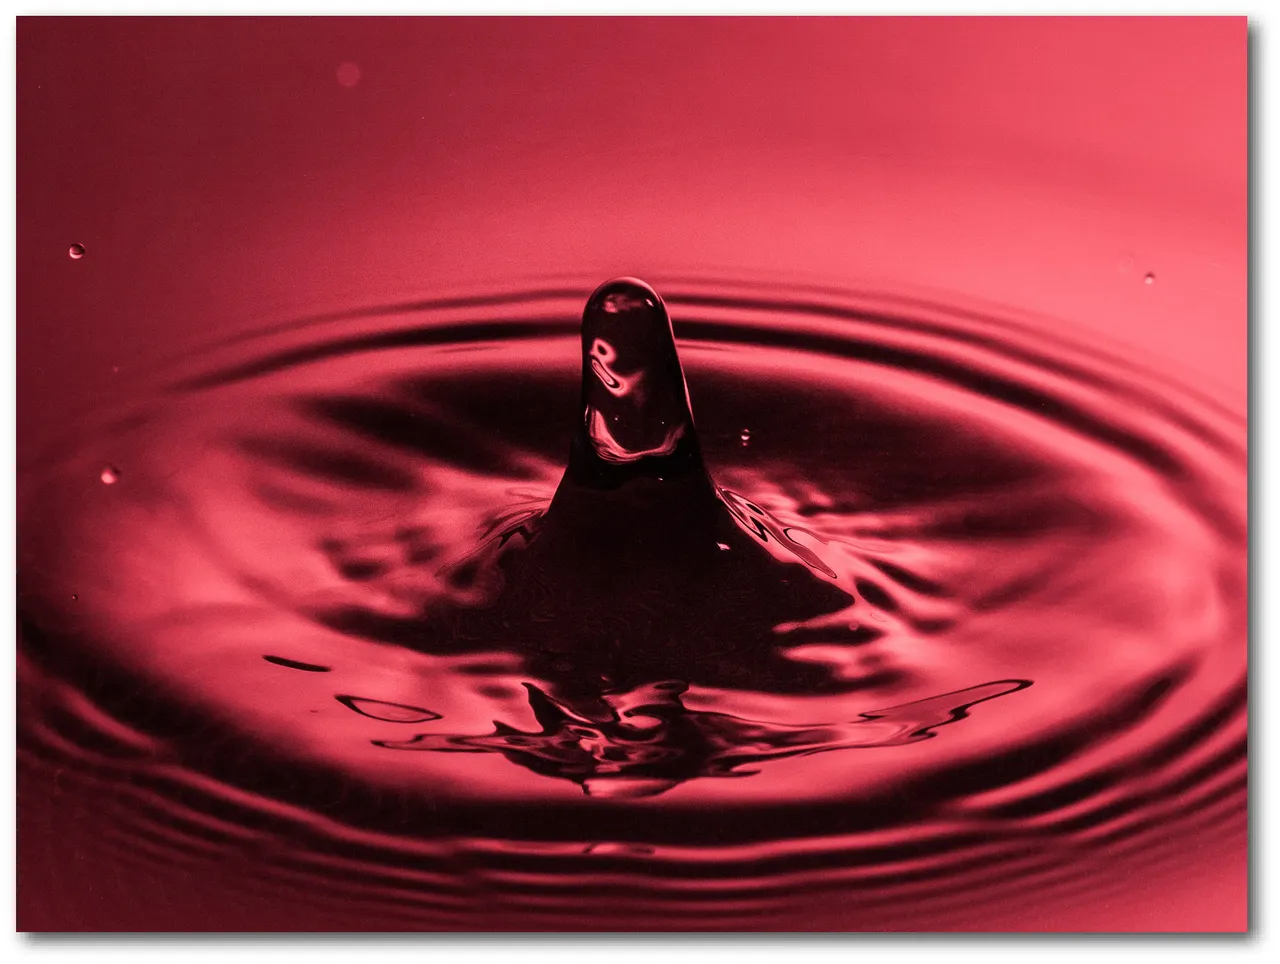
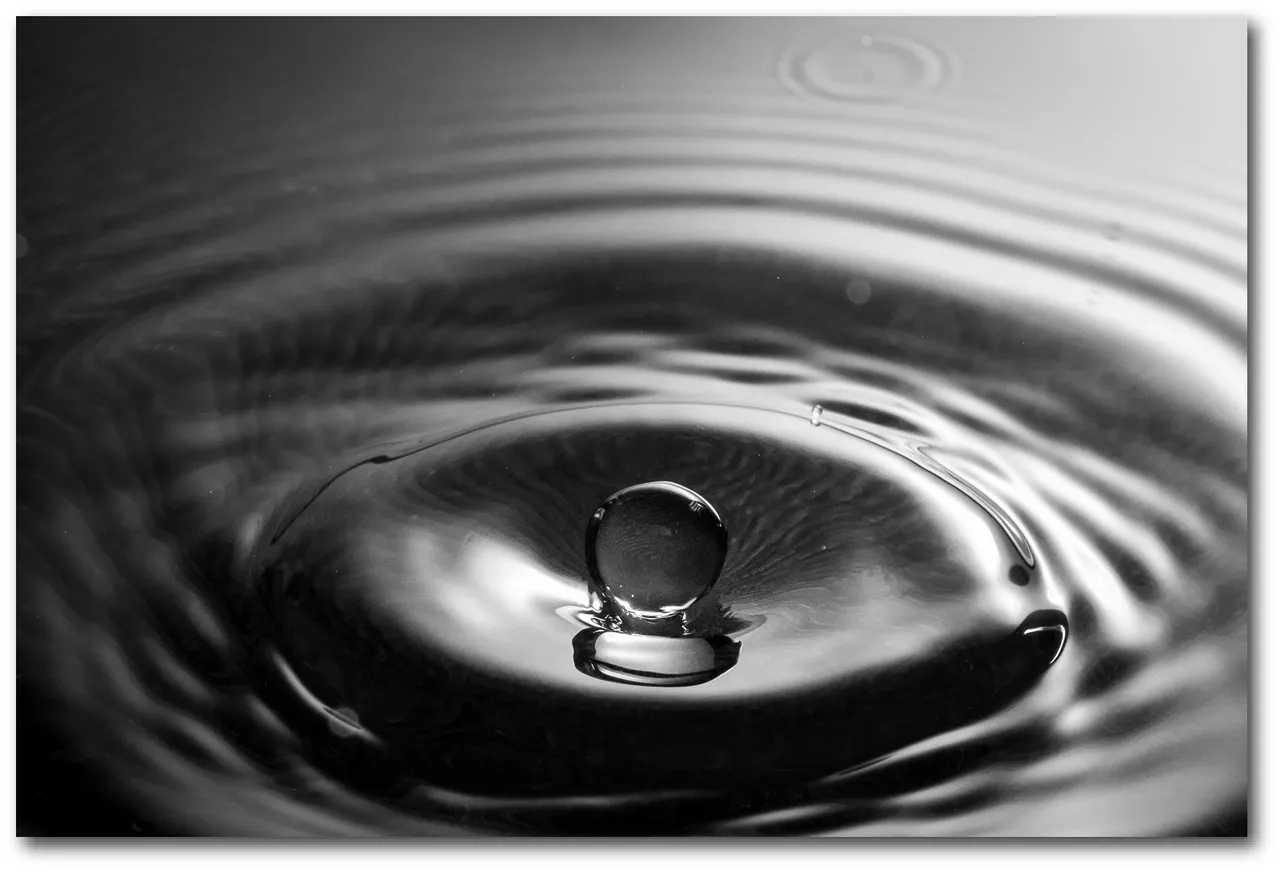
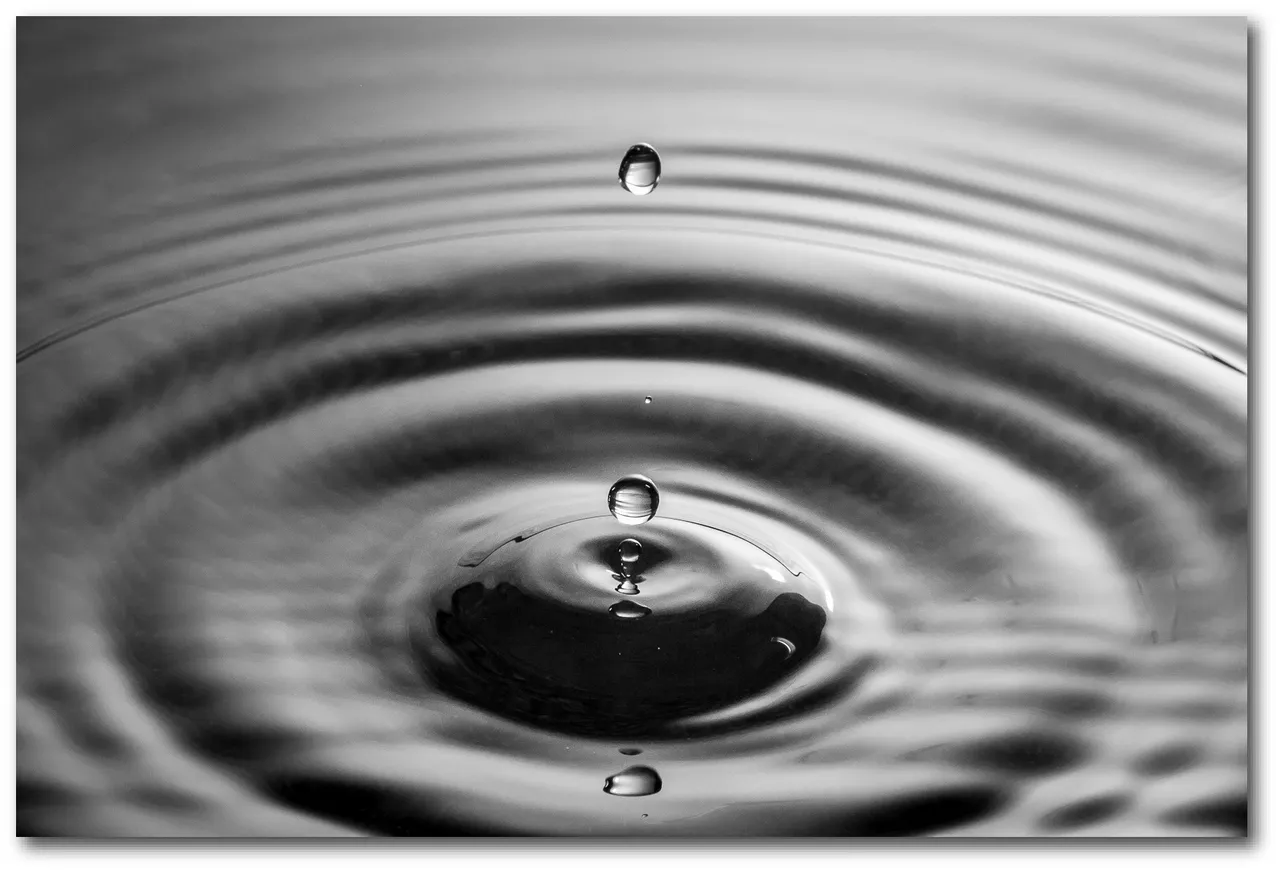
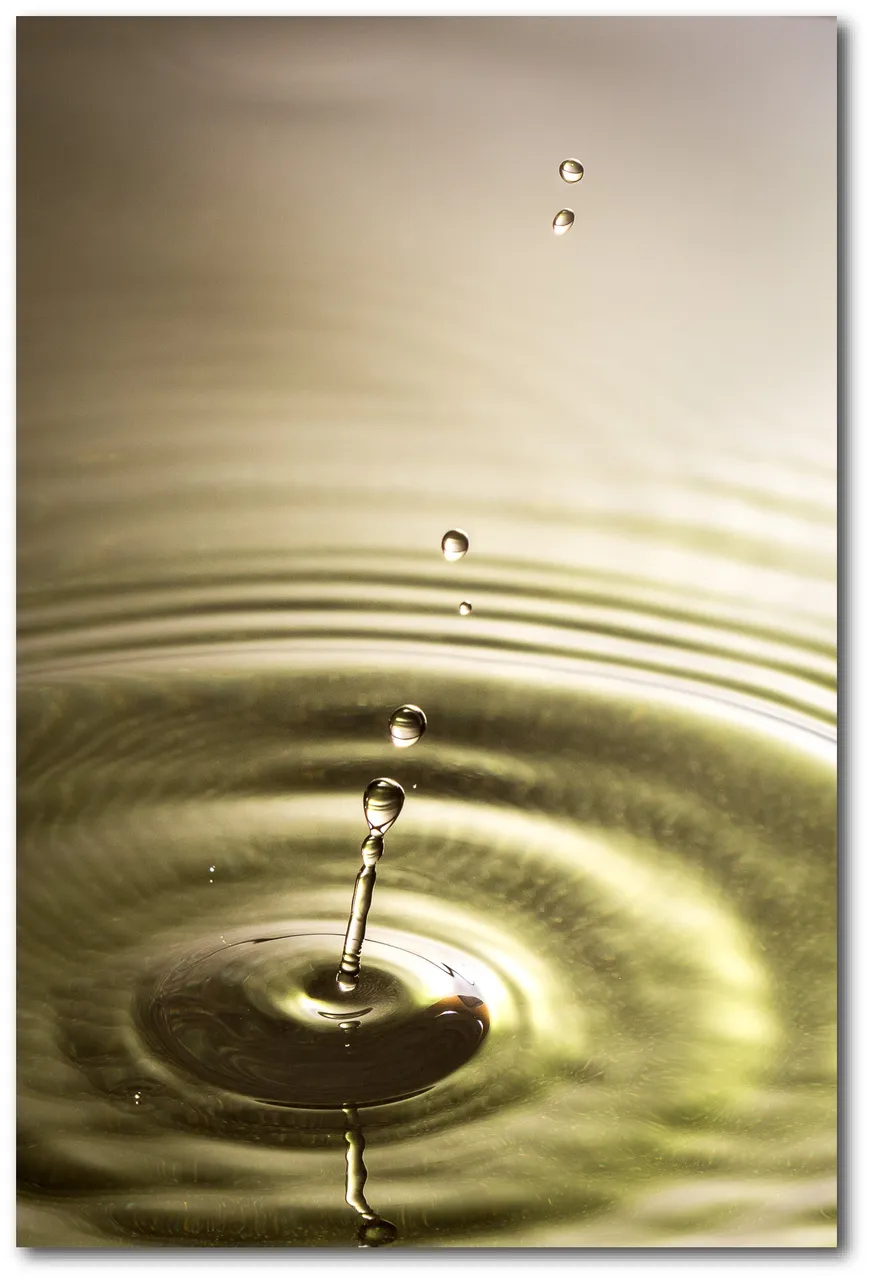
I've always wanted to do water droplet photography after seeing the cool images online taken by others. Today I would like to share with you my first serious attempt at water droplet photography!
自從在網路上看到許多水滴攝影的作品之後,自己也一直想來試試看。今天我就來分享我第一次認真拍水滴的一些作品及過程吧!
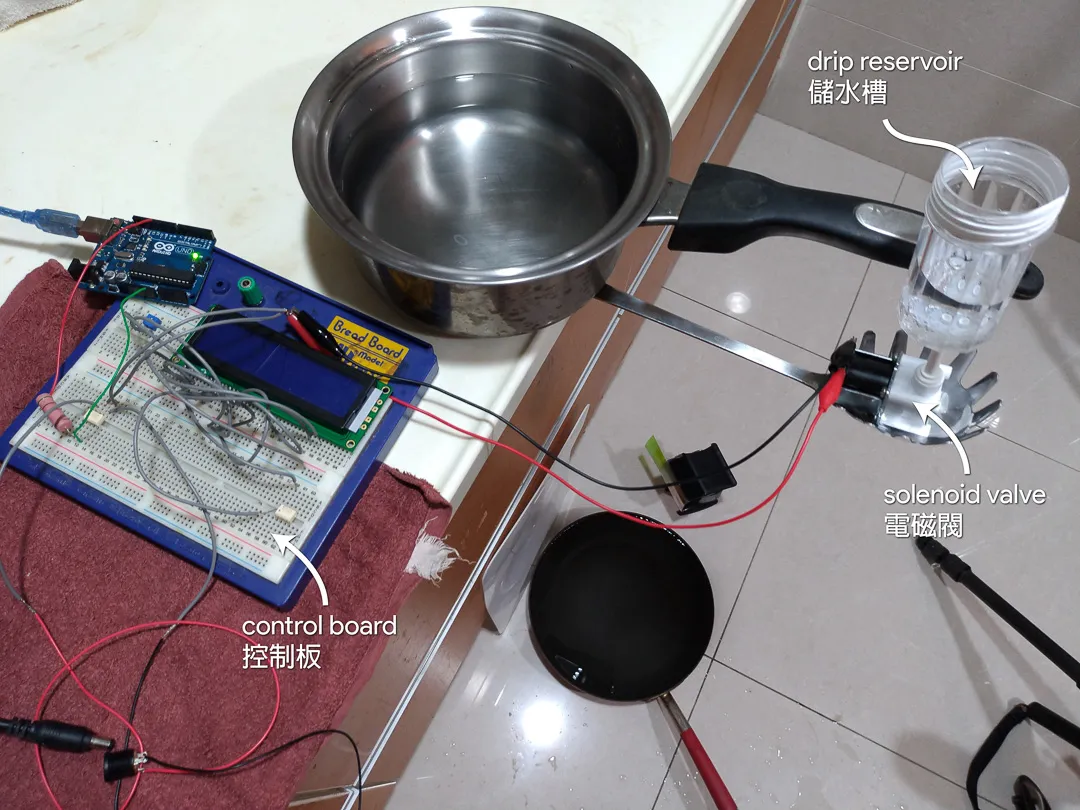
To control the water drops, I used an Arduino hooked up to a simple circuit that opens and closes a solenoid valve automatically at regular intervals.
我用了一塊Arduino配上簡單的電路去控制一顆電磁閥開關,達成自動滴水裝置。
The Code 程式
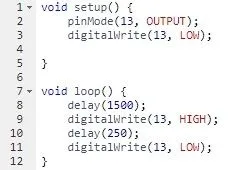
The code is very simple: set pin 13 to output mode, then toggle it on for 250 ms, then off for 1500 ms, and repeat.
程式非常簡單:設定pin 13為輸出,然後開250 ms,接著關1500 ms,重複開關。
The Circuit 電路

The circuit consists of an Arduino connected to a TLP250 optocoupler which is used to drive a 24-volt solenoid valve.
電路基本上是一塊Arduino連接到一顆TLP250光偶合IC來驅動一個24伏特的電磁閥。
The Setup 架設方式
With the electronics ready, the rest is just setting up the valve with a reservoir raised above a pan full of water used to catch the drops. A flash and reflector is placed at the pan to light the image.
電子的部分搞定後,剩下的就是把電磁閥及水槽放置在一個接水盤的上方,讓後在接水盤旁邊架設閃光燈及反光板。
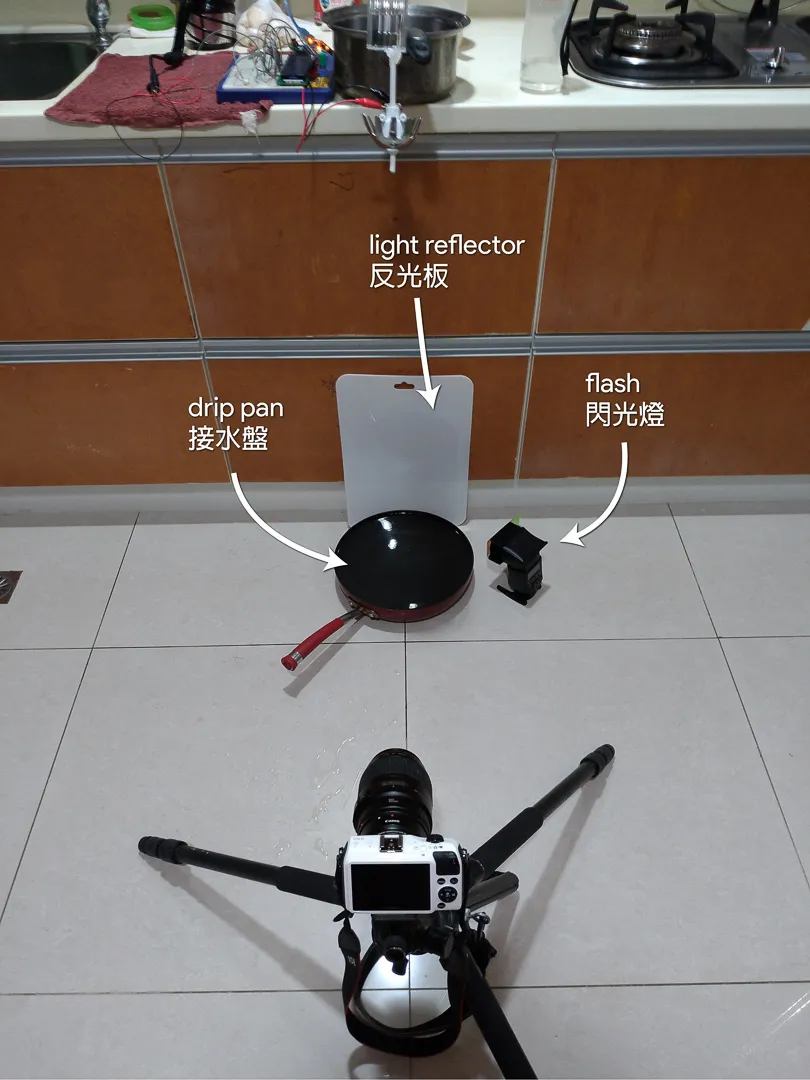

Taking The Photo 拍照方法
I set the camera to 1~2 seconds exposure, f/11 at ISO 400. The flash is set to 1/8 power. With the lights turned on and the water dripping into the pan, I pre-focused the camera at the location of the water drop. Then I turned off the lights in the room except for a dim lamp. For each shot, I start the exposure, then I fire the flash manually when I see the water droplet hit the surface of the water in the pan. The short flash duration is what captures the images.
我將設定調成1~2秒曝光時間、f/11、ISO 400、閃光輸出1/8,厨房燈開著時把對焦設在水滴打到接水盤的位置。拍攝前先把燈關掉,留下一盞小夜燈開著。拍攝每一張照片是先按快門,然後看著接水盤,當水滴掉落時手動觸發閃光燈。照片其實是透過閃光燈短暫的一閃來捕捉一瞬間的影像。
Equipment Used / 使用攝影器材
- Camera: Canon EOS M
- Lens: Canon EF 100mm f/2.8
- Flash: Canon Speedlite 430EX II
- Software: Adobe Lightroom

