Framing the Shot:
Landscapes and portraiture are two of the most commonly practised forms of photography. People have always taken pictures to document their travels, and the rise of the "selfie" is a truly fascinating, and somewhat disturbing phenomenon. I think that landscape photography can be a good starting point for any budding photographer, and I hope to share a few tips with you today.

Southerndown, South Wales. Nikon D750, Sigma 24mm A @ f/8, 24mm, 1/125 sec, ISO 400
This is a picture that I took on an overcast day in South Wales. I chose this shot because it demonstrates several "rules" in action. Firstly the horizon is almost perfectly straight (I say almost, because the curvature of the earth and lens distortion can affect this). A wonky horizon, unless intentionally used for stylistic effect, should always be avoided.
The second thing to note is the rule of thirds being applied. Briefly, the rule of thirds states that you divide your image into thirds when considering composition. For some reason the eye is drawn to a subject if it occupies a third of the image. You'll notice that the rock formation is in the left third of the picture when divided vertically, and the sky is situated in the uppermost third.
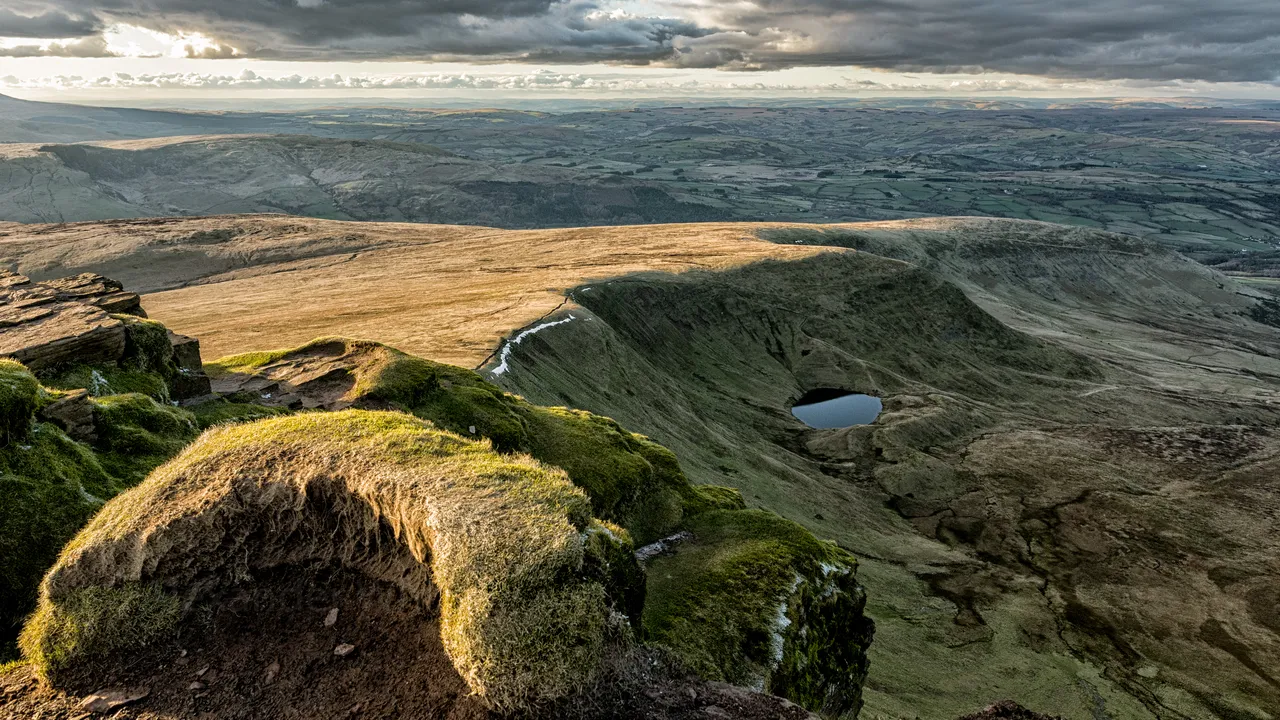
Brecon Beacons at Sunset. Nikon D750, Sigma 24mm A @ f/9, 24mm, 1/200 sec, ISO 400
Having foreground interest can also be important when taking landscape shots. Both of these shots have foreground interest that act as a kind of anchor point in the image. Having something present in the foreground can also help to give your photo a sense of scale, while giving a starting point from which to lead the viewer's eye through the image.
Hyperfocal:
Something often overlooked in landscape photography is something known as "hyperfocal distance". The hyperfocal distance is, in practice, the point of focus within a shot that gives you the maximum depth of field. You'll notice that the pictures in this article were all taken at a fairly small aperture, this was to help ensure sharpness throughout the image. What is not immediately apparent however, is that in each instance I endeavoured to focus at the hyperfocal distance of the lens used.
There are apps that you can download or hyperfocal distance charts freely available online that will give you the hyperfocal distance relevant to any focal length and aperture. In my experience, a good way to approximate this is to simply focus about a 1/3 of the way to the horizon. Provided you have a fairly small aperture and a reasonably wide focal length, it should yield you front to back sharpness.
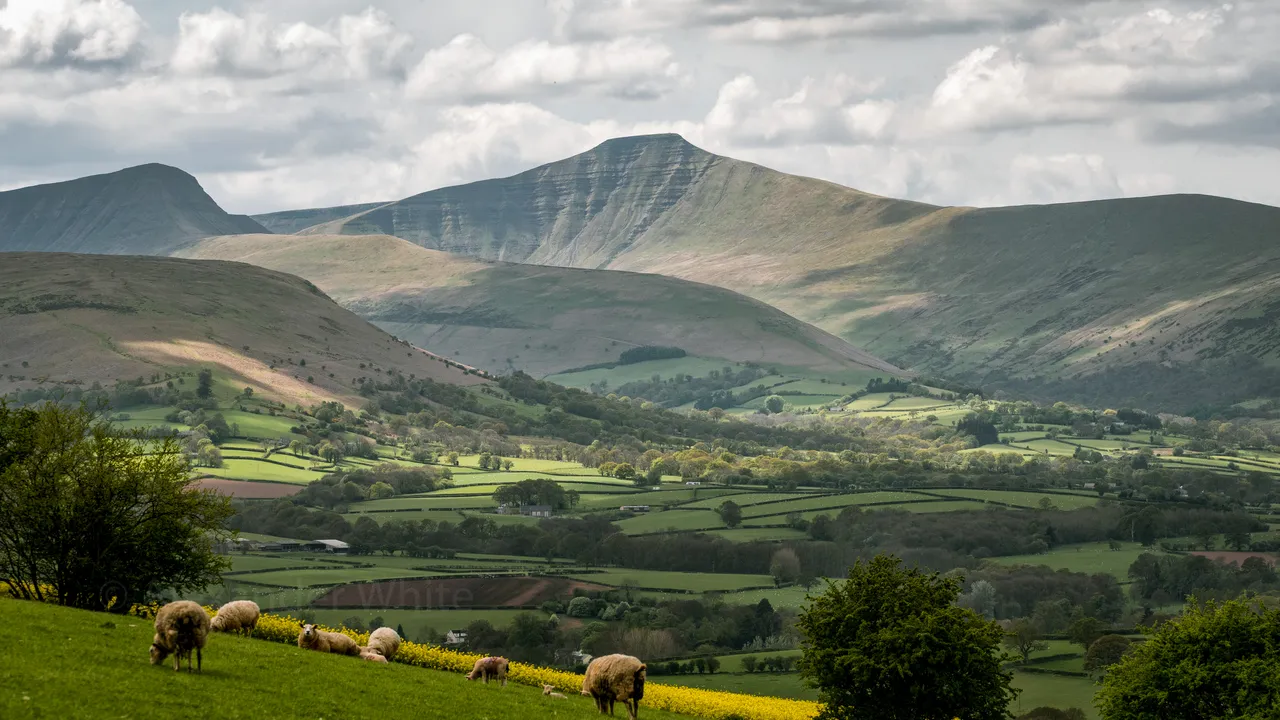
Pen y Fan. Nikon D750, Sigma 150 - 600mm C @ f/10, 150mm, 1/640 sec, ISO 320
I wouldn't normally have posted this shot but it's a good example of when attempting to find the hyperfocal distance didn't work. The foreground is out of focus because the focal length is simply too long, and the sheep too close to the lens.
Selective Editing
One way to give your landscape photos a boost is in post processing. Editing software such as Lightroom has many great tools to help you get the most out of your images. Some adjustments are better applied selectively however. When working with landscapes I'll often use a graduated filter or an adjustment brush to highlight a part of the image and boost clarity or reduce atmospheric haze.
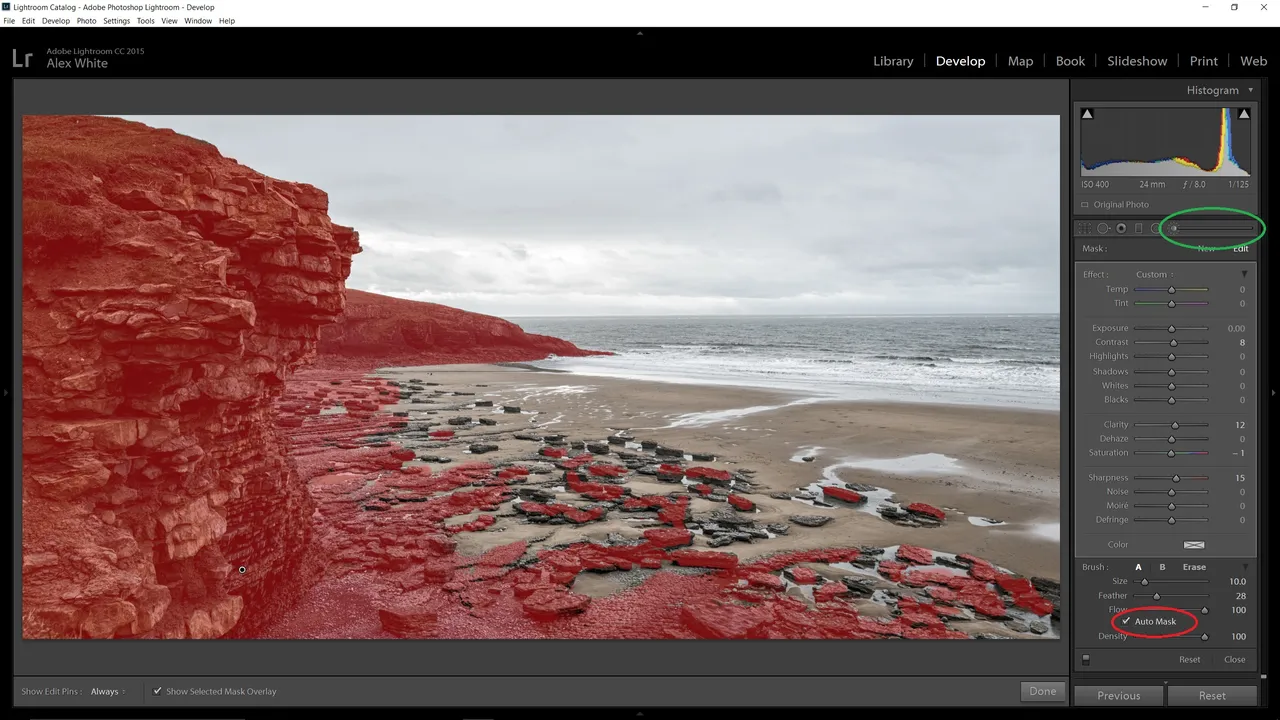
The adjustment brush has been highlighted in green on this screenshot, just click on it and start selecting parts of your image by holding down the left mouse. Some useful shortcuts to bear in mind, press the letter "O" to enable the red overlay so you can see what you're selecting. You can also press "A" to enable or disable the auto mask function (highlighted in red on the screenshot). Automask is especially useful as it helps to make sure you don't accidentally select something by mistake. It works particularly well between two contrasting areas of a scene, between land and sky for example.
This is a before and after comparison showing the selective adjustments (I had to compress this gif quite a lot to upload it here so you may notice some artefacting in the image).
Diffraction
The best way to learn about landscape photography is to experiment with the equipment you have at your disposal. Re-visiting old locations at different times of day or during different seasons can help you to see things in new ways. Try some of the things I've mentioned here too, add foreground interest, and utilise hyperfocal distance and let me know how you get on.
I'll leave you with a few more examples of my work, though there is one last thing that I almost forgot to mention with regards to aperture. Don't use the maximum aperture of your lens when photographing landscapes. You'd be forgiven for thinking that a higher f-stop means sharper images, but this isn't the case. Extremely small apertures such as f/22 or more can result in lens diffraction. This means that light starts to bounce around inside the lens, resulting in a softer image.
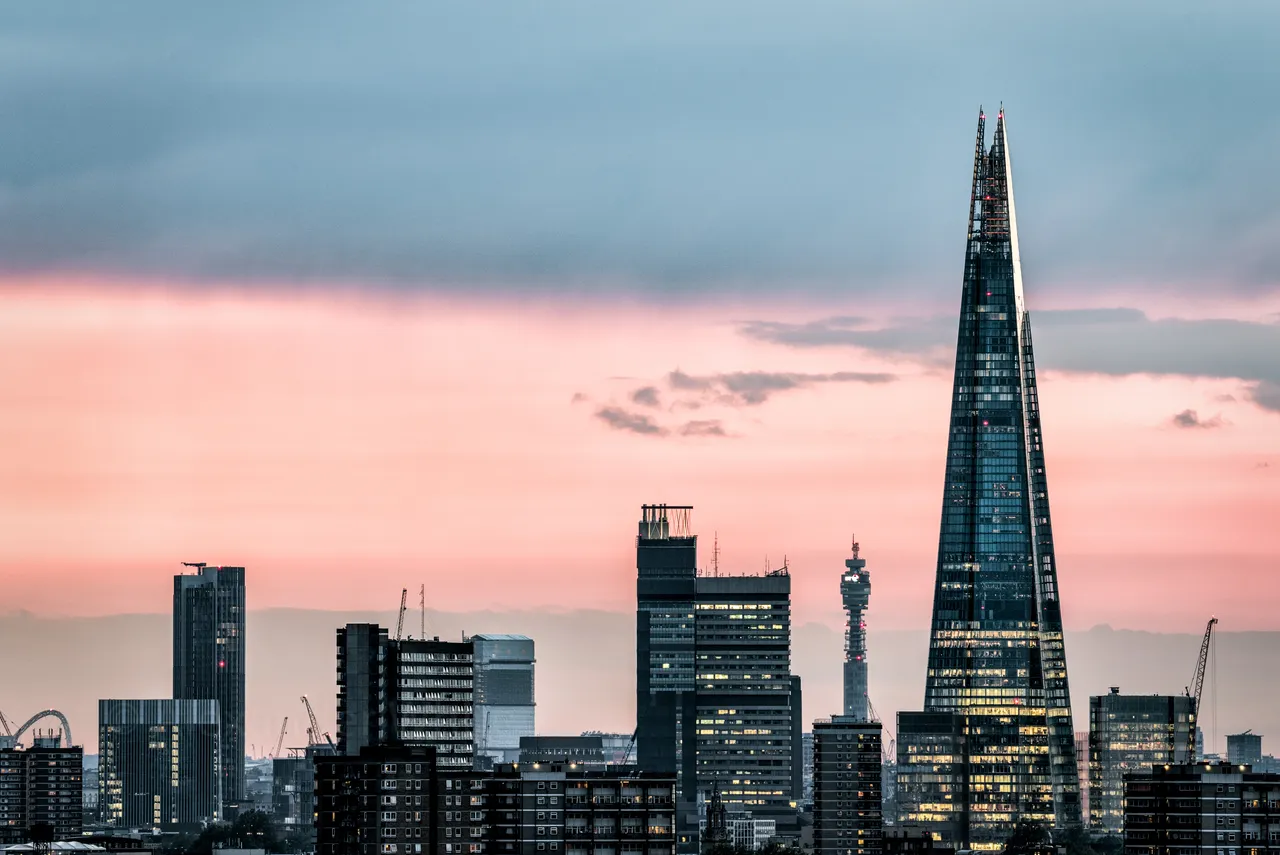
London Shard at Sunset. Nikon D750, Sigma 150-600mm C @ f/8, 360mm, 1/5 sec, ISO 250
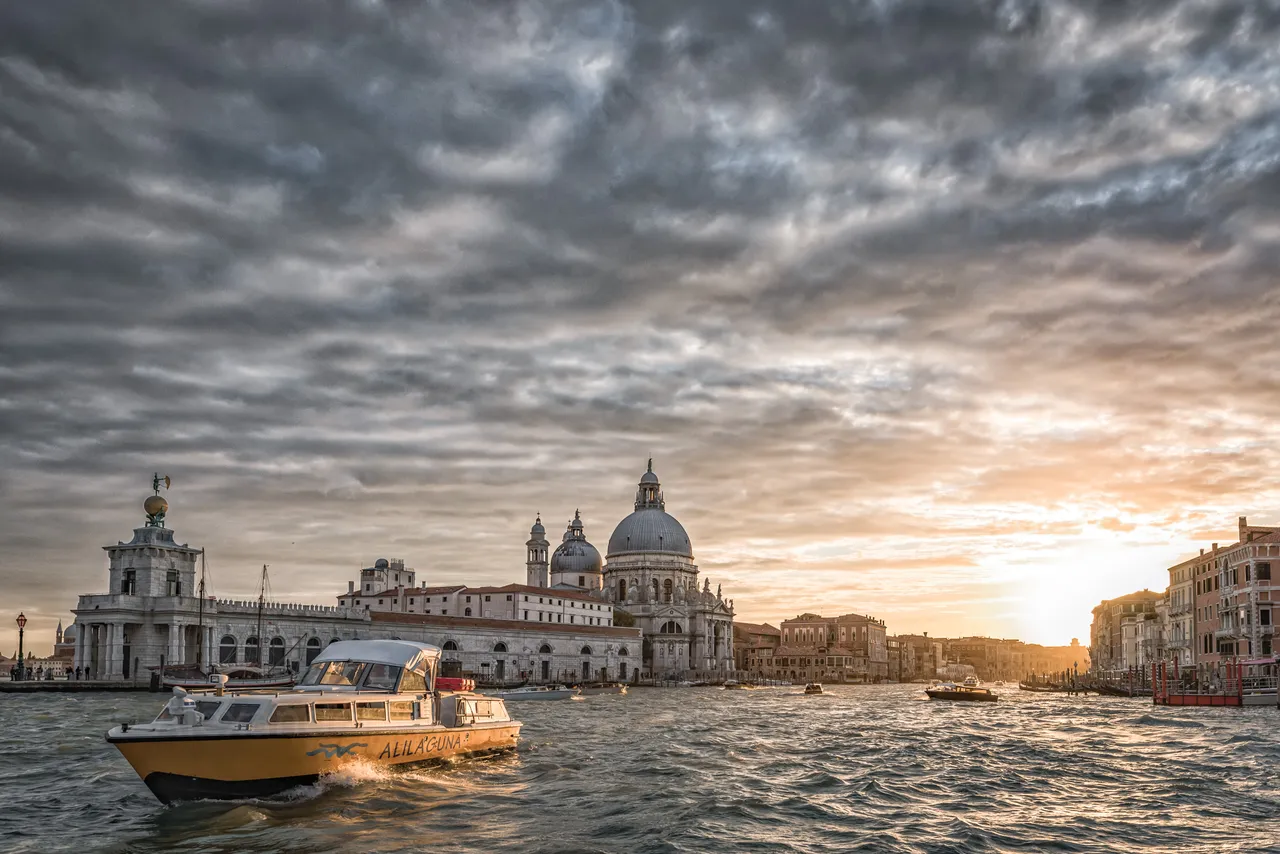
A Sunset in Venice. Nikon D750, Sigma 24mm A @ f/6.3, 24mm, 1/400 sec, ISO 200
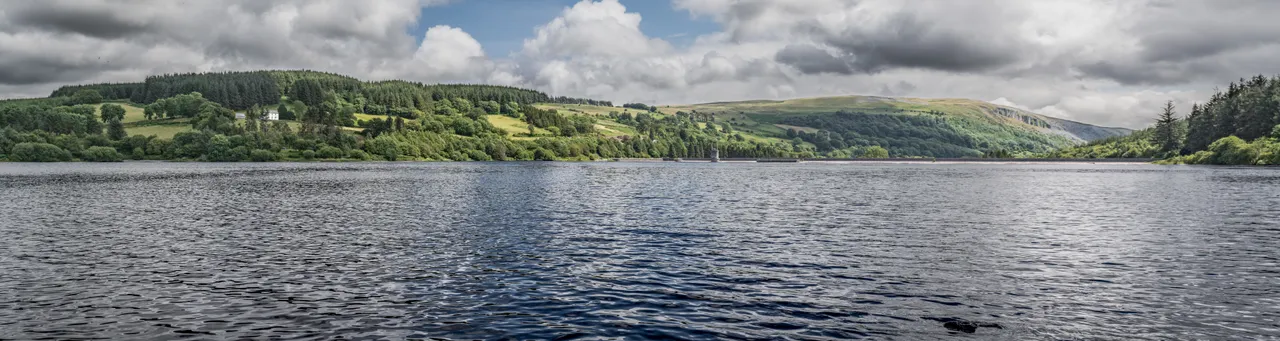
Llwyn-On-Reservoir. Nikon D5200, Nikkor 18-55mm @ f/11, 28mm, 1/160 sec, ISO 160
Panoramas can be fun too : )
If you've found this article useful then please upvote & follow me for similar content in the future. Also please consider resteeming this blog if you believe it deserves to be shared with the wider community. Cheers everybody : )
All images present in this article are © Alexander White