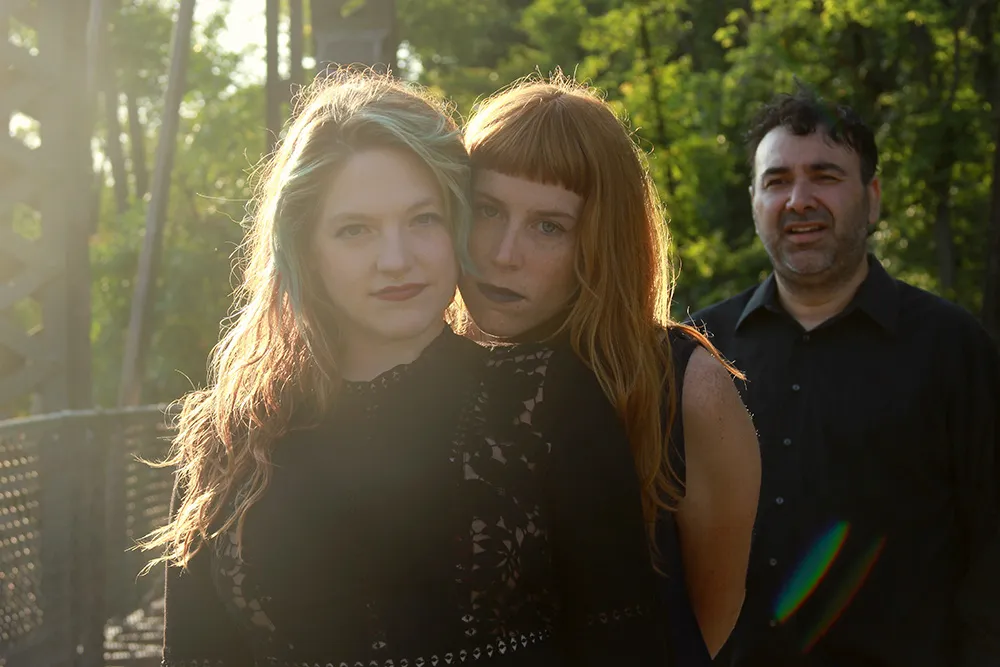
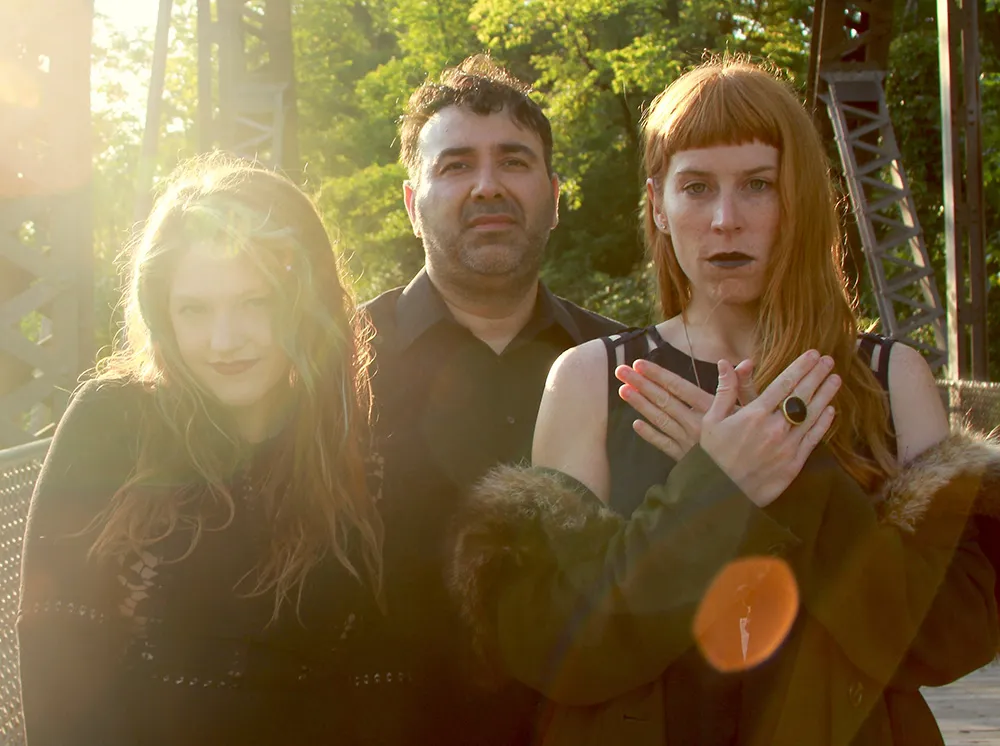
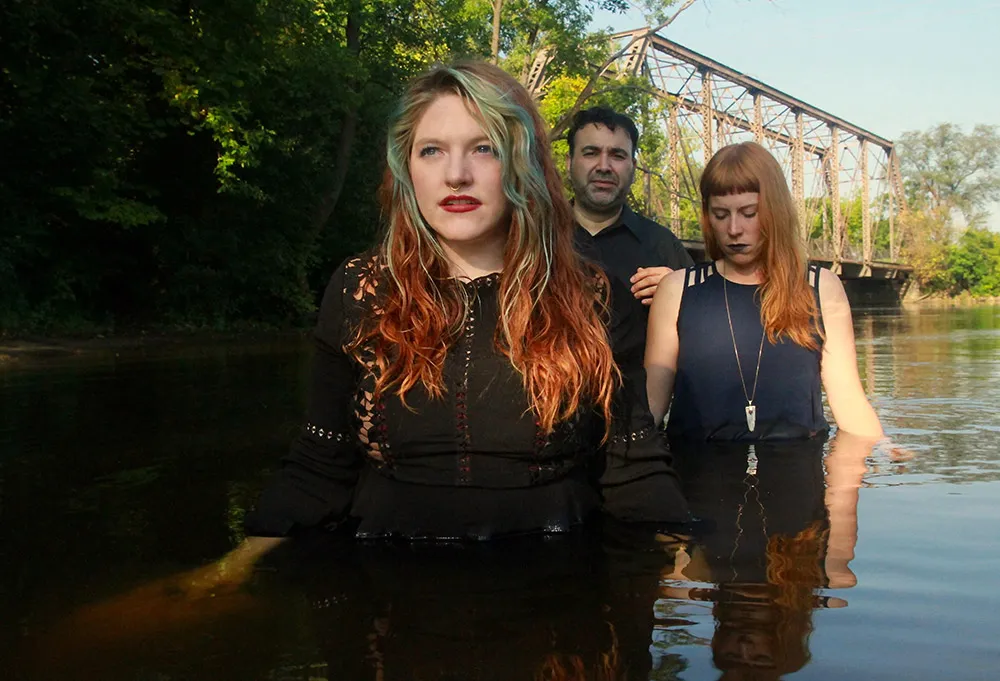
Before
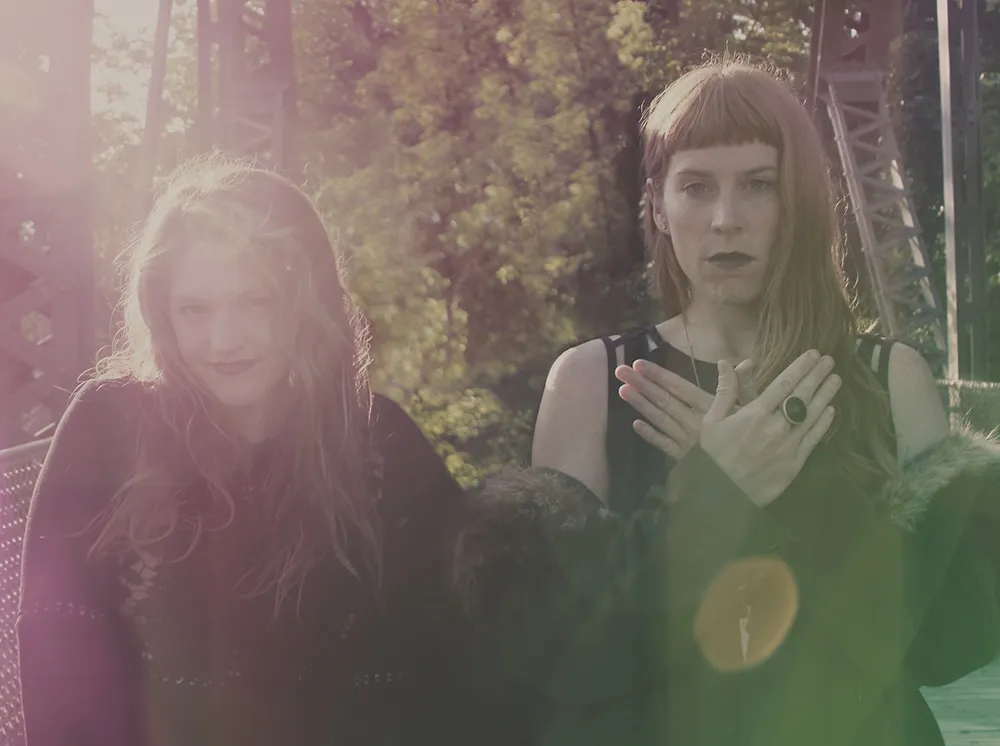
After
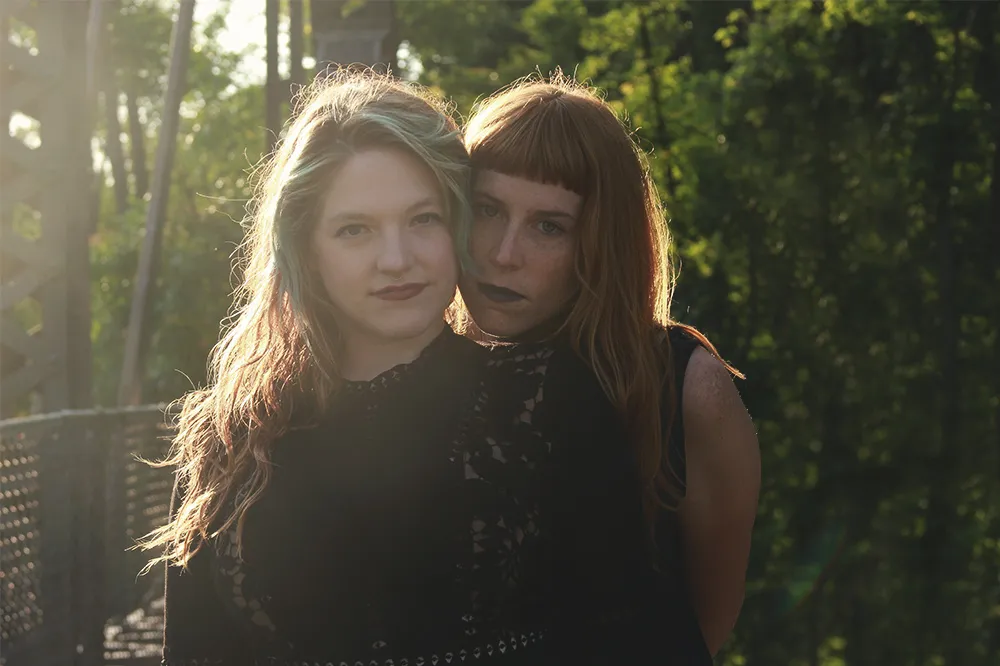
An old flame doesn’t need to prevent the continued circulation of an otherwise circulatable photo 😍
Bathing Belles parted ways with a musical partner a couple months ago, not too long after we had taken a bunch of photos together. Luckily, this type of Photoshopping is my favorite -- technical procedural work that is done best when you can't tell it was done at all.
Here is my process...
There may be better ways to do this, but I will show you what I do. It involves a lot of duplicating, cloning, and masking.
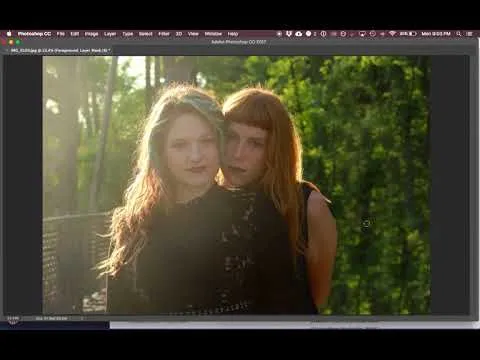
1. Mask the foreground
Duplicate the background layer and mask the part of the foreground area that is touching the part of the image that will be erased.
In this case, my left arm was touching his soon-to-be-erased body. I wanted to be able to paint/paste background contents on new layers and tuck them safely underneath my foreground/arm layer.
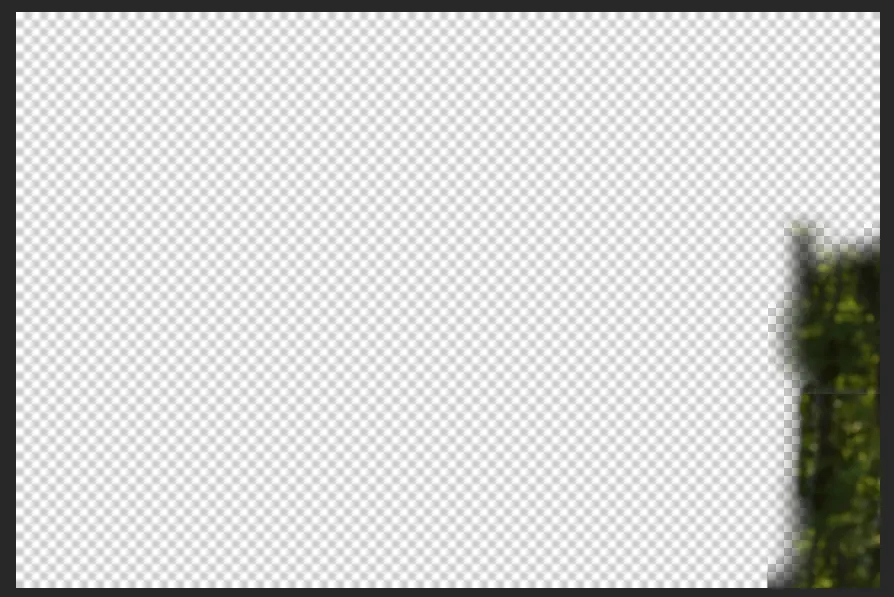
2. Clone + Mask
Make a new blank layer. Use the Clone Stamp Tool to sample parts of the background that could be used to cover up the person/object/ex you are trying to remove. In my case, I sampled the visible areas of trees, and I masked away parts that I didn't like or need.
3. Duplicate + Mask
You can also straight up copy and paste parts of the image. In this photo, I used the Rectangular Marquee Tool to select segments of trees and paste them into different areas.
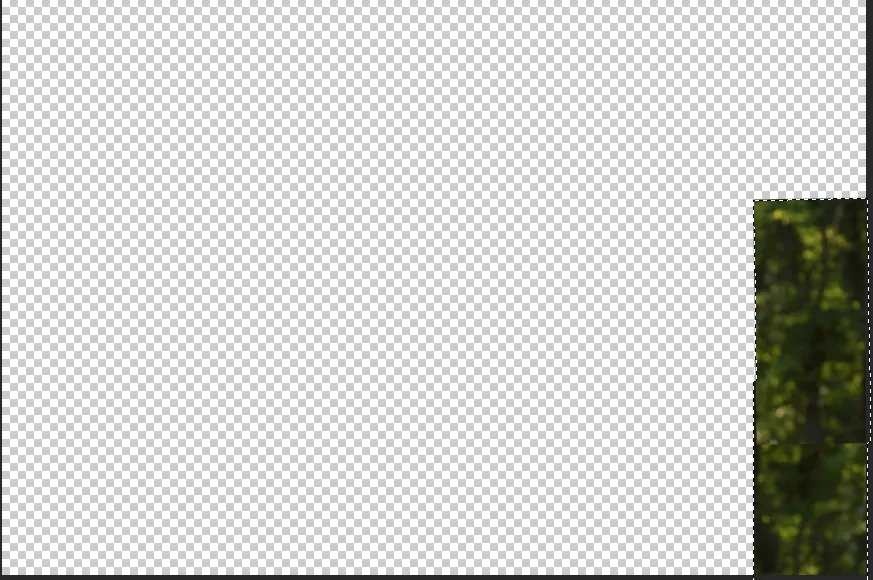
I added masks to those layers so I could smooth out their hard edges.
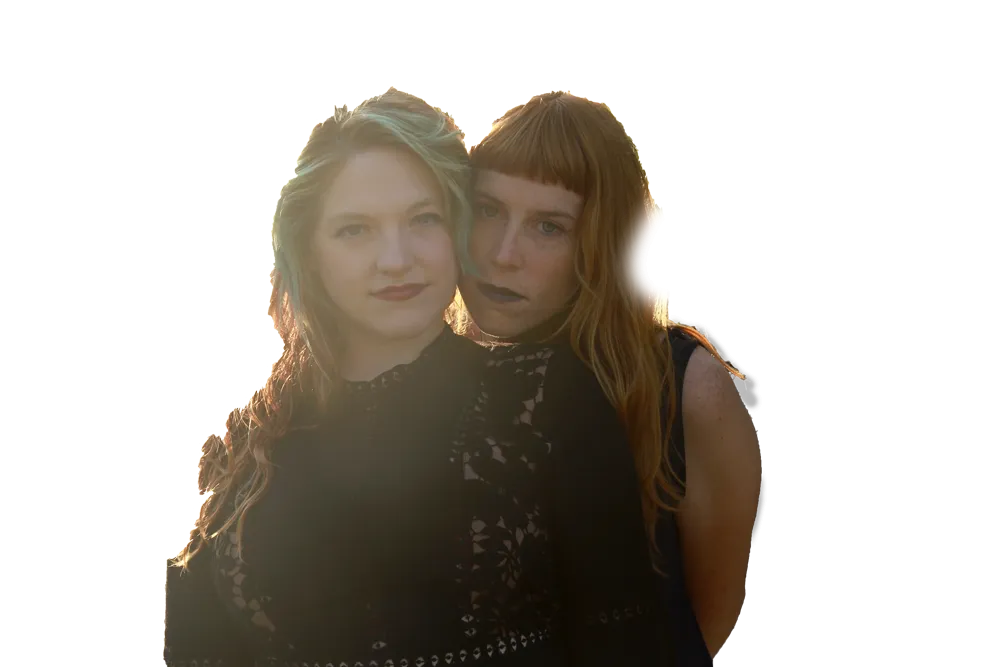
Trust your eye, and use whatever you have access to.
There are no limits! You can sample:
- Elements of the photo
- Elements of other photos from the same session that may contain more visible background elements
- Elements from random internet photos that look like they could be part of your photo.
Little by little, you will come up with a convincing photo. <3

Share your tips with me!
I would love it.
-Jessica
P.S. That's @amyinautumn in the photos with me. Say hello, she's new... ;)