HOW TO CAPTURE LIGHTNING
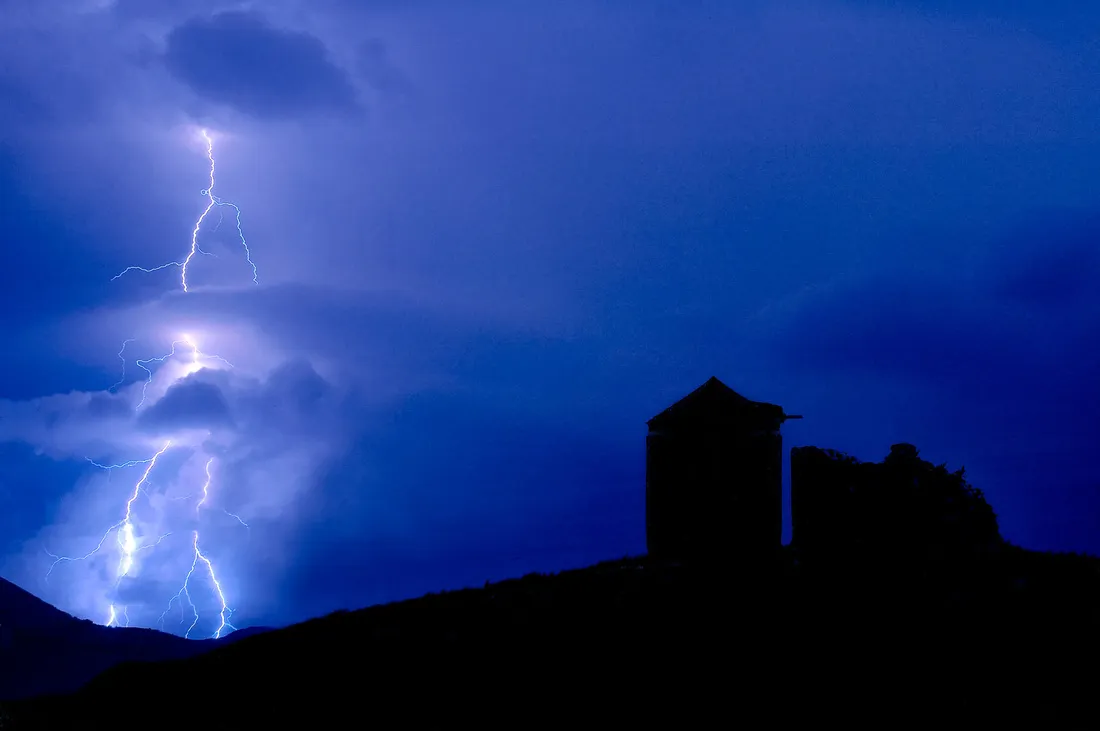
Nikon D70 & AF 24mm f/2.8D Exposure: 6sec @ f/8 @ ISO 100
NOTE: This article was first published over at johncaz.net on the 26th March 2014
INTRO
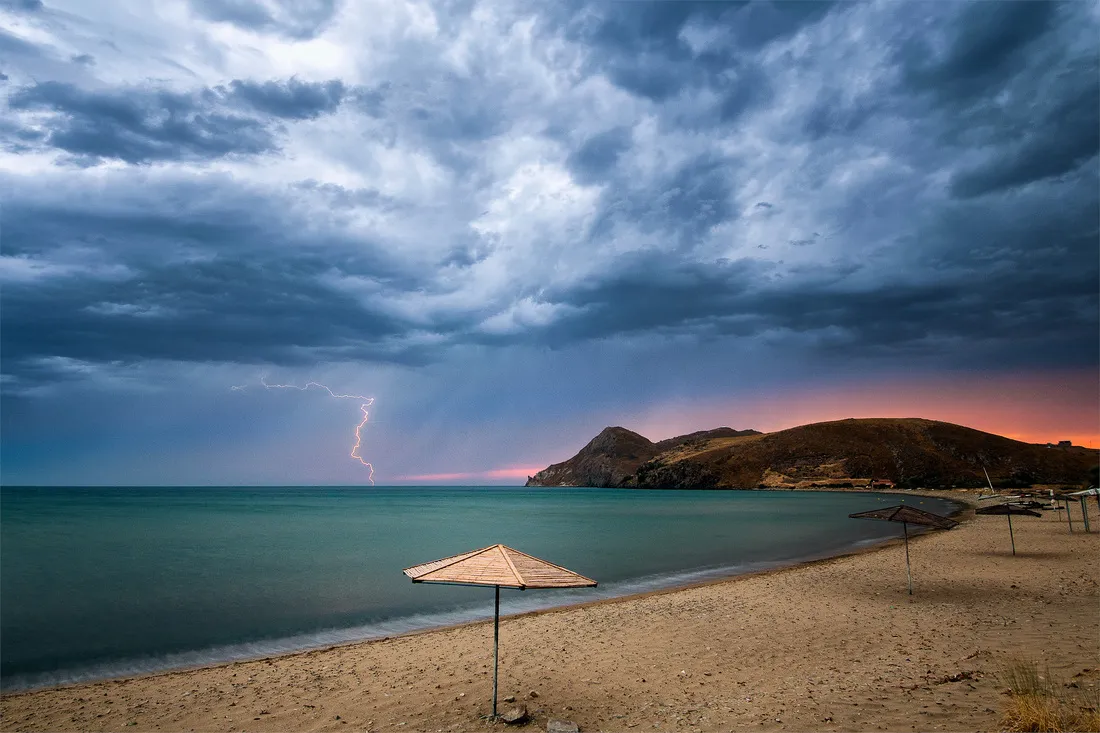
Photographing lightning like the ones in this blog post isn’t that difficult and can make for some impressive images. Basically you pinpoint the part of the sky where lightning is active, you then point the camera in that direction, focus to infinity, select an aperture of f/5.6 or f/8, you open the shutter with a remote shutter release and last you close the shutter after lightning has stricken. In reality, the lightning has just taken a picture of itself; the lightning is the “flash” that is lighting the subject, as you wait in the darkness with the shutter open.
Loosely speaking, if your frame is only part of the black sky, then the duration of the exposure is not that important since there is no light to be captured by the sensor until lightning strikes. In most cases after a lightning strike, we end the exposure and start another. You can of course wait for a second strike on the same exposure, experimentation is the name of the game.
But keep in mind that lightning shots just like sunsets are not that impressive on their own. This is why it helps to have a foreground that can complement your lightning filled sky. In essence our lightning filled sky becomes our impressive backdrop for a foreground that will be more of an anchor point to help give our image depth and a touch of uniqueness. The moment we select a foreground subject, which in most cases will be artificially lit, our overall exposure for the lightning will be limited by the exposure needed for the foreground subject (unless it’s not lit, and will be used as a silhouette). The exposure for the foreground subject doesn’t need to be exact since it usually takes up a small part of the frame and is usually of secondary importance compared to the lightning shot.
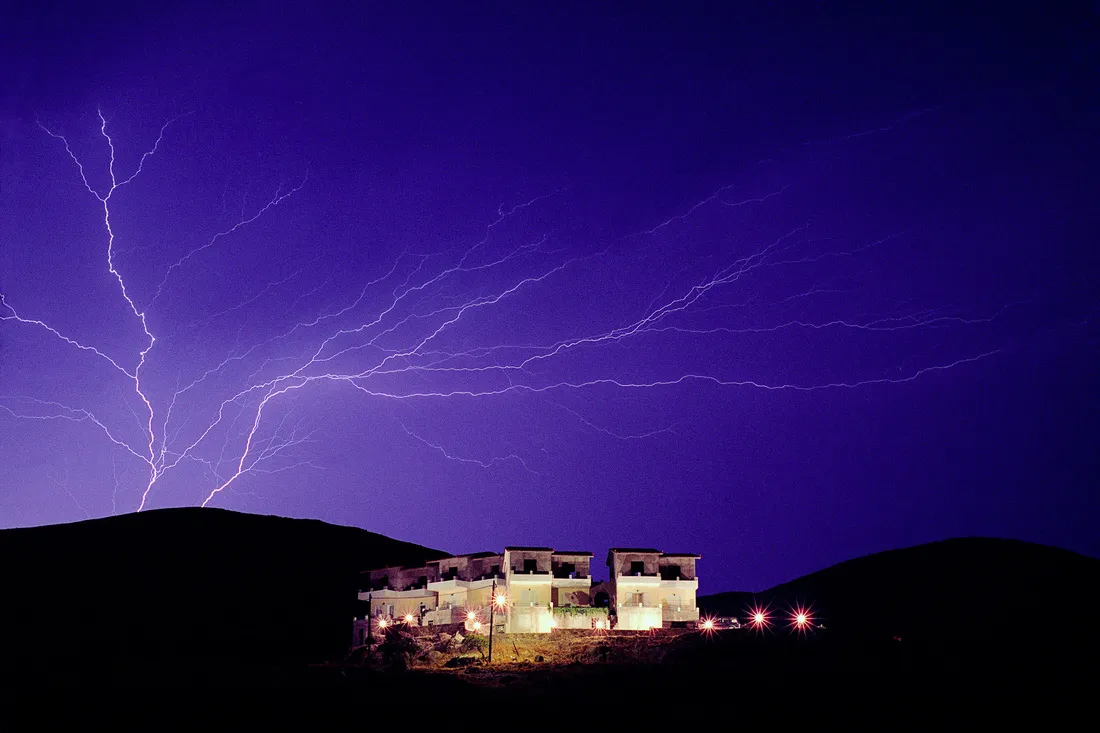
Nikon D70 & AF 24mm f/2.8D Exposure: 12sec @ f/8 @ ISO 100 When chasing storms your choices are governed by what’s available in the area. When I took the above lightning shot, I didn’t have many choices. I selected the above building which was artificially lit, so the length of time I could have the shutter open was limited by the exposure needed for the building. At 100 ISO and with a diaphragm of f/8 I held the shutter open for 12 seconds which in essence was a bit too long for the exposure on the building, but I was lucky to be able to pull the exposure back in post and end up with a good print.
CAMERA SETUP
ISO setting: Since our exposure will be limited by the exposure needed for the foreground subject and since we want the longest time available to get a chance to capture a lightning strike, it is only obvious that our ISO setting is going to be the lowest available to us.
RAW or JPEG: If you are a JPEG shooter, then this is one subject that will force you to shoot RAW. A JPEG file cannot give you the exposure and WB leeway needed for processing a lightning shot.
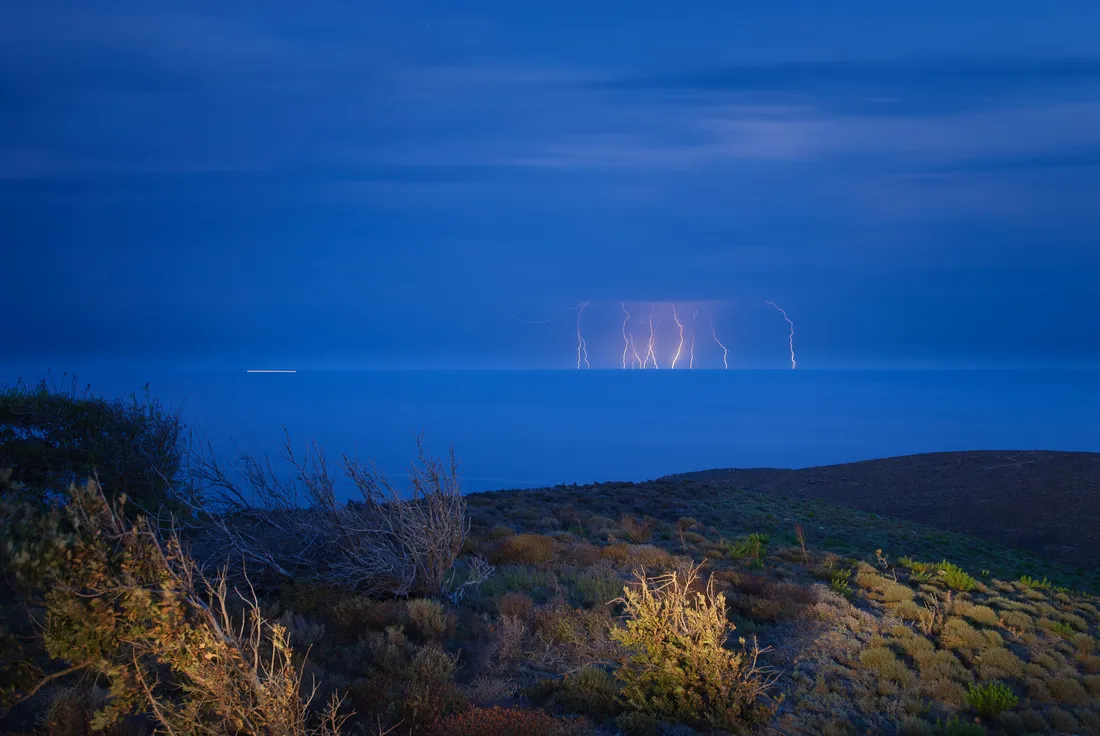
Importance of Aperture size: Lightning strikes may seem powerful to the eye, but in practice are not that strong to be recorded by small apertures. This is why some trial and error is needed to judge lightning distance. The further away the lightning the more you need to open the aperture and the closer the lightning to more you can close the aperture. It’s good to avoid small apertures since lightning that is far away will not be recorded. Here is a rough estimate to get you started. With a 24mm lens and with lightning the height of nearly the whole frame, try f/5.6 –f/8. If further away with a height of half the frame, then start at f/4. Thankfully lightning strikes are usually repetitive for a certain amount of time in a certain direction so setting up your frame will not be that difficult. Also a DSLR is able to give you results straight away so after only a few shots you will have found what exposure to use. Generally a good starting point is 100 ISO and with an aperture of f/5.6.
WHEN & WHERE
First it is good practice to observe the storm and its direction without taking any photographs. In most cases the storm will have a certain direction and lightning will have a certain rate of repetition. Once you know these characteristics you will be able to judge where it’s heading and if you know the landscape you can quickly decide what may be a good choice for a foreground subject. Once in place you set up your tripod and camera, take a few shots to check framing and determine exposure and are then ready to capture your first lightning. As the storm starts to dissipate lightning will be few and far between. This will also be a sign that the storm has passed and is nearly over. We will have a better chance at capturing a great shot at the start of a storm that’s close by and not when it’s already moving away or finishing.
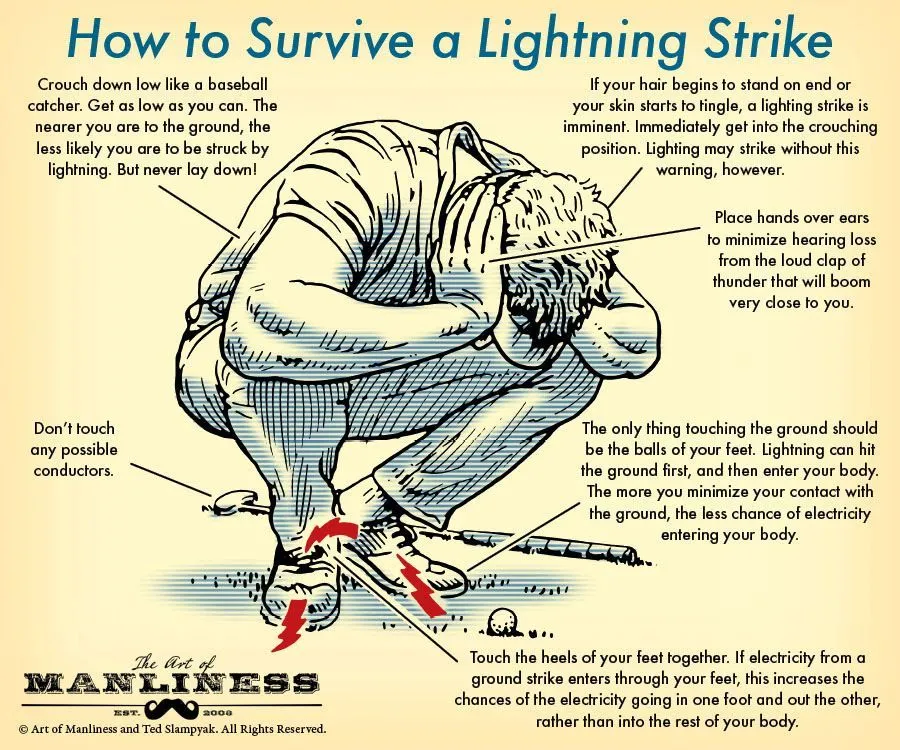
SAFETY
It may sound as an exaggeration, but being outside and exposed to the weather as a storm is passing can be deadly. Lightning doesn’t need to hit you directly, it can travel electricity and phone lines, metal and wire fences, or even the ground you are standing on. Generally, being inside a house or car is considered safe. Dangerous places are under a tree or out in the open on top of a hill or other high spot. So with that in mind, when the next storm approaches your location, find a good and safe location and fire away!
SOME LIGHTNING IMAGES


UPVOTE & SHARE
If you enjoyed this article I would really appreciate an upvote ;-) You could also help me by resteeming my article for others to find and read, thanks!