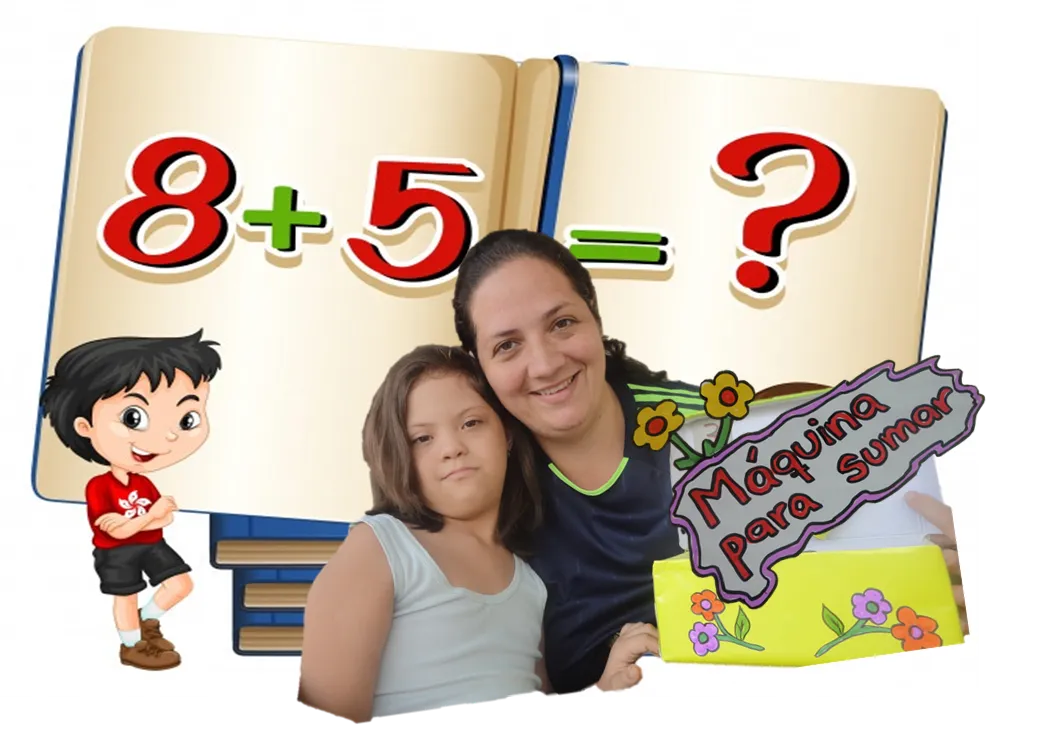
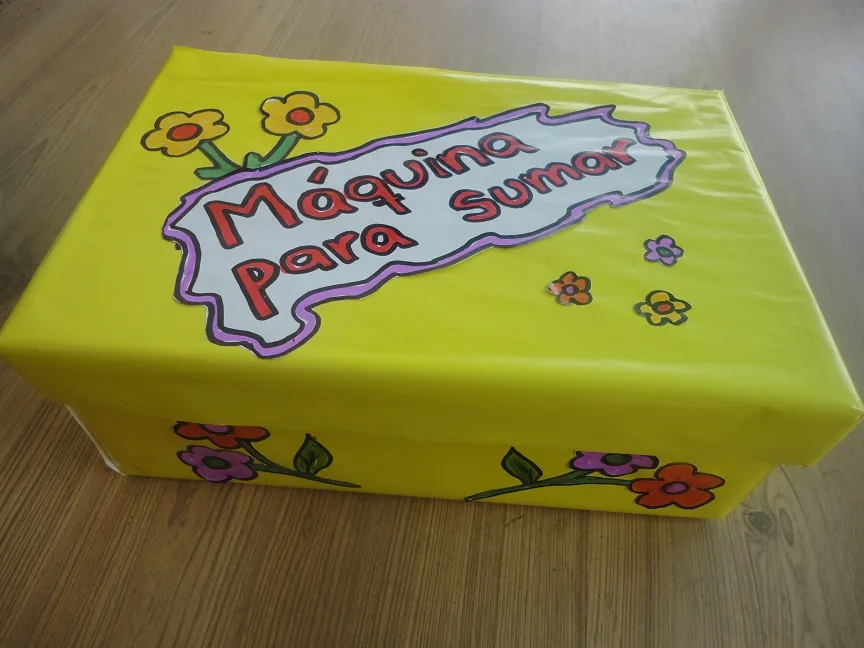
Hoy les traigo un sencillo tutorial para enseñar a sumar a nuestros niños, de una manera didáctica y divertida. Se trata de una llamativa "máquina para sumar", la cual puedes decorar con los detalles que sabes que llamarán la atención de tus pequeños.
Hello, how are you? beautiful community ...
Today I bring you a simple tutorial to teach our children to add, in a didactic and fun way. It is a striking "adding machine", which you can decorate with the details that you know will attract the attention of your little ones.
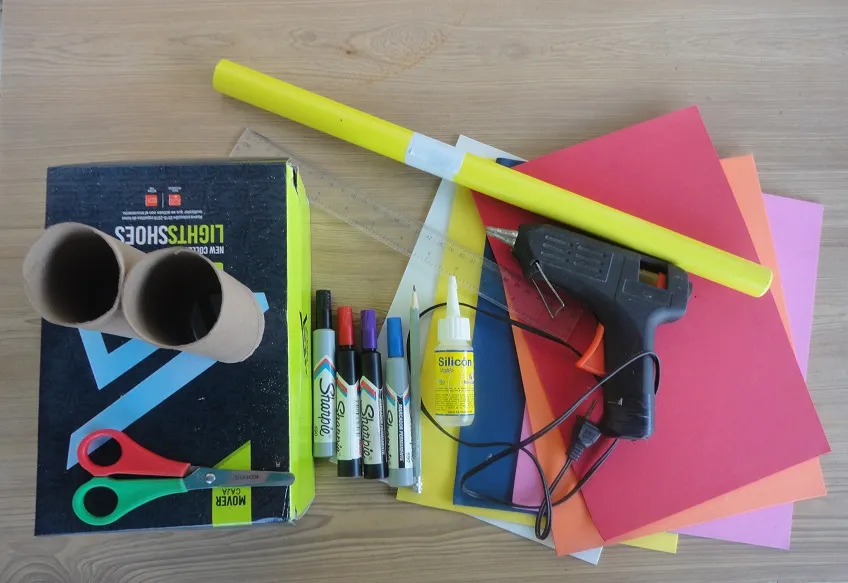
Para hacer esta estrategia didáctica y muy divertida, necesitaras:
Marcadores
Papel lustrillo del color de tu preferencia
Foami de color contrastante al diseño que elijas
Tijera
Silicón líquido
Silicón en barra
Pistola de silicón
Cinta adhesiva
2 cilindros de cartón (de papel higiénico)
1 caja de zapatos o similar.
1 taza reciclada (margarina)
Cartón o cartulina
To make this didactic and very fun strategy, you will need:
Markers
Glossy paper in the color of your choice
Contrasting color foam to the design of your choice
Scissors
Liquid silicone
Stick silicone
Silicone gun
Scotch tape
2 cardboard cylinders (toilet paper)
1 shoe box or similar.
1 cup recycled (margarine)
Cardboard
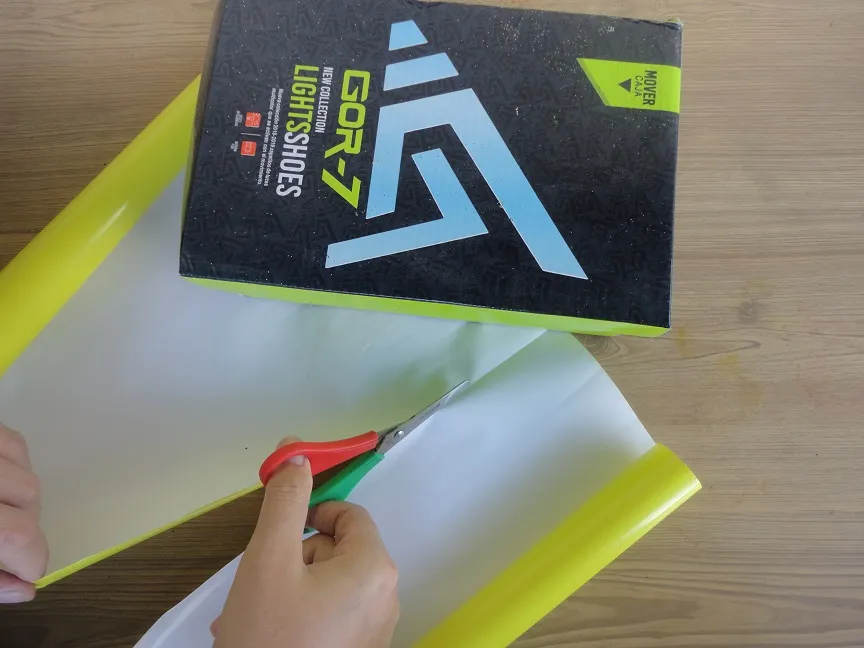
- Primero forra la caja de cartón con el papel lustrillo elegido. También puedes usar papel de envolver regalos con algún motivo o personaje que guste a tu niñ@.
First line the cardboard box with your chosen glossy paper. You can also use gift wrapping paper with a motif or character that your child likes.
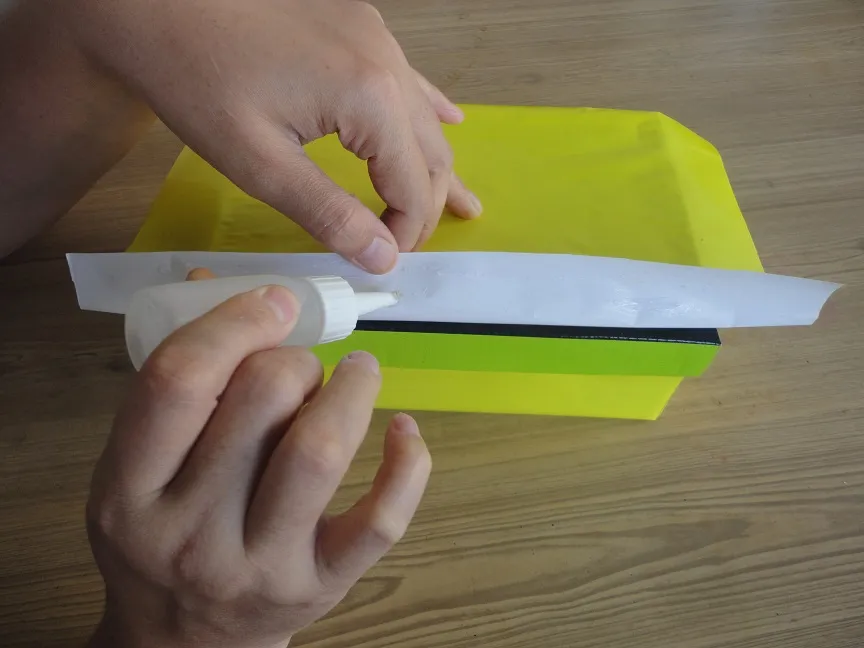
- Pega todos los extremos, para asegurar que no se levanten con el uso.
Glue on all the ends, to ensure that they do not lift with use.
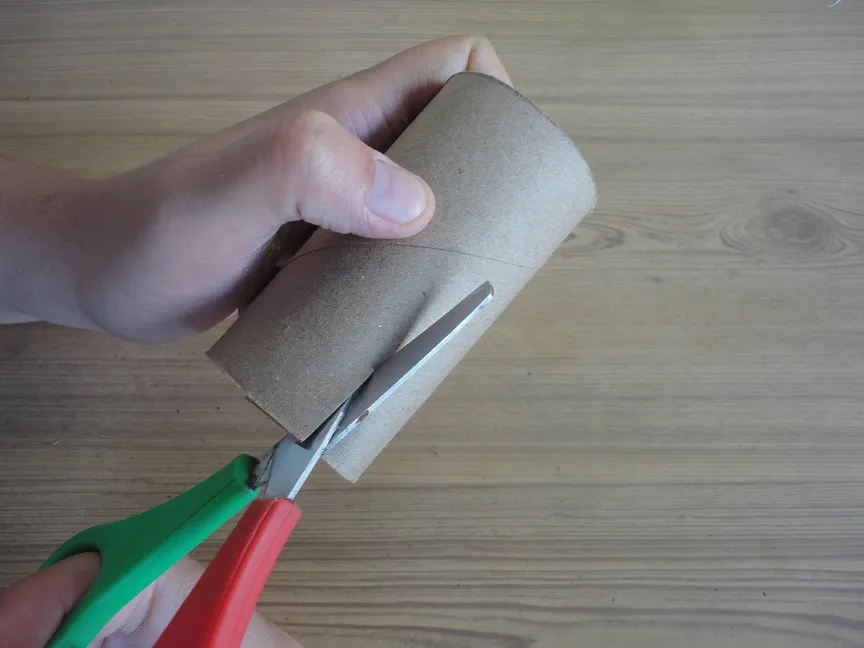
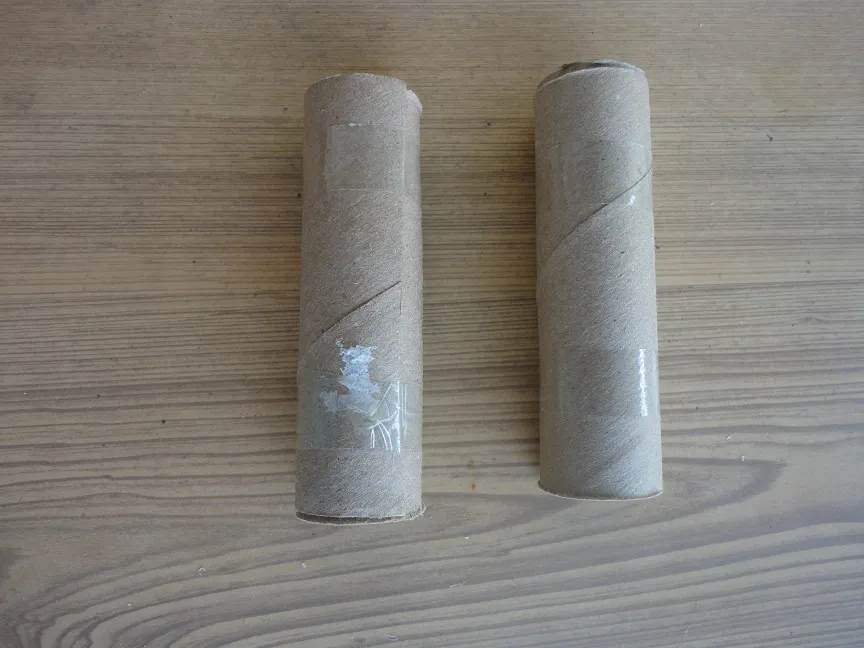
- Realiza un corte en cada cilindro de cartón para reducir un poco su radio. Este paso es opcional, lo hice así porque la caja de zapatos que utilicé es algo pequeña.
Make a cut in each cardboard cylinder to reduce its radius a little. This step is optional, I did it like this because the shoebox I used is somewhat small.
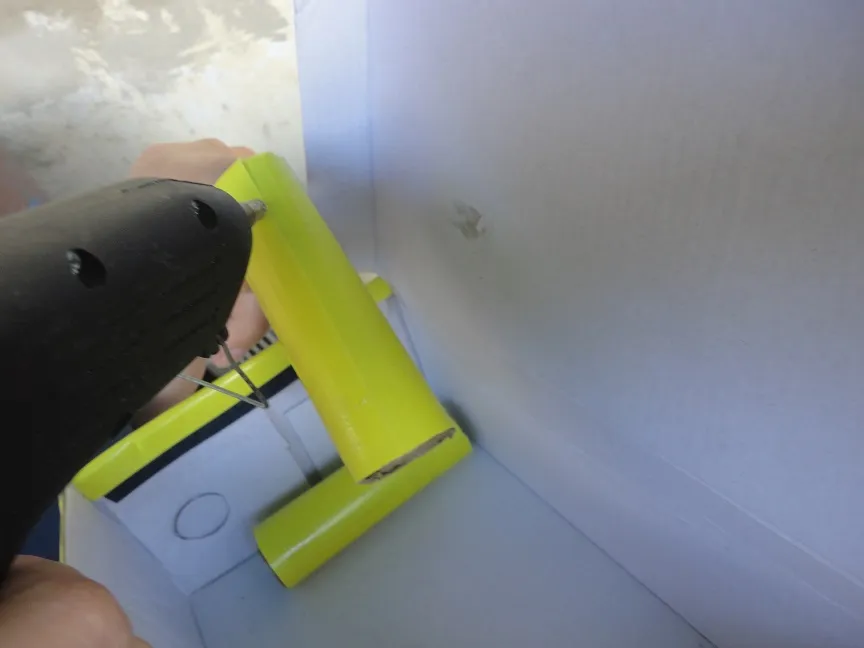
- Fija cada cilindro con silicón caliente o un poco de cinta adhesiva.
Secure each cylinder with hot glue or some masking tape.
- Forra los cilindros. Pegalos con silicón caliente, en la parte interna de la tapa de la caja.
Line the cylinders. Stick them with hot silicone, on the inside of the lid of the box.
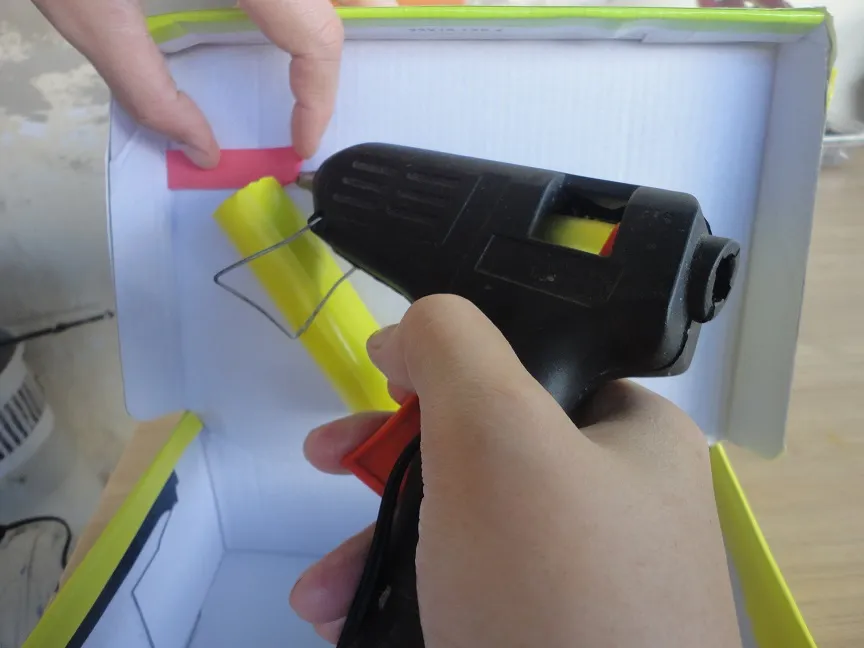
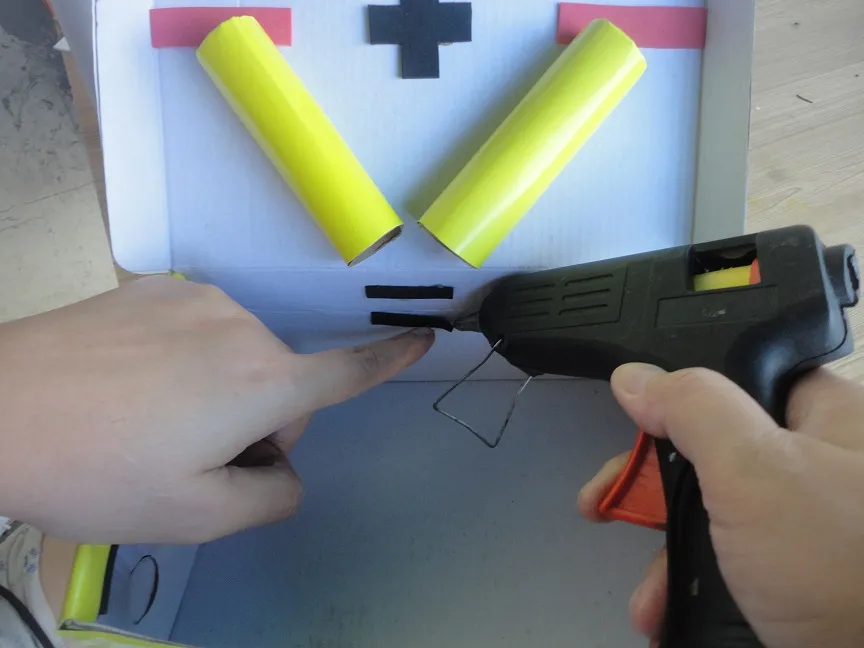
- Recorta dos tiras de foami y fijalas arriba de cada cilindro. Es importante que pongas el silicón solo en la parte de abajo de la tira, como se indica.
Cut out two strips of foam and fix them on top of each cylinder. It is important that you put the silicone only on the bottom of the strip, as indicated.
- Recorta en foami (preferiblemente negro) un signo "+" y dos tiras para el signo "=" y fijalas así:
Cut out a "+" sign and two strips for the "=" sign in foami (preferably black) and fix them like this:
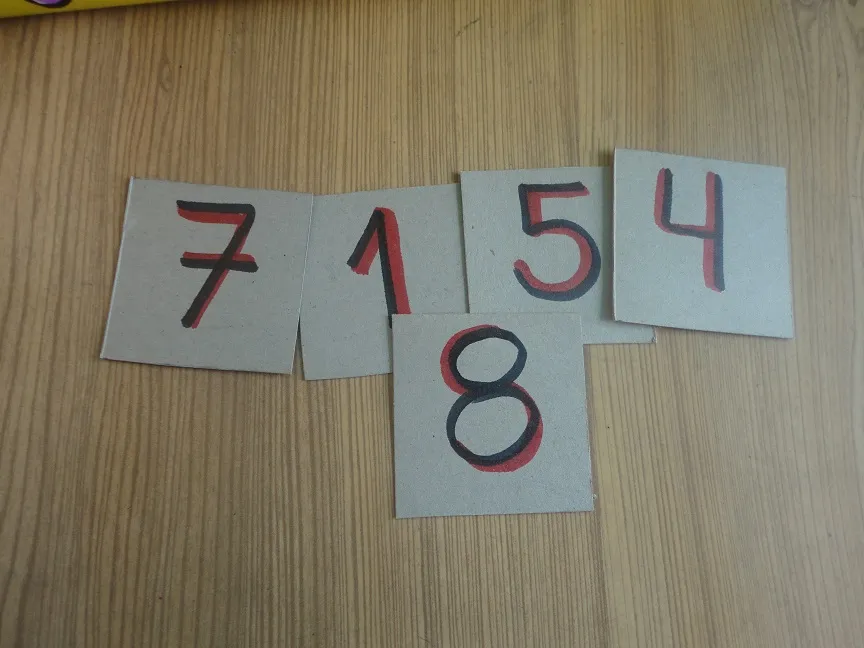
- Ahora recorta fichas (en cartón o cartulina) y escribe los números. Yo los hice hasta el 9 porque mi hija se está iniciando en la suma, pero puedes hacer los necesarios de acuerdo al nivel que tenga el niño.
Now cut out index cards (cardboard or cardboard) and write the numbers. I did them until the 9th because my daughter is starting with the addition, but you can do the necessary ones according to the child's level.
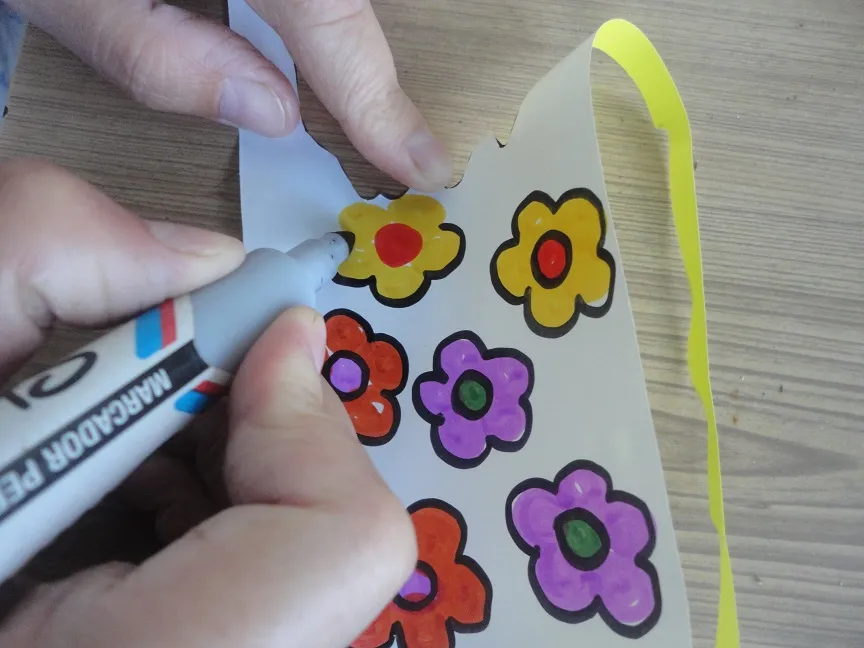
- Ahora vamos a decorar la caja. Dibuja con los marcadores figuritas y palabras. También puedes recortar dibujos de revistas, o realizar figuras en foami. Todo es valido a la hora de decorar. Si elegiste forrar con papel de regalo, puedes saltarte este paso.
Now we are going to decorate the box. Draw figures and words with the markers. You can also cut out pictures from magazines, or make figures in foam. Everything is valid when decorating. If you chose to wrap with wrapping paper, you can skip this step.
- Pega los adornos que elegiste y forra la taza de margarina reciclada.
Glue on your chosen decorations and line the cup with recycled margarine.
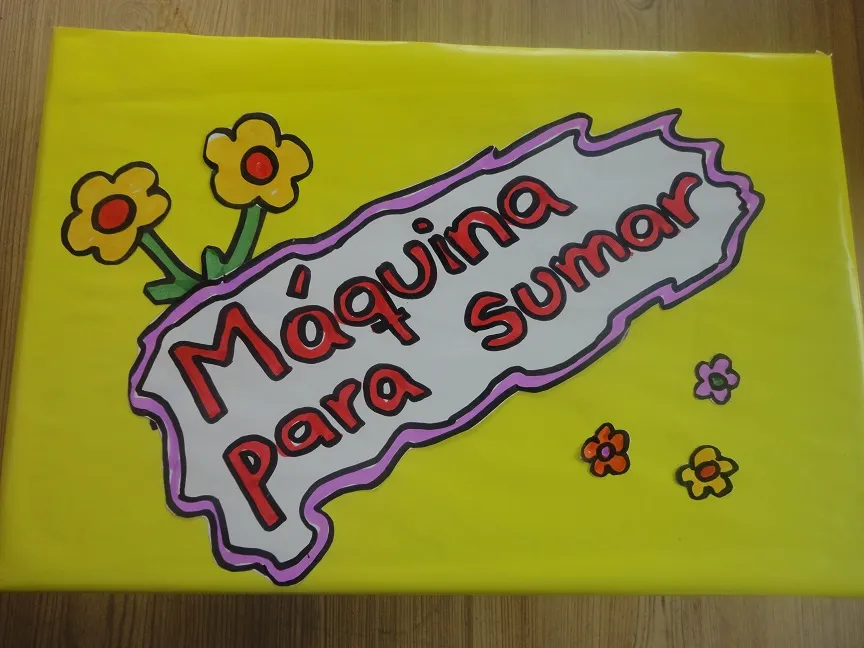
- Y listo, así quedó esta entretenida "máquina de sumar"
And voila, this is how this entertaining "adding machine" was left.
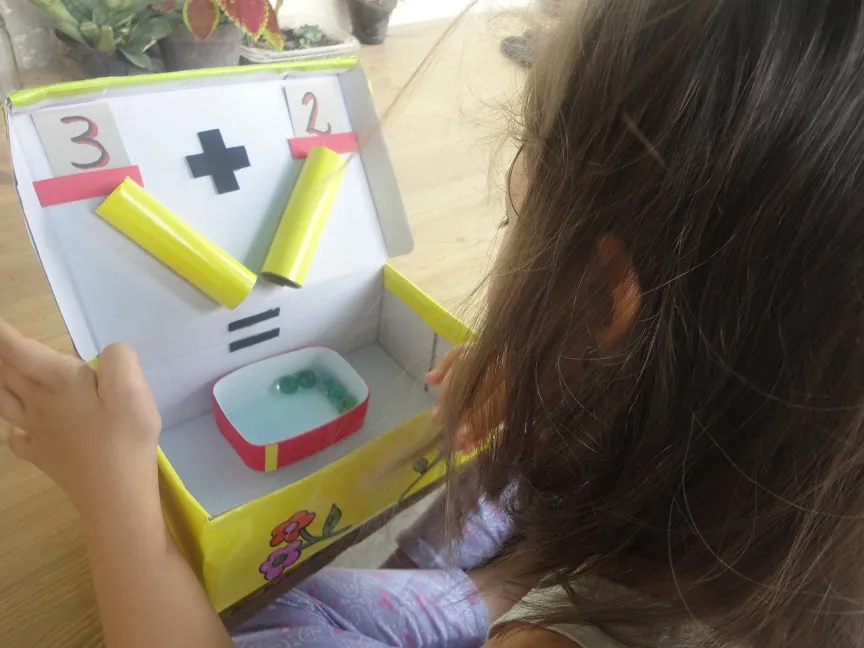
- Ahora la probamos para ver si funciona, basta con ofrecer al niño objetos que pasen por los cilindros (metras, semillas, monedas, entre otros.)
Now we test it to see if it works, it is enough to offer the child objects that pass through the cylinders (meters, seeds, coins, among others.)
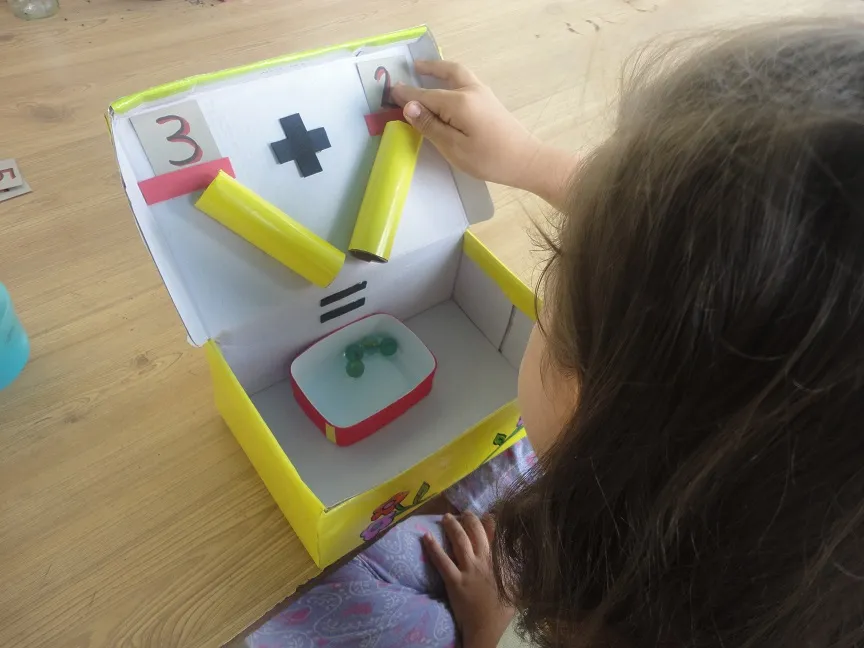
- Recomiendo guiar al niño en el proceso de suma de las piezas (sobre todo si son pequeños por su seguridad)
I recommend guiding the child in the process of adding the pieces (especially if they are small for their safety)
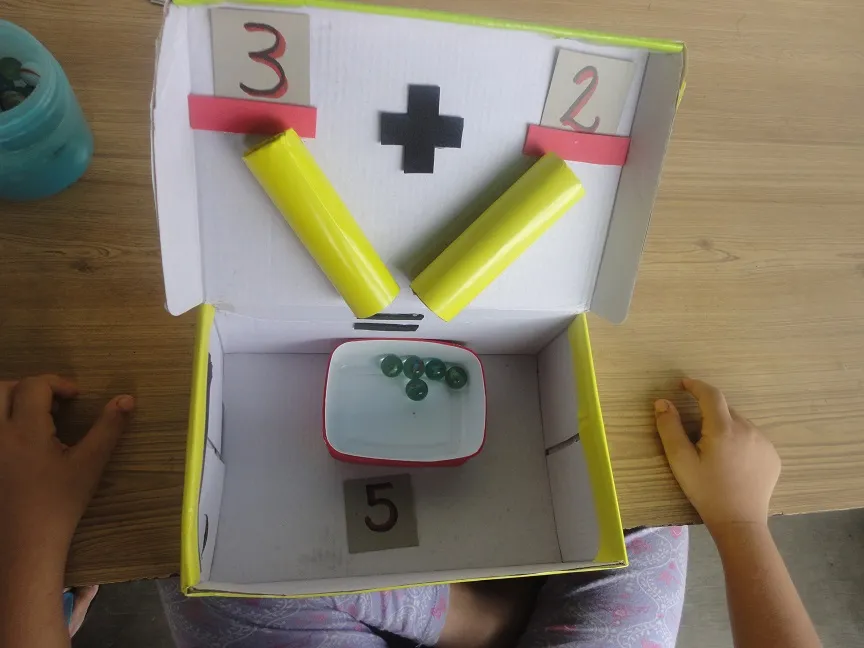
- Así se ve cuando se completa el proceso de la suma.
This is what it looks like when the addition process is completed.
***** Nota: Las imágenes presentadas se realizaron con una cámara Sony CiberShot, no están editadas ni se hizo uso de filtros para su presentación en este post. La imagen de portada fue diseñada con Power Point *****
En nuestro tiempo libre nos gusta realizar manualidades de todo tipo, tanto para nuestros hijos como también para facilitar las situaciones que se nos presentan en nuestros día a día. Todas las compartiremos con ustedes a través de este blog.
Pronto estaremos presentando nuestros nuevos proyectos, hasta la próxima...
***** Note: The images presented were made with a Sony CiberShot camera, they are not edited or filters were used for their presentation in this post. The cover image was designed with Power Point *****
In our free time we like to do crafts of all kinds, both for our children and also to facilitate the situations that arise in our day to day. We will share them all with you through this blog.
Soon we will be presenting our new projects, until next time ...