(I have added this section of the finished project for the thumbnail)
I have been quite busy this past week : finishing the squirrel, doing a bit of embroidery and sewing and upcycling things. Today I will show you one of the projects I've been working on : a spectacle case using an empty shampoo bottle.
1 - The process starts with a humble empty shampoo bottle. The decision is always between recycling and throwing, but in this case the marks on the back of the bottle tell you the inevitable: it can't be recycled ! I do feel guilty about it as I don't even use this shampoo - it's one of my daughters who uses it, but as the 'recycling officer' at home I deal with the recycling every week and try to encourage more thought on purchases.
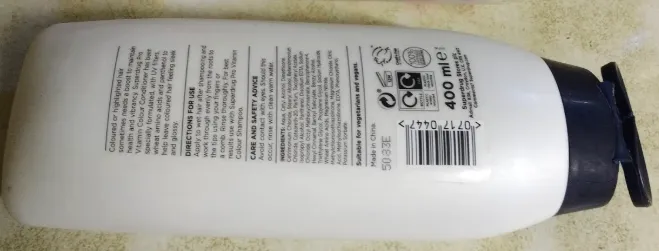
I had two possible bottles to choose from. I went for this one because I needed to line it and wanted to make sure there would still be enough space for a pair of glasses and a cloth to clean the glasses.
2 - At this point, I would suggest making a line either with pen or a Sharpie pen so when you cut you follow a straight line. As always my creative flow took over and my bottle was a bit crooked, but I used scissors afterwards.
3 - Next, I used a craft knife to cut off the neck and lid :

The photos above show two bottles but for the project I chose one. I am including the two photos because the second one looks clearer.
This process was easy with a craft knife. You are left with a lid and top; I reckon the lid could be made into a button or something.
** Incidentally, @tahiaarq has already shown us how to recycle or upcycle a plastic bottle. In her post she used crochet to finish off the open end. She crocheted using plastic yarn and she had previously described the process on how to make it here.
4 - I washed my bottles thoroughly, but they were still quite perfumed. I found an old children's sweater that my friend had given me and cut off one sleeve - I will use the rest for other projects.
5 - Then I divided the cutoff sleeve in half and I had the lining and the cover for the bottle.
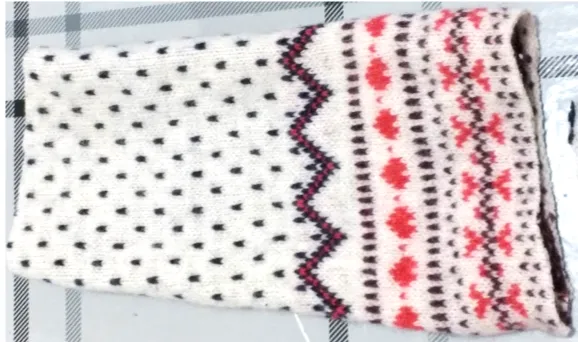
The main issue I had was the shape of the sleeve, I had to sew off the tapering so it was a tube of the same width.
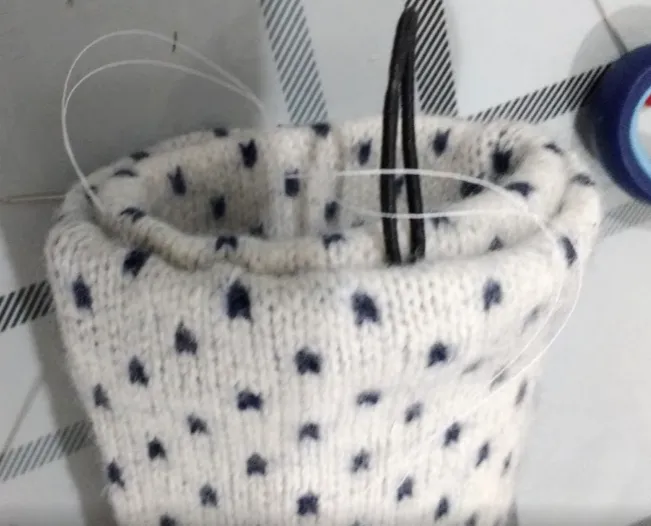
6 - I sewed one end of the sleeve tube and inserted it into the bottle. I used a ruler to push it as far as it would go.

7 - I then repeated the process with the other half of the cutoff sleeve, that is I sewed one end but this time I turned it the right side out and put the bottle into it:

It was quite hard to stop everything from moving while I sewed the ends of the lining and the outside of the sleeve.
8 - I found an elastic band to use (thank you, @tinygalaxy) together with a button to help the pair of glasses stay safe inside.

I used pins to keep things together but clips (or even) clothes pegs would have been okay (the pins kept on coming off...).
9 - I used 'invisible' stitch to join the two bits of sleeve (lining and cover).
Everything was beginning to take shape in the photo above. One more photo ...

I was just saying to @marblely the other day how I tend to collect nice looking bottles. Unfortunately that's not just glass bottles, sometimes I also keep plastic bottles that have potential for some craft. Making this sort of useful item justifies my hoarding.
Thank you for reading !
all photos and work by @cryptocariad
🌻 Thank you @crosheille and @crystalize for hosting #needleworkmonday 🌻