Most people will want to record sound at some point for various reasons.
Understanding the basics of sound/audio recording will help you get the best quality sound possible in different situations/applications.
Welcome to @j-alhomestudio! My name is Jay. I will take you on a tour and give away some of the secrets to the rich, clean and full mixes our clients get at a low cost.
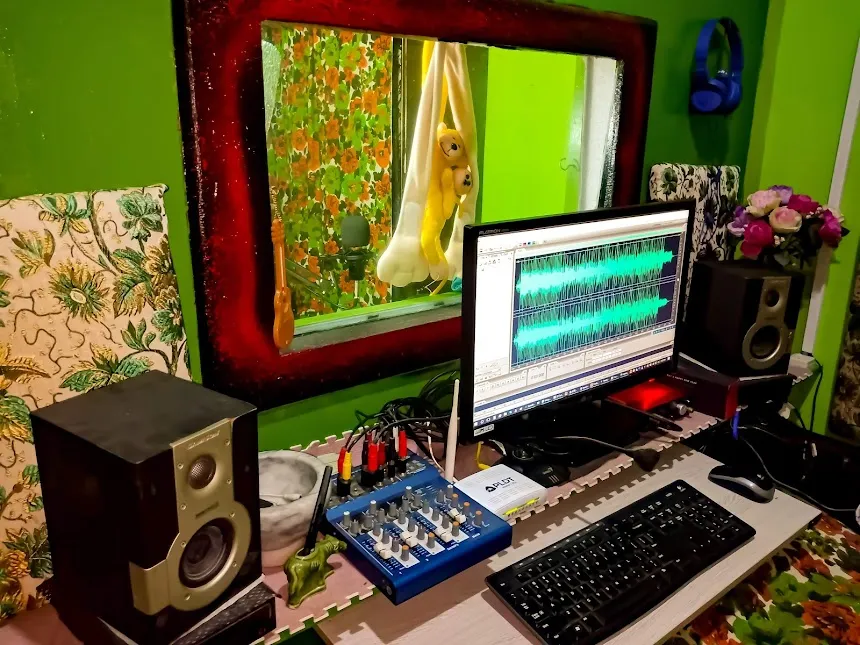
It’s typical for newbies to look for a quiet environment, experiment and learn recording music indoors so this part will cover indoor recording. Whether you’re just beginning to set up a home recording studio or would like to improve your first recordings, this post is right for you. I will cover most gear that I use and how to get the most out of them. Chances are, you're using or planning to buy a different kind of equipment so I’ll keep the discussion as simple and as general as possible. Many sound recording principles I will discuss here are useful for a wide variety of applications.
The Source
If you want high-quality sound to be recorded and sound pleasing on playback, make sure that there are no problems with the source of the sound itself. I.e. offer your vocalist some water once in a while during the recording session (yes, I’m serious), make sure that guitars, drums and other acoustic instruments are in tune before you get started and that they don’t drift away from exact tuning while being played. The more effort you put into ‘the source’, the less work has to be done later on. An ideal case scenario is that the song or part to be recorded has been rehearsed and well-performed. There is no ambient/line noise recorded along with it and very little processing has to be done with the recorded material. Mixing for final output (CD or MP3) will be a breeze!
Here’s a very important sound recording principle I want to share with you:
Familiarize yourself with the frequency ranges of different sound sources.
The sounds we usually hear are a mixture of vibrations in the air with different loudness levels (amplitude) and tones (frequencies). What makes a vocal or instrument sound good or bad depends on how well their sound output frequencies are mixed or altered before they reach our ears. We also want to hear more high notes or low notes depending on what song part is being played, as well as the musical genre. Simply put, if you hear a pleasing sound/part in music, that means it sits well in the context of the song in terms of amplitude and tone. These qualities can be easily managed if you’re already familiar with the differences between sounds in different frequency ranges (from the deepest, shaky bass that you can feel, to hard-to-hear high-frequency hiss). A well-mixed musical piece sounds pleasing because the sound engineers have worked on the balance among different sources (instruments and vocals) and enhanced the pleasing qualities (accentuated useful frequencies and attenuated bad/unnecessary ones) of each part. Many people underestimate the importance and the amount of work that goes into this mixing process which I’ll discuss in detail in the latter parts of this series.

[Video: NCH Tone Generator]
In this video, I demonstrate what pure tones (sine waves) sound like in different frequencies. Most people hear sounds between 20-20,000 Hz. Frequencies outside this range can only be heard by other animals like bats, dogs and whales. This is why most studio and consumer gear are only capable of or at least focus on this particular range of 20-20kHz. Our hearing is most sensitive at around 2000-5000 Hz so these frequencies may sound louder even on a professional-grade pair of headphones or studio monitors. On the other hand, many pieces of consumer gear take advantage of these easy-to-hear mid-range frequencies to simulate loudness at the expense of balance. Low-end small consumer speakers often lack bass (30-120Hz) and clear highs (8000-16000Hz). These frequencies, when recorded and reproduced effectively, often separate the pros (sound engineers and pro-gear) from the average consumer and equipment.
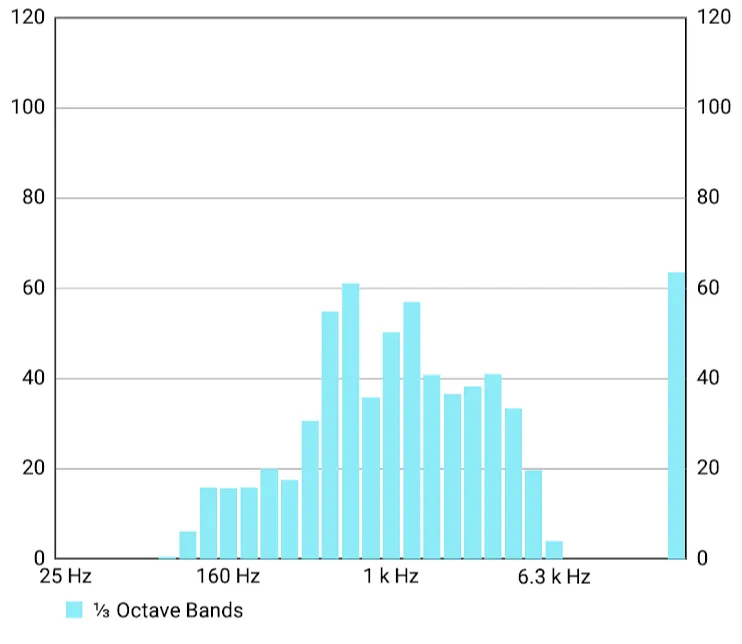
[The Sound Analyzer app shows the highest note I can comfortably sing (falsetto).]
The instrument with the lowest frequency output in the mix is usually the kick drum with a dominant frequency between 80-160 Hz. The highest frequencies heard in a typical mix usually belong to the cymbals/hi-hats and vocal sibilants (S, CH and sometimes T sounds) at around 10KHz. The sound analyzer app shown above can give you an idea what frequencies are involved in almost every sound you hear. The dominant frequency of the source should appear with the highest bar in the graph. You can experiment with different sound sources to have an idea of how loud they are at different frequency ranges.
Soundproofing
To reduce indoor ambient noise, you want your recording room/vocal booth as sound-tight as possible. Airtight is usually sound-tight but I prefer a well-ventilated room to an air-tight room. Many air conditioners even have a vent or snorkel that sucks in fresh air from the outside to make sure there is enough oxygen and stale air won’t accumulate in the room.
Ideally, you want the door to be as airtight as possible when shut (and this is perhaps the easiest part to resolve) but air still has to be replaced regularly via air ducts/vents and air conditioning.
To make it easy to remember, some engineers refer to the following soundproofing principles as:
“The Four Ds”.
D for Density
High-density material (like steel and concrete) hardly transmit airborne sound. That’s why it’s impossible for two people to talk through a thick concrete wall in between.
Where we can’t put up a concrete wall, this high-density foam makes good insulation and absorbs a great deal of sound so we used a lot of them to stuff the soundproof wall between the control room and the vocal booth. We also filled the door with dense rubber mats and heavy rags.
D for Decoupling
Ideally, you want two high-density and stuffed wooden walls with just air in the gap between them. This will make the wall very expensive though, so we invested in a multi-layered single wall instead. The window is made of two layers of reused glass panes from an old table. They’re angled in such a way that they reflect sound downwards and won’t amplify sound in between them like the inside of an acoustic guitar, a sound box or a drum does. The floor and the ceiling are much harder to thicken and decouple since space might be limited, so beginners should experiment first and find out if they’re really needed. Other techniques I will discuss later can compensate for lapses in soundproofing.
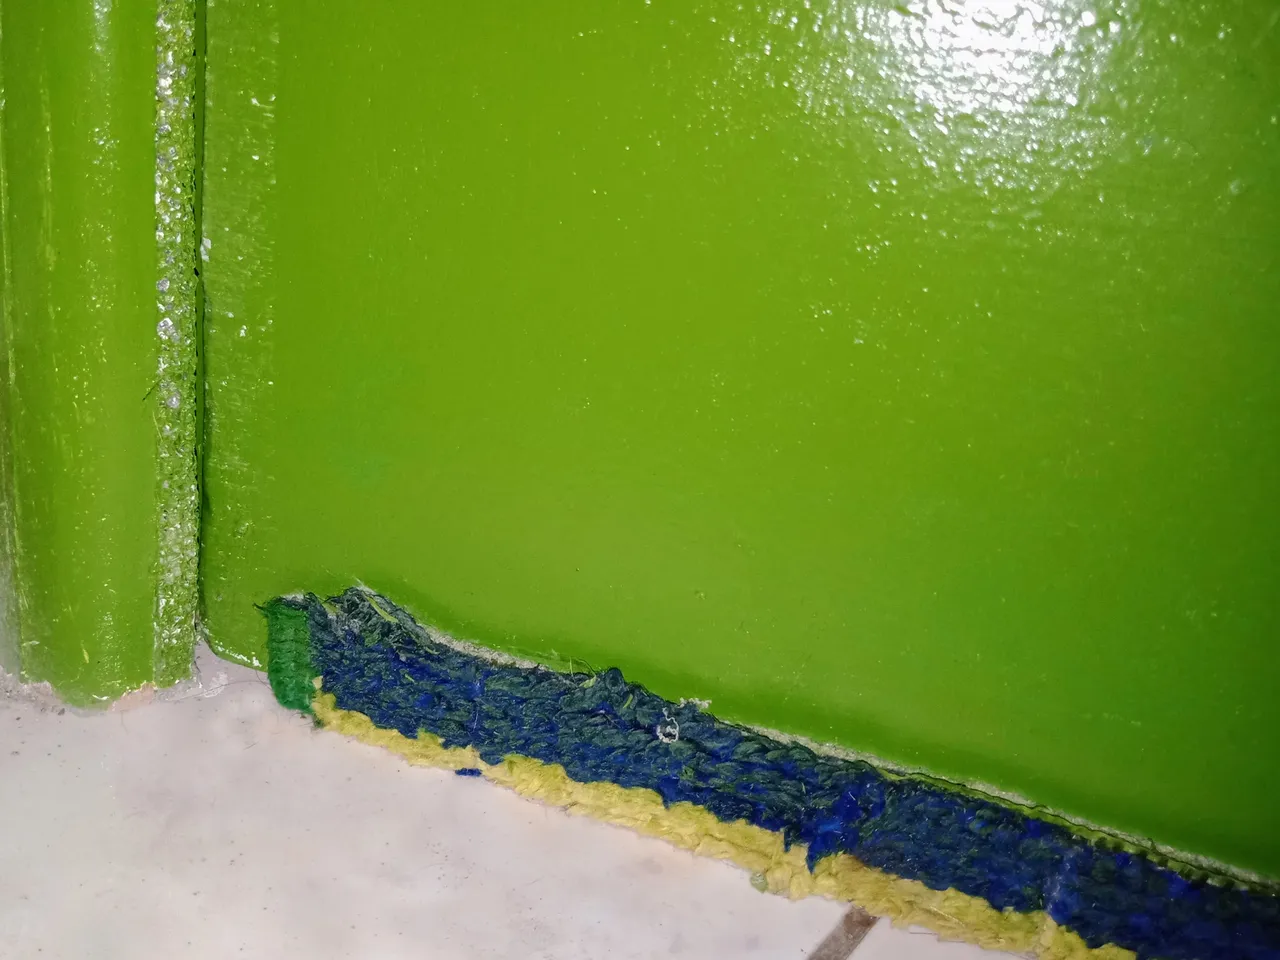
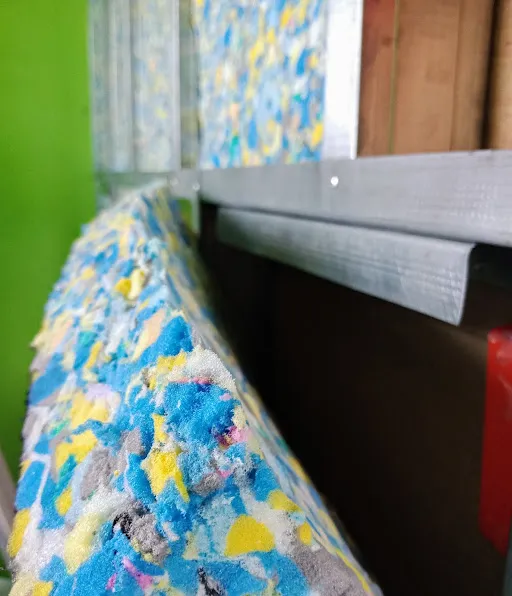
D for Diversity
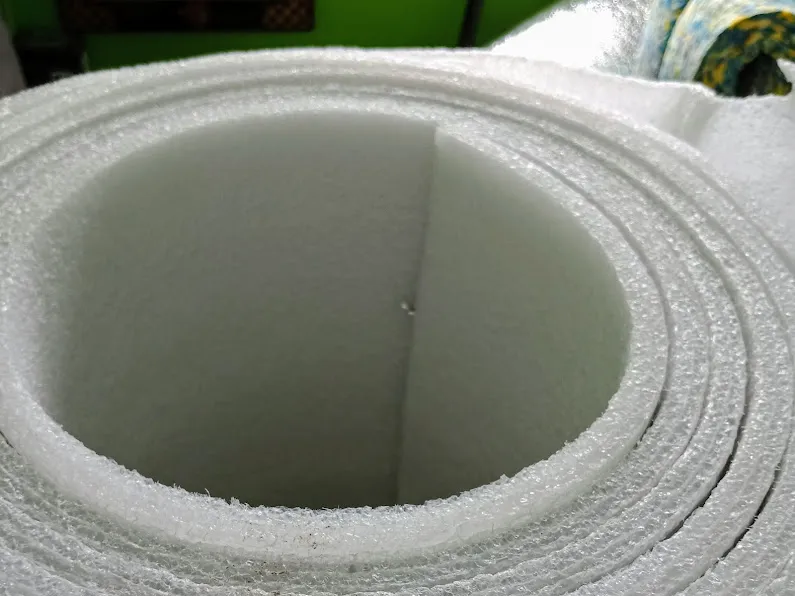
Several layers of various materials with different densities often make better soundproofing than a single high-density material of the same thickness. That’s why we put another layer of insulating material on top of the foam stuffing before installing the last layer of plywood.
This principle also applies to these sound traps for room treatment which making is shown above.
D for Distance
The farther away you are from the sound source, the less you hear it. You want to set up your microphone as far away as possible from windows, air conditioners and even computers with fans. It’s one of the reasons why I keep the CPU separated in the control room and wired-up the computer monitor, keyboard and mouse inside the vocal booth. This is useful whenever I have to record my own voice (and I use them for my online English classes as well) in the vocal booth.
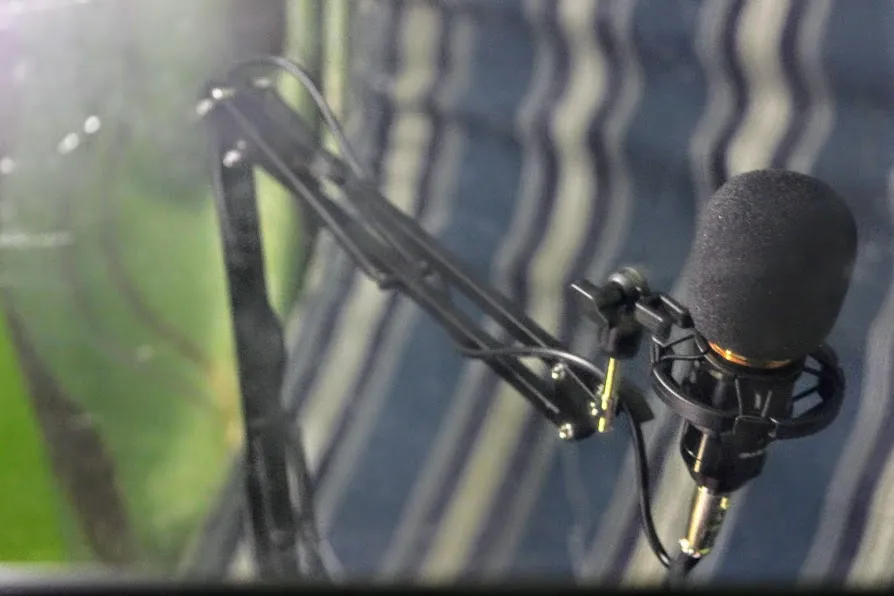
In this picture, you see my main vocal mic. A foam mattress plus various materials set up in front of the AC blocks air conditioning noise but I still had a switch installed in the control room so I can turn off the air conditioner when recording vocal solos or in quiet song sections. This setup takes much less work and is less expensive than installing soundproof air-ducts.
Room Treatment
“Why do you need so much material?” “Aren’t you done yet with soundproofing?” -It’s not that easy to explain to my family members why after going through all the hoops for soundproofing, I still needed more materials for room treatment. These are two different things! Room treatment is done to reduce unintended reverberations (those short echoes) that are only easy to hear when you listen carefully and compare the sound of a treated vs. non-treated room. Basically, the more uneven, sound-absorbent surfaces there are, the less sound tend to bounce back, allowing you to record clean, unmuddled sound.
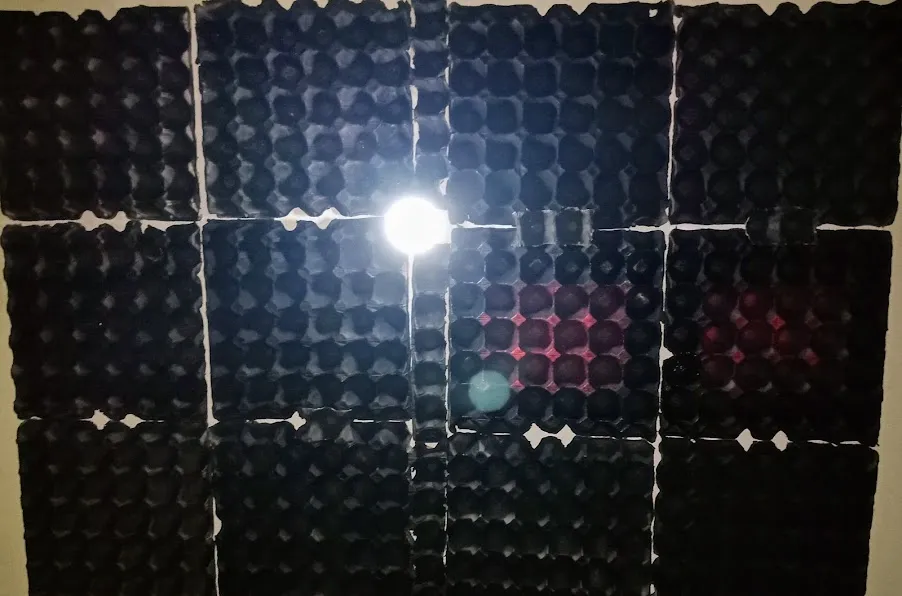
Egg trays are not the most effective in terms of sound absorption but still provide an uneven surface to reduce the ‘slapback’ of certain frequencies. Buy professional-grade acoustic foam right away if you can to avoid having to install things like these twice. For the meantime, we poked tiny holes through the egg trays to improve sound absorption and painted them black for a more pleasing look.
Now, we’re done discussing the sound sources and the recording room. Next, we will talk about common challenges with microphone techniques, cables, air conditioning, line noise and an audio interface. Please stay tuned!
All images are my original work except actual screenshots from the software I'm using.
Thanks for reading/viewing!
[Credits to the Author of Life]
Please consider casting your votes for the following witnesses: @curie, @surpassinggoogle, @steemgigs, @precise, @cloh76.witness, @ausbitbank, @teamsteem, @gmuxx, @hiroyamagishi, @elizahfhaye, @bayanihan, @papa-pepper, @steemph, @daveks, @jerrybanfield, @teardrops, @donkeypong, @davidpakman, @minnowsupport, @themarkymark, @blocktrades and @sndbox who have been adding invaluable contribution to the community.
To cast your votes, just go to
https://steemit.com/~witnesses


Please stay tuned for my favorite photos and the lessons I learned behind the scenes.