One of my primary Minimalism goals is to only use electricity harvested from the Sun or my truck's alternator while I'm driving it around. In order to pull that off I'm going to need a battery!
I decided to go with Lithium-ion for reduced weight and environmental impact. I also decided to learn how to make my own from scratch. I hope you'll enjoy this video showing the process of building my very first Battery Pack:

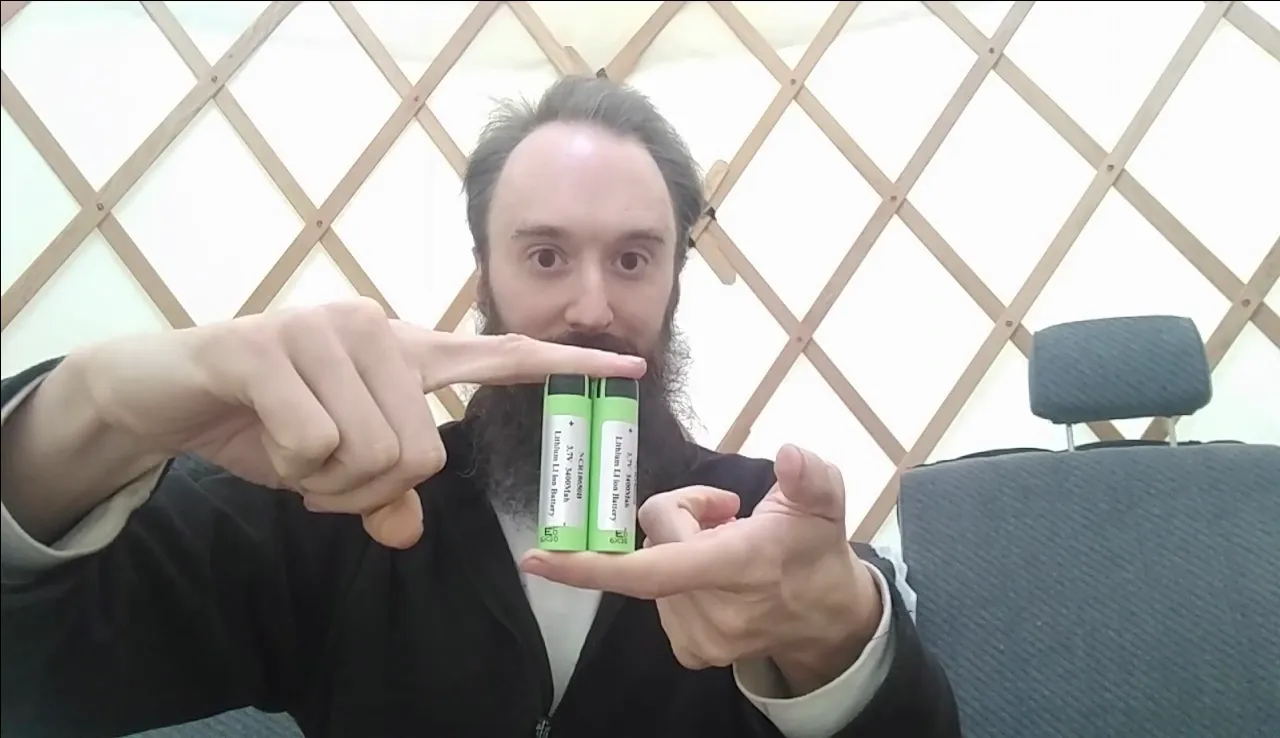
Lithium-ion 18650 Battery Cells
- I am using 18650 cells to build this Battery Pack. These are the same type of cells Tesla uses to power their electric cars! One cell has roughly the same amount of energy as a decent cell phone battery, and I'm going to use 48 of them!

Connecting Cells in Parallel
- In order to increase the amount of energy that my Battery Pack can hold, I need to wire cells in Parallel. This is done by connecting the positive side of a cell to the positive side of another cell, and then doing the same thing for the negative sides. Connecting 2 cells in Parallel doubles the energy storage. I'm going to wire 12 cells in Parallel which means my Battery Pack will have 12 times the capacity of a single cell.
Connecting Cells in Series
- I want the Voltage of my Battery Pack to be roughly the same as a car battery, so at least 12 Volts. 18650 cells are multiple times less than that, so I need to wire 4 cells in a Series to bump it up. Wiring in Series is done by connecting the positive end of a cell to the negative end of another cell. 4 cells in a Series is equal to 4 times the Voltage of a single cell, which is exactly what I need.

Assembling & Wiring the Battery Pack
- I opted to use the Vruzend Battery Kit to assemble my battery. This kit allows you to create a pack of any size which solidly holds itself together, and also does a large part of the wiring of the Battery Pack for you. The plastic holders are placed on the top and bottom of each cell and attached to nearby cells by sliding them together. Metal bars are then placed on threaded posts on the tops and bottoms to connect the cells. My pack's dimensions will be 12x4 cells - 12 in Parallel and 4 in Series.

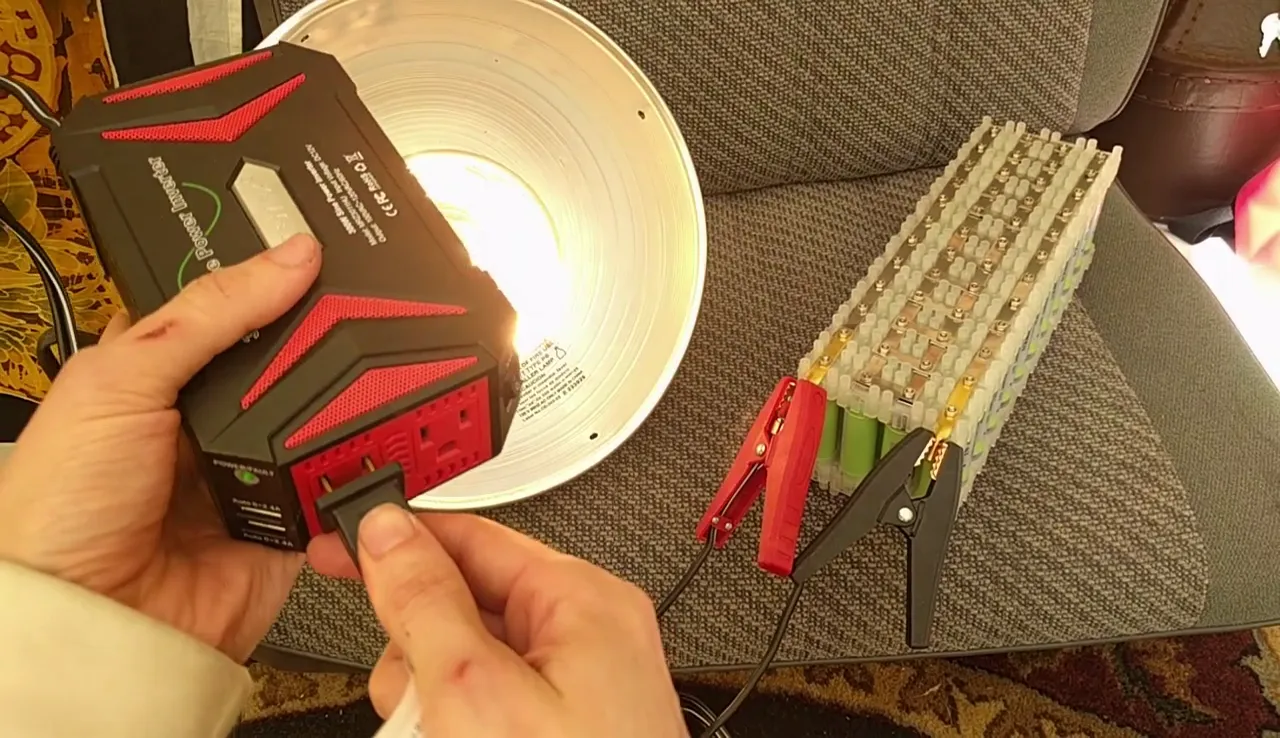
Testing the Battery Pack
- Once the battery is assembled I checked the Voltage to see if it matched what I was expecting from running 4 cells in Series, and it was right on! I then tested to tested to see if it could charge my laptop... success! Now the big test - can it power a 150 Watt Heat Lamp running through an inverter? Heck yes it can, and for a very long time!
Be Careful Out There
- If you decide to try making your own Lithium-ion Battery Pack, please research it on your own until you feel completely sure you know how to avoid short circuiting your battery. A short circuit effectively releases as much power as the battery can discharge and the wire can withstand, and that can be a ton of energy! Once you cause a short circuit you can have a serious fire on your hands, and water is not going to stop the battery from sparking (it's like pissing on lava). Please be careful!
Products Seen in this Video
- Vruzend Battery Kit
- Panasonic 18650 Lithium-ion Cell
- Cigarette Lighter w/ Battery Clip*
- 300W Power Inverter*
- Digital Multimeter*
- USB Car Charger*
- Samsung Chromebook Pro*
* Affiliate - Using this link supports the creation of my future content.
I hope you have enjoyed this post as much as I have enjoyed creating it! If so, please support the creation of my future content by Upvoting, Resteeming and/or Following.
Thank you for allowing me to share a part of my life with you. I look forward to engaging with you in the Comments section.
Cahlen Lee