Would you like to know how to easily batch resize your images on a Mac just using a built-in application because if you are working with a lot of images like I do, this will be useful for you.
If you are reading my posts on Steemit, you have certainly noticed that I have a lot of screenshots in my tutorials or a lot of photos for my travel posts.
Resizing images is one of those things that can take you a lot of time when you have 20 to do. I have been resizing all my images to 1,000 pixels for Steemit using Automator on Mac and it is great when you have more than 20 to resize frequently.
You may want to read the post here: How to Resize Images Automatically with Automator on Mac!
Today, I am showing you a simpler method that everyone can start to use now.
How to Easily Batch Resize your Images on a Mac!
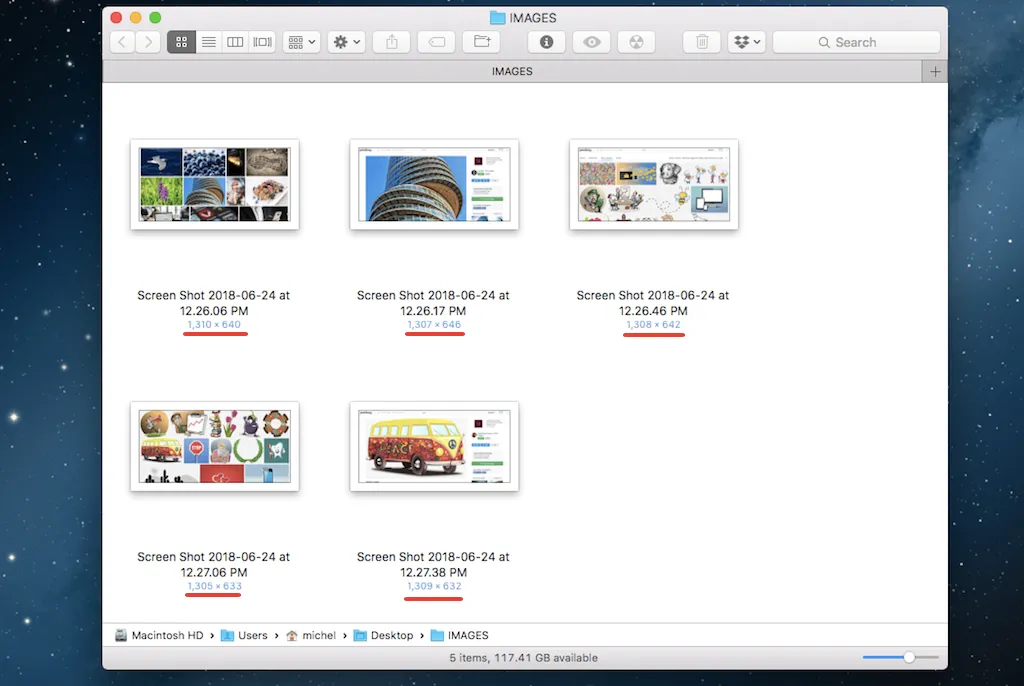
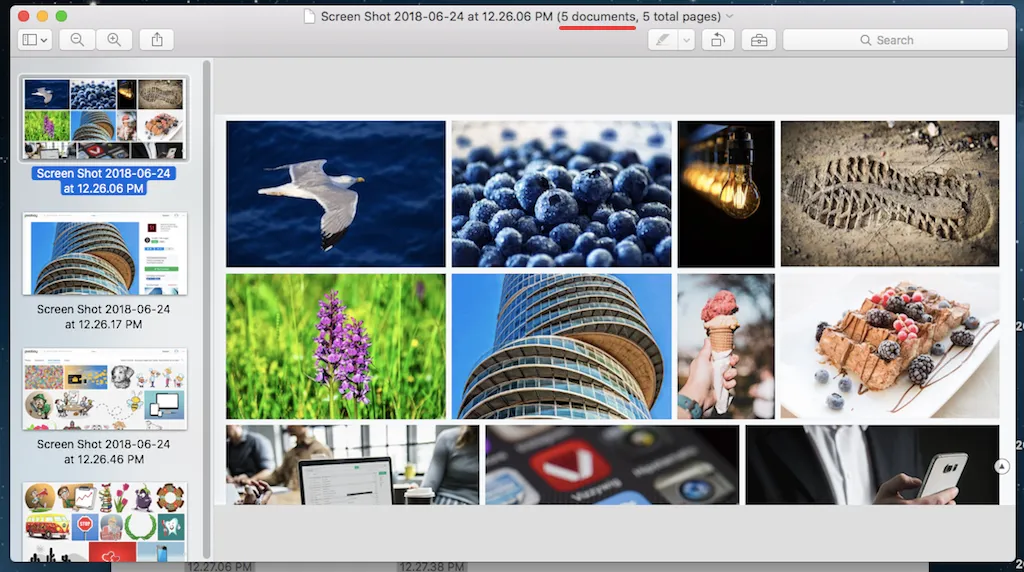
First, I prepared a folder with 5 screenshots that I am going to resize.
Screenshots always have different sizes like you see below where the width is 1,310, 1,305 or 1,309. This is too large and I want them to be all the same width.
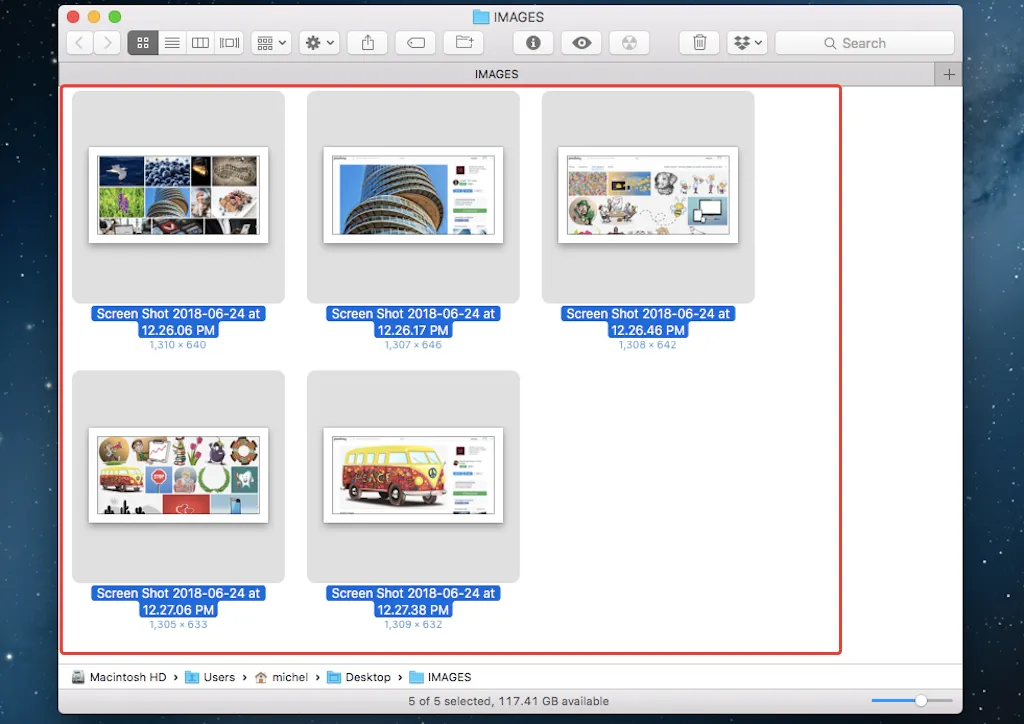
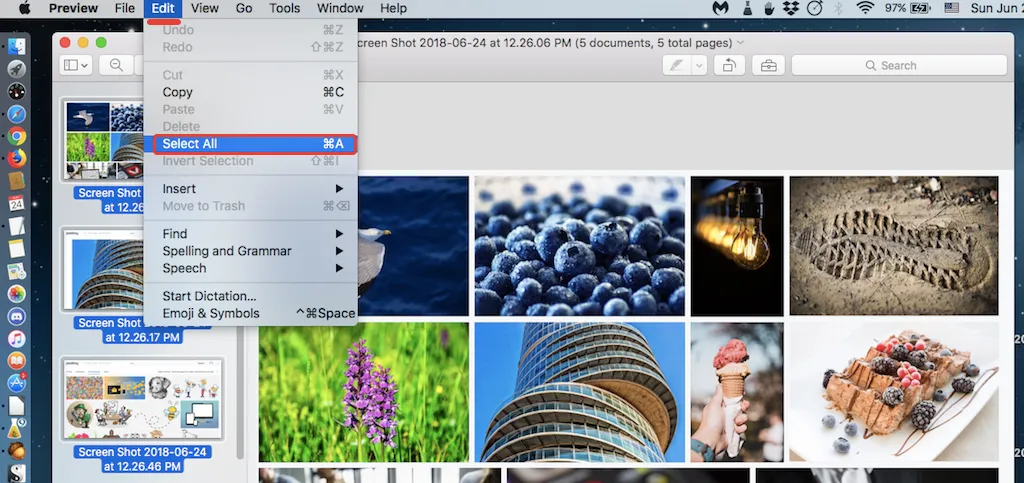
The first thing is to select them all in the window using the keyboard shortcut "Cmd + A."
Then, you click right and select "Open With" and "Preview."
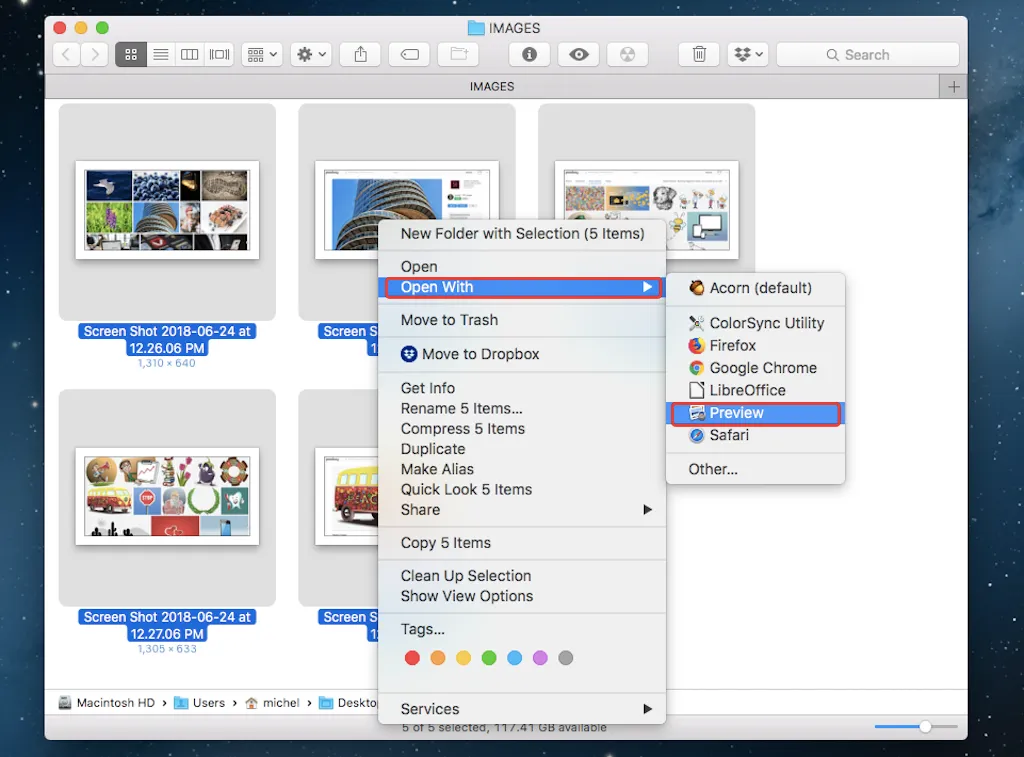
This will open the preview window with all the images in it.
You can use the keyboard shortcut "Cmd + A" or the menu to select them all: "Edit" and
"Select All."
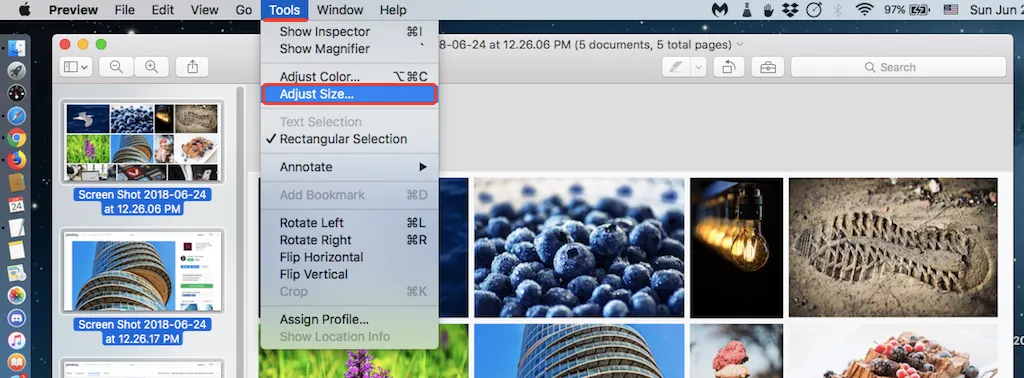
Then, go to "Tools" and "Adjust Size."
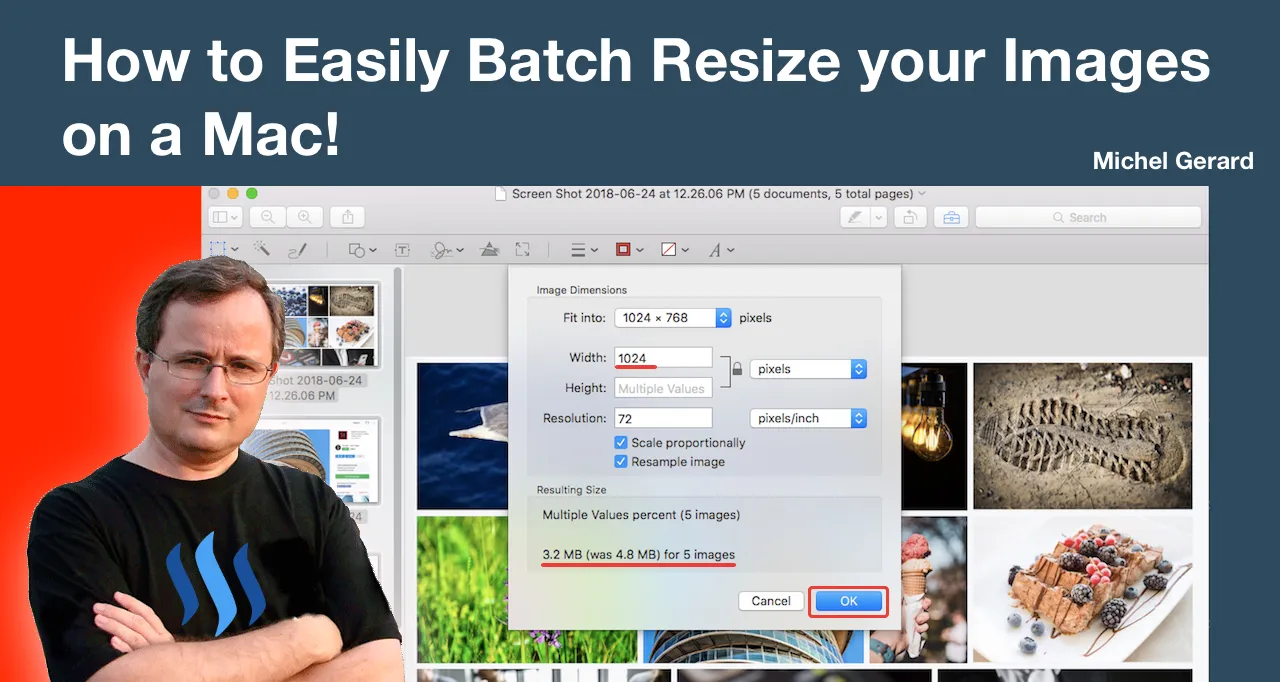
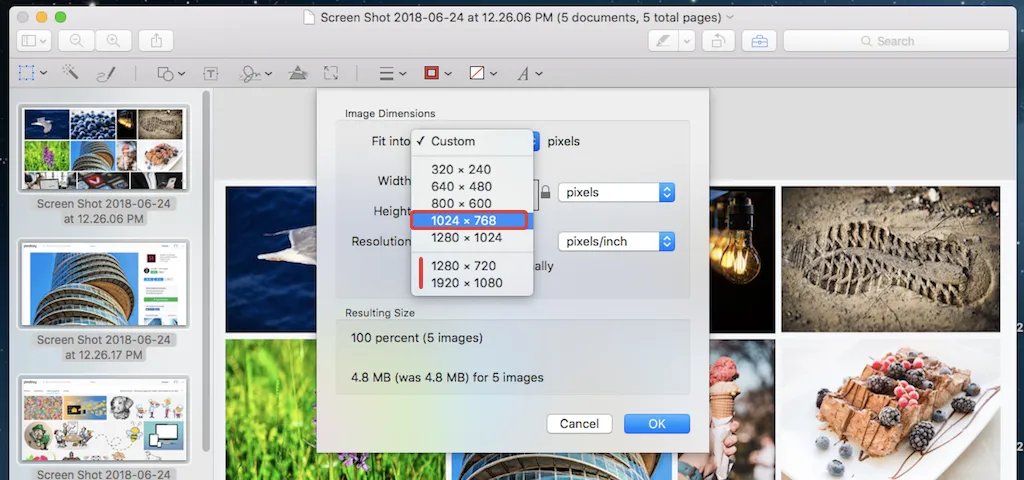
This will open this panel where you can select a "Custom" size if you wish.
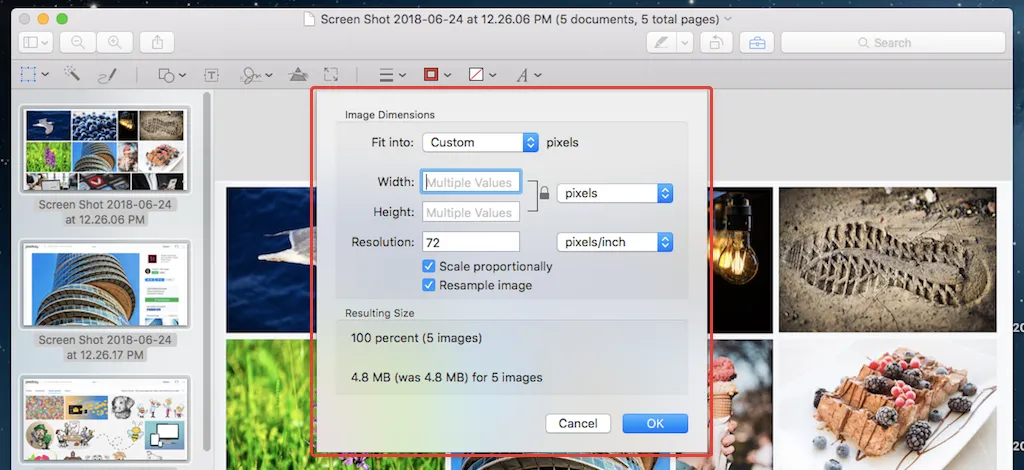
Instead, I am going to select a default size: "1024 x 768"
Note that "1280 x 720" and "1920 x 1080" are very useful sizes for thumbnails.
So here I have the width: "1024"
The height will be different for each image, but what's important for my blog is to have the same width.
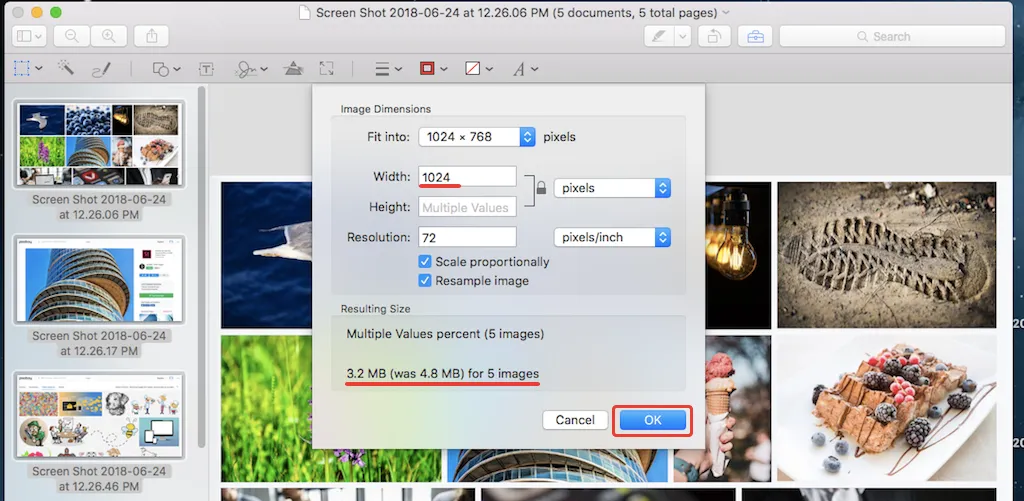
Note that "Scale proportionally" and "Resample image" are checked.
The images were 4.8 MB and they are now 3.2 MB. This is not an optimization tool, but it's still good to see a reduced file size.
Click "OK" when you are ready to resize.
The images are resized now.

Save and close "Preview."
You can verify that the images were indeed properly resized.
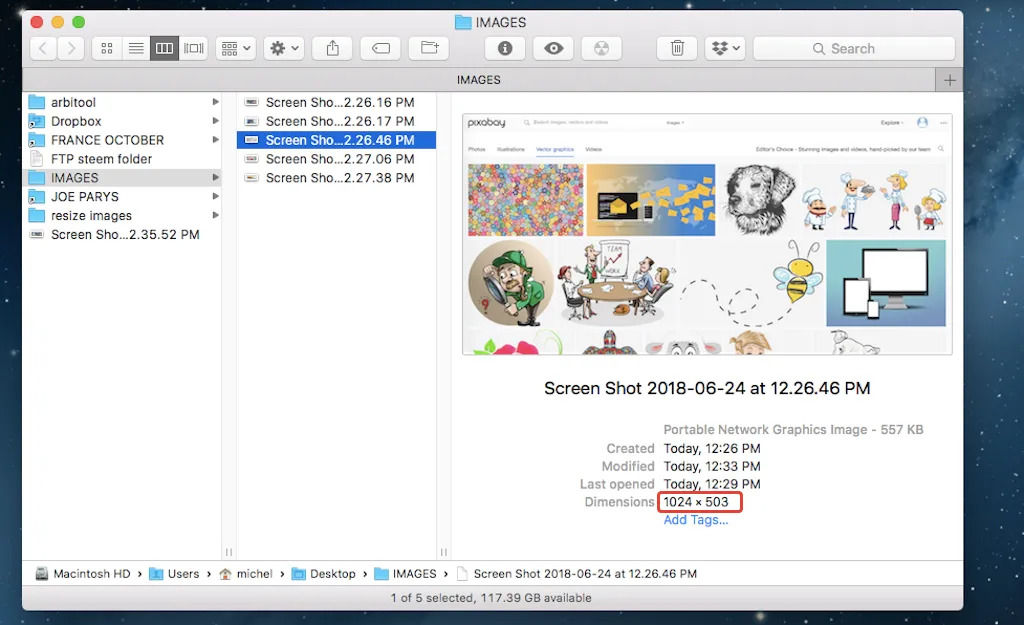
This one has the new width of "1024" like all the others.
I bulk-resized all 11 images in this tutorial using this method without problems.
I hope that this is useful for you if you are a Mac user.
Would you upvote this post and follow me for more because this will encourage me to write more posts like this one?
I have categorized my posts on Steemit for easy access:
Steemit tools | Steemit strategies | Steem economics | Steem on WordPress | Blogging on Steemit | Steemit posts I curated | Cryptocurrency | Cryptocurrency trading | Mac computer tutorials | WordPress & online marketing | Self-development & motivation | Travel in Thailand | Travel in Japan | Travel in France | Life in Thailand | Fitness challenge | Fruit-veggie juices & smoothies | Education | My answers on Quora | Fundition tutorials & projects | Miscellaneous writing
You may prefer to go to my Steemit Posts Directory.
The most important votes you can make on Steem are for Witnesses. The top 20 witnesses can influence the addition or removal of features in future Steem hard forks. Read my post: What is a Steem Witness, How to Vote and Why?
Michel Gerard