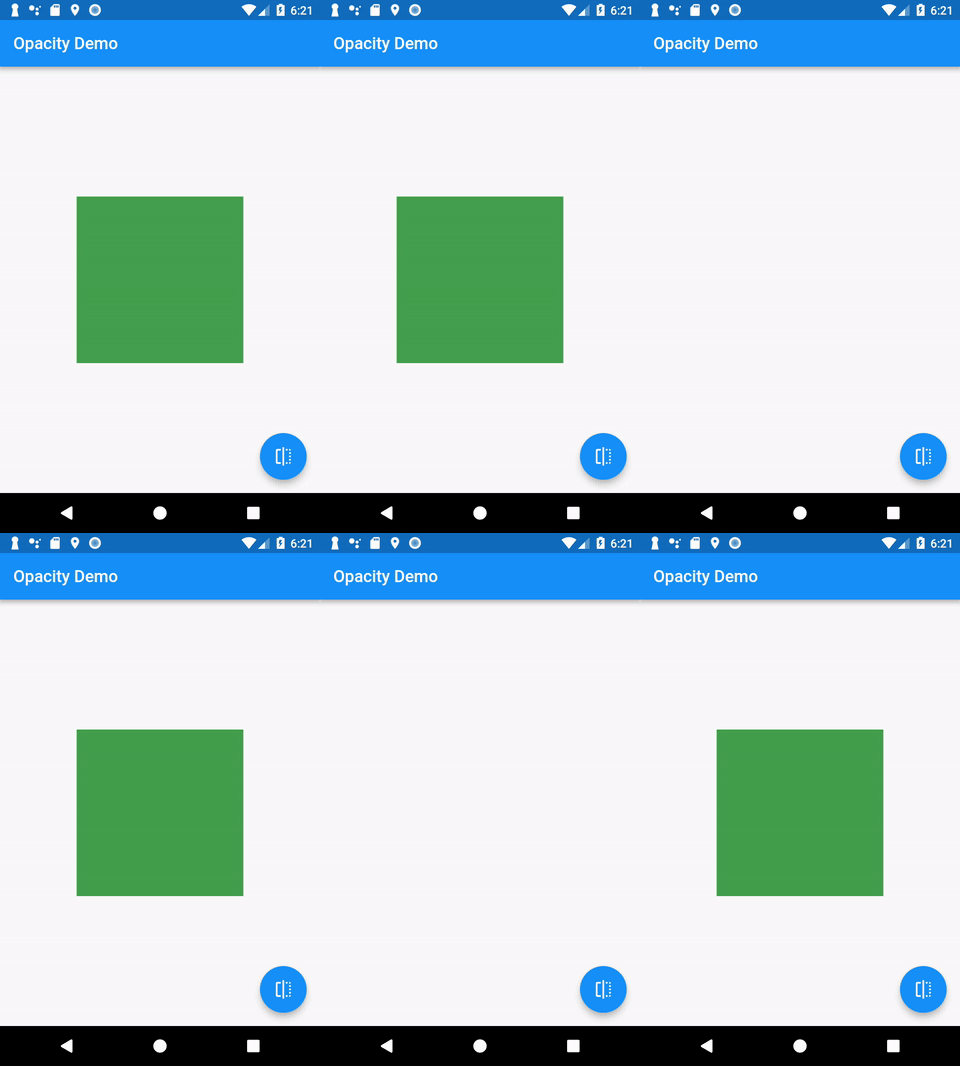
출처 : https://flutter.io/docs/cookbook/animation/opacity-animation

목표
- fade in/out 상자 만들기
- StatefulWidget 정의
- 버튼을 통해 상자 보여주기 토글처리
- 상자에 fade 적용
1. fade in/out 상자 만들기
200x200 의 녹색 상자(컨테이너) 만들기
Container(
  width: 200.0,
  height: 200.0,
  color: Colors.green,
);
2. StatefulWidget 정의
StatefulWidget 은 State(상태) Object를 생성한다. 또한 이 State에는 앱에서 제공하는 데이터를 업데이트 할 수 있으며, 해당 값이 변경되면 Flutter에서는 자동으로 UI를 변경 시켜준다
// StatefulWidget 은 데이터를 가지며 State class를 생성한다
// 이번엔, _MyHomePageState을 통해 위젯이 제목을 생성한다
class MyHomePage extends StatefulWidget {
  final String title;

  MyHomePage({Key key, this.title}) : super(key: key);

  @override
  _MyHomePageState createState() => _MyHomePageState();
}

// State class 는 2가지를 보여준다 : 데이터와 해당 데이터 변경 시 UI를 업데이트 하는 구문
class _MyHomePageState extends State<MyHomePage> {

  // 녹색 상자는 보이거나 않보임
  bool _visible = true;

  @override
  Widget build(BuildContext context) {
    // 녹색상자 관련 코딩은 이곳에 위치한다
  }
}
3. 버튼을 통해 상자 보여주기 토글처리
데이터 값의 변화를 통해 상자를 보여주거나 않보여 주도록 처리하며, 이를 위해 버튼을 추가 하여 상태값을 토글(활성화<->비활성화) 처리하여 상태값을 설정하며, flutter는 이를 감지해 Widget을 재 생성한다
FloatingActionButton(
  onPressed: () {
    // setState() 호출을 통해 값을 설정하며
    // 이를 값의 변경 감지를 통해 flutter는 UI를 재빌드 한다.
    setState(() {
      _visible = !_visible;
    });
  },
  tooltip: 'Toggle Opacity',
  child: Icon(Icons.flip),
);
4. 상자에 fade 적용
_visible 값의 변화에 따라 불투병도를 변화 시킨다
AnimatedOpacity(
  // 위젯이 보이면(visible) 0 => 1.0 불투명도 에니메이션 처리
  // 위젯이 감춰지면(hidden) 1.0 => 0 불투명도 에니메이션 처리
  opacity: _visible ? 1.0 : 0.0,
  duration: Duration(milliseconds: 500),
  // 녹색상자는 AnimatedOpacity의 자식(child)으로 지정
  child: Container(
    width: 200.0,
    height: 200.0,
    color: Colors.green,
  ),
);
5. 완성된 예제
import 'package:flutter/material.dart';

void main() => runApp(MyApp());

class MyApp extends StatelessWidget {
  @override
  Widget build(BuildContext context) {
    final appTitle = 'Opacity Demo';
    return MaterialApp(
      title: appTitle,
      home: MyHomePage(title: appTitle),
    );
  }
}

// The StatefulWidget's job is to take in some data and create a State class.
// In this case, our Widget takes in a title, and creates a _MyHomePageState.
class MyHomePage extends StatefulWidget {
  final String title;

  MyHomePage({Key key, this.title}) : super(key: key);

  @override
  _MyHomePageState createState() => _MyHomePageState();
}

// The State class is responsible for two things: holding some data we can
// update and building the UI using that data.
class _MyHomePageState extends State<MyHomePage> {
  // Whether the green box should be visible or invisible
  bool _visible = true;

  @override
  Widget build(BuildContext context) {
    return Scaffold(
      appBar: AppBar(
        title: Text(widget.title),
      ),
      body: Center(
        child: AnimatedOpacity(
          // If the Widget should be visible, animate to 1.0 (fully visible). If
          // the Widget should be hidden, animate to 0.0 (invisible).
          opacity: _visible ? 1.0 : 0.0,
          duration: Duration(milliseconds: 500),
          // The green box needs to be the child of the AnimatedOpacity
          child: Container(
            width: 200.0,
            height: 200.0,
            color: Colors.green,
          ),
        ),
      ),
      floatingActionButton: FloatingActionButton(
        onPressed: () {
          // Make sure we call setState! This will tell Flutter to rebuild the
          // UI with our changes!
          setState(() {
            _visible = !_visible;
          });
        },
        tooltip: 'Toggle Opacity',
        child: Icon(Icons.flip),
      ), // This trailing comma makes auto-formatting nicer for build methods.
    );
  }
}
맺음말
- 일단 스터디 가즈앙~
