From http://www.organictalks.com/bring-minerals-back-soil-food-supply/
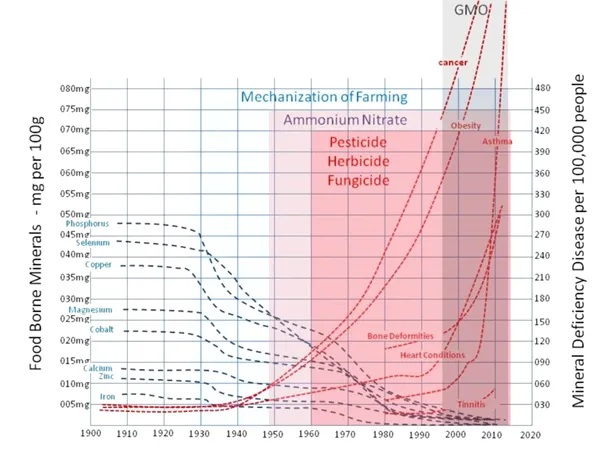
Where I live, the soil has been continuously farmed since the 1670’s. In most places where soil has been farmed, it will have been severely depleted of basic minerals and micro-nutrients.
When soil has a bad imbalance, plants growing in it are weaker and pest and disease problems abound. As a result, I get my soil tested each year, so I will know what I need to add, and how well it is coming into balance. Each year my pest and disease pressure lessens, as the soil grows more healthy and balanced.
So, how does one go about taking a soil test?
That depends on what you want from your soil. In my case, I need the highest nutrient content from the plants I grow, as I use them as treatment for my chronic Lyme disease. So I really work hard to make sure all that is needed is there and available to the plants. This is my food for a year.
If you are just growing things to supplement what is bought in stores and don’t feel you need such high nutrition, you may select a different test or forego one altogether.
I did exactly that for 20 years, and now rue the day as I have spent the last 7 years undoing the damage it did. If I read a plant like potassium, I put down wood ash, more is better right? Well potassium is something my soil has in abundance and I created an imbalance. Ditto for ag lime, that was even worse.
I had really bad pest and disease problems and had to use row covers and other deterrents to try to get some harvest. I stopped using row covers in 2012.

In December 2012, Steve Solomon published The Intelligent Gardener. It explained how different nutrients in the soil work together or against each other and there was a worksheet in the back to be allow you to create a custom amendment mix for your gardens. It worked from a Logan Labs soil test.
Because different labs use different methods of doing soil tests, it could be dangerous to your soil to use the worksheet with other labs’ test results. You could toxify your soil for years.
PLEASE DO NOT USE ANOTHER LAB’S RESULTS ON THIS WORKSHEET!
Now on to how to take the sample.
You get the instructions from Logan’s website:
http://www.loganlabs.com/customer-tools.html
Soil Sampling Instructions
If a soil test is to be a reliable guide for the addition of fertilizers or lime, the sample tested must represent the soil condition of the area sampled. The specific purpose of the test must be kept in mind, and the completeness of the test desired. Read and follow applicable instructions carefully, the laboratory results will tell you only what is in the sample you send. It is the sample taker’s responsibility to take a truly representative and unbiased sample of the field area in question.
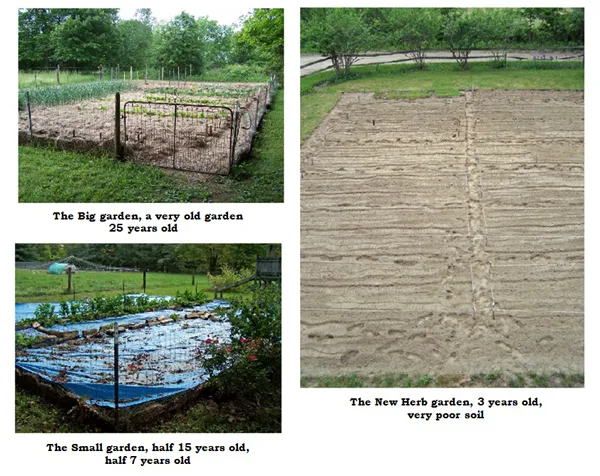
- Soils that differ in soil type, appearance, crop growth, or past treatment should be sampled separately, provided the area can be treated separately. A soil map or crop response map can be of help in distinguishing areas and in recording location of samples.
I test each of these gardens separately. Their soils have been treated differently, and their locations are very different.
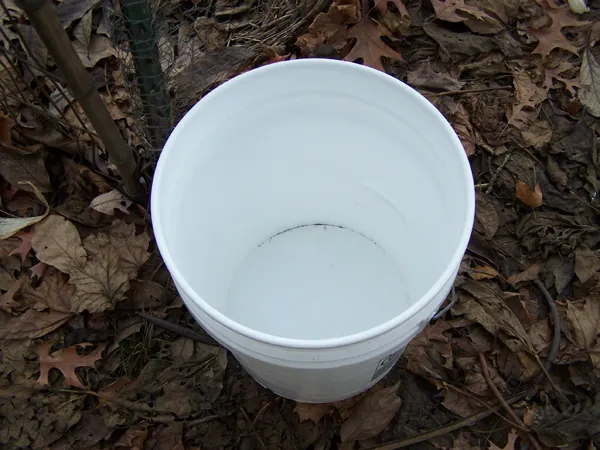
- Several different tools – such as an auger, a soil sampling tube, or a spade may be used in taking soil samples. Use a clean bucket or container.
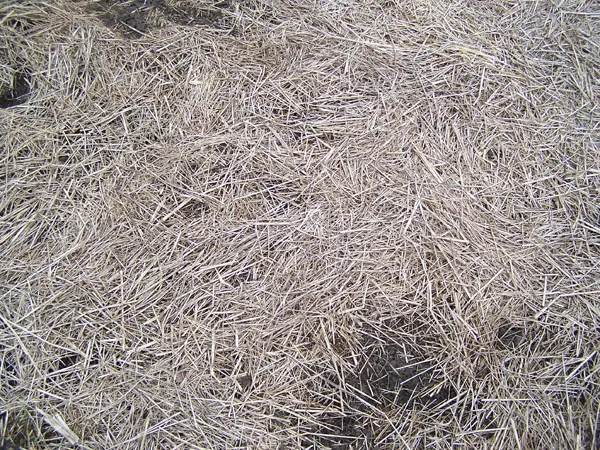
Mulch on the garden
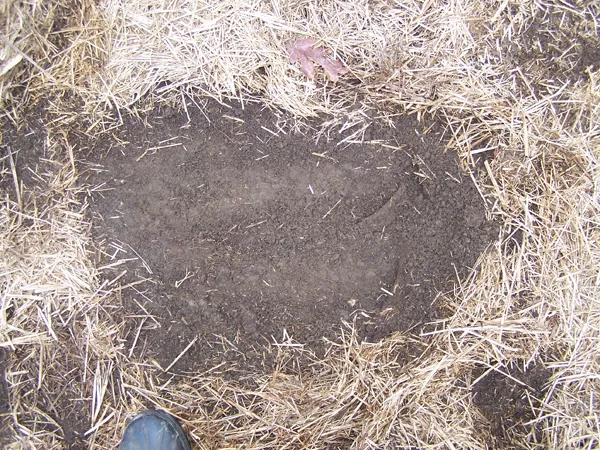
Remove all organic matter
- Scrape away surface litter.
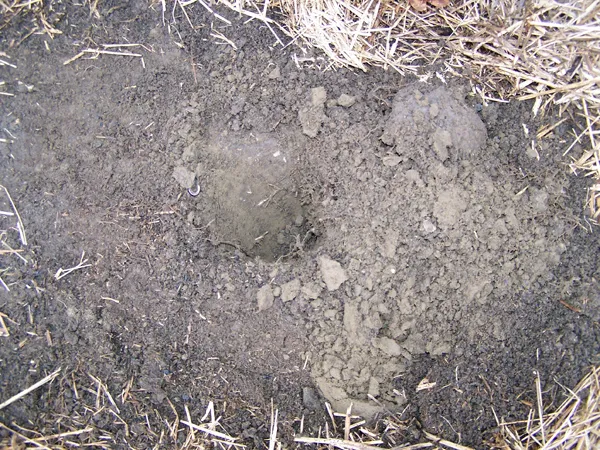
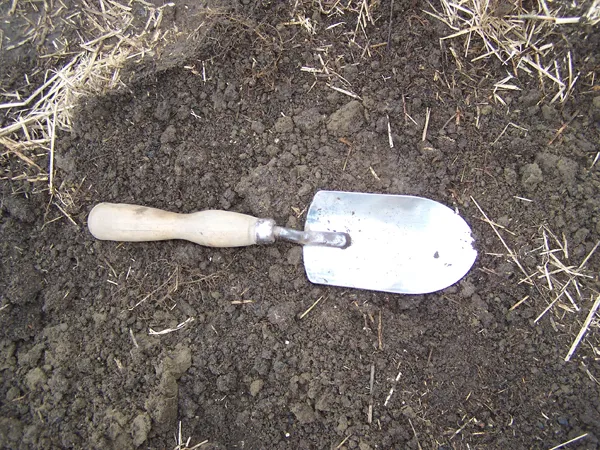
6” hole made with a trowel
If an auger or soil sampling tube is used, obtain a small portion of soil by making a boring about 6 inches deep, or if plowing or tilling deeper, sample to tillage depth. If a tool such as a spade is used, dig a V-shaped hole to sample depth;
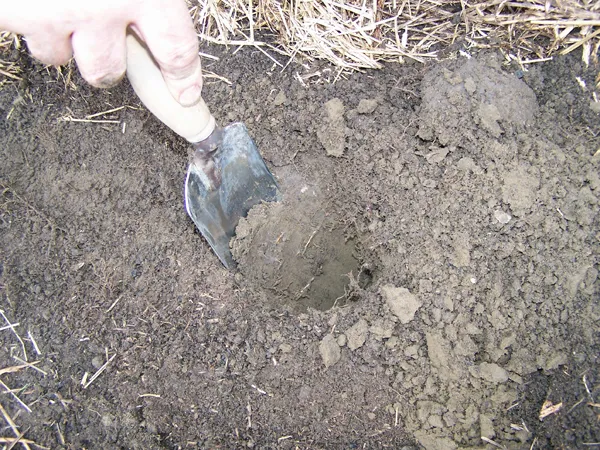
then cut a thin slice of soil from one side of the hole.
Avoid areas or conditions that are different, such as areas where fertilizer or liming materials have been spilled, gate areas where livestock have congregated, poorly drained areas, dead furrows, tillage or fertilizer corners, or fertilizer band areas of last year’s crop. It is also advisable to stay at least 50 feet from barns, roads, lanes or fence rows.
Because of soil variations, it is necessary that each sample consist of small portions of soil obtained from approximately 15 locations in the soil area.
This is a lot of digging, but it should be done to give as broad a sample as possible.
Remember, only 6” Deep!
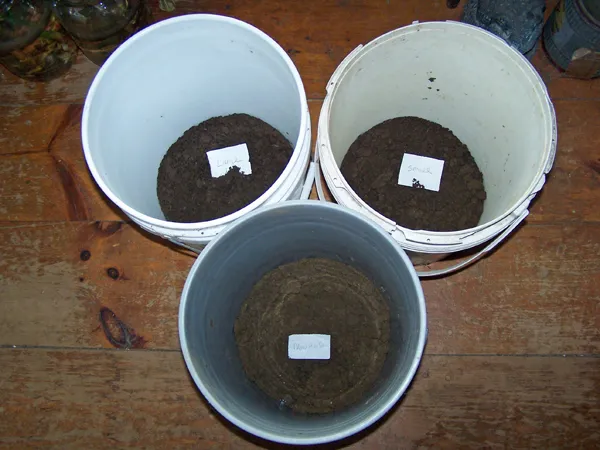
After obtaining these portions of soil, mix them together for a representative sample. Samples can be sent dry or wet.
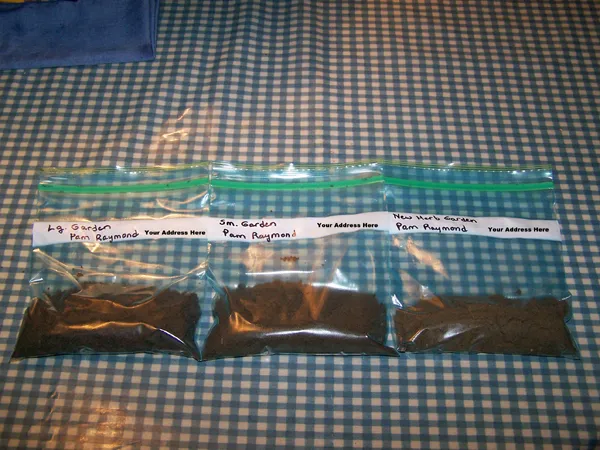
Place 2 cups of soil in a soil sample bag or ZipLoc bag. Where soil is very varied and especially where land leveling has been done, or erosion and deposition are severe, the field should be checked on a grid or incremental unit basis.
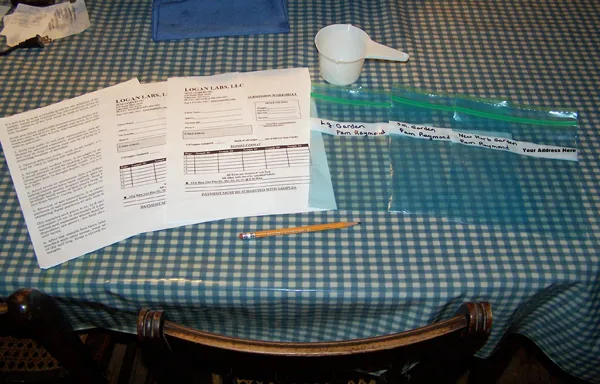
1 cup measure, 2 copies of Worksheet, instructions to follow, clearly marked bags
- After the sample has been taken, the soil sample bag should be clearly marked with your name, your address, and the sample ID on the outside of the soil bag. Make sure bags match Submission Worksheet. Keep a record for yourself of the area represented by each sample.
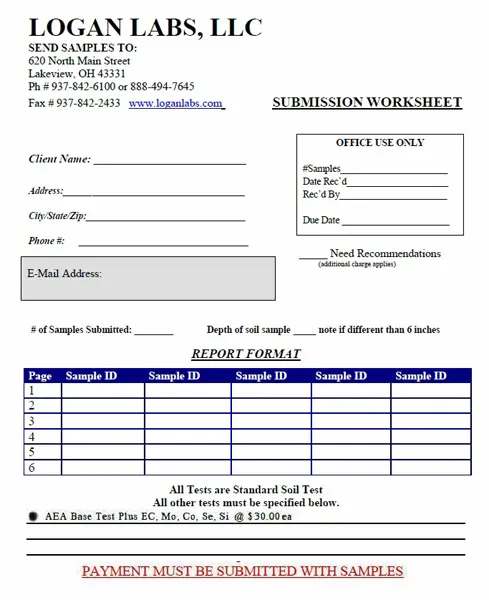
To get the micros done, use this form, the Submission Worksheet.
http://goldenoakfarm.us/LoganSoilTestForm2018/Logan's%20Soil%20Test%20Form%202018.html
Don't use the form on the website as it doesn't specify the micros.
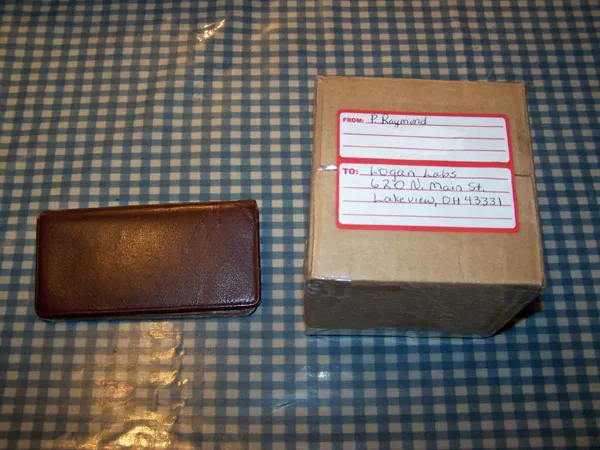
Package securely, so the bags don’t break open. Soil is heavy…
And DON’T do what I did: forget to put the form AND A CHECK for payment in the box. I had to open the other end and put them in….
If you have included an e-mail address, you will get results in 7 – 10 days.
Here’s my posts on what to do with the test:
https://steemit.com/gardening/@goldenoakfarm/reading-a-soil-test-part-1
https://steemit.com/gardening/@goldenoakfarm/how-to-read-a-soil-test-part-ii