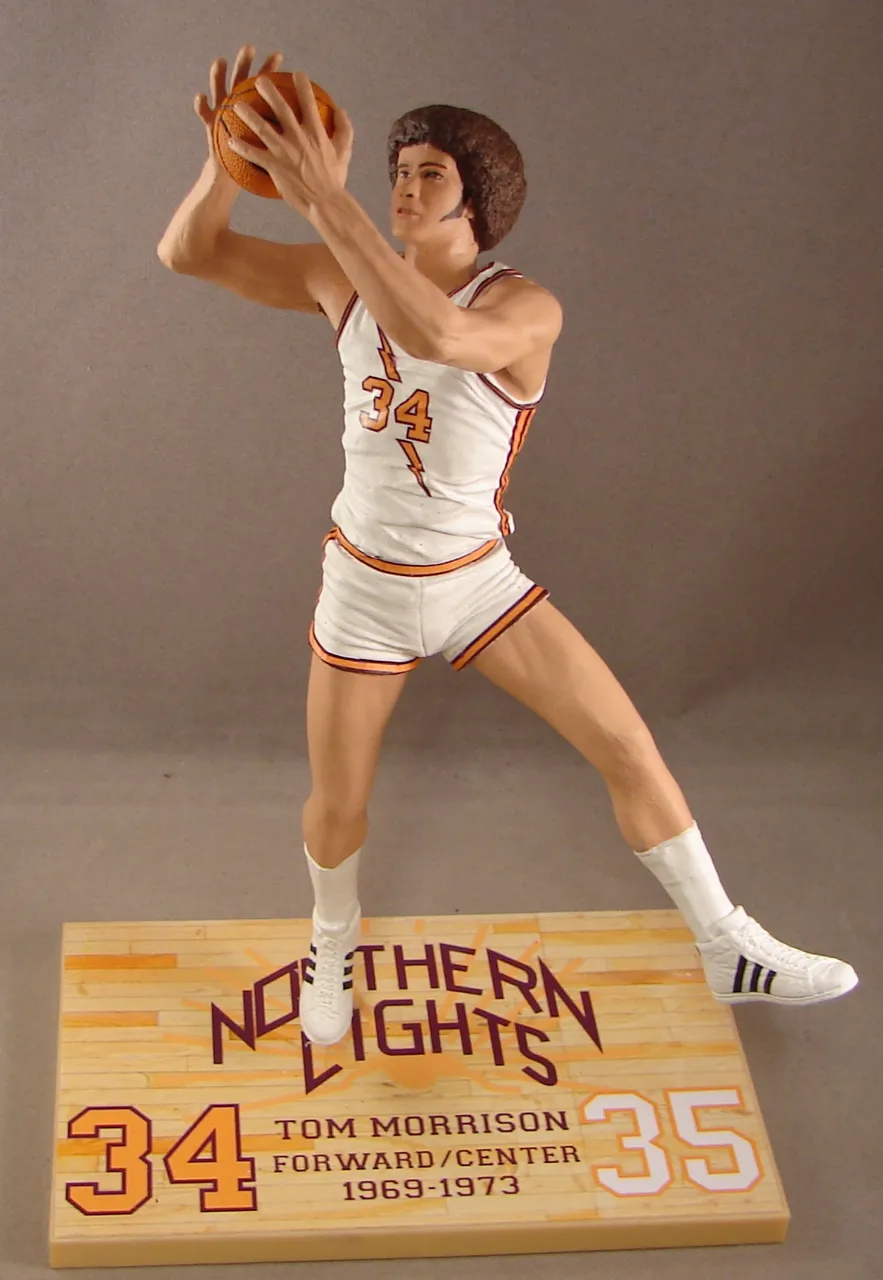
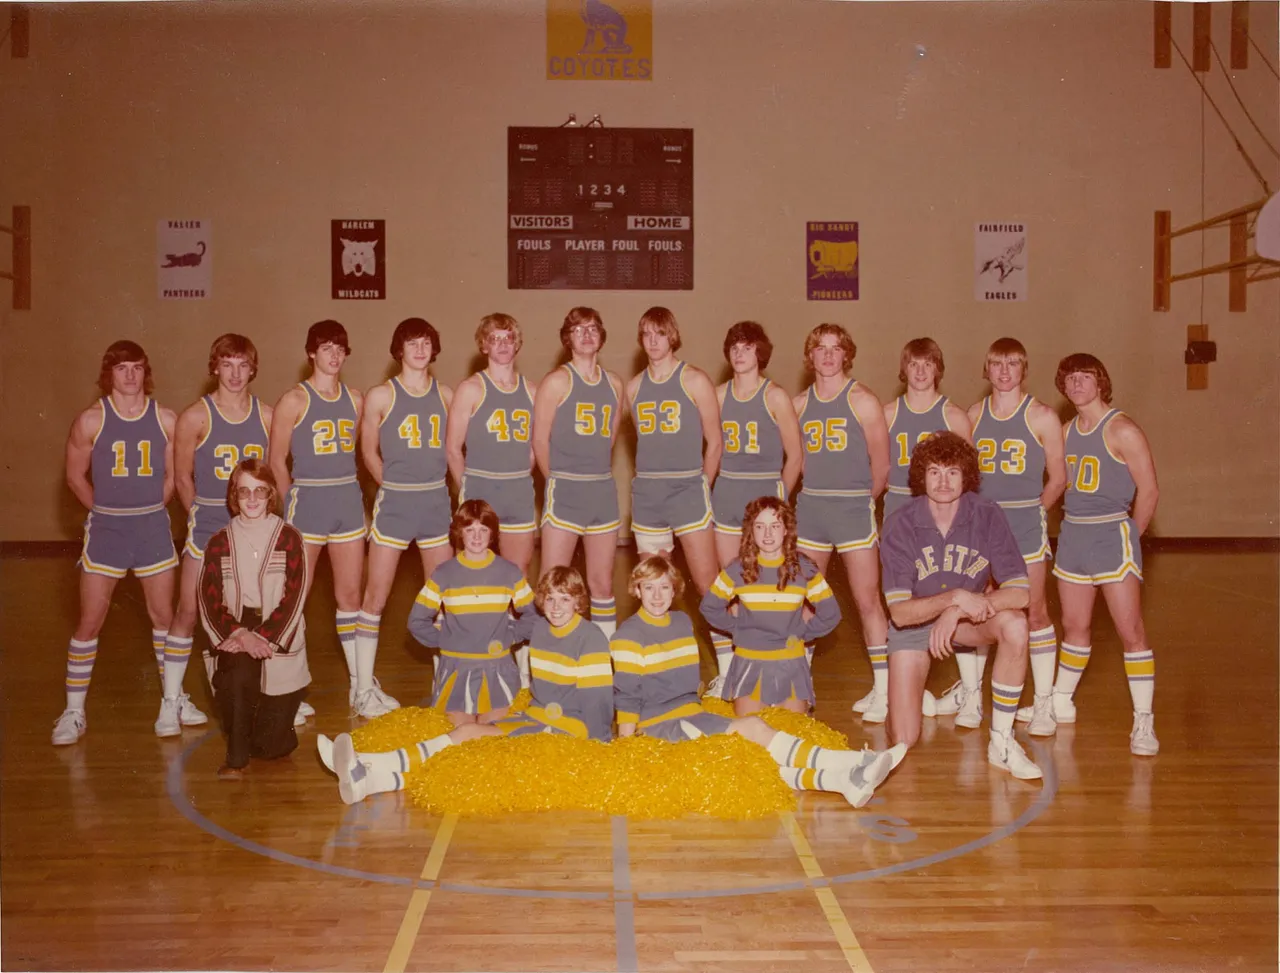
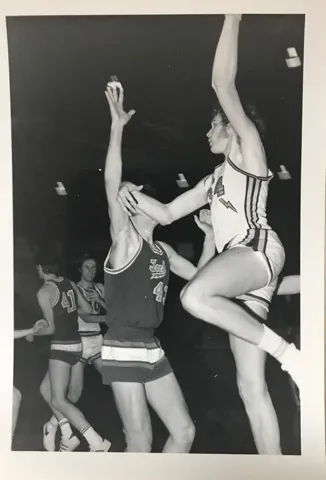
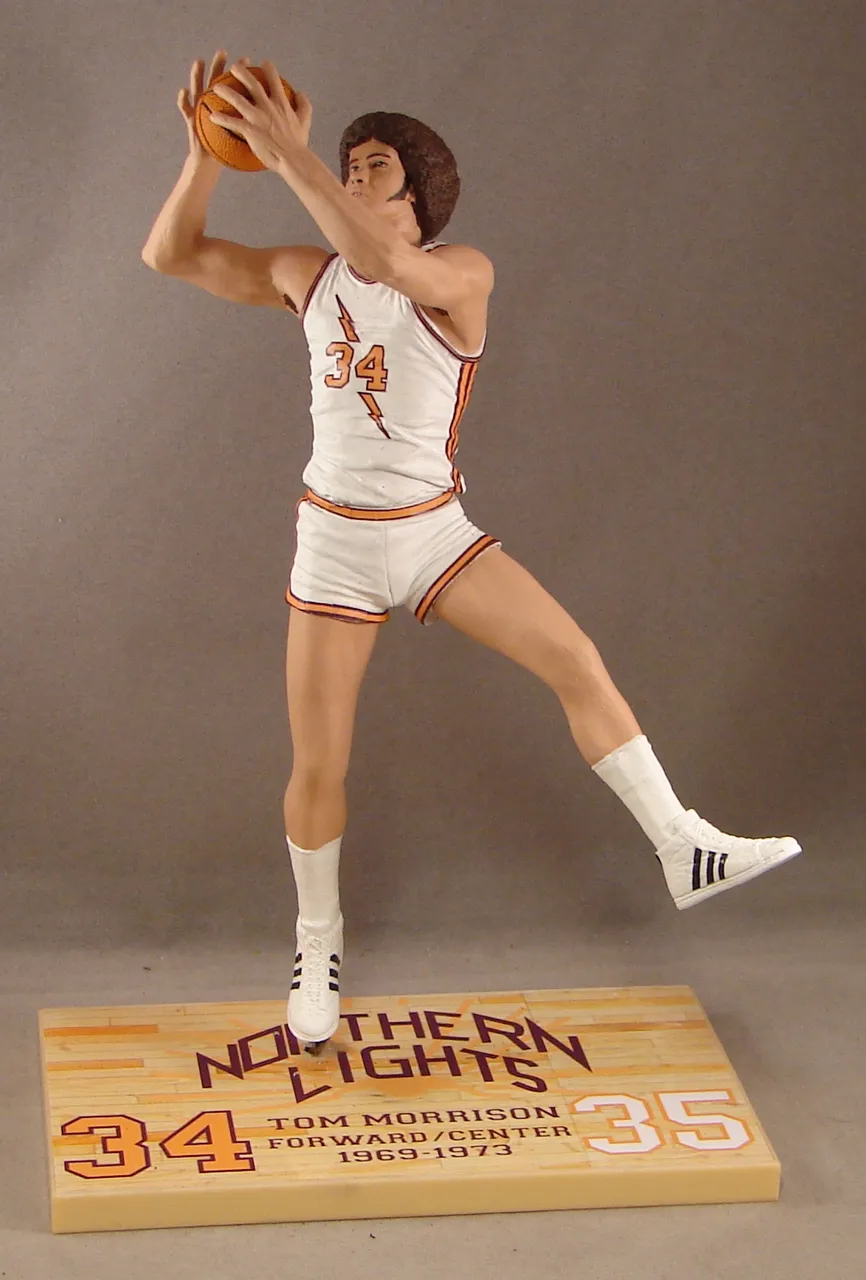
I just finished this custom figurine of a basketball player from a small college in Montana, Nothern Montana, the Lights. He played for them from 1969-1973. This order has an interesting back story. I received the order from his son, this is a surprise and he will not receive it until August (I was shooting for Father's Day but he wanted to wait). During communication with the son, I came to figure out the person who he wanted made was actually my high school coach for basketball my senior year. I thought that was pretty interesting. Here is the team picture from my yearbook. The coach is kneeling in front with the big afro.
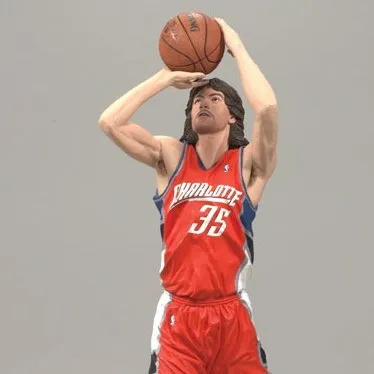
So the challenge with this order was I had to create that hair do for him. Another interesting fact about this person, is he is Adam Morrison's uncle. Maybe some of you recall Adam Morrison? He was a shooting phenomenon at Gonzaga University in the early 2000's and was drafted into the NBA where he has a relatively short and unspectacular career with several teams. However, when he was drafted, McFarlane Toys decided he was worth making a figure for. So it was perfect, about as close a facial resemblance as you can get.
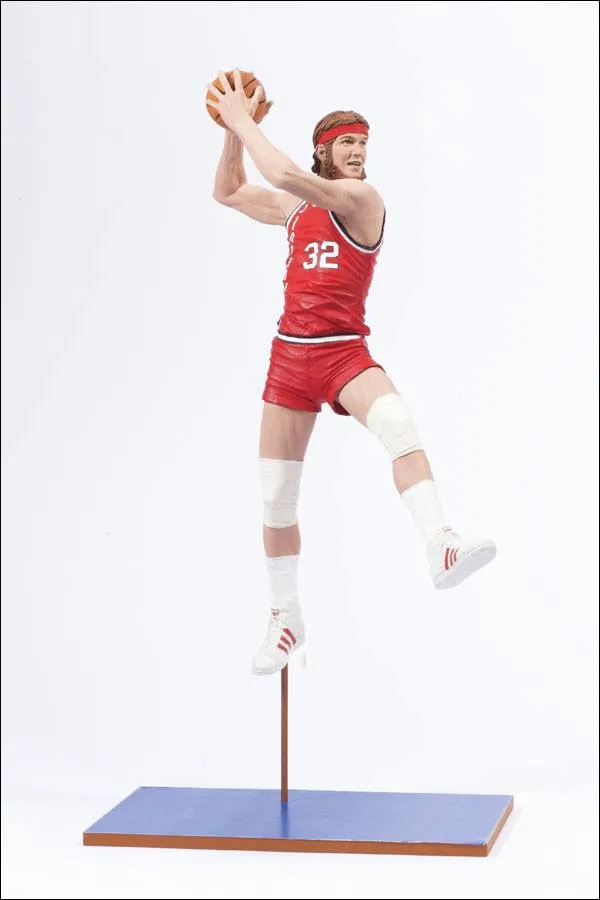
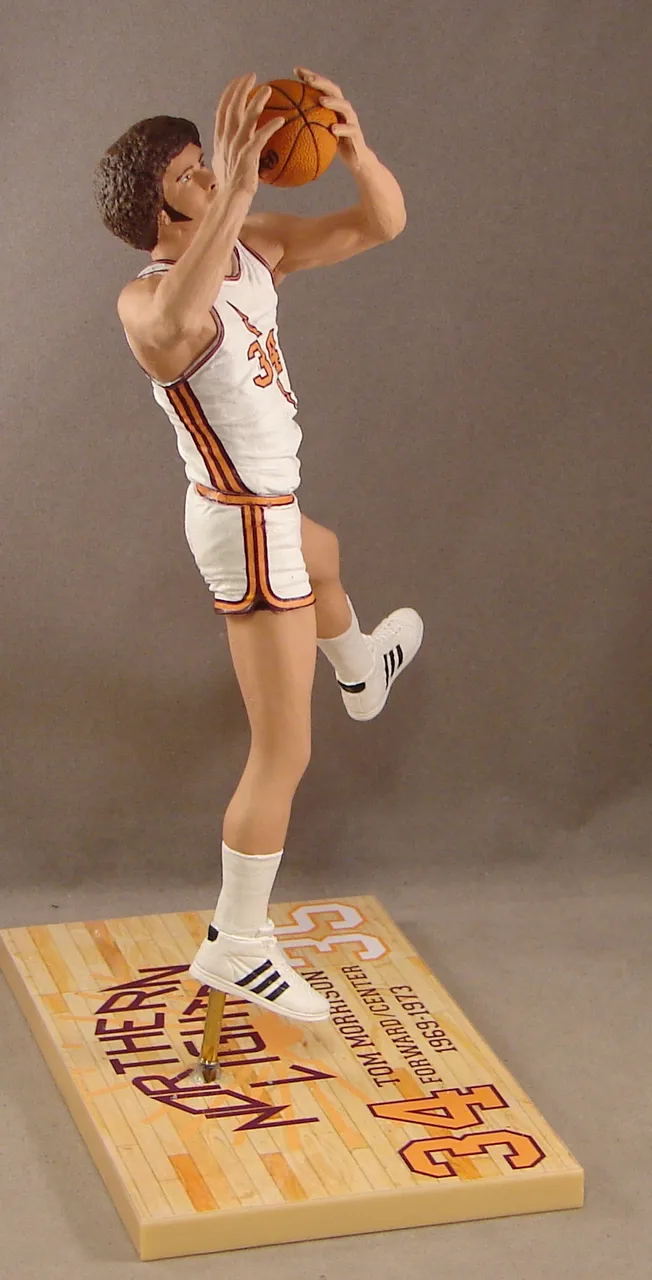
As always, I work with the customer to find a pose they like. There are a number of old school poses that work, and he chose the Bill Walton figure.
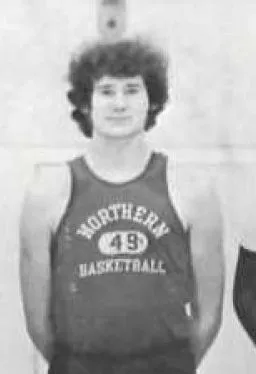
Really on this project, the head was the main challenge, as there would be minimal changes to the rest of the figure. I had to sand off the knee sleeves and that was it. Here is a picture of Tom Morrison from his playing days in the uniform I was to do. Plus a picture of the hair.
Sculpting the Afro
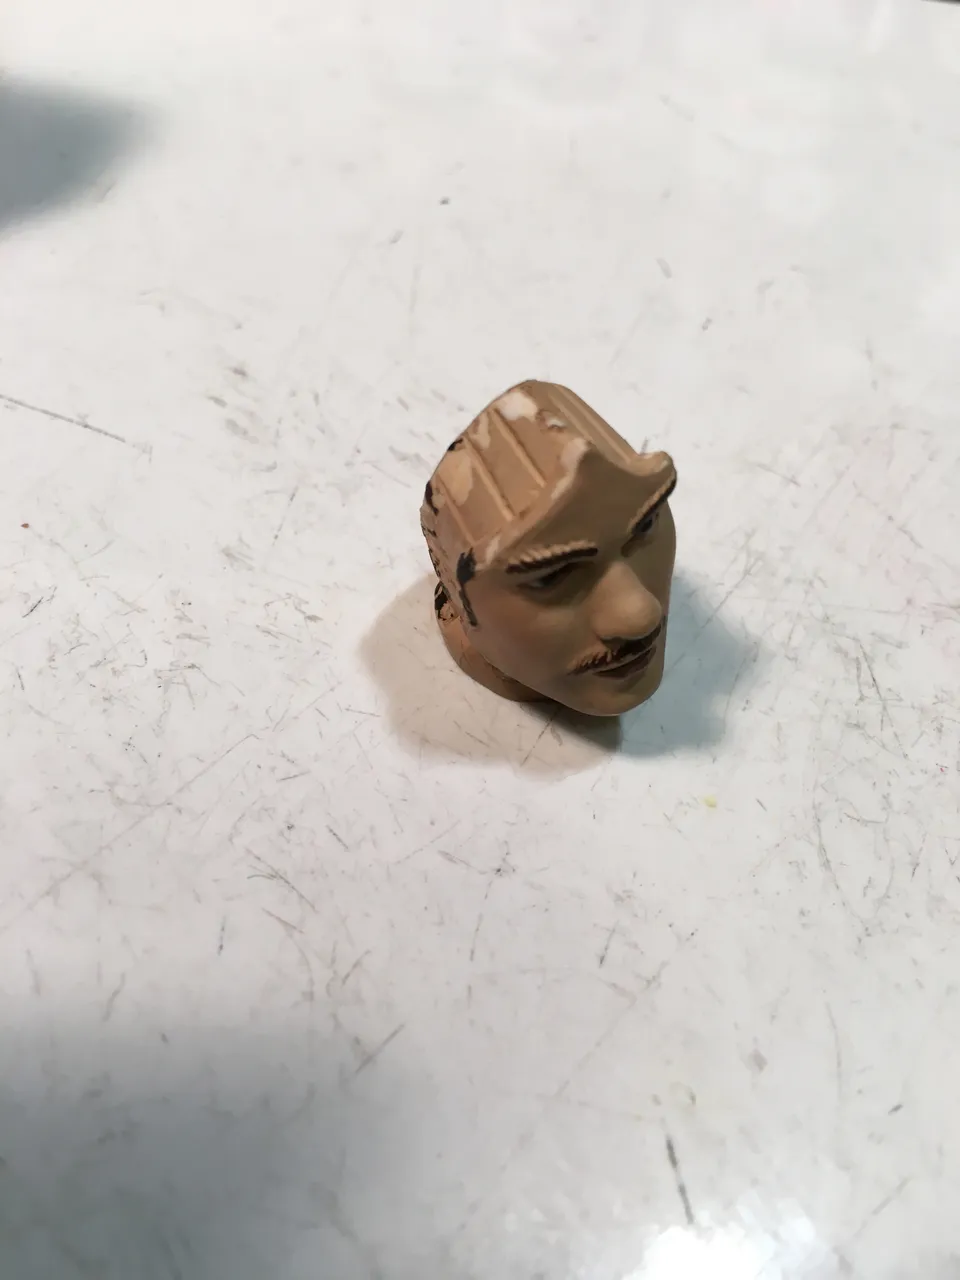
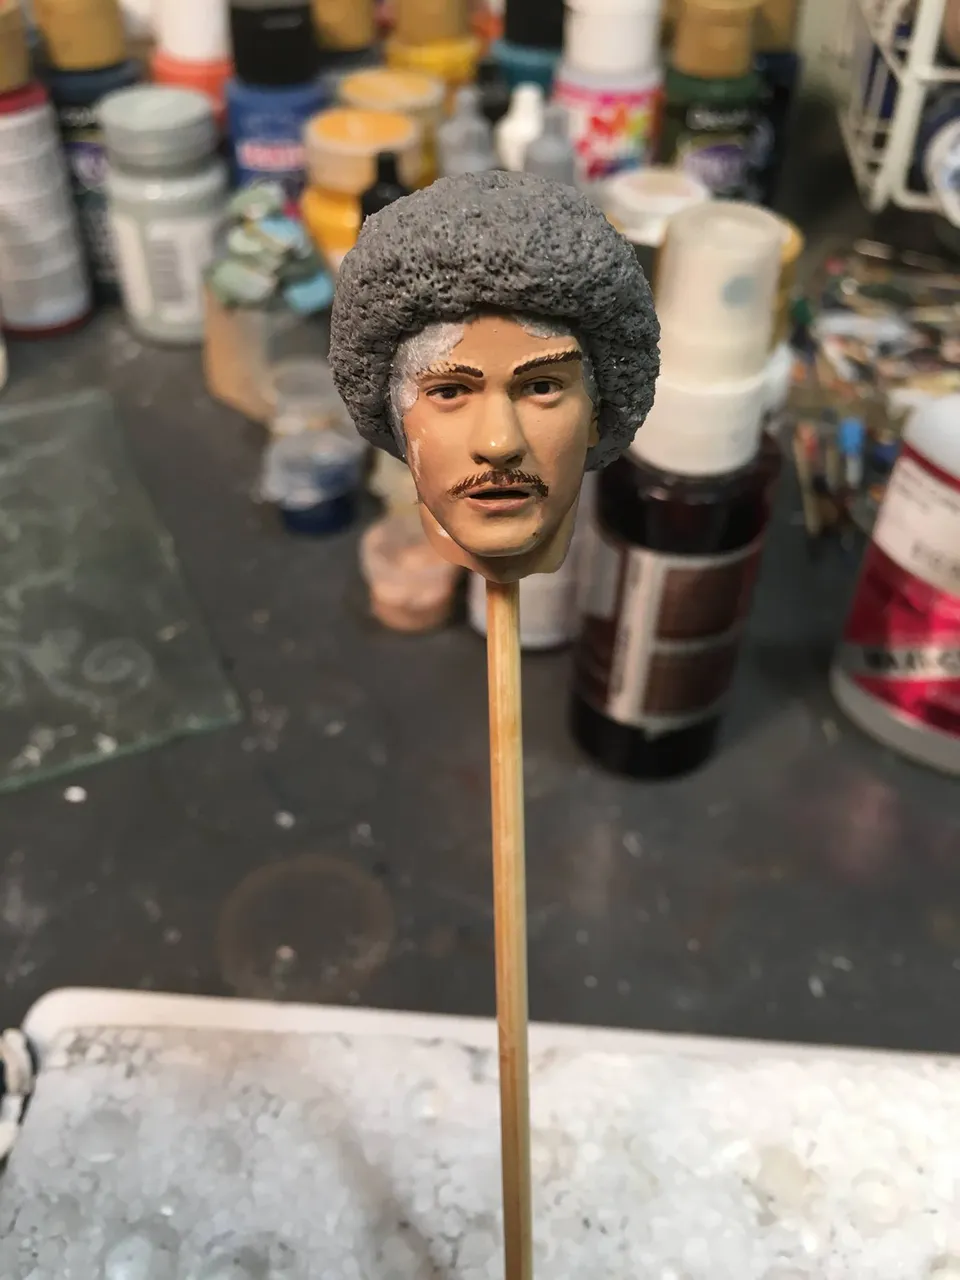
The project required I do the head swap between Bill Walton and Adam Morrison. The hair on the Adam Morrison head was a separate piece and I removed it leaving the bare head.
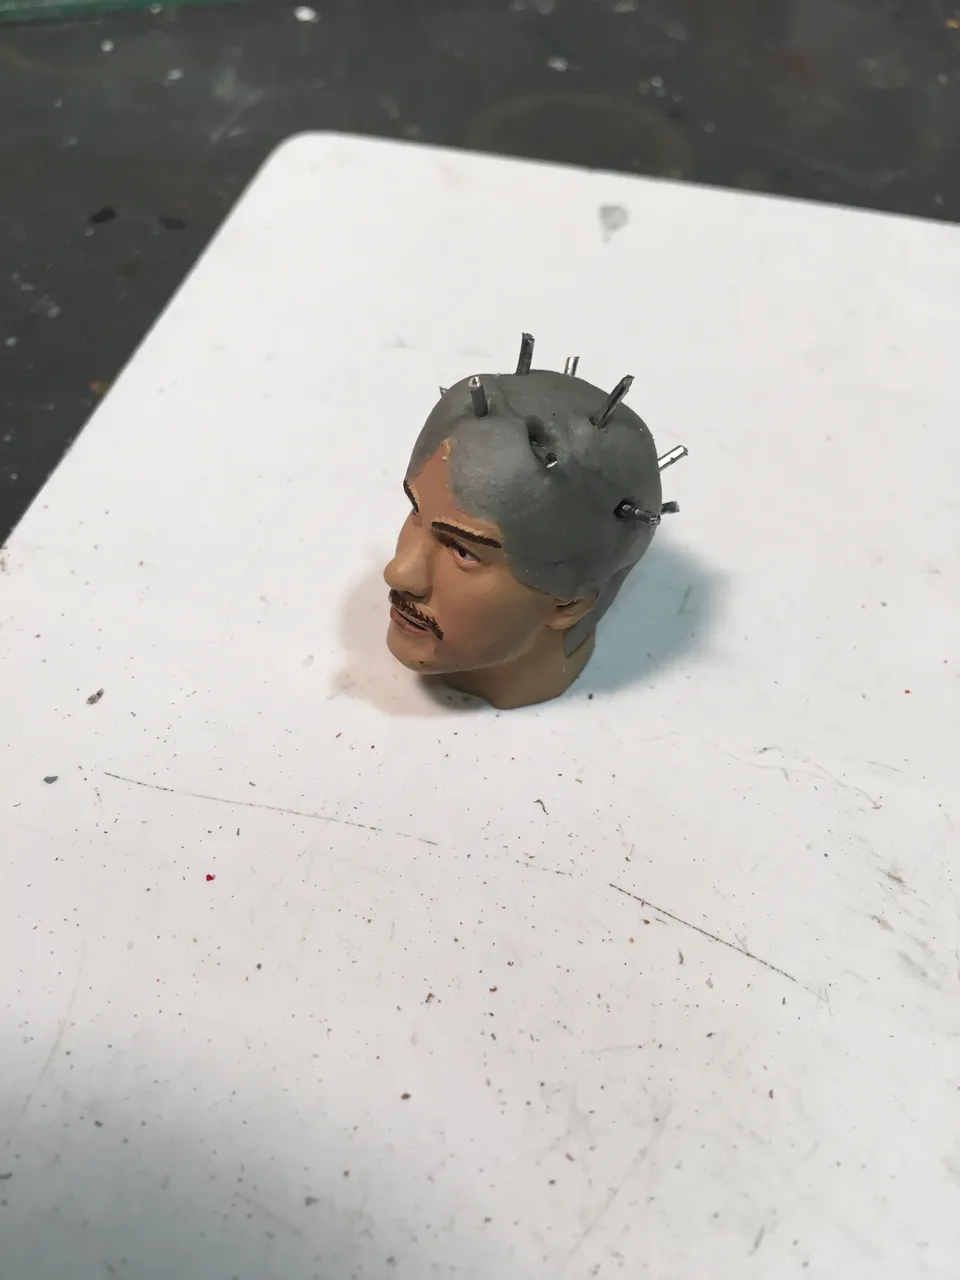
My plan was to sculpt the head/skull shape first, then add the hair after that had dried. To give the hair something to gripe onto I cut some short pieces of paper clip and stuck them in the head.
Then I sculpted the hair, using a different sculpting putty than I typically use, ProCreate, as it is a bit stiffer than the Apoxie Sculpt I used for the head. To achieve the afro look, once I had the basic shape of the hair in place, I used a stiff wire brush to create the texture.
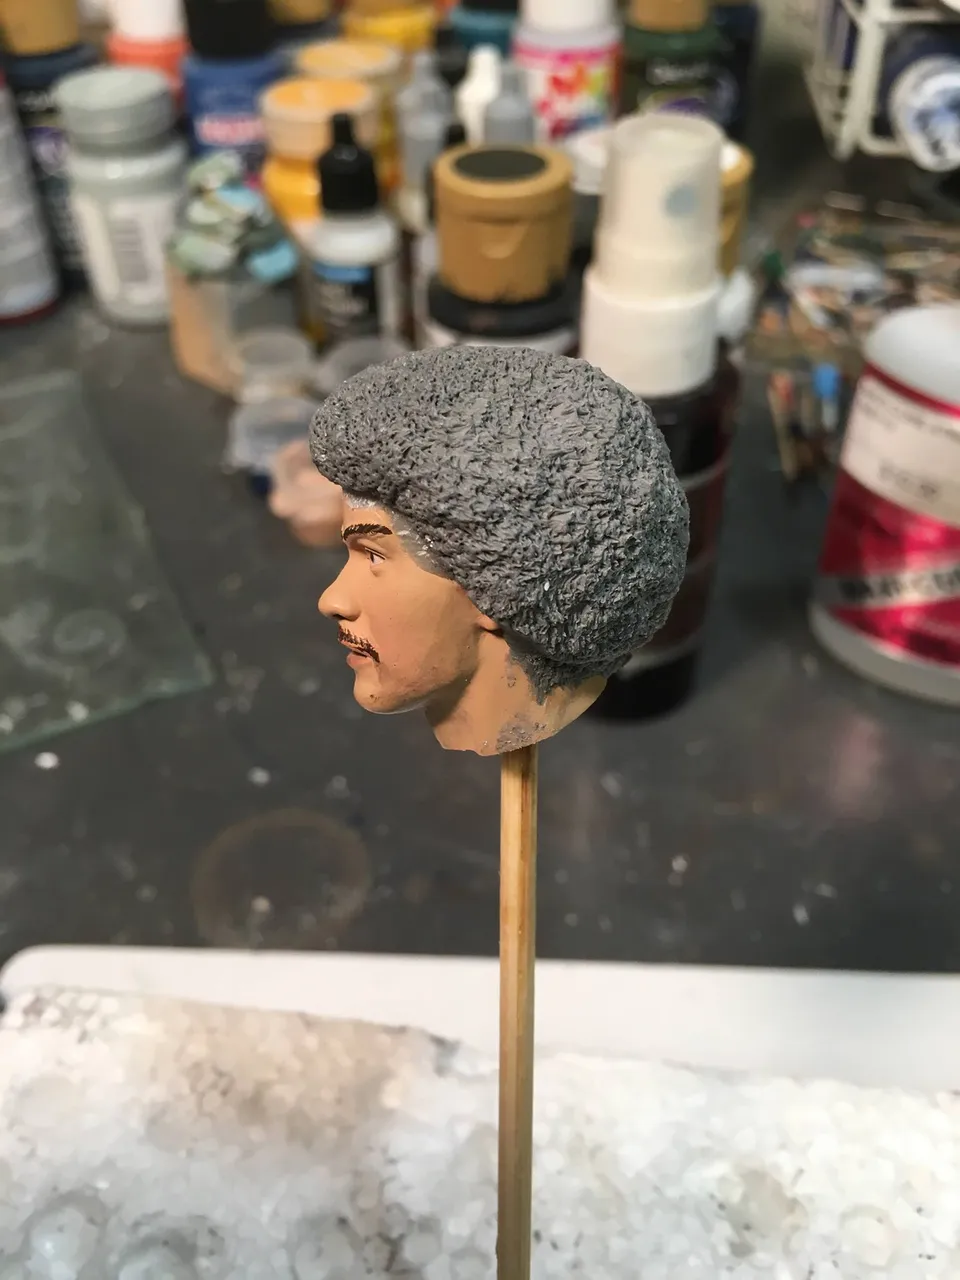
I next had to create the neck and fit it into the torso. Sometimes I will keep the original neck and pin the new head to the neck but since the original head was looking to the side and I wanted ot have Tom looking forward, I did a complete sculpt. I use plastic wrap between parts if I want the two pieces separate so I can work on them easier. It prevents the adhesion of the putty and peels off once the putty had set.
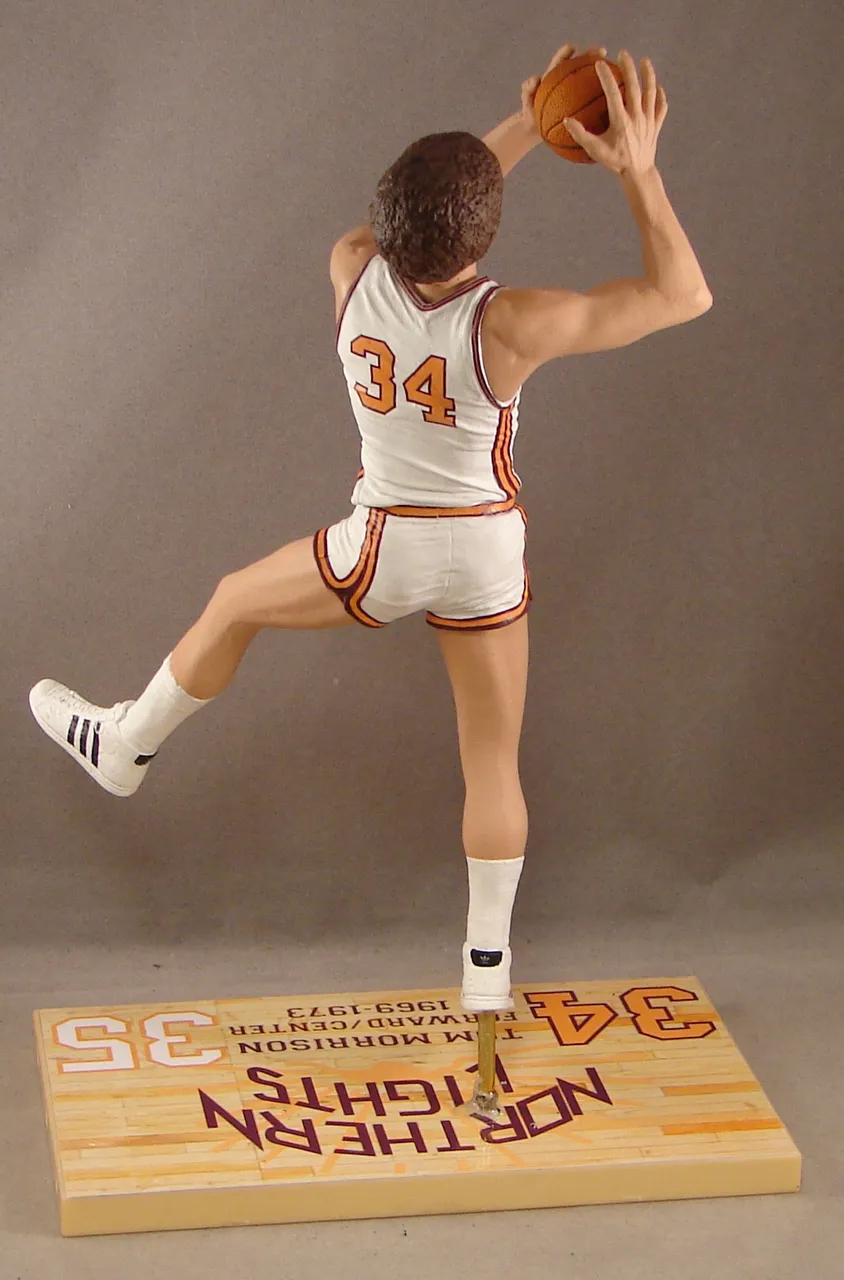
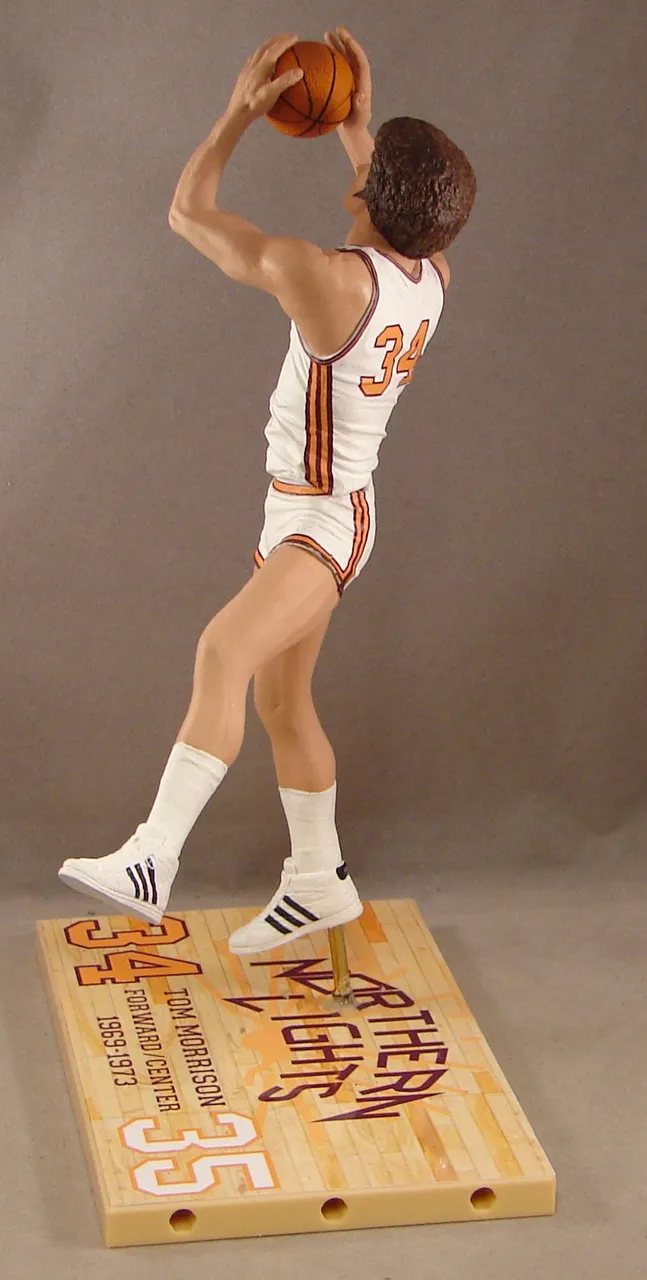
After the putty had set up, I sanded down the neck area a bit and pieced the figure together to make sure it looked right. I usually like to change the pin in the base from the McFarlane one as they tend to bend over time, so using a thick brass rod, I cut and pin via the leg. You might also notice I sanded off the thin mustache from the original figure's head.
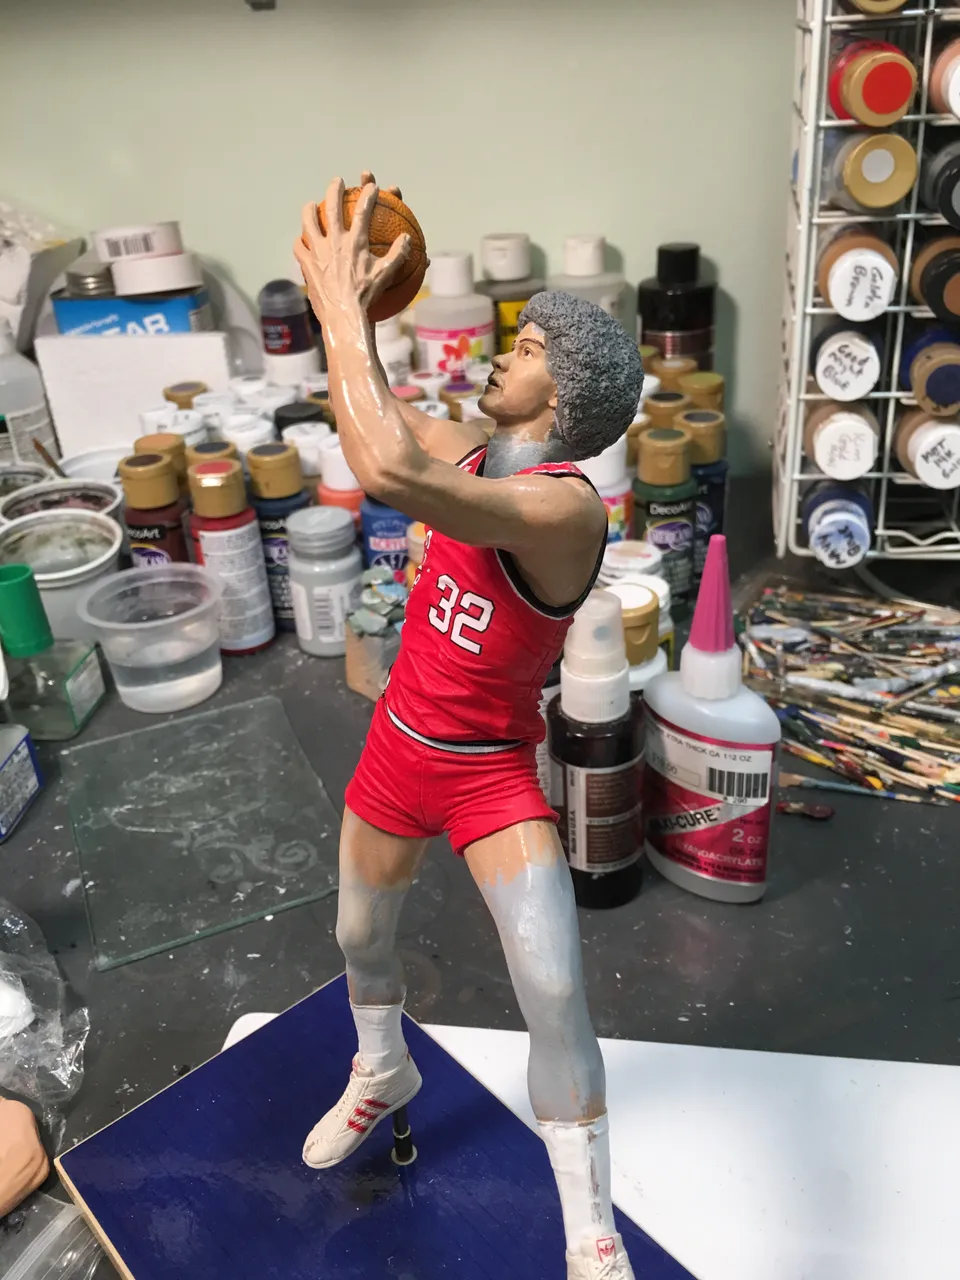
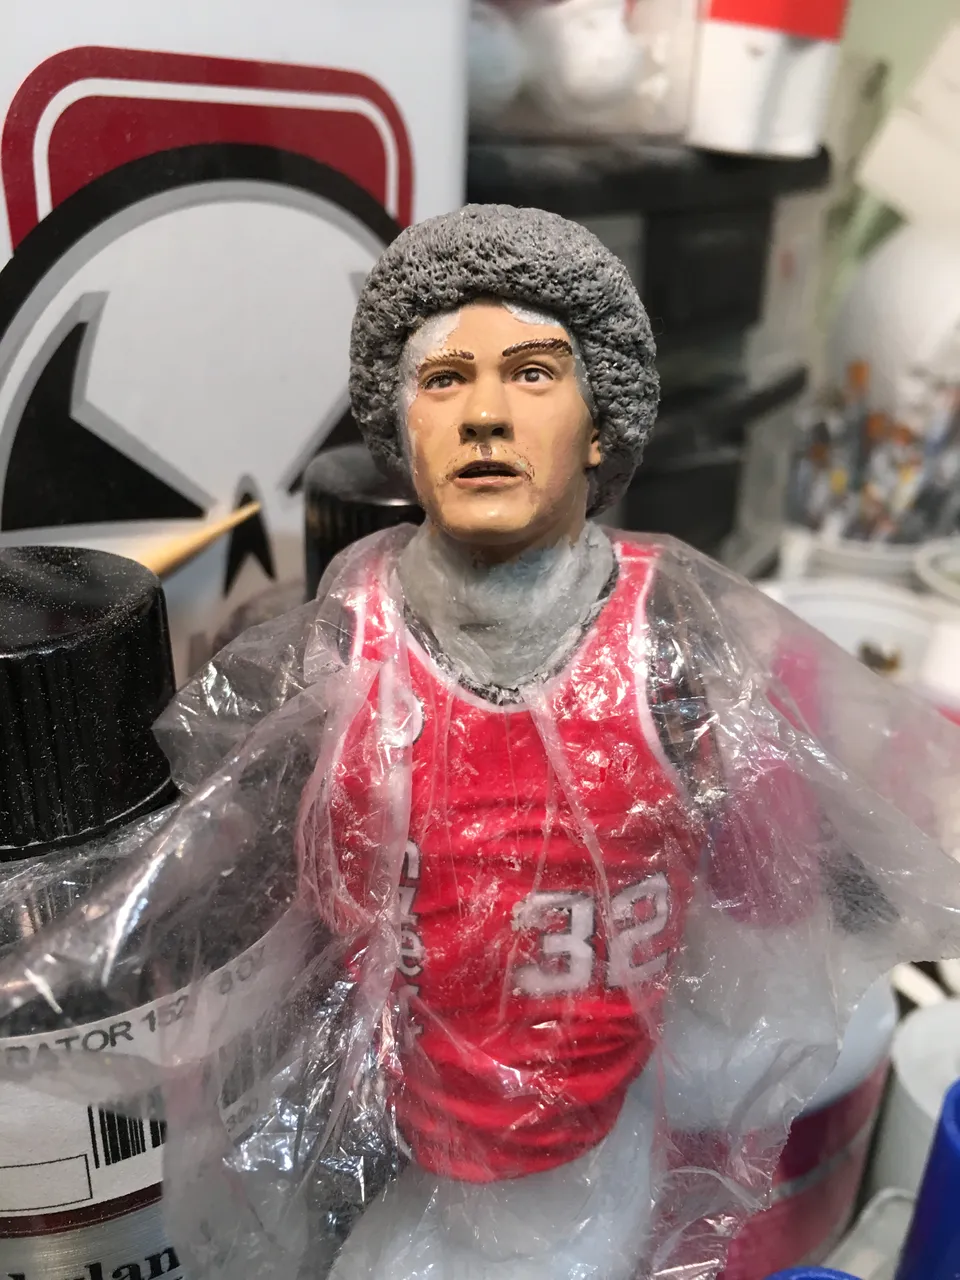
After this photo, I primed, created the decals (with the help of a friend), painted and and completed the figure. Another part of basketball customs is doing the base with custom made graphics which I create in Photo shop and print on photopaper which is then attached with spray glue. Here are some final pictures. The side burns I painted on.
Thanks for reading my post about this custom basketball player. I hope you enjoyed it. Feel free to comment if you want or have any questions.