Finally !
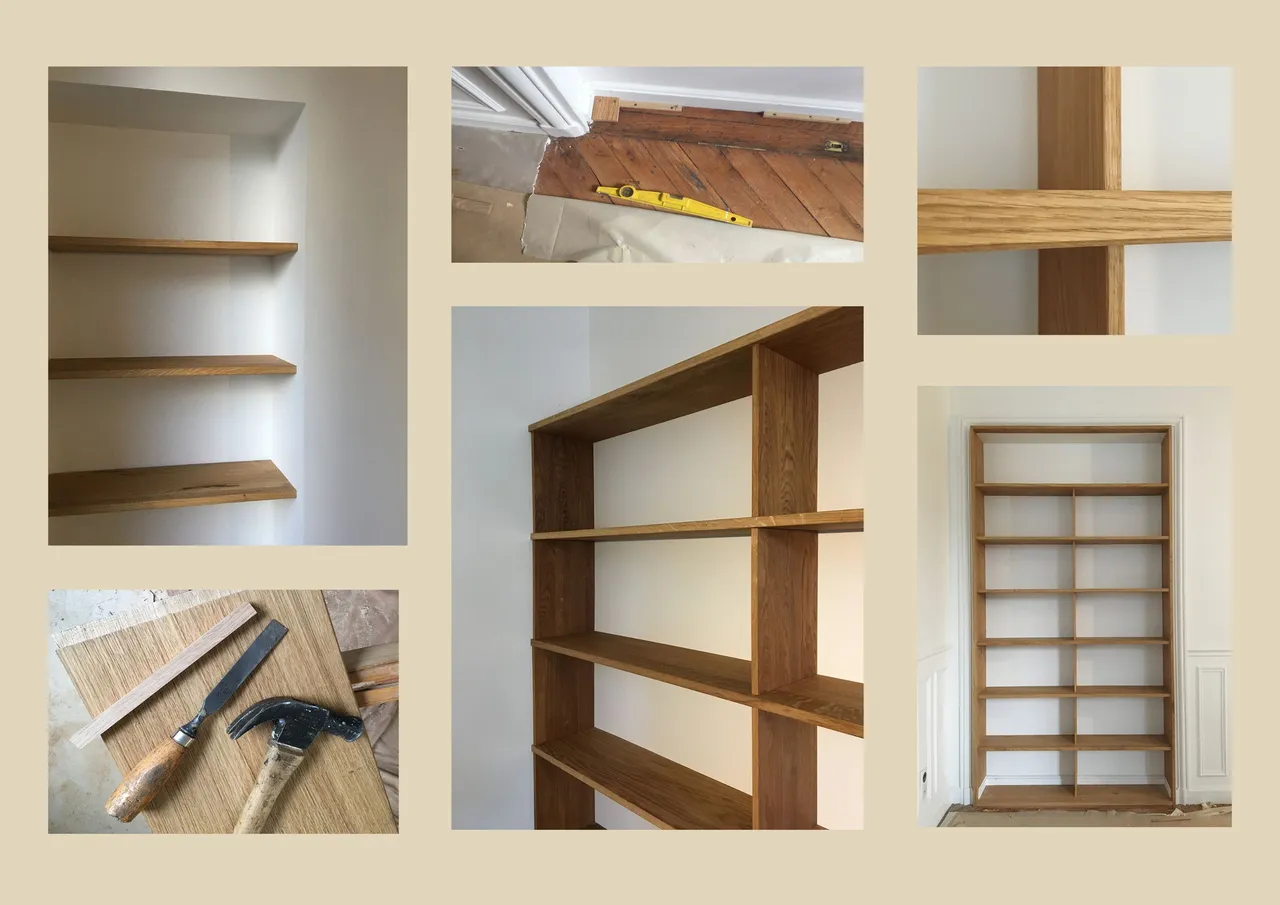
As promised a few days ago, here is a little update of this woodworking session. The bookshelves are well installed on the wall :) It was a real mission...! For the previous article, it's here !
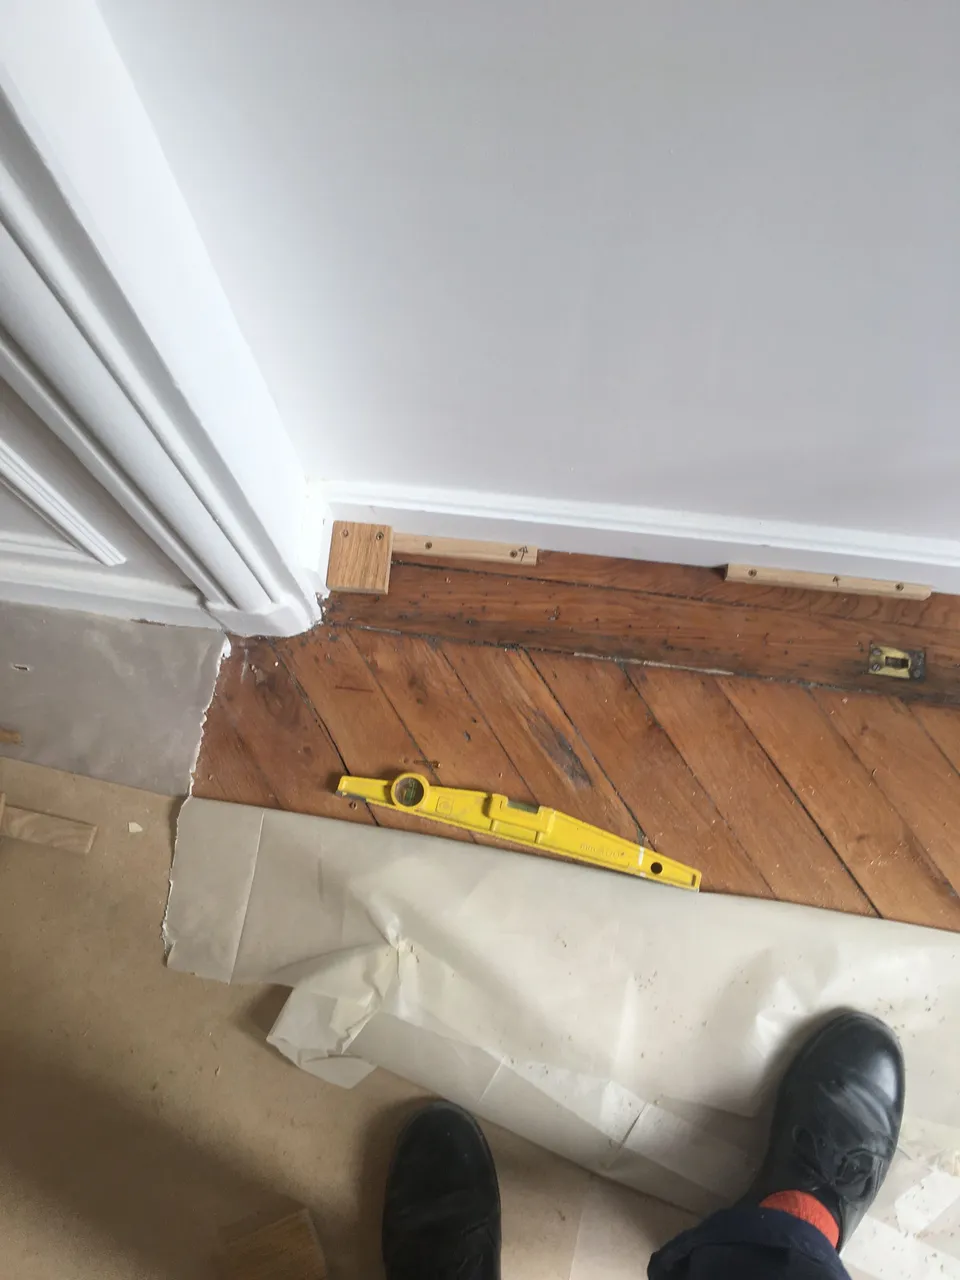
We start without waiting with the skirting board, all level of course and with small wedges screwed in the floor.
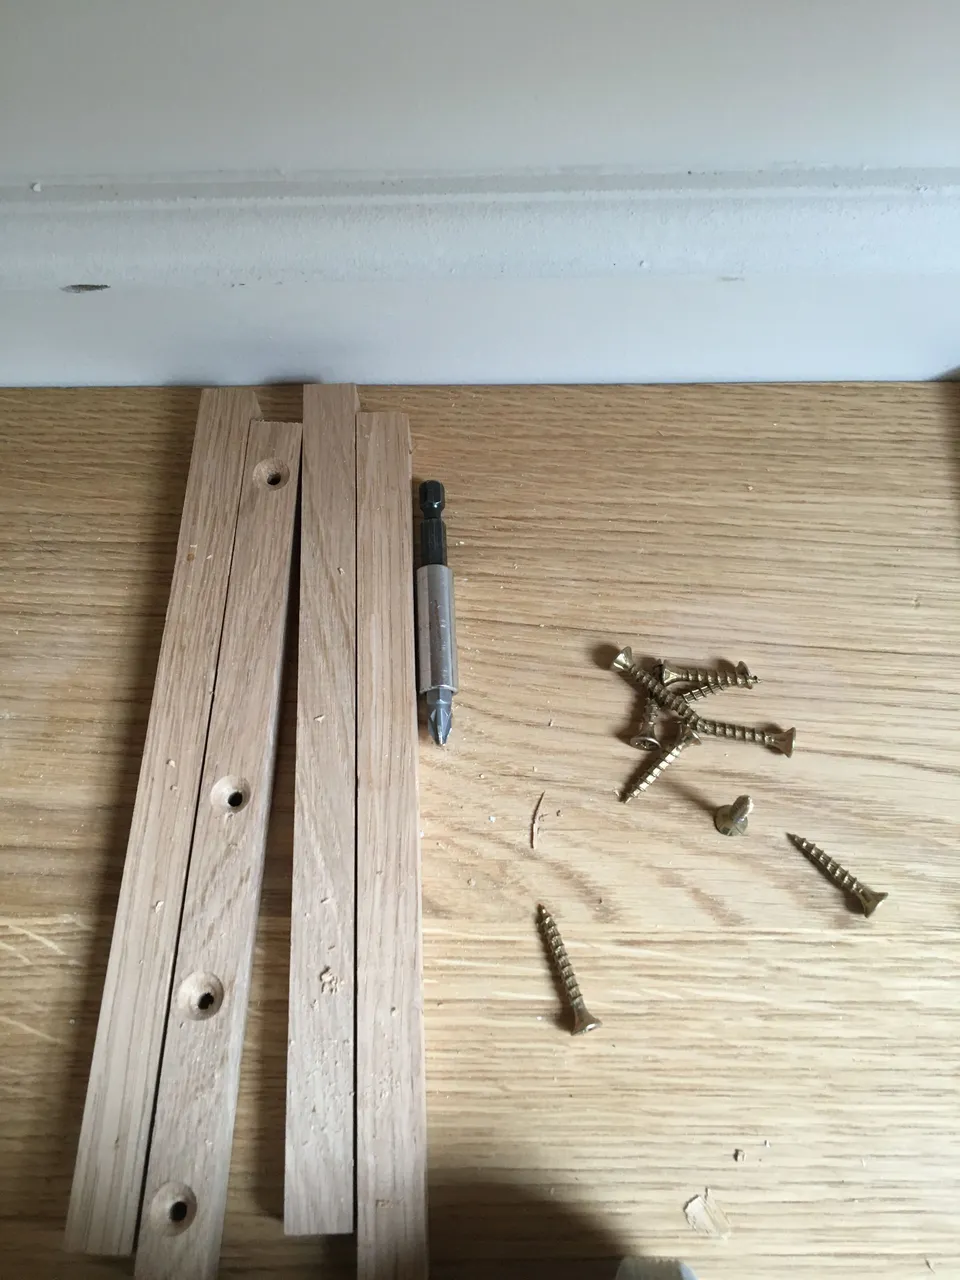
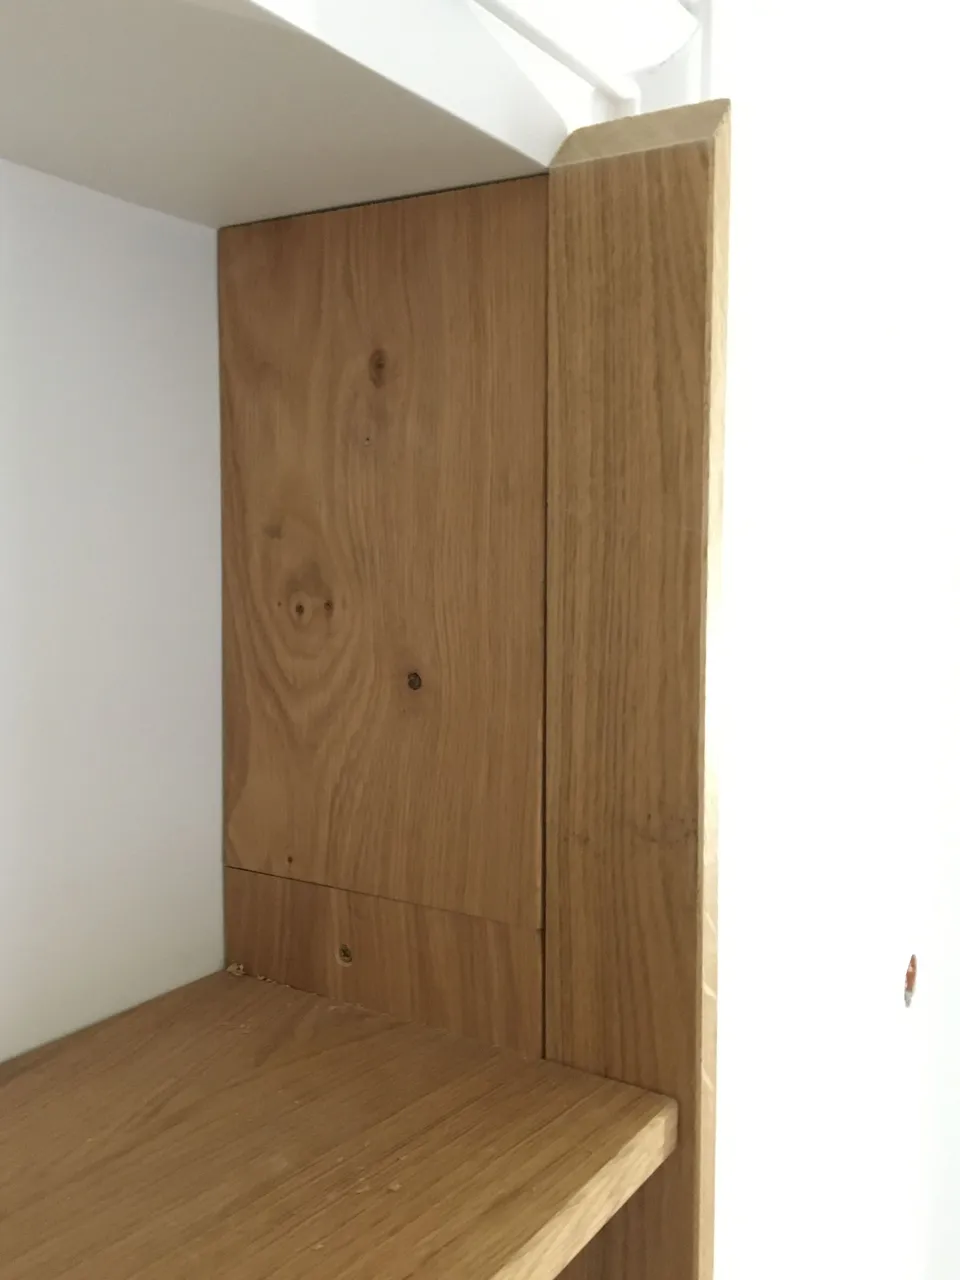
We use these small cleats which are fixed either in the wall or in the uprights of the bookcases.
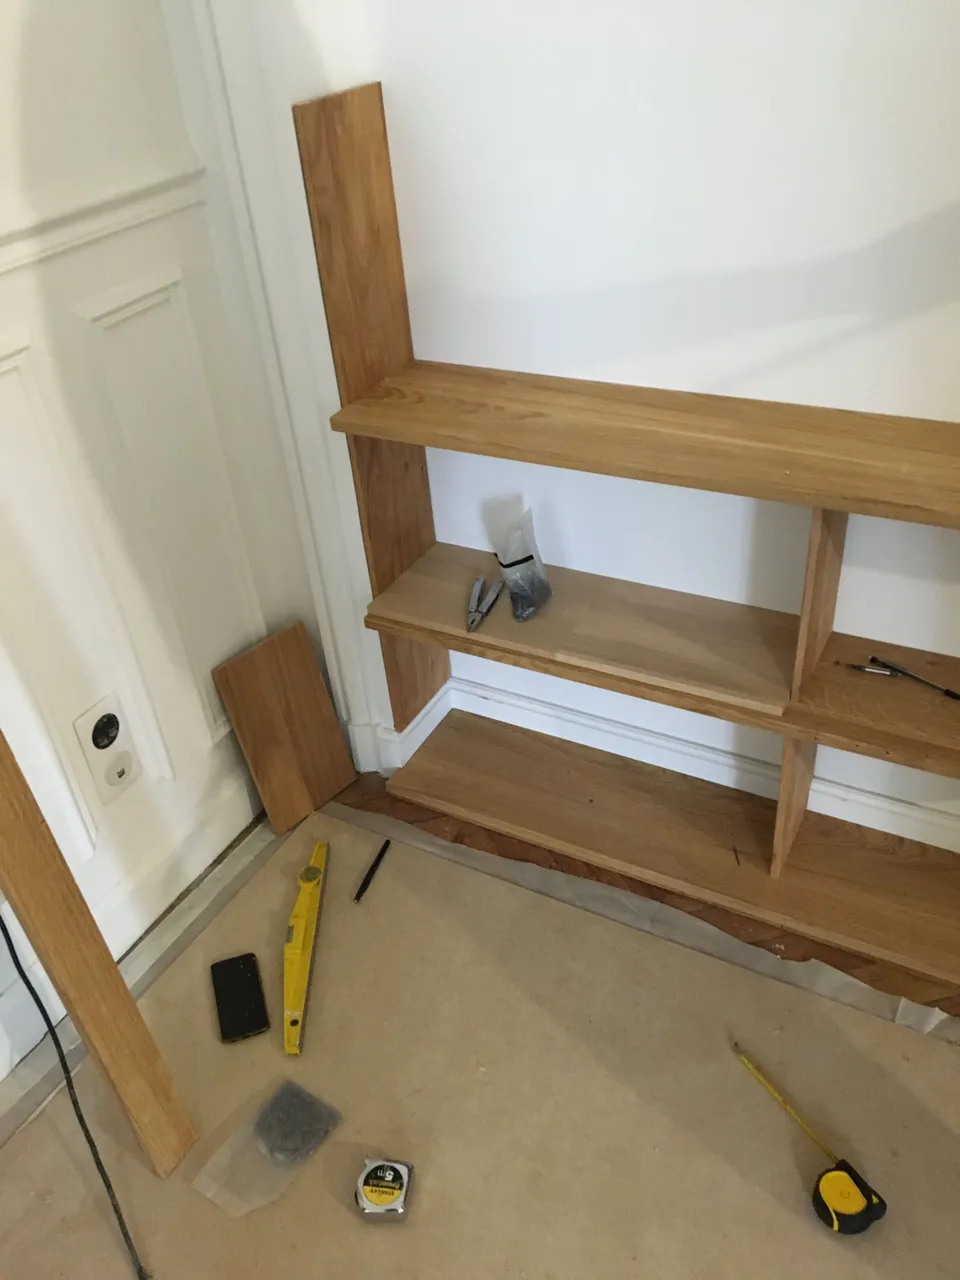
Then, we start to assemble, floor by floor, by repeating the same procedures: measurements - brackets - fixing the board - etc.
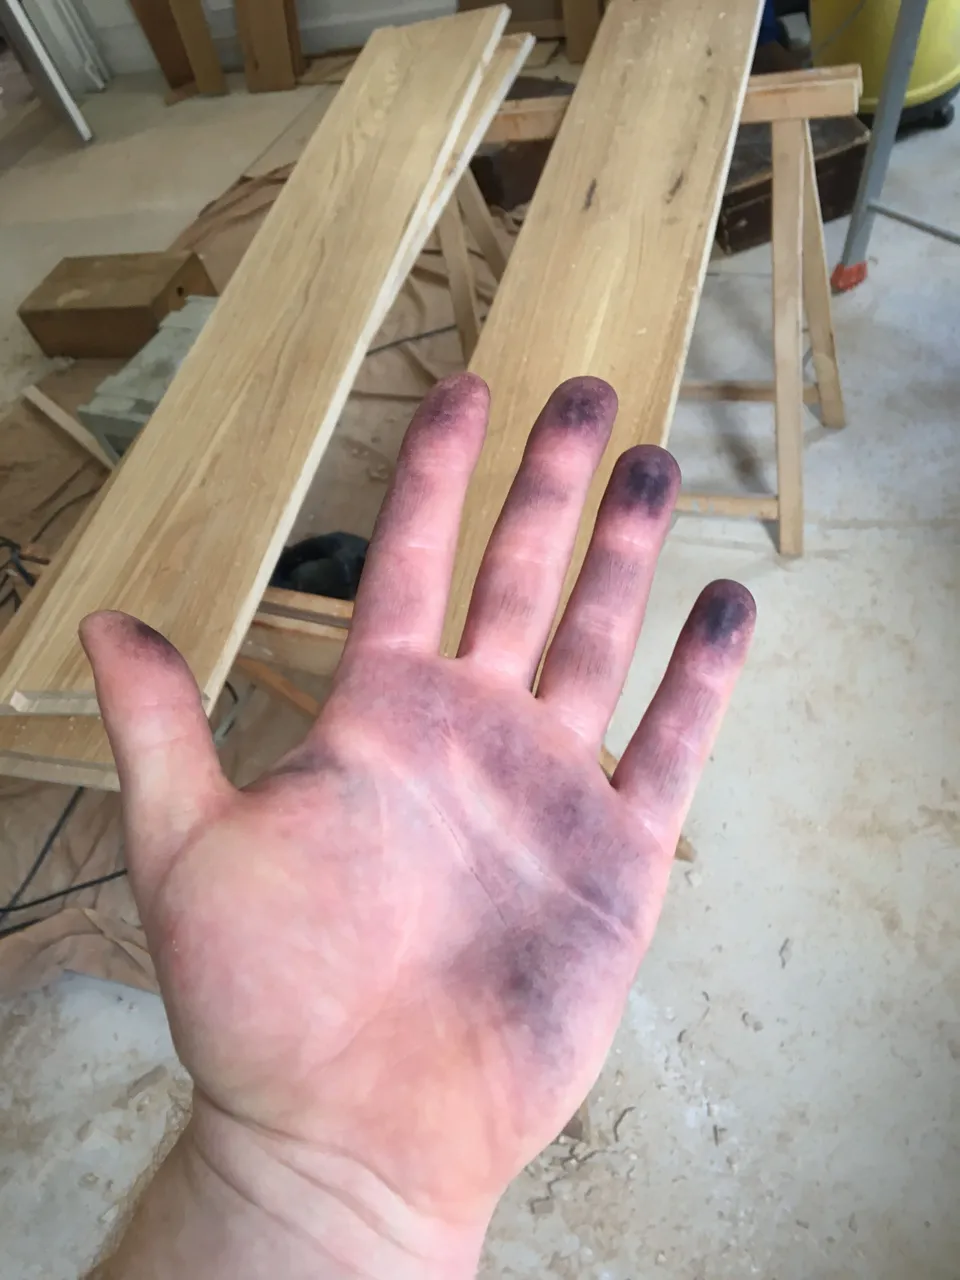
Always the hands well stained by the work of solid oak :)
Below, a small finishing detail with the "spacers" used to measure and support the different levels of boards.
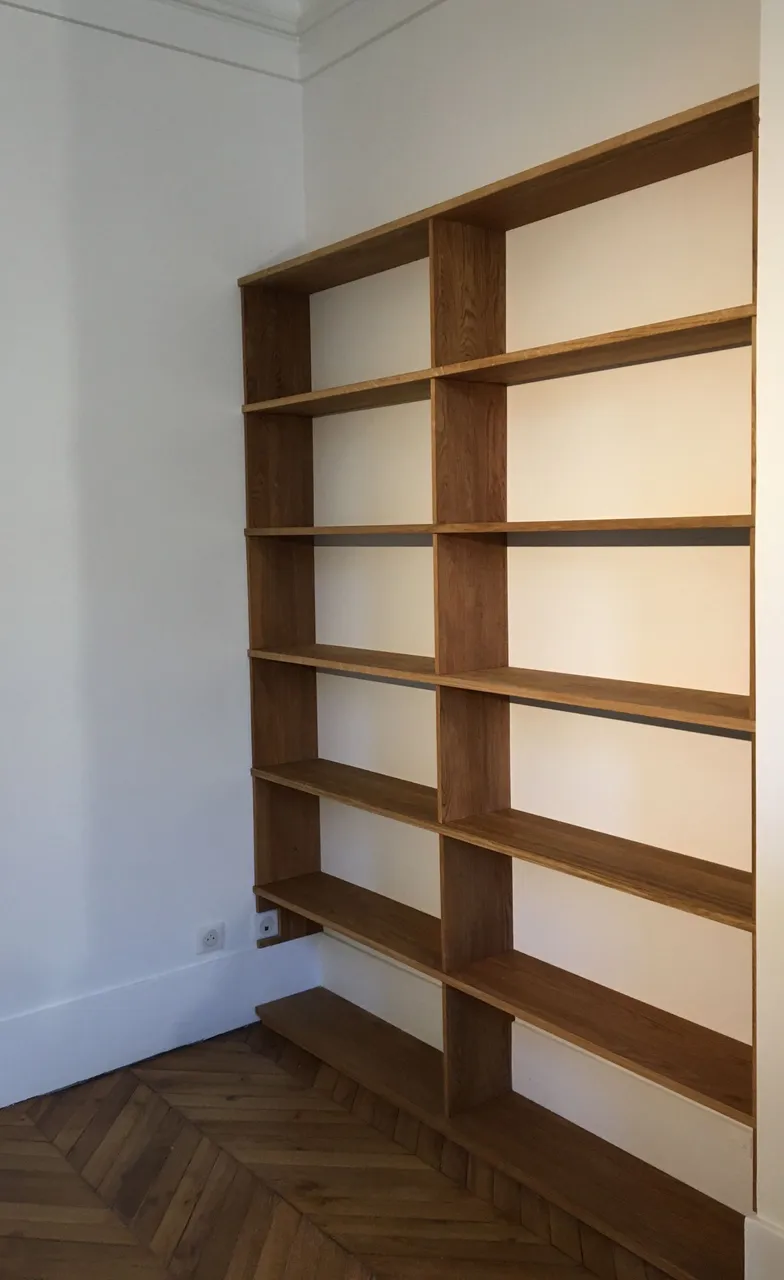
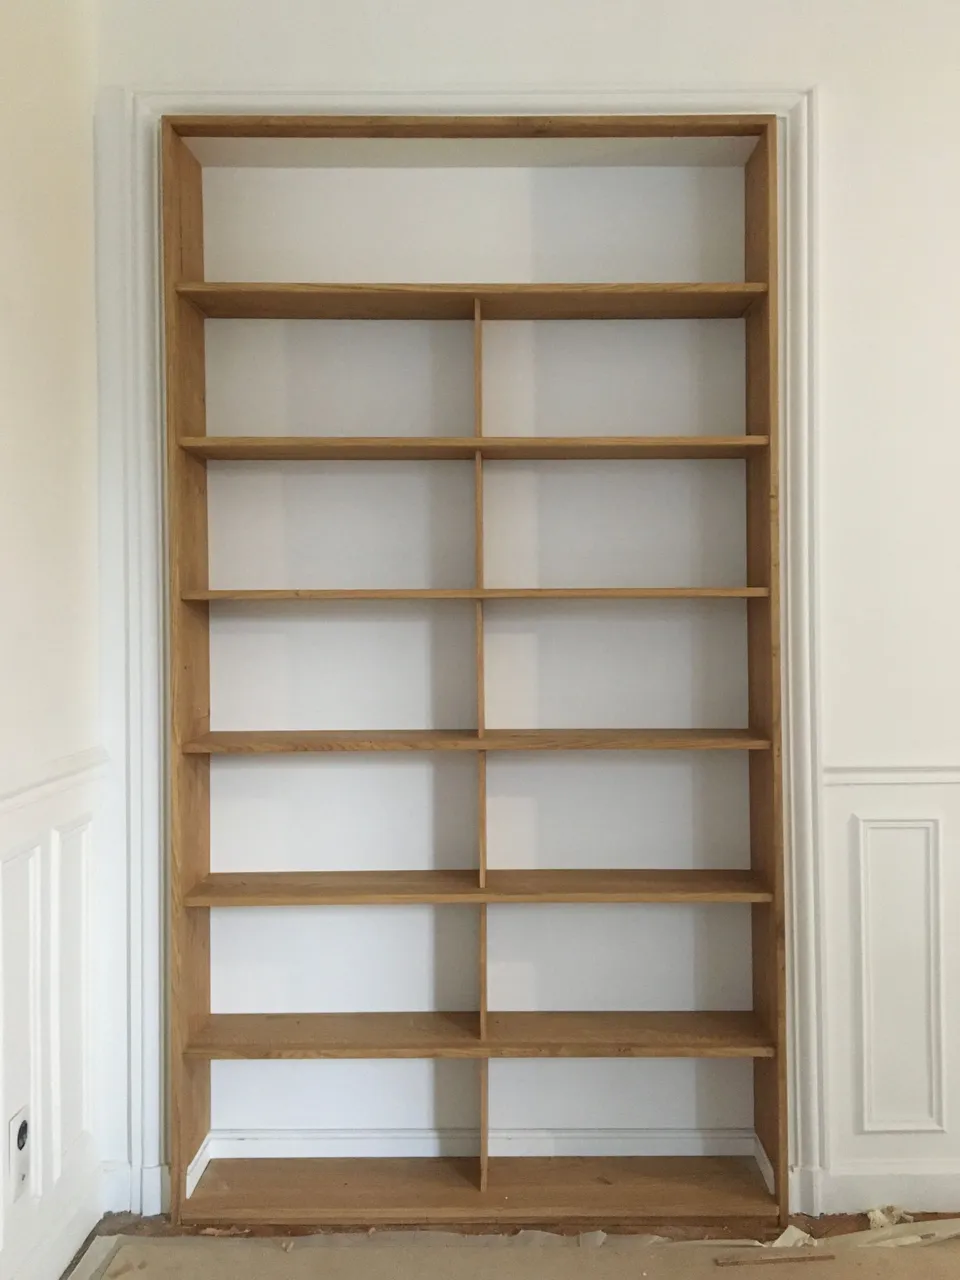
Here, one of the finished bookcases.
Here is another one, with no other fixing system than the small cleats (see previous photos) which are wedged in the rebates of the boards. Invisible system in the cornice !
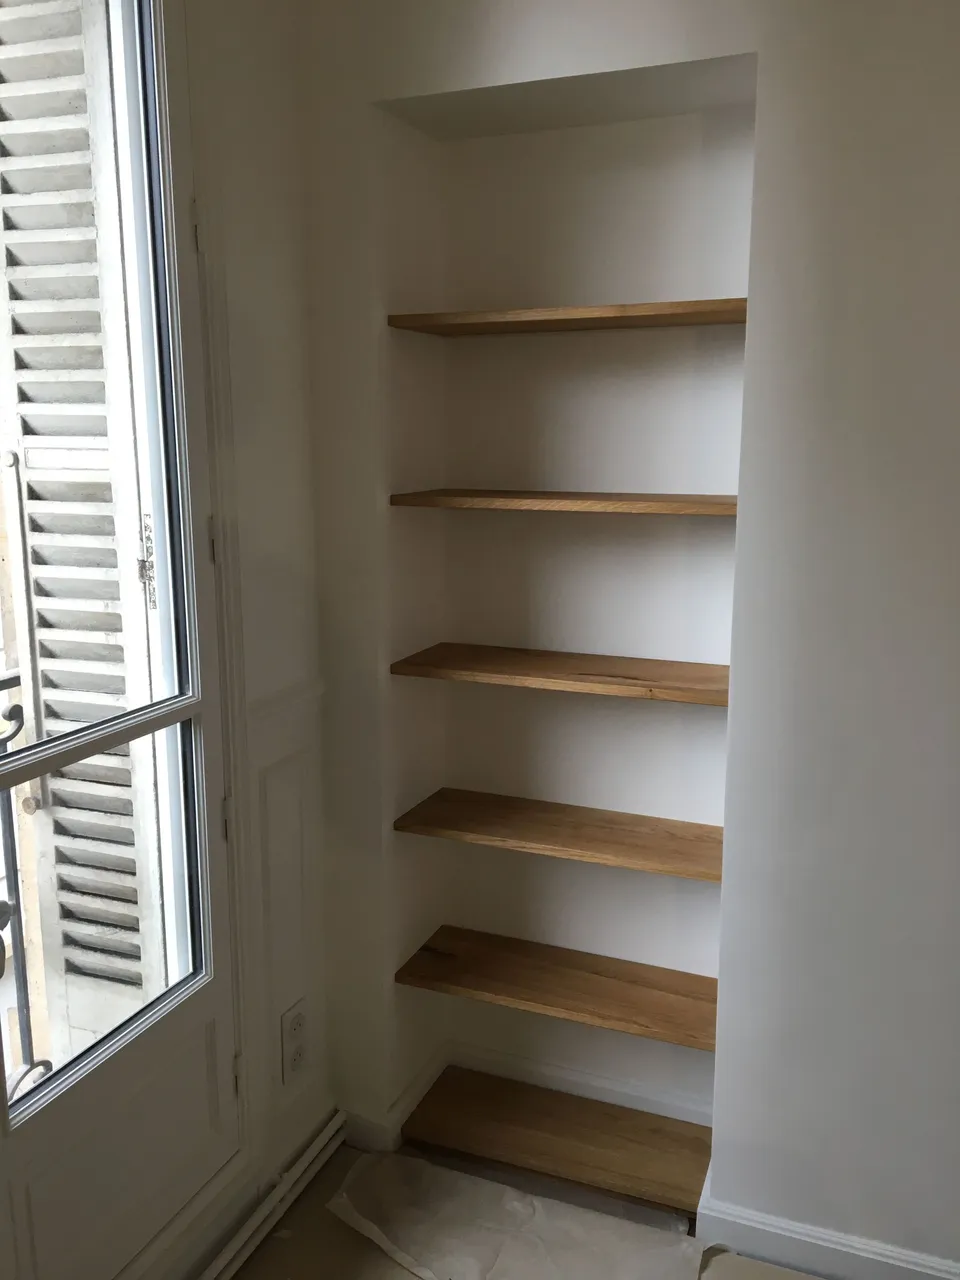
And to finish, here is perhaps my favourite, sober, stable and balanced !
I didn't get to take many photos and as with the articles here, I try to favorise quality over quantity - it's not always easy if you want to share a lot ! So unfortunately the details of each step are missing, because if I had stopped at each one, we wouldn't have finished and this article would still take a while to see the light of day 😉
I hope you have enjoyed this article. It goes without saying, please do not hesitate to ask me questions if you are interested, I will be happy to answer them. Your suggestions or feedback are also welcome !
The weekend is just right for me to take some time off and get back to gardening !
Take care of yourself and your loved ones,
Have a good weekend !
Enfin !
Comme promis quelques jours plutôt, voici une petite update de cette session de travail du bois. Les bibliothèques sont bien installées au mur :) C'était une vraie mission...! Pour l'article précédent, c'est ici !
On démarre sans attendre avec la pause de la plinthe, le tout à niveau bien-sûr et avec des petites cales vissées dans le sol.
On utilise ces petits tasseaux qui eux sont fixés soit dans le mur, soit dans les montants des bibliothèques.
Puis, on commence à monter, étage par étage, en répétant les mêmes procédés : mesures - tasseaux - fixation de la planche - etc.
Toujours les mains bien teintées par le travail du chêne massif :)
Ci-dessous, un petit détail de finition avec les "espaceurs" qui servent à mesurer et à soutenir des différents niveaux de planches.
Ici, une des bibliothèques terminée.
En voilà une autre, sans autre système de fixation que les petits tasseaux (voir photos précédentes) qui se calent dans les feuillures des planches. Système invisible dans la corniche !
Et pour finir, voici peut-être ma préférée, sobre, stable et équilibrée !
Je n'ai pas pu prendre beaucoup de photos et comme pour les articles ici, j'essaie de privilégier la qualité à la quantité - ce n'est pas toujours simple si l'on souhaite beaucoup partager ! Donc il manque malheureusement le détail de chaque étape, car si je m'étais arrêté à chacun de ceux-ci, nous n'aurions pas fini et cet article mettrai encore du temps à voir le jour 😉
J'espère que vous aurez apprécié cet article. Cela va sans dire, n'hésitez vraiment pas à me poser des questions si cela vous intéresse, je me ferais un plaisir d'y répondre. Vos suggestions ou retours sont aussi les bienvenus !
Le weekend arrive à point pour prendre un peu de repos et me remettre notamment au jardinage !
Portez-vous bien ainsi que vos proches,
bon weekend à tous !