Hola, hola, buenas noches y bienvenidos mis amigos a mi espacio preferido!.
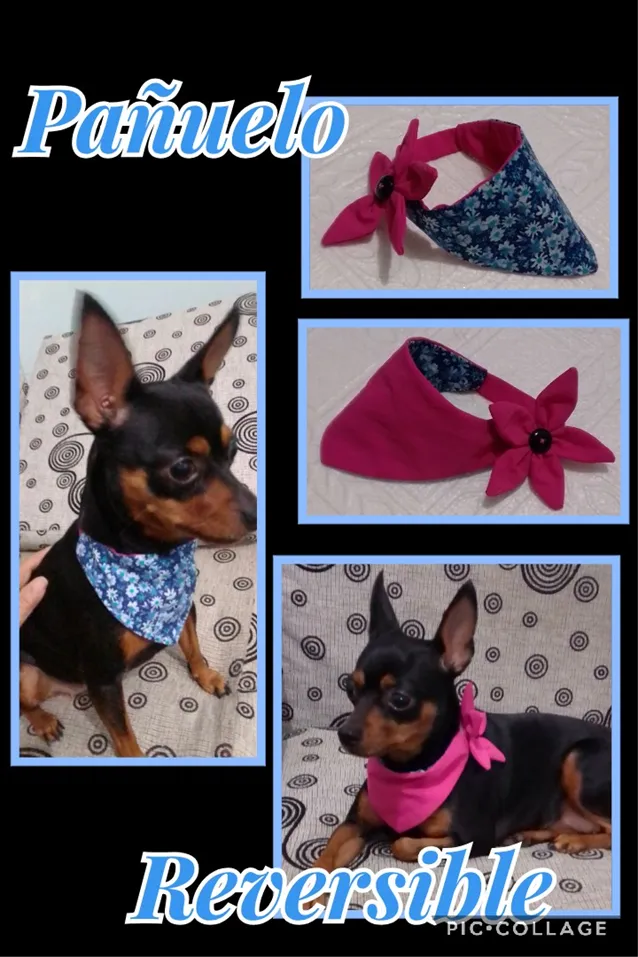
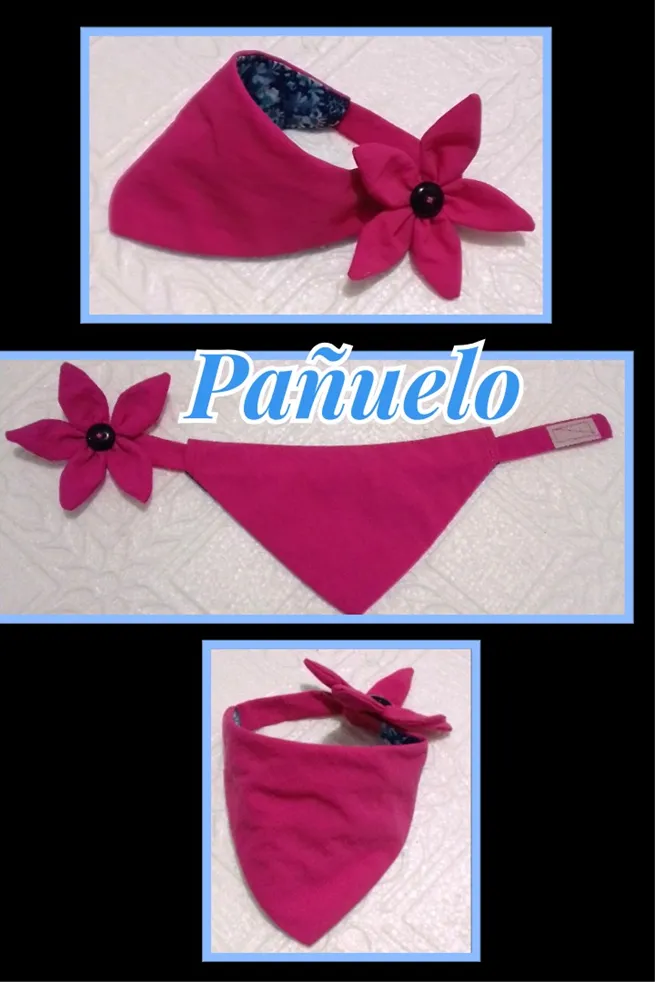
Como siempre quiero compartirles un tutorial lindo y fácil, hoy les enseñaré como realizar un Pañuelo Reversible y al que le puedes cambiar la correa y ponerle cinta ó cordón si lo prefieres.
Las medidas y los colores dependen del tamaño de tu mascota y de tu gusto, a mí me encantan los colores vivos para París. Aunque a ella pareciera que todo le queda lindo! Jajajaja! es que yo la veo con los ojos del amor y creo todo le queda bello.
Pienso que a ustedes les pasa igual con sus mascotas.
Entonces para este paso a paso necesitas los siguientes materiales:
| Retazos de tela (2) colores | Cierre mágico |
|---|---|
| Tijera | Cinta métrica |
| Hilo | Aguja y alfileres |
| Molde o patrón | Palito de madera |
| Máquina de coser (si tienes) | Plancha para ropa |
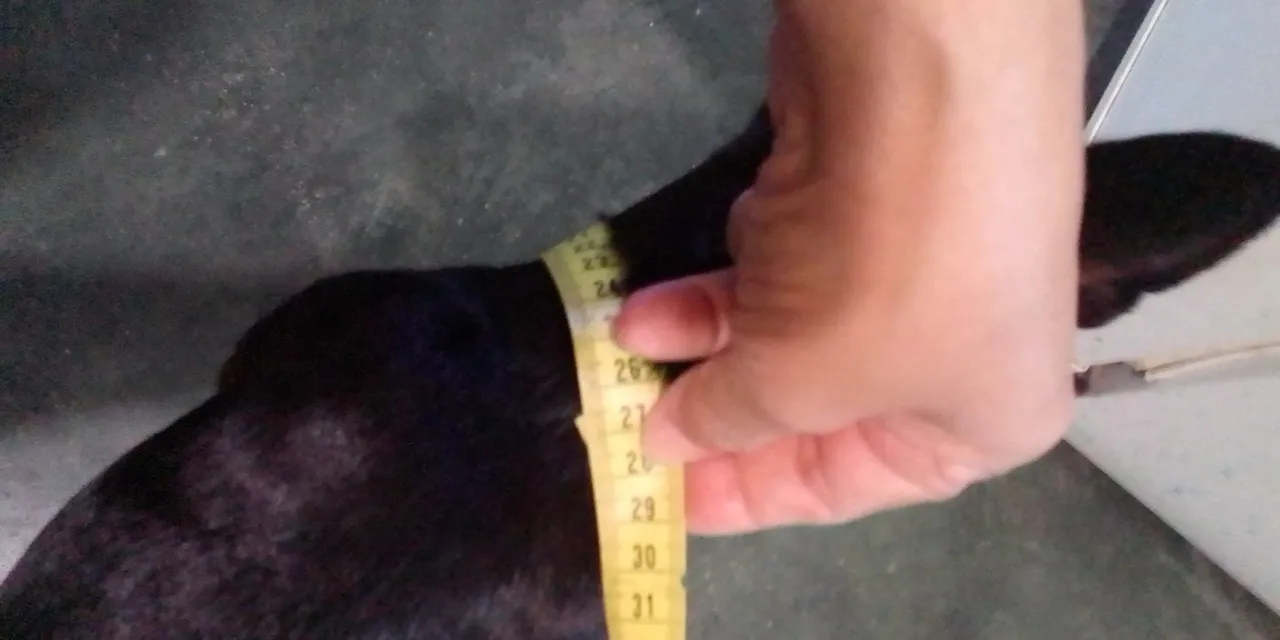
- Medir el contorno del cuello de tu mascota.
- Hacer el molde marcando en una hoja la altura (desde donde comienza el cuello hasta el largo deseado) y el ancho aproximado de oreja a oreja y trazas un triángulo, después le adicionas en la parte de arriba 5 cms y por los lados 1 cm para la costura.
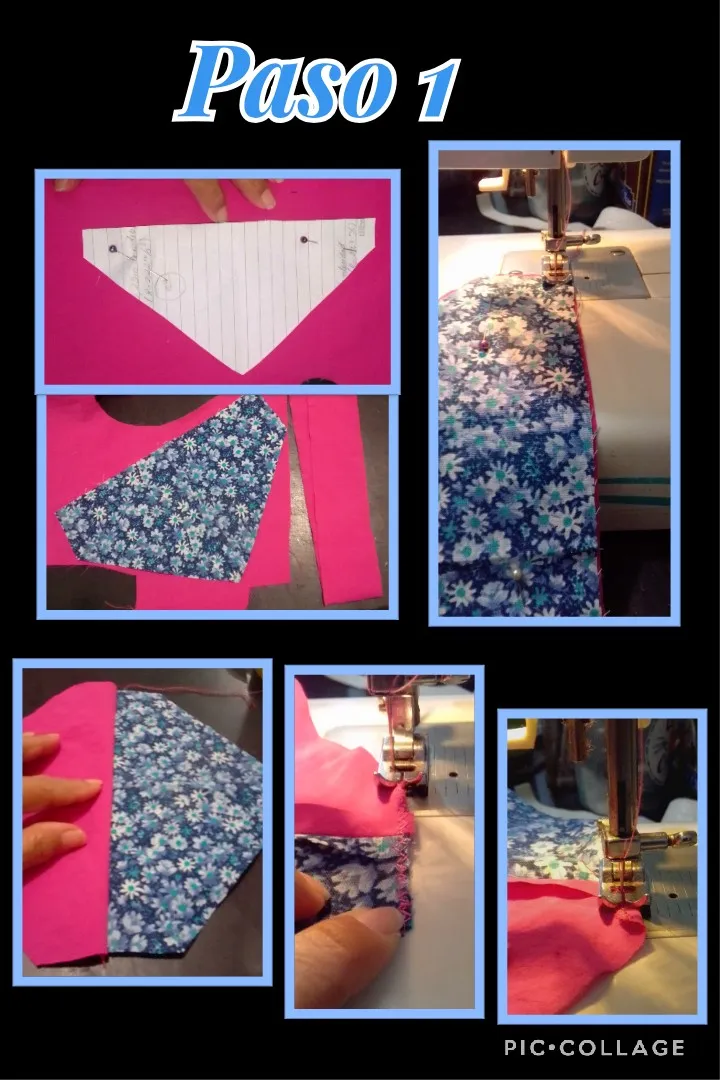
- Fijar con alfileres el molde sobre la tela y recortar dos (2) piezas en los colores de tu preferencia.
- Recortar una tira del largo del cuello y aumentar 3cms más a cada lado.
- Coser uniendo las dos piezas en la parte de arriba.
- Abrir las dos piezas y coser con zic zac las orillas de los lados y luego doblar hacia adentro y pasar costura recta en el mismo lugar..(Ver foto)
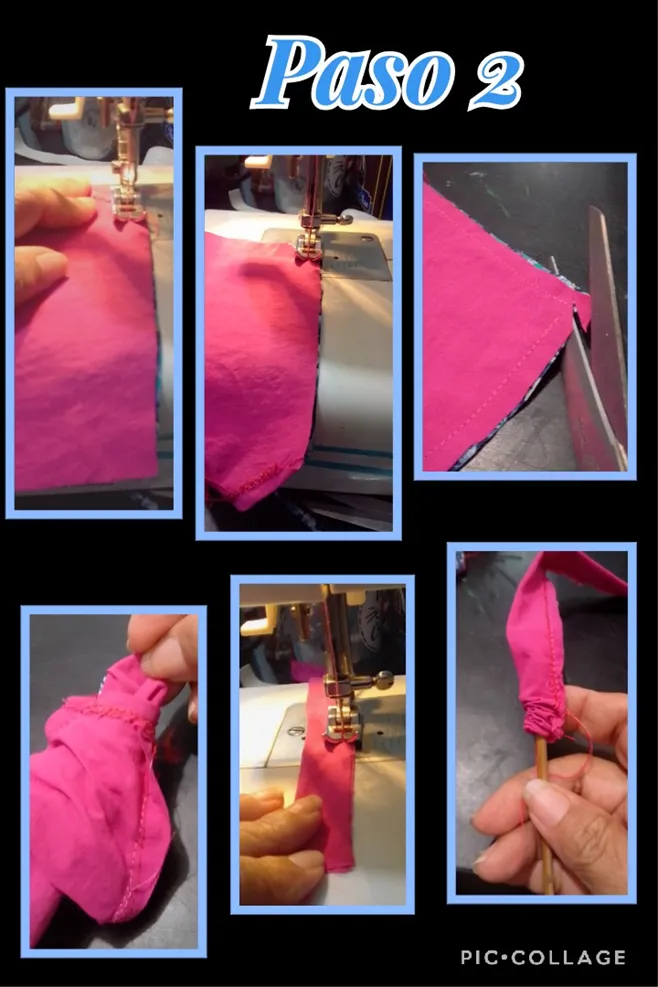
- Unir las caras del pañuelo y coser las orillas restantes dejando los lados abiertos para luego voltear.
- Recortar la punta de abajo del pañuelo.
- Voltear sacando por uno de los extremos.
- Pasar costura a la tira y voltear con la ayuda de un palito de madera.
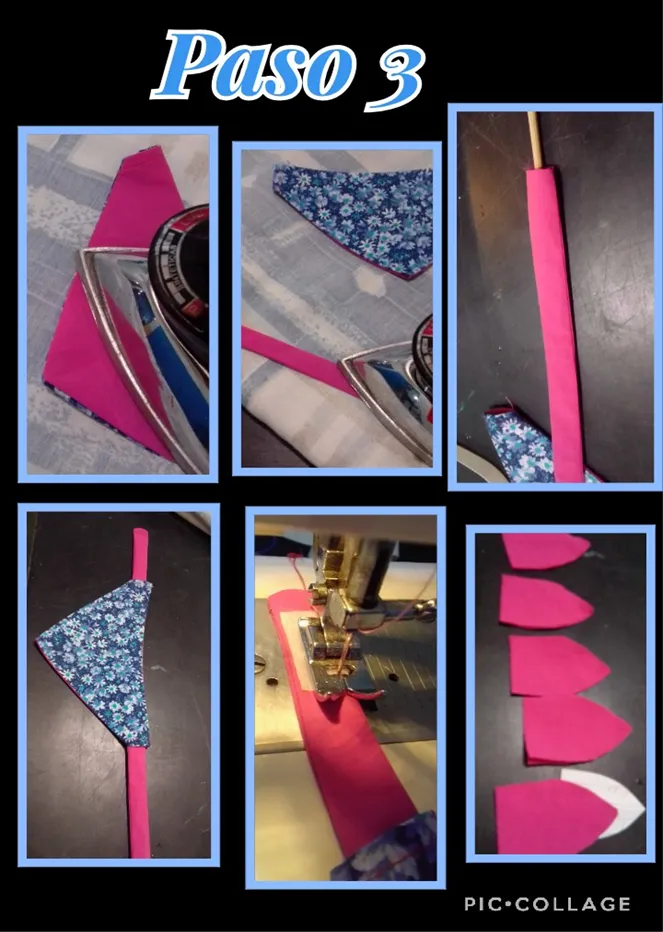
- Planchar las piezas, y meter la tira por dentro del pañuelo, con un palito de madera.
- Recortar dos cuadritos de 3 cms de largo y coser en los extremos de la tira.
- (Opcional)..Recortar 5 pétalos dobles.
 -
-
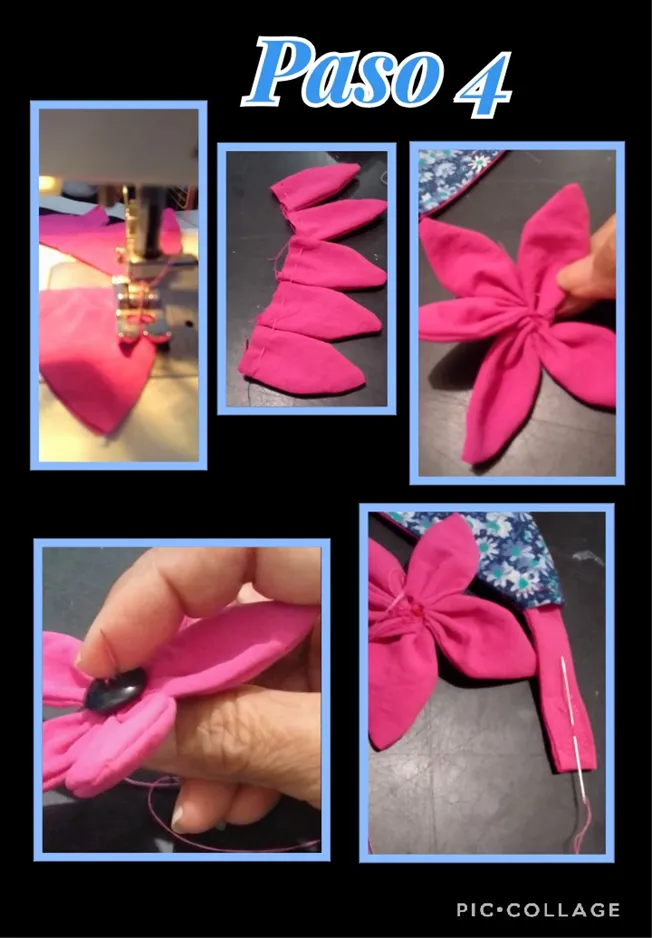
- Coser uno a uno cada pétalo, voltear y luego hilvanar por toda la orilla uniéndolos.
- Halar poco a poco el hilo hasta formar la flor, rematar sin cortar el hilo, y para decorar en el centro le coses un botón, y con el mismo hilo coser en el extremo que va en la parte de arriba donde la tira cerrará, rematar bien para fijar la flor
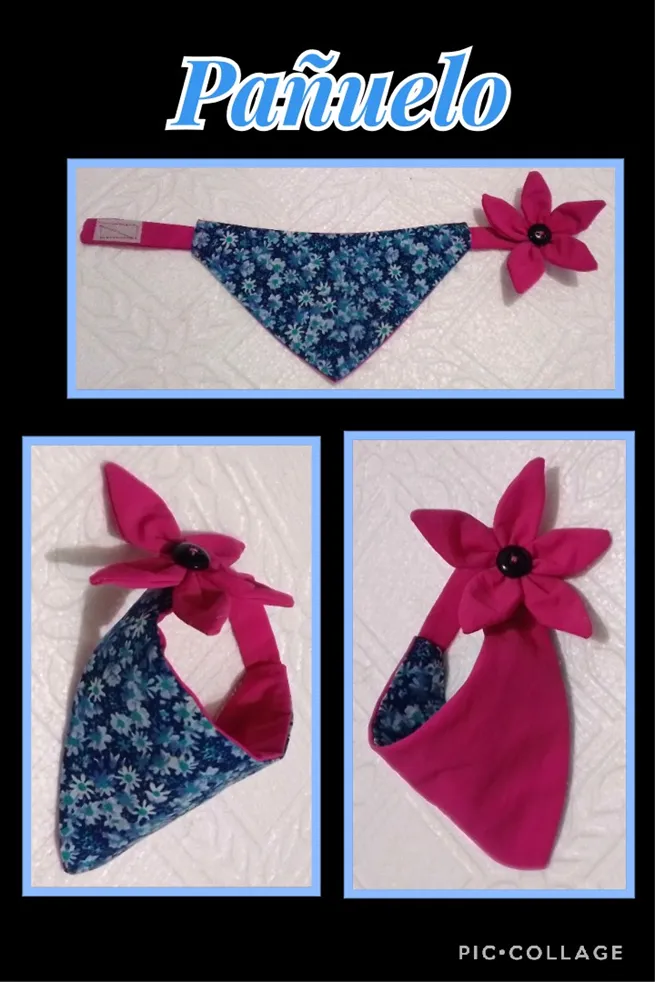
y así queda listo este lindo Pañuelo.
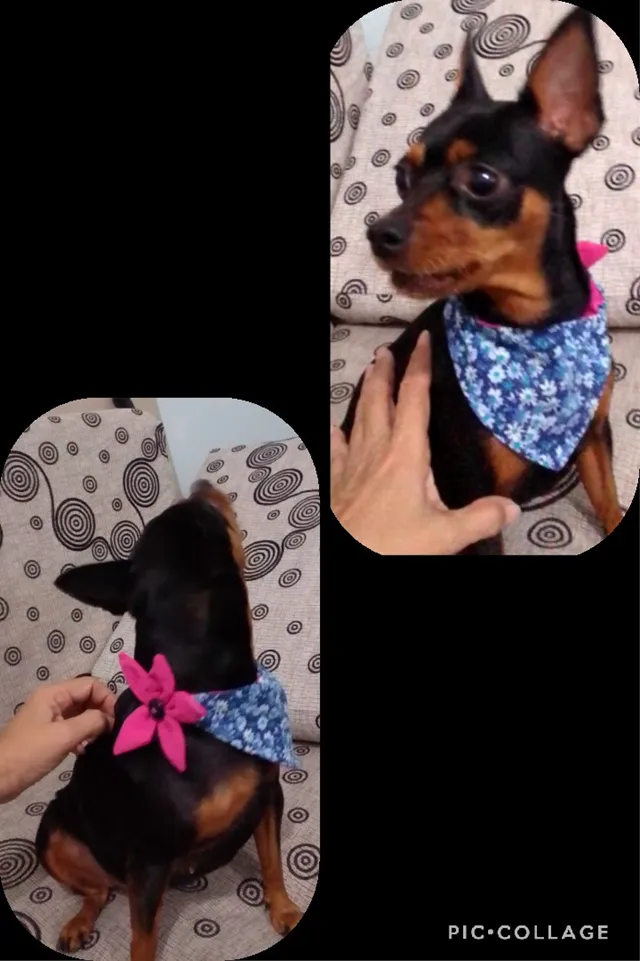
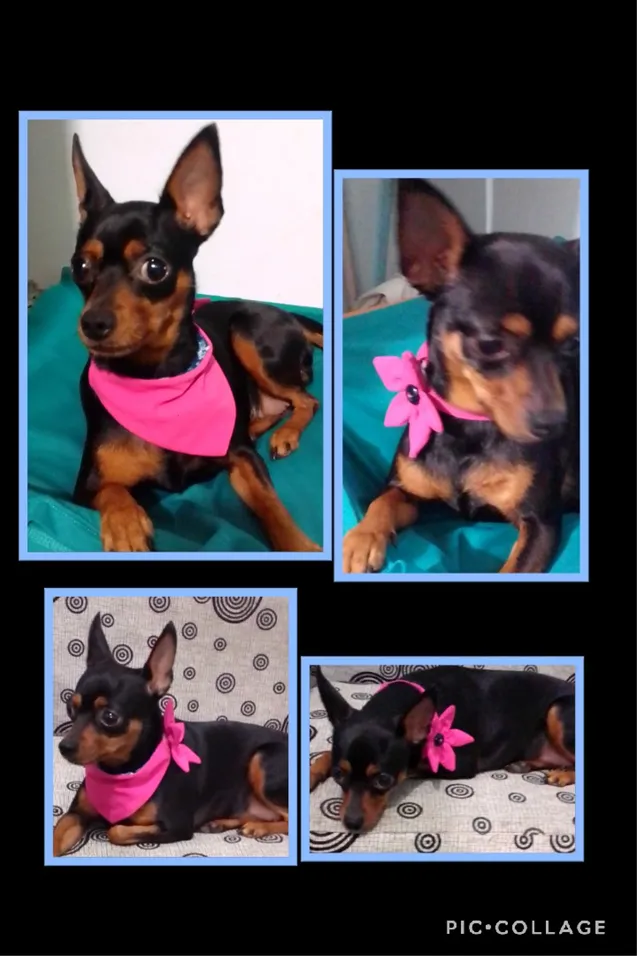
Ahora verás a mi linda modelo París, luciendo su pañuelo!
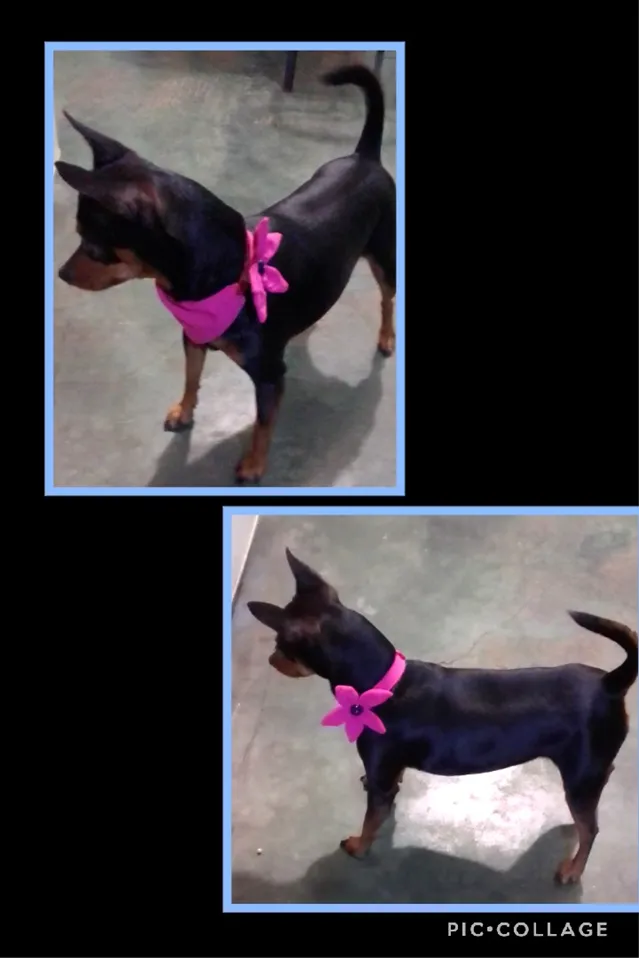
Jajajajaja! hoy no quería fotos!
Ahora me despido no sin antes decirles que esta publicación esta traducida por DeepL, con etiquetas de HTML, las fotos son tomados por mi teléfono Blu G5 y editadas en Pic Collage.
Muchas gracias por la visita, espero te guste mi Paso a Paso hecho con cariño para tí.
A @mariajcastro y @carolinacardoza, las invito a ver este fácil y bonito tutorial y se animen a realizar este Pañuelo, estoy segura que sus mascotas se verán lindas.
Saludos colmena-196708.
Hello, hello, good evening and welcome my friends to my favorite place!
As always I want to share with you a nice and easy tutorial, today I will show you how to make a Reversible Scarf and you can change the strap and put ribbon or cord if you prefer.
The sizes and colors depend on the size of your pet and your taste, I love bright colors for Paris.
Although she looks like everything looks cute on her! hahahaha! I see her with the eyes of love and I think everything looks beautiful on her.I think you do the same with your pets.
So for this step by step you need the following materials:
| Fabric scraps (2) colors | Magic Zipper |
|---|---|
| Scissors | Tape measure |
| Thread | Needle and pins |
| Mold or pattern | Wooden stick |
| Sewing machine (if you have one) | Clothes iron |
.
- Measure the contour of your pet's neck.
- Make the mold by marking on a sheet the height (from where the neck starts to the desired length) and the approximate width from ear to ear and trace a triangle, then add 5 cm on the top and 1 cm on the sides for the seam.
- Pin the mold to the fabric and cut out two (2) pieces in the colors of your choice.
- Cut a strip to the length of the collar and add 3 cm more on each side.
- Sew the two pieces together at the top.
- Open the two pieces and zic zac stitch the edges of the sides and then fold inwards and sew a straight seam in the same place...(See photo).
- Join the sides of the scarf and sew the remaining edges together leaving the sides open and then turn over.
- Trim the bottom end of the scarf.
- Turn the scarf over by pulling out one end.
- Stitch the strip and turn over with the help of a wooden stick.
- Iron the pieces, and insert the strip inside the scarf, using a wooden stick.
- Cut out two 3 cm long squares and sew on the ends of the strip.
- (Optional) Cut out 5 double petals.
-
- Sew each petal one by one, turn over and then baste all the way around the edge joining them together.
- Pull the thread little by little to form the flower, finish off without cutting the thread, and to decorate in the center you sew a button, and with the same thread sew on the end that goes on the top where the strip will close, finish off well to fix the flower.
and this is how this pretty scarf is ready.
Now you will see my pretty model Paris, wearing her scarf!
Hahahahahaha! I didn't want pictures today!
Now I say goodbye before telling you that this post is translated by DeepL, with HTML tags, the photos are taken by my Blu G5 phone and edited in Pic Collage.
Thank you very much for visiting, I hope you like my Step by Step made with love for you.
To @mariajcastro and @carolinacardoza, I invite you to watch this easy and cute tutorial and encourage you to make this Scarf, I'm sure your pets will look cute.
Greetings beehive-196708.