EN
"Citizen Science" Project Activity Report 5 - Exploring a neutrino mass signal at CERN’s Large Hadron Collider
By Enio...
Summary
This is the fifth installment of the report of activities that I do as a participant in the participatory research project Citizen science particle physics project on Hive led by @lemouth and undertaken by a number of blockchain science enthusiasts. It describes the tasks that help us explore a neutrino mass signal at CERN’s Large Hadron Collider. The instructions for this can be found in this post. I managed to complete tasks 1, 2 and 3. There is one result for task 3 that does not seem to match the expected one. As for assignments 1, 2 and 3, I am still working on them. This post may receive updates in the short term as I make another attempts to do the assignments. I thank @lemouth in advance for the respective review and advice.
Task 1: Installation of a particle physics model in MG5aMC
In order to be able to simulate the signal, it is necessary to add a database model to MG5aMC. To do this I ran:
cd MG5_aMC_v2_9_9/models;
curl https://feynrules.irmp.ucl.ac.be/raw-attachment/wiki/HeavyN/SM_HeavyN_NLO_UFO.tgz > model.tgz;
tar xf model.tgz;
rm -f model.tgz
I did not have to modify the path given in the instructions, as it matches mine. I can confirm that I have obtained a Python module that according to the instructions corresponds to the UFO model.
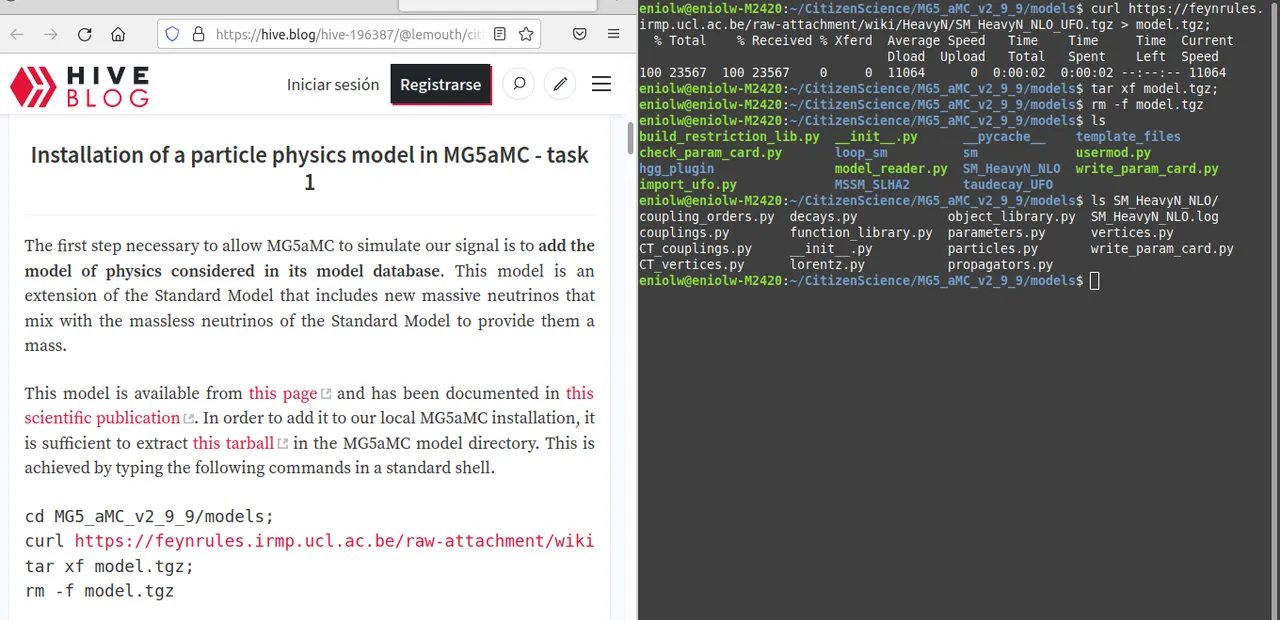
⬆️ Image 1: There it is
Task 2: Preparing the simulation of a heavy neutrino signal
I proceed to execute the commands that will allow me to reproduce the purple WW line shown in figure 2 of the post with the instructions. To do this I run MG5aMC and then a series of commands that will allow me to covert the UFO model from Python2 to Python3, which is the version I have installed. So I executed inside MG5_aMC:
set auto_convert_model T
import model SM_HeavyN_NLO
define p = g u c d s u~ c~ d~ s~
define j = p
generate p p > mu+ mu+ j j QED=4 QCD=0 $$ w+ w- / n2 n3
add process p p > mu- mu- j j QED=4 QCD=0 $$ w+ w- / n2 n3
output test_signal
I must admit that I am not clear on how this performs the migration to Python3, but my impression is that the commands perform more than that, such as specifications on the particles to collide (two protons) and produce (two anti-muons and two jets). They also create Fortran code for the simulation that is stored in a directory called test_signal. All this is according to the instructions.
Here is the screenshot I got:
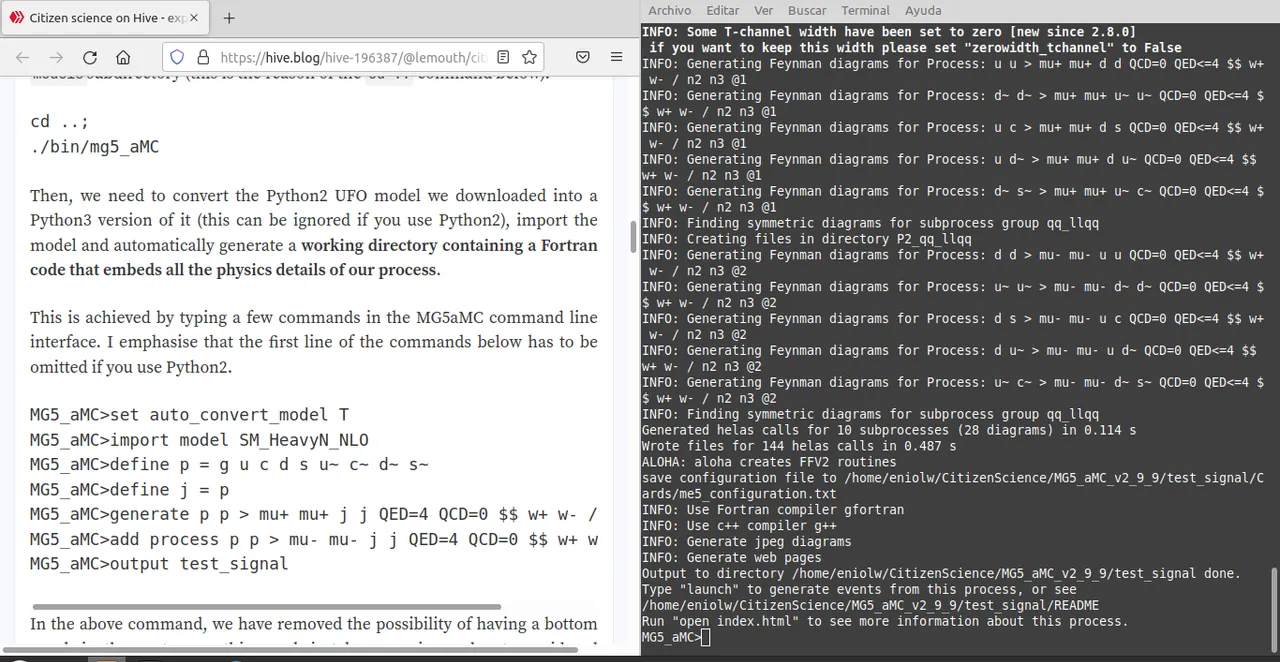
⬆️ Image 2: Entering and executing the commands
And after typing open index.html I got the following:
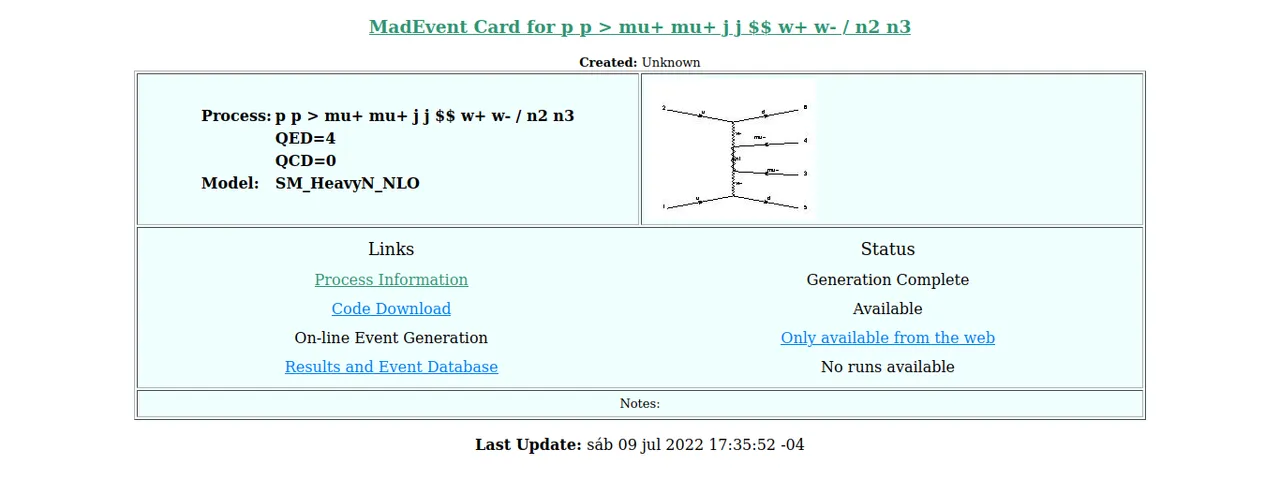
⬆️ Image 3: Results
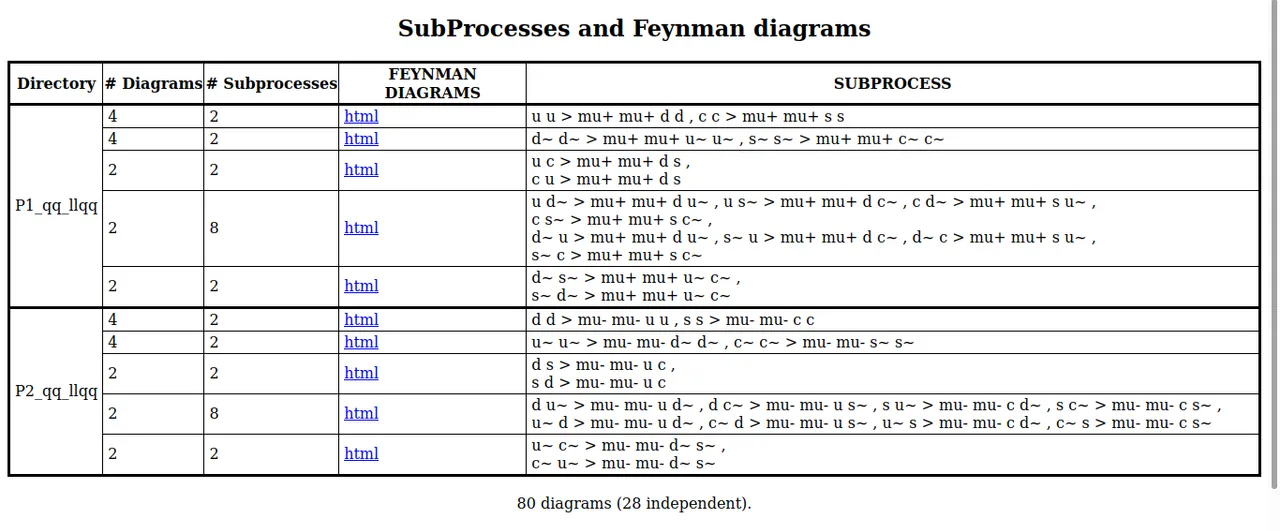
⬆️ Image 4: List of the Feynman diagrams and subprocesses
As for assignment 1 (Feynman diagrams)... To be continued :)
Task 3: Calculation of the signal production rate
Here "we will calculate the rate at which the process of interest occurs at the LHC Run 2". To do this we run on MG5aMC:
launch
Then I press 0 and start modifying the parameters in the configuration files. I opted to use a visual editor (since vim sometimes gives me a headache) for which I traced the path where they were stored. Here are the samples:
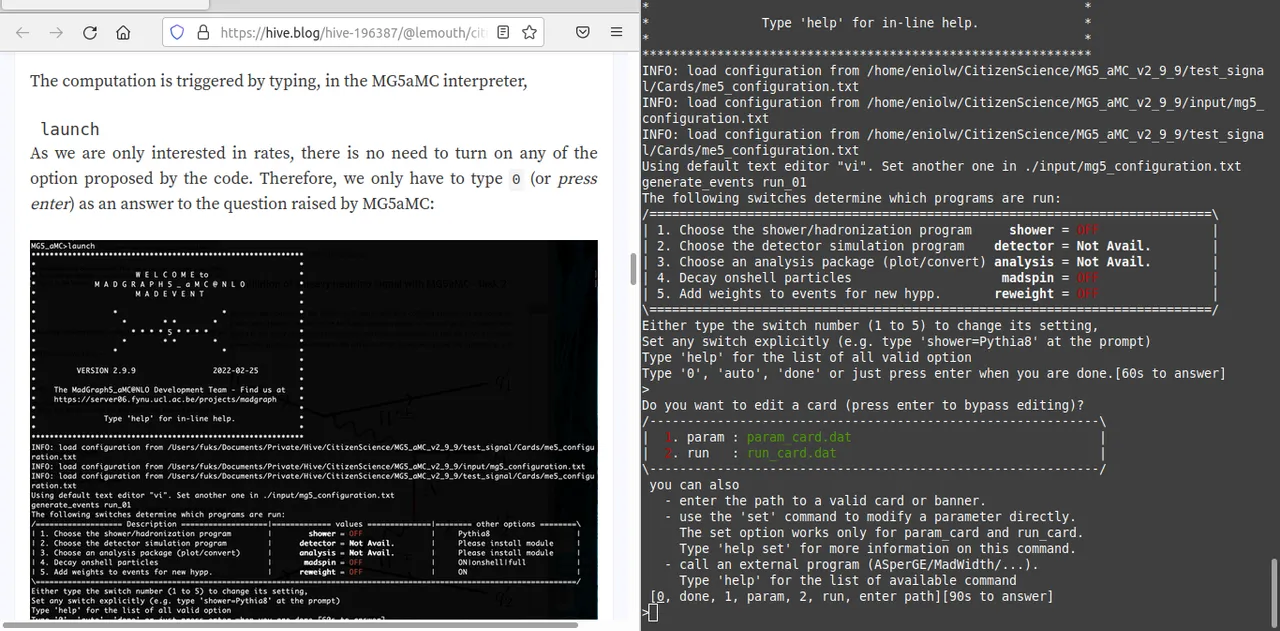
⬆️ Image 4: Getting started
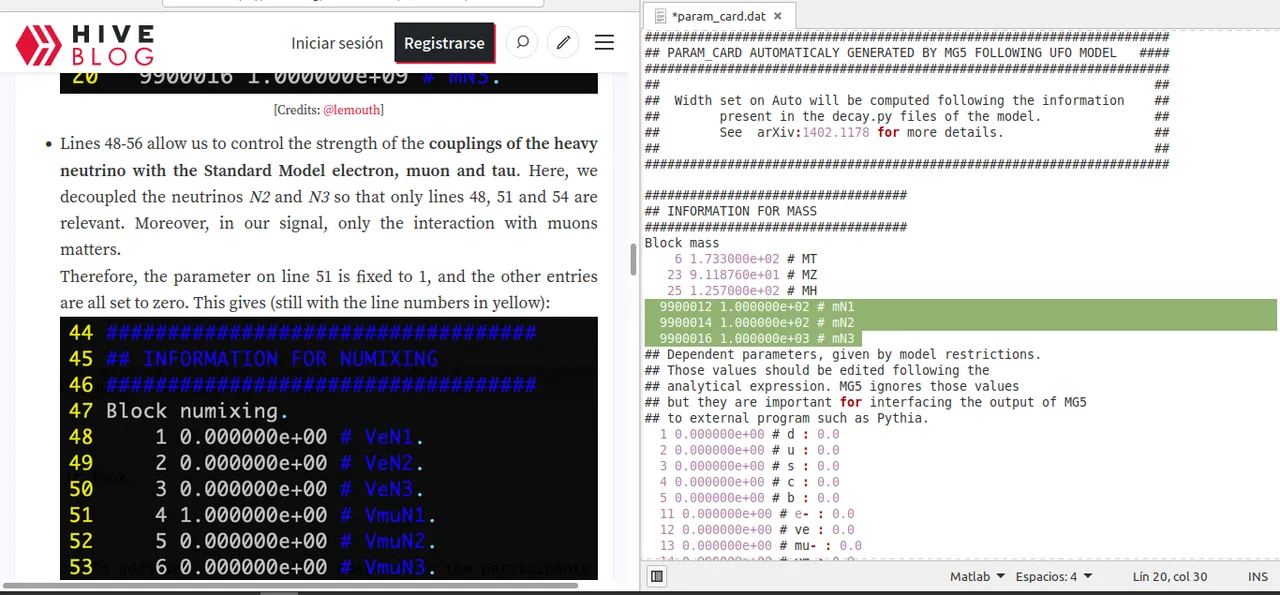
⬆️ Image 5: Modifying parameters in param_card.dat.
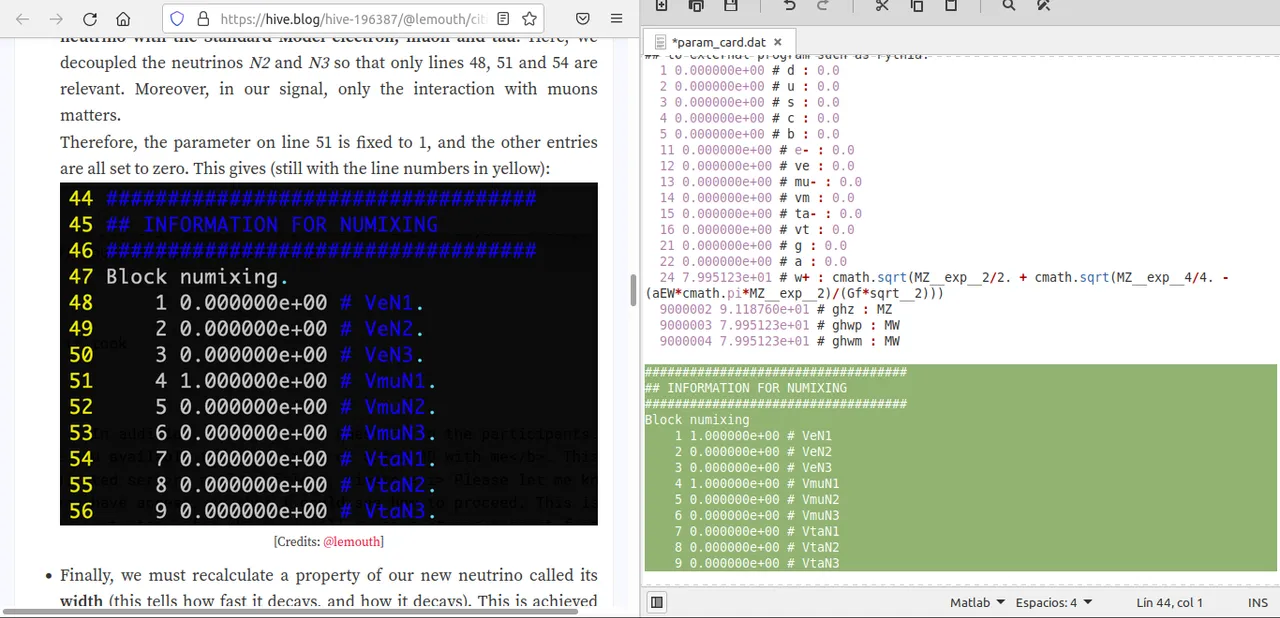
⬆️ Image 6: Modifying parameters in param_card.dat.
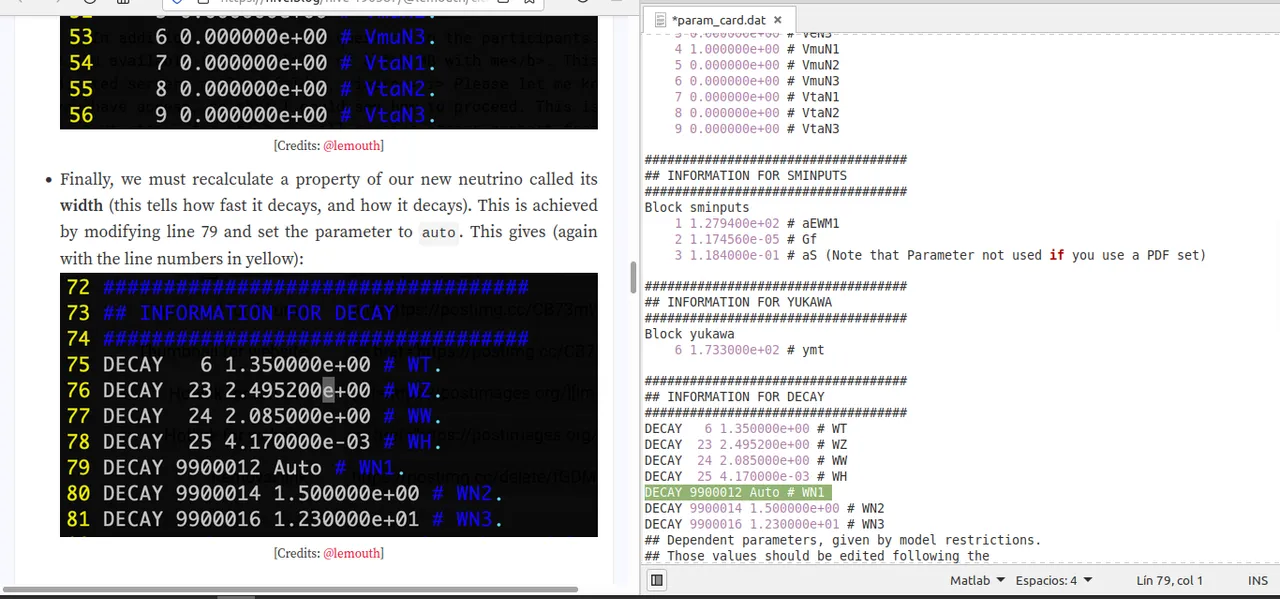
⬆️ Image 7: Modifying parameters in param_card.dat.
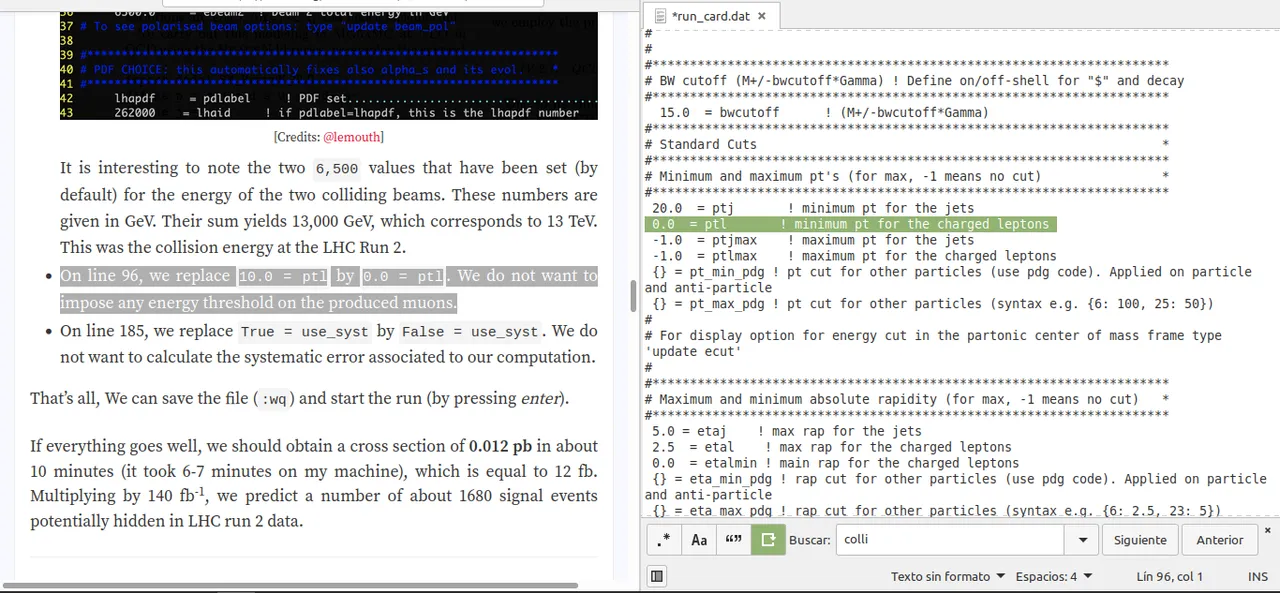
⬆️ Image 8: Modifying parameters in run_card.dat.
After that I pressed enter to start the run and got the following:
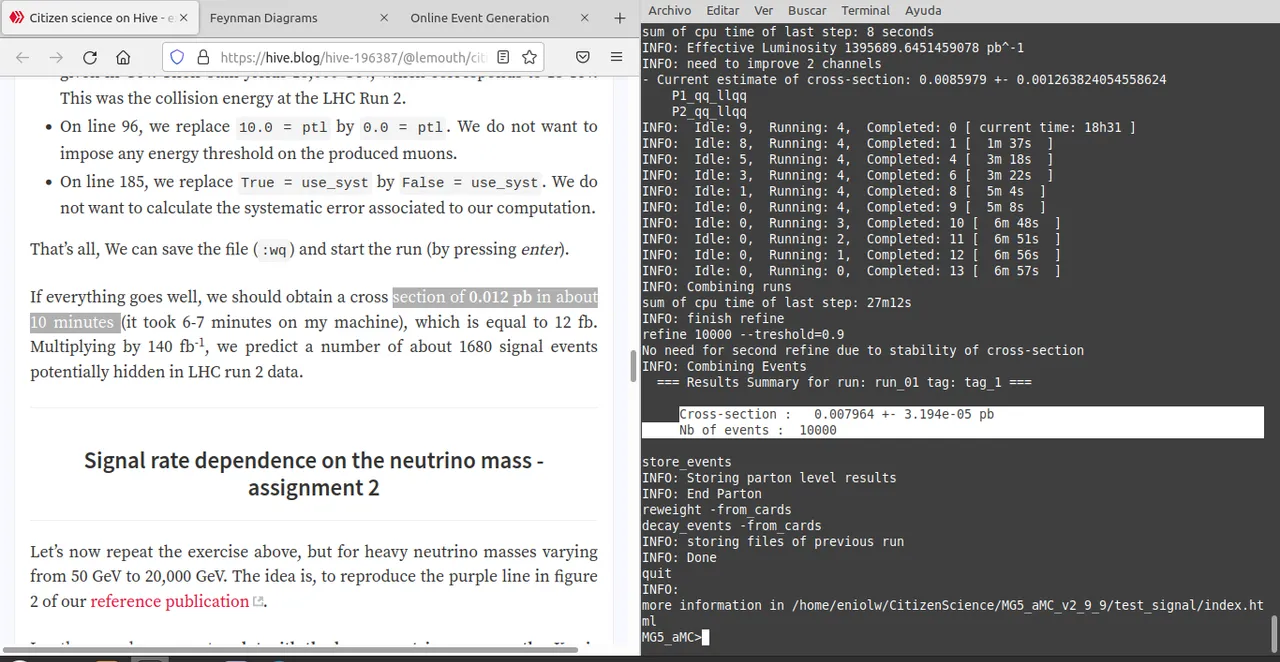
⬆️ Image 9: comparing outputs.
However, as you can see my result does not seem to match what I expected. I wonder if I have done something wrong.
As for assignment 2 (Signal rate dependence on the neutrino mass) and assignment 3 (Signal rate at LHC run 3), I am still working on them. At the moment this is what I have. I am waiting for feedback from @lemouth to know how I am doing and how to complete the assignments. Thanks in advance.
Some references
My previous reports
- "Citizen Science" Project Activity Report 1
- "Citizen Science" Project Activity Report 2 - Simulating top quark production at CERN’s Large Hadron Collider
- "Citizen Science" Project Activity Report 3 - Detector Effects and Event Reconstruction
- "Citizen Science" Project Activity Report 4 - Deciphering top quark production at CERN’s Large Hadron Collider
If you are interested in more STEM (Science, Technology, Engineering and Mathematics) topics, check out the STEMSocial community, where you can find more quality content and also make your contributions. You can join the STEMSocial Discord server to participate even more in our community and check out the weekly distilled.
NOTES
- Unless otherwise stated, the images in this post are the author's.
ES
Reporte de actividad del proyecto "Ciencia Ciudadana" 5 - Explorando una señal de masa de neutrinos en el Gran Colisionador de Hadrones del CERN
Por Enio...
Resumen
Esta es la quinta entrega del reporte de actividades que hago como participante del proyecto de investigación participativa Citizen science particle physics project on Hive dirigido por @lemouth y emprendido por una serie de entusiastas de la ciencia en la blockchain. En él se describen las tareas que permiten explorar una señal de masa de neutrinos en el Gran Colisionador de Hadrones del CERN. Las instrucciones para esto se encuentran en este post. He conseguido completar las tareas 1, 2 y 3. Hay un resultado para la tarea 3 que no parece coincidir con el esperado. En cuanto a las asignaciones 1, 2 y 3, todavía estoy trabajando en ellas. Este post puede recibir actualizaciones a corto plazo mientras hago otros intentos de hacer las asignaciones. Agradezco de antemano a @lemouth por la respectiva revisión y consejos.
Tarea 1: Instalación de un modelo de física de partículas en MG5aMC
A fin de poder simular la señal, es necesario añadir una modelo de base de datos a MG5aMC. Para ello ejecuté:
cd MG5_aMC_v2_9_9/models;
curl https://feynrules.irmp.ucl.ac.be/raw-attachment/wiki/HeavyN/SM_HeavyN_NLO_UFO.tgz > model.tgz;
tar xf model.tgz;
rm -f model.tgz
No tuve que modificar la ruta dada en las instrucciones, pues coincide con la mía. Puedo confirmar que he obtenido un módulo de Python que según las instrucciones se corresponden con el modelo UFO.

⬆️ Imagen 1: Aquí está
Tarea 2: Preparar la simulación de una señal de neutrinos pesados
Procedo a ejecutar los comandos que me permitirán reproducir la línea púrpura WW que se muestra en la figura 2 del post con las instrucciones. Para ello ejecuto MG5aMC y luego una serie de comandos que me permitirán covertir el modelo UFO de Python2 a Python3, que es la versión que tengo instalada. De modo que ejecuté dentro de MG5_aMC:
set auto_convert_model T
import model SM_HeavyN_NLO
define p = g u c d s u~ c~ d~ s~
define j = p
generate p p > mu+ mu+ j j QED=4 QCD=0 $$ w+ w- / n2 n3
add process p p > mu- mu- j j QED=4 QCD=0 $$ w+ w- / n2 n3
output test_signal
Debo reconocer que no tengo claro cómo esto realiza la migración a Python3, pero mi impresión es que los comandos realizan más que eso, tales como especificaciones sobre las particulas que deben colisionar (dos protones) y producir (dos antimuones y dos jets). También crean un código Fortran para la simulación que se almacena en un directorio llamado test_signal. Todo esto es según las instrucciones.
Aquí está la captura de pantalla que obtuve:

⬆️ Imagen 2: Ingresando y ejecutando los comandos.
Y tras tipear open index.html obtengo lo siguiente:

⬆️ Imagen 3: Resultados.

⬆️ Imagen 4: Lista de los diagramas de Feynman y subprocesos
En cuanto a la **asignación 1 (Feynman diagrams), bueno, esta historia continuará :)
Tarea 3: Cálculo de la tasa de producción de señales
Aquí "calcularemos la tasa a la que ocurre el proceso de interés en el LHC Run 2". Para ello ejecutamos en MG5aMC:
launch
Luego pulso 0 y comienzo a modificar los parámetros en los archivos de configuración. Opté por usar un editor visual (ya que vim a veces me da dolor de cabeza) para lo cual rastreé la ruta donde estaban alojados. Aquí tengo las muestras:

⬆️ Imagen 5: Comenzando.

⬆️ Imagen 6: Modificación de parámetros en param_card.dat.

⬆️ Imagen 7: Modificación de parámetros en param_card.dat.

⬆️ Image 8: Modificación de parámetros en param_card.dat.

⬆️ Imagen 9: Modificación de parámetros en run_card.dat.
Luego de esto presioné enter para comenzar la run y obtuve lo siguiente:

⬆️ Image 10: comparando salidas.
Sin embargo, como se observa mi resultado no parece coincidir con el esperado. Me pregunto si habré hecho algo mal.
En cuanto a la asignación 2 (Dependencia de la tasa de señal de la masa del neutrino) y la asignación 3 (Tasa de señales en el ciclo 3 del LHC), aún estoy trabajando en ellas. De momento esto es lo que tengo. Espero por el feedback de @lemouth para saber cómo voy y cómo completar las asignaciones. Gracias de antemano.
Algunas referencias
Mis reportes previos
- "Citizen Science" Project Activity Report 1
- "Citizen Science" Project Activity Report 2 - Simulating top quark production at CERN’s Large Hadron Collider
- "Citizen Science" Project Activity Report 3 - Detector Effects and Event Reconstruction
- "Citizen Science" Project Activity Report 4 - Deciphering top quark production at CERN’s Large Hadron Collider
Si está interesado en más temas STEM (ciencia, tecnología, ingeniería y matemáticas), consulte la comunidad STEMSocial, donde puede encontrar más contenido de calidad y también hacer sus aportes. Puedes unirte al servidor de Discord de STEMSocial para participar aún más en nuestra comunidad y ver el distilled semanal.
Notas
- A menos que se indique lo contrario, las imágenes de esta publicación son del autor.