CATCH THE FIRE DRAGON
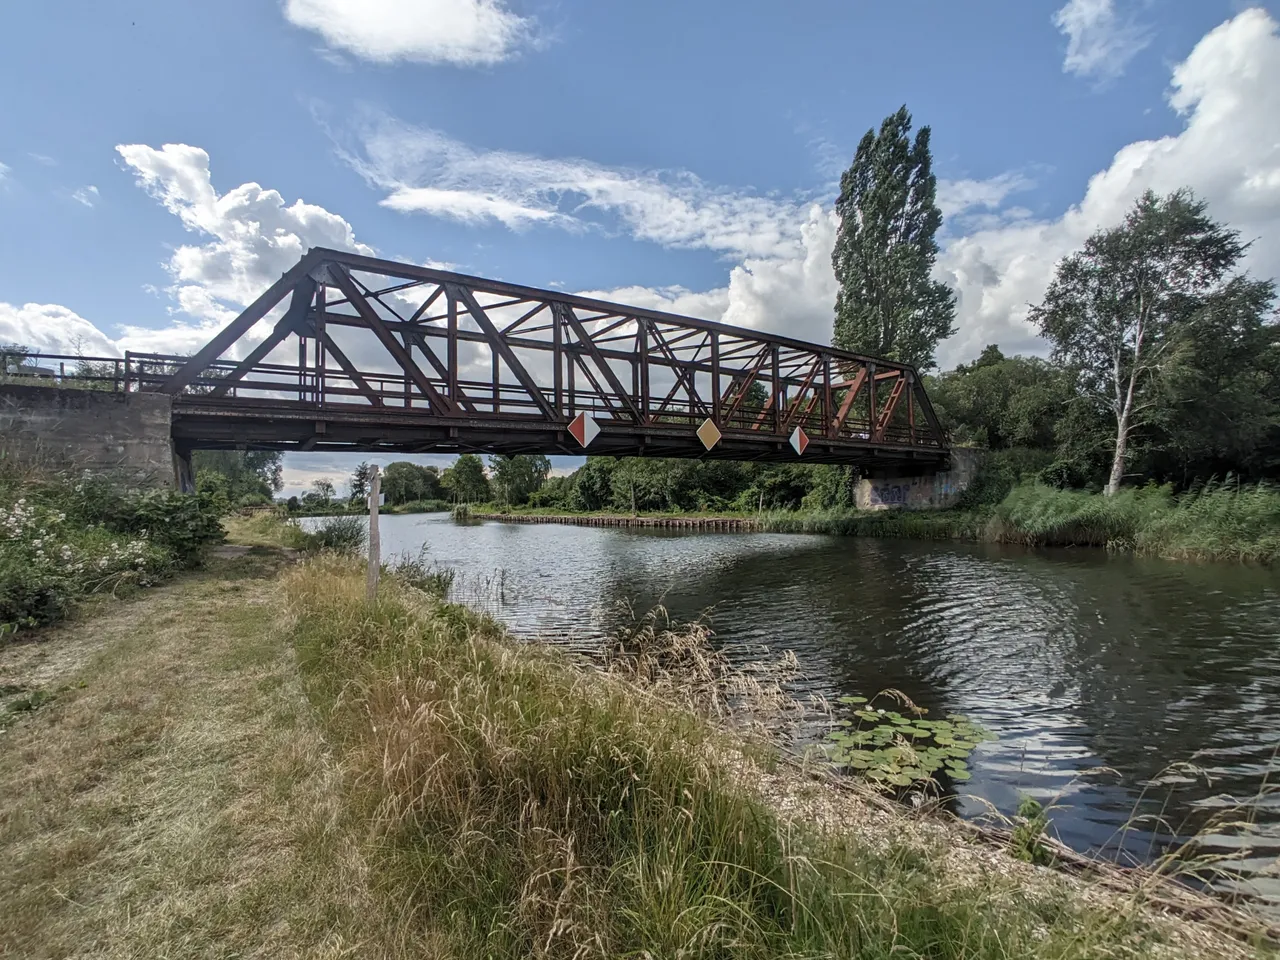
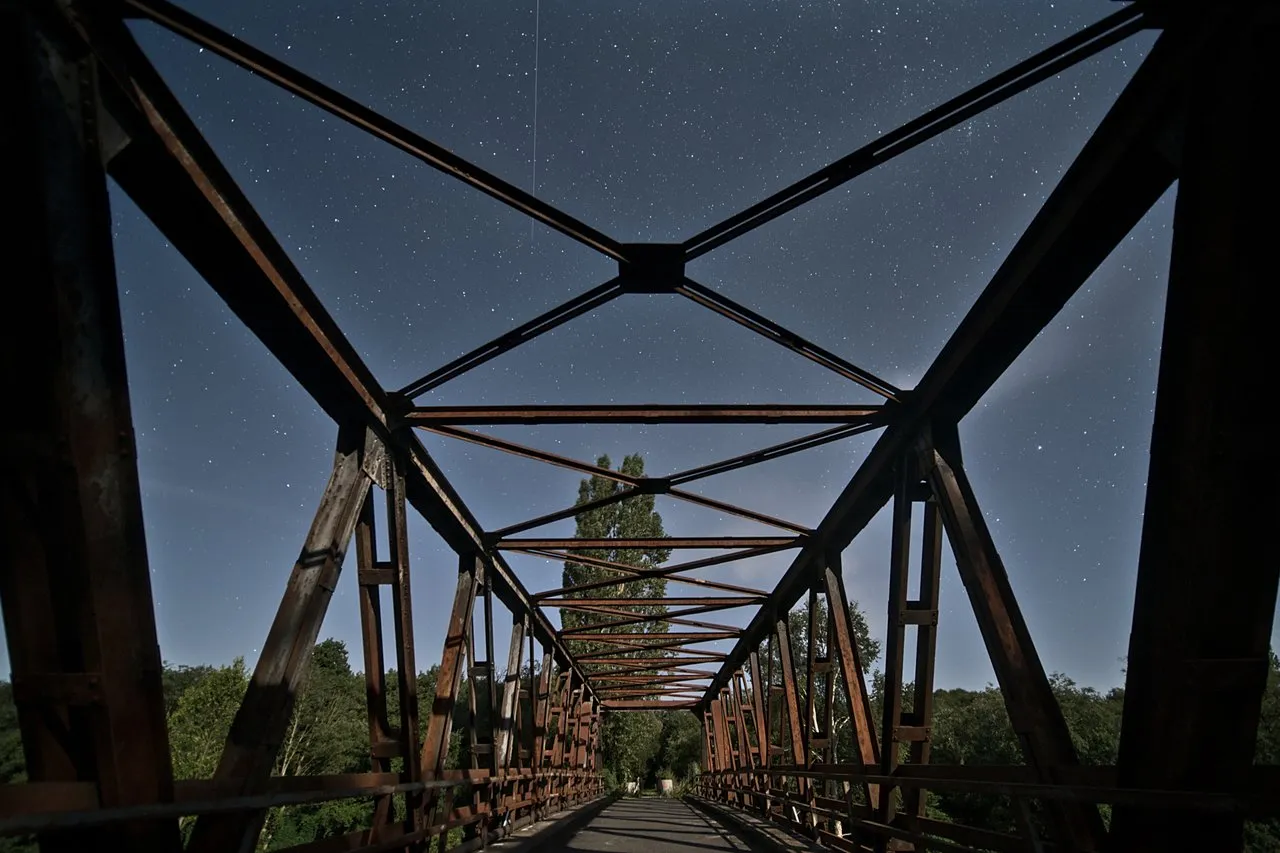
On the way home from the bridge, @stepko and I decided to go there again the next night. The bridge is really a good light painting location. There is hardly any light pollution, it is quiet and there is no one there at night except us crazy light painters. A very big advantage is that you can drive right up to the bridge. It is very good for the light painter's back if you don't have to carry the equipment several kilometres through the rough terrain. The bridge is only defaced with small graffiti in a few places. Most of the paint has peeled off. You can see almost exclusively rust. We had to work very concentrated when illuminating the bridge. The few places where there was still some paint reflected the light more than the rust. During the first attempts, the bridge looked "spotty".
Auf dem Heimweg von der Brücke entschieden @stepko und ich uns dafür in der nächsten Nacht noch einmal dorthin zu fahren. Die Brücke ist wirklich eine gute Light Painting Location. Es gibt kaum Lichtverschmutzung, es ist ruhig und es ist dort außer uns verrückten Light Paintern niemand nachts unterwegs. Ein sehr großer Vorteil ist, dass man direkt mit dem Auto bis an die Brücke fahren kann. Dem geplagte Rücken des Light Painters ist es sehr zuträglich wenn man die Ausrüstung nicht mehrere Kilometer durch das unwegsame Gelände tragen muss. Die Brücke ist nur an einigen wenigen Stellen mit kleinen Graffiti verunstaltet. Der größte Teil der Farbe ist abgeblättert. Man sieht fast ausschließlich Rost. Bei der Ausleuchtung der Brücke mussten wir sehr konzentriert arbeiten. Die wenigen Stellen, an denen noch Farbreste waren reflektierten das Licht stärker als der Rost. Bei den ersten Versuchen sah die Brücke dann "fleckig" aus.

📷 Nikon D750 - Laowa 12/2,8 - f5,6 - ISO 100 - 399 seconds
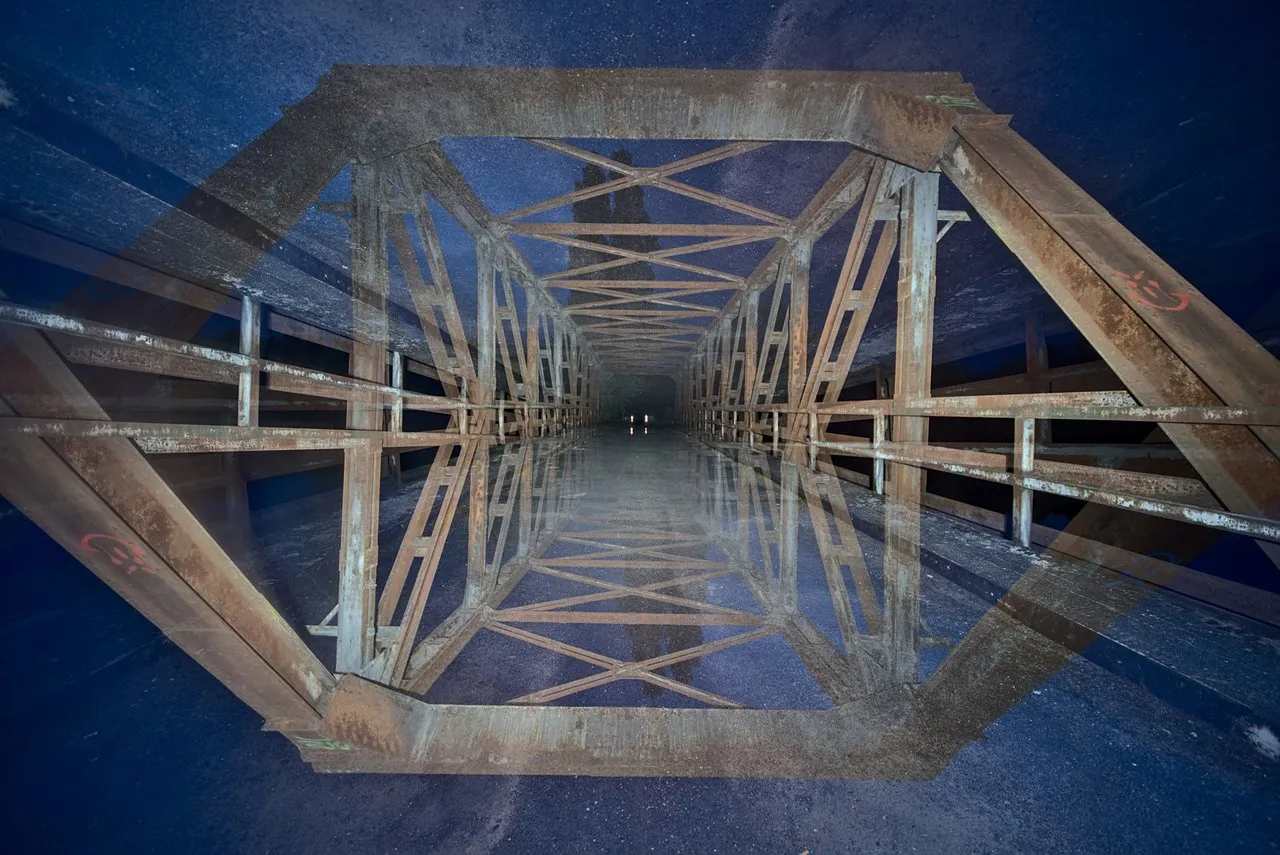
First I pointed the camera exactly at the centre of the bridge with the Rotation Tool. The two parts of the rotation should be as exact and symmetrical as possible on top of each other in the finished image. A kind of cage should be created in which the dragon is then trapped. With the help of some test shots, I checked and corrected the alignment of the camera. First of all, the Camera Rotation Tool must be set perfectly. This is easiest to do in daylight on an even structure such as a tiled wall. The camera is aligned with a cross between four tiles. This cross must then always be exactly in the centre of the picture in every position of the rotation tool. On the bridge, I then set up the tripod exactly in the middle. A folding rule is a good tool for this, even though in this case I had not measured it and had only orientated myself on the easily recognisable centre in the road surface. The camera must be aligned exactly parallel and be in balance both horizontally and vertically. I use the virtual horizon on the camera display for this.
Zuerst richtete ich die Kamera mit dem Rotation Tool genau auf die Mitte der Brücke aus. Die beiden Teile der Rotation sollten im fertigen Bild möglichst exakt und symmetrisch übereinander sein. Es sollte eine Art Käfig entstehen, in dem dann der Drache gefangen ist. Mithilfe von einigen Testaufnahmen überprüfte und korrigierte ich die Ausrichtung der Kamera. Zuerst einmal muss das Camera Rotation Tool perfekt eingestellt sein. Das lässt sich am einfachsten bei Tageslicht an einer gleichmäßigen Struktur, wie beispielsweise einer gefliesten Wand machen. Die Kamera wird auf ein Kreuz zwischen vier Fliesen ausgerichtet. Dieses Kreuz muss dann in jeder Position des Rotation Tools immer genau in der Mitte des Bildes sein. Auf der Brücke stellte ich dann das Stativ genau in der Mitte auf. Ein Zollstock leistet dafür gute Dienste, auch wenn ich das in diesem Fall nicht ausgemessen hatte und mich nur an der gut erkennbaren Mitte im Fahrbahnbelag orientiert hatte. Die Kamera muss genau parallel ausgerichtet werden und sowohl horizontal als auch vertikal in Waage sein. Dazu verwende ich den virtuellen Horizont auf dem Display der Kamera.
After everything was exactly aligned and the test shot was taken, it was time for the second part of the picture, the kite. The dragon is a template that I had prepared. I illuminated the stencil with the Fire Tool, pink glass fibres illuminated with an orange Convoy S2+ torch. I had already introduced the tool in the previous part.
Nachdem alles genau ausgerichtet war und die Testaufnahme gemacht war ging es jetzt an den zweiten Teil des Bildes, den Drachen. Der Drache ist eine Schablone, welche ich vorbereitet hatte. Die Schablone beleuchtete ich mit dem Feuer Tool, rosa Glasfasern beleuchtet mit einer orangen Convoy S2+ Taschenlampe. Das Tool hatte ich ja bereits im vorherigen Teil vorgestellt.

It took a while until we had positioned the template exactly. That always involves a bit of fiddling. After all, the dragon should be exactly in the middle of the cage. We are talking about an accuracy of one millimetre. The template was only about 20 centimetres in front of the lens and the bridge is about 40 metres long and about 8 metres wide.
Es dauerte eine Weile, bis wir die Schablone genau positioniert hatten. Das ist immer mit etwas Fummelei verbunden. Der Drache sollte schließlich genau in der Mitte des Käfigs sein. Wir reden hier von einer Genauigkeit von einem Millimeter. Die Schablone war nur ca. 20 Zentimeter vor dem Objektiv und die Brücke ist ungefähr 40 Meter lang und ungefähr 8 Meter breit.

📷 Nikon D750 - Laowa 12/2,8 - f5,6 - ISO 100 - 485 seconds
In this attempt, the sky looks very good, but the dragon is a bit too small and there is too little fire around it.
Bei diesem Versuch sieht zwar der Himmel sehr gut aus, aber der Drache ist etwas zu klein und es ist zu wenig Feuer um den Drachen herum.
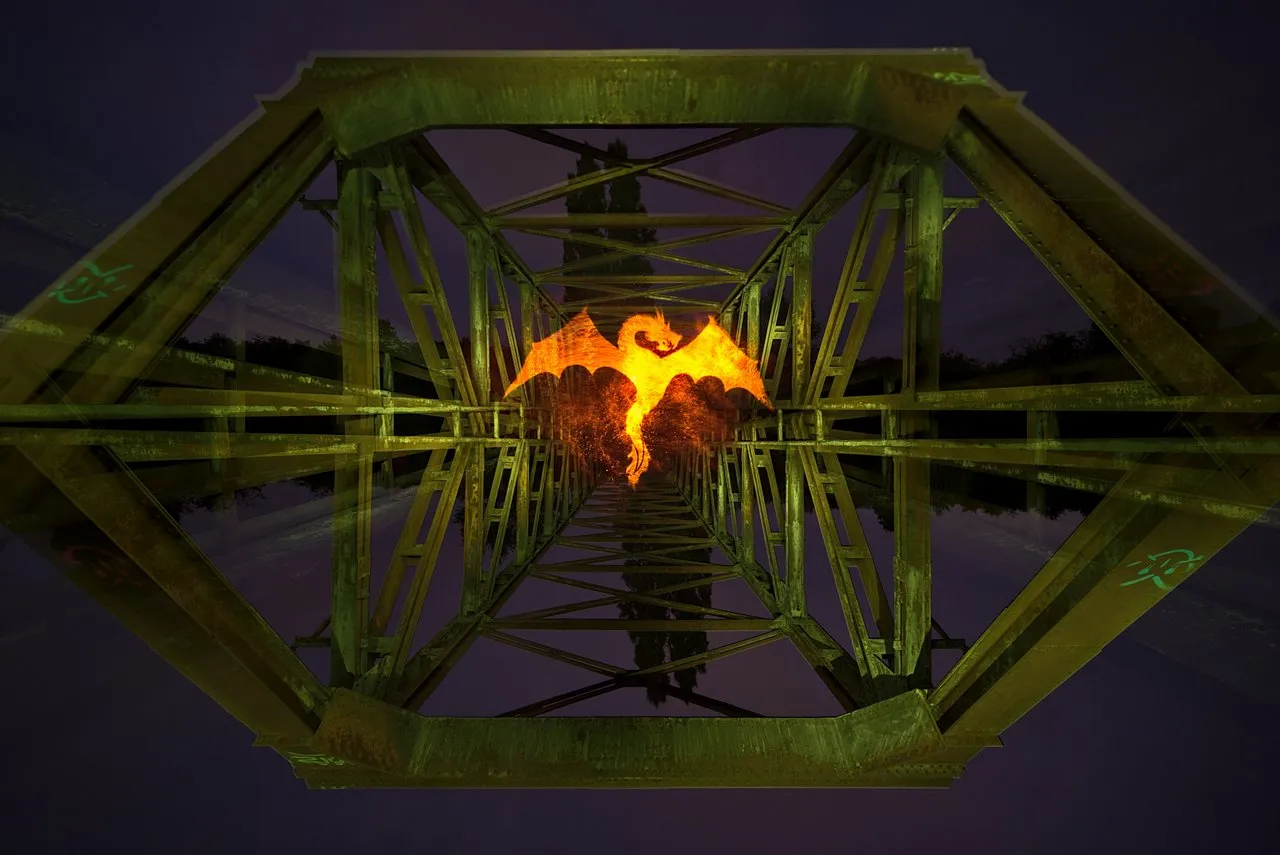
Hier sieht das schon etwas besser aus, aber wir haben das Bild dann noch einmal wiederholt. Nachdem ich den Drachen ins Bild geleuchtet hatte, entfernte @stepko die Schablone. Dann beleuchtete ich die Brücke mit der grünen Convoy S2+. @stepko drehte die Kamera um 180° um die optische Achse und ich wiederholte die Ausleuchtung.


WHAT IS LIGHT PAINTING?
LICHTKUNSTFOTO
If you like my art visit www.lichtkunstfoto.de for more Light Art Photography and informations about Light Painting. Join me on Flickr Twitter

For more great Light Art Photography, Light Painting and inspiration check these light painters: @marlasinger666 @fadetoblack @fastchrisuk @dawnoner @oddballgraphics @martbarras @stepko @rod.evans.visual @yo-hoho @maxpateau @gunnarheilmann @neilru75 @maximepateau @ryuslightworks @lightstabeu @candelart @lacelight

WE ARE LIGHT PAINTERS

To help and support the LightPainters community here on Hive I would appreciate your delegation of HivePower. Any amount is appreciated. It does not require much to get started, we are happy for any gesture. @lightpainters
How to delegate?
Delegate 50HivePower, [50HP]
Delegate 250HivePower, [250HP]
Delegate 500HivePower, [500HP]
Delegate 1000HivePower, [1000HP]
All the Hive Power will help to upvote the artist's contribution as part of the LightPainters community.