PAINTING LIGHT TRAILS THROUGH MOVEMENTS OF THE CAMERA
First of all, please bear with me for not being so active here lately. I've had a lot of work with moving my website. I have restored over 50 blog posts, made halfway decent galleries for my pictures and spent a lot of time optimising the site. I found it most difficult to set up the site bilingually. The entire website including all blog posts, menus, messages, forms etc. is now (hopefully) available in both German and English. Slowly it's all working the way I imagined it would. And by the way, I also moved the Light Up Berlin site. I'd be happy if you'd take a look at it. Then all the work will have been worth it. 😊
Zuerst einmal bitte ich um Nachsicht, dass ich hier in letzter Zeit nicht so sehr aktiv war. Ich hatte eine Menge Arbeit mit dem Umzug meiner Internetseite. Ich habe über 50 Blog Beiträge wiederhergestellt, halbwegs ansehnliche Galerien für meine Bilder gebastelt und viel Zeit in die Optimierung der Seite gesteckt. Die meisten Schwierigkeiten bereitete mir, die Seite zweisprachig aufzubauen. Die gesamte Internetseite inklusive aller Blog Beiträge, Menüs, Meldungen, Formulare usw. ist jetzt (hoffentlich) sowohl in deutsch als auch in englisch verfügbar. So langsam funktioniert das Alles, wie ich mir das vorgestellt habe. Und so nebenbei bin ich auch noch mit der Light Up Berlin Seite umgezogen. Ich würde mich freuen, wenn ihr mal vorbei schaut. Dann hat sich die ganze Arbeit auch gelohnt. 😊

That's why I haven't been able to do any light painting lately. So I can't show you any current pictures. So today I'm giving you a description of how I work in kinetic photography.
Zum Lightpainting bin ich dadurch in der letzten Zeit nicht gekommen. Also kann ich euch keine aktuellen Bilder zeigen. Heute gibt es daher eine Beschreibung meiner Arbeitsweise in der kinetischen Fotografie.

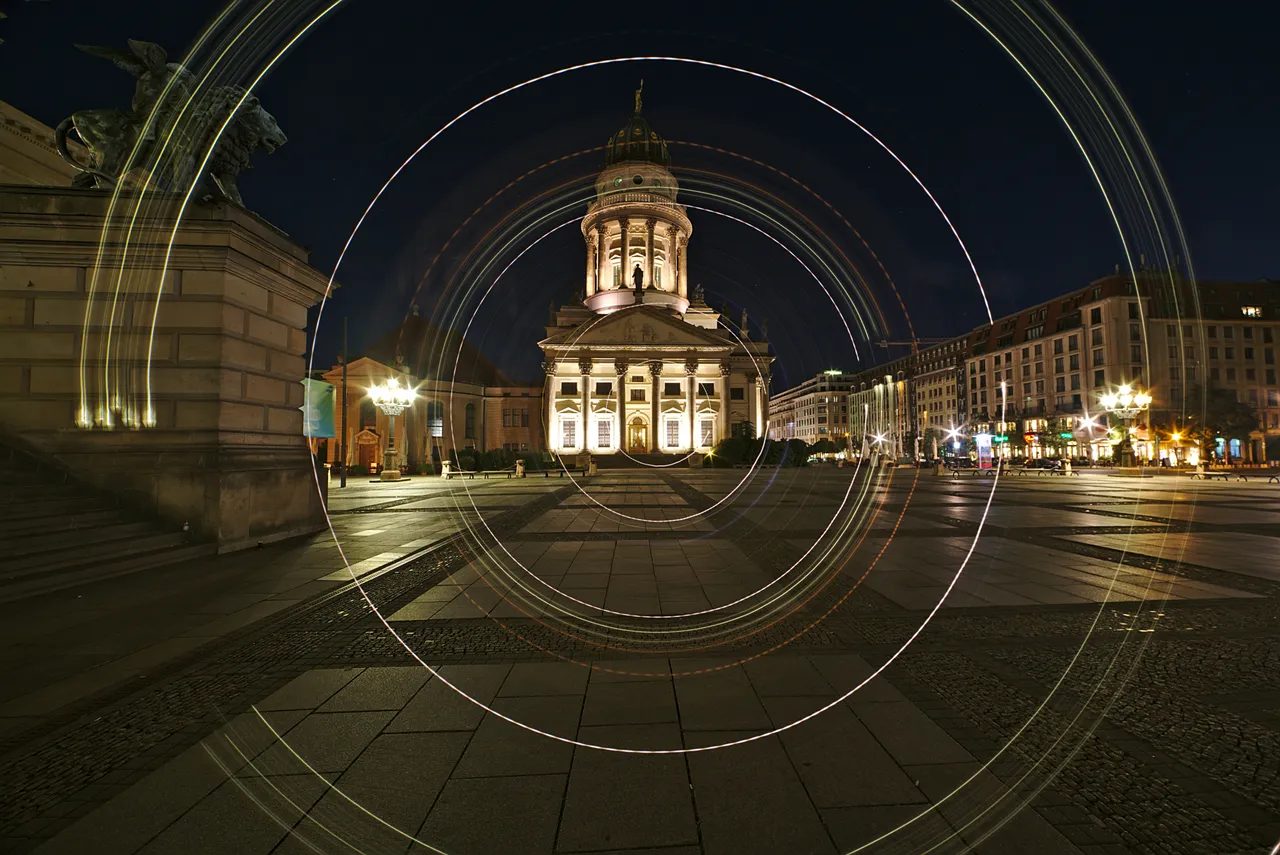
📷 Nikon D750 - Nikkor 17-35/2,8 - f11 - ISO 50 - 92 seconds
In most cases, the light painting artist will work with moving light in front of the camera. A not so widespread form of light painting is kinetic photography. Here, choreographed movements are made with the camera during the exposure. In most cases, the light sources are fixed and the traces of light are painted into the picture solely by the camera movements.
With quite simple equipment, rotations around the optical axis, as in the title picture, turning the zoom of the lens, panning to the left, right, up, down or also the rotations around the axis of the tripod head are conceivable here. For other directions of movement you need special equipment like sliders. That will not be the subject of this article, hardly anyone will have such equipment at home.
In den meisten Fällen wird der Lightpainting Künstler mit bewegtem Licht vor der Kamera arbeiten. Eine nicht so weit verbreitete Form des Light Painting ist die kinetische Fotografie. Dabei werden während der Belichtung choreografierte Bewegungen mit der Kamera ausgeführt. In den meisten Fällen sind die Lichtquellen dabei fest, die Lichtspuren werden dann ausschließlich durch die Kamerabewegungen ins Bild gemalt.
Mit recht einfacher Ausrüstung sind hier Rotationen um die optische Achse, wie im Titelbild, Drehen am Zoom des Objektivs, Schwenk nach links, rechts, hoch, runter oder auch die Drehungen um die Achse des Stativkopfes denkbar. Für andere Bewegungsrichtung benötigt man Spezialausrüstung wie Slider. Das wird nicht Gegenstand dieses Artikels sein, kaum jemand wird solche Ausrüstung zu Hause haben.
ZOOM

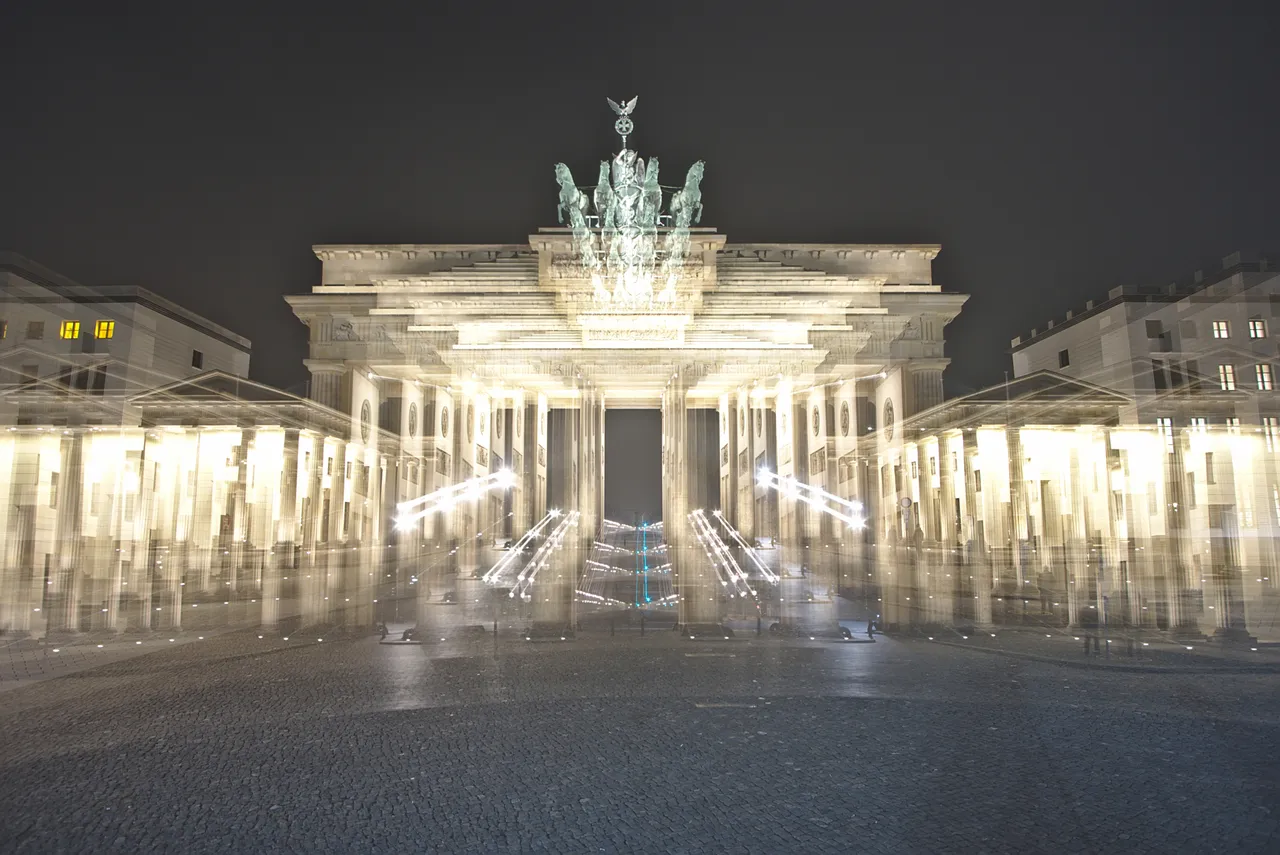
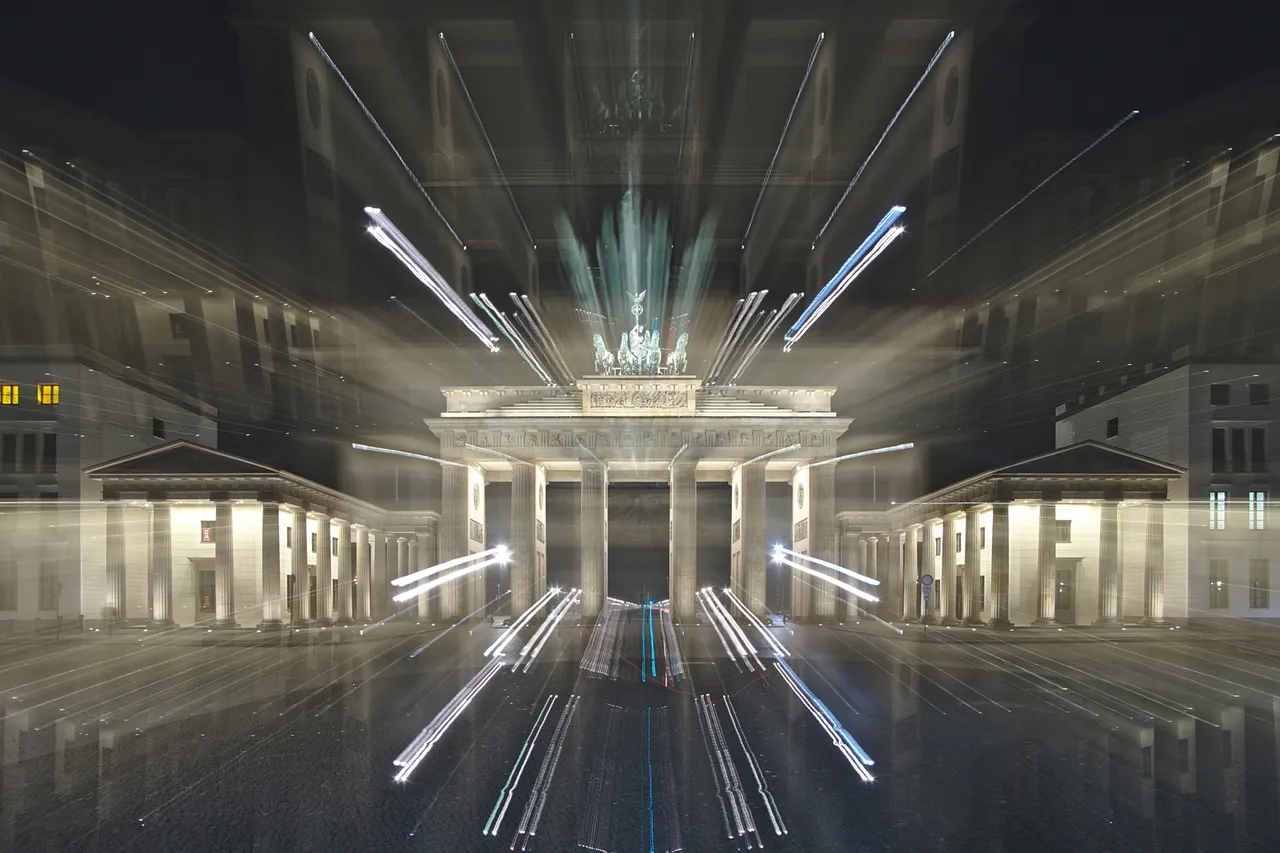
The "simplest" variant of choreographic photography. Simply because almost every photographer has a zoom lens in his possession. During the exposure of the Brandenburg Gate, I moved the zoom ring of the lens several times.
The zoom range does not have to be large, for the example picture I had a Tokina 19-35 mm on the Nikon D750. In order not to have too hard beginnings and ends of the light trails in the picture, I did not move the zoom all the way to the stop, but only to just before it and then immediately in the other direction again. In order to make the Brandenburg Gate more visible, I then exposed it for a few seconds without moving the zoom. For the second picture of the Brandenburg Gate, I covered the lens again and again and then exposed for a few seconds with the different focal lengths.
Die “einfachste” Variante der choreografischen Fotografie. Einfach deshalb weil fast jeder Fotograf ein Zoom-Objektiv in seinem Besitz hat. Während der Belichtung des Brandenburger Tors habe ich mehrfach den Zoom-Ring des Objektivs bewegt.
Der Zoom-Bereich muss nicht groß sein, für das Beispielbild hatte ich ein Tokina 19-35 mm an der Nikon D750. Um nicht all zu harte Anfänge und Enden der Lichtspuren im Bild zu haben habe ich den Zoom nicht bis zum Anschlag bewegt sondern nur bis kurz davor und dann unverzüglich wieder in die andere Richtung. Um das Brandenburger Tor deutlicher sichtbar zu machen habe ich im Anschluss noch einige Sekunden ohne Zoom-Bewegung belichtet. Beim zweiten Bild vom Brandenburger Tor habe ich zwischendurch immer wieder das Objektiv abgedeckt und dann jeweils einige Sekunden mit den verschiedenen Brennweiten belichtet.
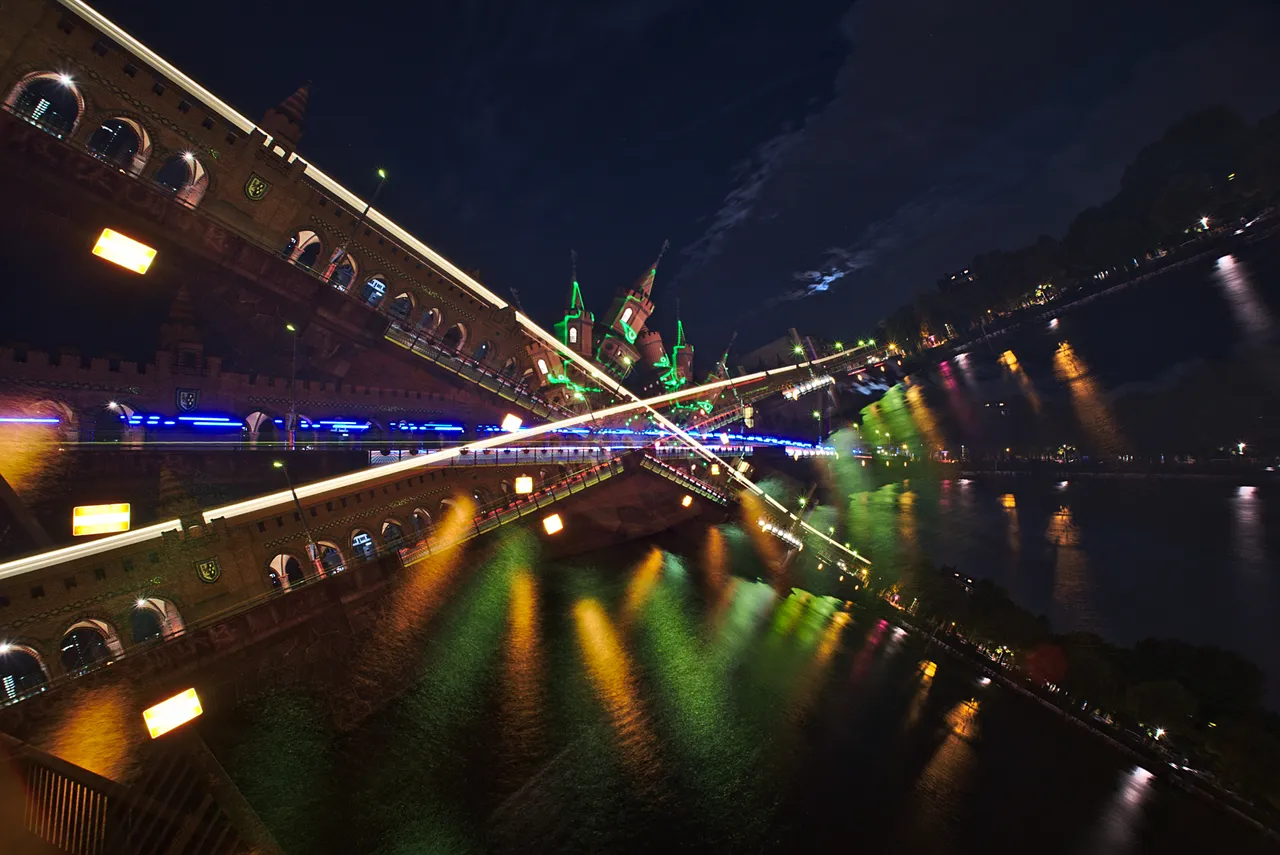
SWIVEL, TILT, ROTATE
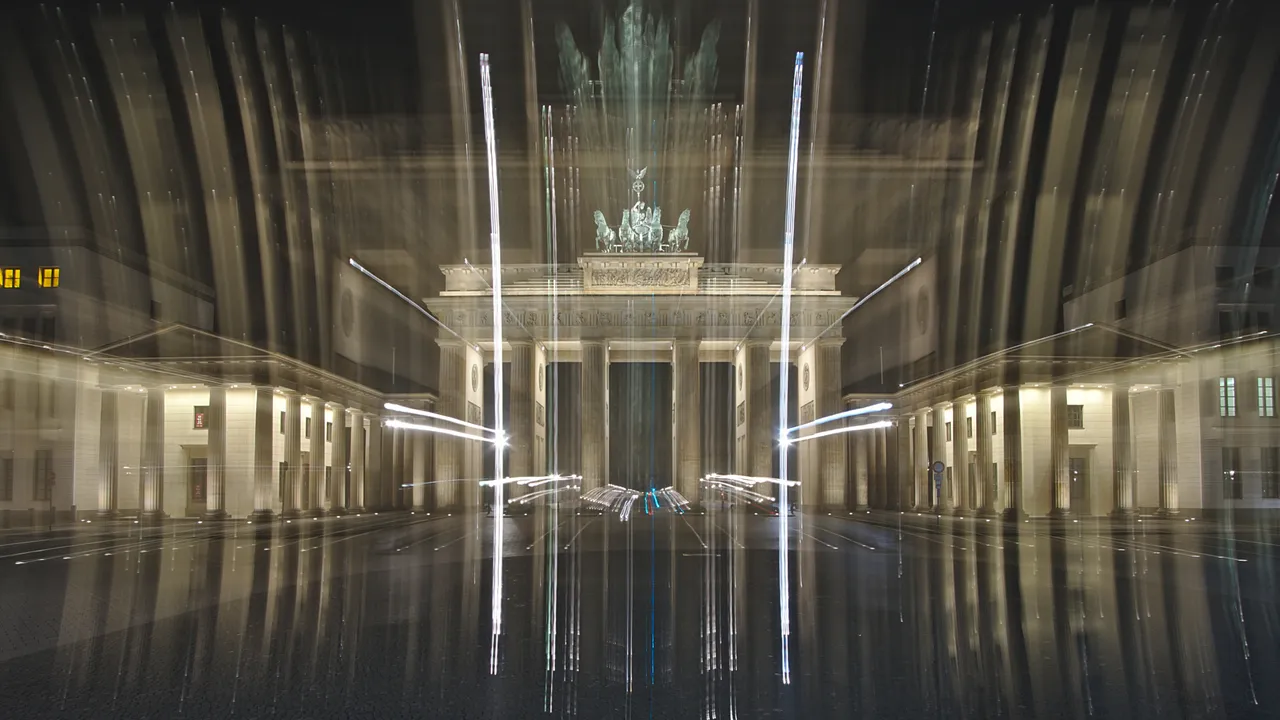

Movements such as tilting, inclining, changing the height or rotating around the fixed point of the camera on the tripod can also be used to create impressive effects in light painting. The creative possibilities are almost unlimited.
Durch Bewegungen wie Kippen, Neigen, Ändern der Höhe oder Drehen um den Fixpunkt der Kamera auf dem Stativ sind ebenfalls eindrucksvolle Effekte im Lightpainting umsetzbar. Die kreativen Möglichkeiten sind nahezu unbegrenzt.
CAMERA ROTATION

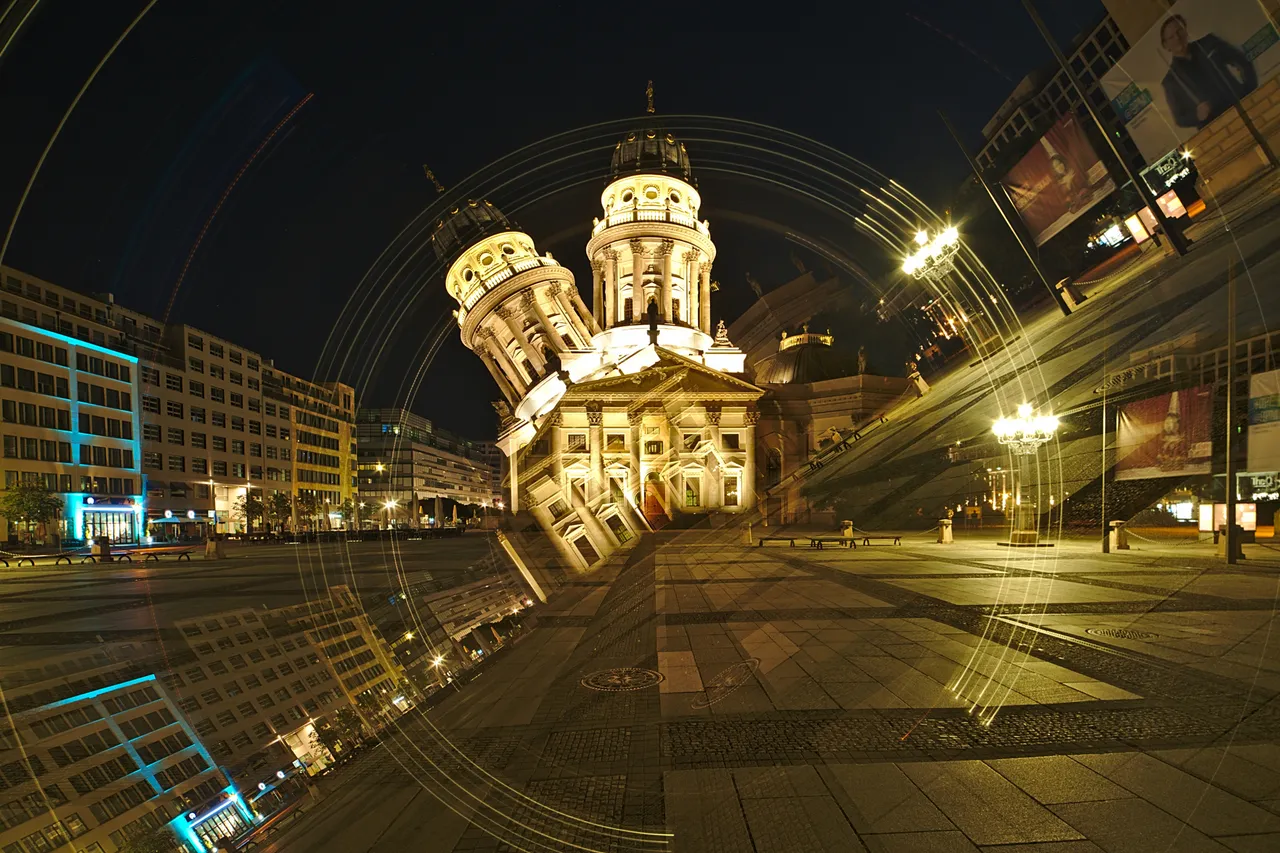
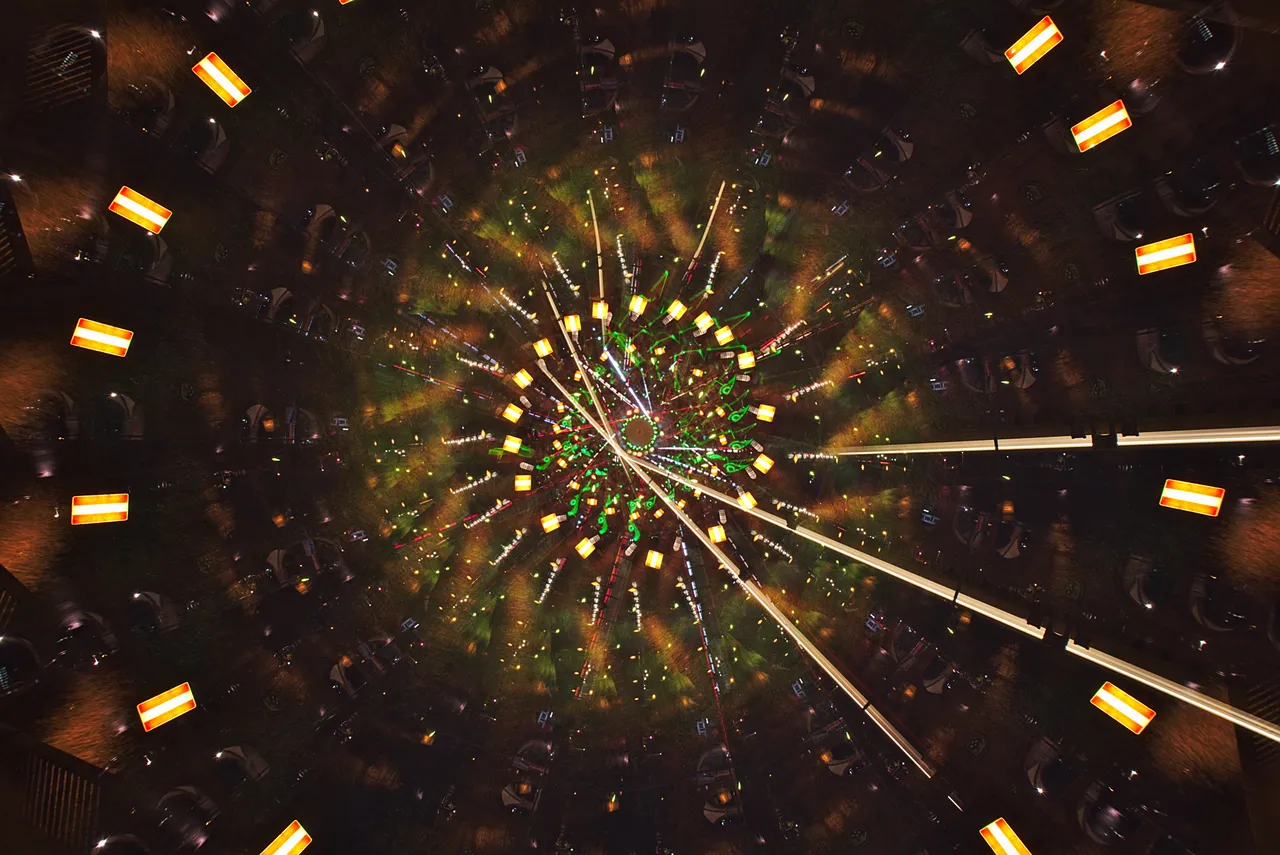
In the meantime, this light painting technique has become quite widespread. Many artists work with a wide variety of tools, ideas and ways of working with the technique of camera rotation photography. The possibilities of creating impressive works of art with this technique are almost limitless. A quite simple variant is to take the picture in two parts, once the right way round and again upside down, i.e. rotated by 180°.
Of course, the number of steps can be increased. I usually expose for a few seconds, then cover the lens with a black opaque cap, rotate the camera a bit around the optical axis, then remove the cap again for a few seconds, and so on until I have completed one rotation. Even "incomplete" rotations can be quite exciting.
Mittlerweile ist diese Light Painting Technik recht verbreitet. Viele Künstler arbeiten mit den verschiedensten Werkzeugen, Ideen und Arbeitsweisen mit der Technik der Camera Rotation Fotografie. Die Möglichkeiten mit dieser Technik eindrucksvolle Kunstwerke zu erschaffen sind nahezu grenzenlos. Eine recht einfache Variante ist es das Bild in zwei Teilen aufzunehmen, einmal richtig herum und noch einmal auf dem Kopf stehend, also um 180° gedreht.
Die Anzahl der Steps lässt sich natürlich erhöhen. Meist belichte ich für einige Sekunden, decke dann das Objektiv mit einer schwarzen, lichtundurchlässigen Mütze ab, drehe die Kamera ein Stück um die optische Achse, entferne dann die Mütze wieder für einige Sekunden, und immer so weiter bis ich eine Umdrehung fertig hatte. Auch “unvollständige” Rotationen können durchaus spannend sein.
EQUIPMENT

The most important requirement is a stable tripod including a stable tripod head. Without an absolutely firm stand, it won't work. The rickety travel tripod for 20€ will most likely simply fall over when you attach the Camera Rotation Tool and camera to it.
And then you need a Camera Rotation Tool. A fairly simple variant is a gimbal head. You can buy this part ready-made. You set it to the right height, so that the optical axis is exactly on the gimbal's pivot point, then attach the camera and you're ready to go.
Die wichtigste Voraussetzung ist ein stabiles Stativ inklusive stabilem Stativkopf. Ohne absolut festen Stand wird das nichts. Das klapprige Reisestativ für 20€ wird höchstwahrscheinlich einfach umfallen wenn man das Camera Rotation Tool samt Kamera darauf befestigt.
Und dann braucht man ein Camera Rotation Tool. Eine recht einfache Variante ist ein Gimbal Head. Dieses Teil kann man fertig kaufen. Man stellt die richtige Höhe ein, also so, dass die optische Achse genau auf dem Drehpunkt des Gimbals liegt, befestigt dann die Kamera und schon kann es losgehen.

However, the gimbal head is quite large and heavy. For this reason I built a smaller, lighter CRT. This consists of an Arca Swiss bracket and a panorama plate with locking brackets. In order to bring this in the right direction, i.e. mostly forwards, I tilt the 3-way panhead forwards. You have to make sure that you tilt it exactly over one of the tripod legs so that the whole thing doesn't fall over. Alternatively, you can of course use two brackets between which the panorama plate is then attached. Then the whole construction sits over the middle of the tripod.
I hope this article was helpful for one or the other of you. I wish you all a wonderful day and always a stable stand when you want to move the camera during the exposure.
Der Gimbal Head ist allerdings ziemlich groß und schwer. Aus diesem Grund habe ich ein kleineres, leichteres CRT gebaut. Dieses besteht aus einem Arca Swiss Winkel und einem Panorama-Teller mit einrastenden Winkeln. Um das dann in die richtige Richtung, also meist nach vorne, zu bringen kippe ich den 3-Wege-Neiger nach vorne. Dabei sollte man darauf achten, das man genau über eines der Stativbeine kippt, damit das ganze Ding dann nicht umfällt. Alternativ kann man natürlich auch zwei Winkel benutzen, zwischen denen dann der Panorama-Teller befestigt wird, verwenden. Dann sitzt die gesamt Konstruktion über der Mitte des Stativs.
Ich hoffe, dieser Beitrag war für den ein oder anderen von euch hilfreich. Ich wünsche euch allen einen wundervollen Tag und immer einen stabilen Stand wenn ihr die Kamera während der Belichtung bewegen wollt.
WHAT IS LIGHT PAINTING?
LICHTKUNSTFOTO
If you like my art visit www.lichtkunstfoto.de for more Light Art Photography and informations about Light Painting. Join me on Flickr Twitter
For more great Light Art Photography, Light Painting and inspiration check these light painters: @marlasinger666 @fadetoblack @fastchrisuk @dawnoner @oddballgraphics @martbarras @stepko @rod.evans.visual @yo-hoho @maxpateau @gunnarheilmann @neilru75 @maximepateau @ryuslightworks @lightstabeu @candelart @lacelight

WE ARE LIGHT PAINTERS

To help and support the LightPainters community here on Hive I would appreciate your delegation of HivePower. Any amount is appreciated. It does not require much to get started, we are happy for any gesture. @lightpainters
How to delegate?
Delegate 50HivePower, [50HP]
Delegate 250HivePower, [250HP]
Delegate 500HivePower, [500HP]
Delegate 1000HivePower, [1000HP]
All the Hive Power will help to upvote the artist's contribution as part of the LightPainters community.