ENGLISH

Greetings @DIYHub community, today I want to share with you how I made this small bouquet of roses made in macramé for a gift, I hope you like the result.


STEP 1: Making the rose petals in macramé.
We take 5 strands of cotton thread (or macramé thread) of almost 2 meters each; depending on the size you want the rose to be, for example with those almost 2 meters of cotton thread I get 14 petals of the rose, if I make 12 or 9, the rose will be smaller. It also depends on the thickness of the thread.
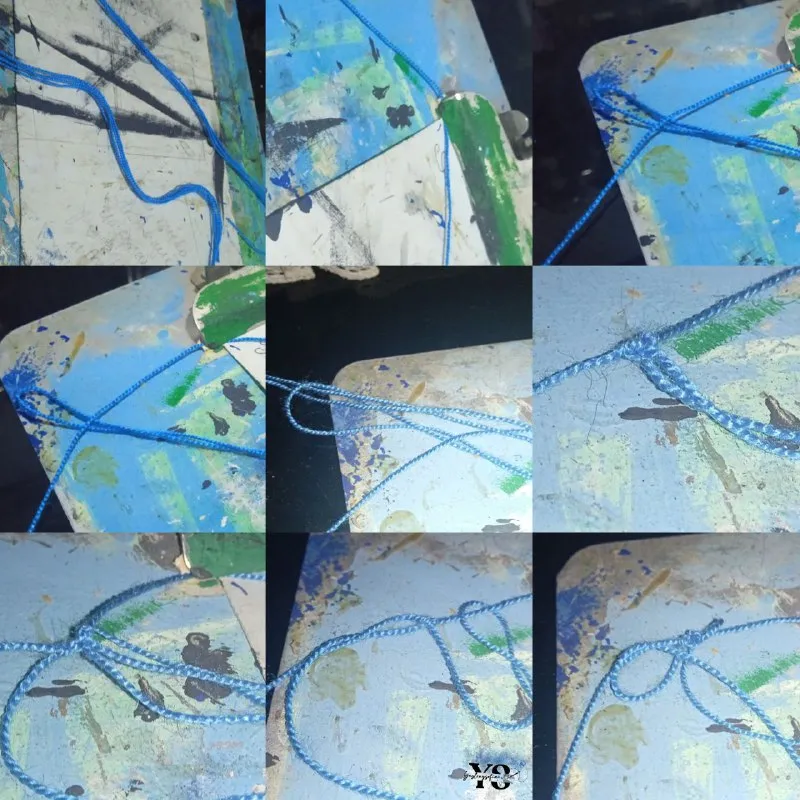
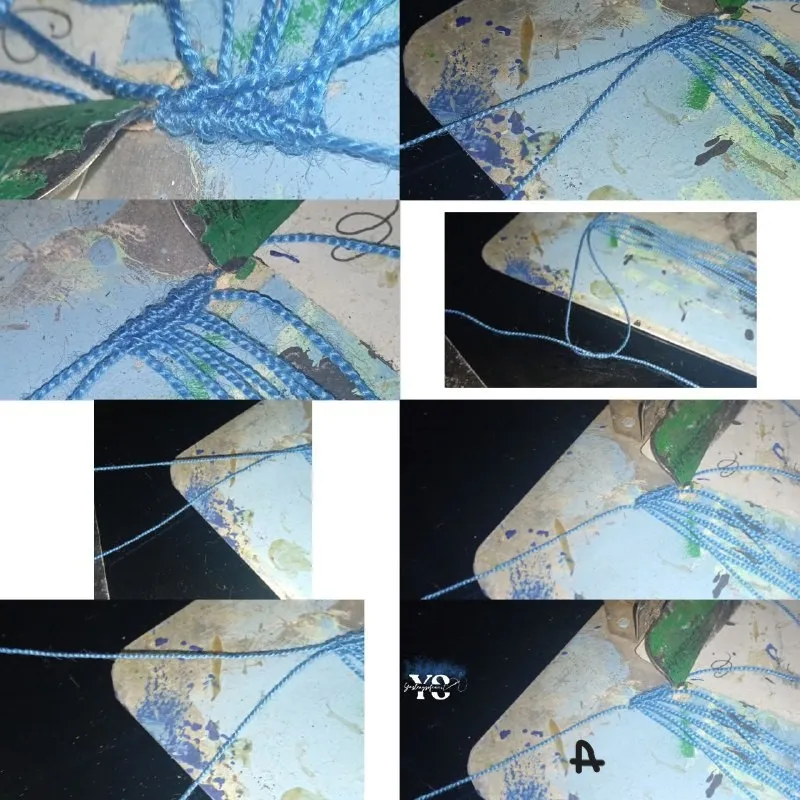
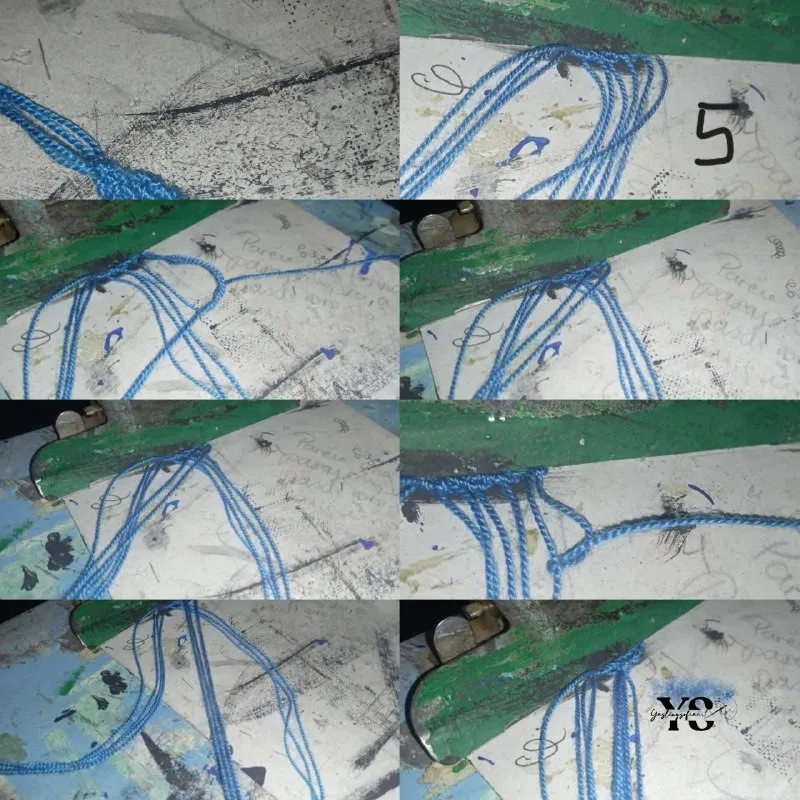
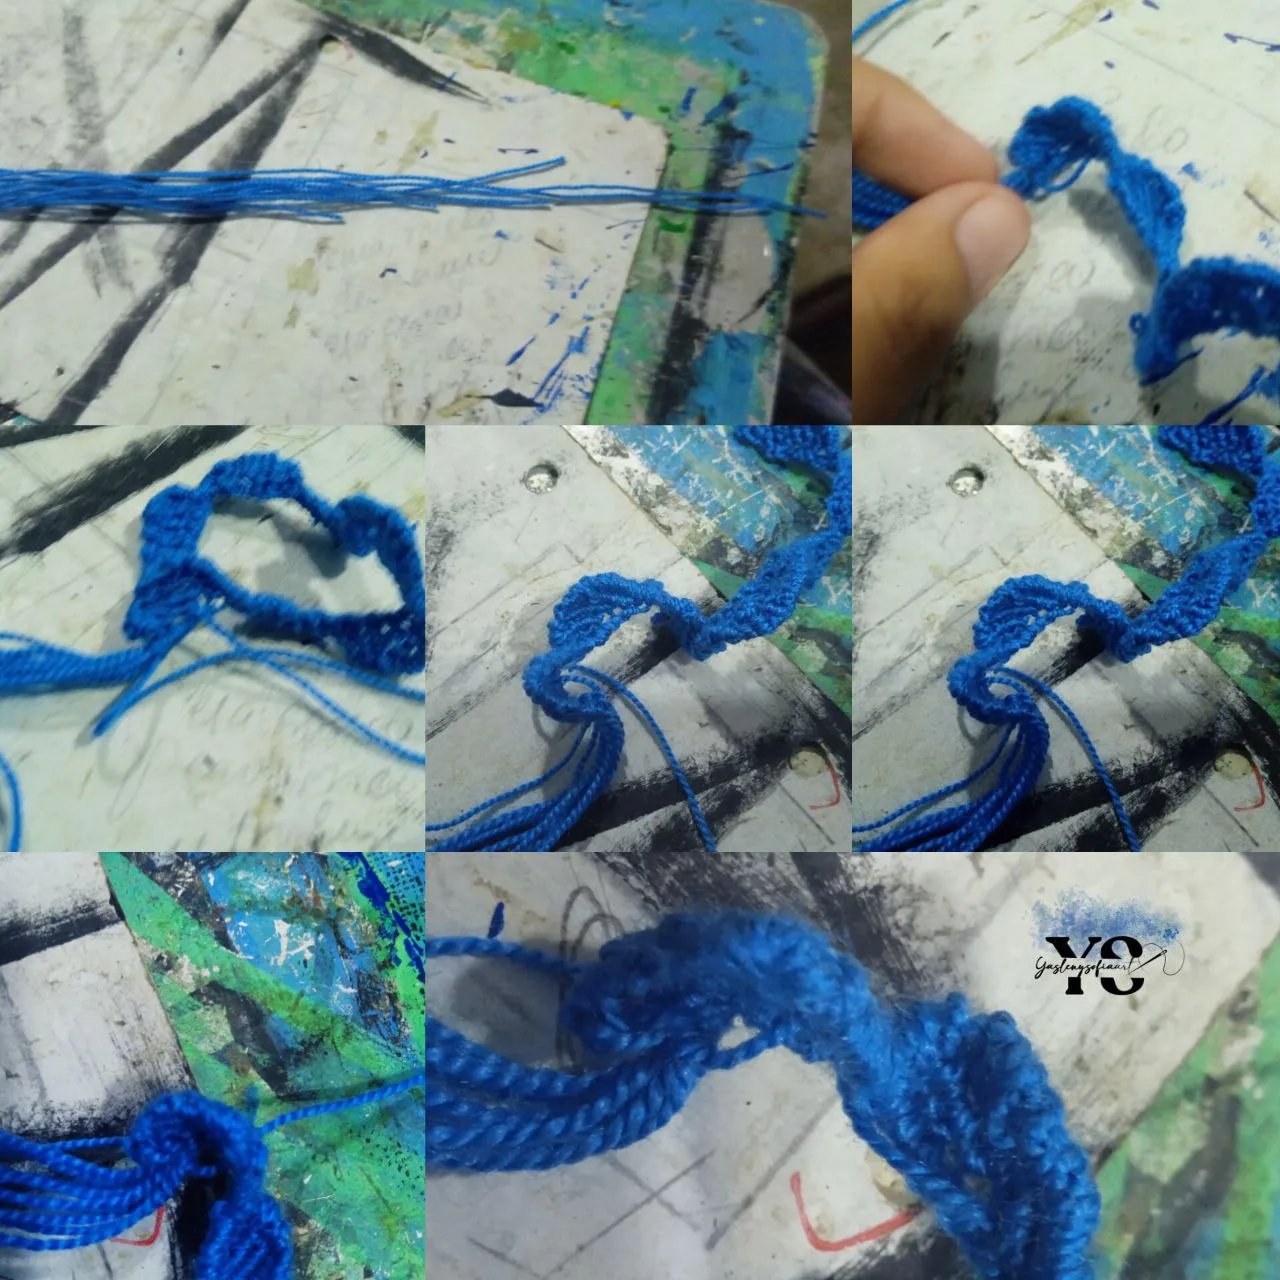
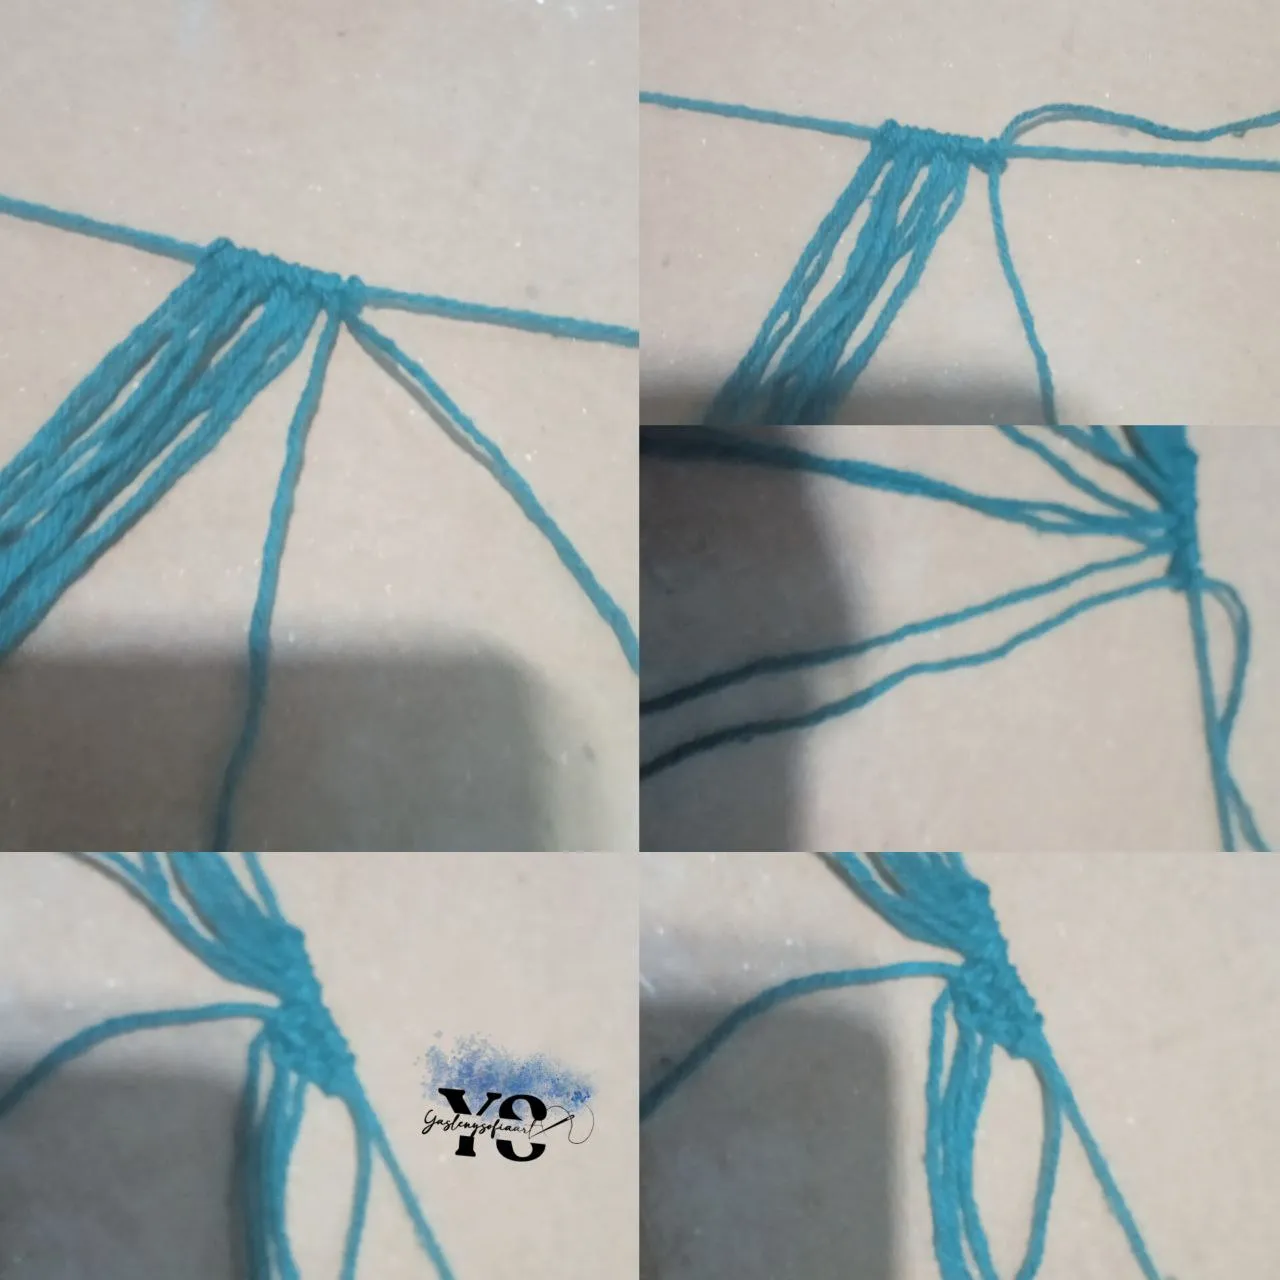
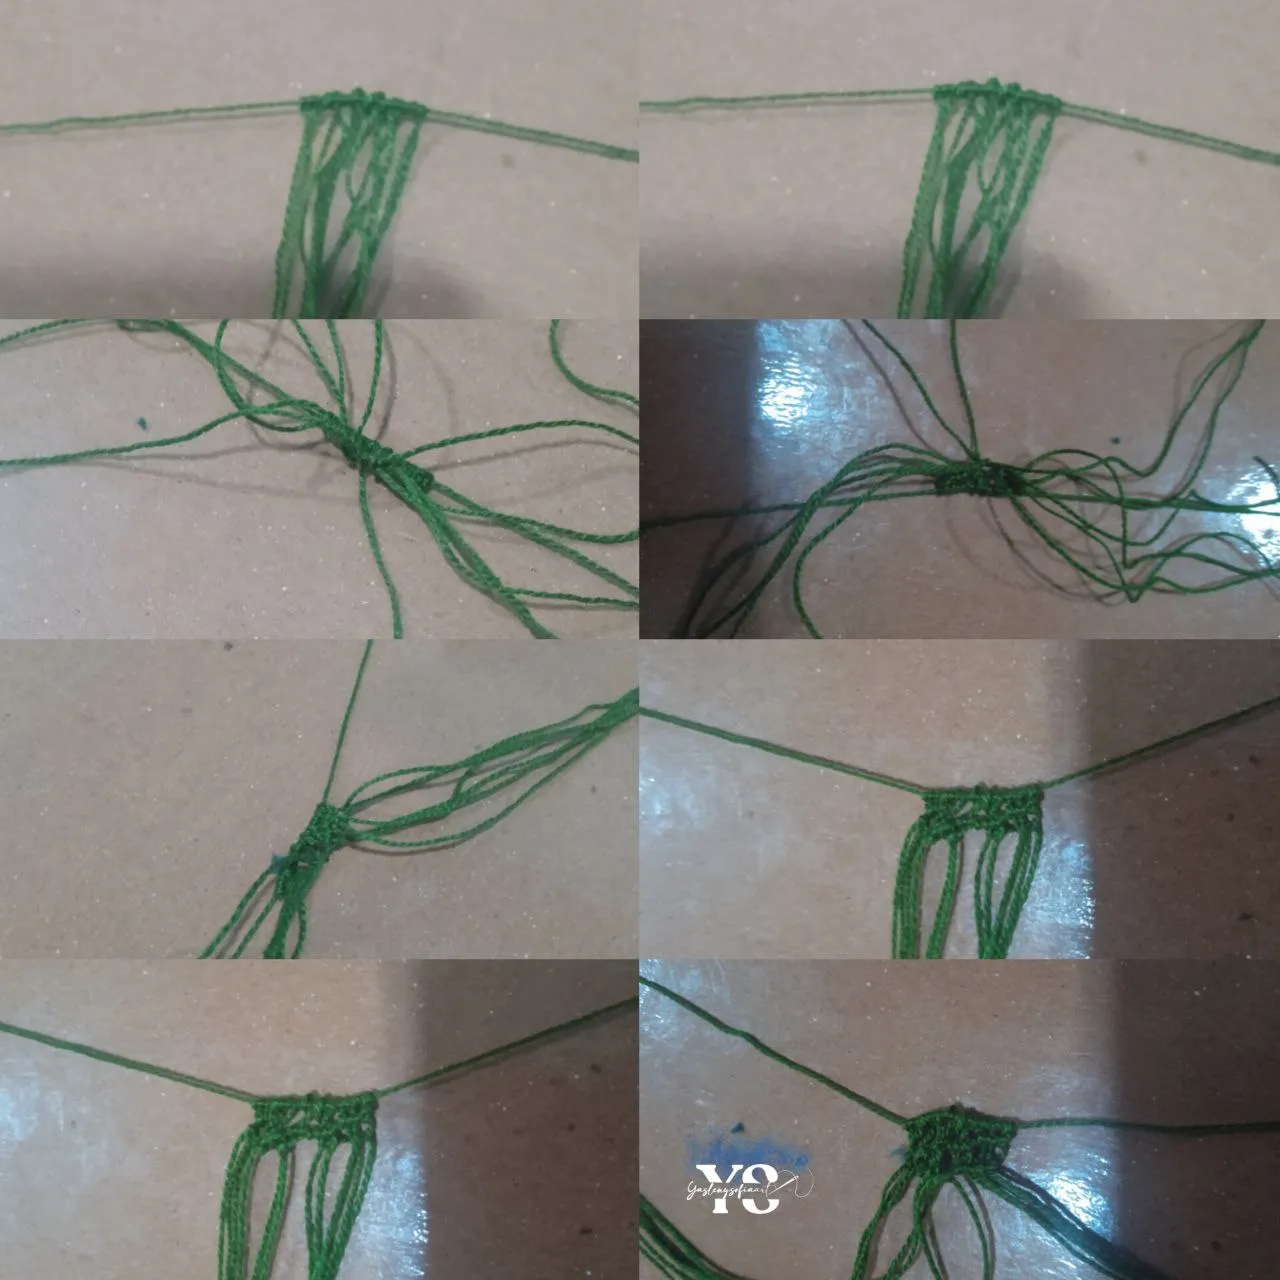
One of these threads, we press it with a hook board, which is a little more than half of the outside. Then, we take another thread, folded in half and we make a lark's knot, which is to pass the loose part of that thread, through the middle of the other.
With this knot ready, we proceed to make a knot for each of the ends of the knot, that is to say, I take the right thread and make a knot, I take the left thread and make a knot. We do the same with the remaining 4 threads, resulting in this way.
We take the first thread of the row (let's call it thread A), from right to left, that is to say the one near the hook and we put it on top of the rest. The next thread after this one (Thread B), crosses with this one and we make a knot twice; when we make these knots we leave this thread (B) and we take the next thread (C) and we knot it with the first one (the A) twice and so on we repeat with the following threads).
When we are at the end of the row, we pass the first thread (A) under the base thread or thread D we make the knots, leaving this thread (A) on the other side.
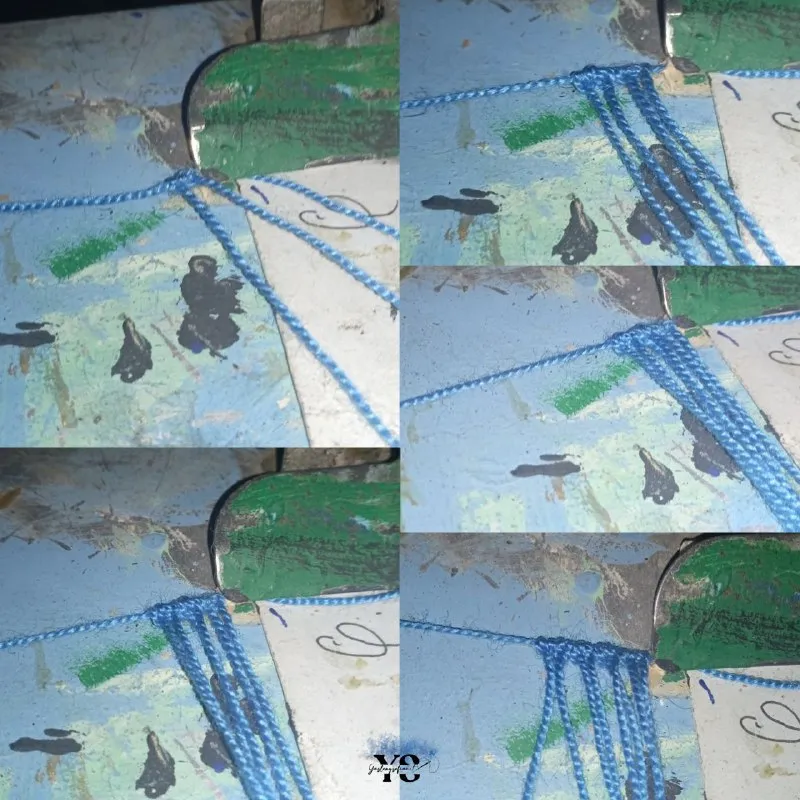
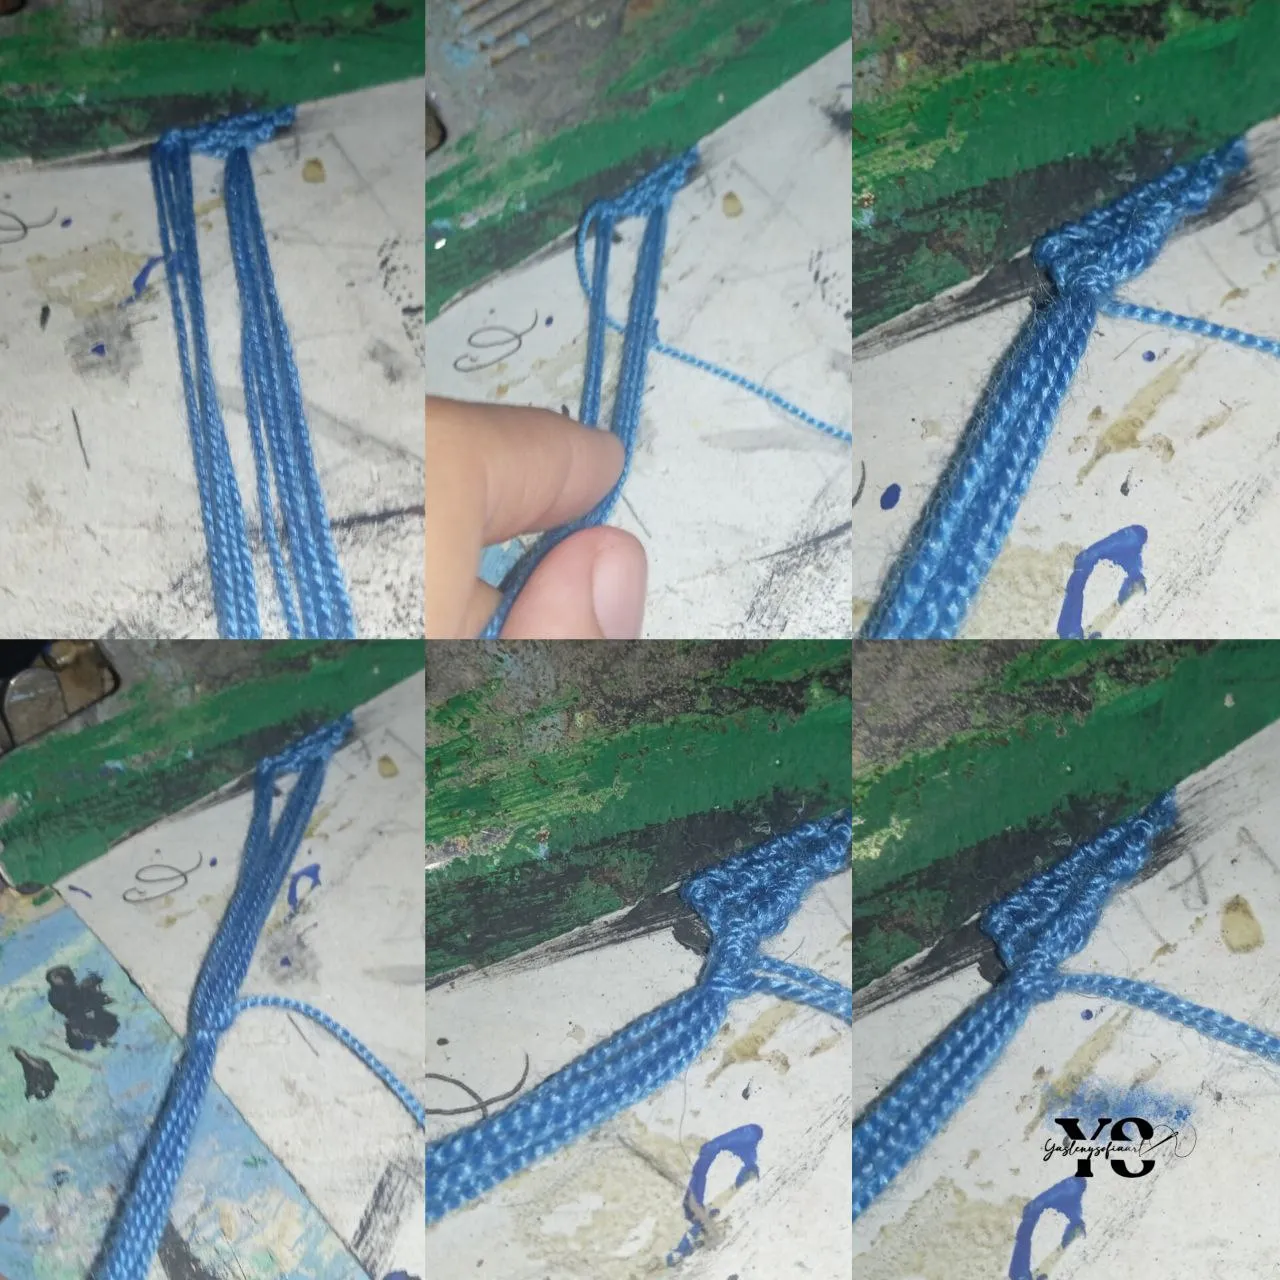
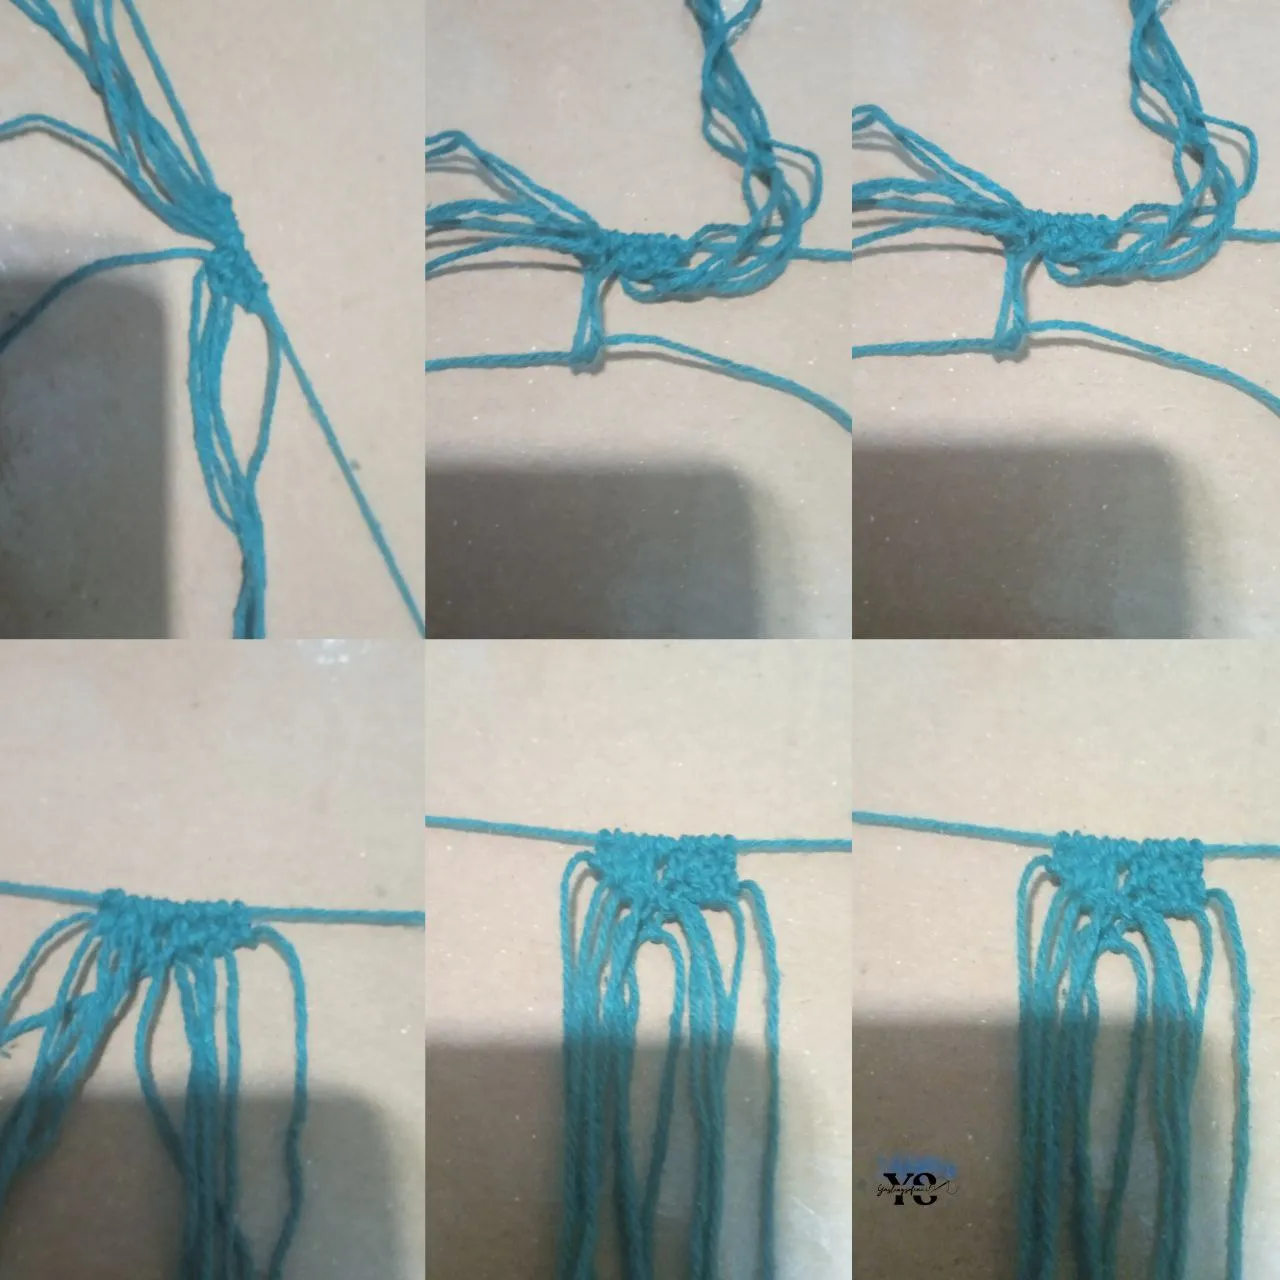
For the next row, the first thread (the B) we leave it to one side so the second thread that would be the C, we do the same as the previous step, on top of the others and with the rest the knot, only that when we reach the end we are not going to make the knot with the thread A, we are just leaving it next to this one.
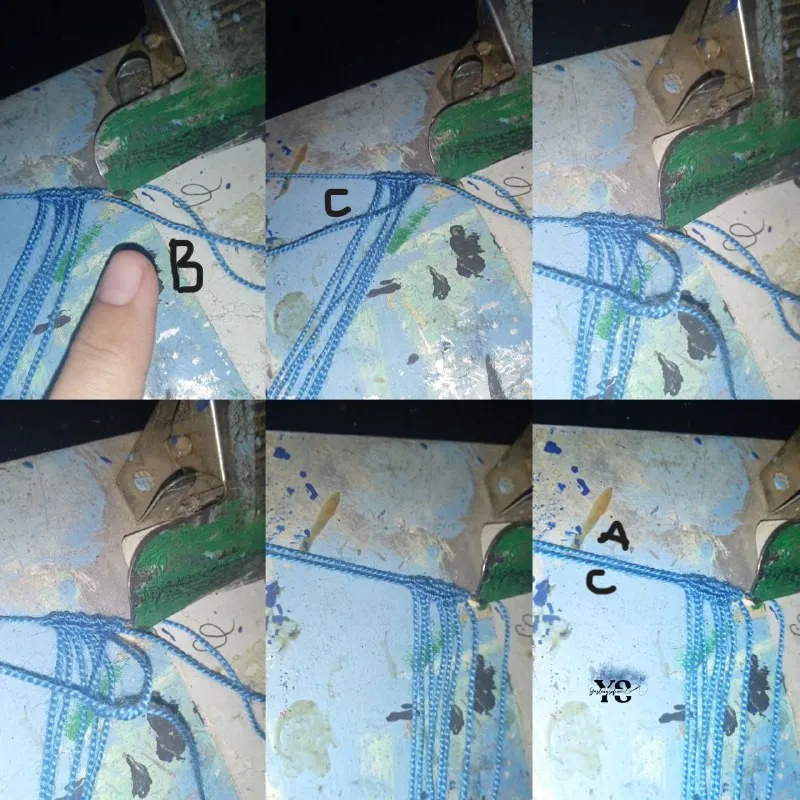
Now, we leave the first two threads to one side, and with the next thread, we make the respective knots. So at the end there would be 3 threads on the other side.
Here we go with the last row, ignoring the first three threads, we do the same process with the remaining ones.
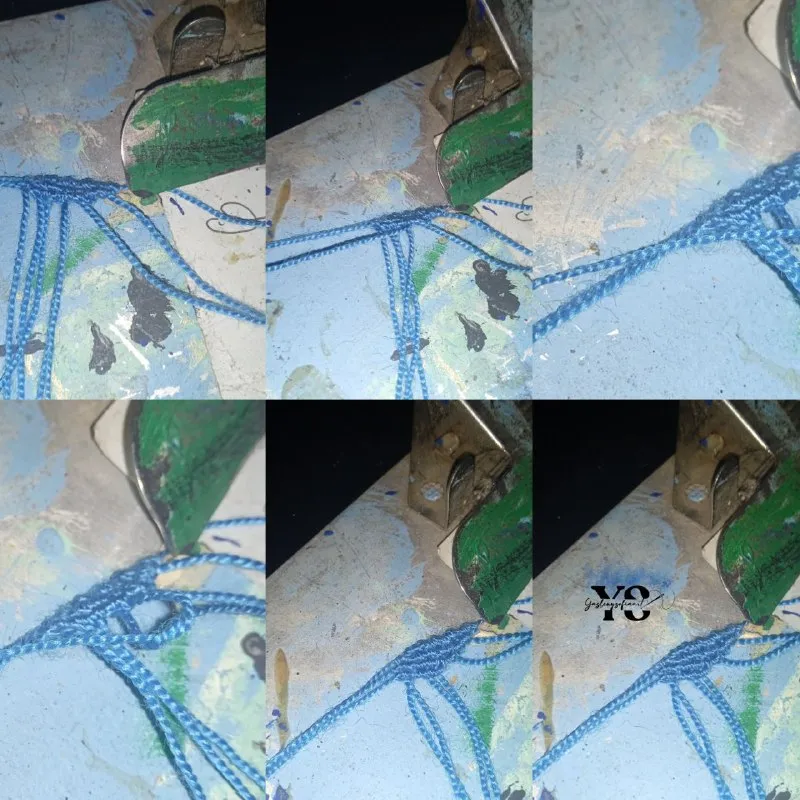
Now, with the four threads that passed the other side, we take the first one from the one that is left to right (the A) passing it over the next one, where we will make two knots, it is almost the same procedure as the previous ones, only instead of leaving aside with the thread that makes the knot, we take them with the first one and make a knot with the next one, we take them with the first one and we make a knot with the following thread, joining this third one to the other two and we make a knot with the following one, that is to say C makes a knot to the thread A, and instead of C staying on one side, it comes with the A and the following thread makes a knot to these two and so on.
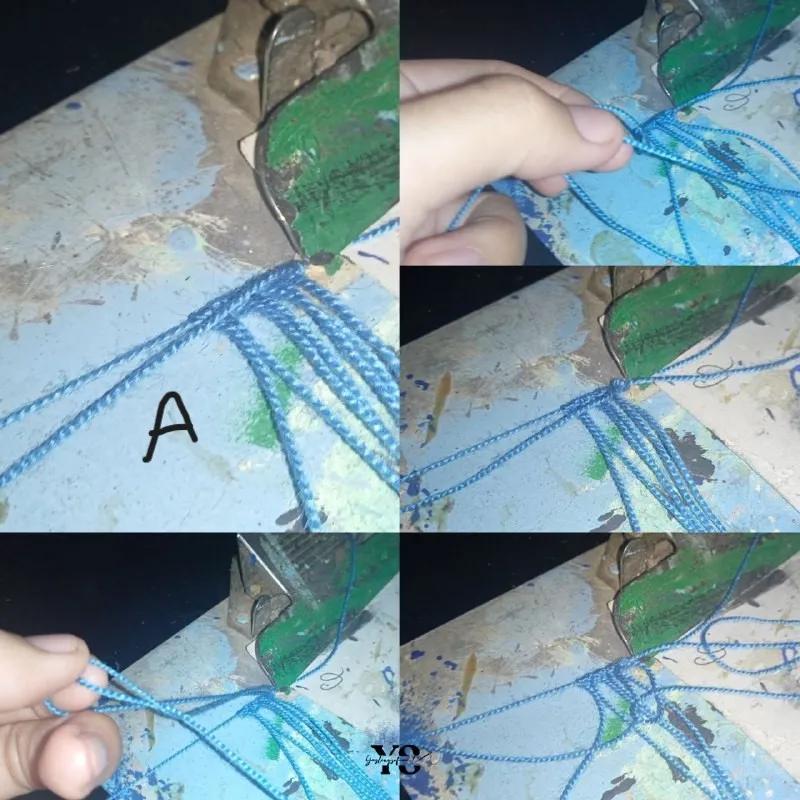
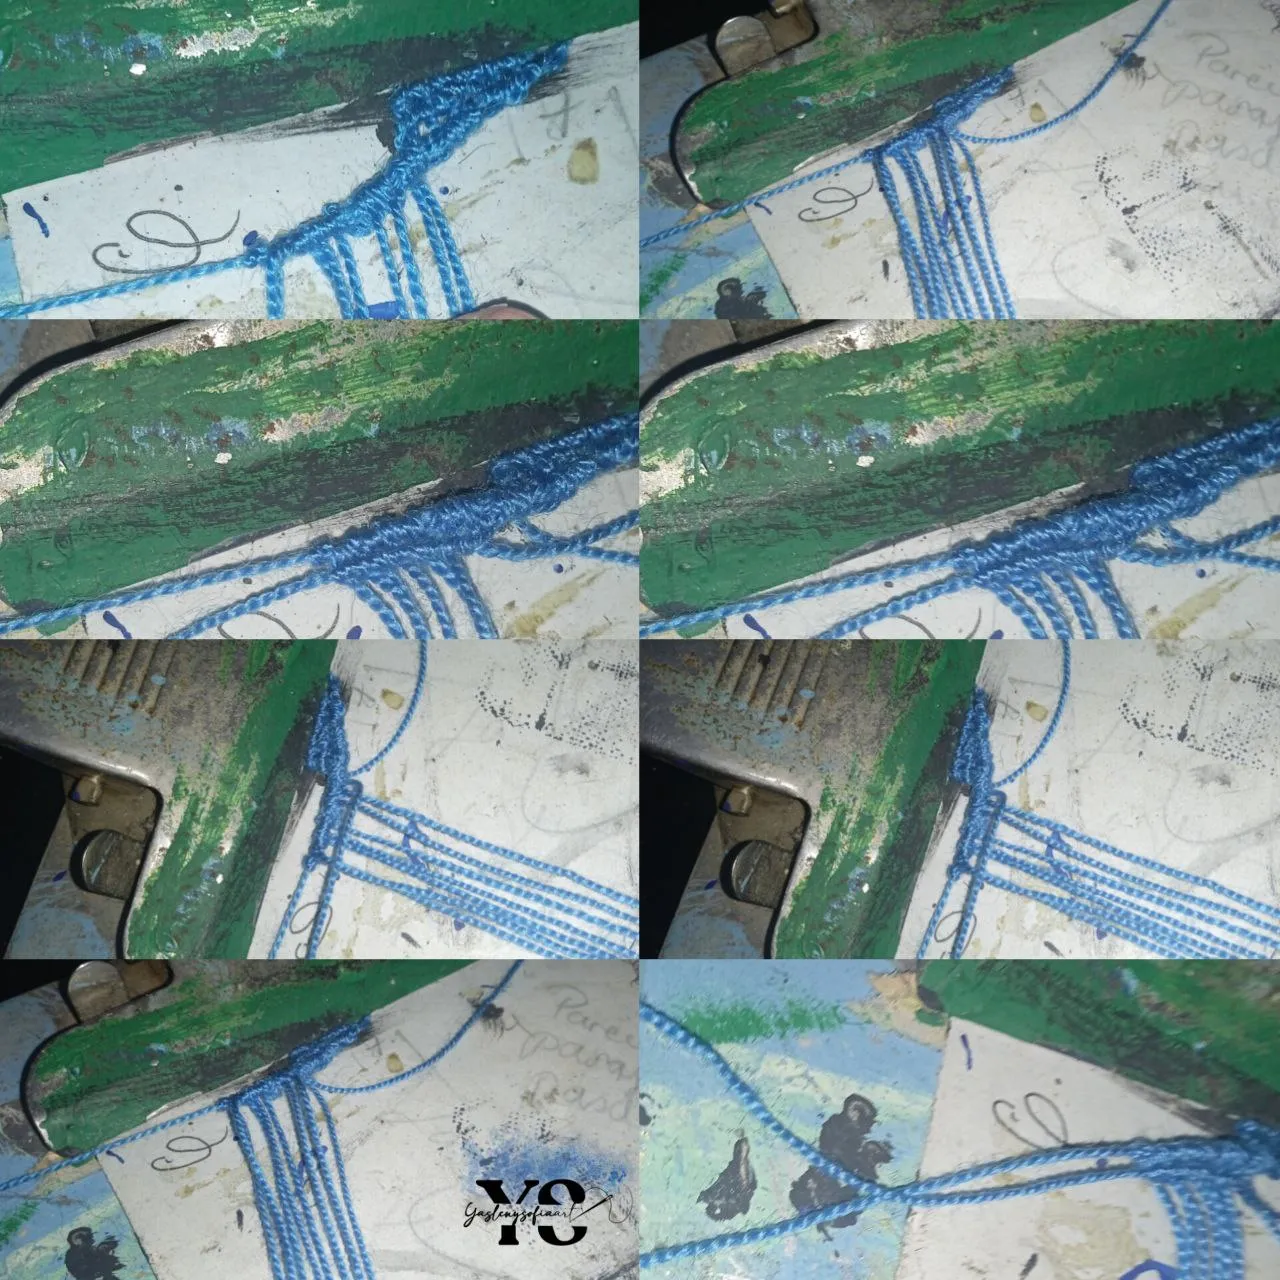
We release from the hook what has just been done and we hold it horizontally again, making with those 5 threads, as I mark them in the image with the number, we do the same process as before, first thread, knot with the next one, instead of leaving the one that makes the knot to one side, we join it with the first and the third thread makes them a knot; that 3 joins the other 2 and with the next one we make them two knots and so on, completing the first petal./div>

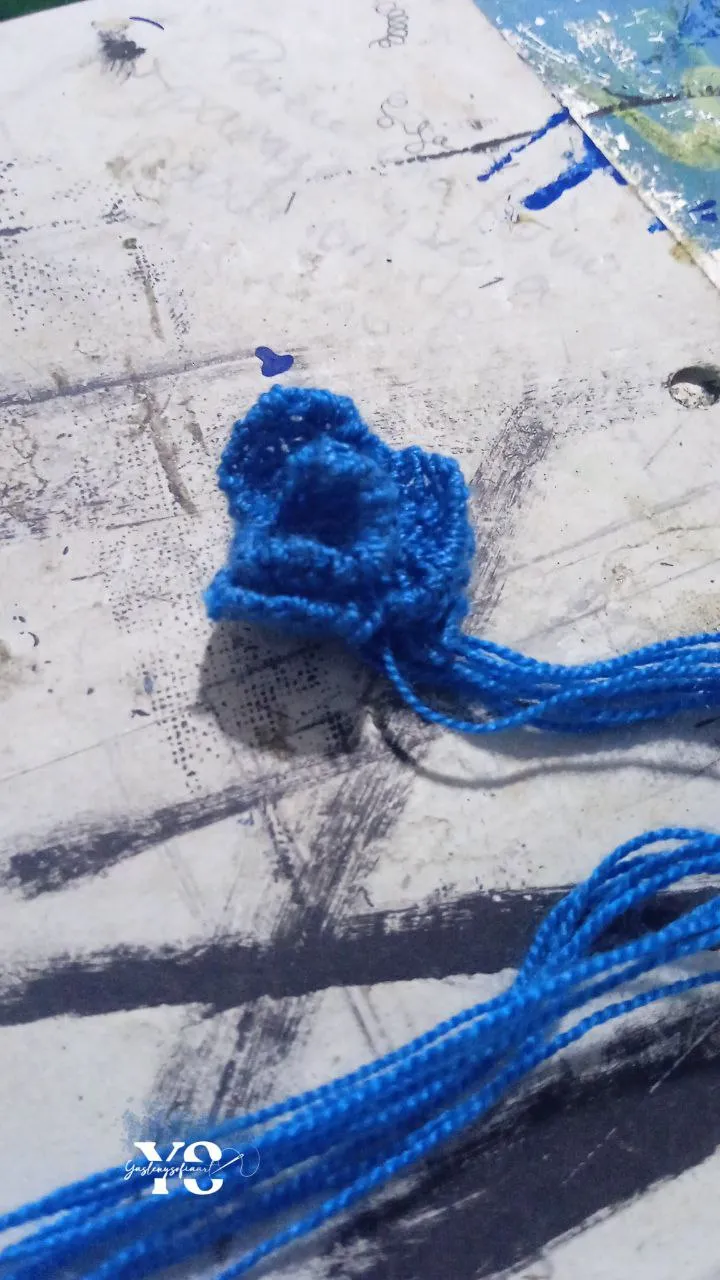
Here's how it's coming along

The images are from my personal archive, taken with my Redmi 9A cell phone. Cover designed in CANVA. Text translated in DeepL.
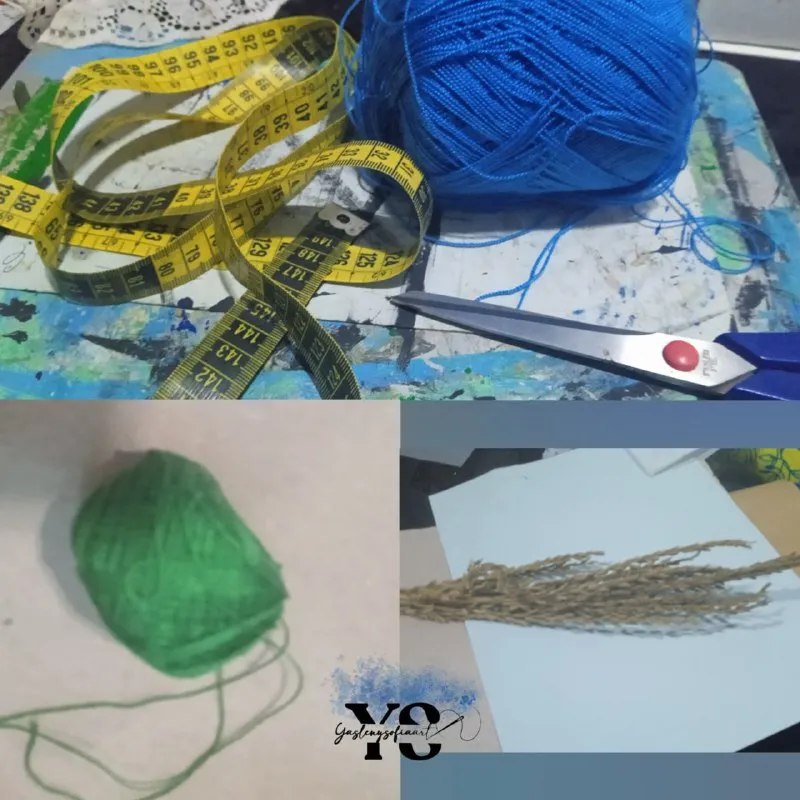
-Hilo para macramé o Hilo encerado de poliéster de 1mm de grosor, en mi caso usé los que tenia en casa, que son para crochet y otro de pabilo, aunque me funcionó, recomiendo dichos hilos. De colores de preferencia, yo usé diversos tonos de azules y verdes.
-Cinta métrica o regla.
-Tijera
-Alambre
-2 tablas con gancho
-Espigas de trigo falsas
-Papel para envolver flores o el craft y otro de un color de preferencia.
-Cordón Yute.
Aquí viendo como va quedando
Las imágenes son de mi archivo personal, tomadas con mi celular Redmi 9A. Portada diseñada en CANVA. Texto traducido en DeepL.
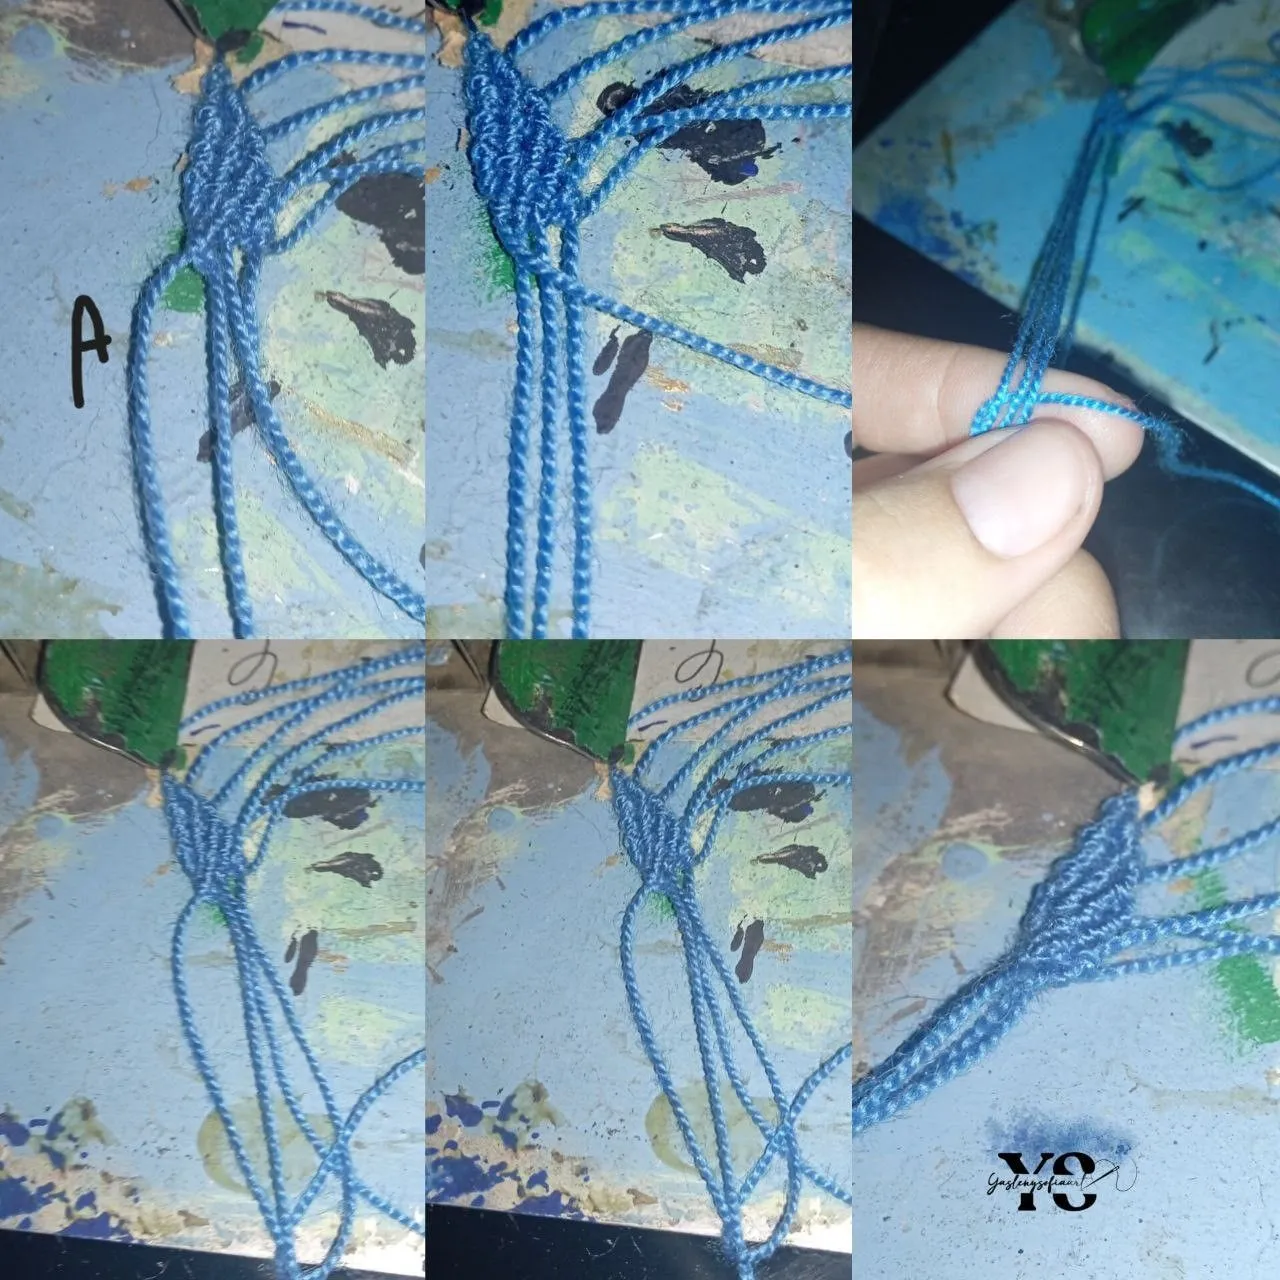
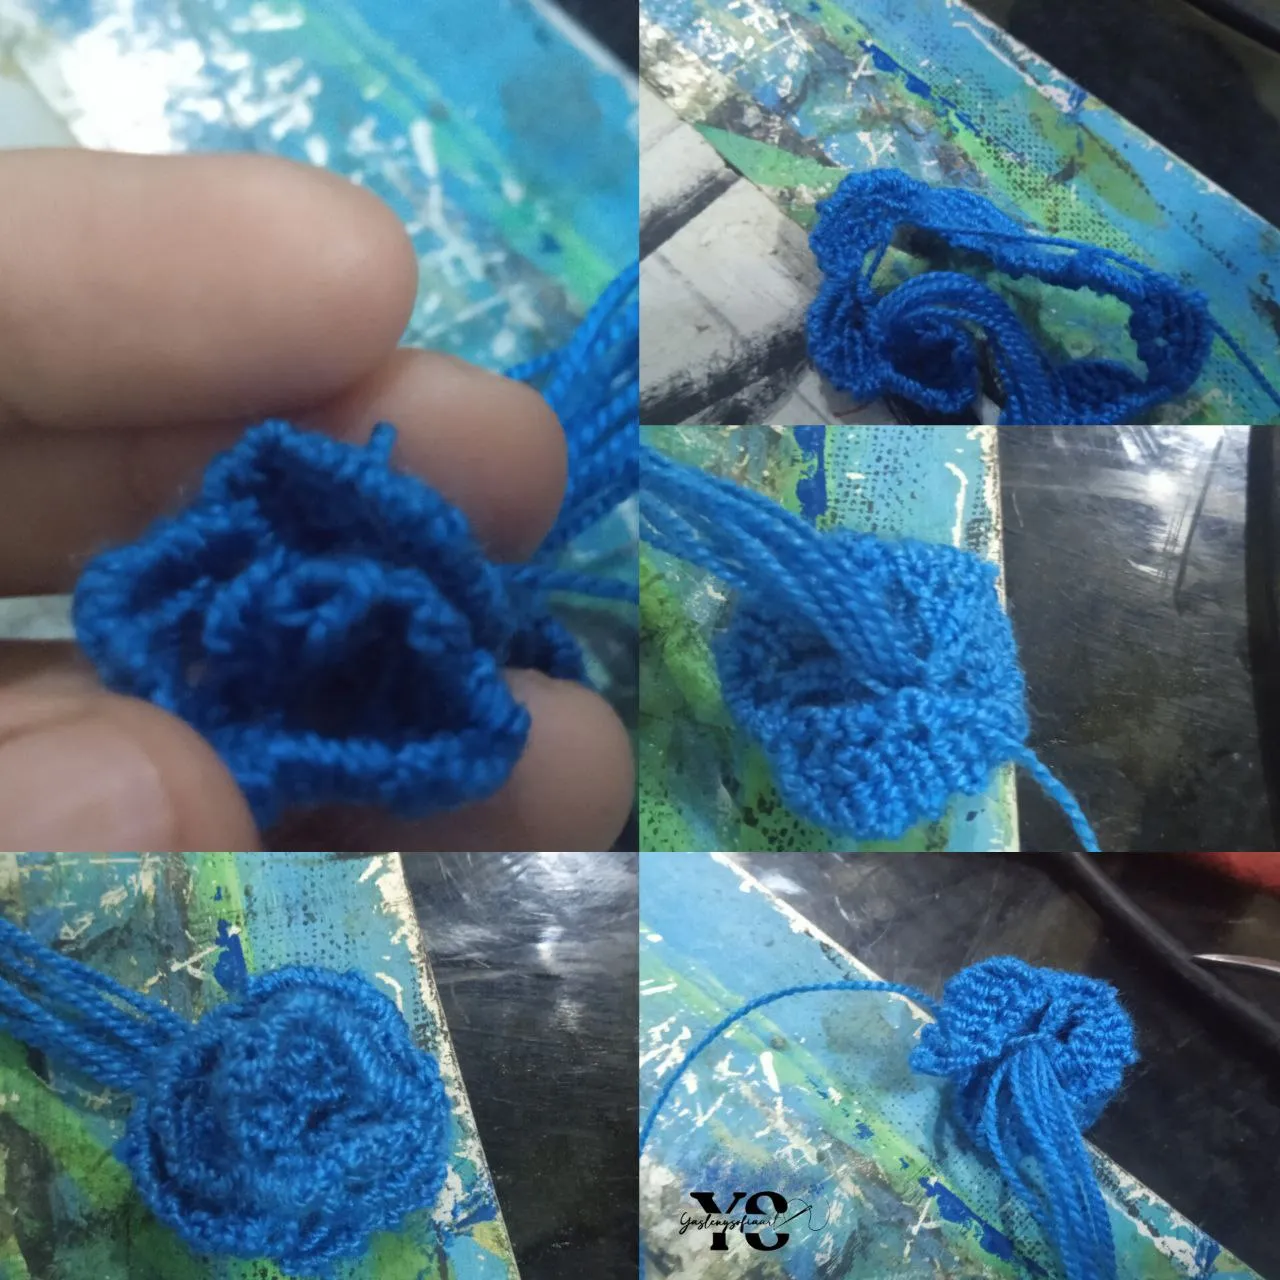
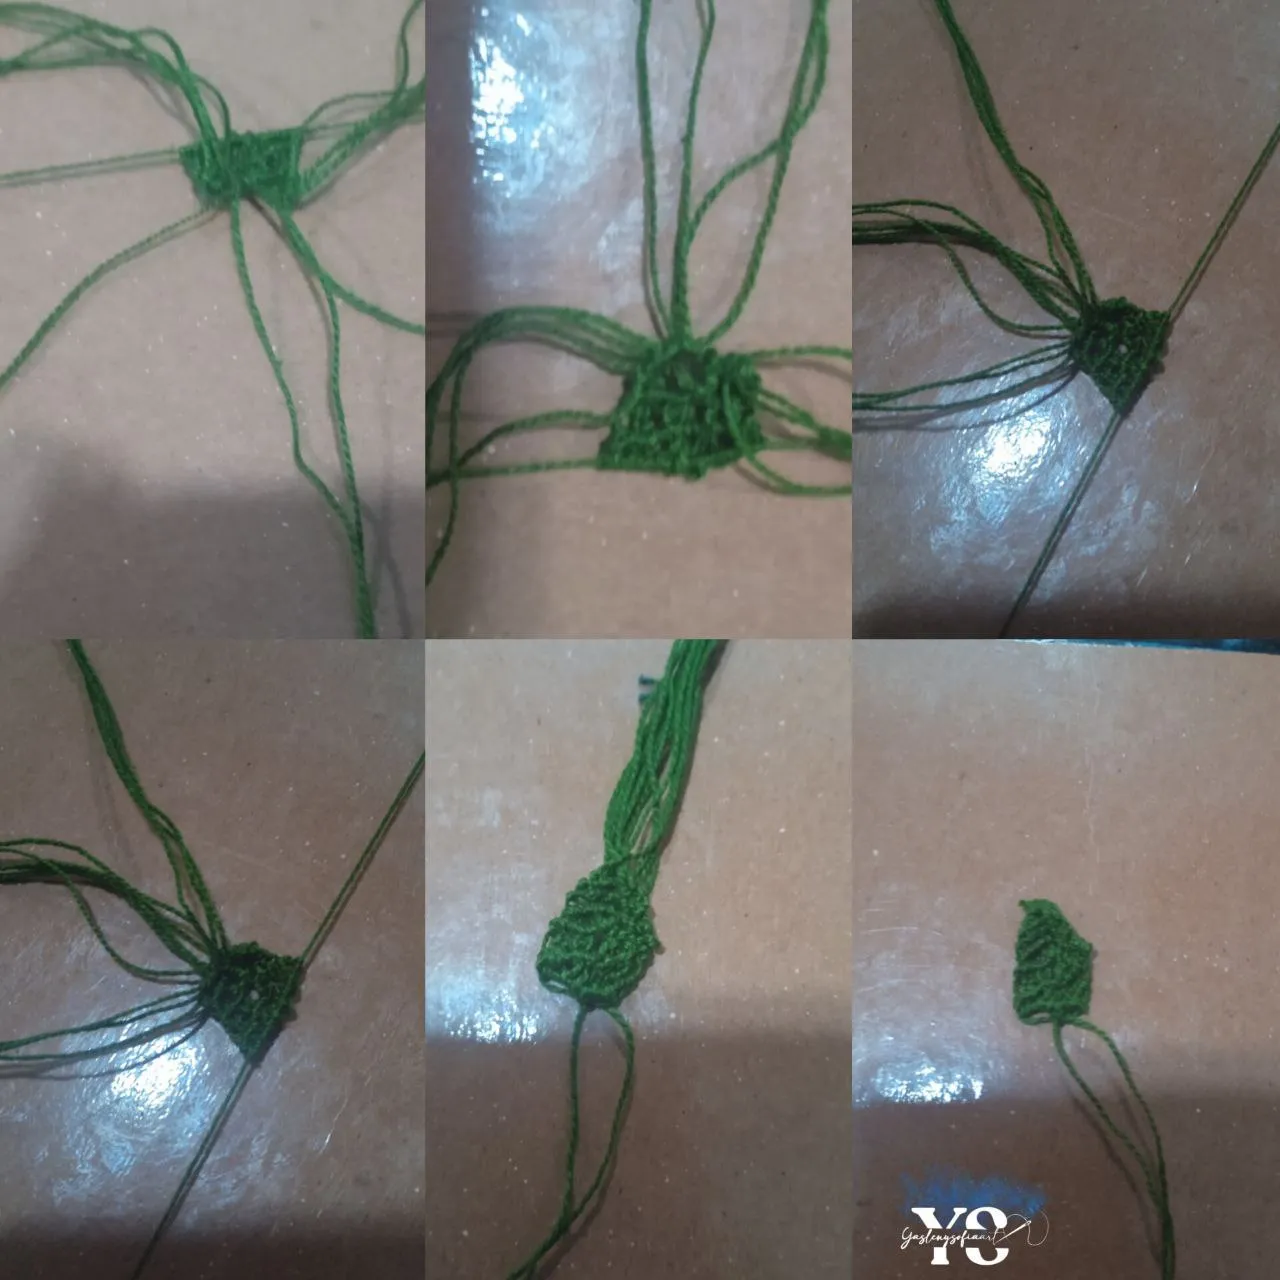
We join those 5 threads with the other 4, we take one of those threads to pass it under the remaining 8 threads, making two knots, and we proceed to make the same with 7 of those 8 threads, because one will remain as a support and this will be the beginning of this new petal.
And we do all the previous steps to make the second petal, only, in this case, from the beginning we ignore the first one (thread A), so the next thread after this one, would remain as the first thread to be knotted.
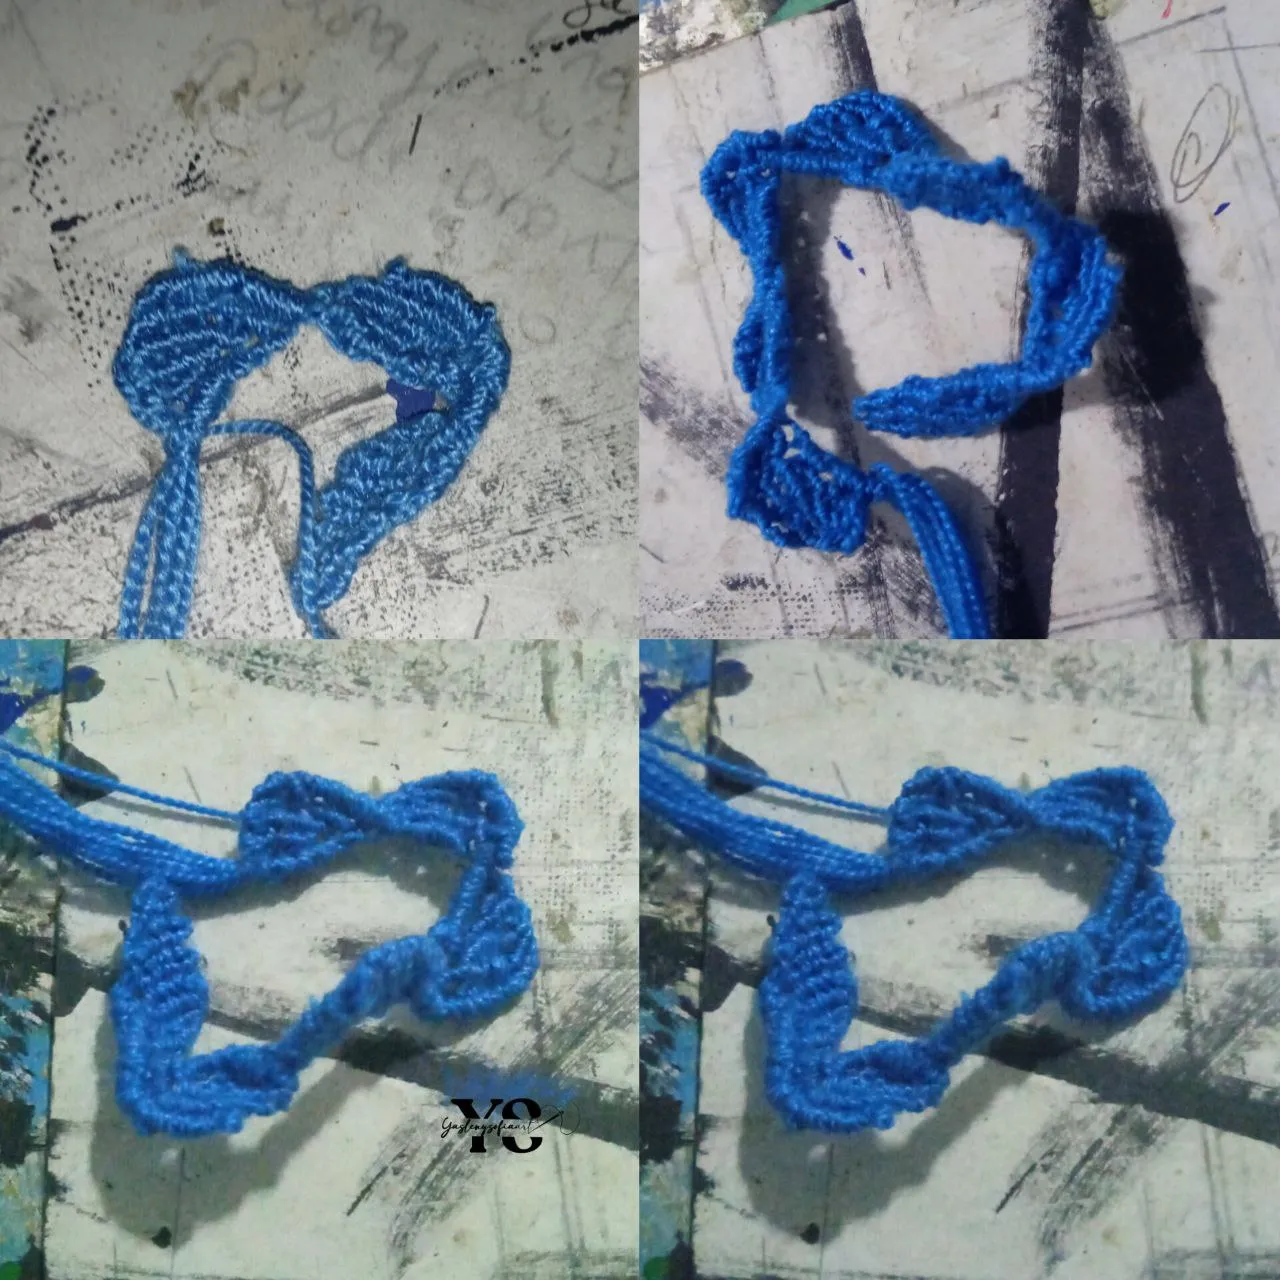
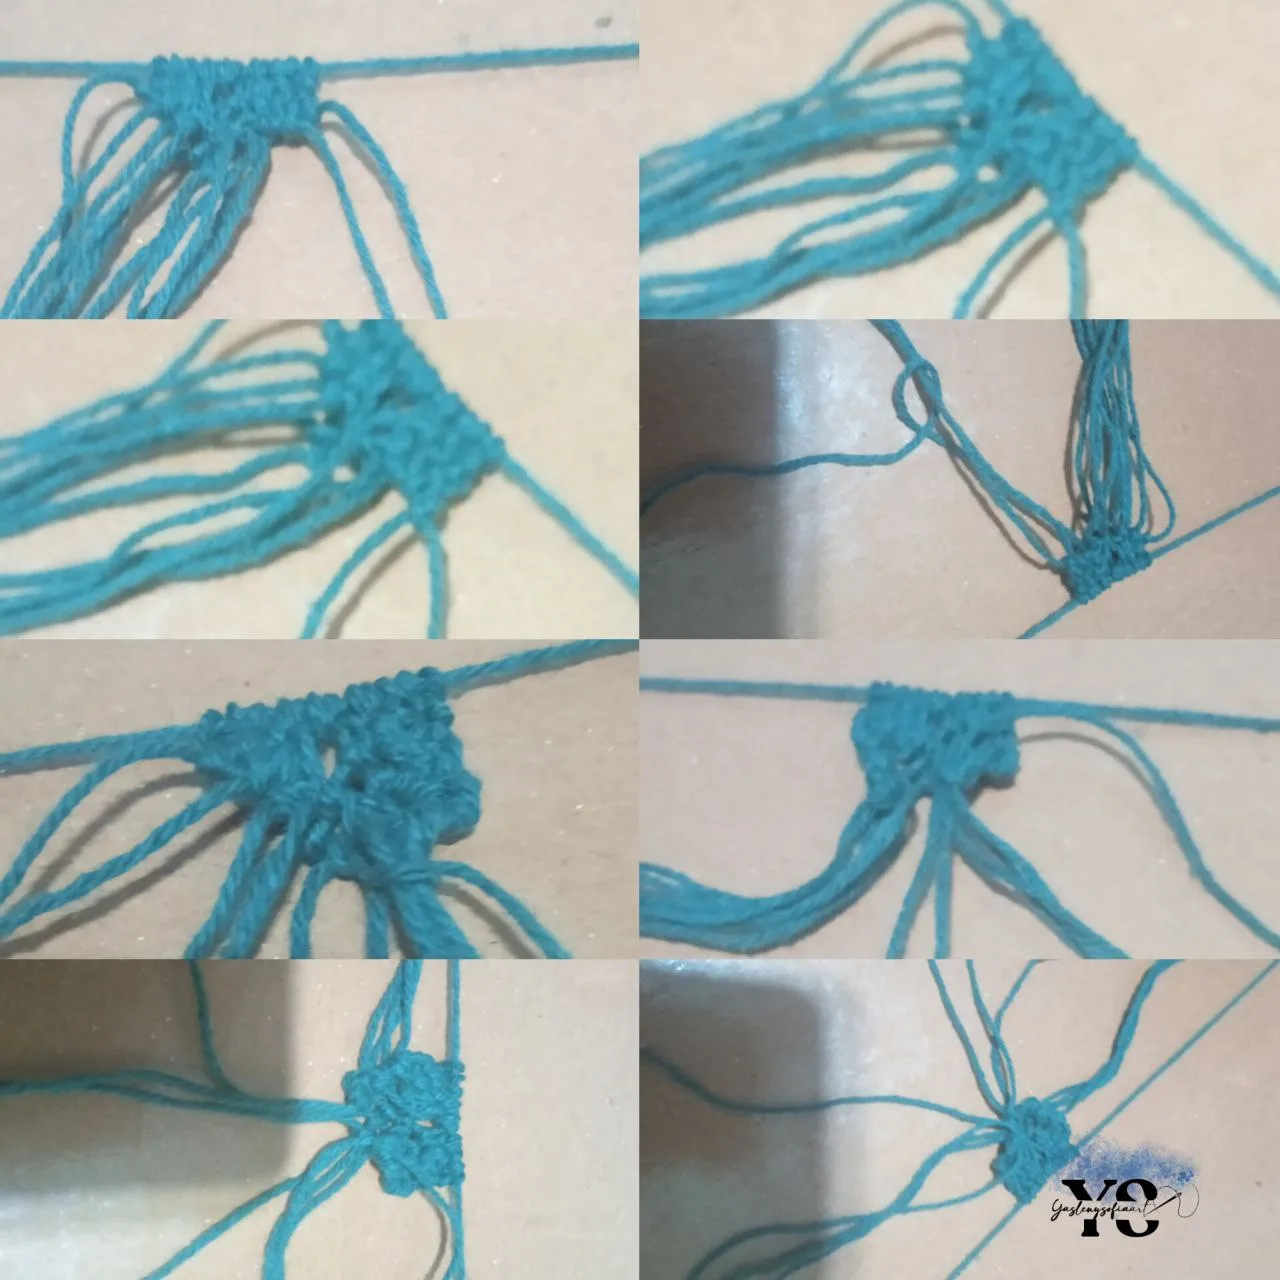
All this we do 14 times, to have 14 petals, if you do it less, the flower will be a little smaller. There is one that I made them with 10 petals because I did not calculate well the size of the threads, but they did not look bad.
Here's how it's coming along
STEP 2: Assembling the rose.
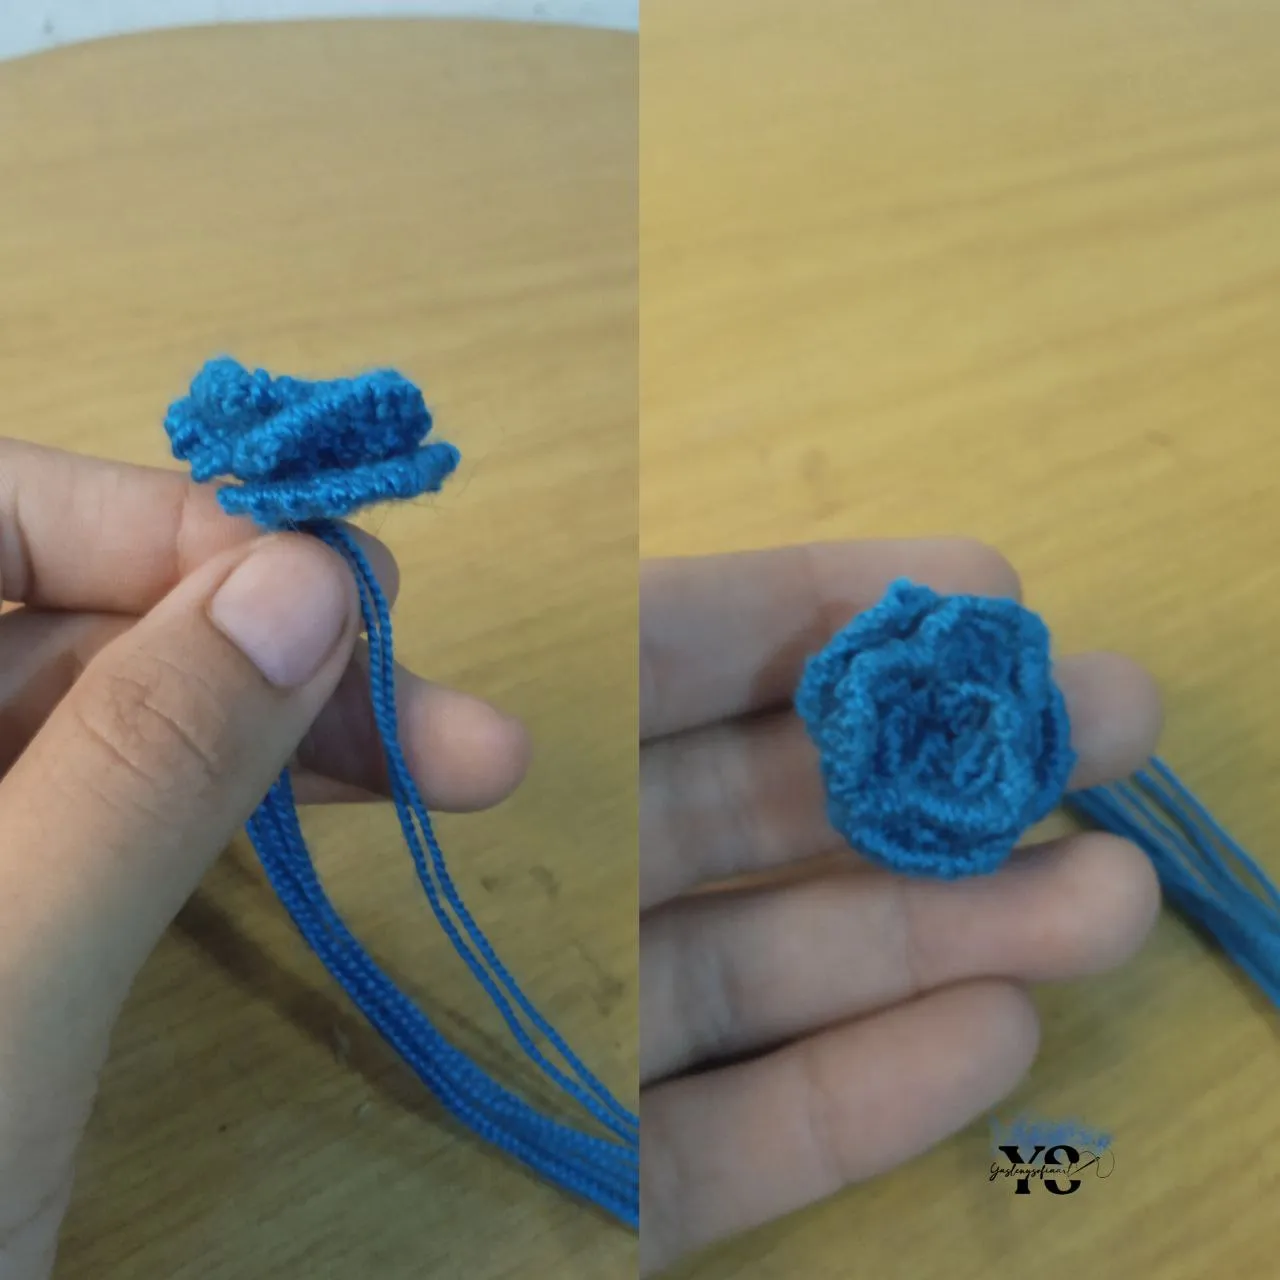
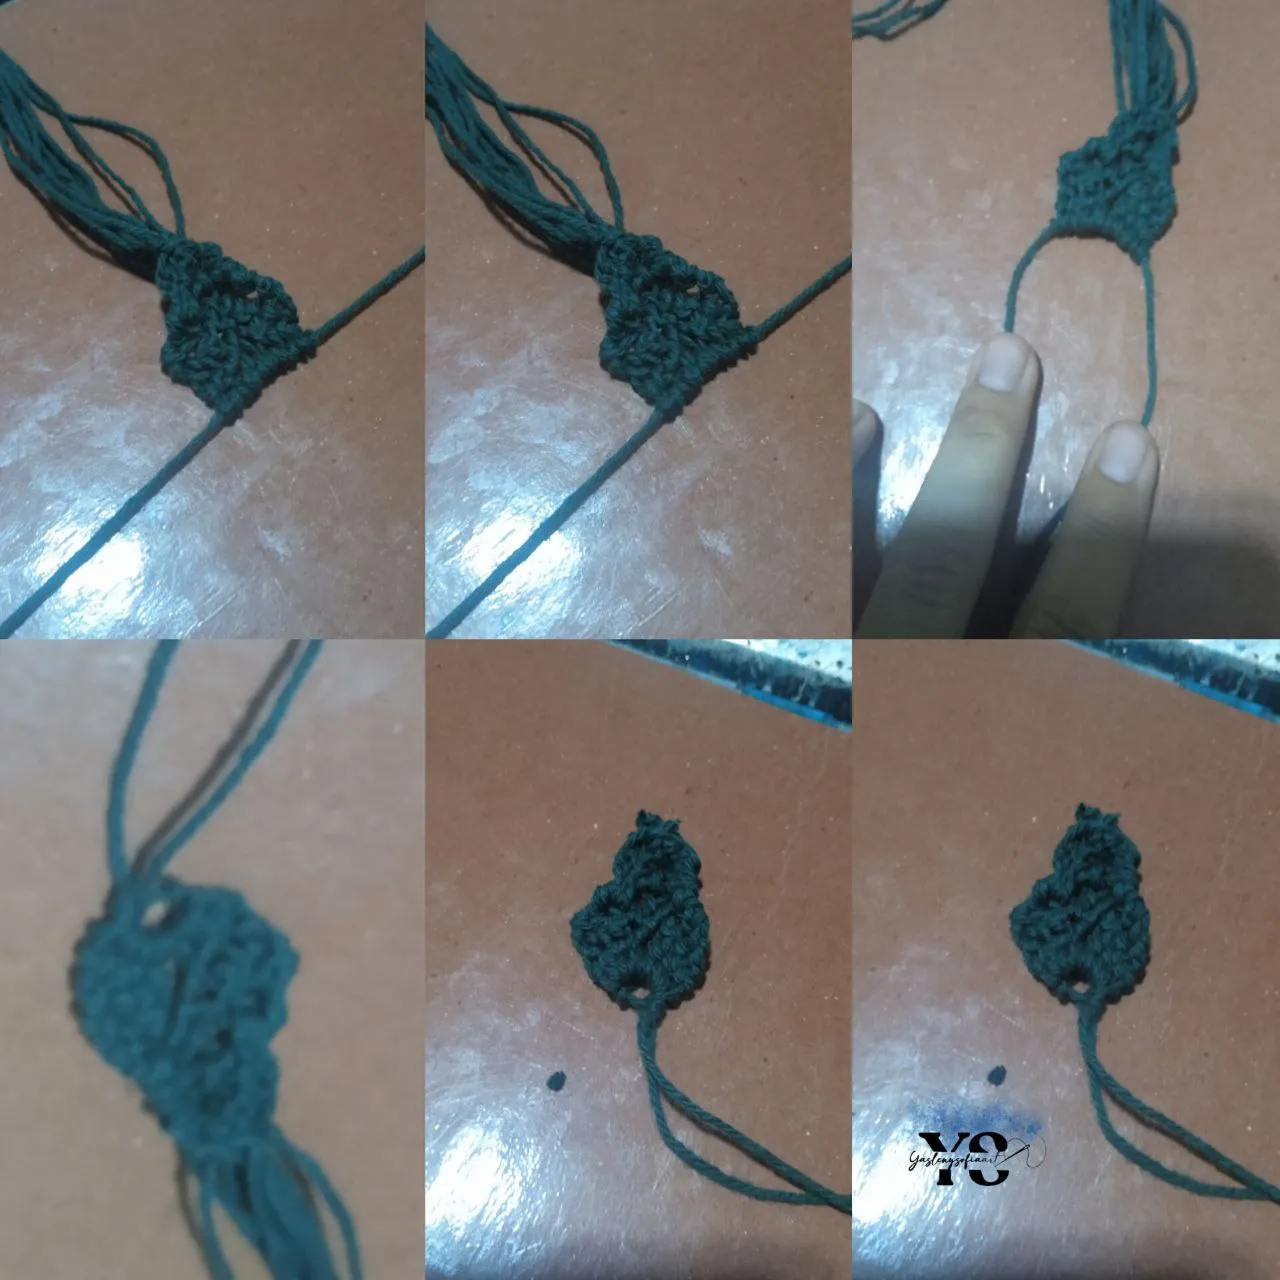
After having the 14 petals, we proceed to take one of the longest remaining threads, passing it through one of the holes that are seen in the petal, on the inside, the face that gives for one. This will be done with the following petals, and you will notice that, as you pull, they will roll up.
When the last one arrives, behind it, we make a knot with the thread, to close the weft, and with two excess threads, we wind all the excess threads, which remain under the rose already formed, to give closure and firmness to everything.
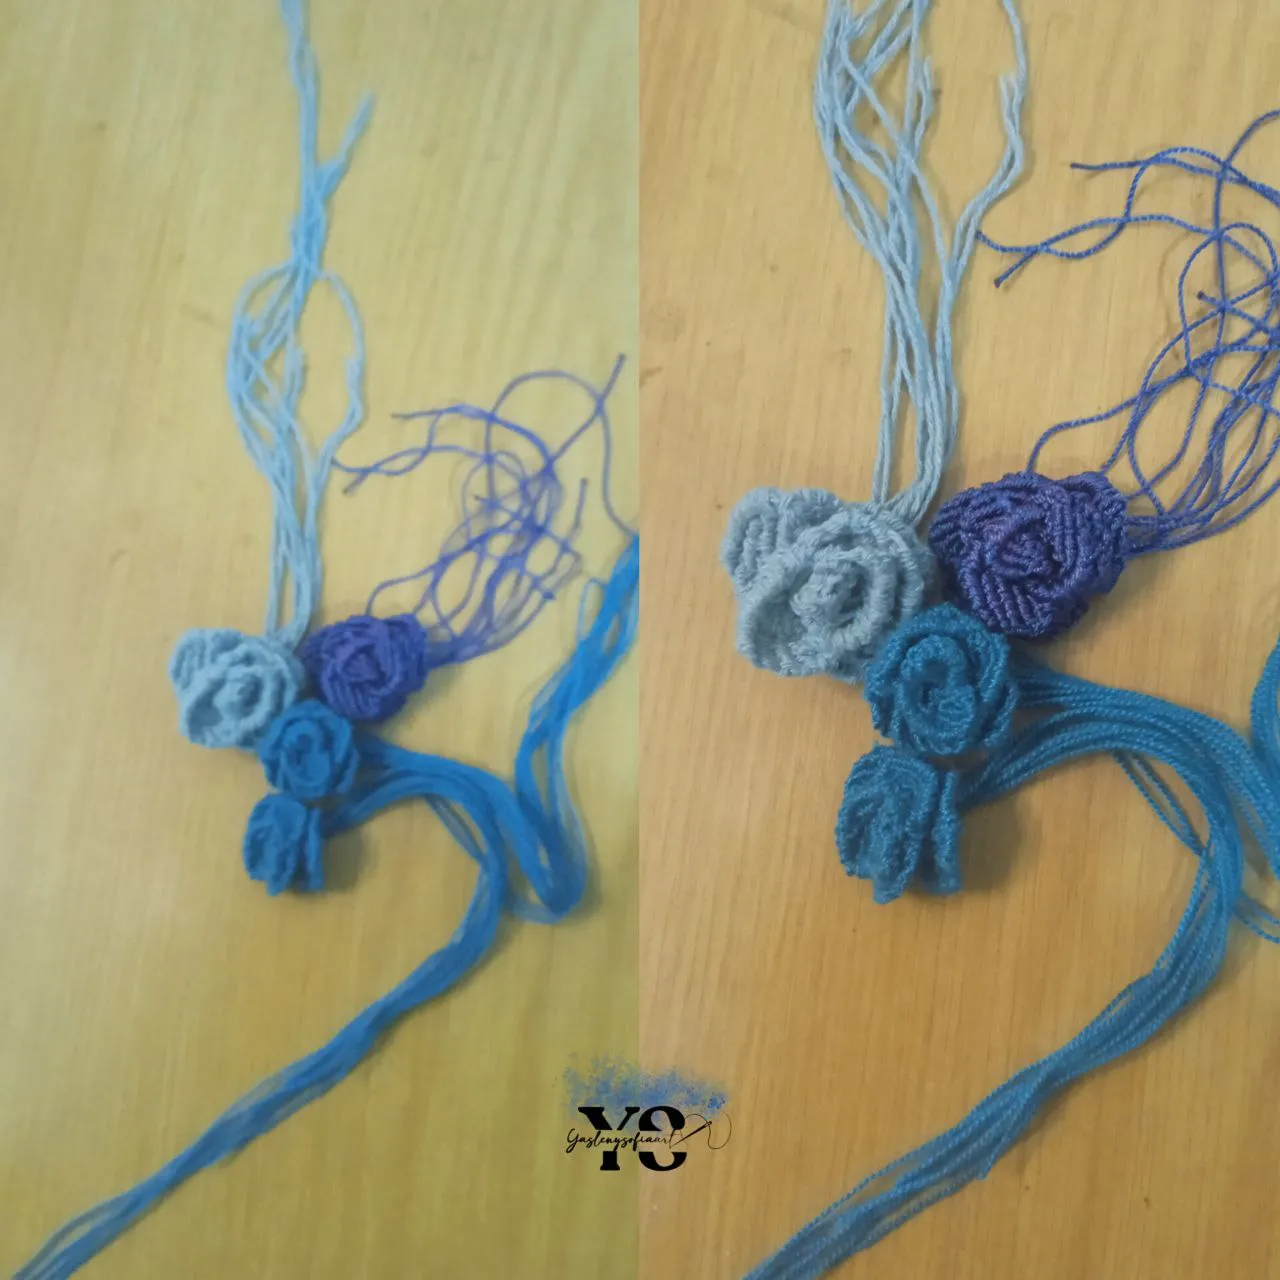
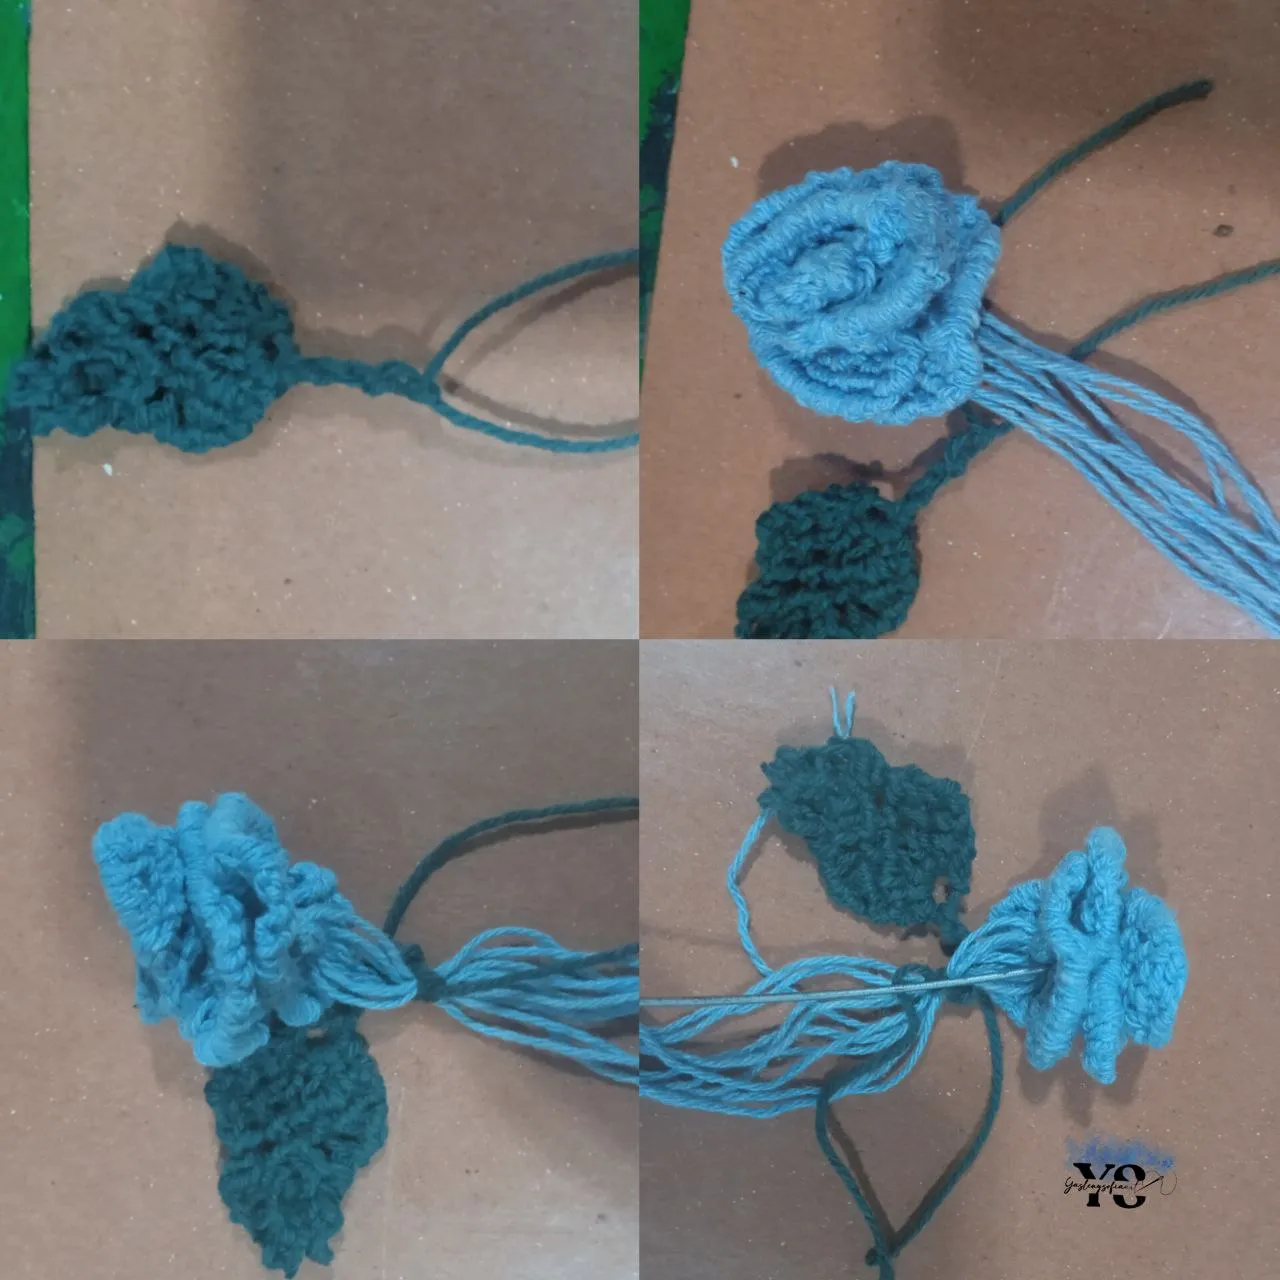
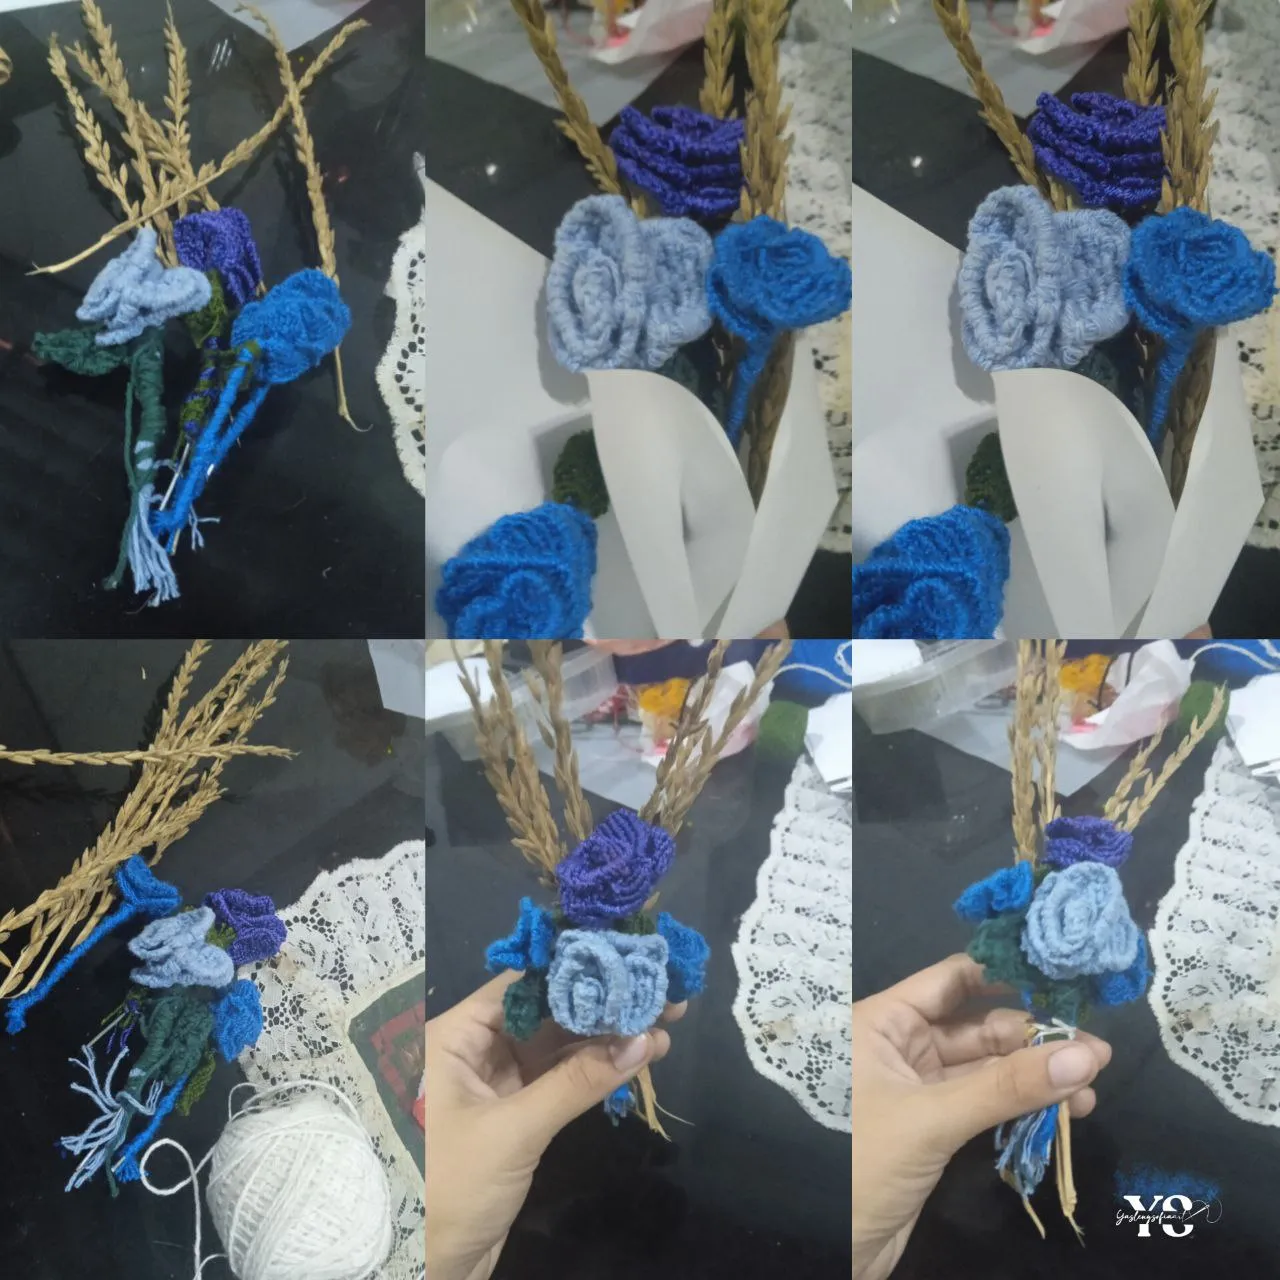
In this image you can see that I made 4 roses of different sizes and materials, the darkest one I made with perle thread and the lightest one with pabilo thread that I had, with this one I liked the texture and it was easier to make the petals.
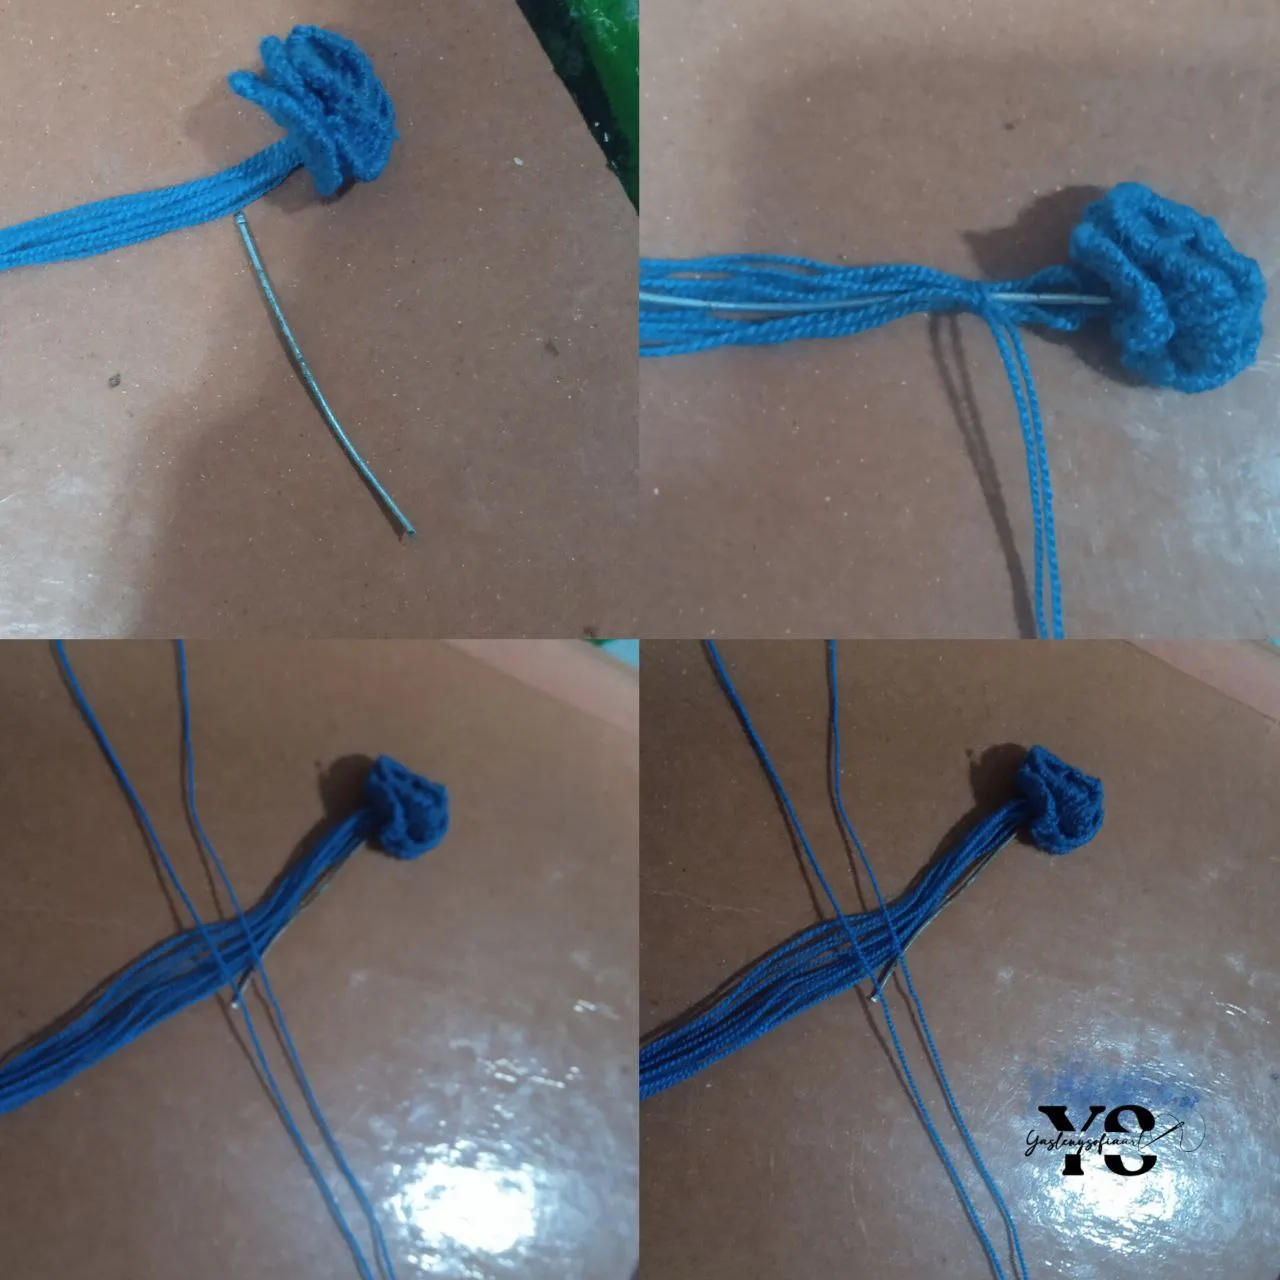
STEP 3: Rose stem.
Here we take a piece of wire, I used one about 7 cm, and with two of the blue flowers and several knots with another thread of the same material, the threads left over from the rose to the wire. It is basically to cover it. Noting that it was better to make green the part of the stem and some leaves.
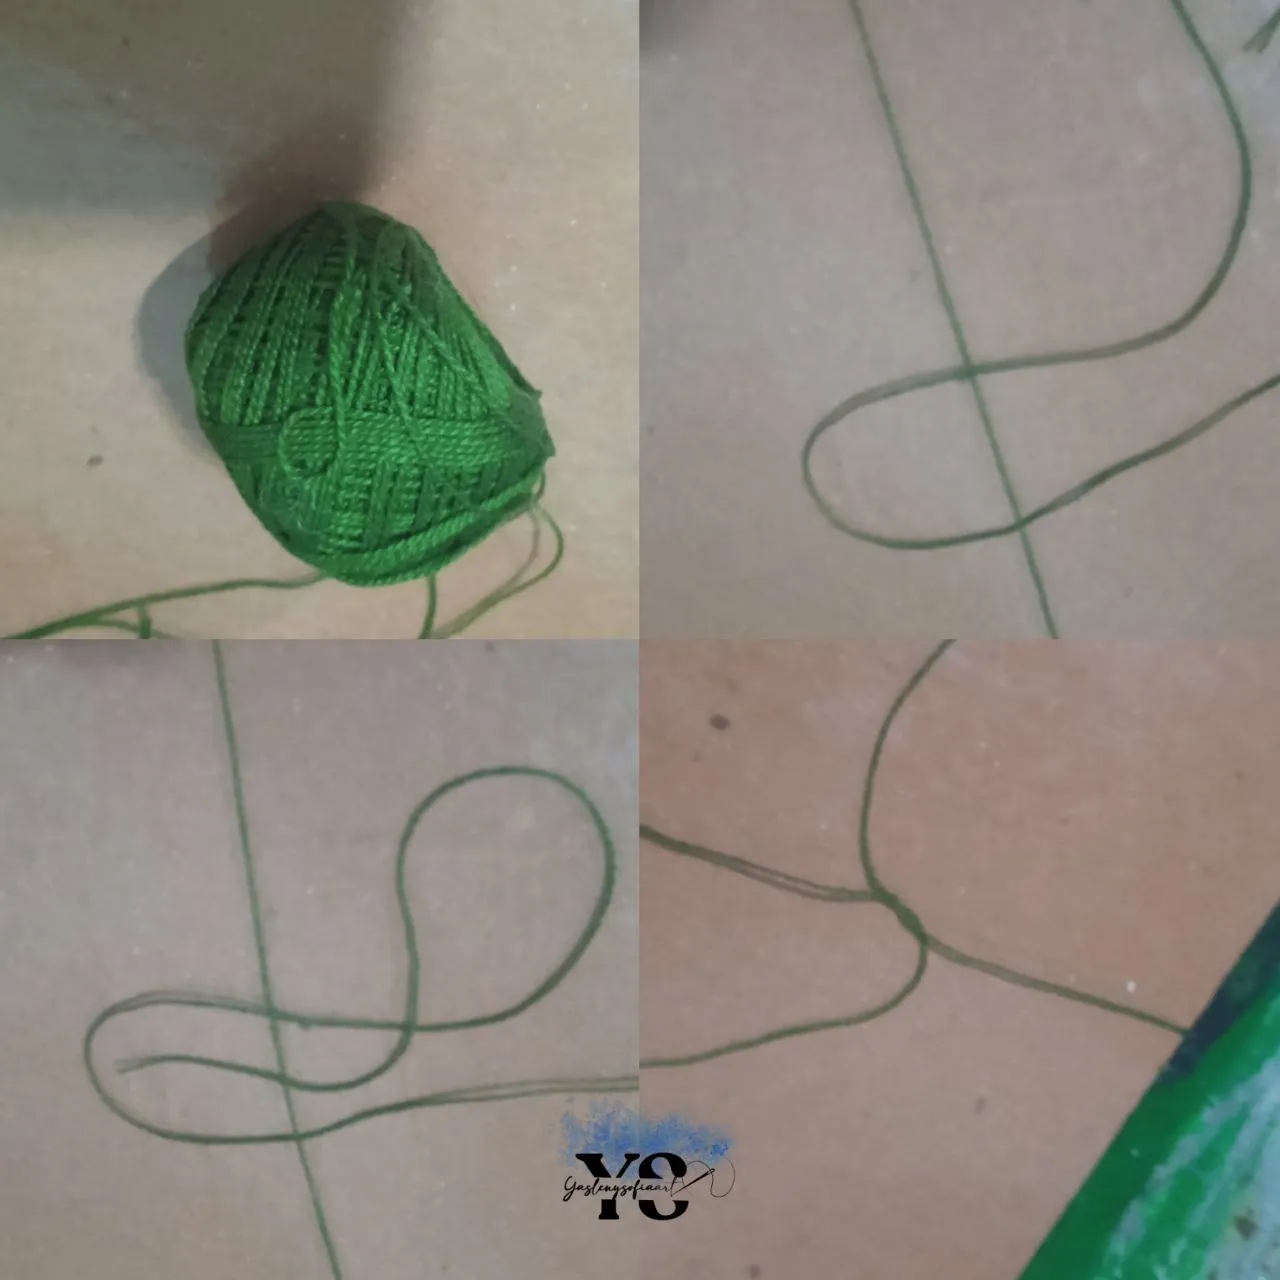
STEP 4: Making the macramé leaves.
For the leaves it was a little more my process, because I could not find a step that would work with the threads I had at hand, I tried a green perle thread and it did not work, in the end I made them with dark green pabilo thread and a thicker cotton thread.
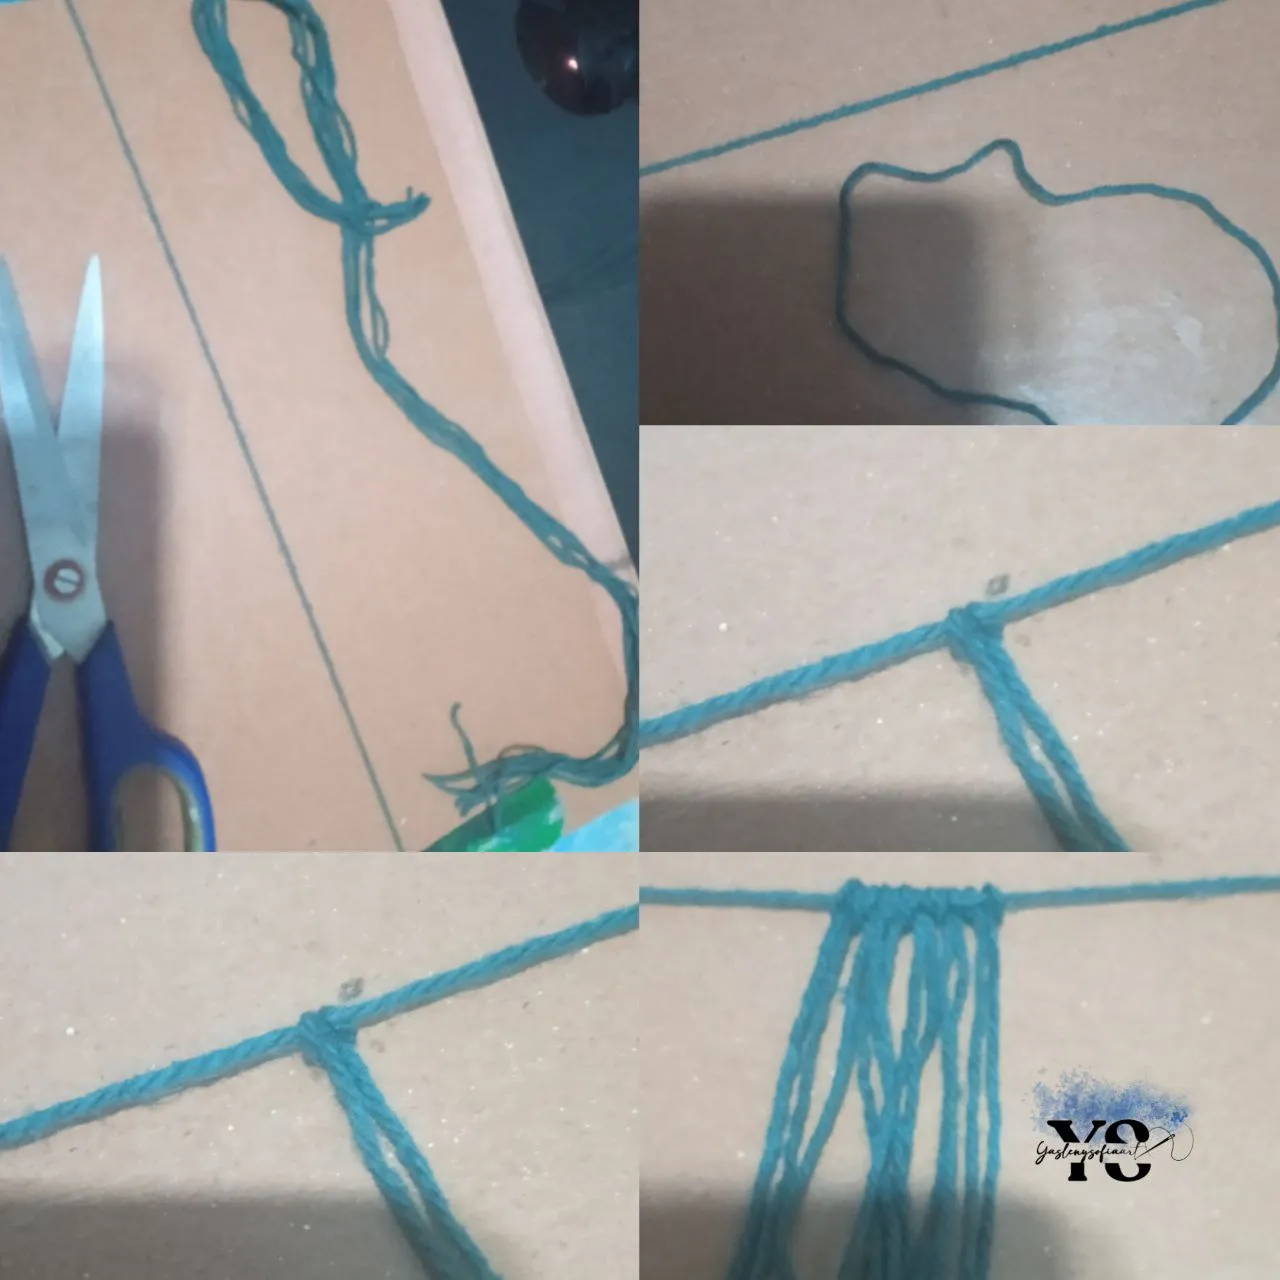
We take 7 threads of 60 cm 6 of them and 30 cm one; the one of 30 cm is going to be the base, so we hook it to the boards. With the other 6 we tie the lark knots. The first thread on the right side, we knot it 2 times with each of the other 5, and this would be in the middle at the end.
We do the same with the other 6 threads on the left side, leaving the first of these 6 in the center. The two threads that remain in the center, we make two knots and repeat the process, it is almost like the petal.
Now, so that all the threads are directed to the center, we are making a knot with the next one, but instead of leaving threads for the other one, we are not bringing it with the other one, and it is directed to the center and making the shape of leaves.
When we have this ready, we release the base thread and we make two knots with its ends, so the leaf bends and gives it that 3D sensation. And, we proceed to cut the other threads that are at the tip of this leaf, except for the base thread, which will be used to attach it to the stem.
With the cotton yarn, I repeated the first steps 3 times, to make it longer, but basically I did the same as the previous steps.
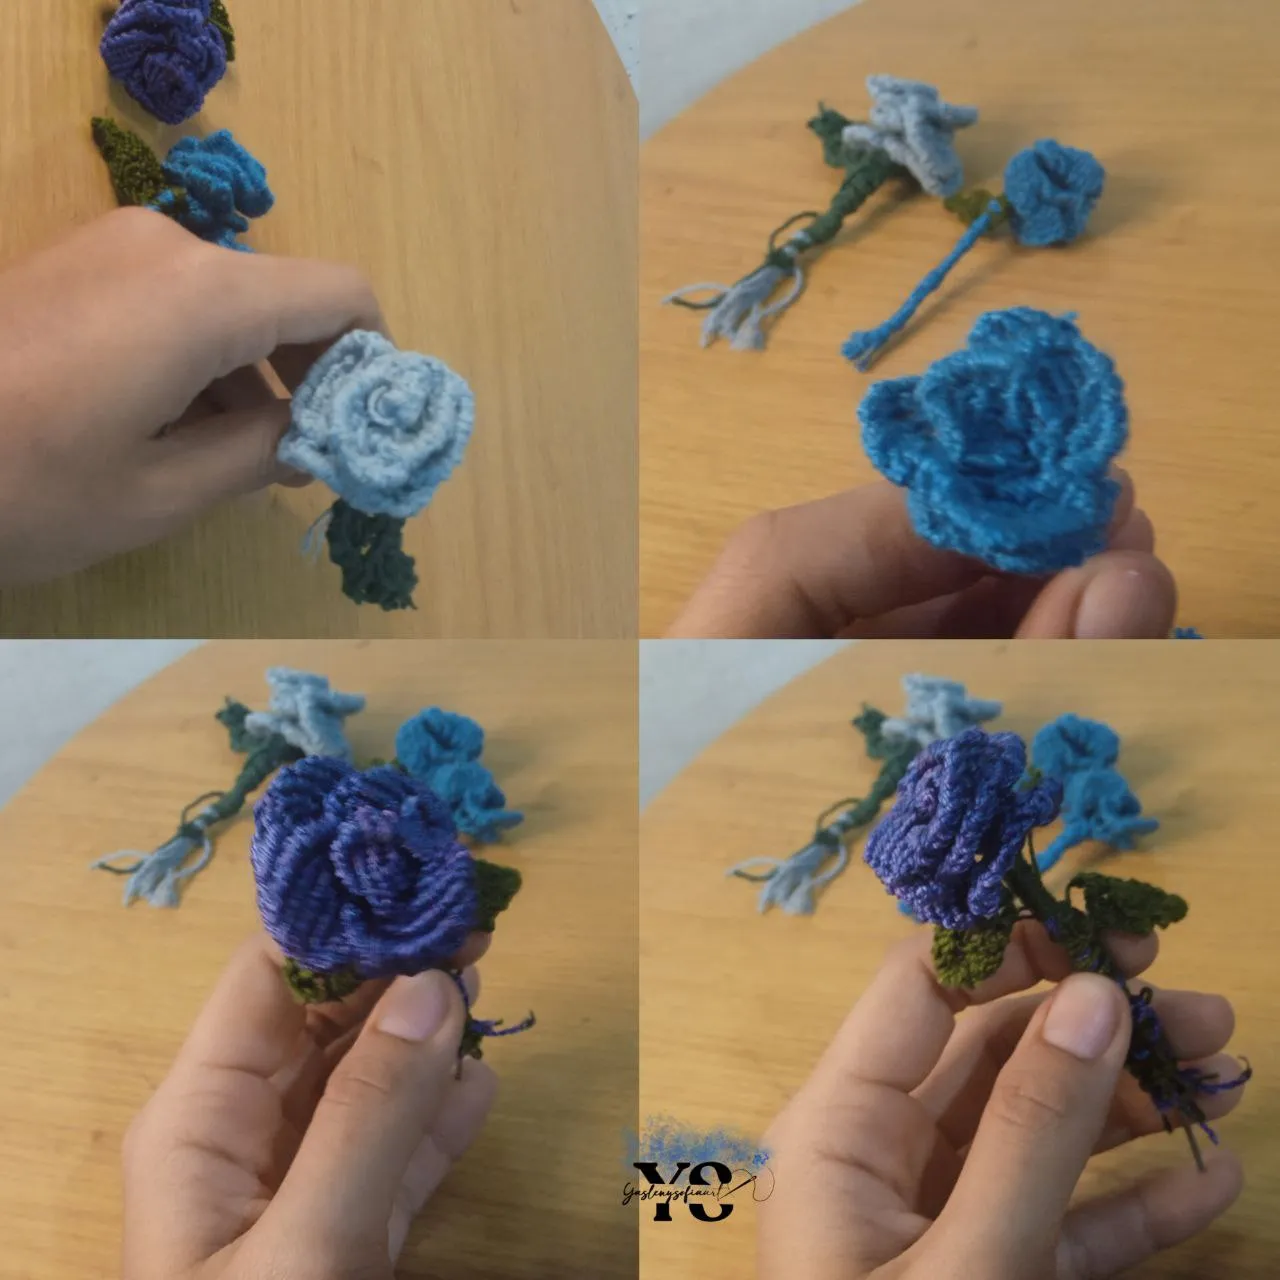
STEP 5: Tie the leaves to the stem of the roses.
Here we first take the leaf and make knots with the leftover threads, to give it firmness, and then we cover it with the green thread, the wire and hooking it to the threads of the rose, as was done with the others.
This is the result of the 4 roses, they did not turn out so well, but for a first time understanding the process, it turned out well.
STEP 6: Assemble the Bouquet.
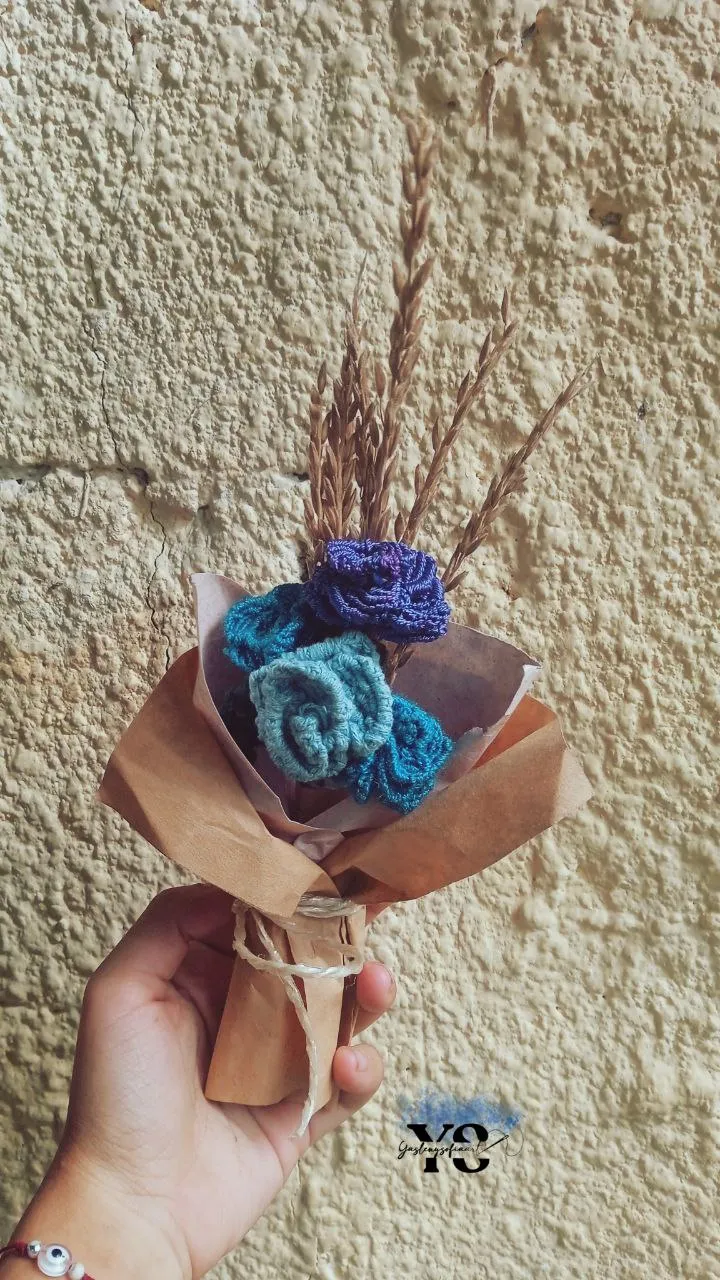
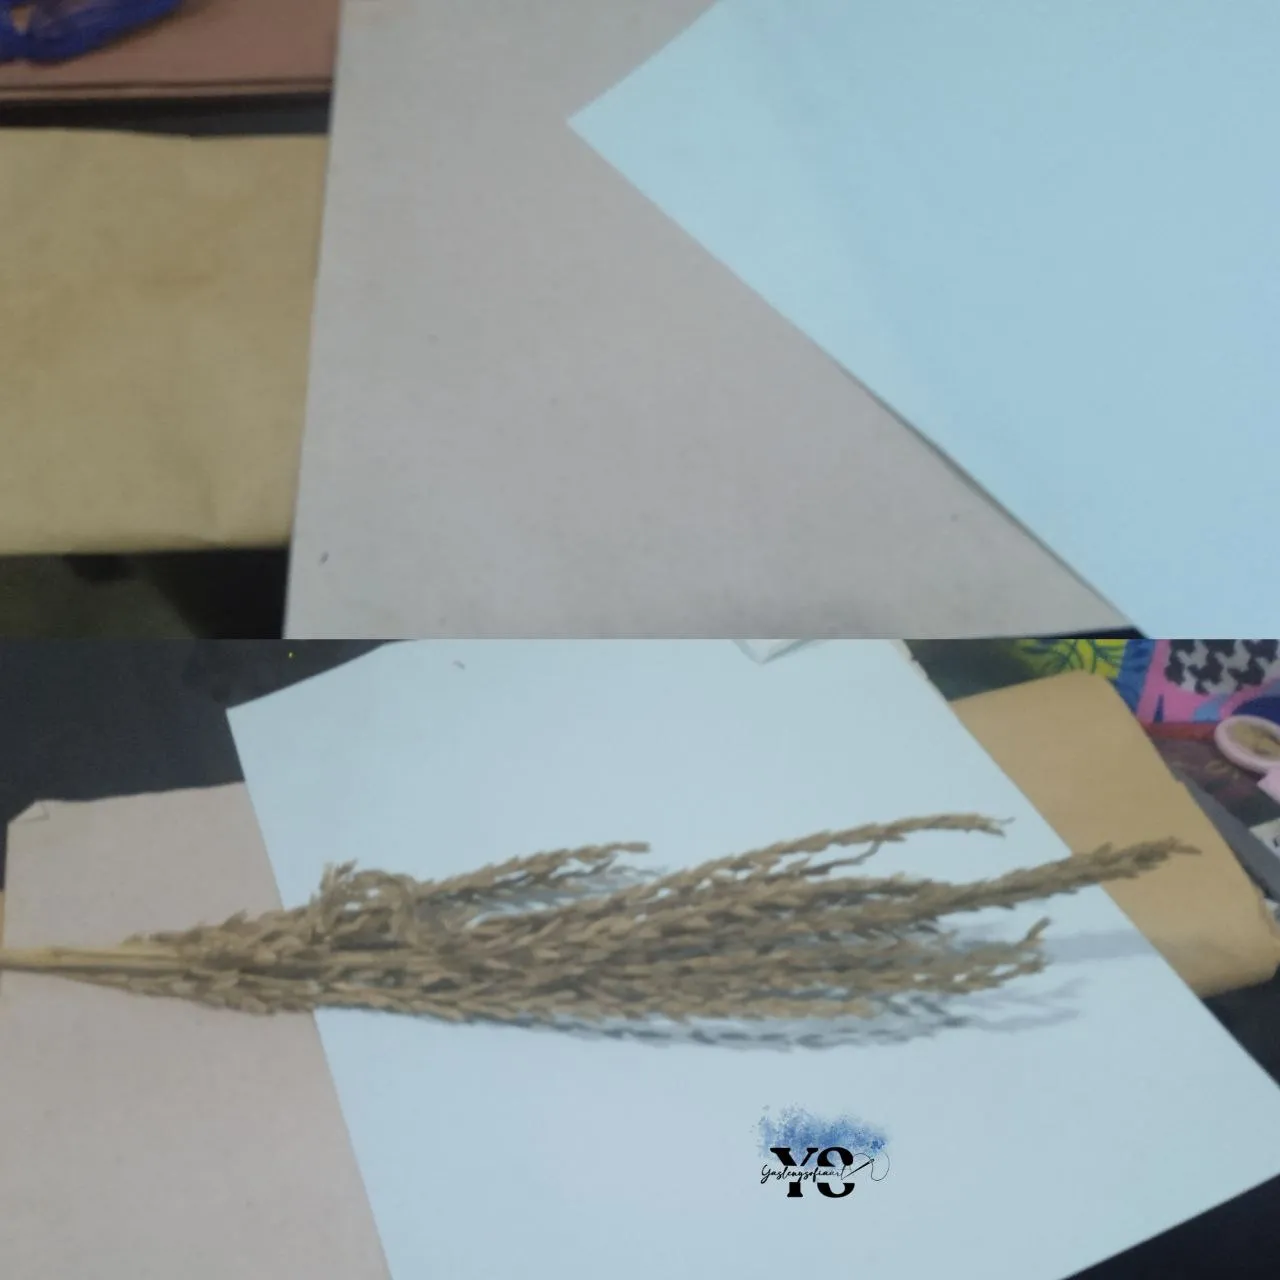
I wanted to make the wheat spikes in macramé, but it didn't work out, so I bought these, which are very large, although by cutting them they can be used for many bouquets and other things. First we take the roses and about 4 or 5 wheat spikes and we join them with wicker thread.
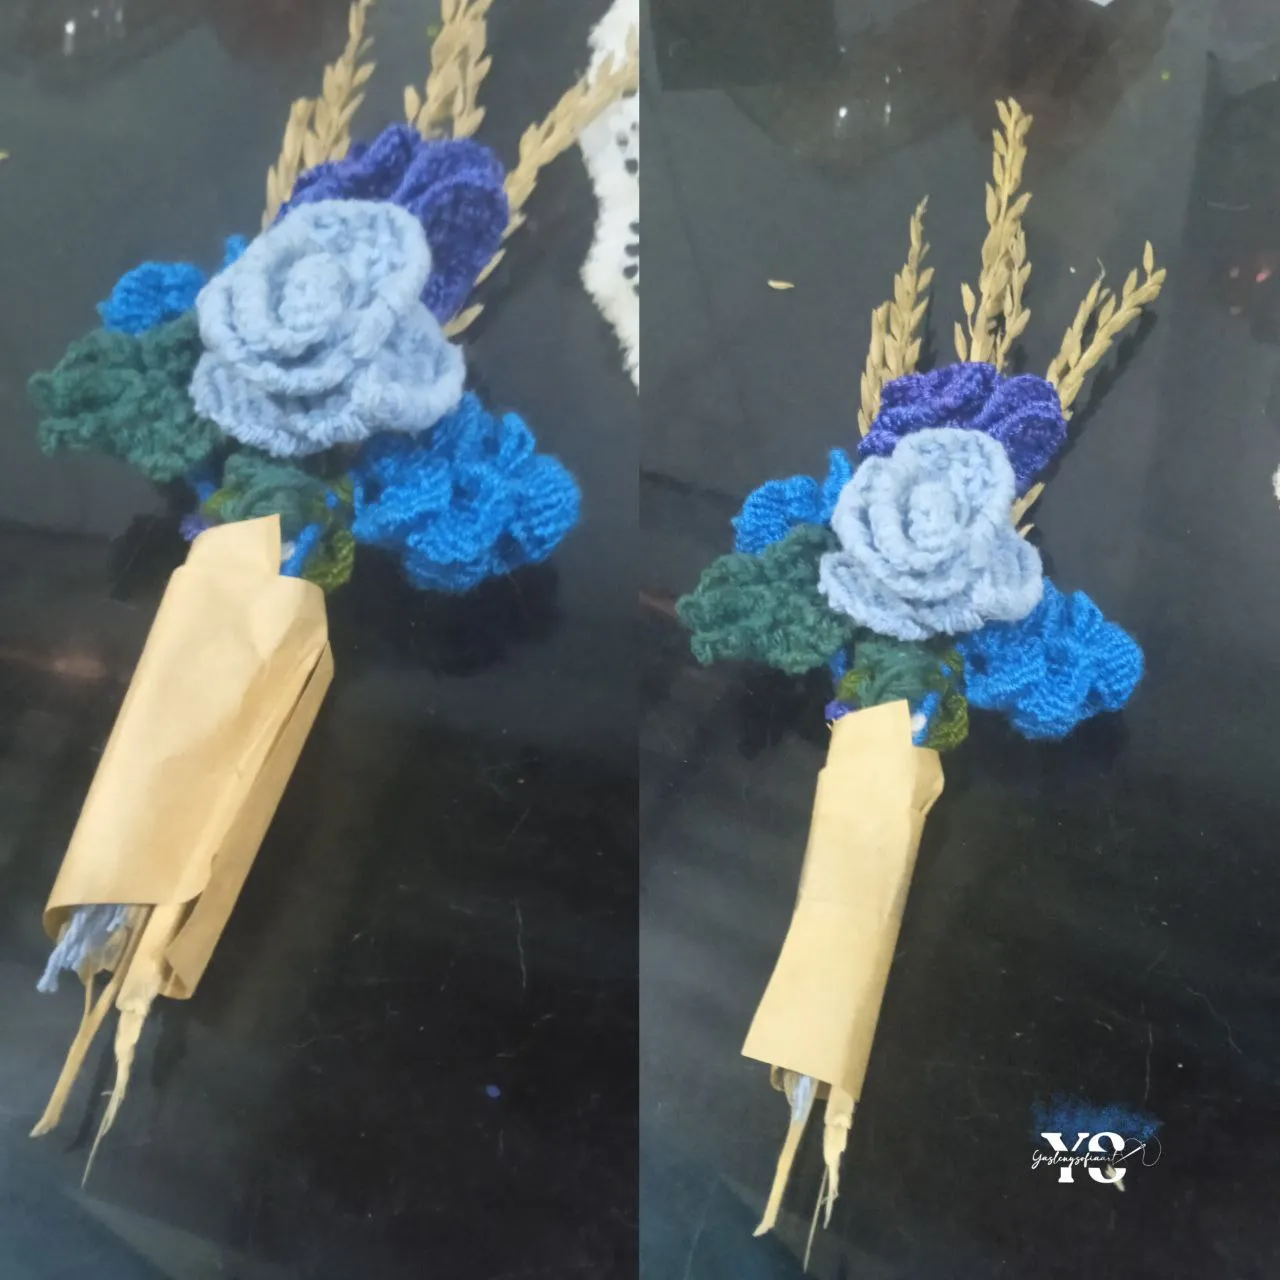
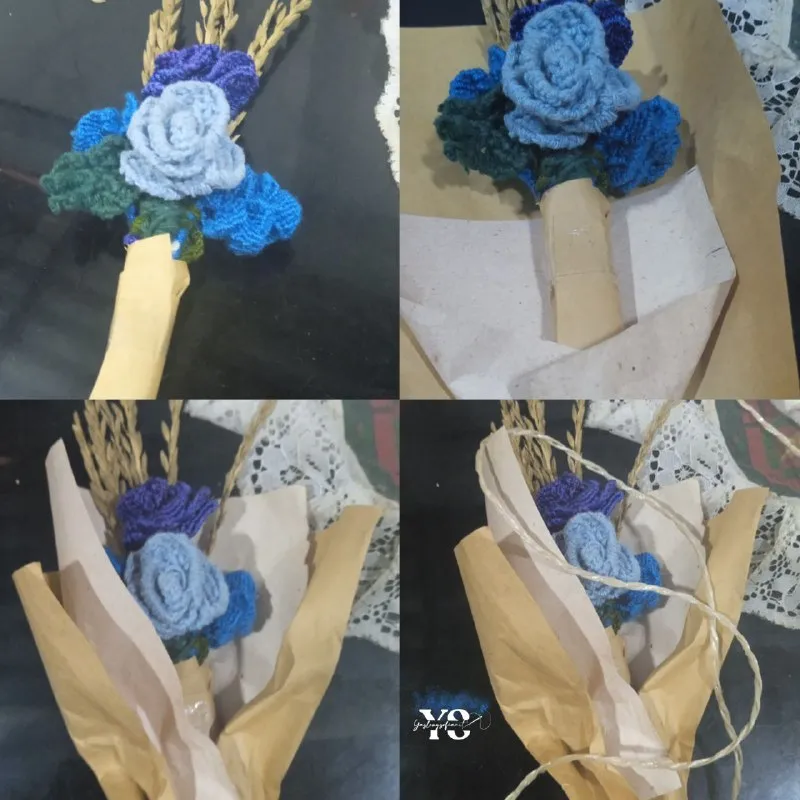
In my case, since the defects of the roses were going to be very visible, I rolled up a small piece of craft paper so that they wouldn't be visible when I rolled them. Then, we cut a piece of craft paper measuring 10 x 12 cm and another pink paper measuring 8 cm x 7 cm, meaning that this one will be smaller than the one that will be visible externally. I don't know how to make a bouquet, but I did my best, so I just rolled the papers into the arrangement and tied them with a jute-style thread, which gives it a touch of its own.
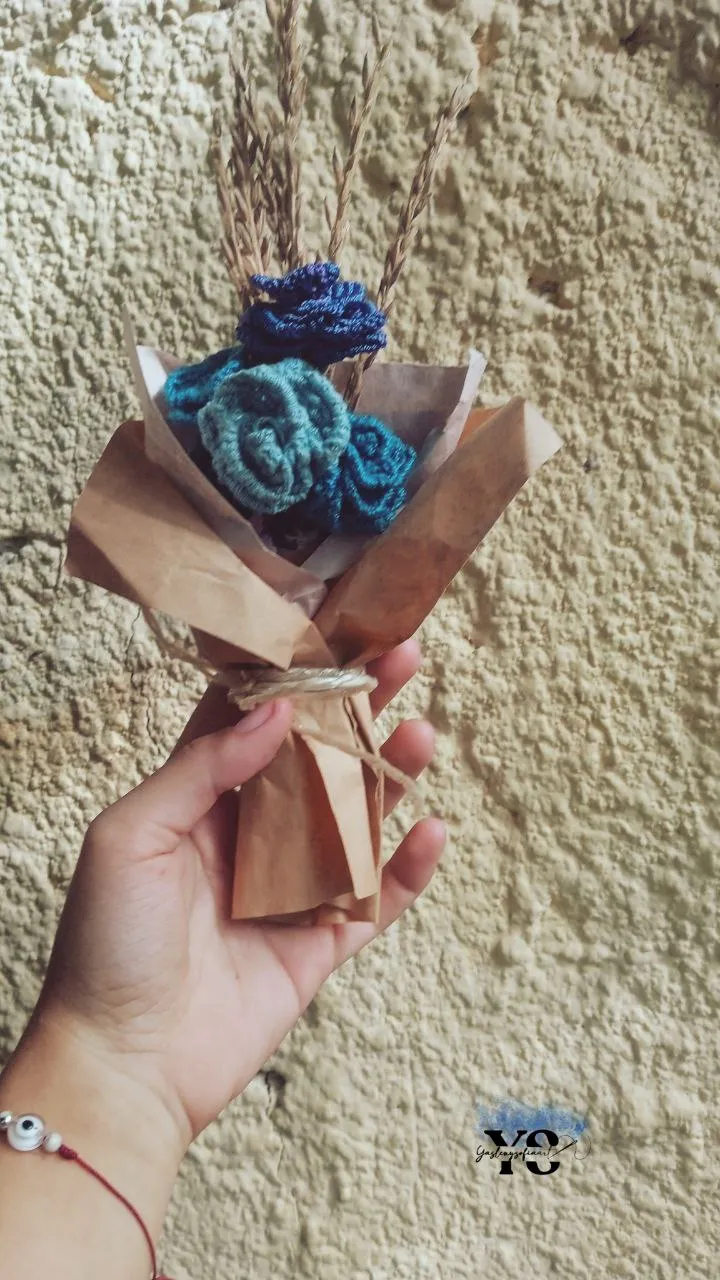
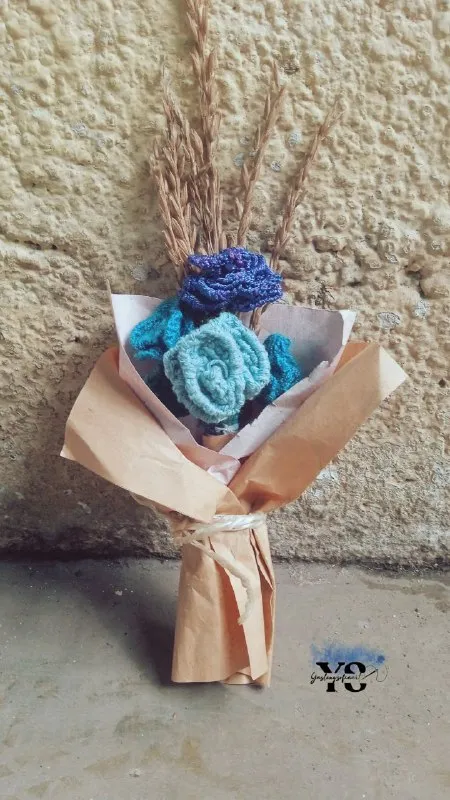
This is the final result of everything, the person I gave it to really liked it and I look forward to your comments on it.


Thank you for reading my post. I hope you liked it. I will be looking forward to answering your comments. You can visit my blog, follow my content and social networks.

FACEBOOK / INSTAGRAM / TWITTER
ESPAÑOL
Saludos comunidad de @DIYHub, hoy quiero compartirles como hice este pequeño bouquet rosas hechos en macramé para un regalo, espero les guste el resultado.
PASO 1: Realización de los pétalos de rosa en macramé.
Tomamos 5 hebras del hilo de algodón (o hilo para macramé) de casi 2 metros cada una; dependiendo del tamaño en el que quieres que resulte la rosa, ejemplo con esos casi 2 metros en hilo de algodón me salen 14 pétalos de la rosa, si hago 12 o 9, la rosa resulta más pequeña. También depende del grosor del hilo.
Uno de esos hilos, lo prensamos con una tabla de gancho, que un poco más de la mitad que por fuera. Luego, agarramos otro hilo, doblado por la mitad y hacemos un nudo alondra, que es pasar la parte suelta de ese hilo, por el medio del otro.
Con este nudo listo, se procede hacer un nudo por cada uno de los extremos del mismo, es decir, tomo hilo derecho y hago un nudo, tomo hilo lado izquierdo y hago un nudo. Este lo hacemos con los 4 hilos restantes, resultando de esta manera.
Tomamos el primero hilo de la hilera (vamos a llamarlo hilo A), de derecha a izquierda, es decir el que está cerca del gancho y lo ponemos encima del resto. El siguiente hilo después de este (Hilo B), se cruza con este se hace un nudo dos veces; al hacer estos nudos dejamos este hilo (B) y agarramos el siguiente hilo (C) y lo anudamos con el primero (el A) dos veces y así sucesivamente repetimos con los posteriores hilos).
Cuando estemos al final de la hilera, el primer hilo (A) lo pasamos por debajo del hilo base o hilo D hacemos los nudos, quedando este hilo (A) del otro lado.
Para la siguiente hilera, el primer hilo (el B) lo dejamos a un lado por lo que el segundo hilo que sería el C, hacemos lo mismos que el paso anterior, encima de los otros y con el resto el nudo, solo que cuando se llegue al final no le vamos hacer el nudo con el hilo A, solo lo vamos dejando a lado de este.
Ahora, dejamos los dos primeros hilos a un lado, y con el siguiente hilo, hacemos los respectivos nudos. Por lo que al final quedarían 3 hilos al otro lado.
Aquí vamos con la última fila, ignorando los tres primeros hilos, hacemos el mismo proceso con los restantes.
Ahora bien, con los cuatros hilos que pasaron el otro lado, tomamos el primero del que esta izquierda a derecha (el A) pasándolo encima del siguiente, donde haremos dos nudos, es casi el mismo procedimiento que los anteriores, solo que en vez de dejar a un lado con el hilo que hace el nudo, nos los llevamos con el primero y hacemos un nudo con el siguiente hilo, juntando este tercero a los otros dos y hacemos nudo con el siguiente, es decir C le hace un nudo al hilo A, y en vez de C quedarse de un lado, se viene con el A y el siguiente hilo le hace un nudo a estos dos y así sucesivamente.
Soltamos del gancho lo que se acaba de hacer y lo volvemos a sujetar horizontalmente, haciendo con esos 5 hilos, como los marco en la imagen con el número, se hace el mismo proceso anterior, primer hilo, anudo con el siguiente, en vez de dejar el que hace el nudo a un lado, lo juntamos con el primer y el tercer hilo les hace un nudo; ese 3 se une a los otros 2 y con el siguiente les hacemos dos nudos y así sucesivamente, completando el primer pétalo.
Esos 5 hilos los juntamos con los otros 4 anteriores, tomamos uno de esos para pasarlo debajo de los 8 hilos restantes, haciéndole dos nudos, y procedemos hacer los mismos con 7 de esos 8 hilos, pues uno quedará como soporte y así quedaría como el inicio de este nuevo pétalo.
Y hacemos todos los pasos anteriores para hacer el segundo pétalo, solo que, en este caso, desde el inicio ignoramos el primer (el hilo A), por lo que el siguiente hilo después de este, quedaría como el primer hilo a anudar.
Todo esto lo hacemos 14 veces, para tener 14 pétalos, si lo hacen menos, la flor les quedara un poco más pequeña. Hay uno que los hice de 10 pétalos porque no calculé bien el tamaño de los hilos, pero no se vieron mal.
Aquí viendo como va quedando
PASO 2: Armado de la rosa.
Luego de tener los 14 pétalos, procedemos a tomar uno de los hilos más largos sobrantes, lo pasándolo por uno de los orificios que se ven en el pétalo, por la parte interna, la cara que da para uno. Así se hará con los siguientes pétalos, y notaran que, a medida que jalan, se van enrollando.
Al llegar el ultimo, por detrás de este, hacemos un nudo con el hilo, para cerrar la trama, y con dos hilos sobrantes, enrollamos a todos los hilos sobrantes, que quedan debajo de la rosa ya formada, para darle cierre y firmeza a todo.
En esta imagen pueden notar que hice 4 rosas de distintos tamaños y materiales, la más oscura la hice con hilo perlé y la más clara con hilo pabilo que tenía, con este me gusto la textura y se me hizo más fácil hacer los pétalos.
PASO 3: Tallo de la rosa.
Aquí tomamos un pedazo de alambre, yo usé uno como de 7 cm, y con dos de las flores azules y varios nudos con otro hilo del mismo material, los hilos que sobraron de la rosa al alambre. Es básicamente cubrirlo. Notando que era mejor hacer verde la parte del tallo y unas hojas.
PASO 4: Realización de las hojas en macramé.
Para las hojas si fue un proceso algo más mío, porque no encontraba un paso que funcionará con los hilos que tenia a la mano, lo intenté un hilo perlé verde y no me resultó, al final las hice con hilo pabilo verde oscuro y uno de algodón que era más grueso.
Tomamos 7 hilos de 60 cm 6 de ellos y 30 cm uno; el de 30 cm va a ser la base, por lo que lo enganchamos a las tablas. Con los otros 6 hacemos los nudos alondra. El primero hilo de lado derecho, lo anudamos 2 veces con cada uno de los 5 restantes, y este quedaría en el medio al final.
Hacemos lo mismos con los otros 6 hilos de lado izquierdo, quedando el primero de esos 6 en el centro. Los dos hilos que queda en el centro, hacemos dos nudos y repetimos el proceso, es casi como el de pétalo.
Ahora para que todos los hilos se dirijan al centro, le vamos haciendo nudo con el siguiente, pero en vez de dejar hilos para el otro, no lo vamos trayendo con el otro, y va dirigiéndose al centro y haciendo como la forma de hojas.
Cuando tengamos esto listo, soltamos el hilo base y hacemos dos nudos con sus extremos, así la hoja se dobla y la da esa sensación de 3D. Y, procedemos a cortar los otros hilos que están en la punta de esta hoja, menos el de los hilos bases, que esos nos servirán a engancharlo al tallo.
Con el hilo de algodón, repetí los primeros pasos 3 veces, para que se alargara más, pero básicamente hice lo mismo que los pasos anteriores.
PASO 5: Anudar las hojas al tallo de las rosas.
Aquí primero tomamos la hoja y hacemos nudos con los hilos sobrantes, para darle firmeza, ya después vamos cubriendo con el hilo verde, el alambre y enganchándole a los hilos de la rosa, como se hizo con las otras.
Este es el resultado de las 4 rosas, no quedaron tan bien, pero para ser primera vez entendiendo el proceso, resultó bien.
PASO 6: Armar el Bouquet.
Yo quería hacer las espigas de trigo en macramé, pero no resultó, así que compré estas, que son muy grandes, aunque cortándolas sirven para muchos bouquet y otras cosas. Primero tomamos las rosas y unos 4 o 5 espigas de trigo y lo unimos con hilo pabilo.
En mi caso, como se iba a ver mucho los defectos de las rosas, le enrolle un pequeño trozo del papel craft, para que así al enrollarlas no se vieran. Despues, cortamos un pedazo de papel craft de 10 x 12 cm y otro papel de color rosa, de 8 cm x 7 cm, es decir que este va ser más pequeño que el que se va ver externamente, yo no sé hacer bouquet, pero hice mi mejor intento, por lo que solo enrollé los papeles al arreglo y los amarré con un hilo estilo yute, que le da como su toque a todo.
Este es el resultado final del todo, a quien se lo di le gustó mucho y espero sus comentarios al respecto.
Gracias por leer mi post. Espero que les haya gustado. Estaré atenta a responder sus comentarios. Pueden visitar mi blog, seguir mis contenidos y redes sociales.
FACEBOOK / INSTAGRAM / TWITTER