Hola mis Chic@s un saludo a todos los integrantes de esta comunidad de hive
Que está Semana sean días de prosperidad amor y mucha creatividad para todos nosotros encantada de hacer nuevos post ,eh estado un poco ausente por cuestiones personales pero siempre teniendo ese anhelo de seguir publicando cada día e ir aprendiendo muchas cosas más de ustedes .
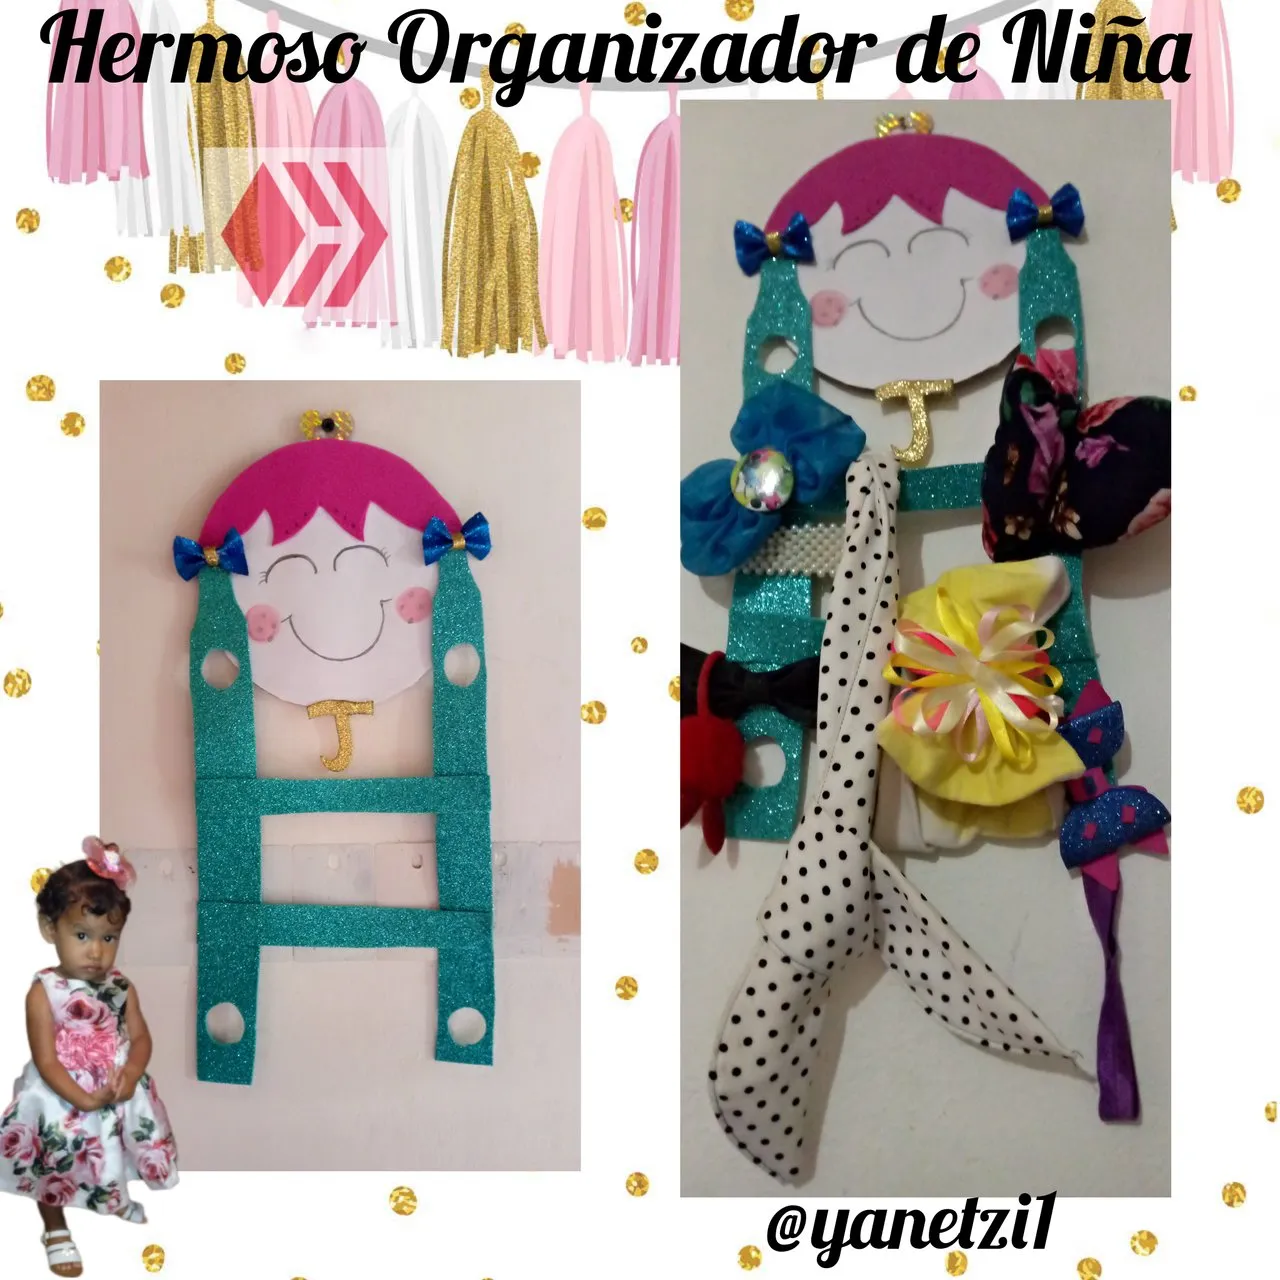
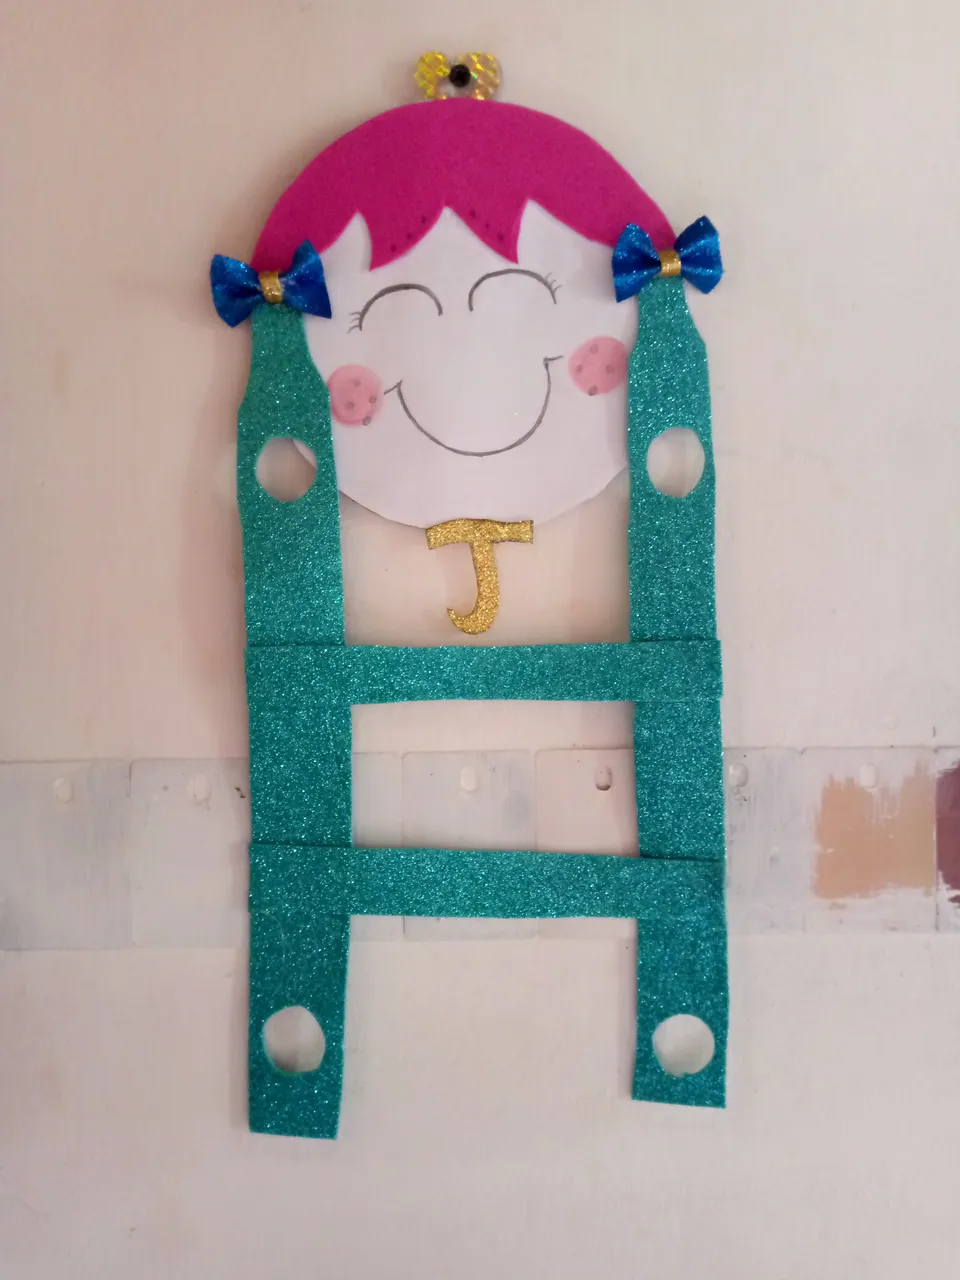
El día de hoy les estaré mostrando y explicando la elaboración de una Hermosa cara de muñeca con tirantes en forma de organizador ideal para las pequeñas de la casa como mi hija hermosa que este fue hecho por mi , para ella y sus grandes lazos ,Cintillos Moños y ganchos. Es muy fácil de hacer yo lo hice con material reciclado y solo Foamy también con un poco de silicón.
A continuación les estaré presentando los materiales utilizados en la elaboración del Organizador De Ganchos y Cintillos
Materiales
👉 SILICON
👉 FOAMY ROSADO
👉FOAMY AZUL ESCARCHADO
👉 FOAMY DORADO ESCARCHADO
👉 FOAMY VERDE TURQUESA ESCARCHADO
👉CARTULINA DORADA
👉 CARTON CIRCULAR
👉 HOJA RECICLADA
👉LAPIZ
👉 PINTURA AL FRIO ROSADA
👉ABRE HUECO

A continuación les estaré presentando los pasos a paso en la elaboración del Organizador
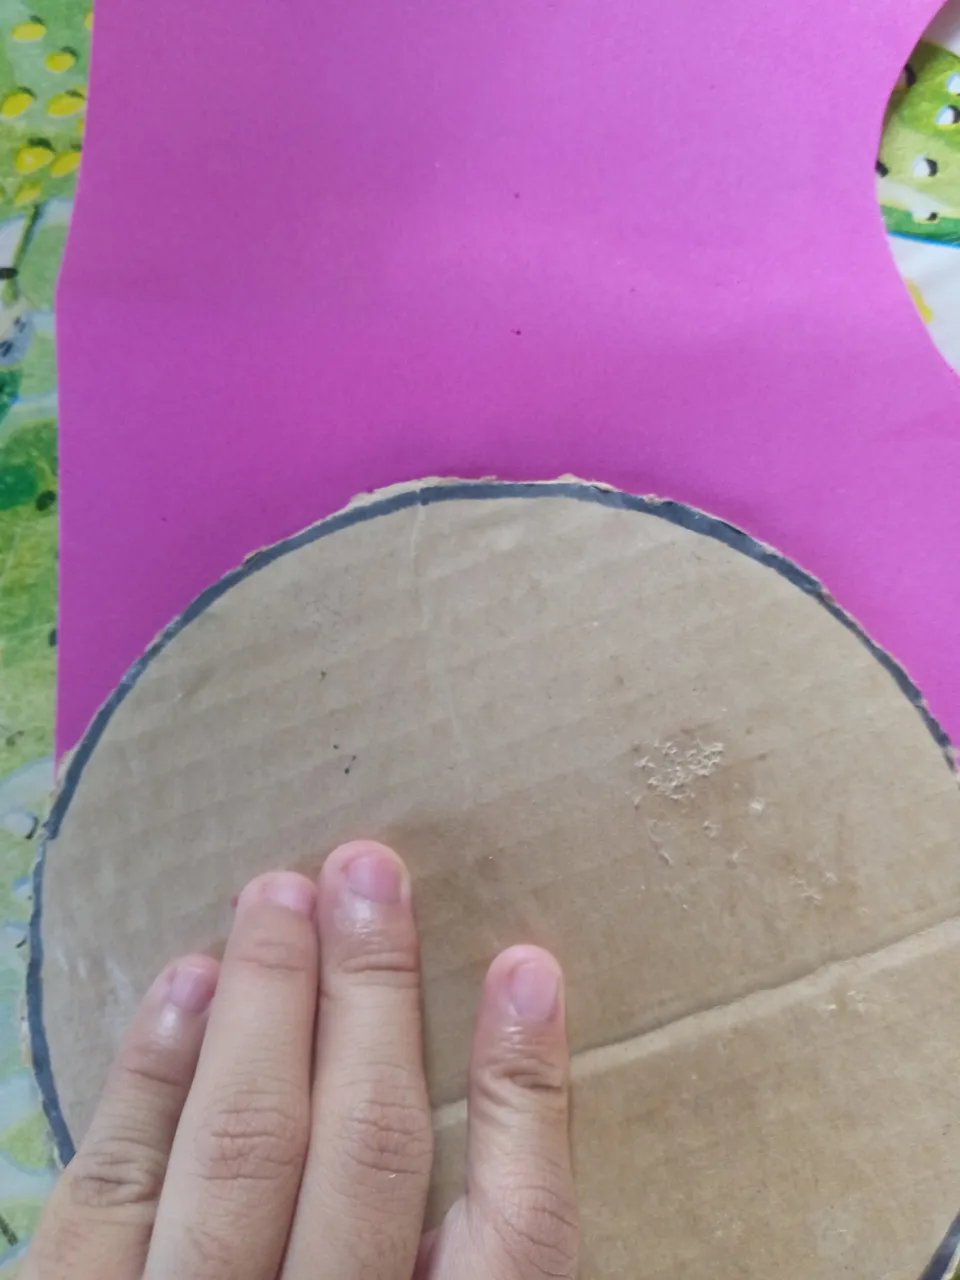
Paso 1
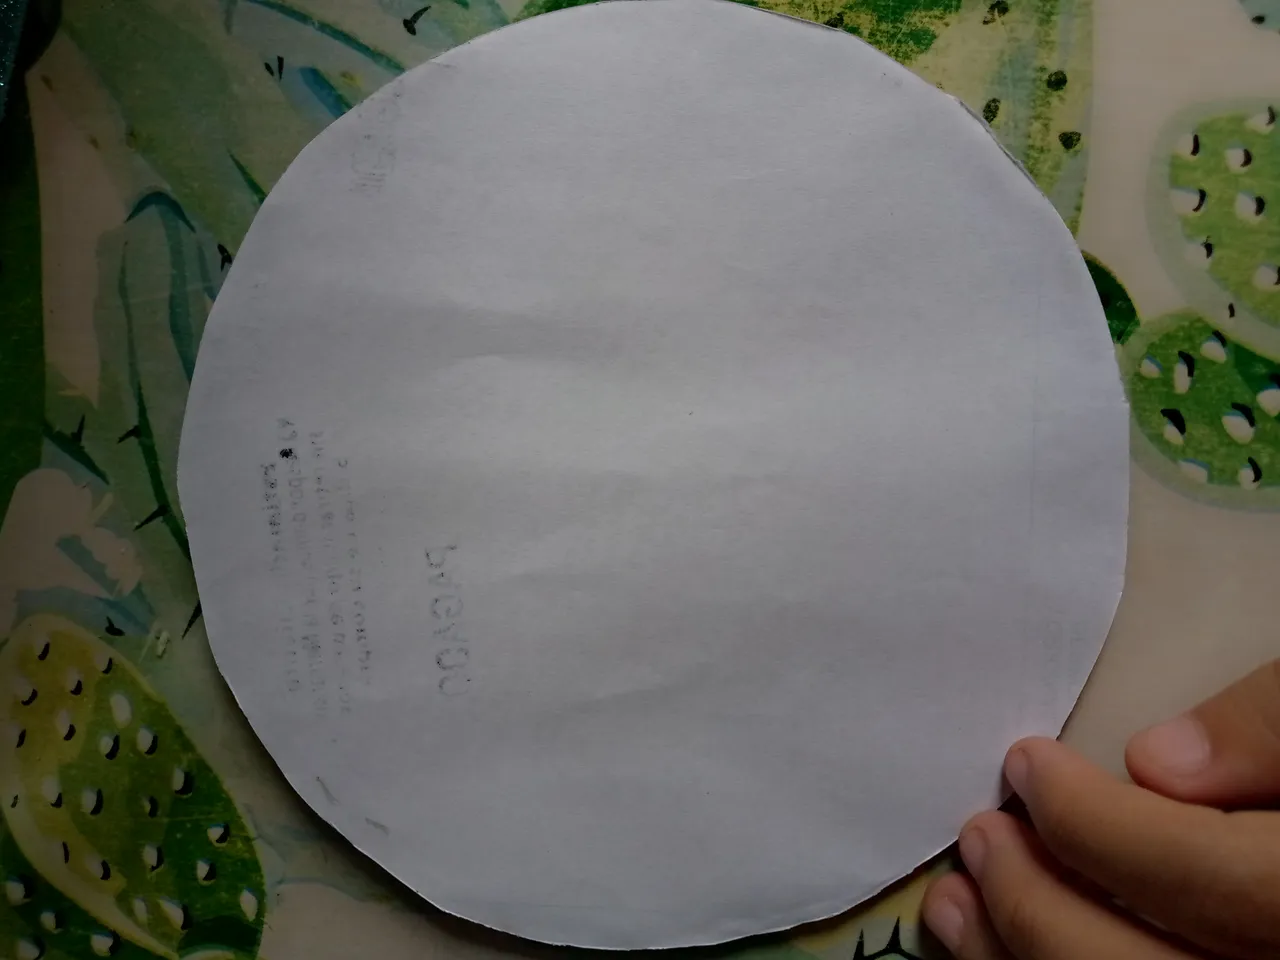
Lo primero que vamos a hacer es tomar el cartón y recortar un círculo dependiendo de cuál tamaño querramos la cara de la muñeca .
Este es el circulo que yo lo tenía recortado ya pero de igual modo explico el procedimiento actual .
Paso 2
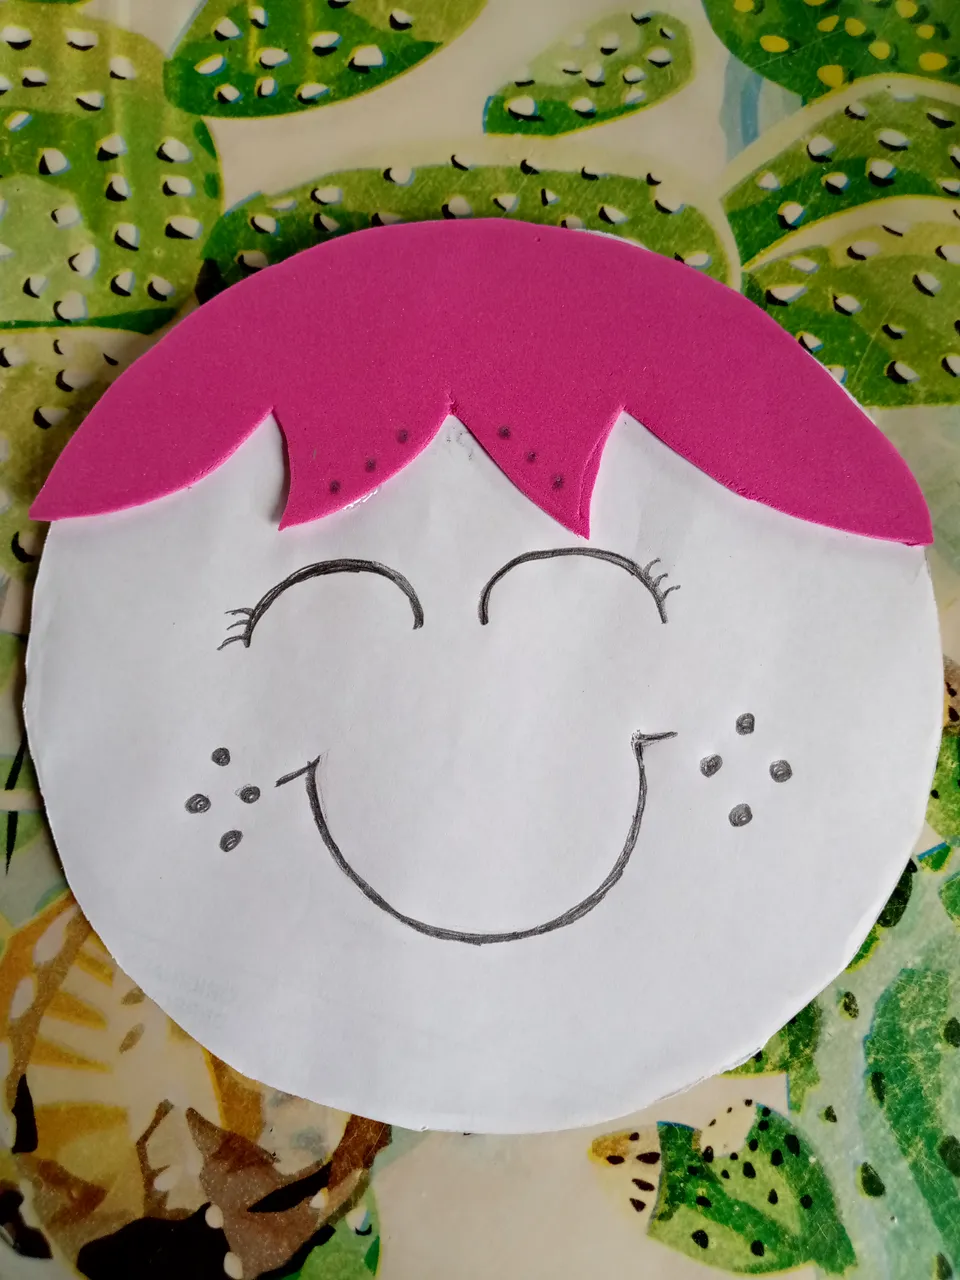
Bueno ahora lo que haremos es con el Foamy rosado vamos a dibujar con el cartón el tamaño y luego después se dibuja digamos que la pollina los flequillos que llevan las muñecas .
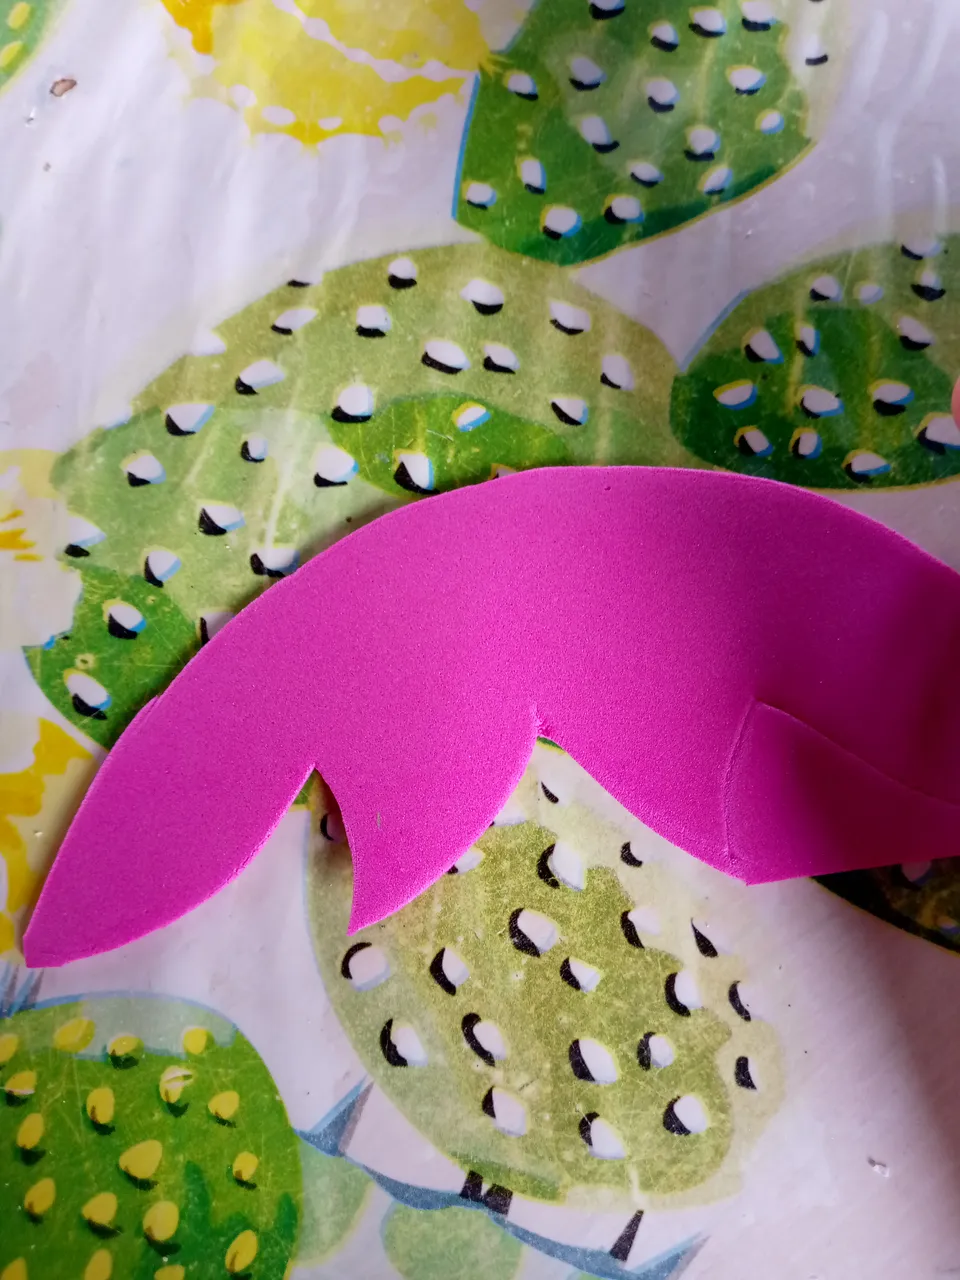
De esta manera quedará nuestro cabello en la parte de arriba .
Con la tijera se debe de asegurar bien que quede marcado para así después recortarlo con la tijera .
Paso 3
Ahora en la hoja blanca vamos a pegar el carton y luego seguidamente y con mucho cuidado vamos a recortar de modo que quede así de esta forma y procurando de que no quede con pelitos de la hoja blanca.
Paso 4
Luego vamos a pegar el cabello de arriba de forma de flequillo de esta manera tenemos que hecharle suficiente silicón para que así quede más resistente.
Así quedará luego de pegarla en la cara poco a poco irá tomando su forma .
Paso 5
Ahora lo siguiente es con el lápiz de creyon vamos a dibujar nada más sencillo que los ojos y la boca muy fácil .
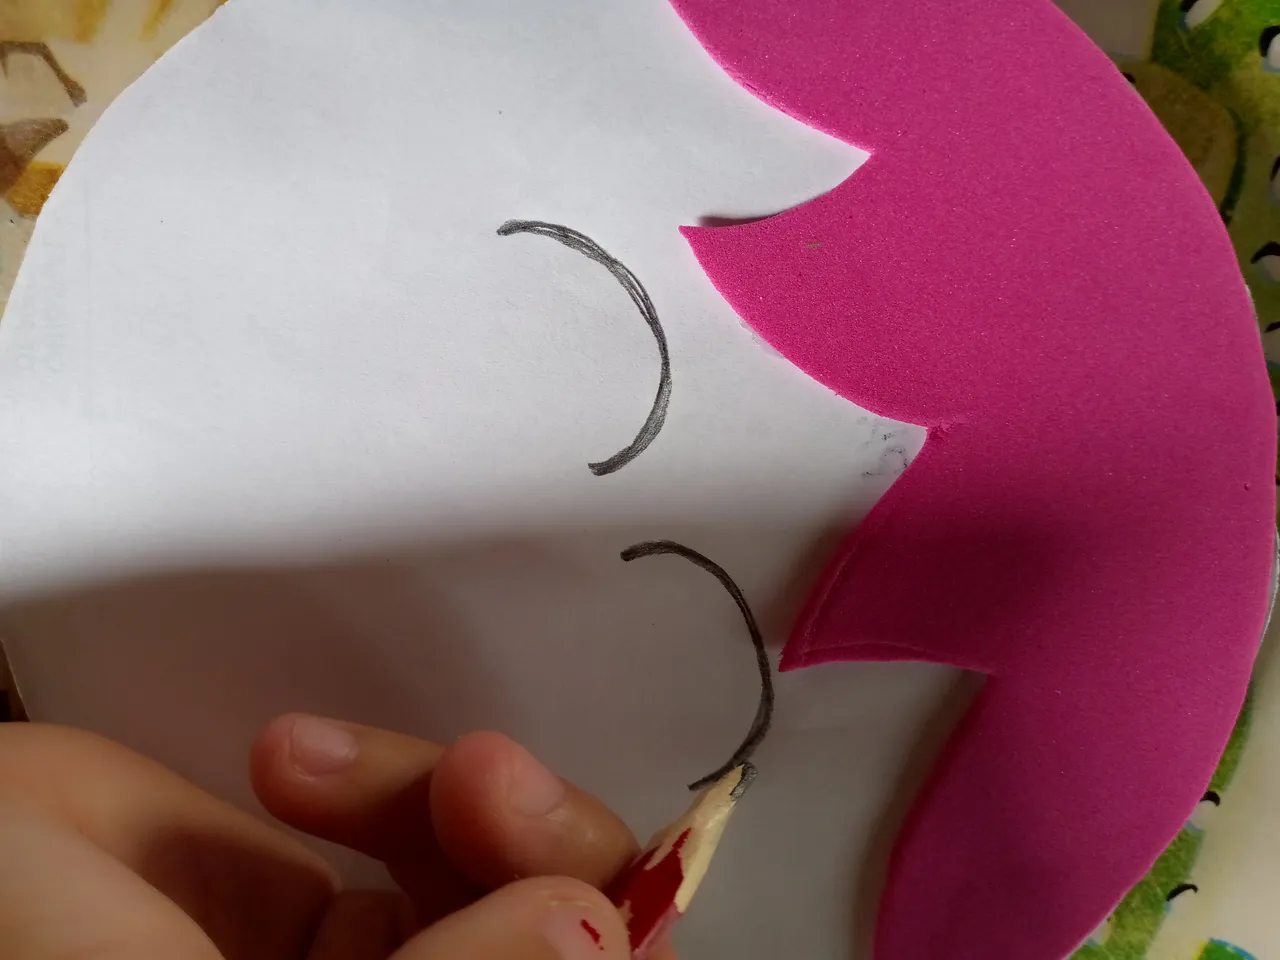
Vamos a dibujar una forma de U pero boca bajo de esta manera viene el otro ojo igual y por último en la parte de la boca dibujaremos solo un aU normal pero más acostada y así será el resultado .
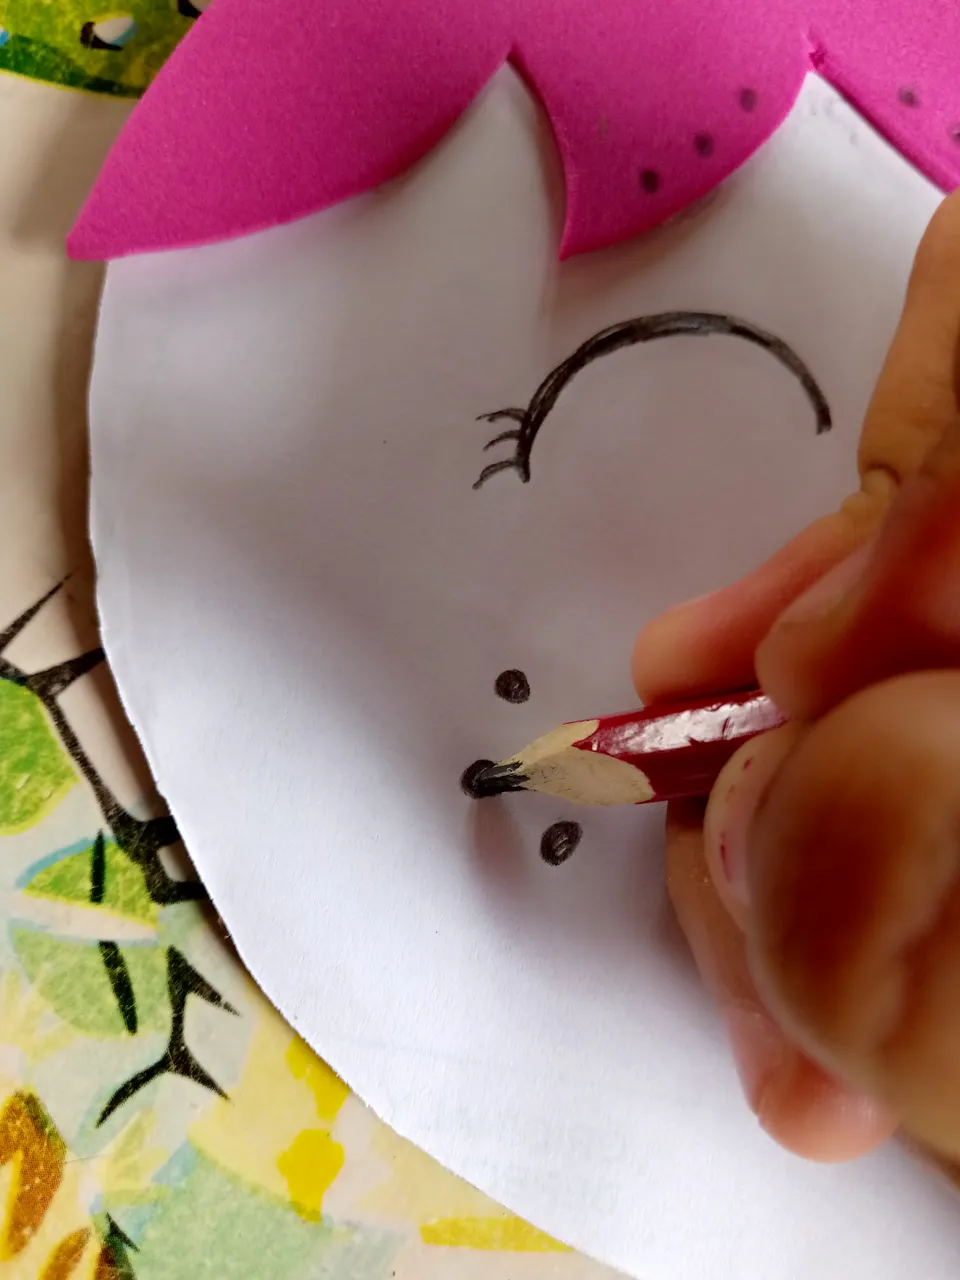
Bueno en los lados laterales vamos a hacer unos puntitos y luego con la pintura al frío rosada hacemos unos pequeños giros para darle color a los cachetes de la muñeca.
Paso 6
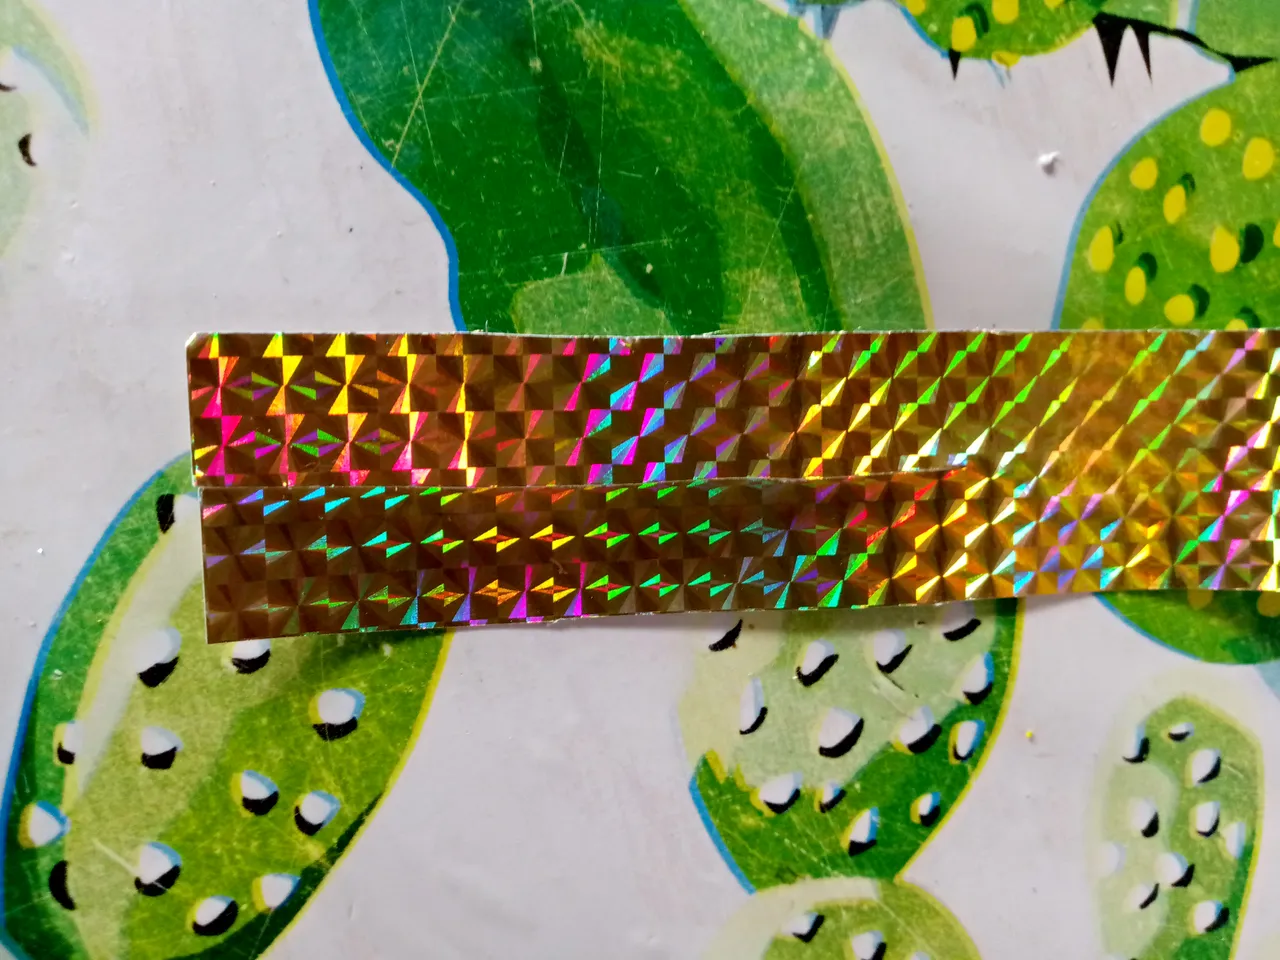
Luego de estos con el Foamy escarchado azul tomamos dos cuadritos y estos serán los pequeños lazos de la muñeca junto con dos tiritas doradas para ponérselo en el medio del lazo .
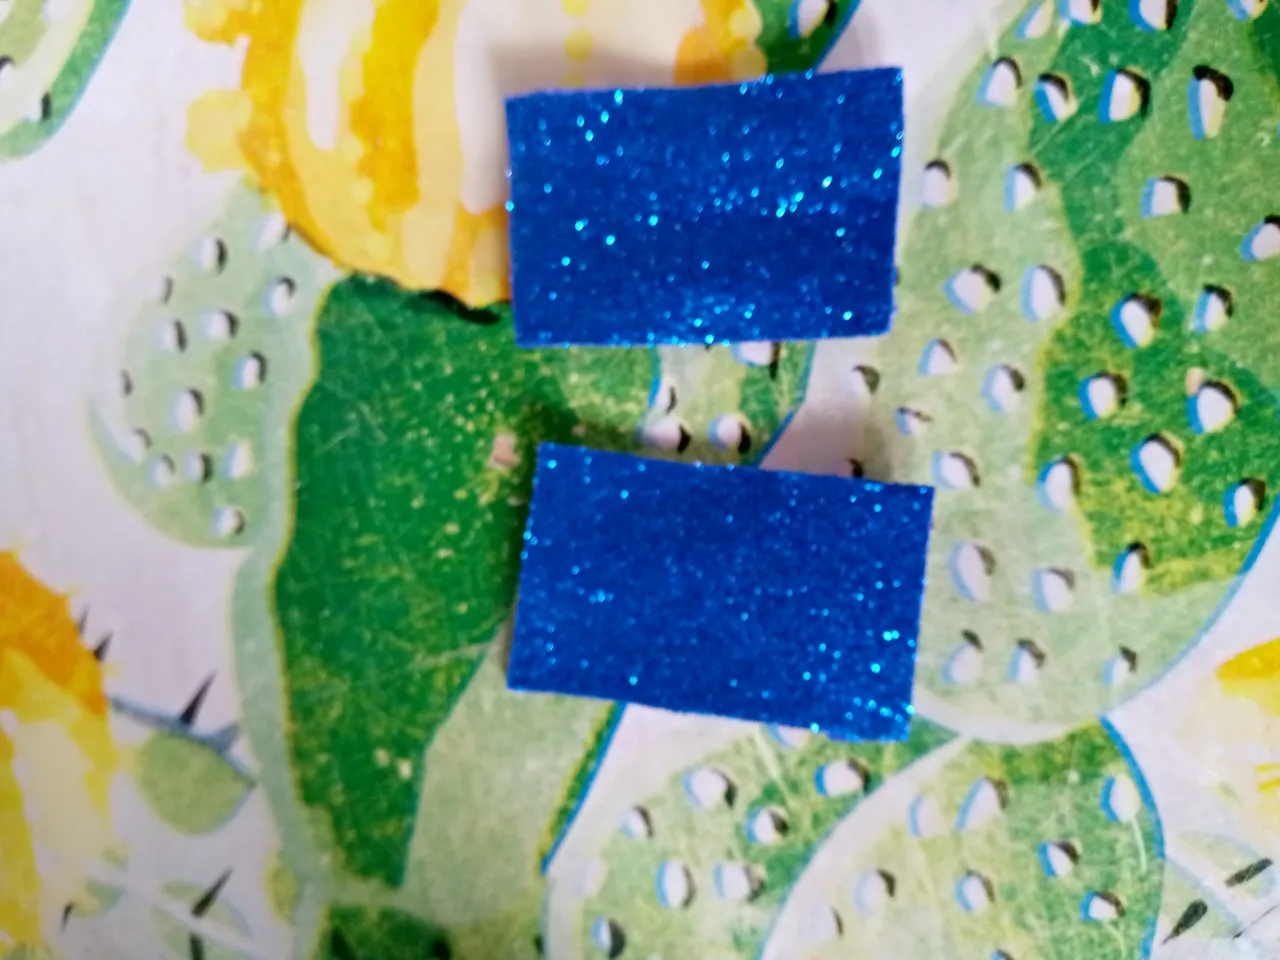
Es muy fácil solo vamos a doblar de arriba hacia bajo y agregamos un poco de silicón junt con las tiras y lo pegamos .
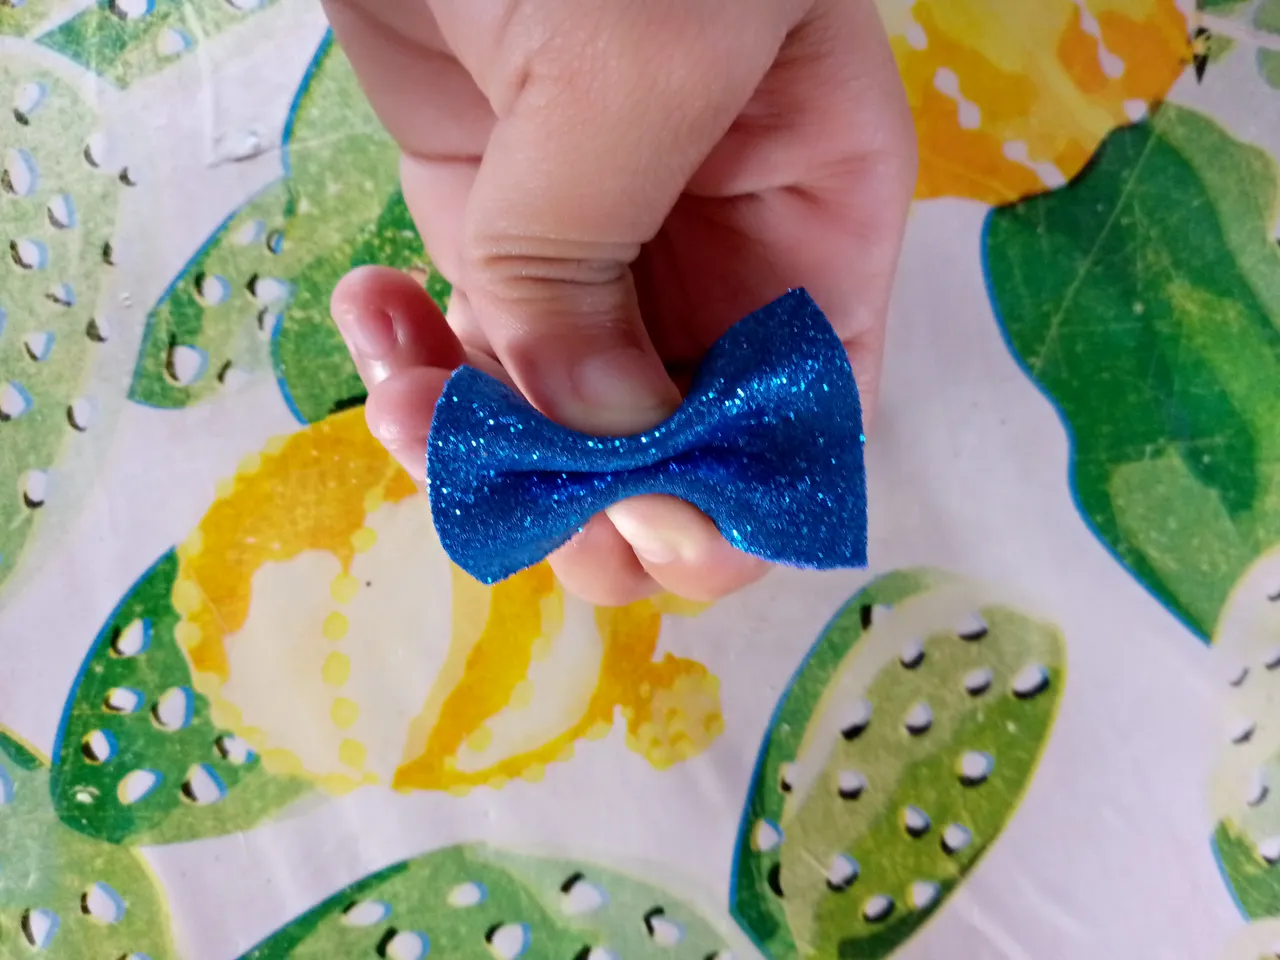
Este mismo lo hacemos con el segundo y después lo que quede de sobra con la tijera recortamos .
Y asi quedará nuestros pequeños dos lazos .

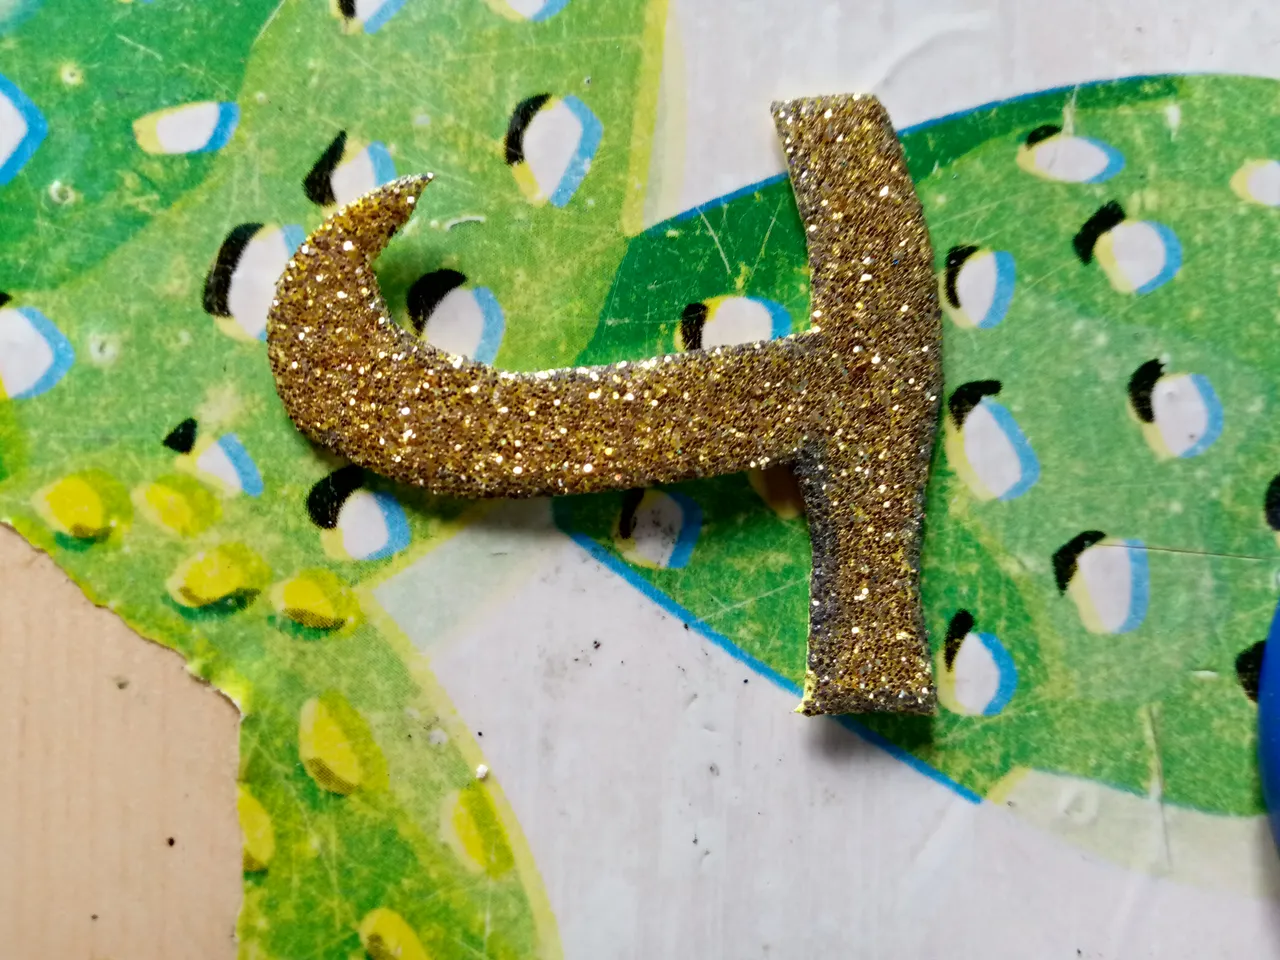
Paso 7
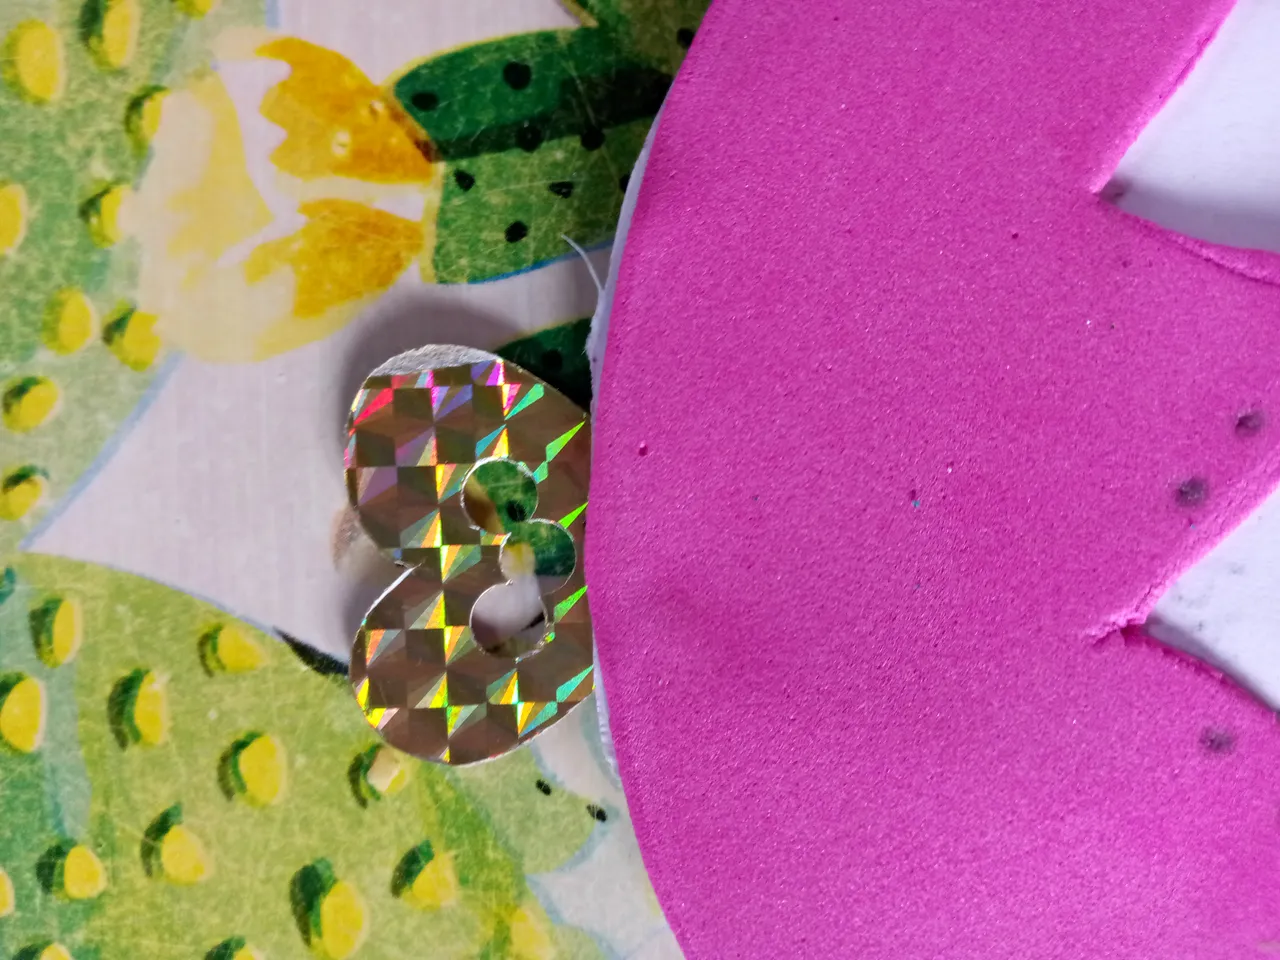
Con un trozito de Foamy dorado dibuje la inicial de Joheisy osea la J de modo que siempre me gusta ponerle la firma de la persona a la que le voy a hacer las manualidades .
Una vez ya dibujada vamos a recortar y después lo que haremos es pegarla en la parte de abajo de la cara .
Paso 8
Luego con el Foamy escarchado azul turquesa recortamos dos tiras de esta manera .
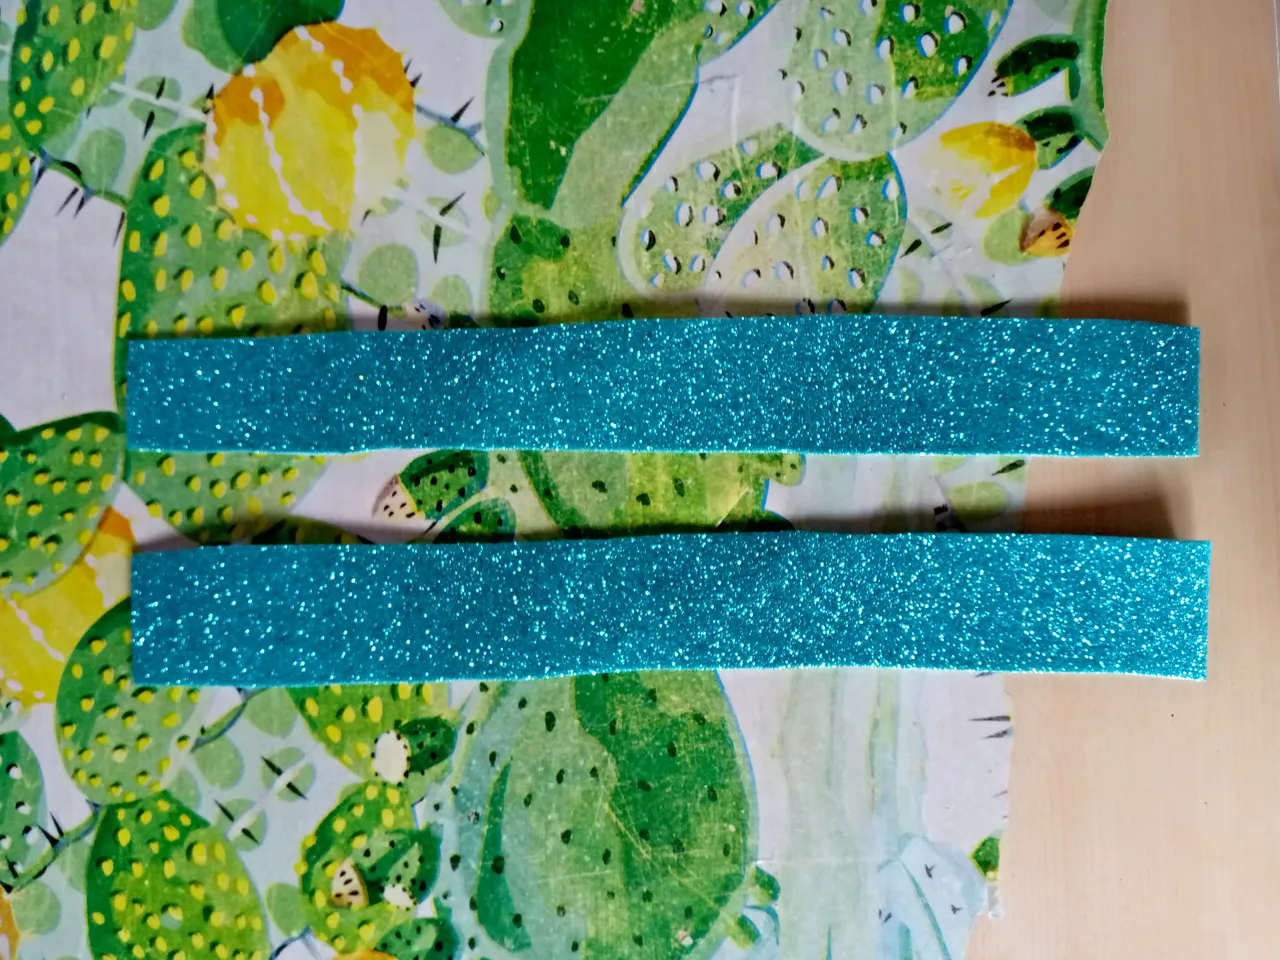
Y seguidamente le vamos a hacer unos dos pequeños circulos a cada uno un círculo arriba y el otro abajo .
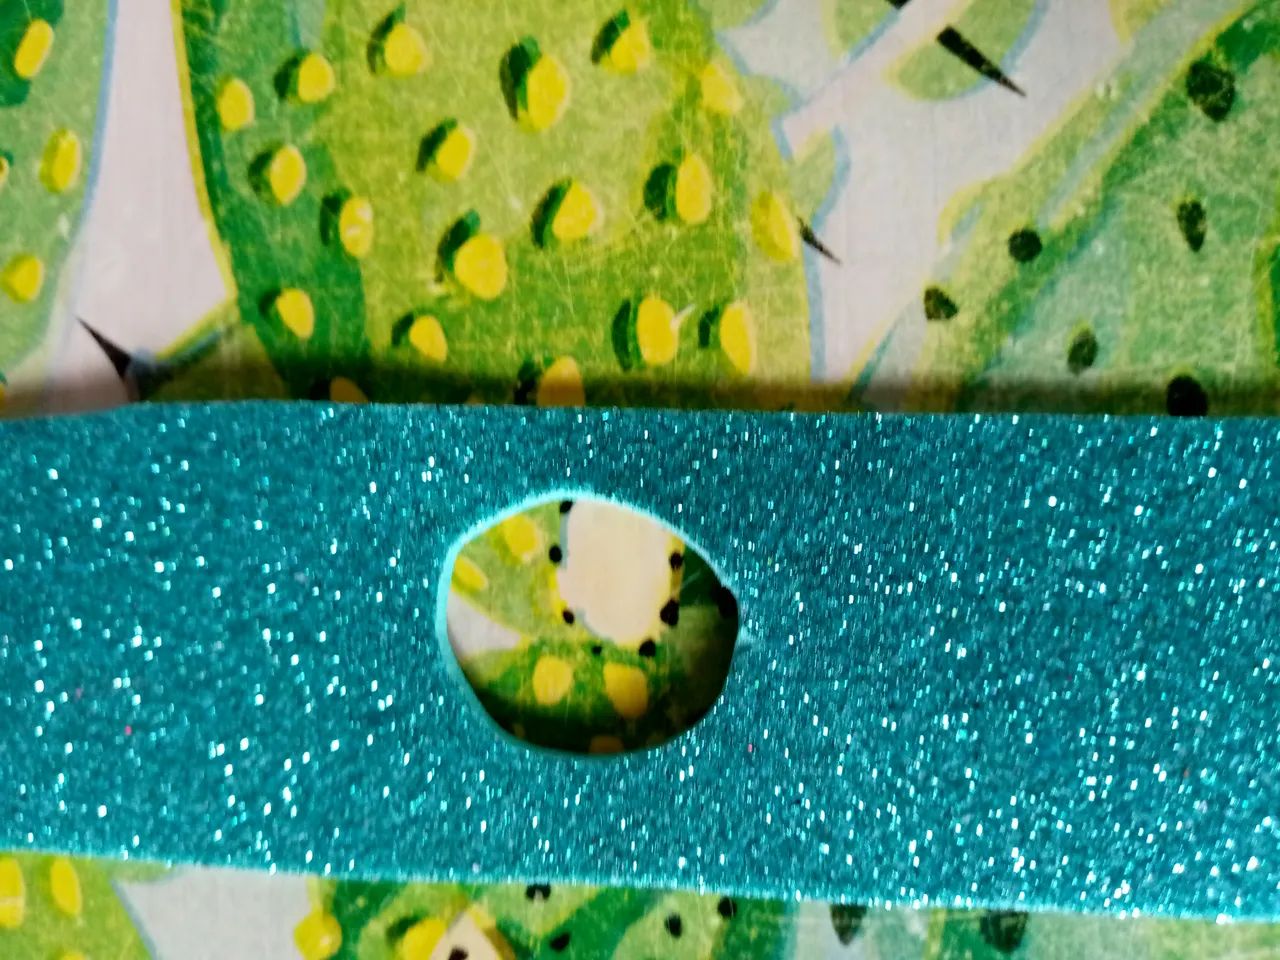
De esta forma debe queda para así poder meter los lazos o cintillos .
Luego con dos pequeñas tiras las vamos a poner en el medio de las dos tiras largas para que así pueda quedar de una manera más estable .
Paso 9
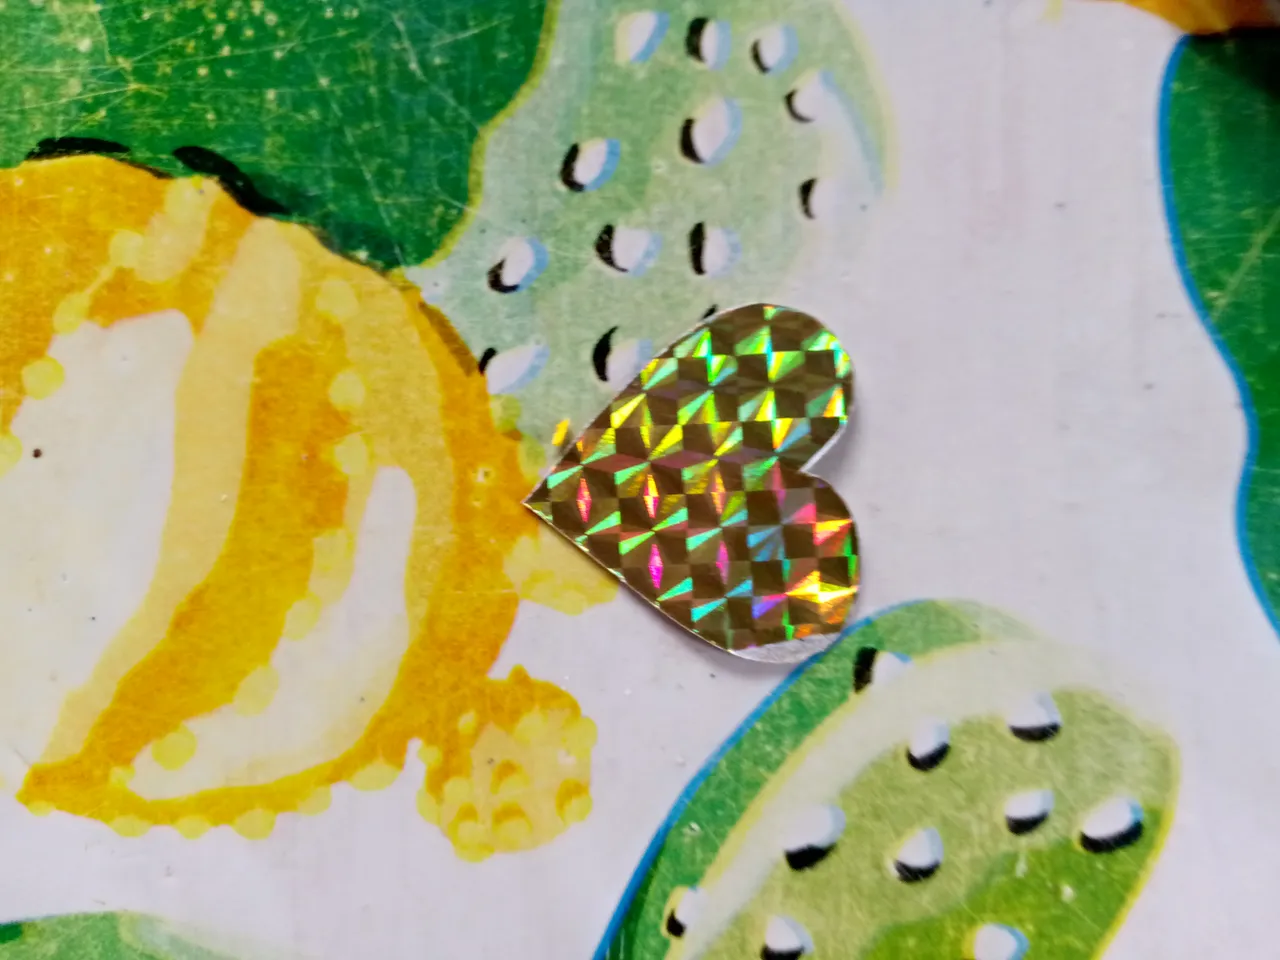
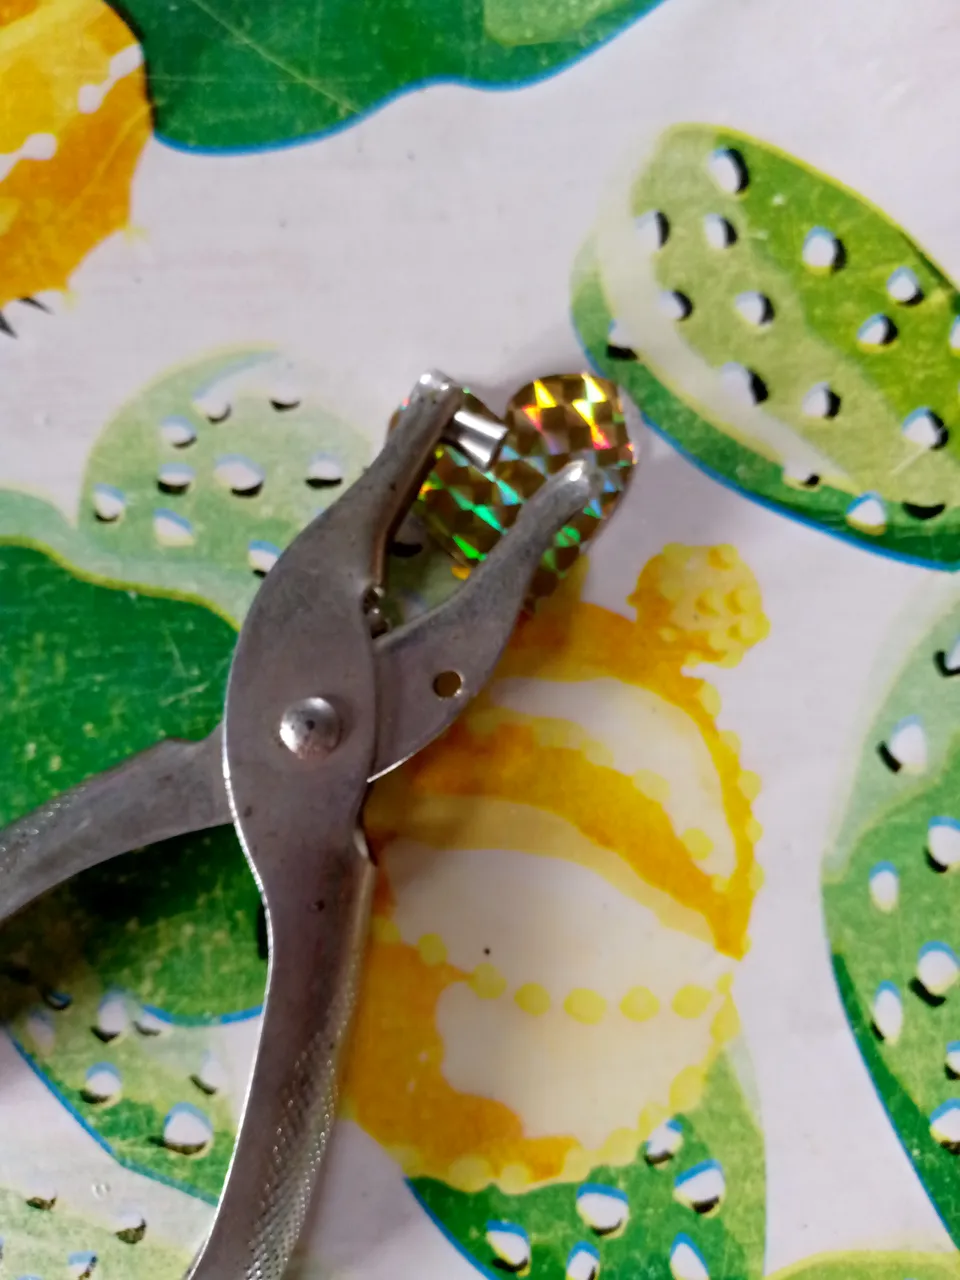
Ahora con la cartulina dorada vamos a dibujar un pequeño corazón y lo vamos a recortar después con el abregueco vamos a hacerle tres agujeros para que así pueda colgar en cualquier parte .
Y con silicón caliente vamos a pegarlo en la parte de arriba de la cara de la muñeca .
Y ya aquí tenemos nuestro hermoso organizador de lazos y Cintillos genial no .
Espero que les guste mucho a mis queridos amigos un fuerte abrazo y muchas bendiciones del Universo para todos Ustedes , Espero sus comentarios y gracias por leer mi post .
HASTA LA PRÓXIMA VEZ
LAS FOTOS SONDE MI PROPIEDAD Y FUERON TOMADAS POR MI TELÉFONO TECNO SPARK GOO 2023
TRADUCTOR UTILIZADO:DEELP TRASLATER
LAS FOTOS SON EDITADAS MEDIANTE LA APLICACIÓN EDITOR DE FOTOS POLISH Y LOS SEPARADORES EN CANVA .
Hello my Chic@s, greetings to all the members of this hive community
May this week be days of prosperity love and lots of creativity for all of us delighted to make new post ,eh been a little absent for personal reasons but always having that desire to continue posting every day and go learning many more things from you .
Today I will be showing and explaining the elaboration of a beautiful doll face with straps in the form of organizer ideal for the little ones in the house as my beautiful daughter that this was made by me, for her and her big bows, ribbons, bows and hooks. It is very easy to make I made it with recycled material and only Foamy also with a little silicone.
Next I will be presenting you the materials used in the elaboration of the Hooks and Ribbons Organizer
Materials
👉 SILICON
👉 FOAMY PINK
👉FOAMY BLUE FROSTED
👉 GOLD FROSTED FOAMY FROSTED FOAMY
👉 FROSTED TURQUOISE GREEN FOAMY FROSTING
👉GOLDEN CARD STOCK
👉 CIRCULAR CARDBOARD
👉 RECYCLED FOIL
👉 PENCIL
👉 PINK COLD PAINT
👉HOLE PADDING
I will be presenting the steps to follow in the elaboration of the Organizer
Step 1
The first thing we are going to do is to take the cardboard and cut out a circle depending on what size we want the doll's face to be.
This is the circle that I had already cut out but I will explain the actual procedure anyway.
Step 2
Well now what we will do is with the pink Foamy we are going to draw with the cardboard the size and then we will draw the bangs that the dolls wear.
This is the way our hair will be on the top of the dolls.
With the scissors you must make sure that it is well marked and then trim it with the scissors.
Step 3
Now on the white sheet we are going to paste the cardboard and then carefully cut it so that it looks like this and making sure that there are no small hairs on the white sheet.
Step 4
Then we are going to glue the top hair in the form of a fringe in this way we have to put enough silicone so that it is more resistant.
This is how it will be after gluing it to the face and it will gradually take its shape.
Step 5
Now the next thing is with the creyon pencil we are going to draw nothing simpler than the eyes and the mouth very easy.
We are going to draw a U shape but low mouth in this way comes the other eye the same and finally in the part of the mouth we will draw only a normal aU but more lying down and this will be the result .
Well in the lateral sides we are going to make some little dots and then with the pink cold paint we make some little turns to give color to the cheeks of the doll.
Step 6
After these with the blue frosted Foamy we take two squares and these will be the small bows of the doll along with two golden strips to put in the middle of the bow.
It's very easy, just fold it from top to bottom and add a little silicone together with the strips and glue it.
We do the same with the second one and then we cut what is left over with the scissors.
And this is how our two little bows will look like.
Step 7
With a little piece of gold Foamy I drew the initial of Joheisy , that is the J , so I always like to put the signature of the person to whom I am going to do the crafts .
Once it is drawn we will cut it out and then we will glue it on the bottom of the face.
Step 8
Then with the turquoise blue frosted Foamy we cut two strips in this way.
And then we are going to make two small circles on each one, one circle on the top and the other on the bottom.
This is the way it should be so we can put the ribbons or ribbons.
Then with two small strips we are going to put them in the middle of the two long strips so that it can be in a more stable way.
Step 9
Now with the golden cardboard we will draw a small heart and we will cut it out and then with the hole punch we will make three holes so that it can hang anywhere .
And with hot silicone we are going to glue it to the top of the doll's face.
And here we have our beautiful organizer of ribbons and ribbons .
I hope you like it very much my dear friends a big hug and many blessings from the Universe to all of you , I look forward to your comments and thank you for reading my post .
UNTIL NEXT TIME
THE PHOTOS ARE MY PROPERTY AND WERE TAKEN BY MY TECNO SPARK GOO 2023 PHONE.
TRANSLATOR USED:DEELP TRASLATER
THE PHOTOS ARE EDITED USING THE POLISH PHOTO EDITOR APPLICATION AND THE SEPARATORS IN CANVA .