

Español
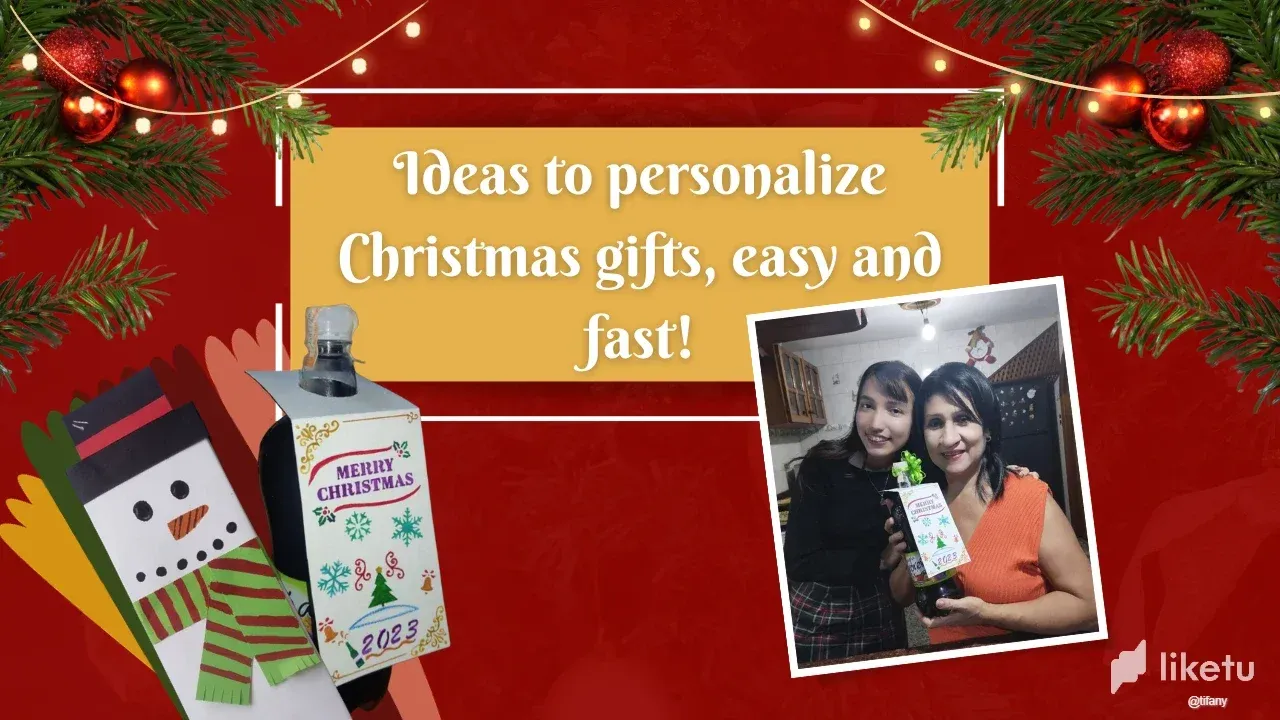
Hola comunidad 👋✨ espero que estén teniendo una bonita navidad 🎄💖 en esta época tan especial donde siempre se busca dar algún que otro regalo, les quiero enseñar dos pequeñas manualidades que les pueden ayudar a embellecer sus presentes.✨
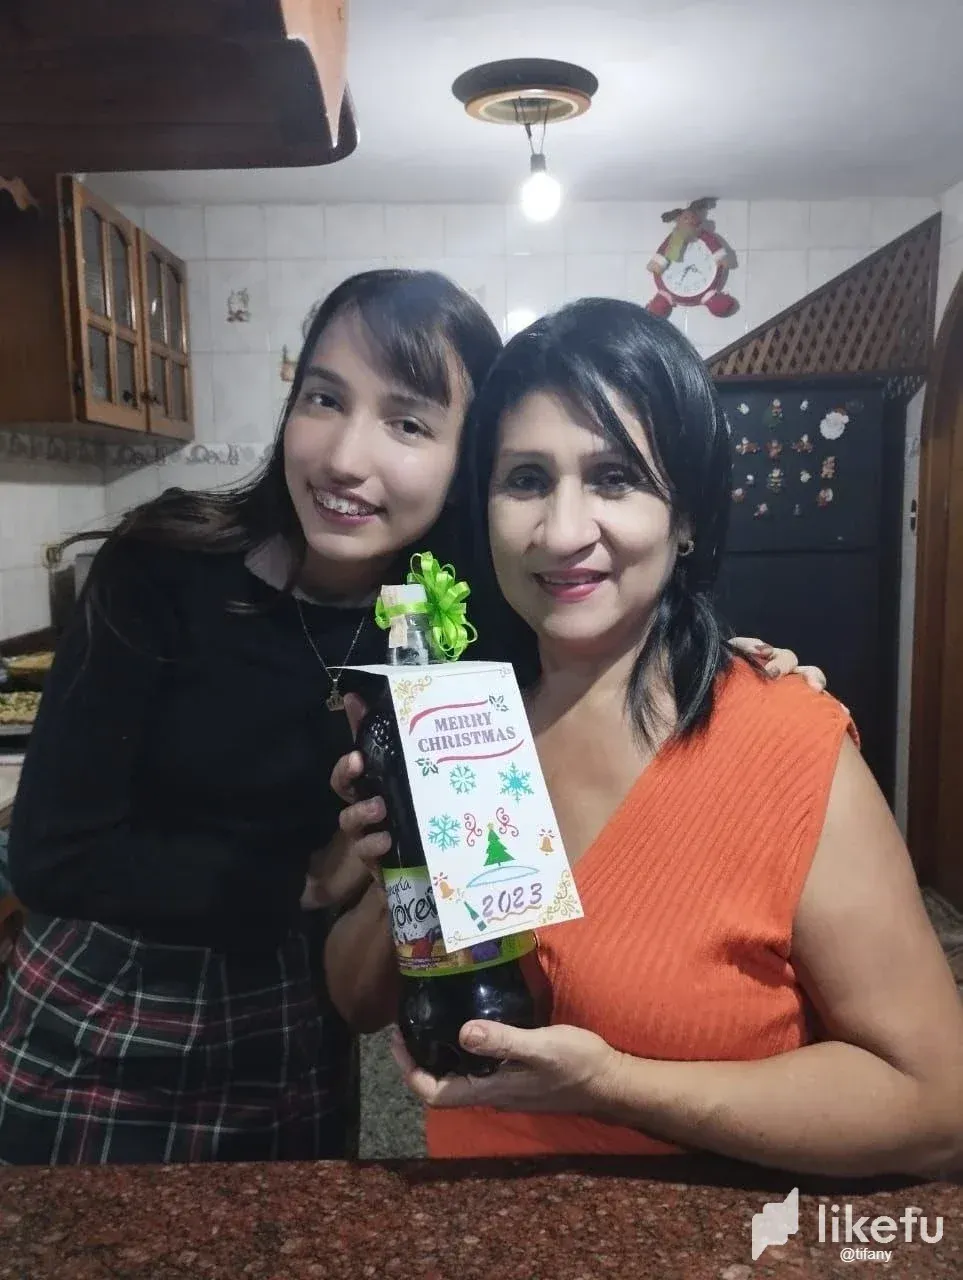
Hace unas semanas antes de la noche buena, estaba pensado en darle un regalo a la mamá de mi pareja ya que se ha vuelto una persona muy especial e importante en mi vida, siempre ha sido muy cariñosa y amable conmigo pero este año me ayudado con un monto de cosas y quería darle un presente como muestra de agradecimiento y cariño. 🎁💝
Pero aunque ya sabía que regalarle, sentía que les faltaba agregarle algo más a los detalles… por eso me puse creativa y me pareció buena idea hacerle decoraciones a cada regalo para darle un poco magia navideña. 🎅
Para estas dos ideas utilice materiales que tenía en casa, los cuales fueron:
• Cartulina blanca, negra, verde y roja
• Pega
• Tijera
• Regla
• Marcadores
• Plantillas para dibujar (opcional)
• Lazo
Envoltorio Muñeco de nieve☃️❄️
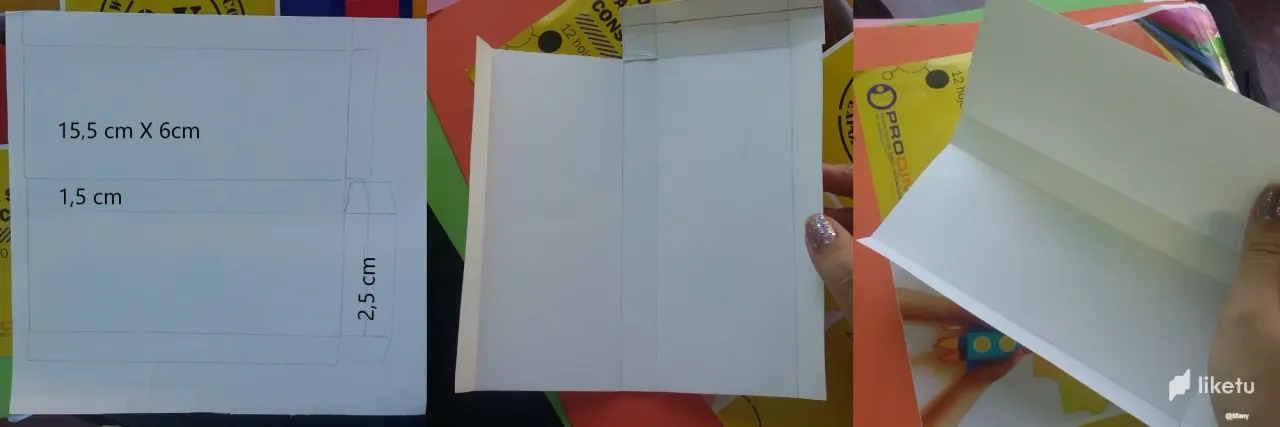
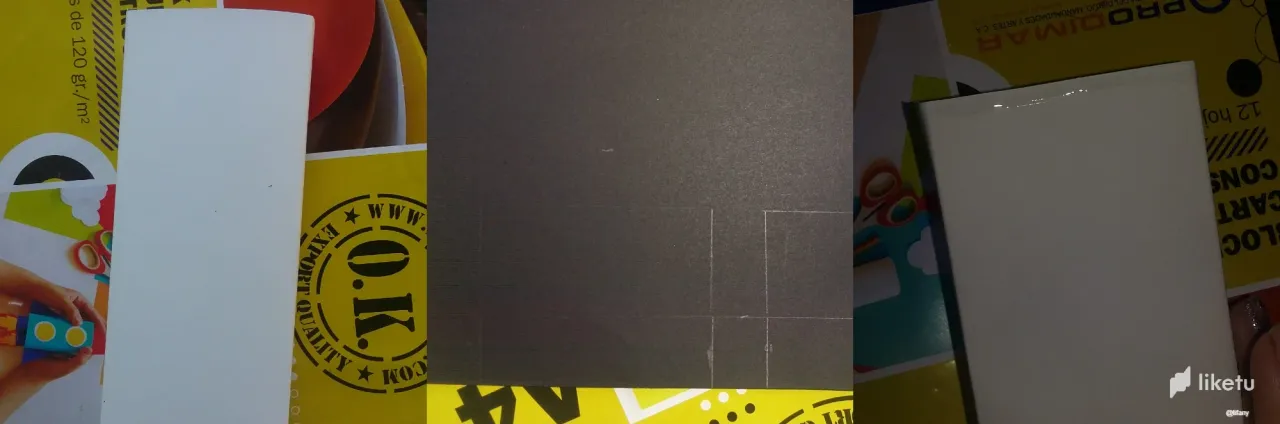
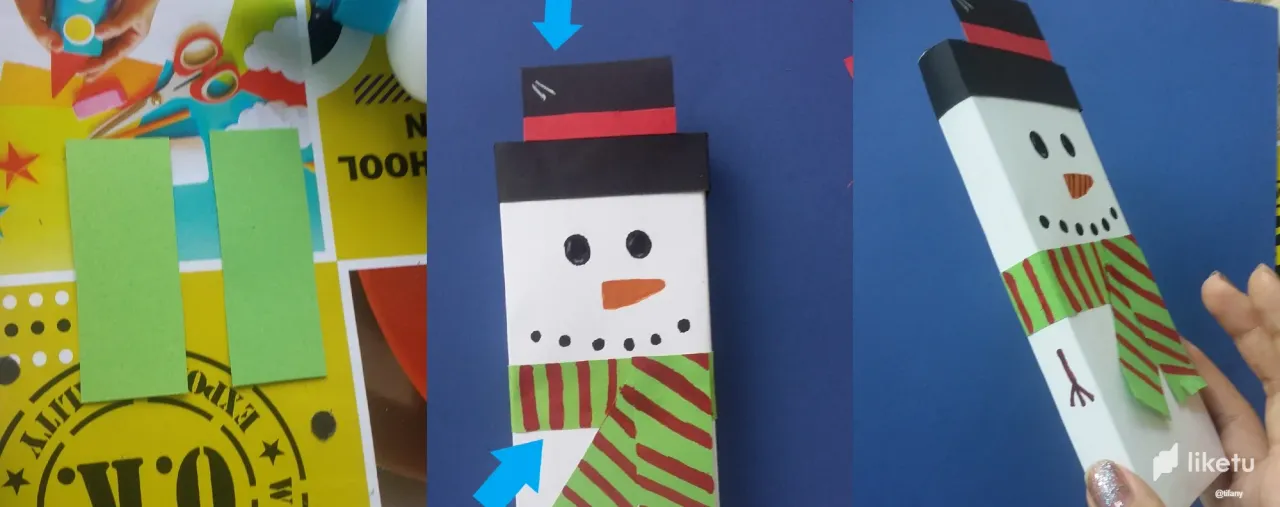
Para este pequeño envoltorio con forma de muñeco de nieve, comencé por marcar con una regla el alto y ancho de la cajita (medidas que se muestran en la foto) dejándole un solapita (que dibuje) para la parte de debajo de esta, luego pase a recortar con mucho cuidado y así proceder a pegar las esquinas.
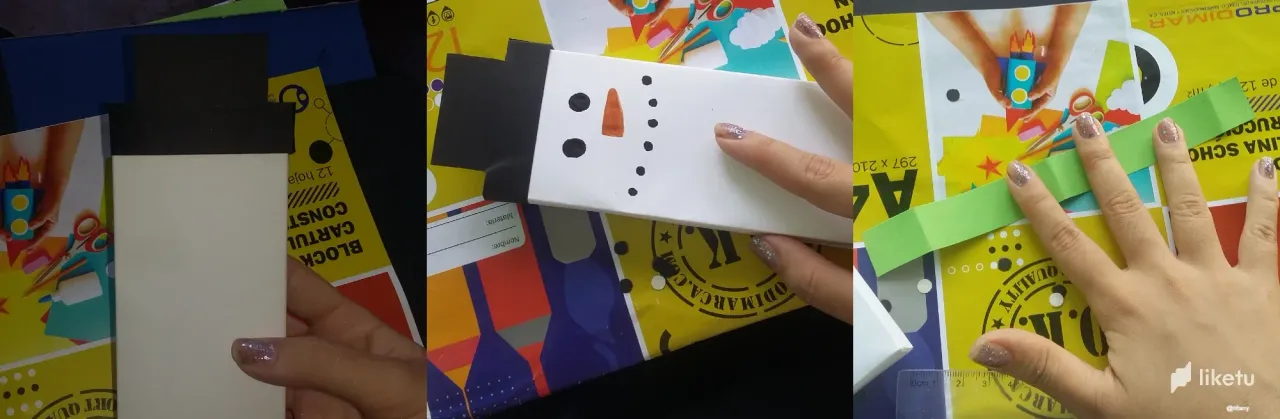
Una vez lista nuestra cajita pase a decorarla, primero le dibuje su carita con marcadores, luego le hice un sombrero con cartulina negra (clásico de los muñecos de nieve) y agregue una bufanda verde también con cartulina que me quedaba de aquella vez que hice mis origamis jejeje 😁 ¡no hay que desperdiciar nada!.
Espere que estuviera todo seco para darle otros detalles y así finalice mi envoltorio, perfecto para barras de chocolate o algún otro dulce con esas proporciones.
Tarjeta navideña para Botella 🍾✨
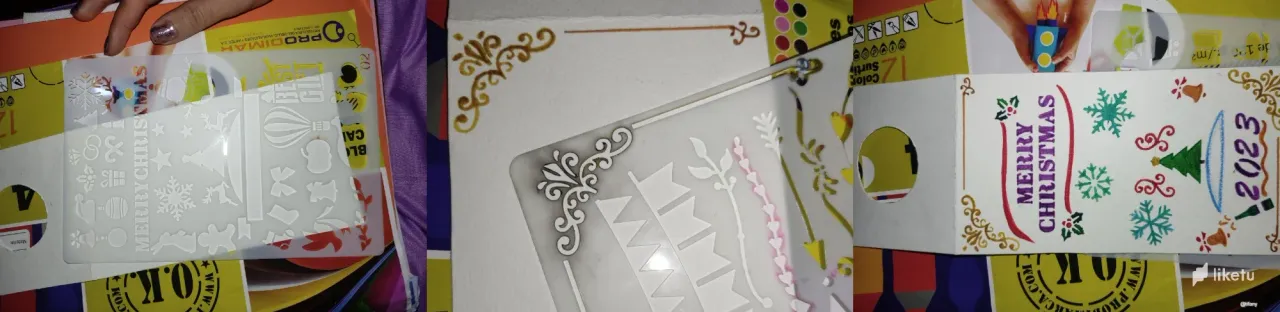
Para la segunda idea use una cartulina más gruesa que la anterior, y procedí a recortar un rectángulo largo que tapara más o menos la botella, doble la cartulina dejando marcado un pequeño cuadrado donde pasaría el cuello y boca de la botella, con una tapa más grande marque un circulo y recorte ,así podría encajarla.
Dejando para lo último la decoración, en esta ocasión use plantillas de dibujo que me presto mi hermana, la verdad me gusto usarlas porque dan un acabado bastante delicado y limpio, sin embargo esto es opcional ya que solo hace falta creativa para llenarla con mensajes y figuras que queramos plasmar en nuestra tarjeta.
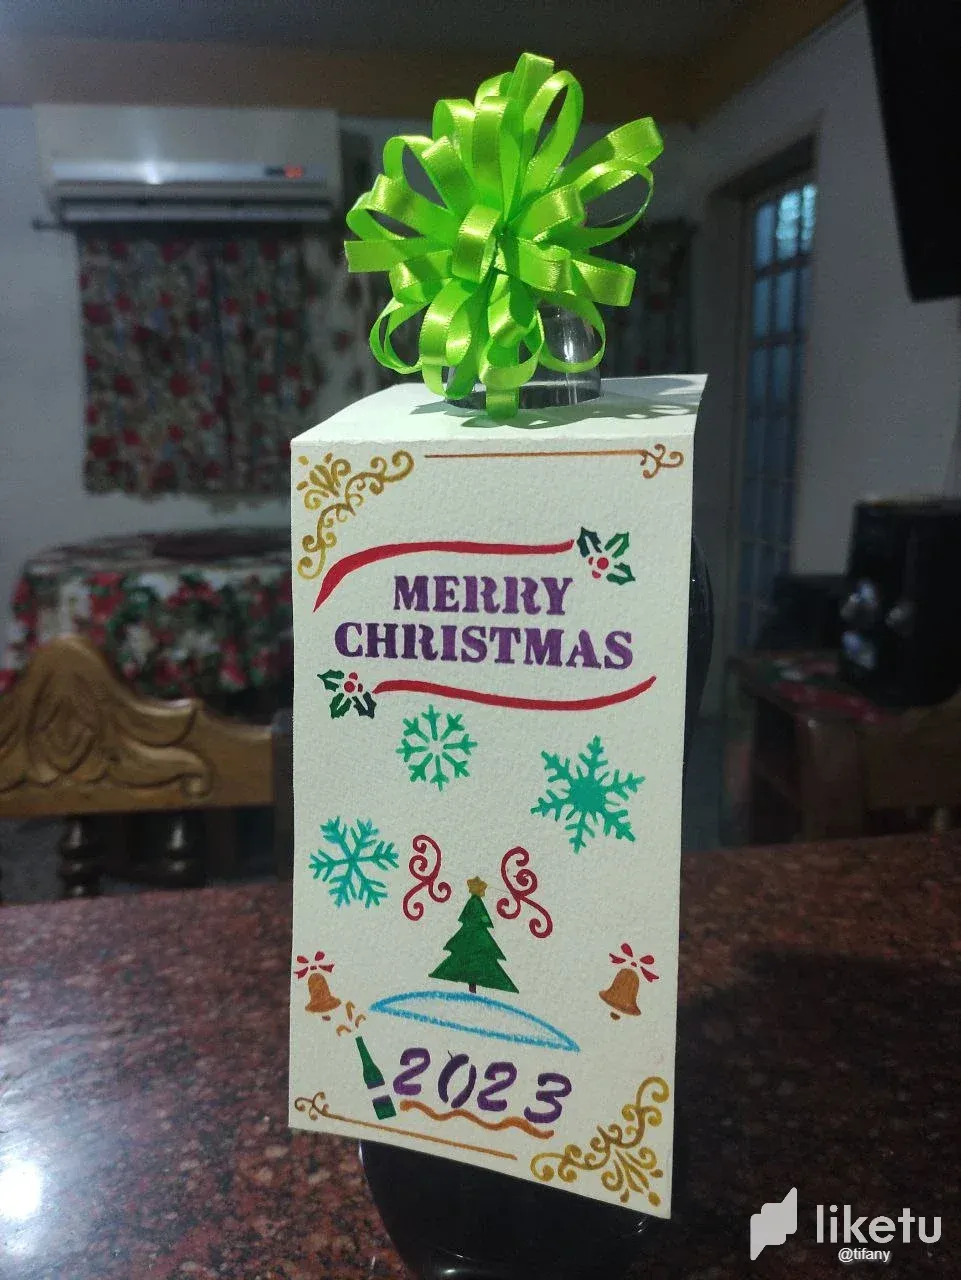
Finalmente le termine agregando un pequeño lazo y ahora si le entregue sus regalitos 💝😄que le terminaron gustando mucho por la dedicación que les puse a ambos.
Espero que les sean utiles estas pequeñas ideas navideñas,que como pueden apreciar son rápidas de hacer y no se necesita tanto para recrearlas.
Gracias por leer 😉💖¡hasta la próxima!
English
Hello community 👋✨ I hope you are having a nice Christmas 🎄💖 in this special time where you are always looking to give some gift or other, I want to show you two small crafts that can help you to embellish your presents.✨
A few weeks ago before Christmas Eve, I was thinking of giving a gift to my partner's mom since she has become a very special and important person in my life, she has always been very loving and kind to me but this year she helped me with a lot of things and I wanted to give her a present as a token of gratitude and affection. 🎁💝
But even though I already knew what to give her, I felt that they were missing something more to add to the details... that's why I got creative and I thought it was a good idea to make decorations to each gift to give it a little Christmas magic. 🎅
For these two ideas I used materials I had at home, which were:
- White, black, green and red cardboard.
- Glue
- Scissors
- Ruler
- markers
- Drawing templates (optional)
- Ribbon
Snowman Wrapper from nieve☃️❄️
For this little snowman wrapper, I started by marking with a ruler the height and width of the box (measurements shown in the photo) leaving a little flap (that I drew) for the bottom part of the box, then I cut it out very carefully and proceeded to glue the corners.
Once our little box was ready I started to decorate it, first I drew his face with markers, then I made a hat with black cardboard (classic of snowmen) and added a green scarf also with cardboard that I had left over from the time I made my origami hehehehe 😁 no need to waste anything!
I waited until it was all dry to give it other details and so I finished my wrapping, perfect for chocolate bars or some other candy with those proportions.
Christmas card for Bottle 🍾✨.
For the second idea I used a thicker cardboard than the previous one, and proceeded to cut a long rectangle that would more or less cover the bottle, fold the cardboard leaving marked a small square where I would pass the neck and mouth of the bottle, with a larger lid mark a circle and cut out ,so I could fit it.
Leaving for last the decoration, this time I used drawing templates that my sister lent me, I really liked to use them because they give a very delicate and clean finish, however this is optional because you only need to be creative to fill it with messages and figures that we want to capture in our card.
Finally I ended up adding a small bow and now I gave her her little gifts 💝😄 which she ended up liking a lot because of the dedication I put in both of them.
I hope you find these little Christmas ideas useful,as you can appreciate they are quick to make and it doesn't take that much to recreate them.
Thanks for reading 😉💖See you next time!
translation: Deelp App
Photos:POCO X3