I finally got some time to screw around in the garage and get creative. I’ve been building a custom center console for my truck to house my 3,200 inverter. Yes, my old 1997 Ford can run any 120v corded power tools. My center console is getting close to being done and I need to round all the edges off with my router before I paint and wrap it.
run the router down one edge…
rotate the work piece…
clamp down…
do another edge…
Nope, not anymore!! My massive mobile workbench finally has a new attachment that I have been wanting to make for a ver long time. A detachable router table!!
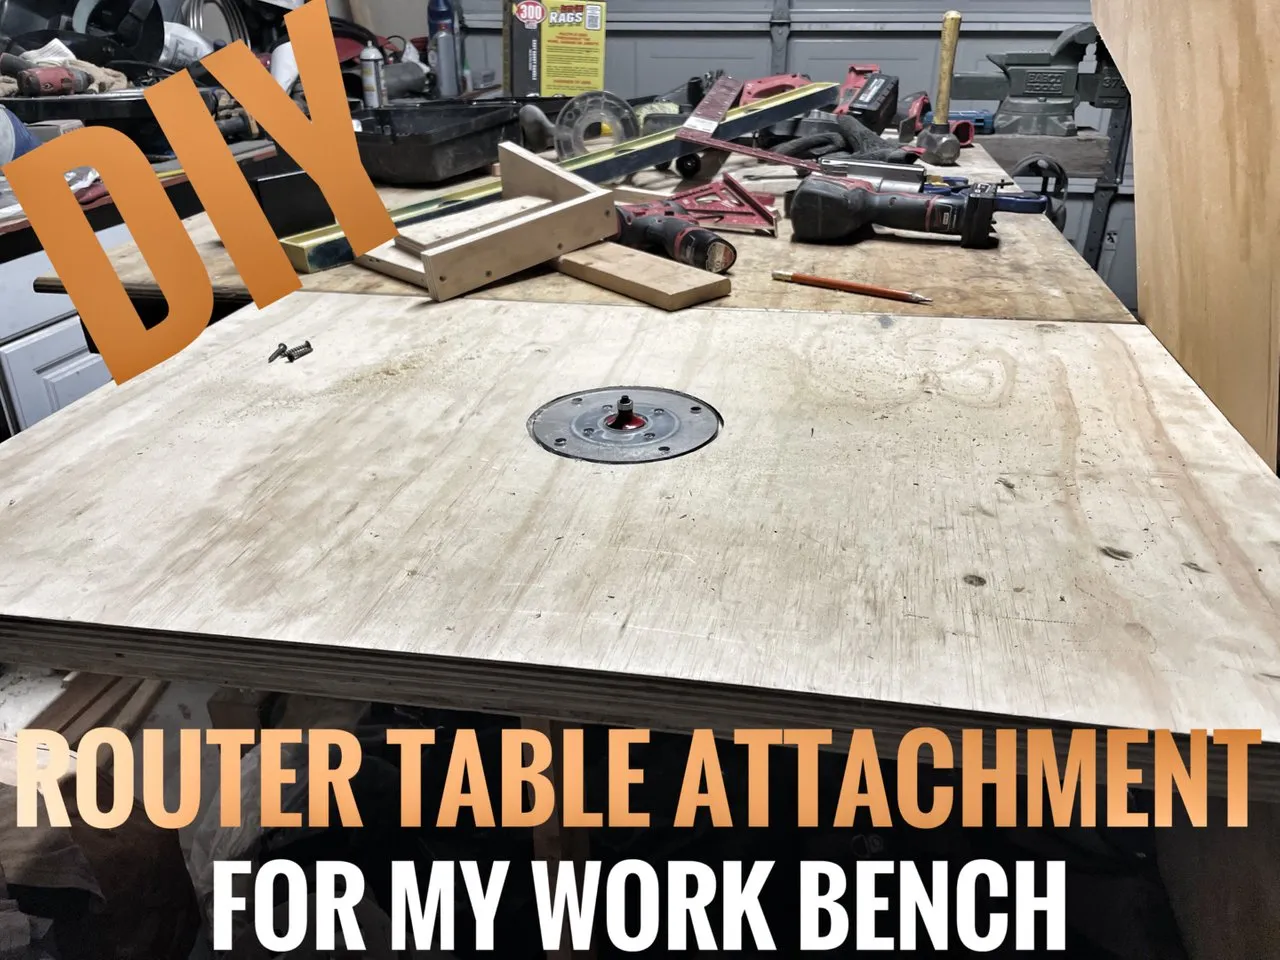
Way back in March of last year I glued 2 pieces of 3/4 inch plywood together… procrastinate much?. So for a year this hunk of wood sat leaned up against the wall in my garage. Well, I’m finally got my ass in gear and made it a mission to complete this project that has sat idle for over a year.
The idea is that this table will slip over the long 5/8 inch all-thread bolts that run through my work bench. My workbench is built from old cross arms off of the old powerlines we rebuilt. The all-thread bolts go through the crossarms and squeeze them together. This table can handle anything!! It’s Stout!!
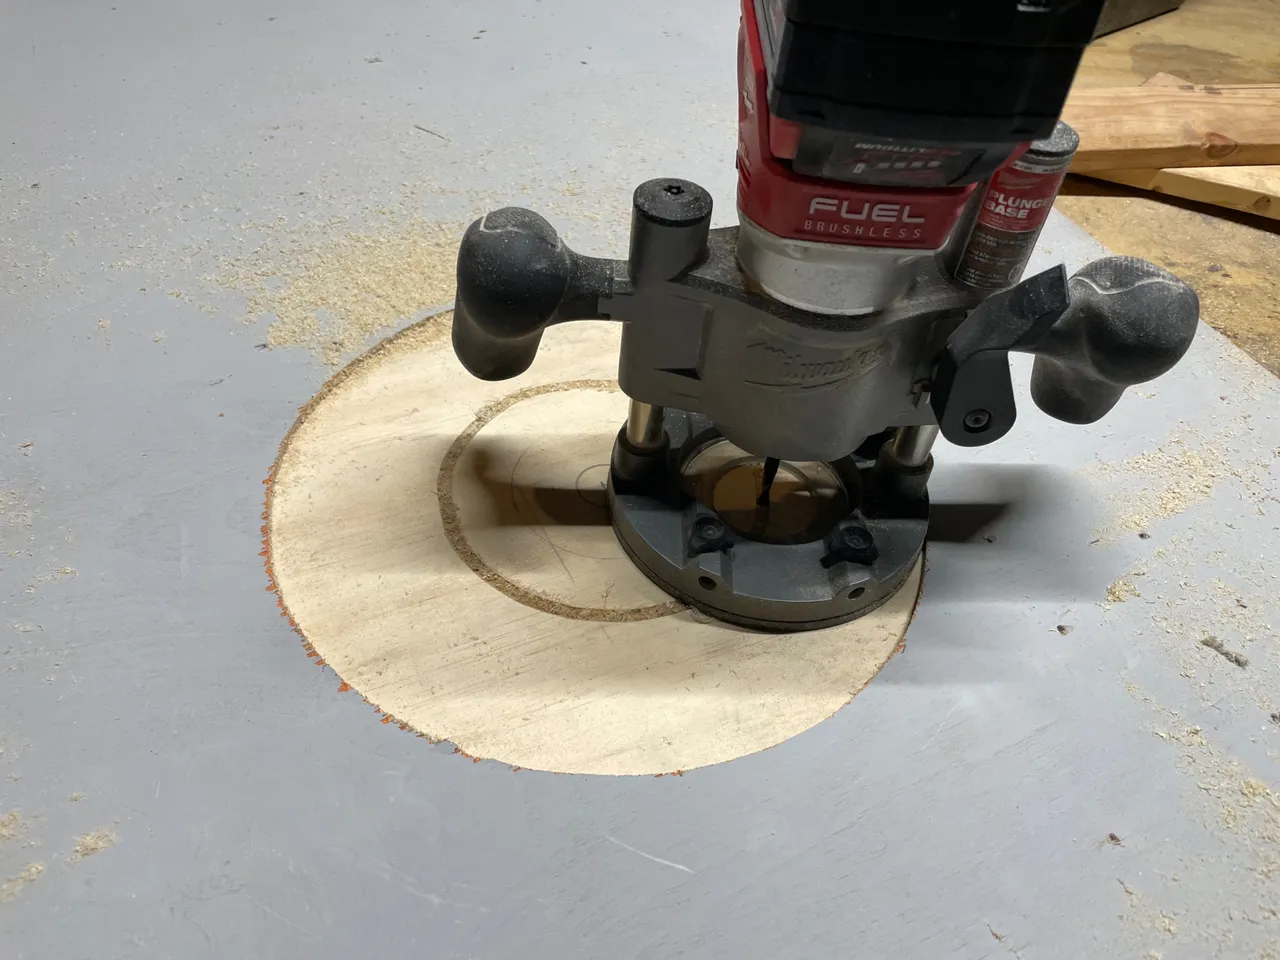
I have a Milwaukee 18V compact router and I’m going to use it to make its own router table. First I need to make a jig to cut out a perfect circle to recess the router base in the table. Using my framing square, I anchor it down with a screw and mark a circle.
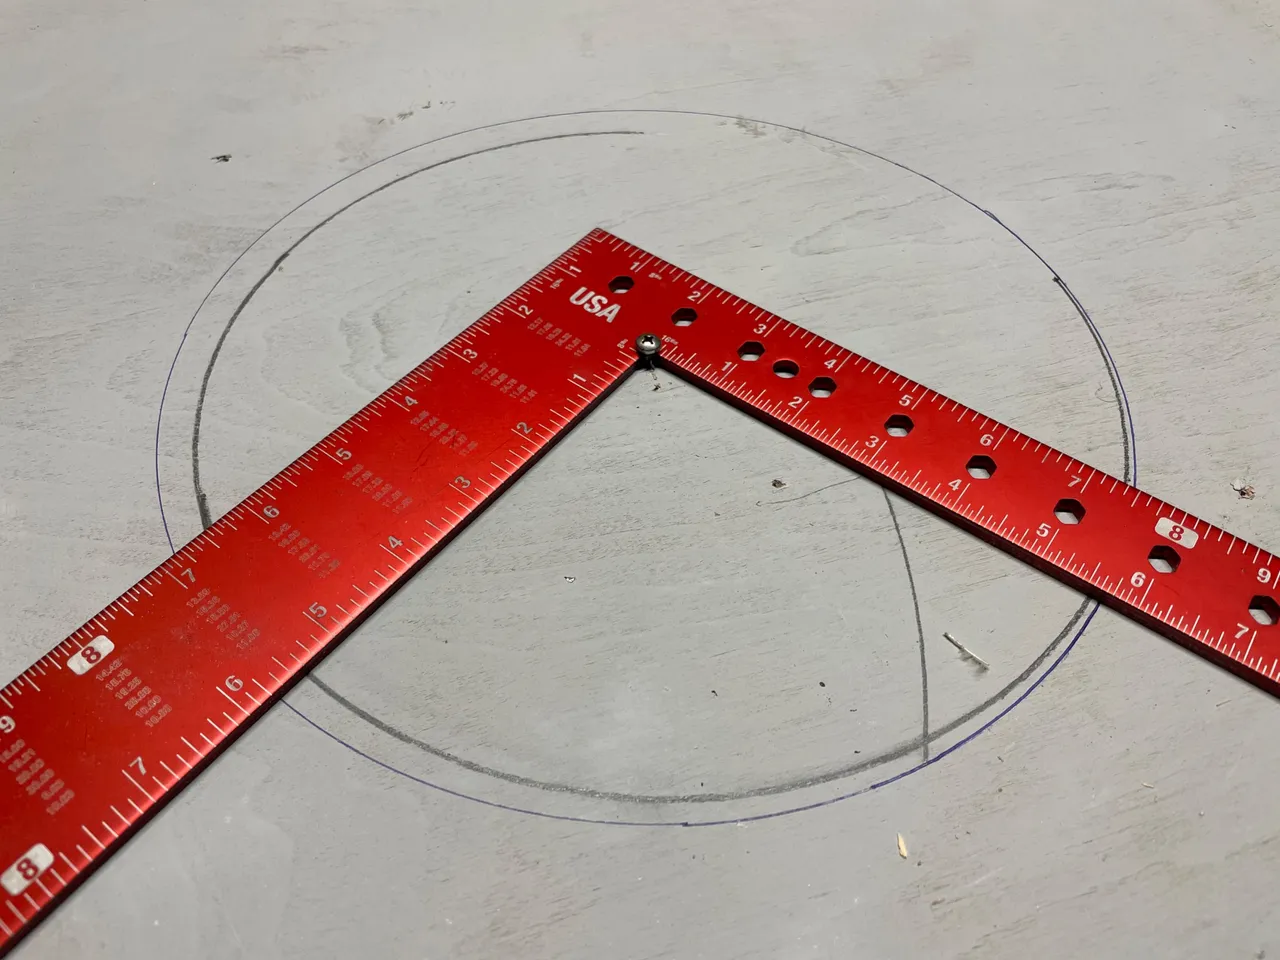 Pick a line… any line…
The circle jig is quite a bit bigger than the circular base of the router. This is because the plunge router base needs to ride along this edge in order to cut out the smaller circle due to the bit placement in accordance with the base.
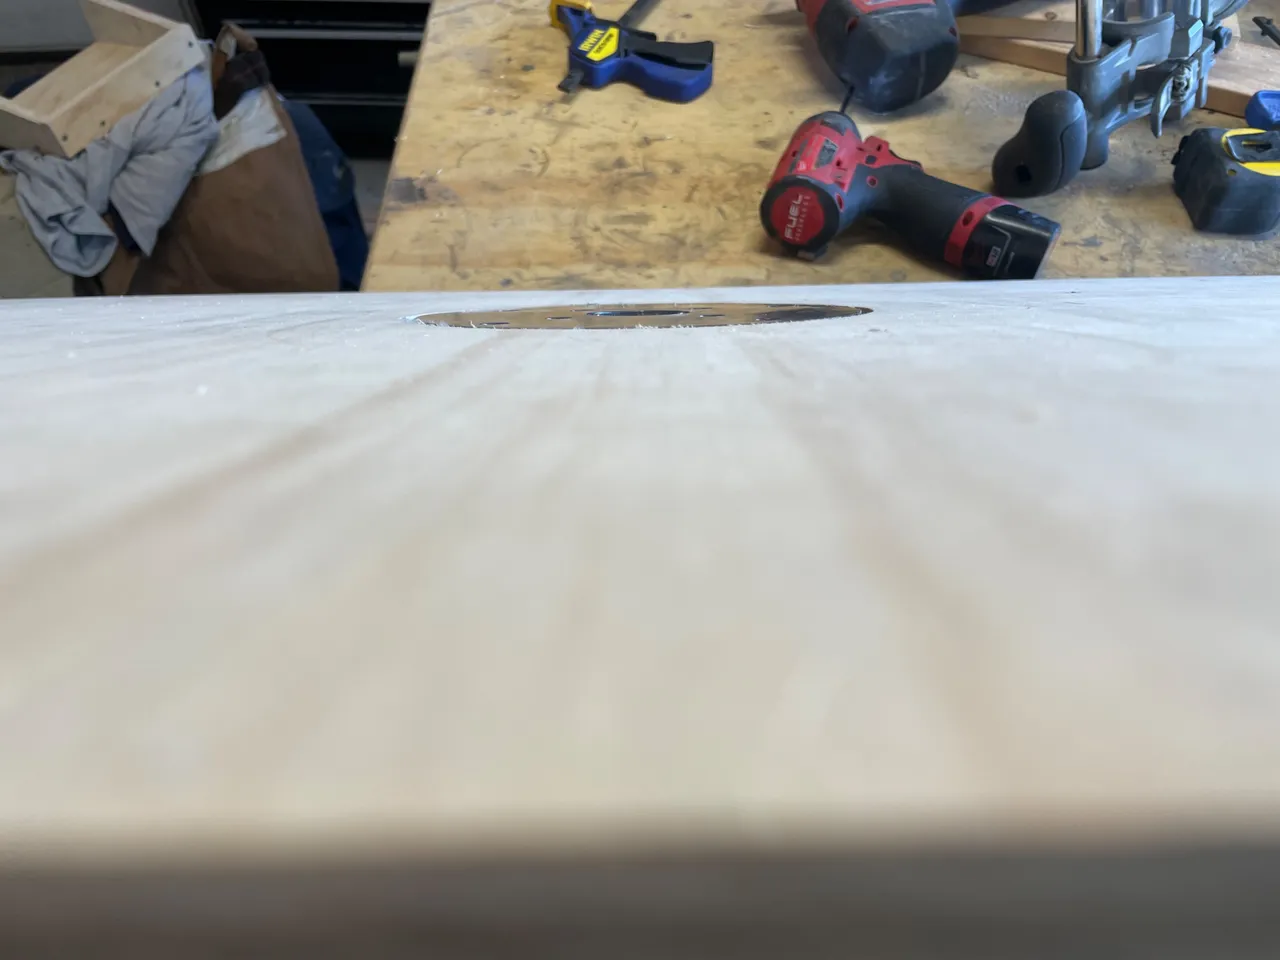
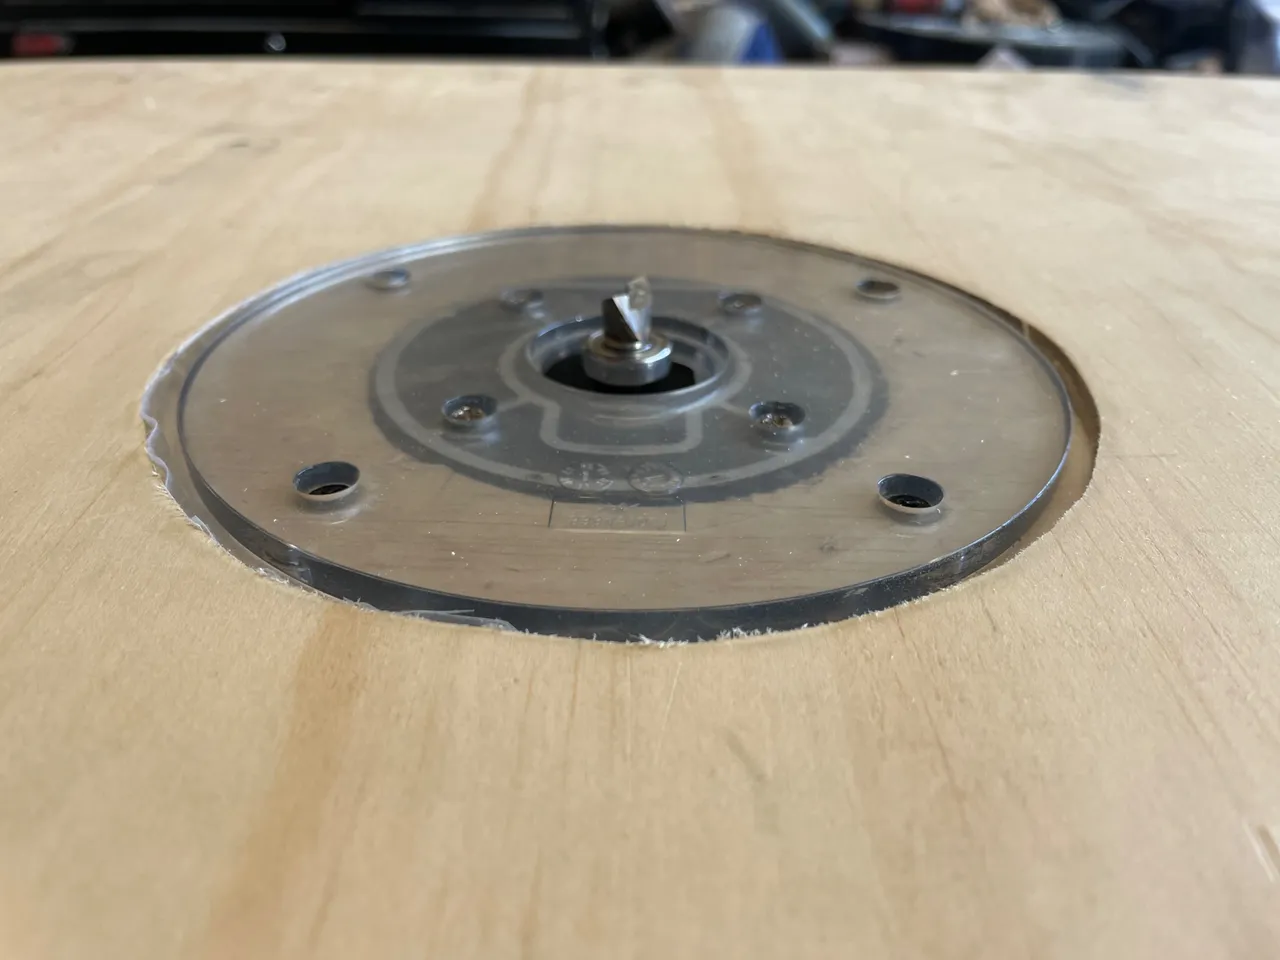
I used a mortising bit to remove all the material inside the circle. This is so the clear router base will sit flush to the top of the router table.
My circular cutout was just a touch big but not a big deal. The clear base fits in perfectly flush with the top of the table
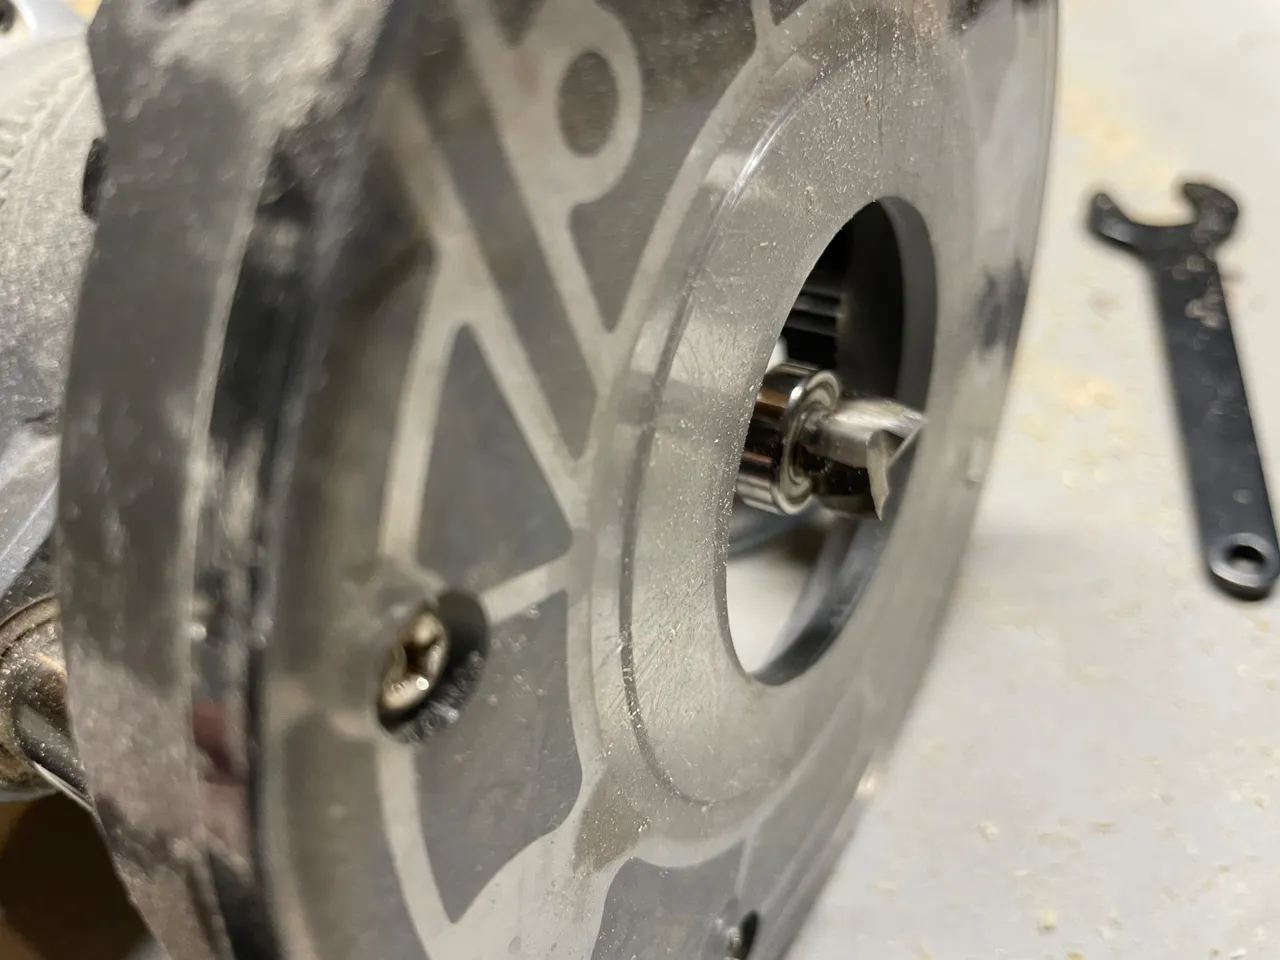
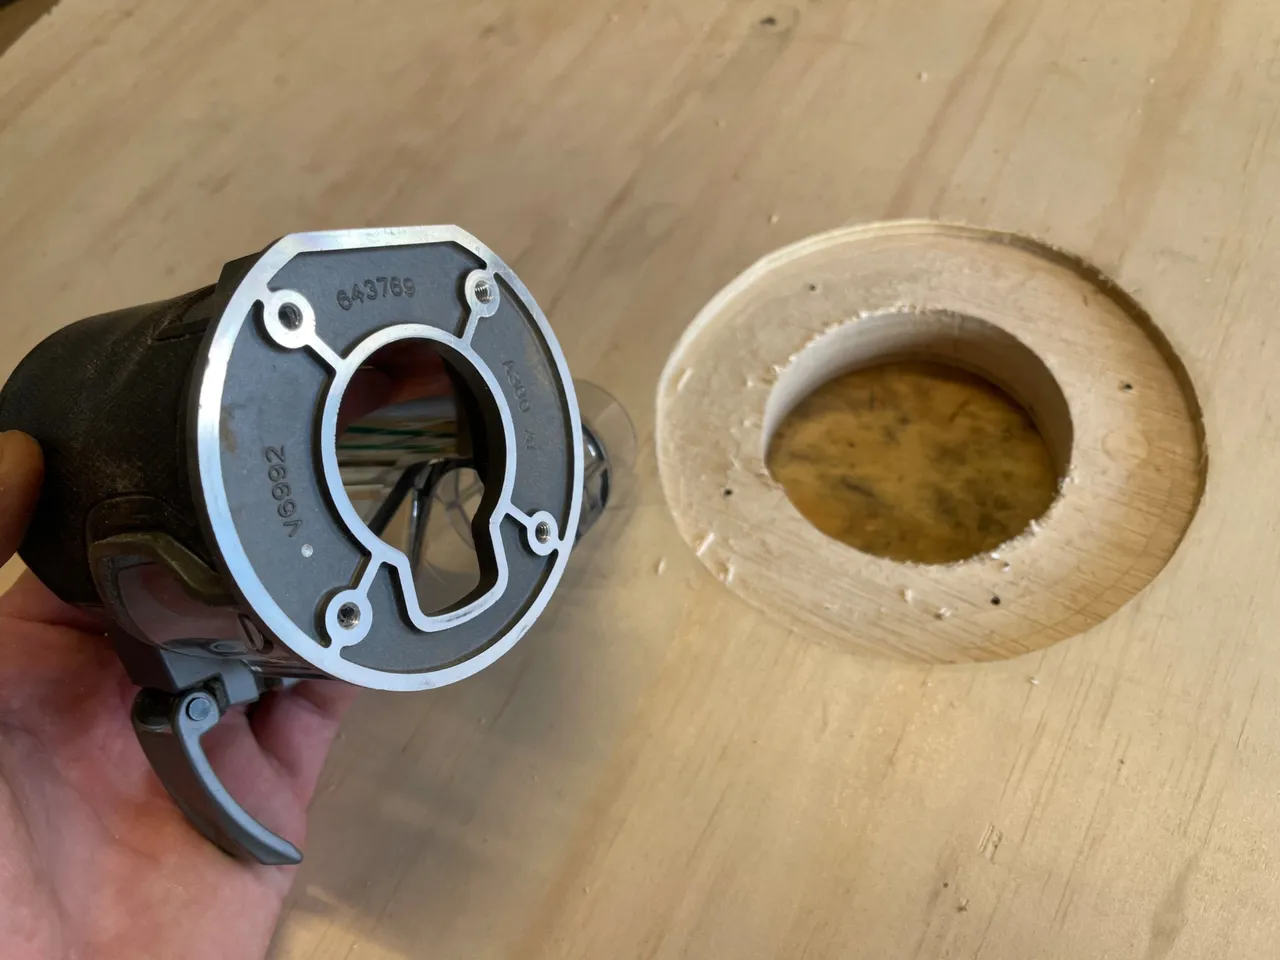
Using my Milwaukee 12V jig saw, I cut out another circle in the center of that. This is because the base of the router is detachable. The router can be removed from this base and put inside another, like my plunge router base for instance.
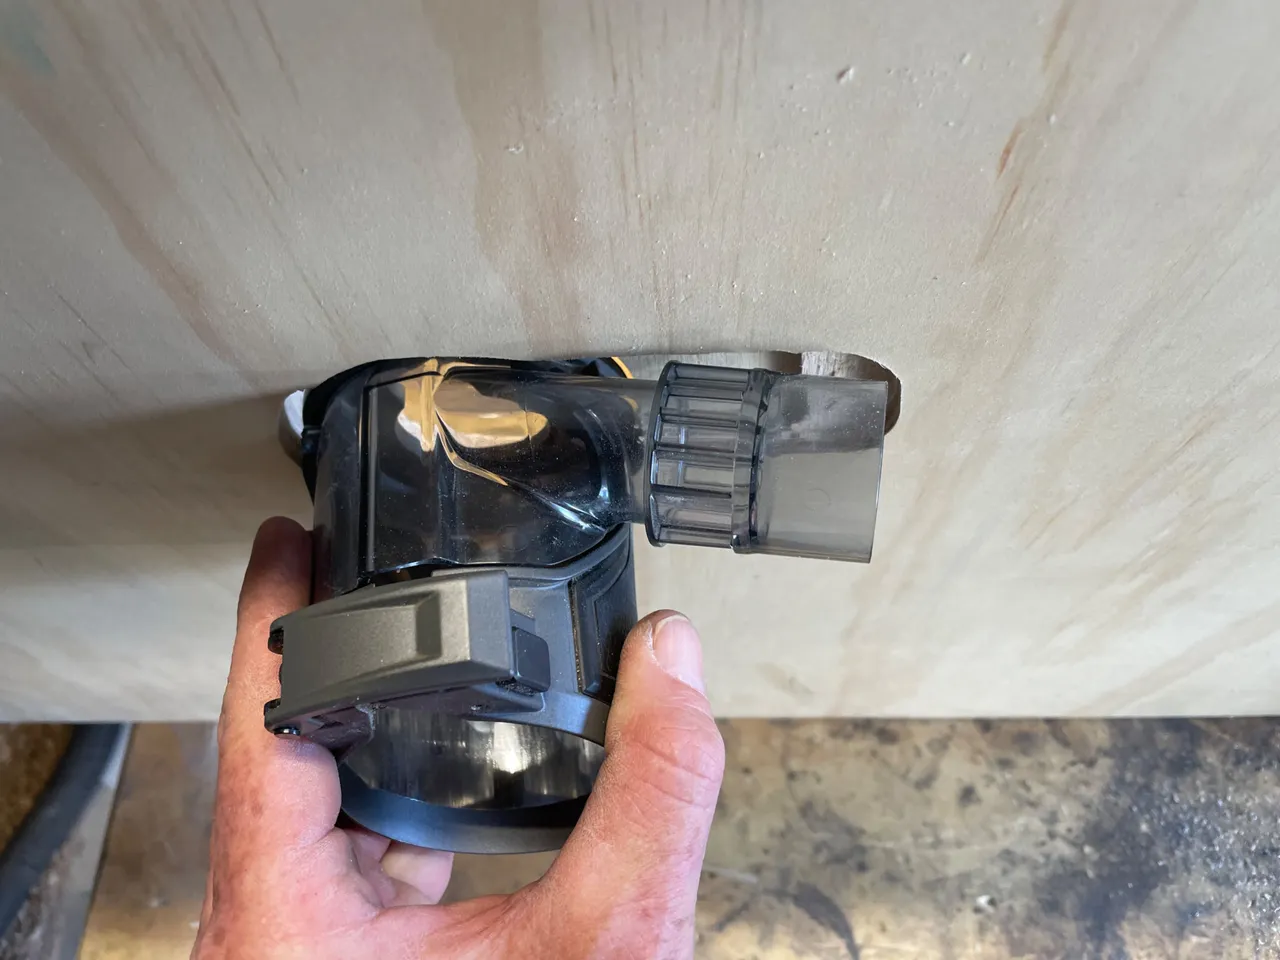
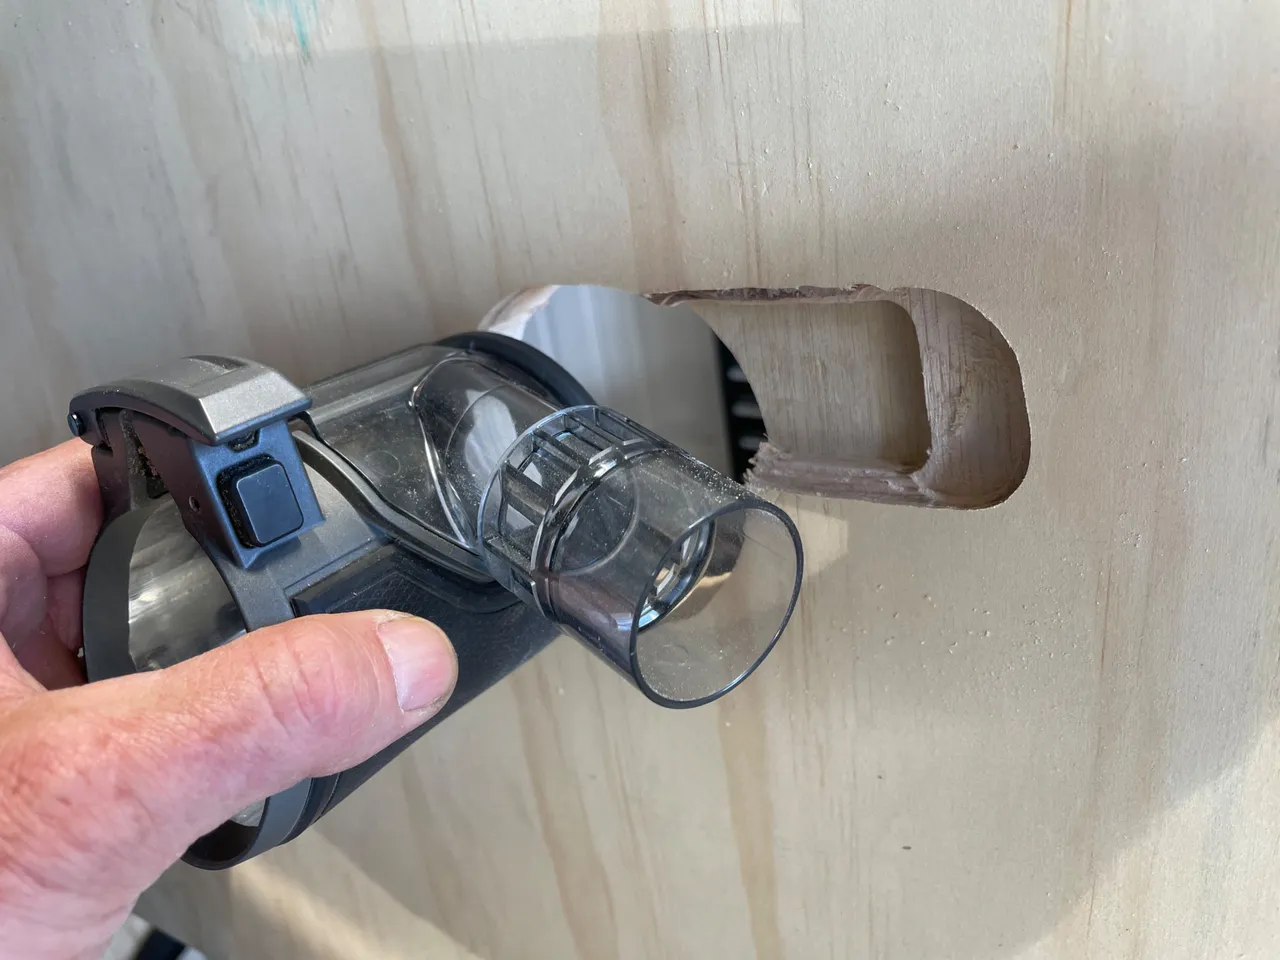
I wanted to be able to hook a vacuum up to it and my router came with a dust collection plate. This allows you to attach a vacuum to it to keep the saw dust from going absolutely everywhere. If you have used a router… you know what I mean. So again I used the mortising bit to remove material surrounding the dust collector attachment. Little by little until it fit the way I wanted it.
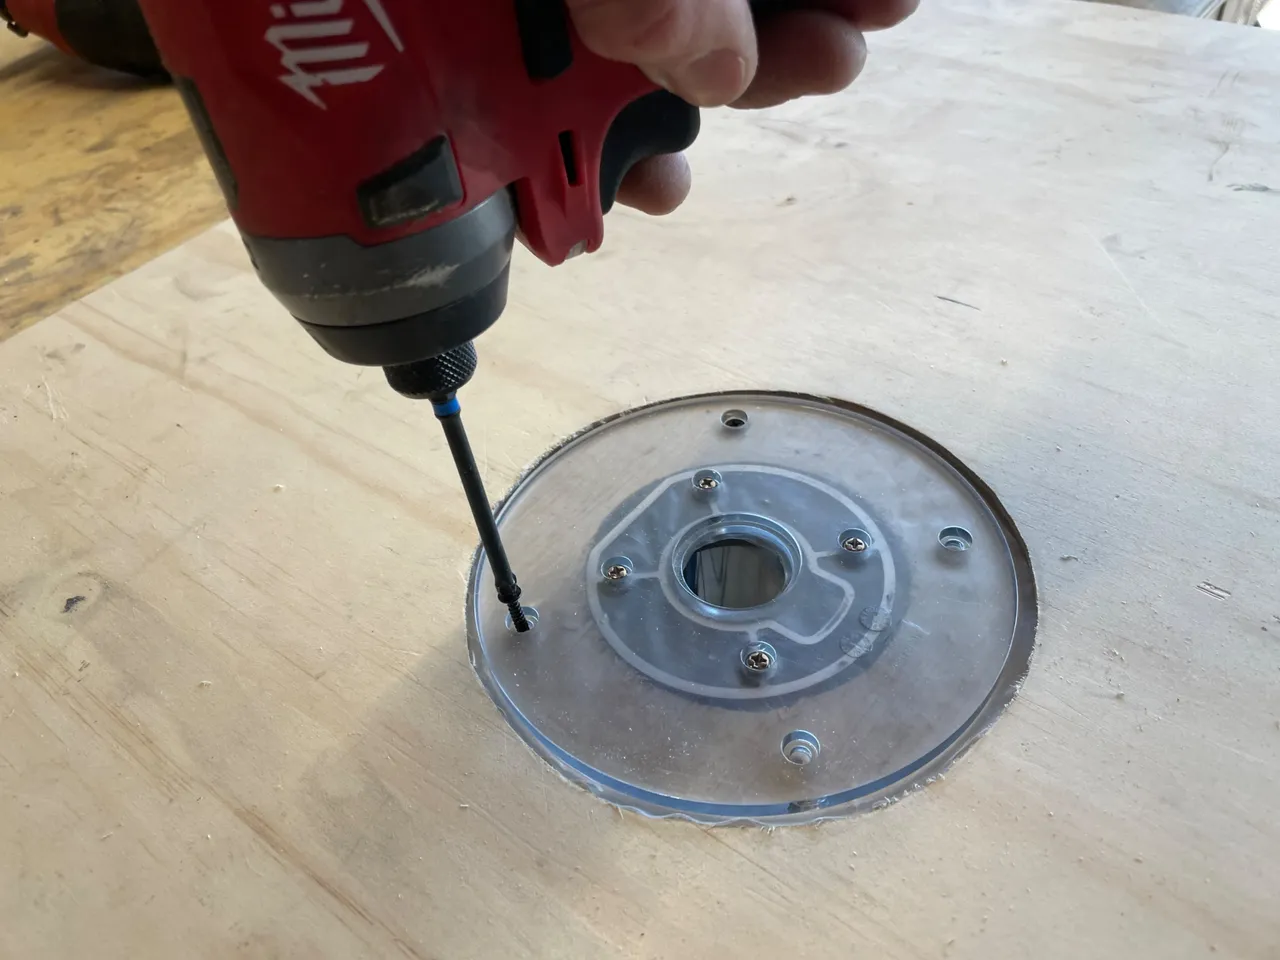
Now all that’s left is to screw the router base to the clear plate…
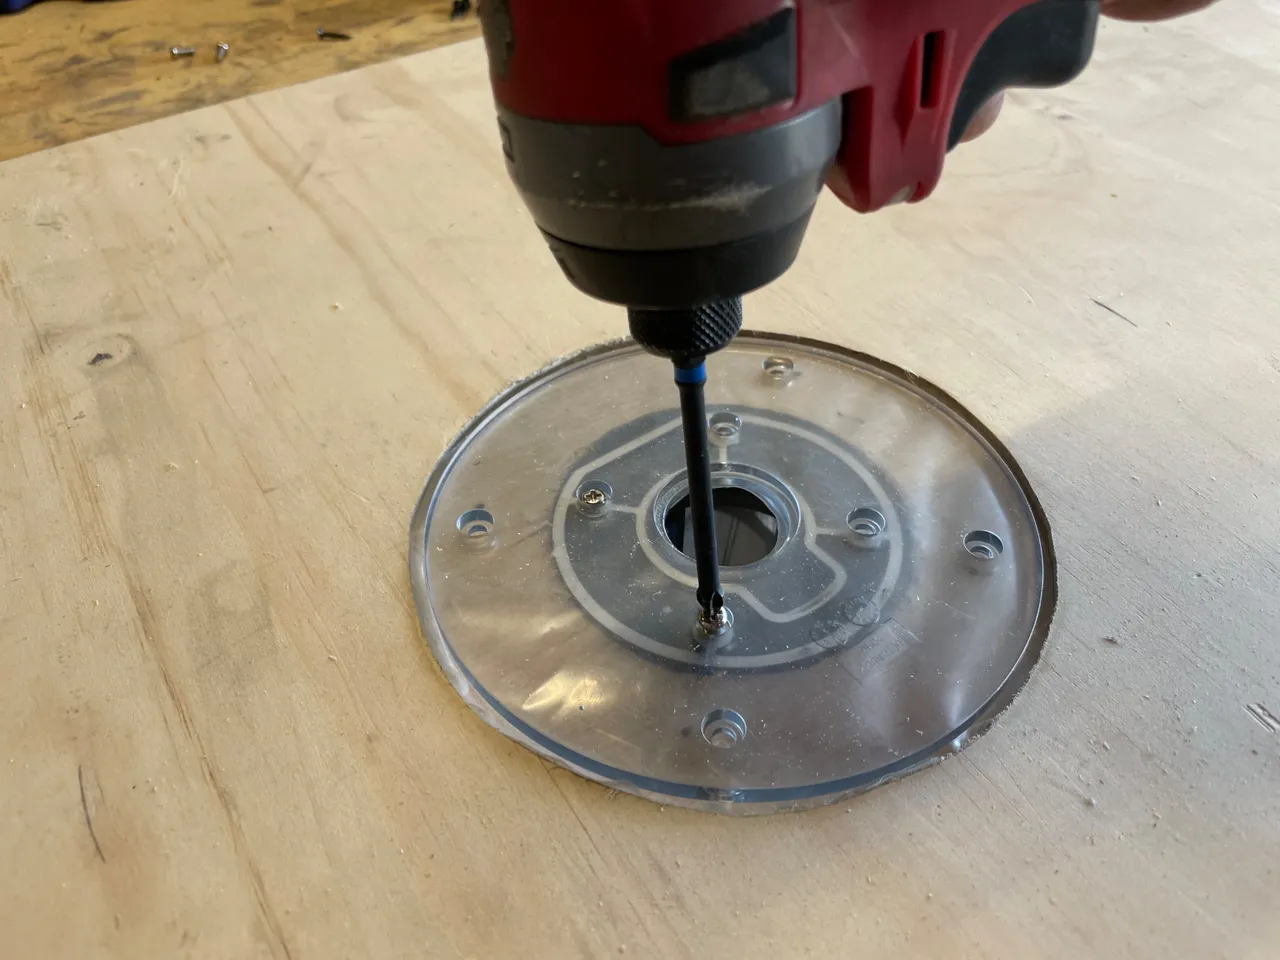
Then the clear plate to the table…
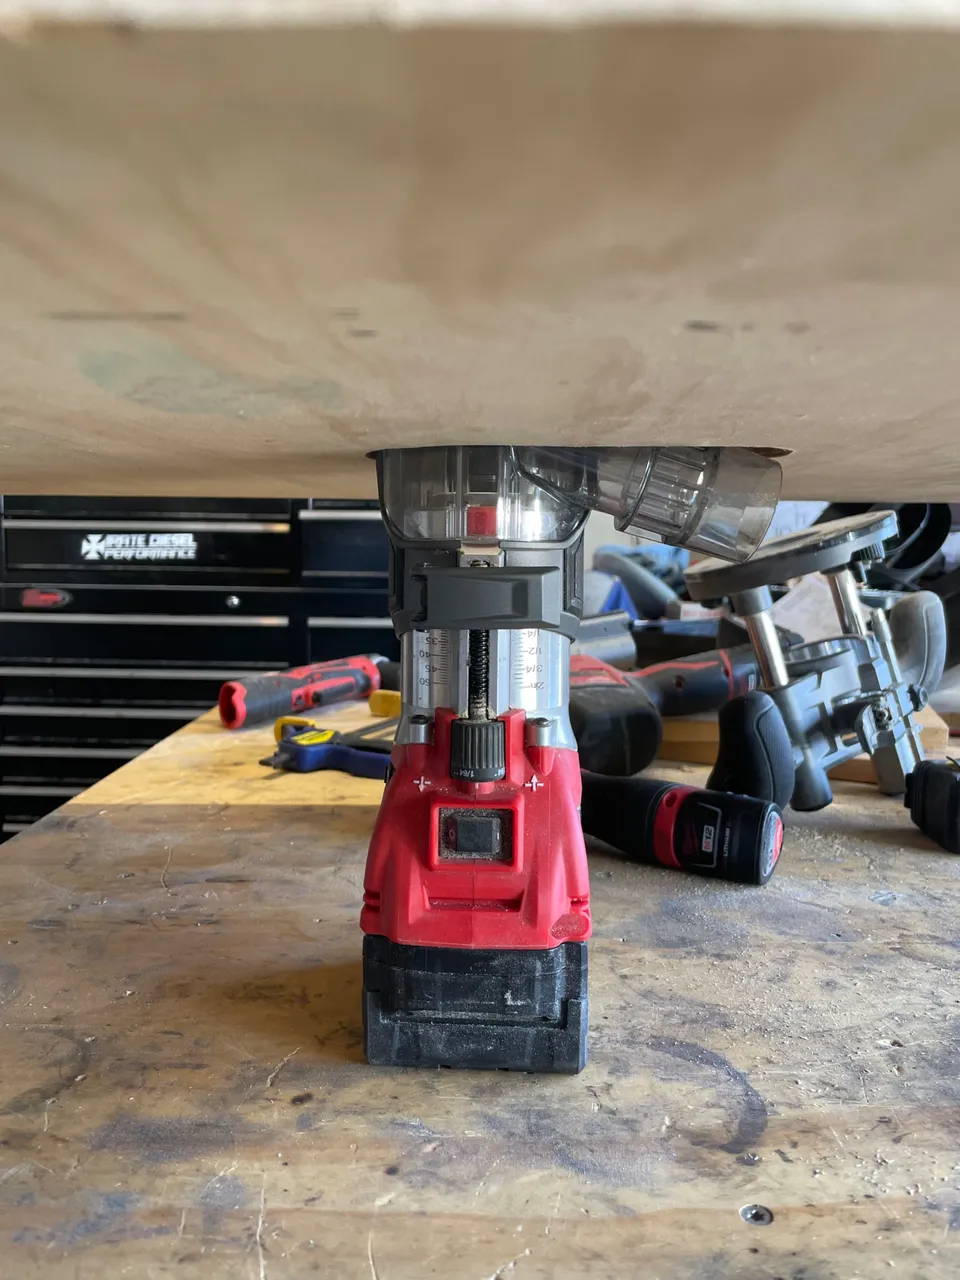
Then slide the router into the base and it’s ready for action
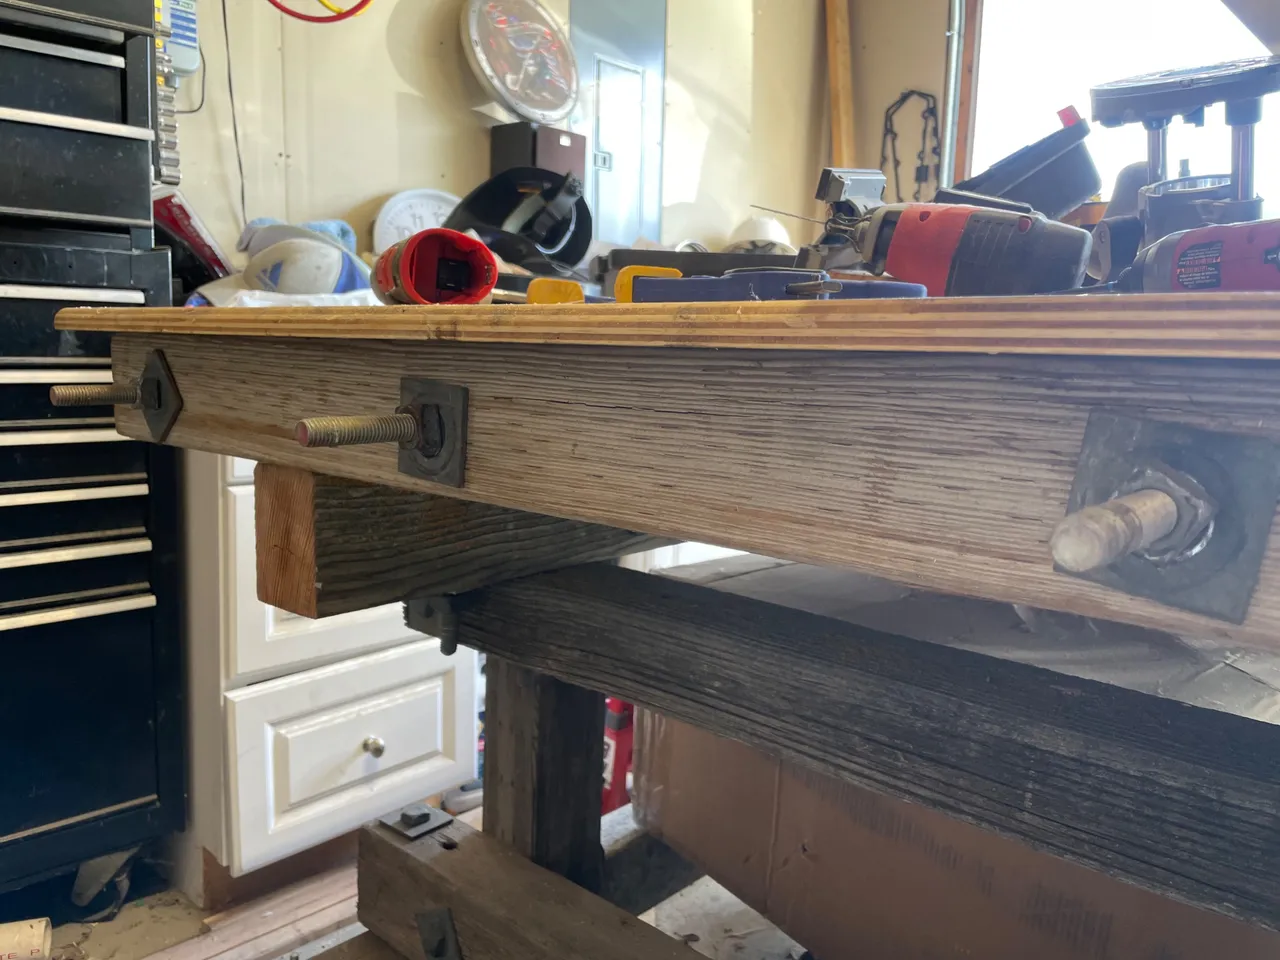
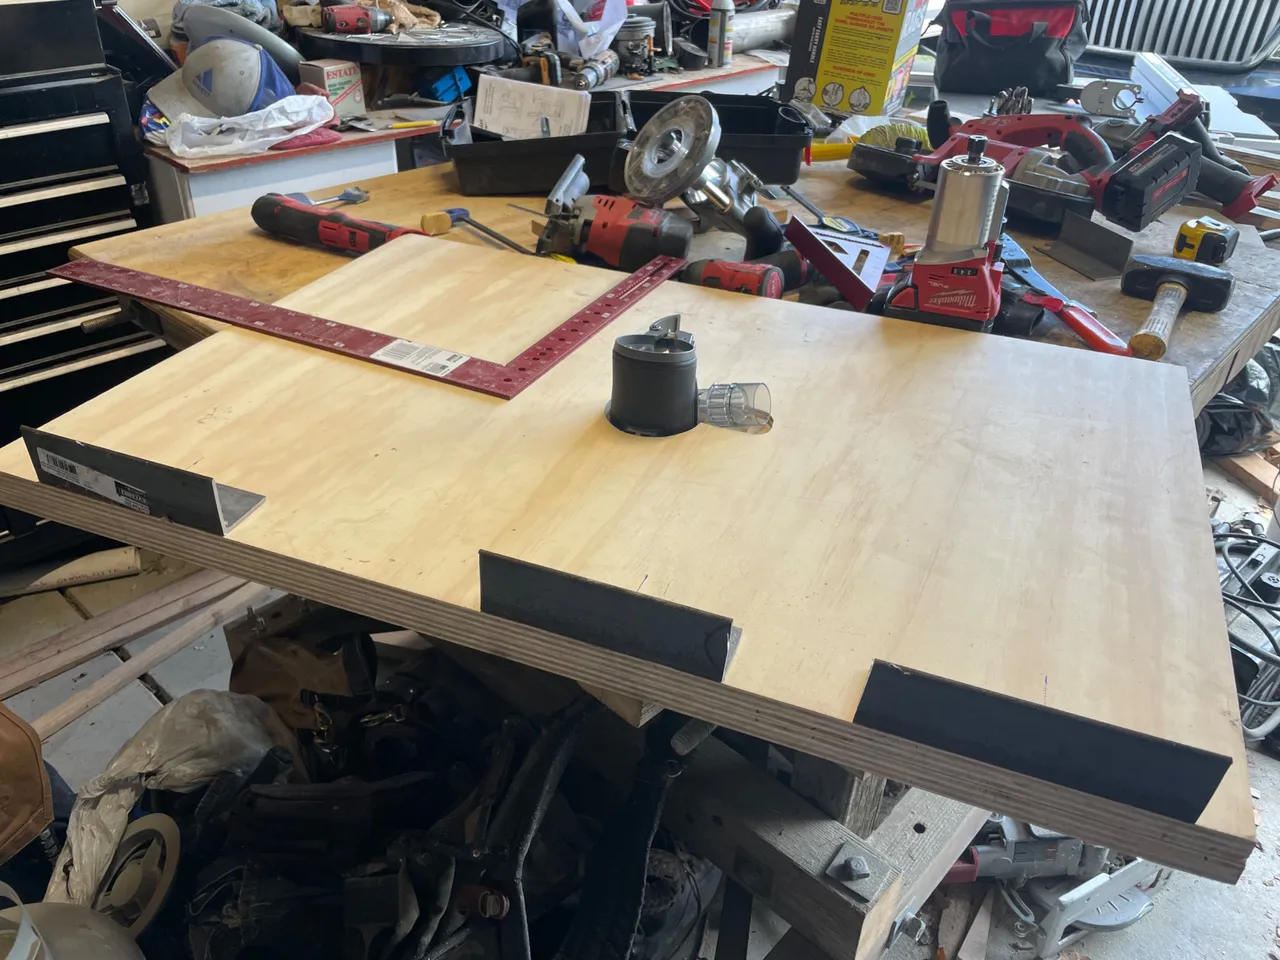
With the router table finished, it’s time to figure out how to mount the router table to the workbench. I need to make some sort of metal bracket that would slide over those 5/8 inch all-thread bolts. I know I have some 1/8 inch thick - 1-1/4 angled steel laying around somewhere in this disaster area…
FOUND IT… I cut the angled steel into 7 inch pieces. Now there are 4 all-thread bolts sticking through the workbench. The router table isn’t that wide so I will only be using 3 of the all-thread bolts to hold the table.
I couldn’t drill each mounting bracket in the same spot. Each all-thread bolt came out of the workbench just slightly different than the other. I measured from the top of the workbench to the center of the all-thread bolt to get the correct placement of the holes. This will ensure the table mounts flush to the workbench.
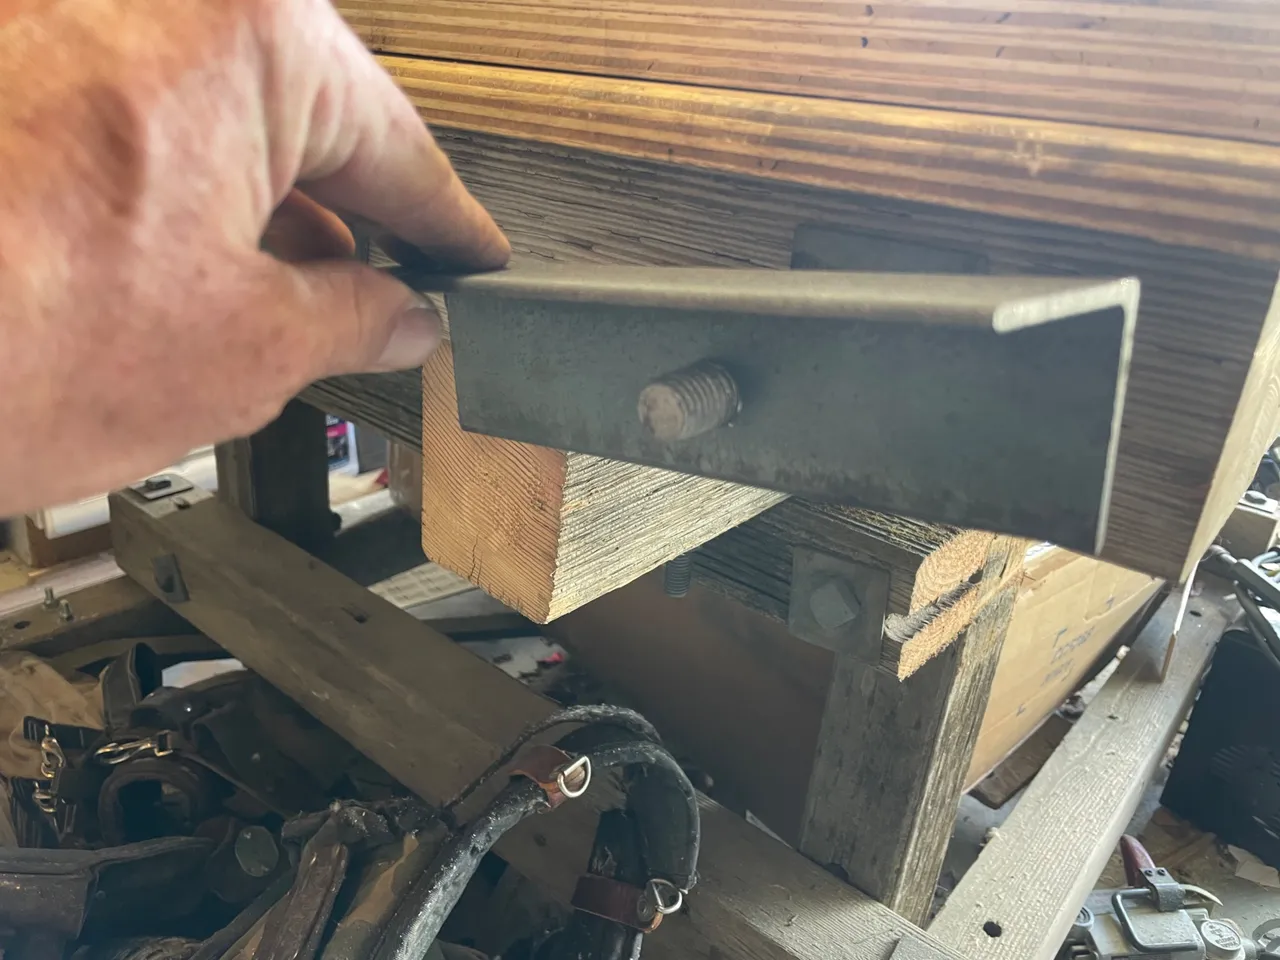
Then I drilled 3 holes in the bracket to mount the bracket to the table. Balancing the table on the brackets and keeping the table tight to the workbench was a little tricky. I didn’t want a gap between the workbench and table and I wanted them flush with each other.
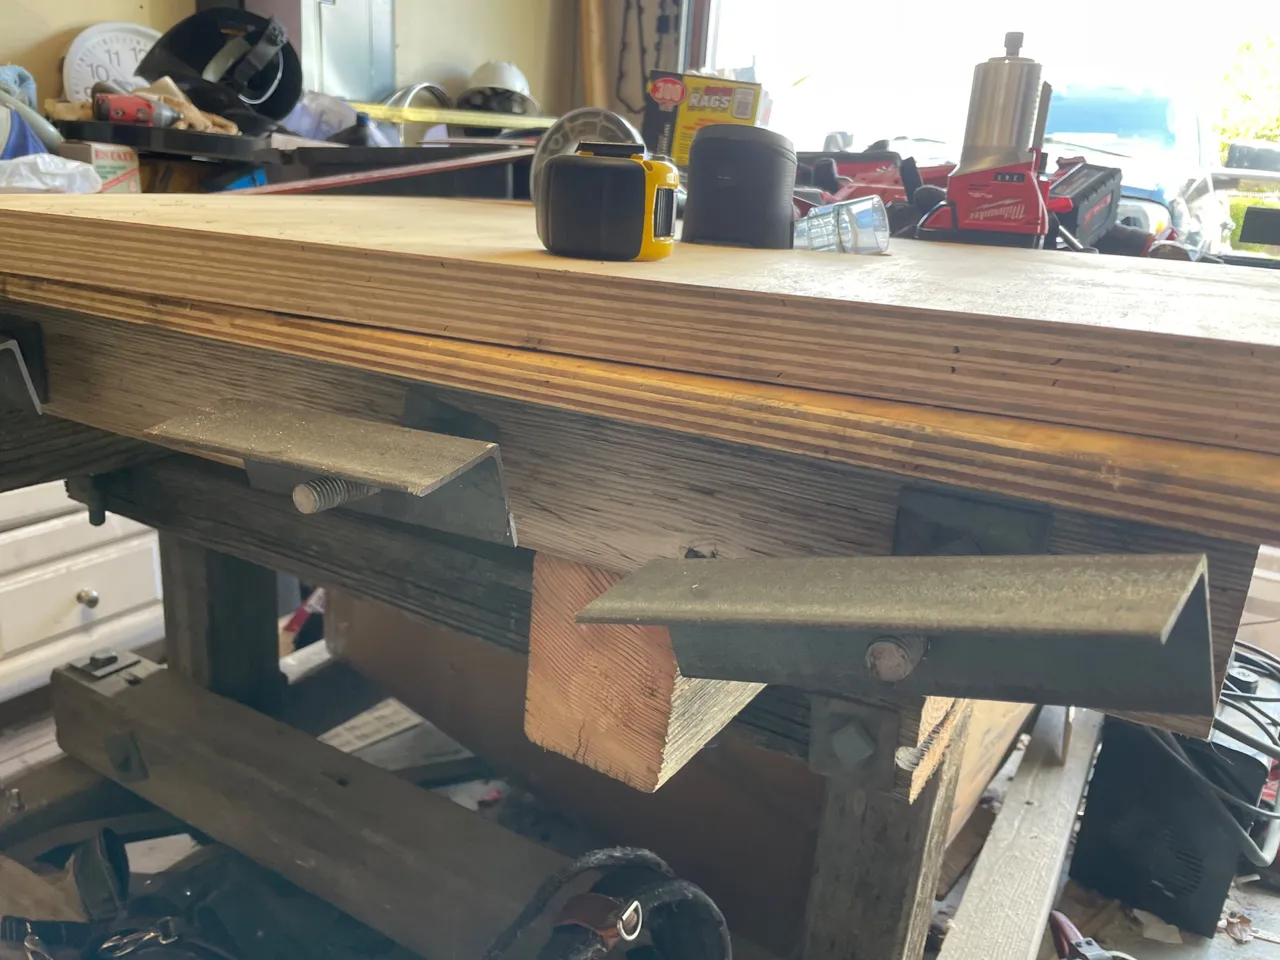
I put a 5/8 nut on the all-thread, then the bracket, then another 5/8 nut to trap the bracket.
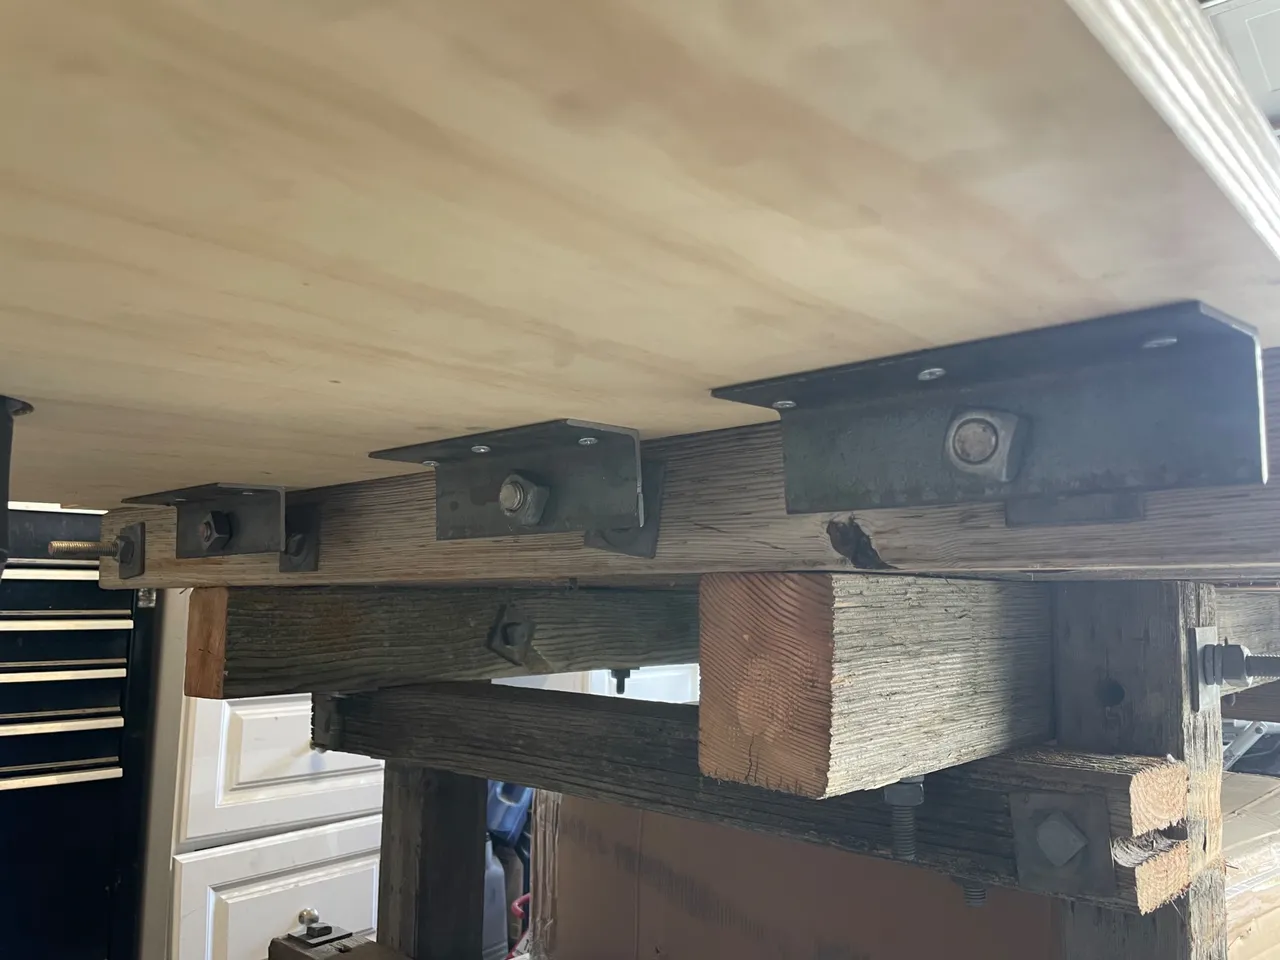
The table slips over the bolts really easily and the nuts just need to be installed finger tight in order to secure the table to the work bench.
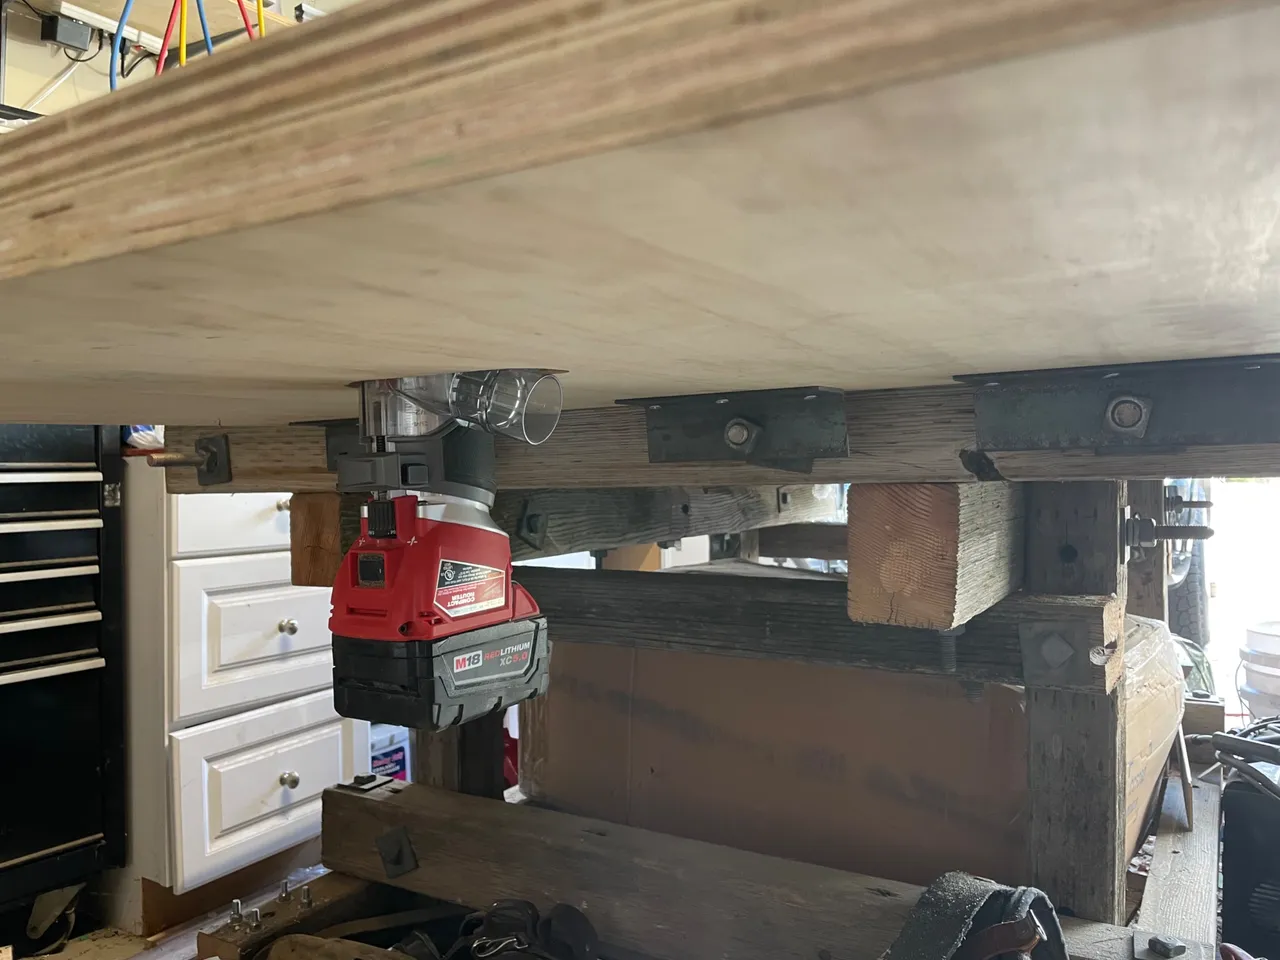
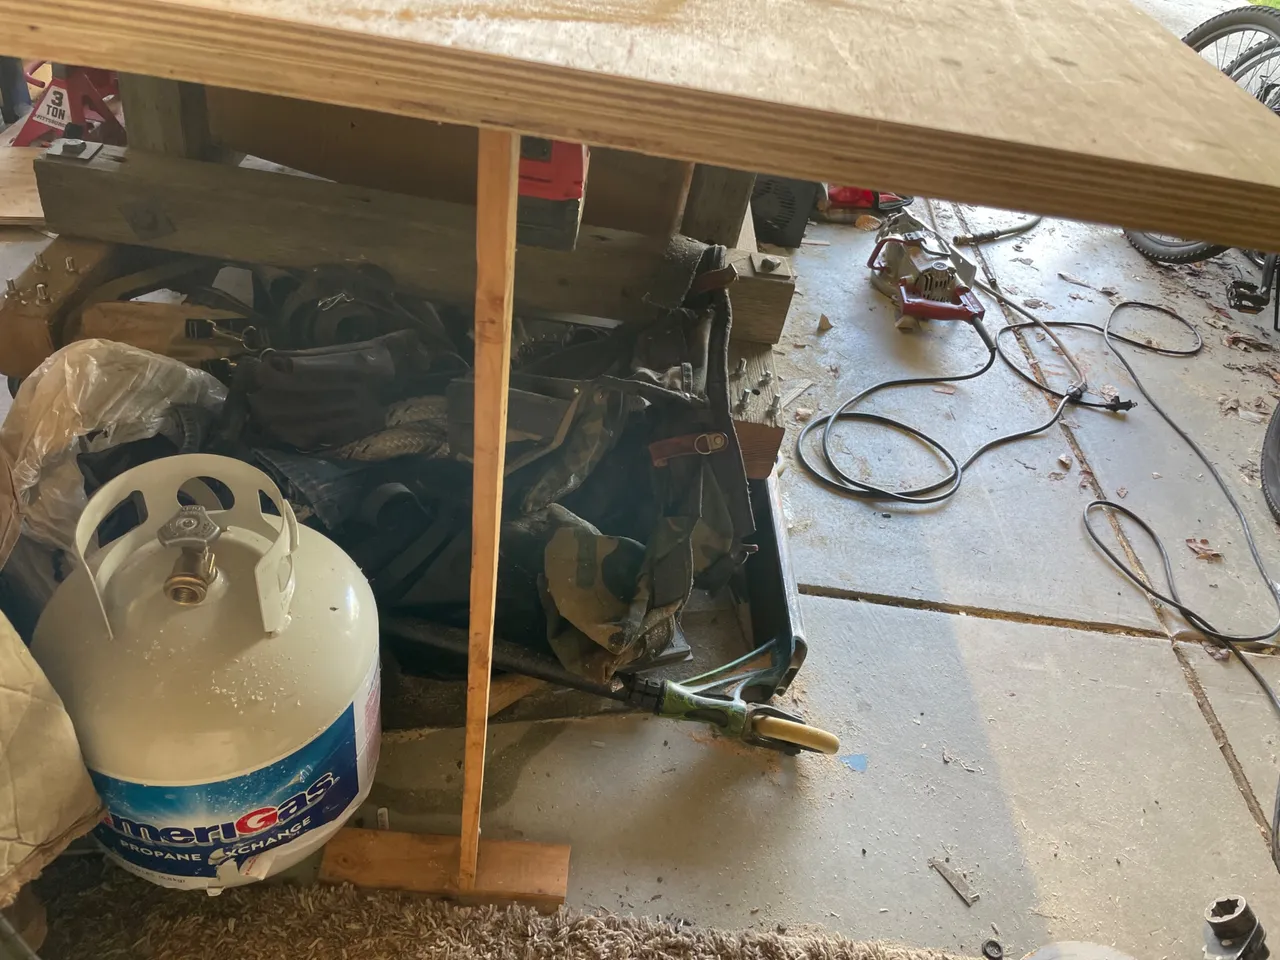
I did notice that the router table side away from the workbench did sag a little bit. So I made a kickstand to support the end of the table. I’m going to design a better one that folds up but for now this will work. It will probably be another year before I get to it. Lol
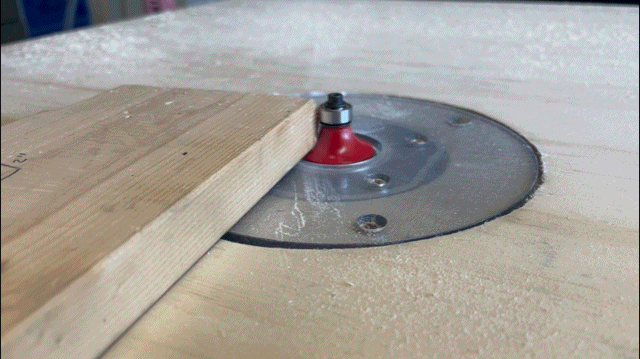
That is so much easier than pushing the router around a workpiece. Especially when it comes to rounding all the edges of a square piece.
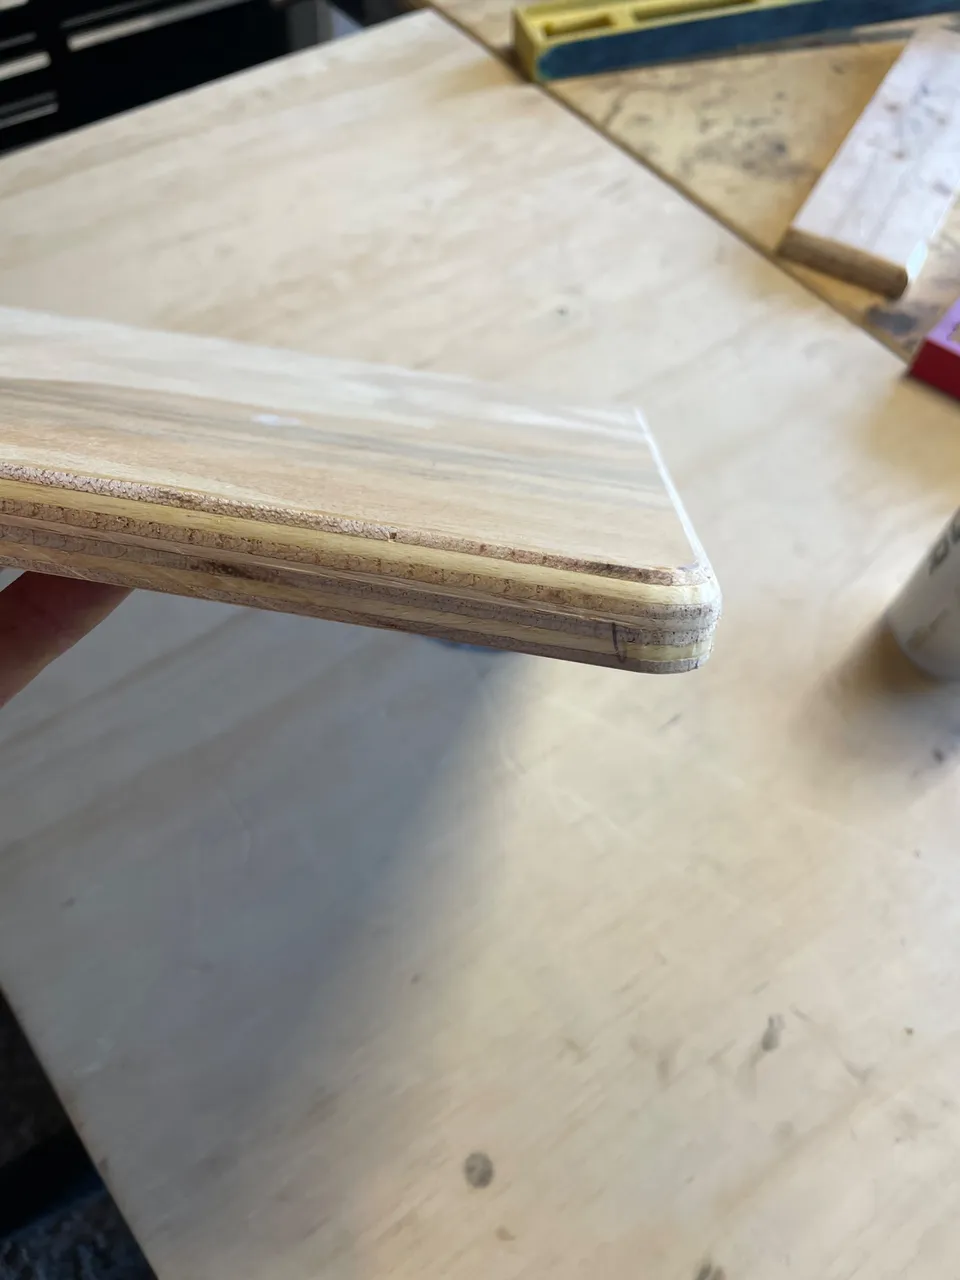
This table made quick work of getting all the edges rounded on my center console build. It’s getting closer to completion…
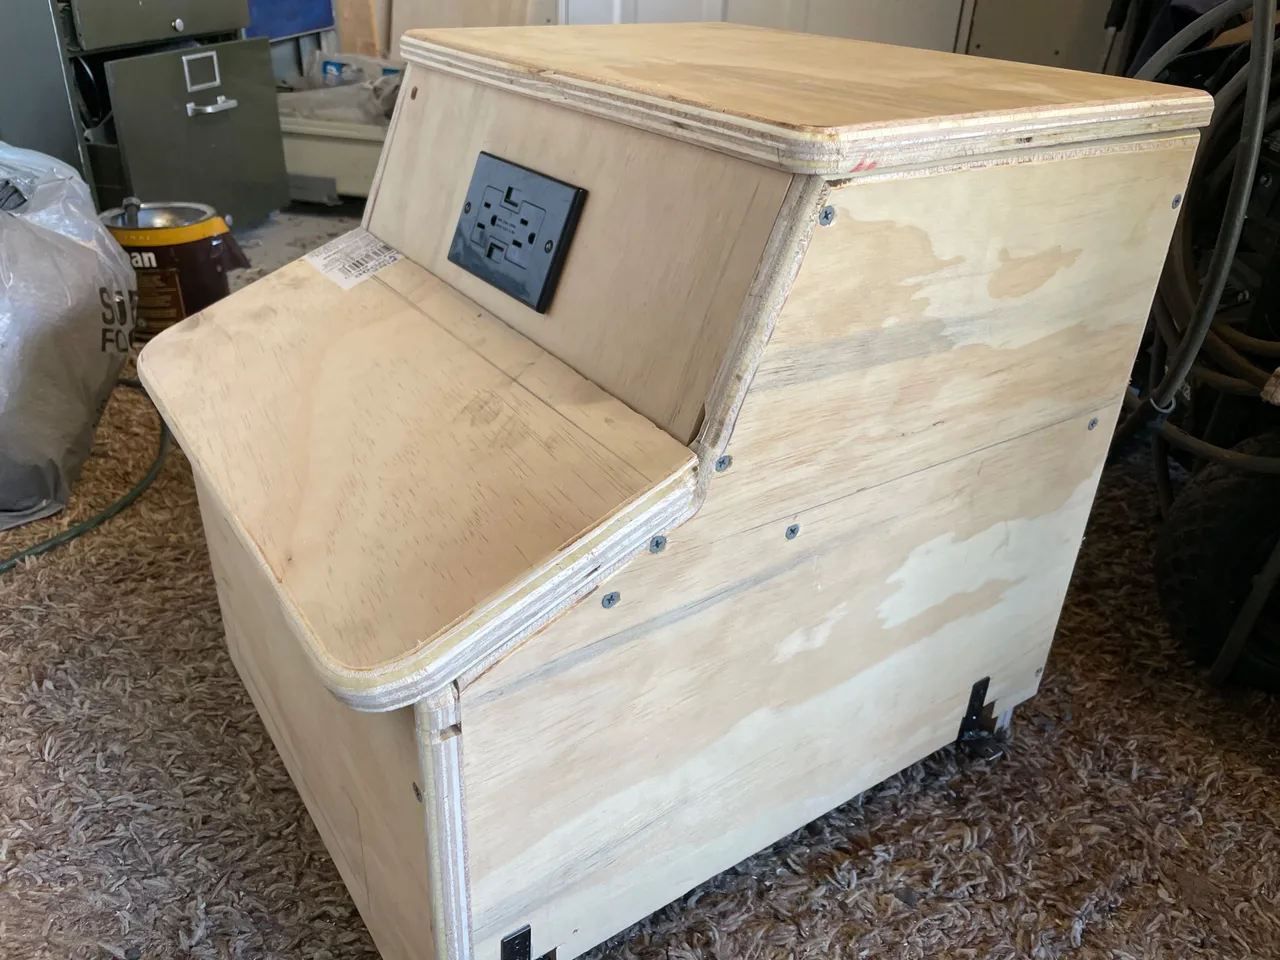
I’m super happy how this turned out and glad to see another procrastinated project finished.
Thanks for stopping by and checking out another DIY project done by yours truly…

Your Random
Dose of...