
Good to see you again, Homesteaders, Build-Itters, HiveGardeners, and DIYHubbers! Off Grid community doesn't have as much happening (yet!), but if you're into these kinds of projects, they are definitely worth a look.
That multi community shout-out was harder to arrange than it looks! Now that I've gotten that promotional work out of the way, let's get to the subject of this post:
Another new chicken tractor!!!
This is basically an upgrade to my last chicken tractor, which worked really well for a while, but the lightly spalted lumber that I used for its frame has given way to the elements, and the chickens. I really don't mind having to build this new one... there were some improvements I wanted to make to the old design anyway.

The first of the new improvement I wanted to make was to add a handle. Handles have been a problem for me on both of my previous chicken tractors, and I finally figured out how to easily solve the issue. Below you can see one side of the frame for the new tractor. That extra foot of material on the right side of the top piece is where my new handle will go.

In the photo below you can see the complete frame. Aside from the addition of the handle on the front and the materials used, very little is changed from the last design. The frame this time is made from the same reclaimed deck boards I used for the new chicken coop I built last summer.

This will be much more enclosed than the first version was, with only a portion of the front half of the enclosure covered with wire fence. The rest will be covered with 1/2" ash boards that I cut with the sawmill. This is to add rigidity and security to the overall structure, and to help keep the chickens drier during rainstorms.

Another upgrade on this model will be the addition of a flip down door in the front. On the old chicken tractor, I just took the cover off the top to let the chickens out, but some of them got confused about how to get back in. In the photo above you can see the boards for the door lying on the ground in front of the frame.

I didn't have any boards wide enough for a full height door, so I joined a couple together using backer boards, wood glue, and wire brad nails. The clamps you see in the photo above are just to hold things together until the wire nails are in place. Below you can see that the wire nails poked through a bit, but I don't mind. The pointy ends face away from the chickens, and it should be one more deterrent to keep predators from nosing around.

Here you can see the door installed and open. The chickens should have no problems at all finding their way in and out of here! (In fact, I've been using this for months now, and the chickens all seem very happy with their new access!)

To hold the door shut, I use a simple locking hook latch, seen below. These simple latches are enough to stop any of the local animals from getting in through the front door.

A lot more planning went into their cover and 'coop' area this time around. I wanted to be able to access the chickens through this space, and had originally thought about making a hinged roof. What I eventually decided was to make the whole coop area hinged, as you'll see later.

There was a lot of repetitious cutting for this project, and I meant to take better pictures of how I set multiple stop points for my miter saw, but that will have to get its own post in the future. For now, you'll have to settle for this picture of me using the space in front of my newly assembled outdoor shelves.

Below you can really see the project taking shape. I used wire fence with much smaller openings for this design, so I should be able to use this for very small baby chicks. This should also keep out weasels, but I guess we'll just have to wait and see...

I had a better selection of lumber to choose from for the roof this time, and decided to give it another try. The wood roof didn't work out very well on the last chicken tractor, but on that build I was 'making do' with whatever scraps I could get together.
Our hen tending rooster stopped by to check on my handiwork as I was getting close to finished. These chickens will never live in this enclosure, but I'm hoping someday their offspring will. This will be used mostly for raising slaughter chickens, and for transitional space when I have new chickens to introduce to the flock.

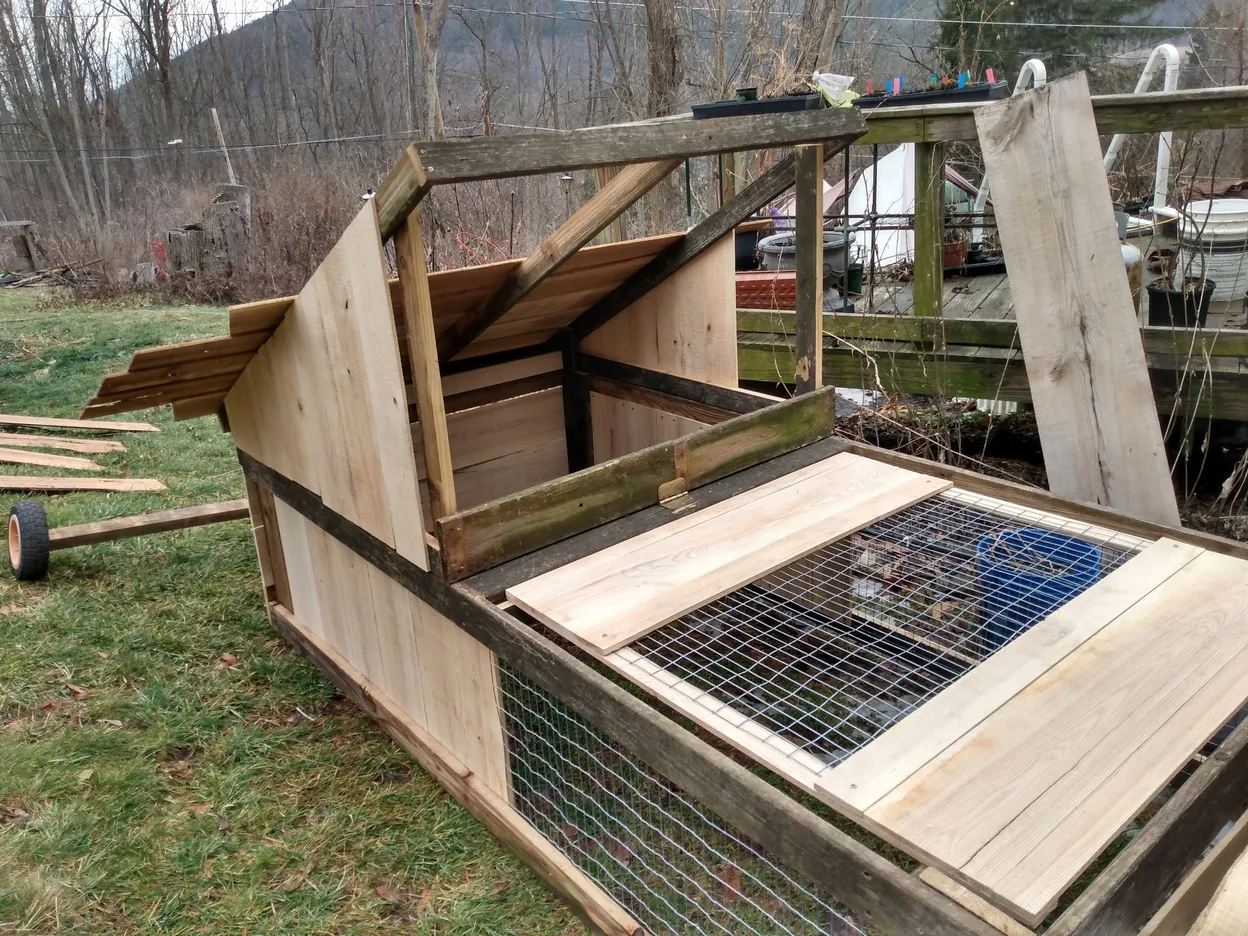
In the photo below you can see the chicken tractor with the coop flipped up. The cross bar you see is the upper perch for the chickens, there is another lower one that you can't really see in this photo. The odd round thing you see near the peak of the roof (middle of the photo) is a heat lamp, to help prevent frostbite on their combs.

Hinging the top like this had the added benefit of being able to move much of the weight of the tractor forward, which makes it easier to lift the back when placing the wheels underneath.

So far, the wooden roof has held up very well through snow and rain. Hopefully I'll be able to get it painted soon, with the warmer spring weather upon us.

The one heavy snowfall we've had so far this year was so fluffy, it didn't even go through the holes in the wire fence lid. I was more than a little shocked to come outside after the snow and see the chicken tractor looking like it had a cover over it.

The chickens definitely didn't seem to mind having some green grass to walk around on. One thing about this flock of chickens... not a one of them like to step foot in snow! These four roosters are just biding time in here, waiting for an opportunity to mate before they go head first into the kill cone. Fortunately for them, none of the hens have gone broody yet. If one doesn't start sitting on some eggs soon, I'm going to build or buy an incubator.

This design, and the previous design that I linked at the beginning of the post, are best used for keeping roosters, or young slaughter birds. If you need a space to keep laying hens, a design like The A-Frame Chicken Tractor will have the necessary nesting space. Chickens will make a space to lay eggs even in an enclosure like this, but your hens will not produce as well, and your eggs will be more likely to get broken and dirty.
It feels good, dear readers, to finally be putting the finishing touches on this post! Though I've definitely fallen behind the post schedule I'd hoped to keep, I have a folder full of drafts near completion, and I've managed to post at least once a month, while still staying on top of curation, Homesteading Communitly Highlights posts, engagement in the Comedy Open Mic COMmunity with my alt, as well as my many other undocumented real life adventures. It's been a struggle, but I feel like I'm finally getting a handle on things.
Thank you all for you interest, you attention, your support, and your patience!