FULL VERSION ESPAÑOL

Saludos Comunidad de #DIYHub. Un placer estar por aquí de nuevo. Hoy les voy a compartir la reparación que le hice a uno de los juguetes favoritos de #DrakoCinnamonRoll. Sé que el acabado del mismo no quedó como esperaba, pero pienso que al final posee más personalidad de antes, ¿ustedes qué creen? Acompáñenme a ver de qué les hablo.


Se supone que era un Bugs Bunny pero fue tan maltratado por Drako y Yara desde que llegaron a mi casa (hace aproximadamente poco más de 2 años, que lo que quedaba de él quise rescatarlo y darle vida de nuevo con retazos de tela de Jean. Y pues quedó, así como un Conejo Enmascarado que lucha contra el mal con el mismo estilo de Daredevil.
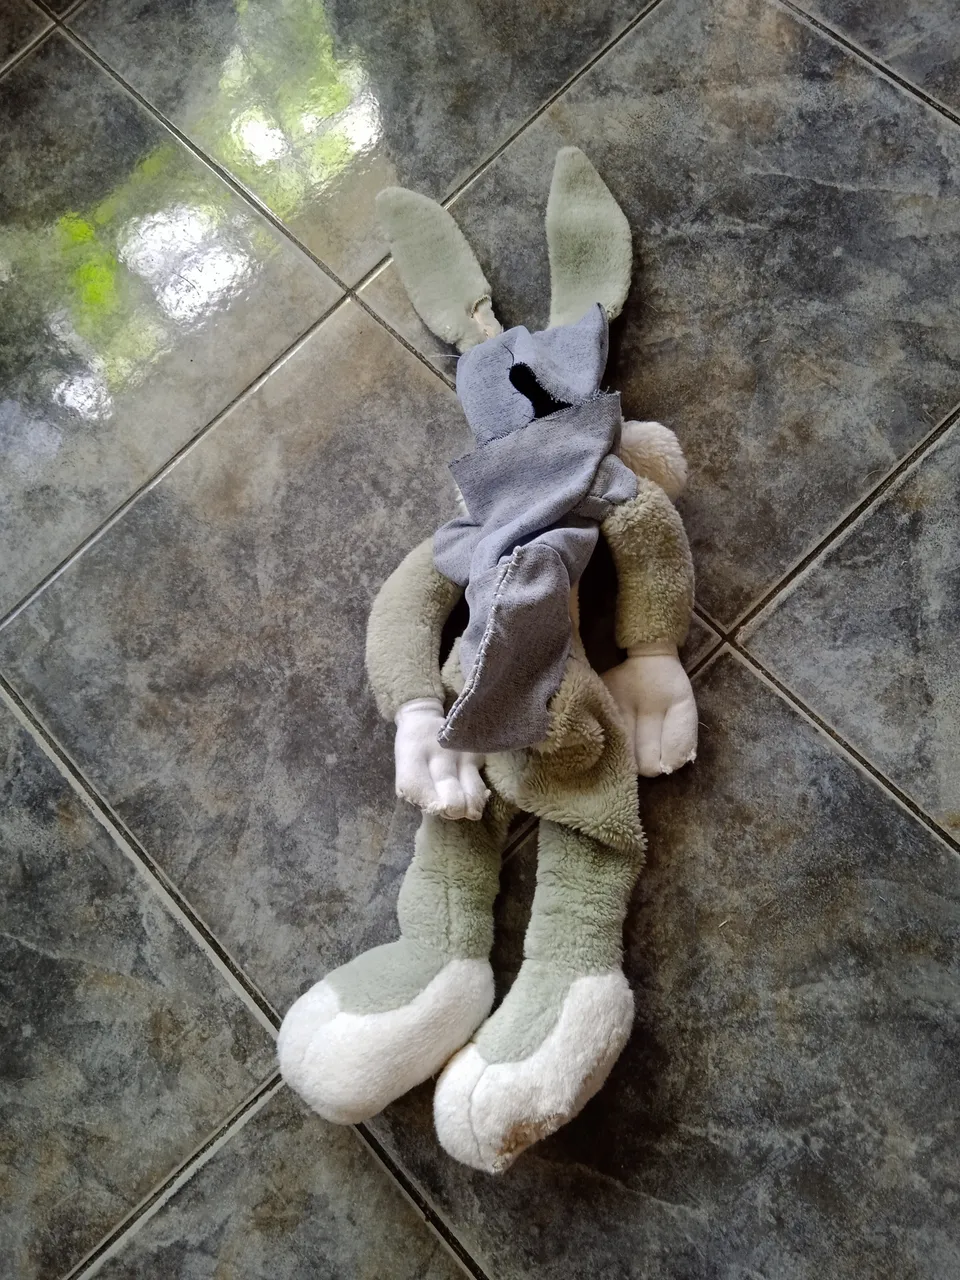
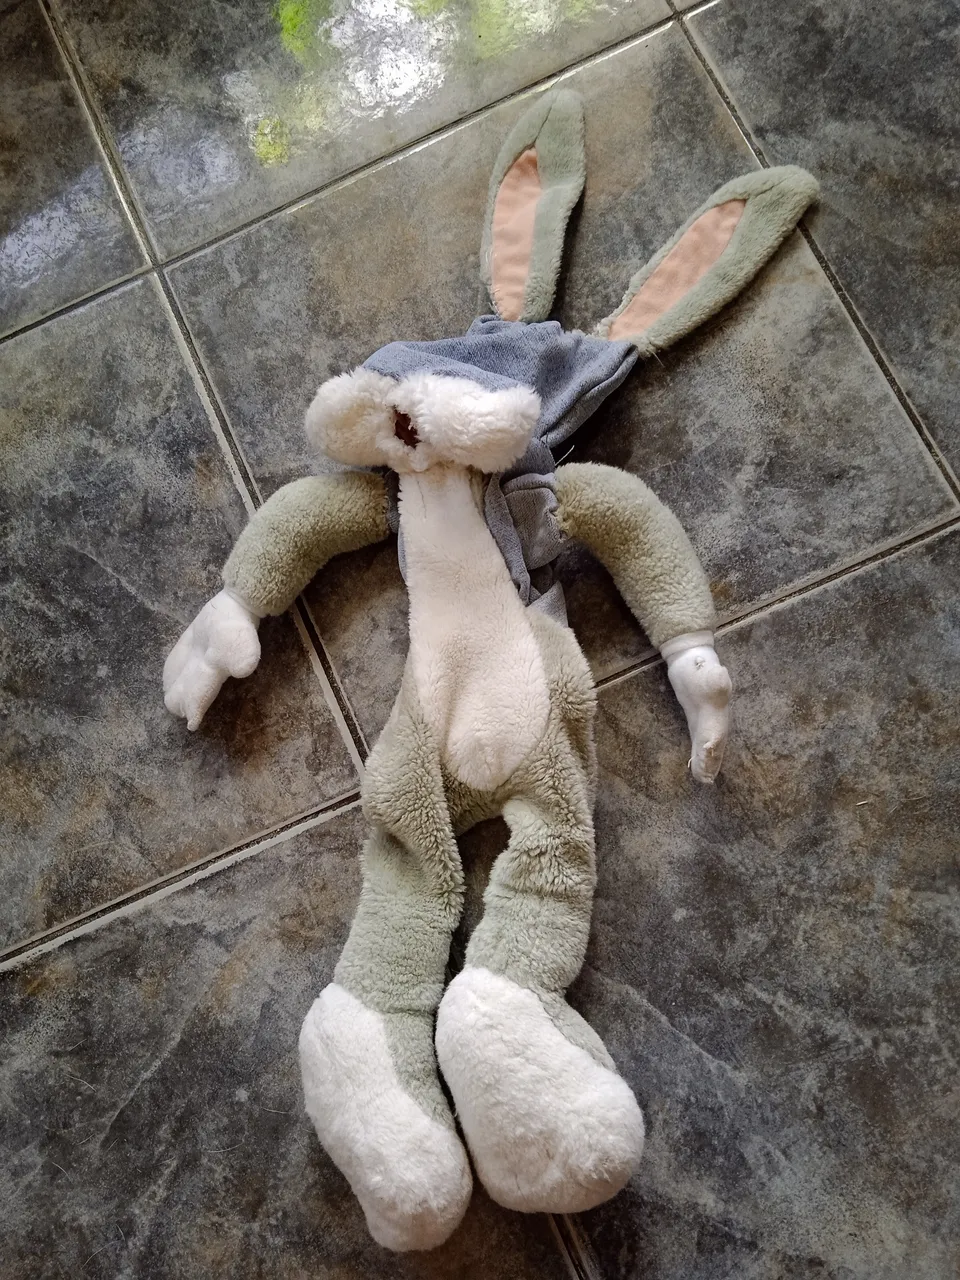
Para que me entiendan mejor, les muestro una imagen de cómo tenían al famoso conejo de la Warner Bros.
| Antes | Después |
|---|---|
 |  |
 |  |
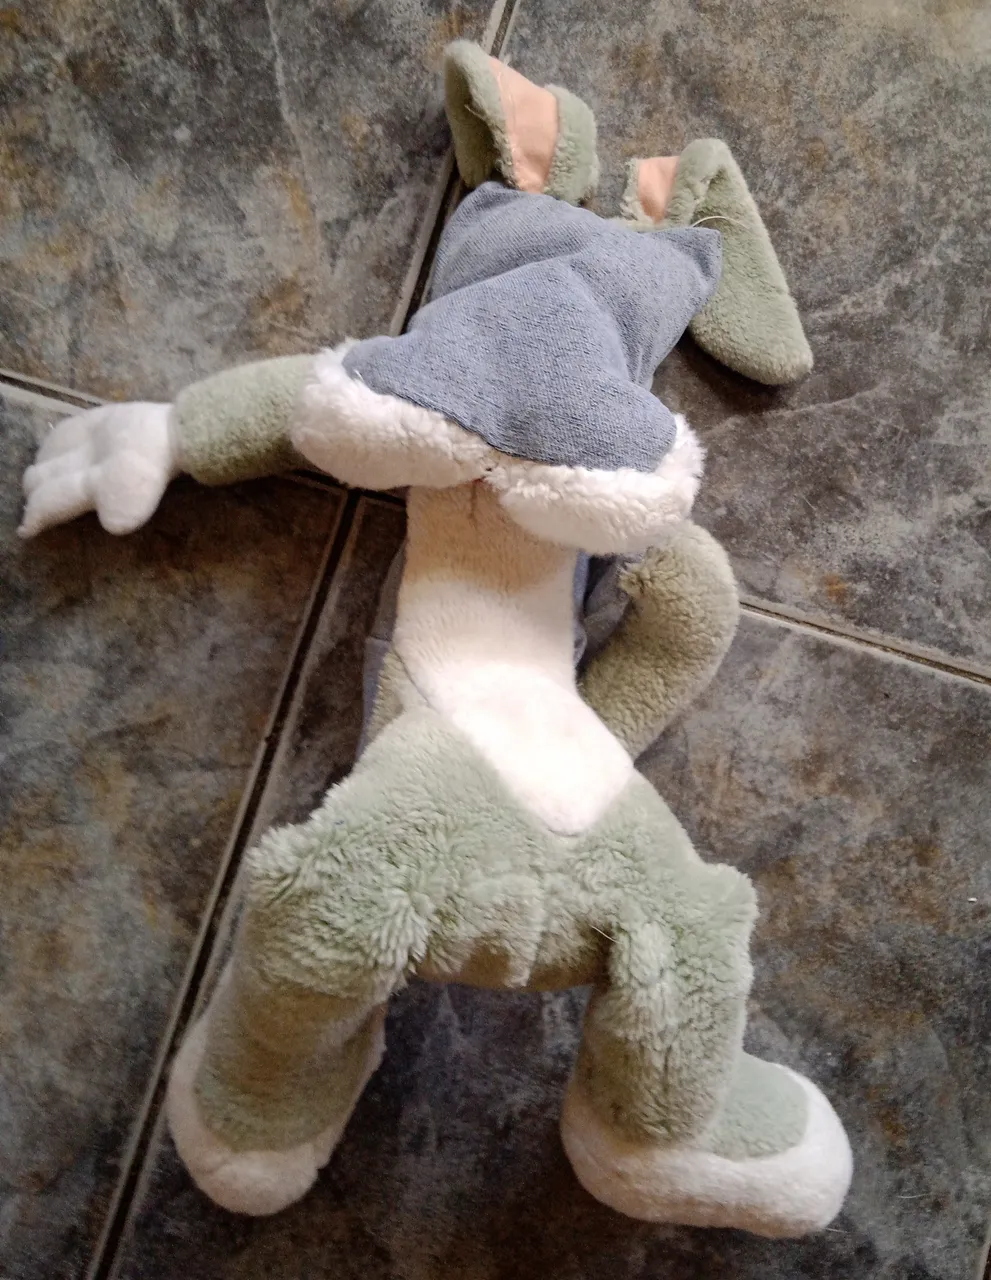
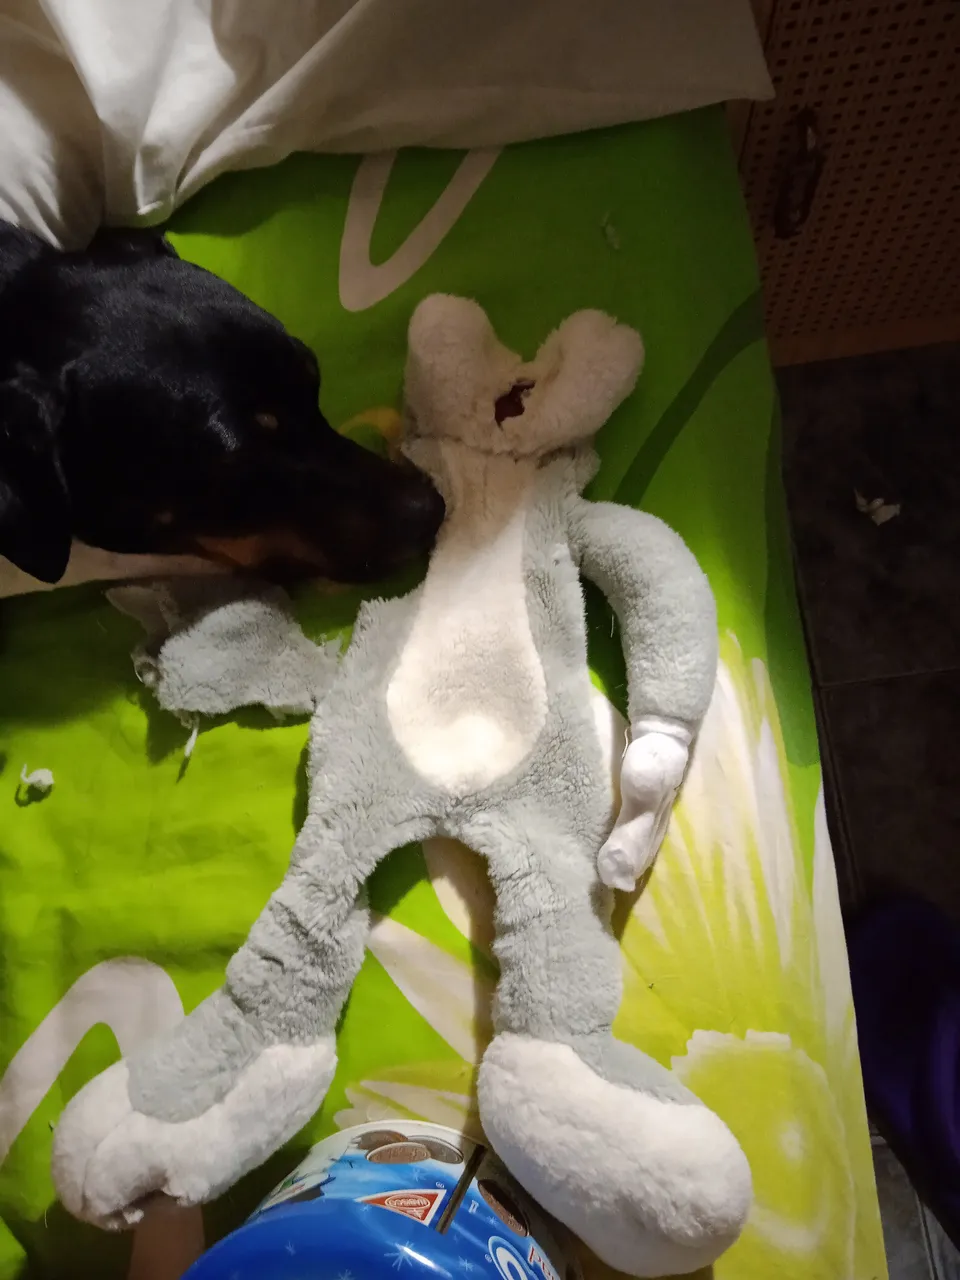
Como ven, estaba bastante deteriorado, incluso le faltaba un brazo. Ya yo se los había reparado una vez, pero lo dañaron tanto, y recuerdo que hicieron un desastre esparciendo todo el relleno y duró tan poco reparado que se me quitaron las ganas de arreglarlo de nuevo.
Imagino que ustedes se preguntarán ¿por qué no lo tiro y compro uno nuevo? Mis recursos financieros son bajos y aquí en Venezuela todo está costoso. Así que opté por reparar nuevamente este conejo con materiales reciclados. Ahora si les muestro el paso a paso.
𝙴𝚕𝚎𝚖𝚎𝚗𝚝𝚘𝚜 𝚊 𝚄𝚝𝚒𝚕𝚒𝚣𝚊𝚛
| Materiales | Material Reciclado |
|---|---|
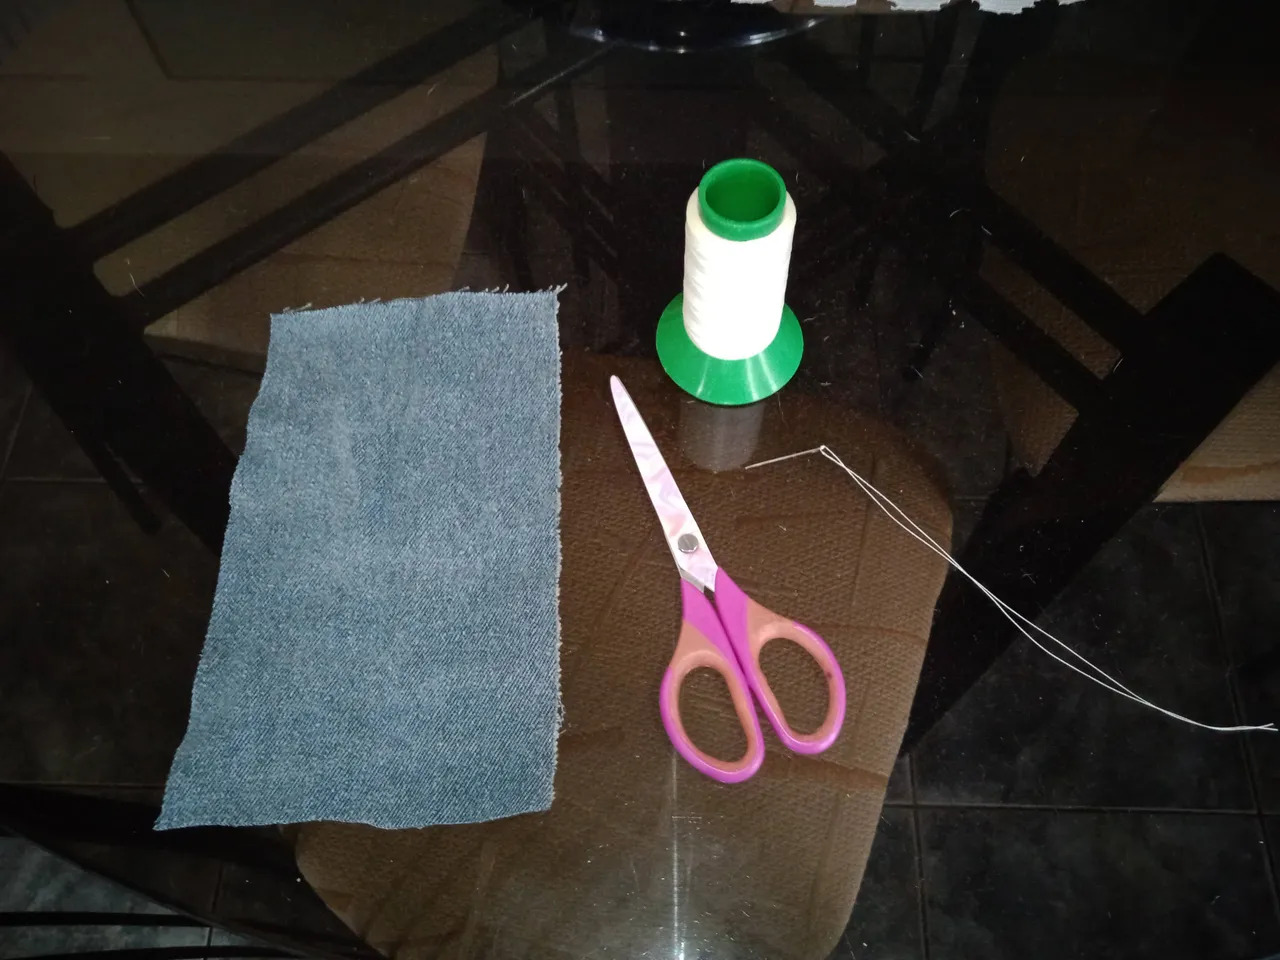 |  |
Los elementos que utilicé fueron:
- Hilo grueso y resistente
- Aguja
- Tijera.
- Retazos de pantalón Blue Jean.
- Trapitos o retazos de tela vieja para el relleno.
𝙿𝚊𝚜𝚘 𝚊 𝙿𝚊𝚜𝚘
| Paso 1 | Paso 2 |
|---|---|
 |  |
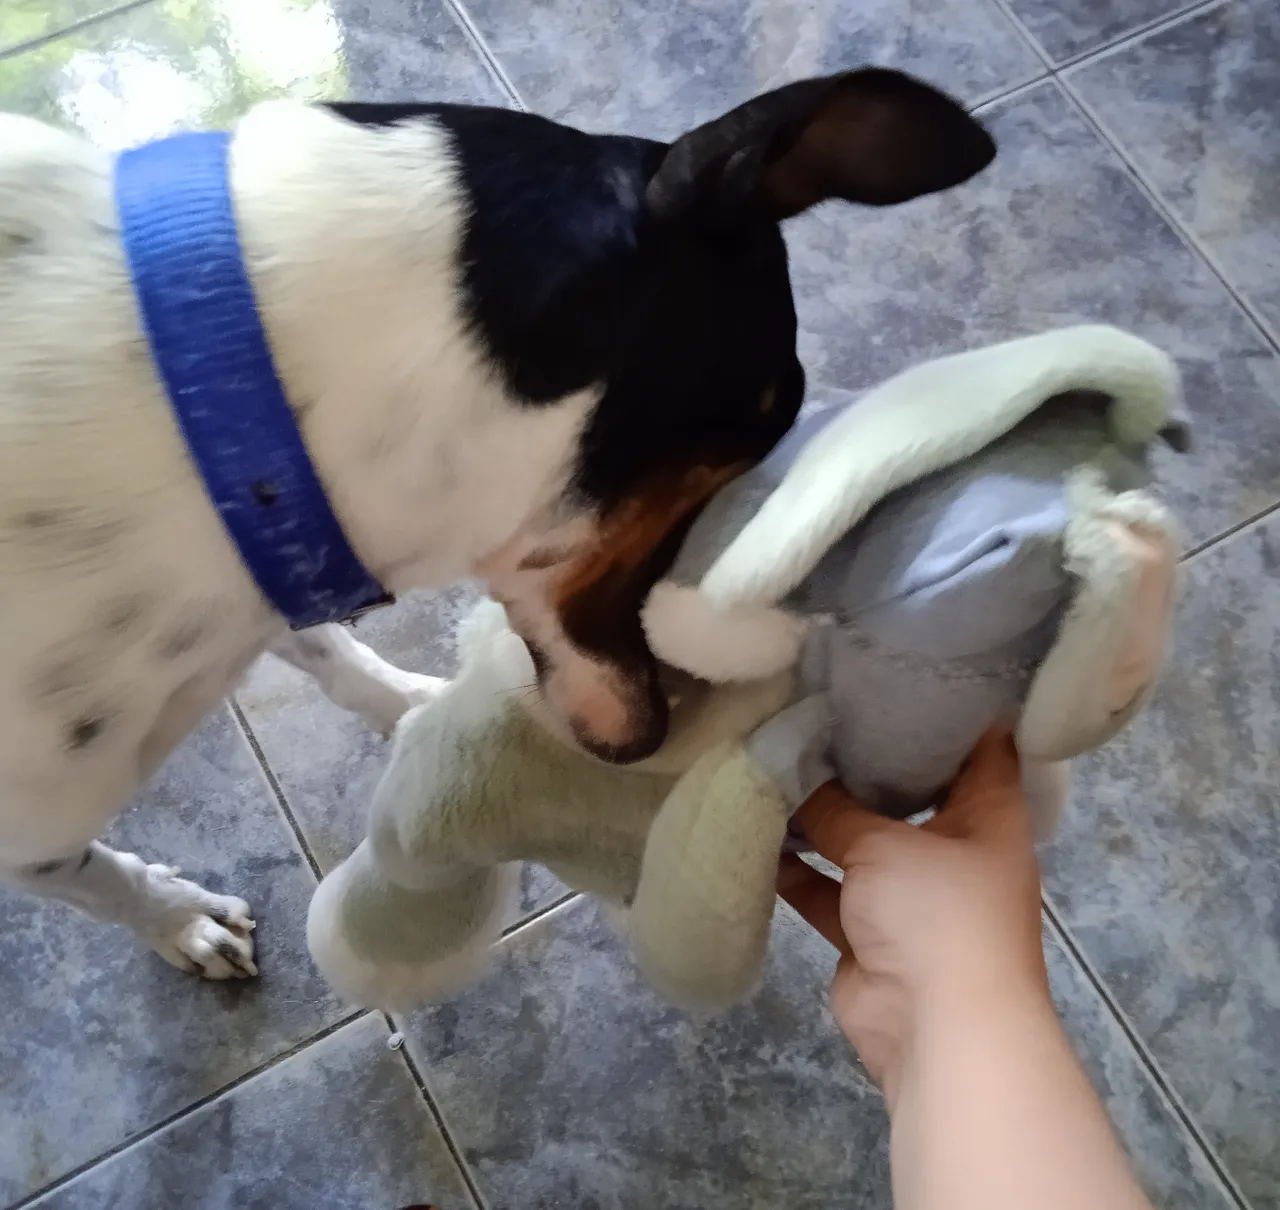
- Paso 1: Inicié limpiando las áreas rotas, es decir, recorté todos esos espacios deshilachados y empecé reparando el área de la boca con tela Vinotinto que tenía por allí. Como verán Drako me estaba supervisando en todo momento para ver si hacía un buen trabajo.
- Paso 2: Luego empecé a reparar la cabeza, cosiendo lo mejor que pude un trozo de Blue Jean viejo. Antes de terminar esta parte quise anexar las orejas.
| Paso 3 | Paso 4 | Paso 5 |
|---|---|---|
 |  |  |
- Paso 3: Al igual que el conejo, limpié de hilachas las orejitas dejándolas juntas para mayor comodidad a la hora de coserlas al nuevo cuerpo.
- Paso 4: Le abrí una pequeña abertura a la cabeza para agregar las orejitas.
- Paso 5: por la parte interna o posterior (para que no se vieran las costuras), procedí a coser con hilo y aguja lo mejor que pude las orejitas de Bugs Bunny.
| Paso 6 | Paso 7 | Paso 8 |
|---|---|---|
 |  |  |
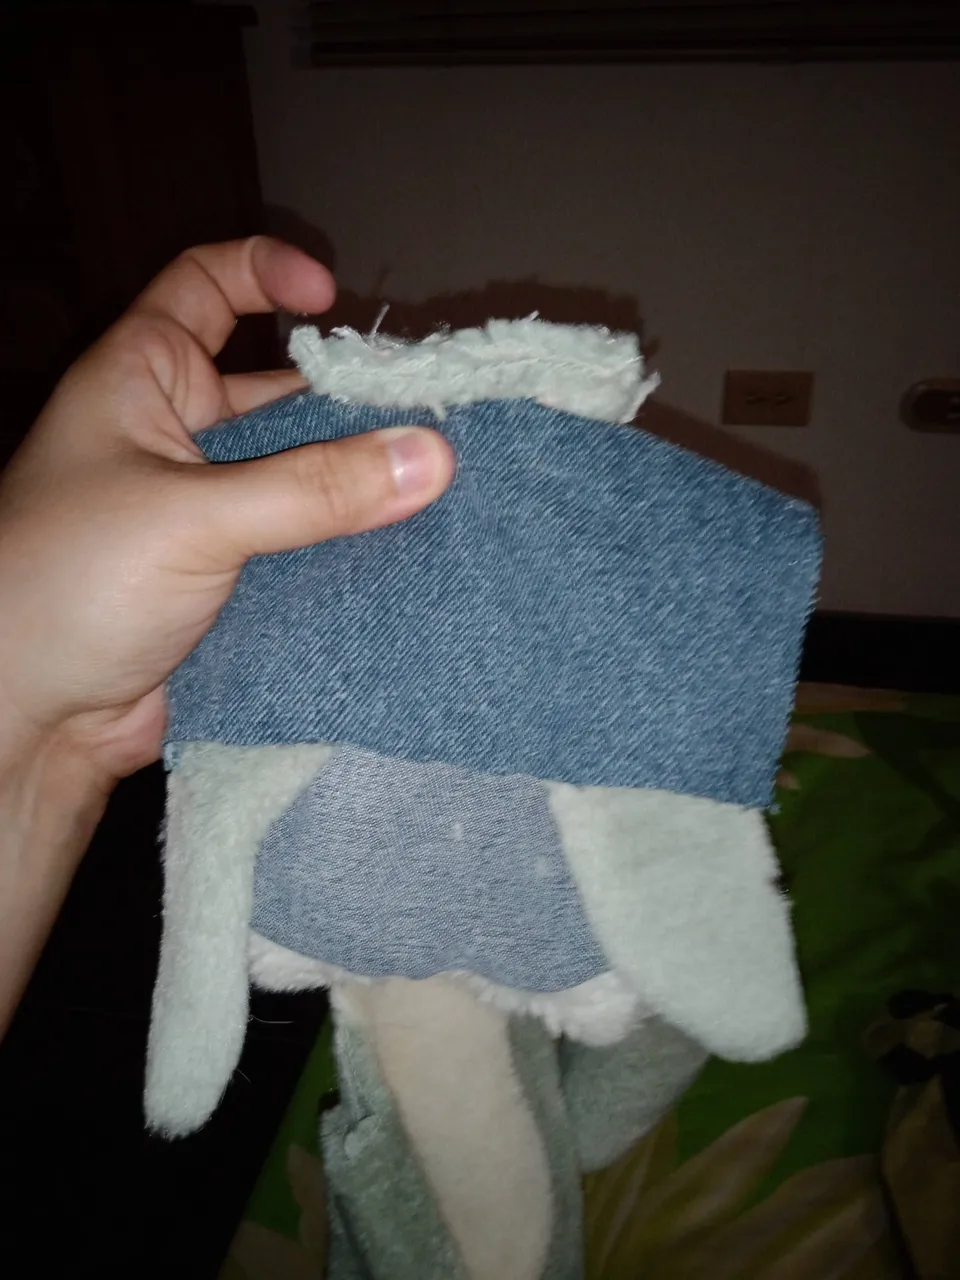
- Paso 5: Acá está terminada el área de la cabeza. Me quedó algo cuadrada, pero cumple su función a mi parecer 🤣.
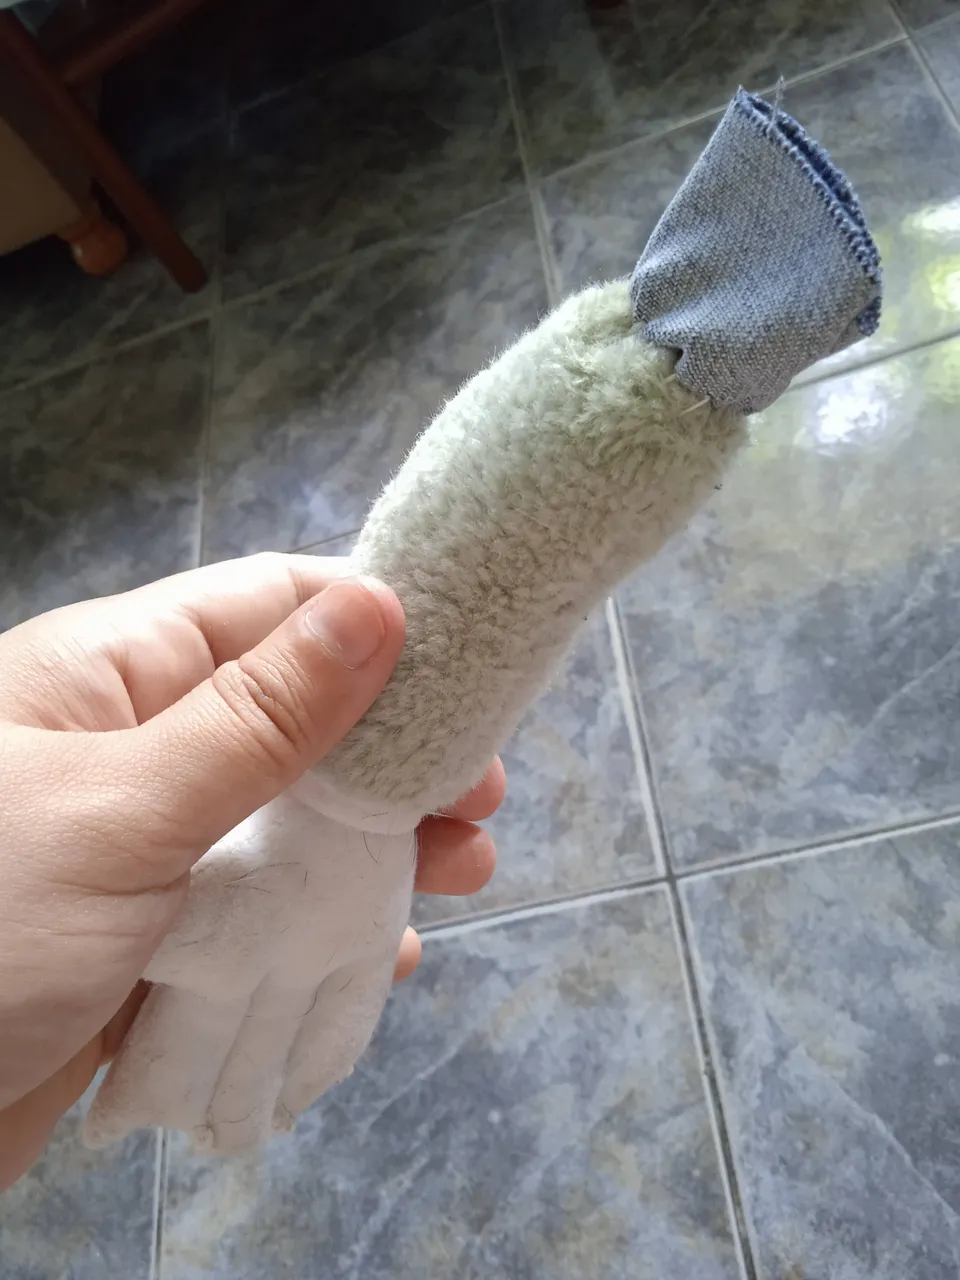
- Paso 6: Luego empecé a reparar los bracitos y las manos del Bugs Bunny (los cuales junto con uno de los pies tenían huecos abiertos donde se salía el relleno que aún le quedaba).
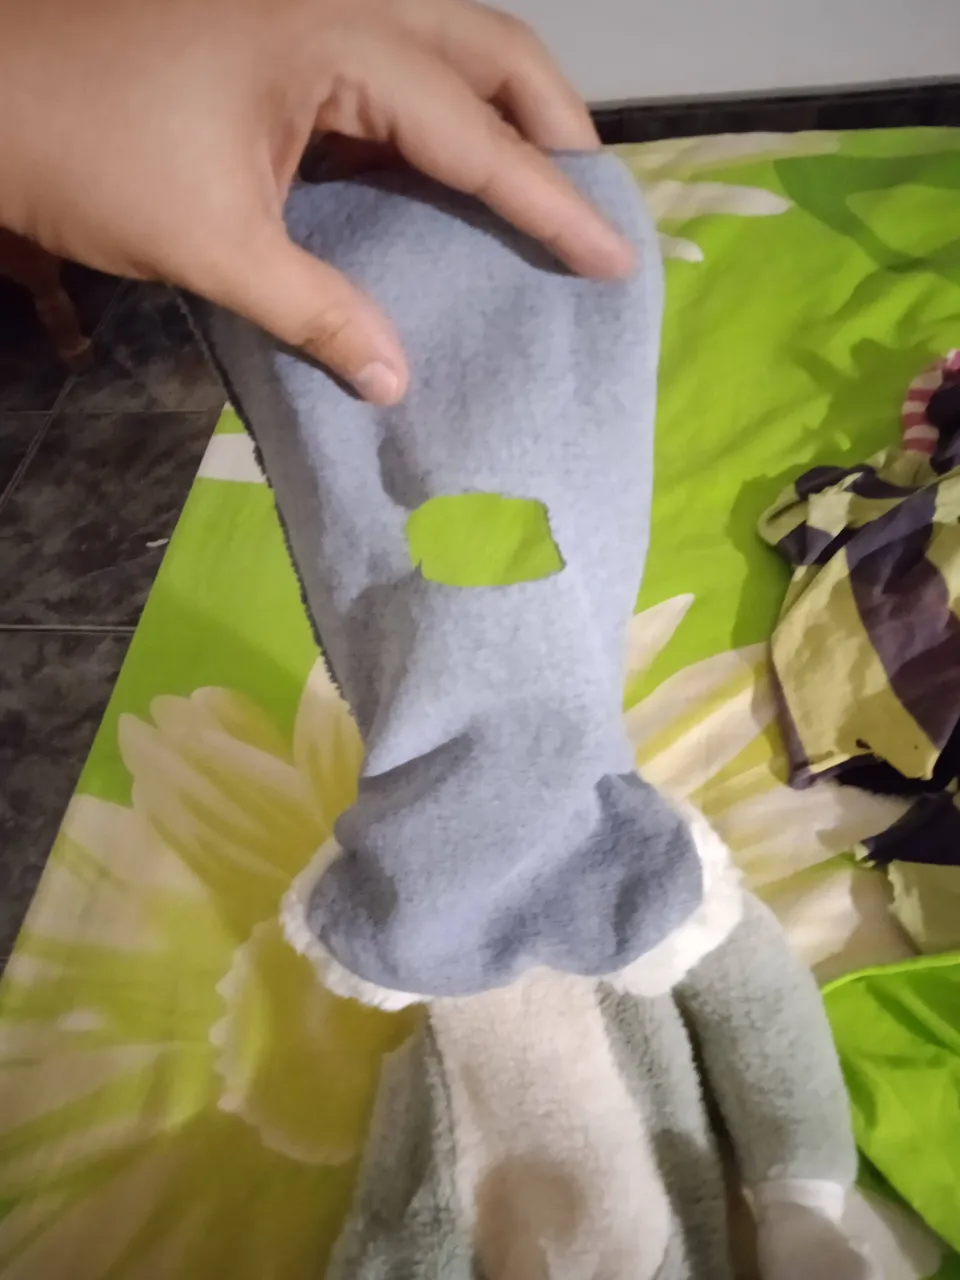
- Paso 7: Ya en este paso tenía adelantado parte del torso con otro retazo de Blue Jean y repetí el mismo paso que con las orejitas, abrí una abertura para coser internamente cada brazo.
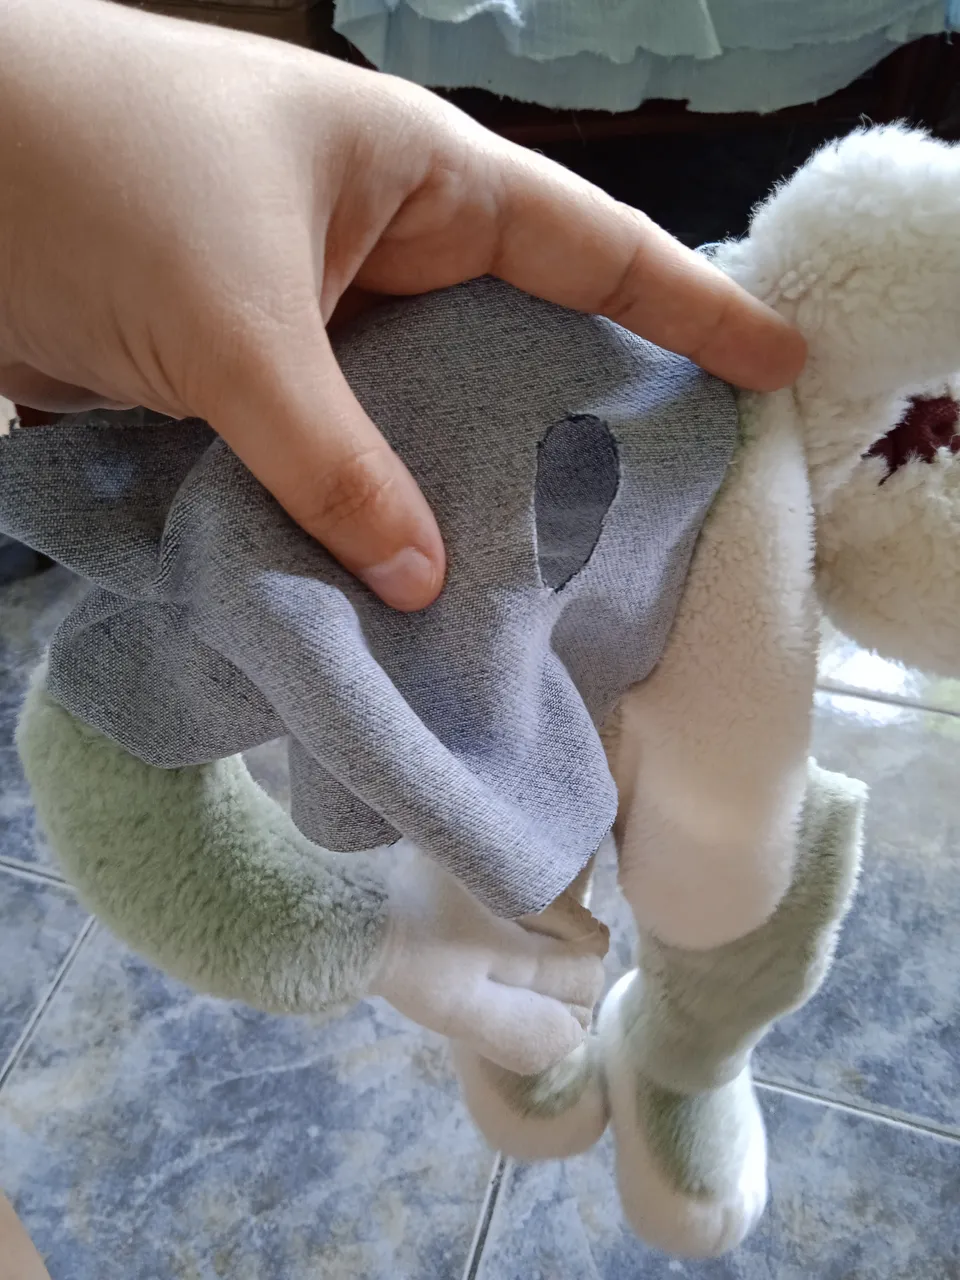
- Paso 9: Aquí muestro más de cerca cómo fue lo que hice para coser con mayor comodidad cada brazo.
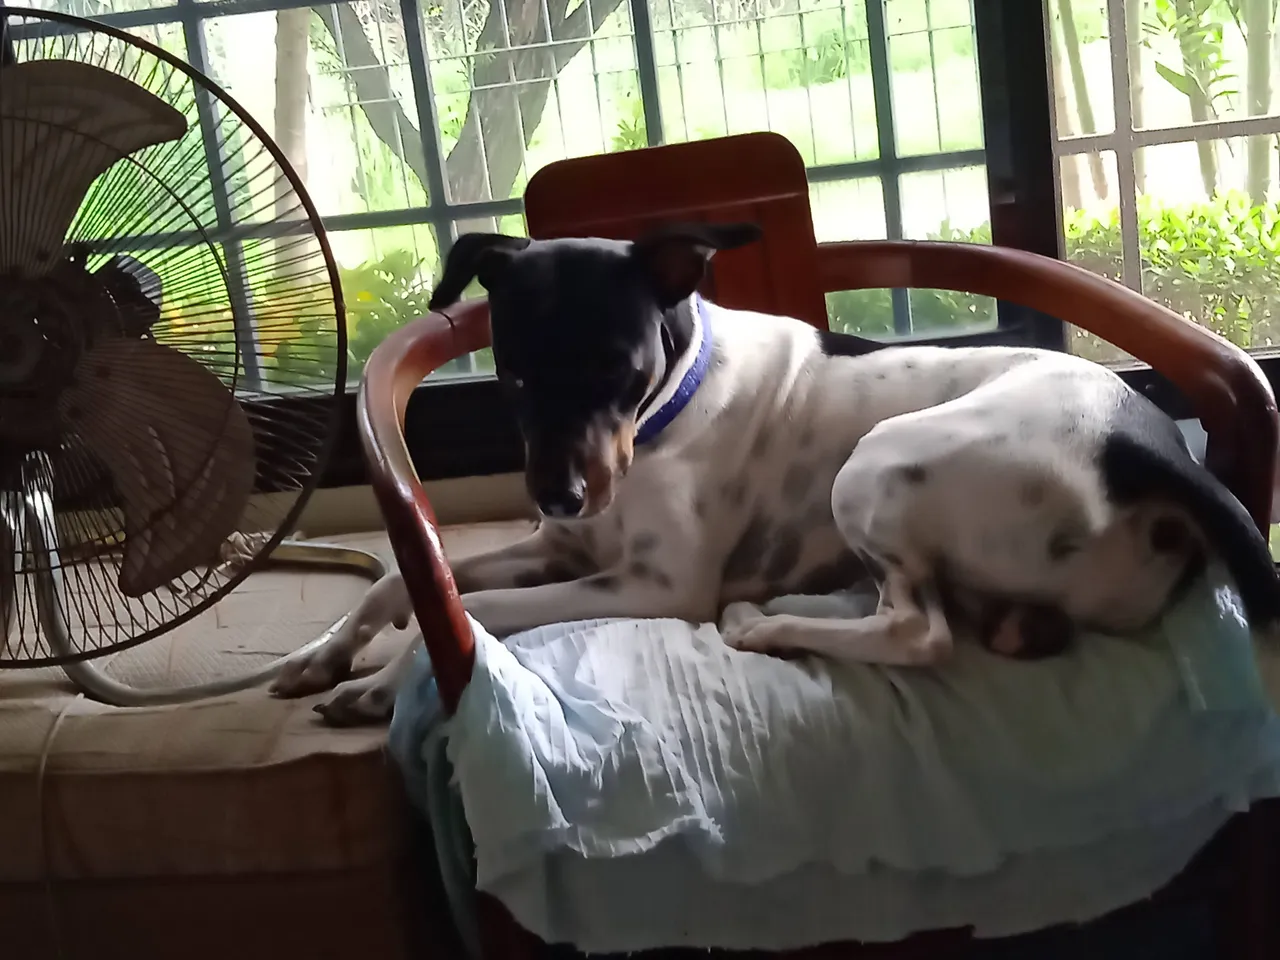
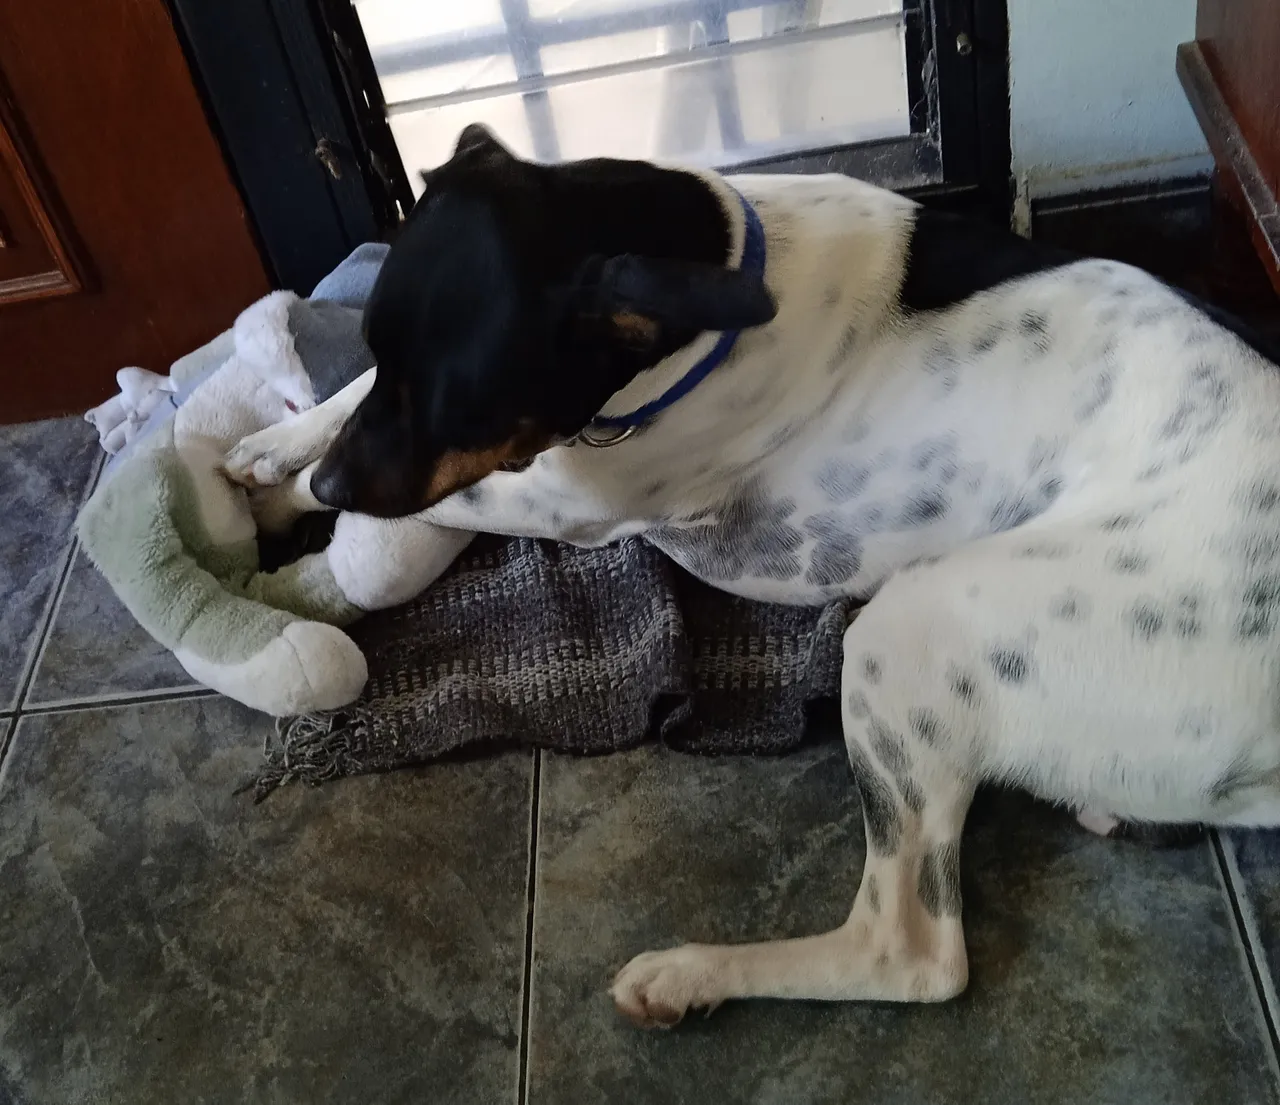
| Mientras Tanto... Me supervisaban | Y Saboteaban mi trabajo |
|---|---|
 |  |
𝙲𝚘𝚗𝚝𝚒𝚗𝚞𝚊𝚗𝚍𝚘 𝚌𝚘𝚗 𝚕𝚊 𝚁𝚎𝚙𝚊𝚛𝚊𝚌𝚒ó𝚗
| Paso 10 | Paso 11 |
|---|---|
 |  |
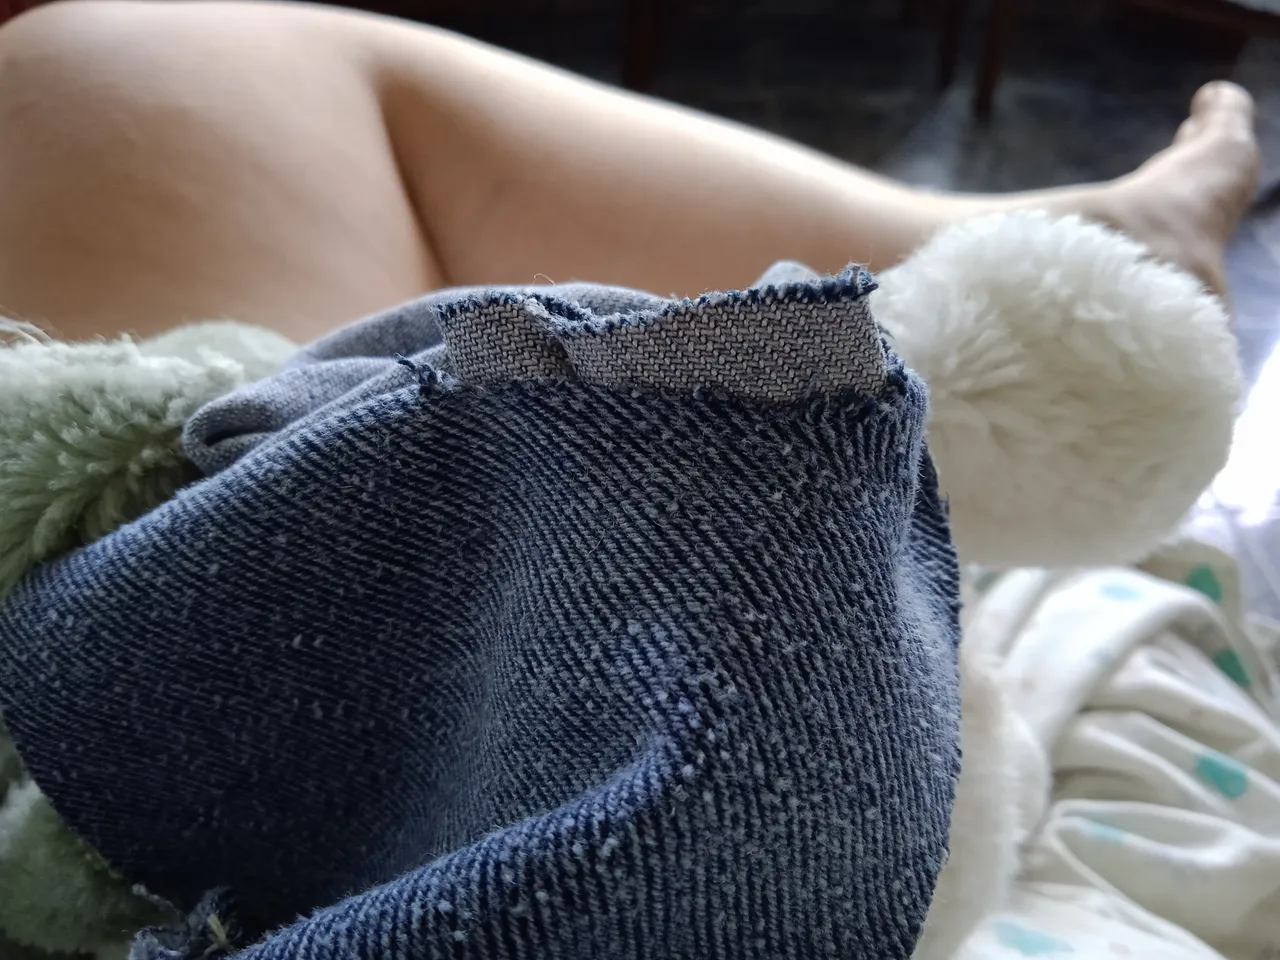
- Paso 10: Terminé agregando dos retazos más de Blue Jean y cosí todo lo mejor que pude para el torso. Dejando una abertura para rellenar la cabeza y el cuerpo.
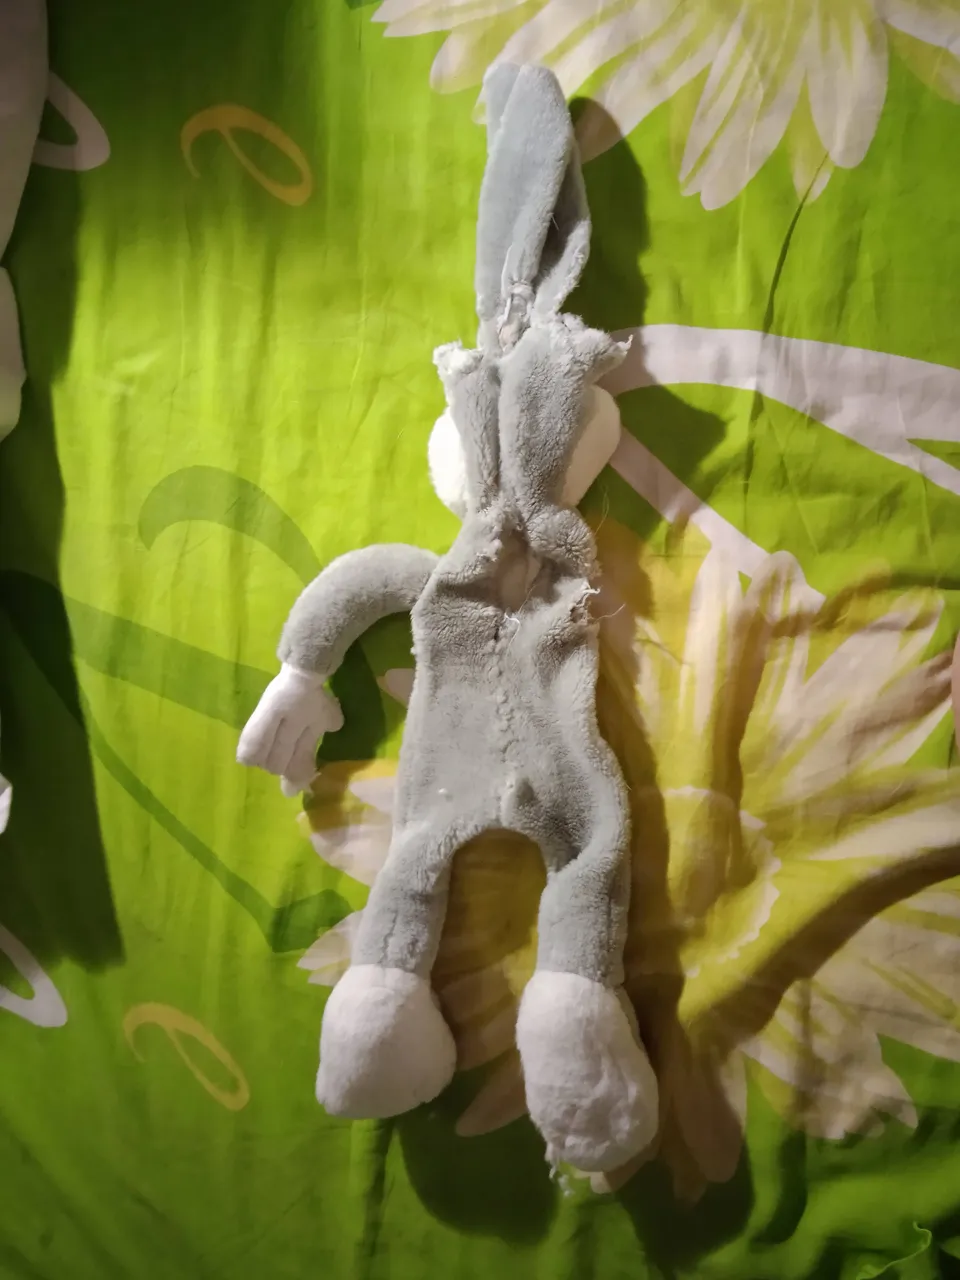
- Paso 11: Así quedó el Bugs Bunny, así se ve sin relleno.
𝚁𝚎𝚜𝚞𝚕𝚝𝚊𝚍𝚘 𝙵𝚒𝚗𝚊𝚕
Así quedó un Bugs Bunny reparado como por tercera vez. Espero que dure. Su relleno como dije anteriormente fueron diferentes retazos de tela vieja que tenía guardados por allí de otras costuras. Todo este trabajo me llevó menos de un día. Empecé anoche (algo tarde) y terminé hoy en la mañana.
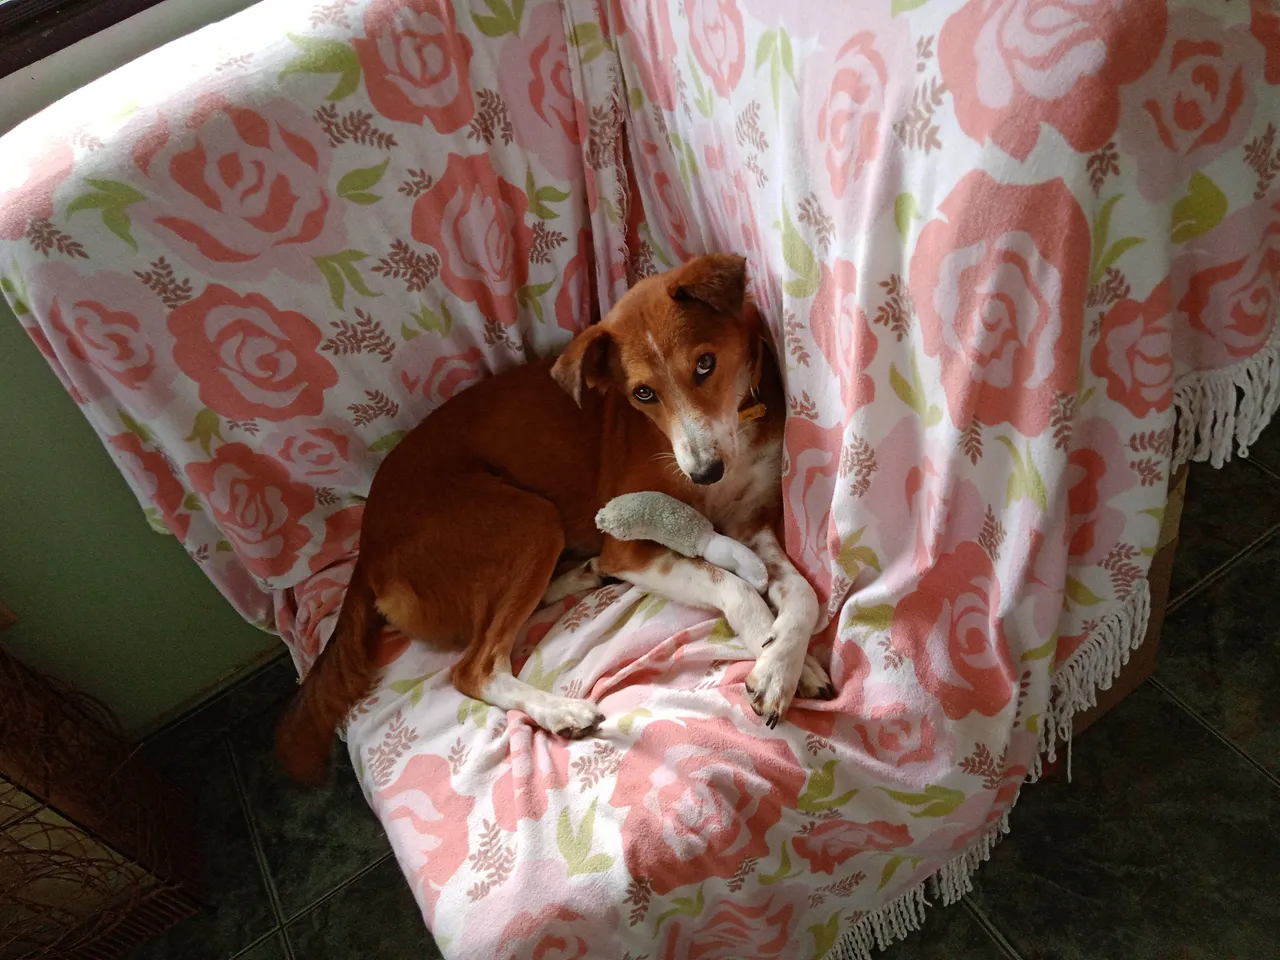
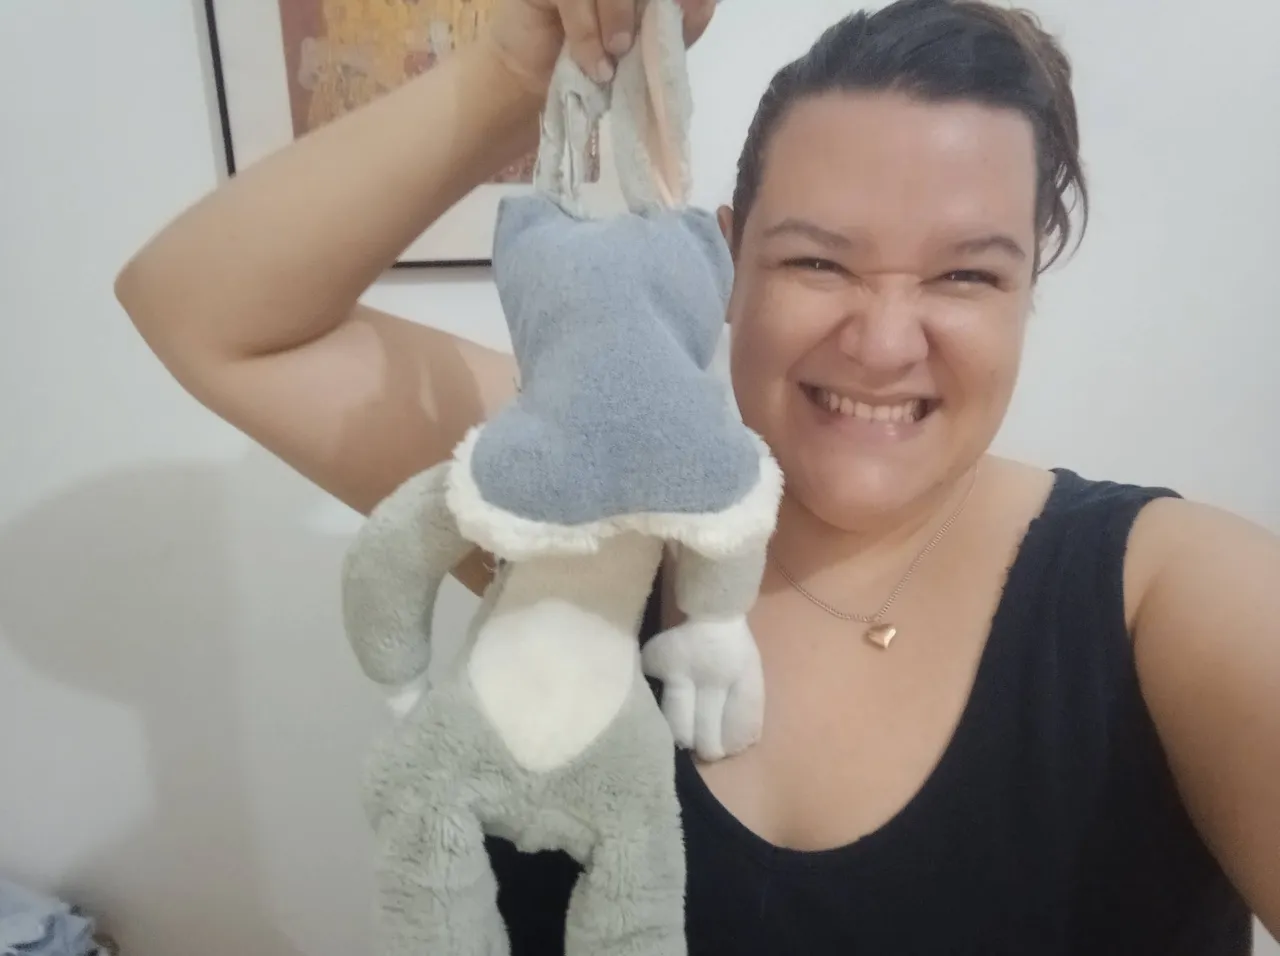
Ya para finalizar, les muestro el resultado final con un Conejo que ahora se sienta perennemente y la aprobación de su dueño. Así como también una pose sexy de mi modelo favorita Yara junto a su juguete renovado. Les deseo a todos un feliz sábado. ¡Saludos! 💕
| Drako Aprobando su Juguete "Nuevo" | Drako Agradecido de que Terminé de coser | Yara Posando |
|---|---|---|
 |  | 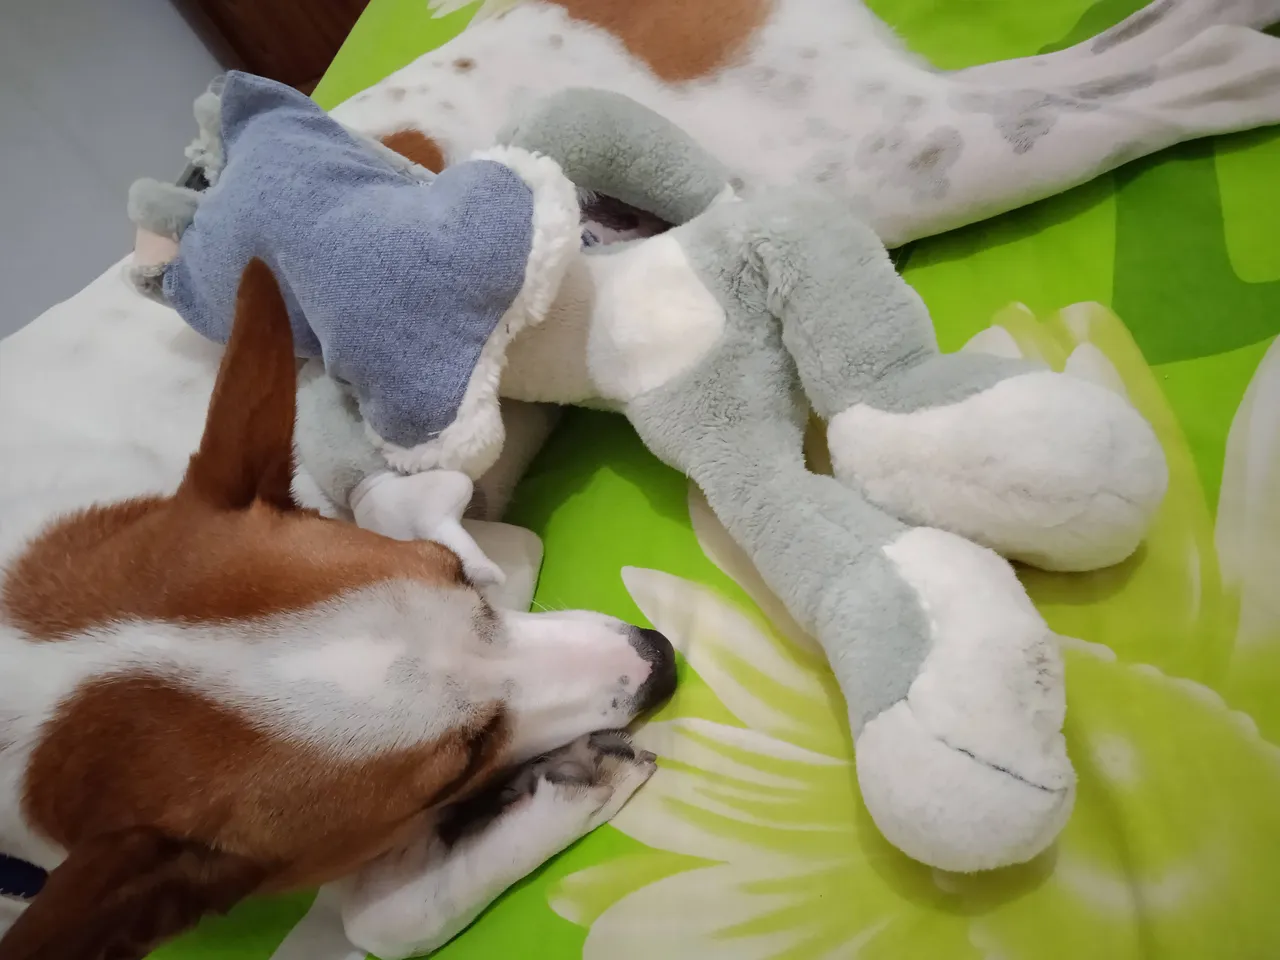 |

¿𝚀𝚞𝚎 𝚙𝚒𝚎𝚗𝚜𝚊𝚜 𝚊𝚌𝚎𝚛𝚌𝚊 𝚍𝚎 𝚎𝚜𝚝𝚘?
𝙼𝚎 𝚎𝚗𝚌𝚊𝚗𝚝𝚊𝚛í𝚊 𝚕𝚎𝚎𝚛𝚝𝚎!
𝙷𝚊𝚜𝚝𝚊 𝚕𝚊 𝚙𝚛𝚘𝚡𝚒𝚖𝚊!

| 𝙴𝚕𝚎𝚖𝚎𝚗𝚝𝚘𝚜 | 𝙷𝚎𝚛𝚛𝚊𝚖𝚒𝚎𝚗𝚝𝚊𝚜 |
|---|---|
| Imágenes usadas a lo largo del Post son de mi autoría | Traductor DeepL |
| Contenido y Texto Original de mi Autoría | CANVA |
| 💕 | Grammarly Extensión para correcciones en inglés |
| 💕 | Microsoft 365 Word en Línea para correcciones en español |
| 💕 | Cámara Redmi Note 9A |
| 𝙼𝚒𝚜 𝚁𝚎𝚍𝚎𝚜 𝚂𝚘𝚌𝚒𝚊𝚕𝚎𝚜 |
|---|
| X |
| TikTok |
| Threads |
| Discord |
| Spotify |
English
Greetings #DIYHub Community. It's a pleasure to be here again. Today I'm going to share with you the repair I did to one of #DrakoCinnamonRoll's favorite toys. I know the finish was not as I expected, but I think in the end it has more personality than before, what do you think? Join me to see what I'm talking about.
He was supposed to be a Bugs Bunny but he was so badly mistreated by Drako and Yara since they came to my house (about 2 years ago, that what was left of I wanted to rescue and bring him back to life with scraps of Jean's fabric. And so it was like a Masked Rabbit who fights evil in the same style as Daredevil.
To help you understand me better, I show you an image of how they had the famous Warner Bros bunny.
| Before | After |
|---|---|
| |
| |
As you can see, it was quite deteriorated, it was even missing an arm. I had already repaired it once, but they damaged it so much, and I remember that they made a mess spreading all the stuffing and it lasted so little repair that I didn't want to fix it again.
I guess you are wondering why I don't just throw it away and buy a new one. My financial resources are low and here in Venezuela, everything is expensive. So I decided to repair this rabbit again with recycled materials. Now I show you the step-by-step.
𝙴𝚕𝚎𝚖𝚎𝚗𝚝𝚜 𝚝𝚘 𝚄𝚜𝚎
| Materials | Recycled Materials |
|---|---|
| |
The elements I used were:
- Thick and resistant thread.
- Needle.
- Scissors.
- Pieces of Blue Jean pants.
- Rags or scraps of old fabric for stuffing.
𝚂𝚝𝚎𝚙-𝙱𝚢-𝚂𝚝𝚎𝚙
| Step 1 | Step 2 |
|---|---|
| |
- Step 1: I started by cleaning up the broken areas, that is, I cut out all those frayed spaces and started repairing the mouth area with the vinotint fabric I had lying around. As you will see Drako was supervising me at all times to see if I was doing a good job.
- Step 2: Then I started to repair the head, sewing as best I could a piece of old Blue Jean. Before finishing this part I wanted to attach the ears.
| Step 3 | Step 4 | Step 5 |
|---|---|---|
| | |
- Step 3: As with the rabbit, I cleaned the ears of the lint, leaving them close together to make it easier to sew them to the new body.
- Step 4: I made a small opening in the head to add the ears.
- Step 5: on the inside or back (so that the seams were not visible), I proceeded to sew the Bugs Bunny ears with thread and needle as best I could.
| Step 6 | Step 7 | Step 8 |
|---|---|---|
| | |
- Step 6: Here is the finished head area. It is a bit square but it does the job in my opinion 🤣.
- Step 7: Then I started repairing the arms and hands of Bugs Bunny (which along with one of the feet had gaping holes where the remaining stuffing was coming out).
- Step 8: At this step I had already advanced part of the torso with a piece of Blue Jean and I repeated the same step as with the ears, I opened an opening to sew internally each arm.
- Step 9: Here I show a closer look at what I did to sew each arm more comfortably.
| In the meantime... I was supervised | And sabotaged my work |
|---|---|
| |
𝙲𝚘𝚗𝚝𝚒𝚗𝚞𝚒𝚗𝚐 𝚁𝚎𝚙𝚊𝚒𝚛
| Step 10 | Step 11 |
|---|---|
| |
- Step 10: I ended up adding two more scraps of Blue Jean and sewed as best I could for the torso. Leaving an opening to fill in the head and body.
- Step 11: This is what the Bugs Bunny looks like without filler.
𝙵𝚒𝚗𝚊𝚕 𝚁𝚎𝚜𝚞𝚕𝚝
This is how a Bugs Bunny was repaired for about the third time. I hope it lasts. His stuffing as I said before was different scraps of old fabric that I had stored around from other seams. All this work took me less than a day. I started last night (kind of late) and finished today morning.
Finally, I show you the final result with a Rabbit that now sits perennially and the approval of its owner. As well as a sexy pose of my favorite model Yara with her renewed toy. I wish you all a happy Saturday. greetings! 💕
| Drako Approving his "New" Toy | Drako Grateful that I finished sewing | Yara Posing |
|---|---|---|
| | |
𝚆𝚑𝚊𝚝 𝚍𝚘 𝚢𝚘𝚞 𝚝𝚑𝚒𝚗𝚔 𝚘𝚏 𝚝𝚑𝚒𝚜?
𝙸 𝚠𝚘𝚞𝚕𝚍 𝚕𝚘𝚟𝚎 𝚝𝚘 𝚛𝚎𝚊𝚍 𝚢𝚘𝚞!
𝚂𝚎𝚎 𝚢𝚘𝚞 𝚗𝚎𝚡𝚝 𝚝𝚒𝚖𝚎!

| 𝙴𝚕𝚎𝚖𝚎𝚗𝚝𝚜 | 𝚃𝚘𝚘𝚕𝚜 |
|---|---|
| Images used throughout this post are my authorship. | Traductor DeepL |
| Original Content and Text of my Authorship | CANVA |
| 💕 | Grammarly Extensión for English corrections |
| 💕 | Microsoft 365 Word en Línea for Spanish corrections |
| 💕 | Redmi Note 9A Camera |
| 𝙼𝚢 𝚂𝚘𝚌𝚒𝚊𝚕 𝙼𝚎𝚍𝚒𝚊 |
|---|
| X |
| TikTok |
| Threads |
| Discord |
| Spotify |