FULL VERSION ESPAÑOL

Feliz y bendecido sábado tengan todos aquellos que dan vida a la fabulosa Comunidad de #DIYHub. Sé que he estado ausente por aquí, pero ha sido más que todo por problemas de salud, ni crean que los he olvidado. Hace unos días mi mamá me pidió que le ayudara a reparar uno de sus tantos libritos de oraciones. Hoy les traigo el paso a paso del proceso.

 -1-
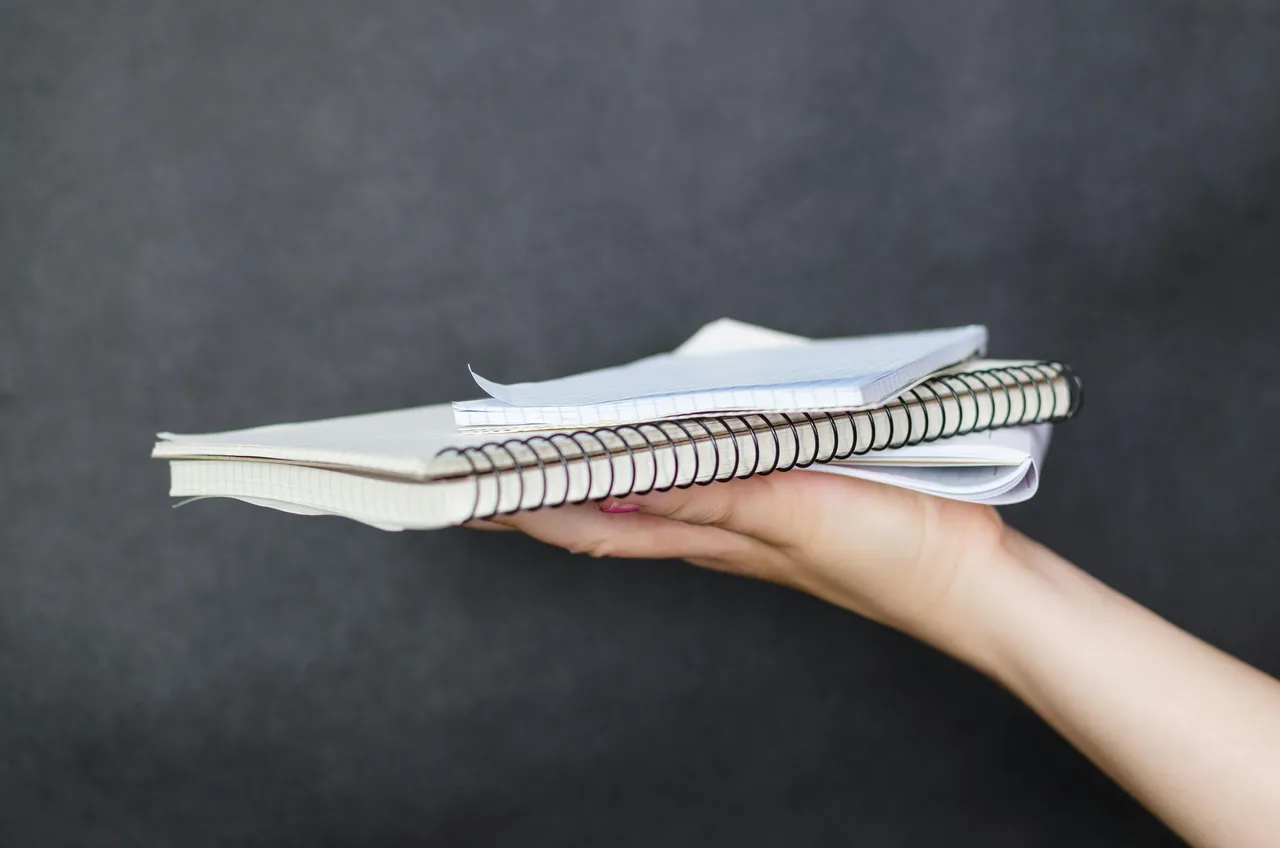
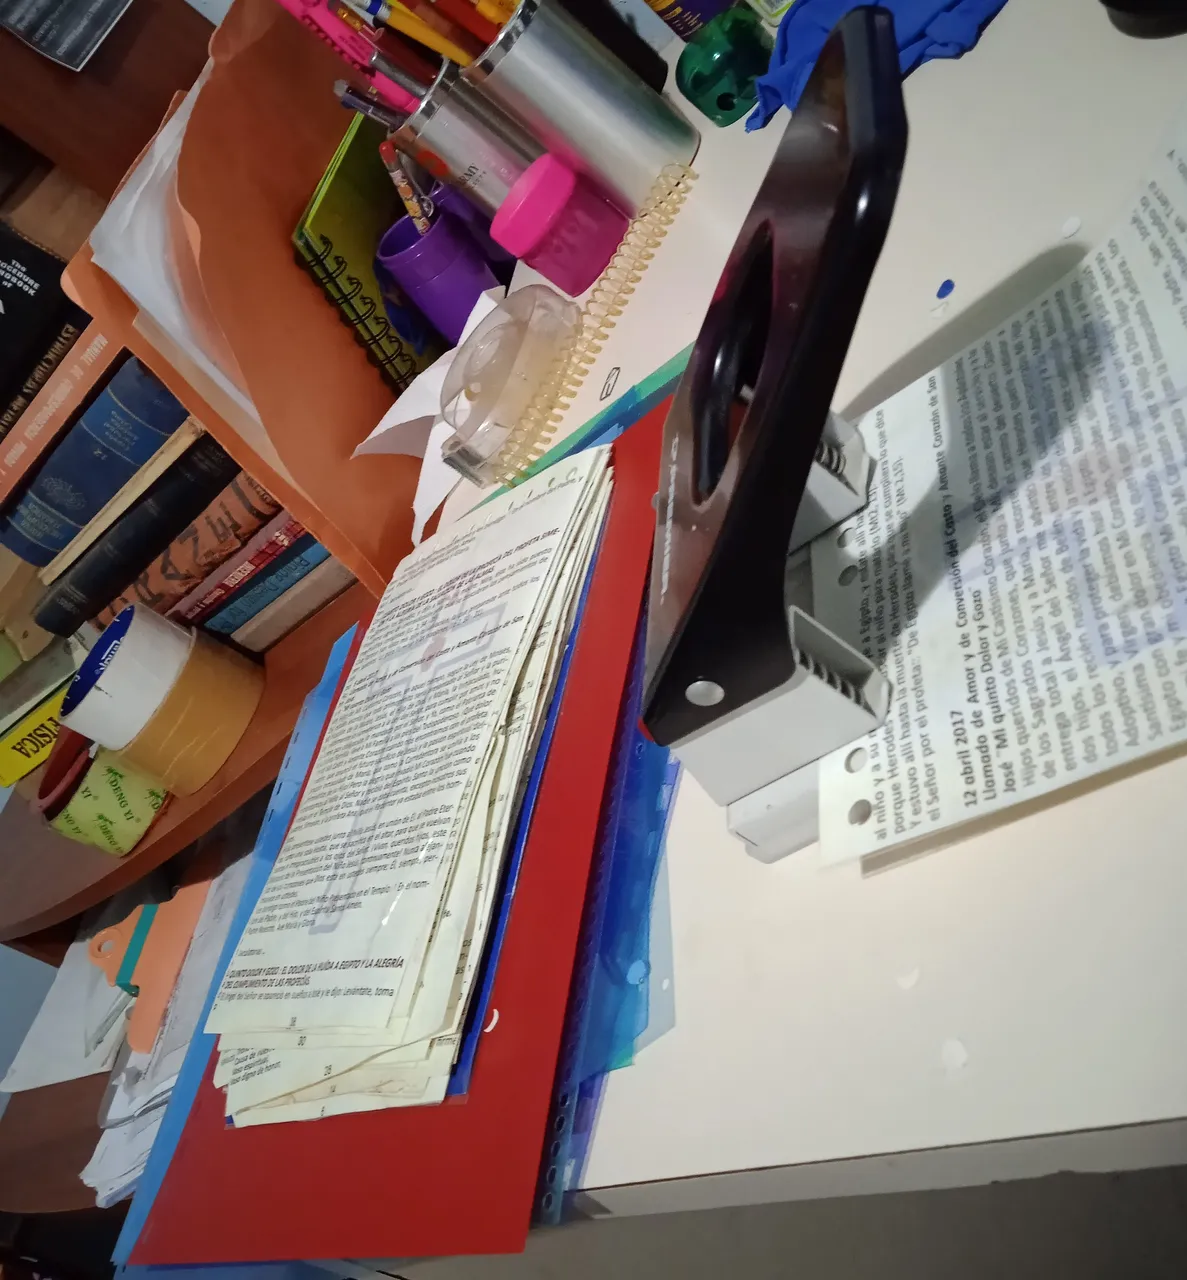
-1-Para los que no lo sepan, yo estuve trabajando por 6 años en una papelería donde se hacían encuadernaciones y otras cositas. Fue allí que descubrí lo mucho que me gusta recuperar y restaurar libros, cuadernos y demás. No es que sea experta a tal punto de hacer un empastado, pero en cuanto a encuadernas si siento que domino en el área.
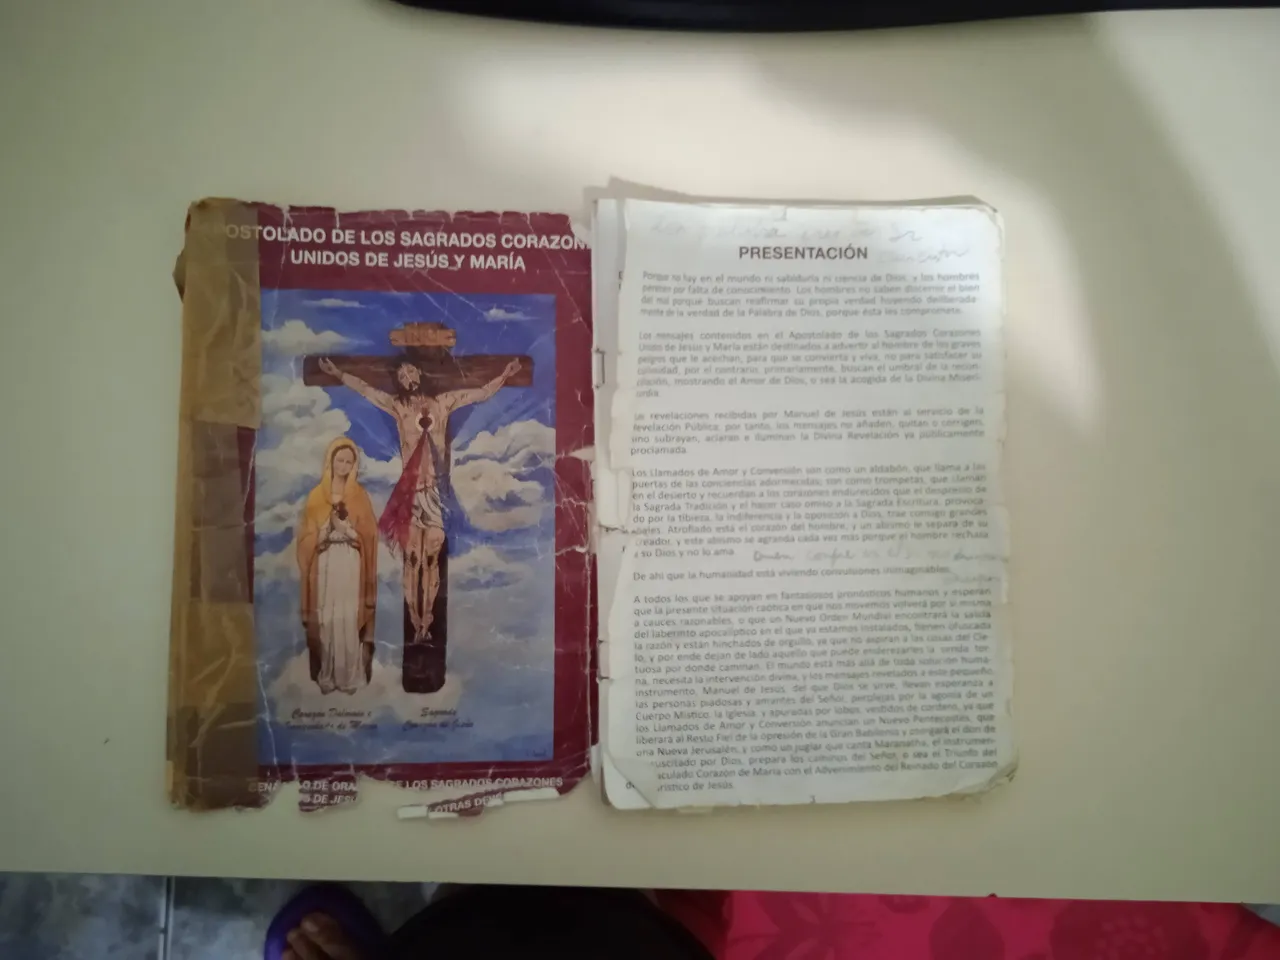
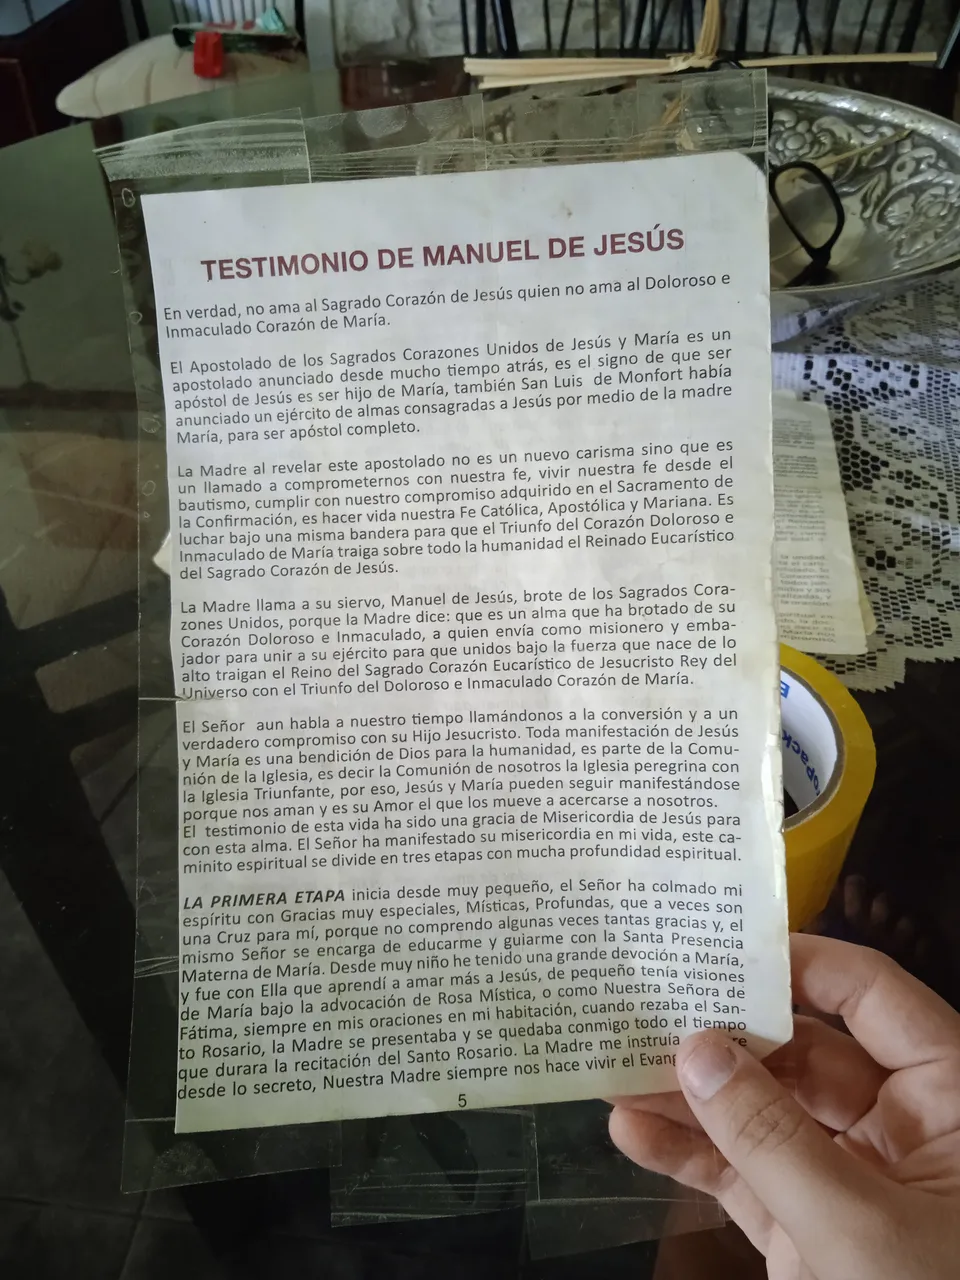
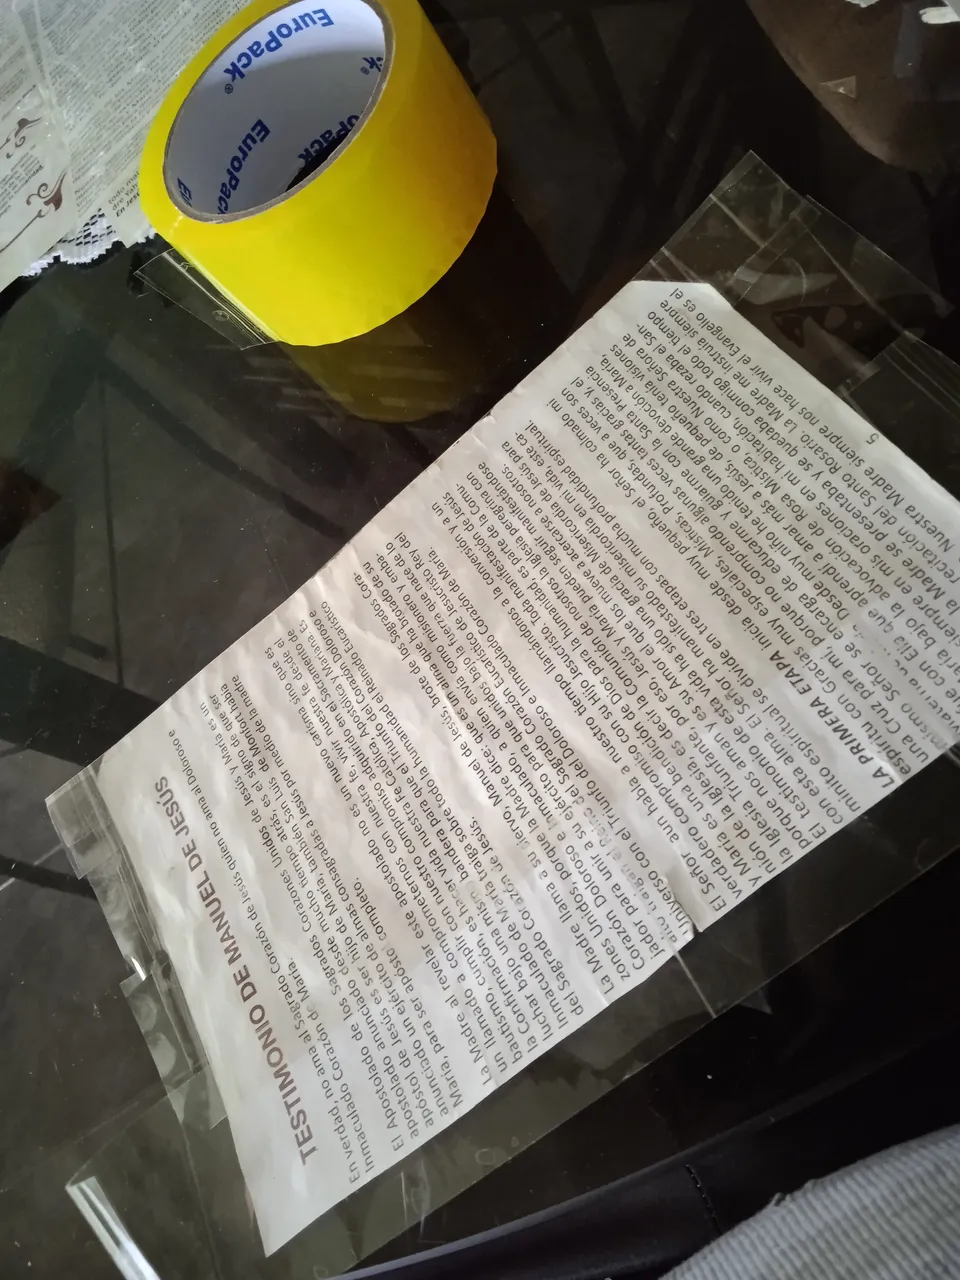
Hace poco le regalaron a mi mamá un librito de oraciones bastante maltrecho, a tal punto que cuando lo vi me pregunté ¿qué hizo su antiguo dueño con él? ¿cómo volteaba cada página? y muchas otras preguntas, porque la verdad era uno de los libros más maltrechos que he visto desde que dejé de trabajar en aquella librería.
 -2-
-2-Observen que la portada casi ni existe, la parte de atrás de la misma no está y bueno el resto del librito en sí, estaba totalmente desprotegido. Así que después de evaluarlo un poco, ver la cantidad de hojas maltratadas y tomando en cuenta que poseía un muy bajo presupuesto para la reparación, decidí pedirle a mi mamá unos implementos más económicos que también cubren la misma función de varios metros de papel contact transparente.
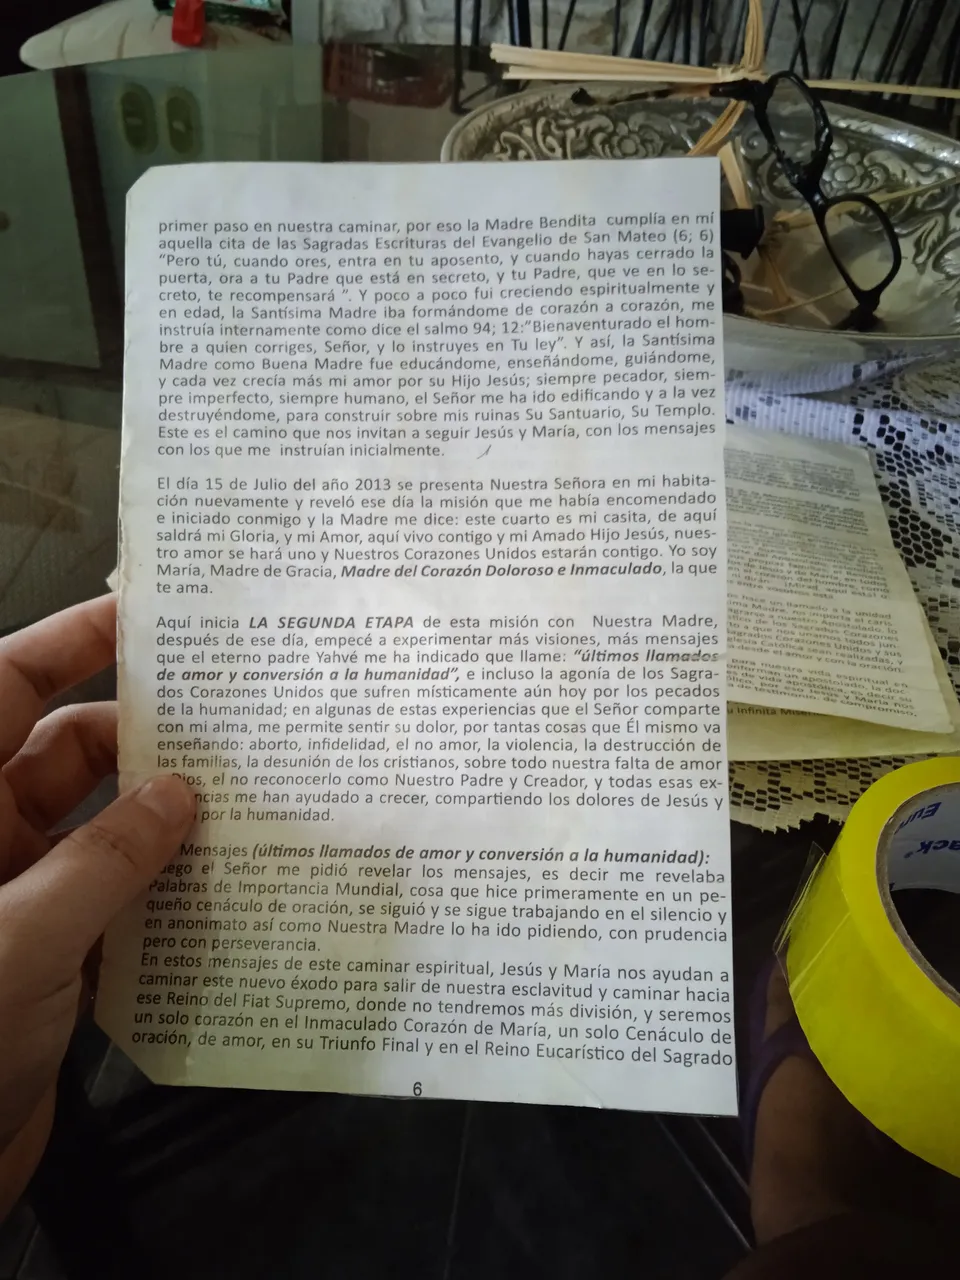
Muchas de las hojas del librito, se encontraban en una situación similar a las que les muestro a continuación:
| -3- | -4- |
|---|---|
 |  |
𝙴𝚕𝚎𝚖𝚎𝚗𝚝𝚘𝚜 𝚊 𝚄𝚝𝚒𝚕𝚒𝚣𝚊𝚛
 -5-
-5-Los elementos que utilicé de bajo presupuesto fueron:
- Tirro Transparente (de embalar)
- Teipe transparente
- Tijeras.
- Cartulina escolar para la portada.
- Tapas plásticas o acetato para mayor protección del libro.
- Espiral o Anillo para encuadernar.
𝙿𝚊𝚜𝚘 𝚊 𝙿𝚊𝚜𝚘
| Paso 1 | Paso 2 |
|---|---|
 |  |
- Paso 1: Empecé quitando las grapas que lo sostenían al medio.
- Paso 2: Continué recortando los bordes por ambos lados de cada página ya que estaban muy maltratados. Los dejé al raz, muy cerca del texto.
| Paso 3 | Paso 4 |
|---|---|
 |  |
- Paso 3: Luego empecé a pegarle tiras de tirro transparente a lo largo. Empecé desde uno de los bordes, dejando una pestaña afuera para doblarla y pegarla hacia adentro, aprovechando al máximo el tirro.
- Paso 4: Cubrí con varias tiras de tirro primero un lado y luego el otro. En total usé 7 tiras de tirro por cada hoja. De esta manera "plastifiqué" cada papel.
| Paso 5 | Paso 6 | Paso 7 |
|---|---|---|
 |  |  |
- Paso 5: Aqui muestro cómo cubrí uno de los lados de la página.
- Paso 6: Así cubrí el lado posterior.
- Paso 7: Luego procedí a cortar el exceso de tirro por los bordes superior e inferior de cada hoja de papel.
| Paso 8 | Paso 9 |
|---|---|
 | 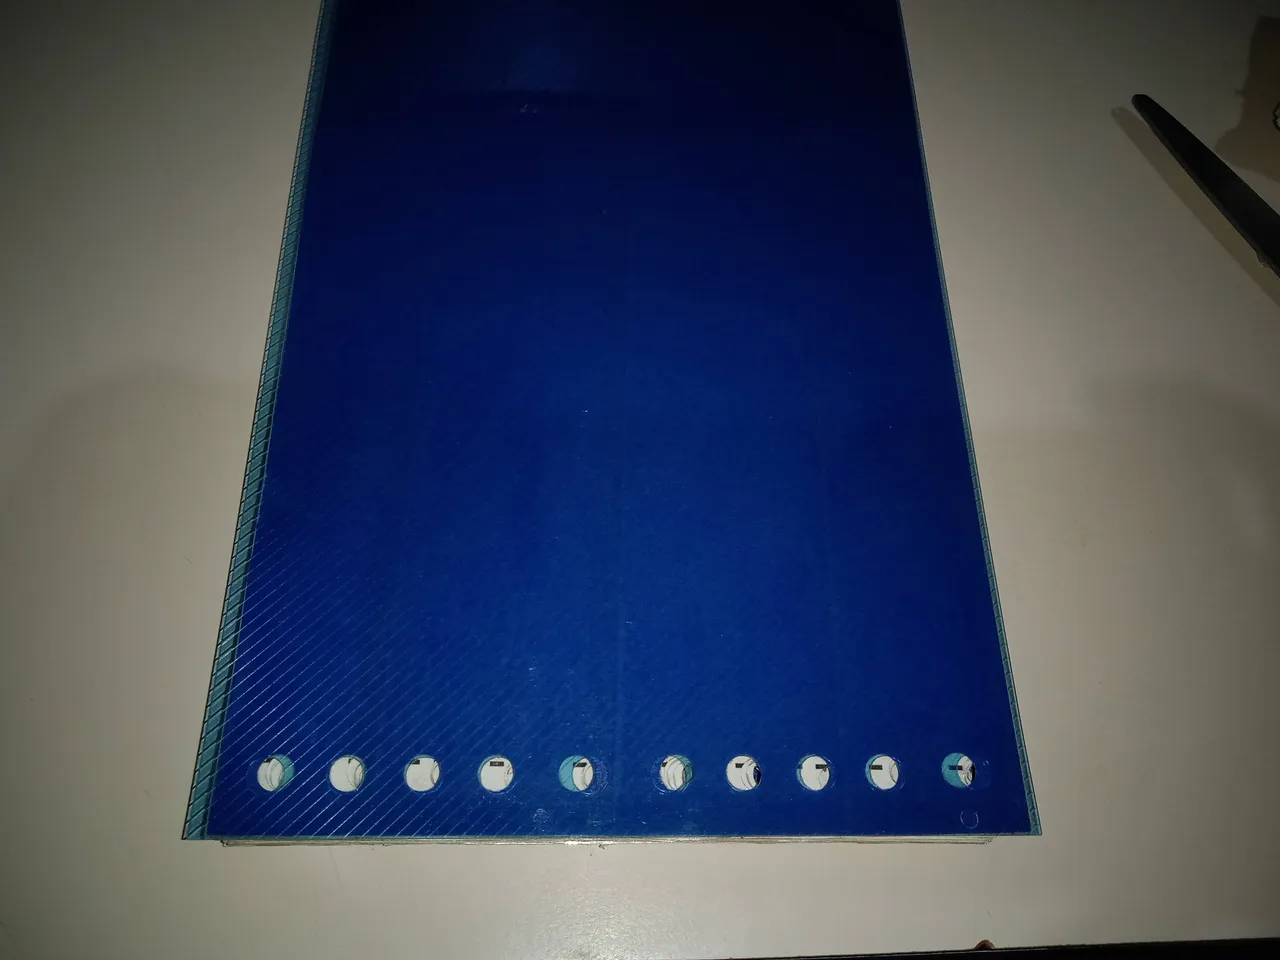 |
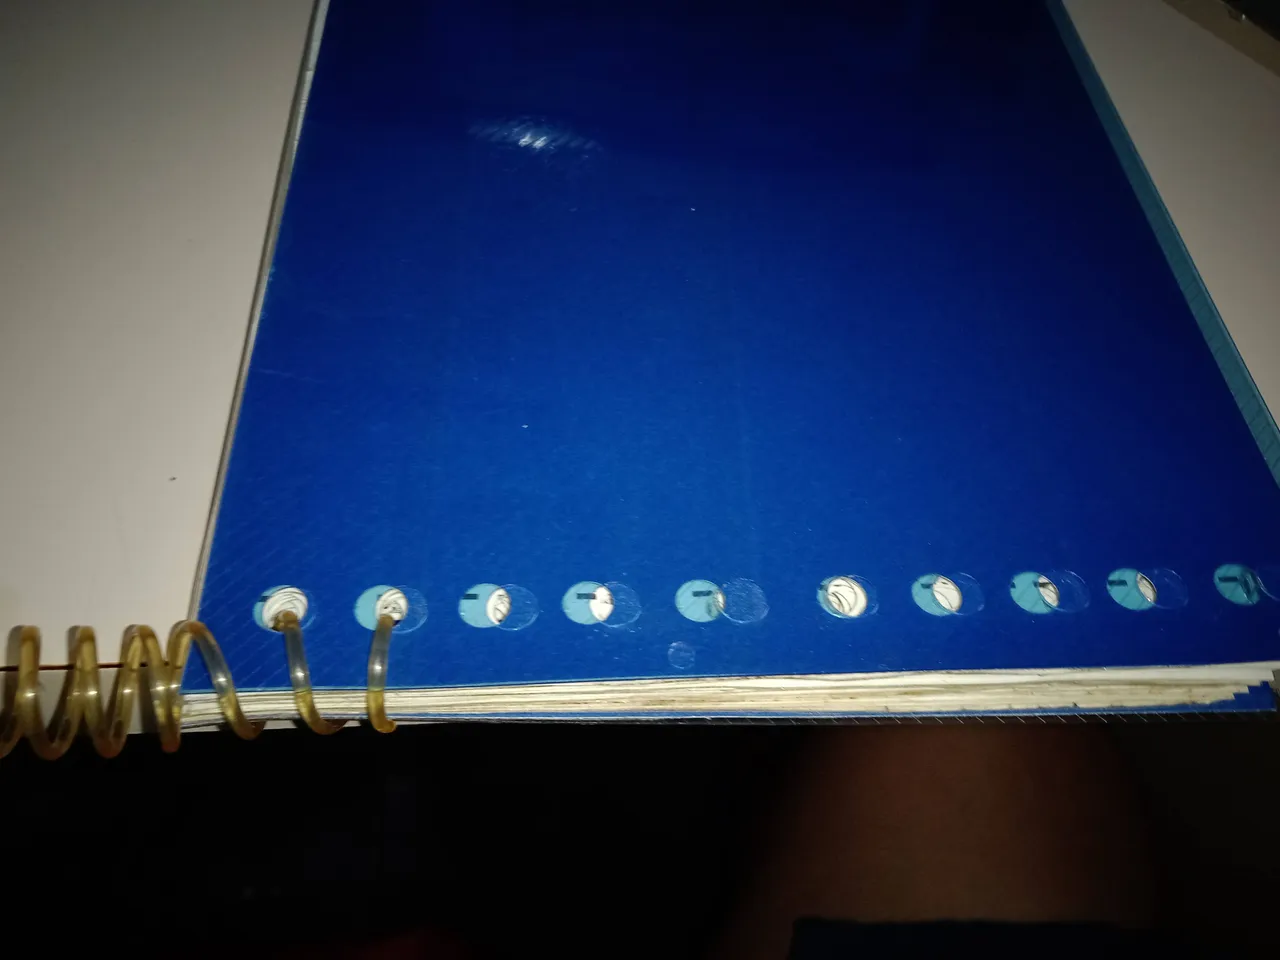
- Paso 8: Después con un abre huecos de 2 orificios, le abrí los hoyos a cada página al ojo por ciento. En total hice 10 orificios a cada página. También agregué cartulina escolar para las portadas y dos tapas plásticas.
- Paso 9: La cartulina escolar también opté por "plastificarla" con tirro transparente para mayor protección y durabilidad. En cuanto a las tapas de acetato o plásticas, las tomé de encuadernaciones viejas que en algún momento desarmé. Es decir, son recicladas.
| Paso 10 | Paso 11 | Paso 12 |
|---|---|---|
 |  |  |
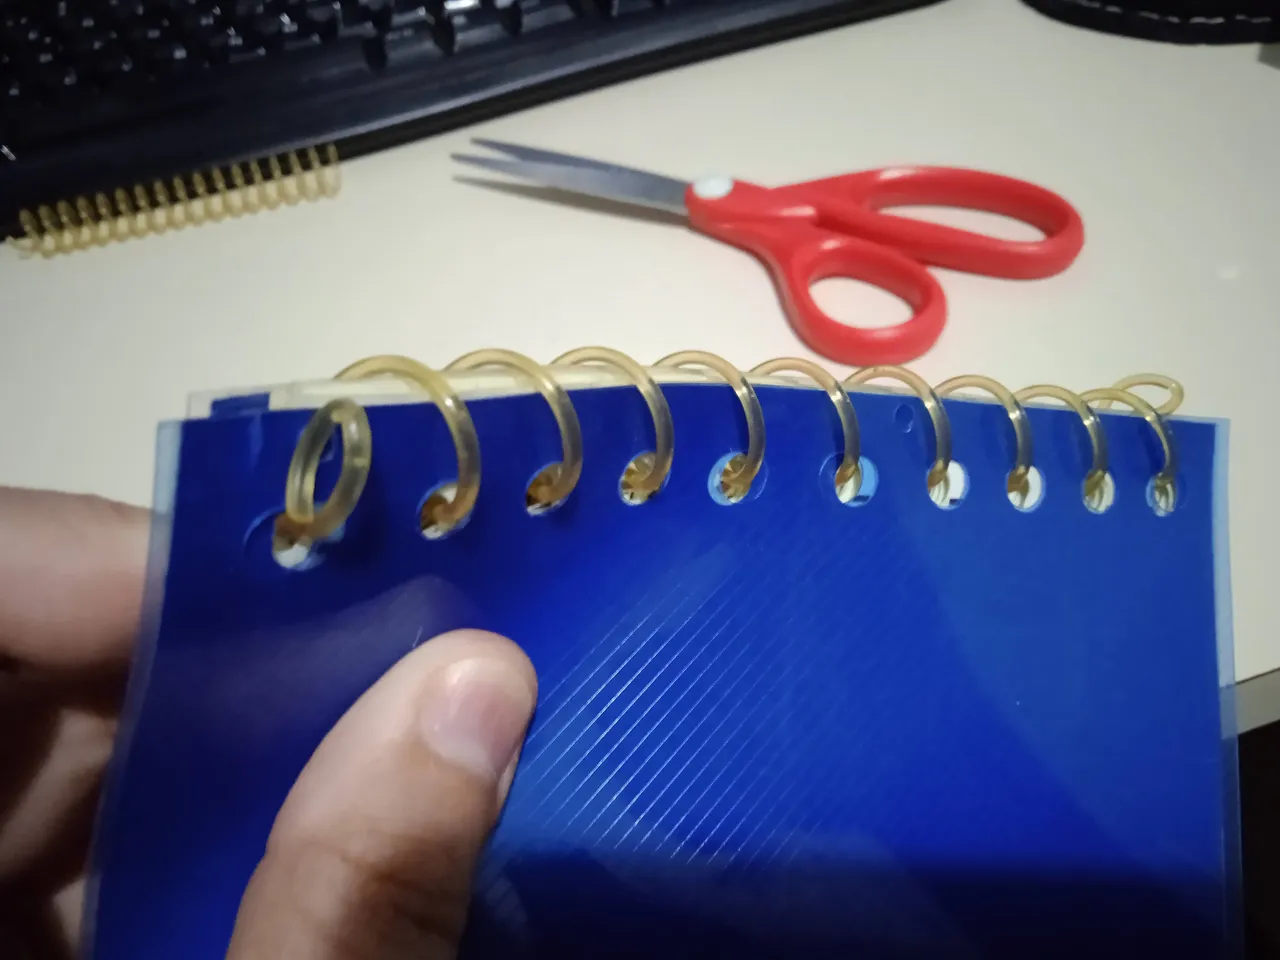
- Paso 10: Tomé la espiral para terminar el encuadernado.
- Paso 11: Empecé metiendo el anillo por uno de los costados, hasta el otro.
- Paso 12: Aquí se ve más del proceso del encuadernado, fue relativamente sencillo.
| Paso 13 | Paso 14 |
|---|---|
 |  |
- Paso 13: Recorté el exceso del espiral por ambos lados y doblé la punta para que no se suelte. Primero de un lado y luego del otro.
- Paso 14: Aquí está el borde del otro lado.
𝚁𝚎𝚜𝚞𝚕𝚝𝚊𝚍𝚘 𝙵𝚒𝚗𝚊𝚕
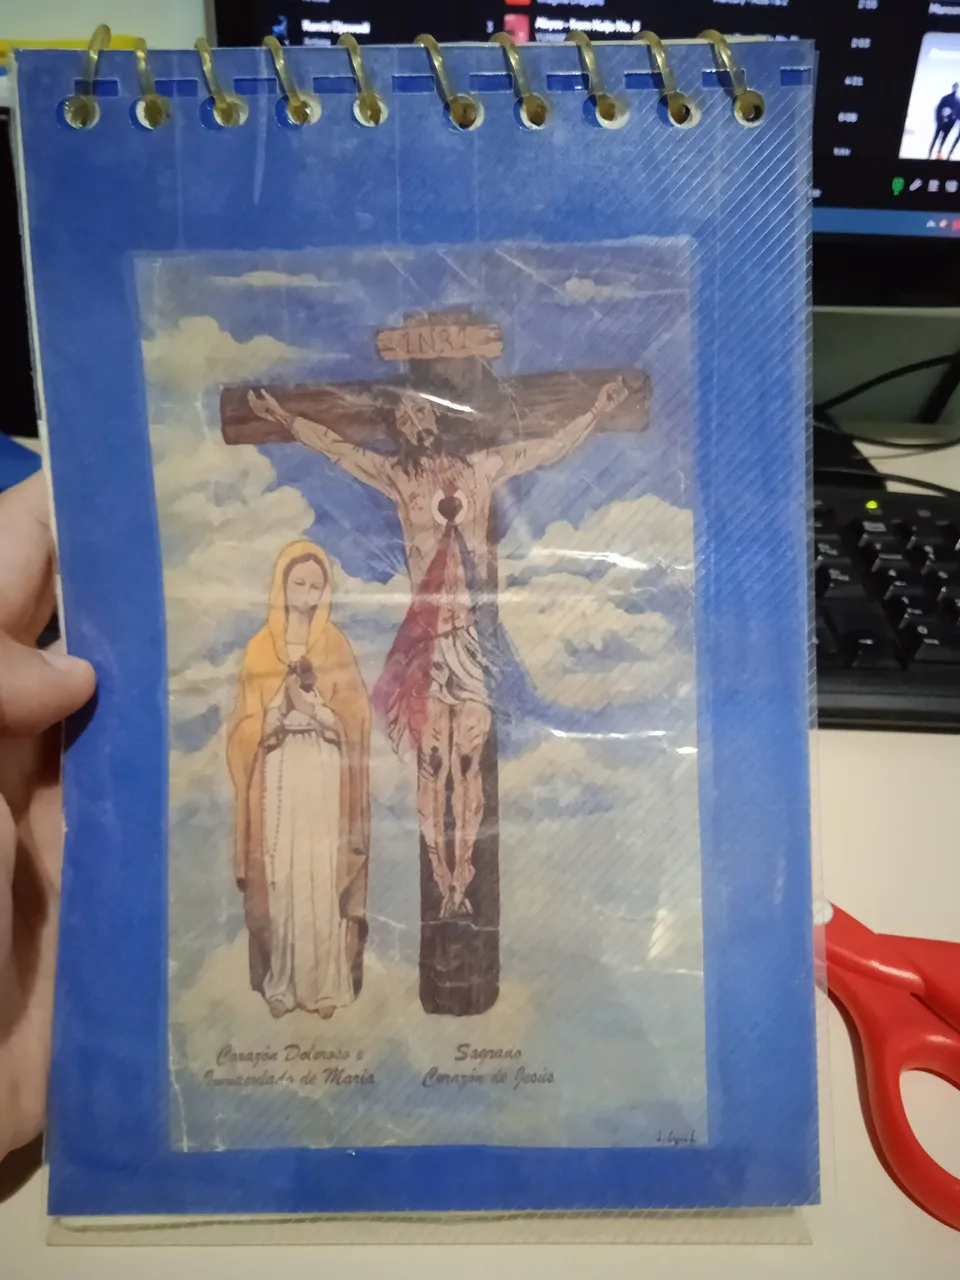
Así quedó luego de terminar toda la restauración. Cada hoja fue "plastificada" con tirro transparente. En total fueron 29 hojas, recubiertas con 7 tiras de tirro de 26 cm de largo con mucho amor y paciencia. El presupuesto fue poco más de 2 $. Pero lo más importante de todo es que a mi mamá le encantó y le pude rescatar su librito de oraciones.
Antes de irme sólo quiero agregar que en mi familia somos católicos y este post fue elaborado por y para fines informativos, mostrando el paso a paso de una restauración y encuadernación. Respeto la religión de los demás y sus creencias. Les deseo a todos un hermoso día. ¡Saludos! 💕
¿𝚀𝚞𝚎 𝚙𝚒𝚎𝚗𝚜𝚊𝚜 𝚊𝚌𝚎𝚛𝚌𝚊 𝚍𝚎 𝚎𝚜𝚝𝚘?
𝙼𝚎 𝚎𝚗𝚌𝚊𝚗𝚝𝚊𝚛í𝚊 𝚕𝚎𝚎𝚛𝚝𝚎!
𝙷𝚊𝚜𝚝𝚊 𝚕𝚊 𝚙𝚛𝚘𝚡𝚒𝚖𝚊!

| 𝙴𝚕𝚎𝚖𝚎𝚗𝚝𝚘𝚜 | 𝙷𝚎𝚛𝚛𝚊𝚖𝚒𝚎𝚗𝚝𝚊𝚜 |
|---|---|
| Imagen de Portada | Traductor DeepL |
| Imagen 1 | CANVA |
| Imagen 2 en adelante (utilizadas a lo largo del post): me pertenecen | Grammarly Extensión para correcciones en inglés |
| Contenido y Texto Original de mi Autoría | Microsoft 365 Word en Línea para correcciones en español |
| --- | Cámara Redmi Note 9A |
| 𝙼𝚒𝚜 𝚁𝚎𝚍𝚎𝚜 𝚂𝚘𝚌𝚒𝚊𝚕𝚎𝚜 |
|---|
| X |
| TikTok |
| Threads |
| Discord |
English
Happy and blessed Saturday to all who give life to the fabulous #DIYHub Community. I know I've been absent here, but it's been mostly due to health problems, I don't even think I've forgotten them. My mum asked me to help her repair one of her many little prayer books a few days ago. Today I bring you the step-by-step process.
-1-For those of you who don't know, I worked for 6 years in a stationery shop where they did bookbinding and other little things. It was there that I discovered how much I enjoy recovering and restoring books, notebooks, and so on. It's not that I'm an expert to the point of doing a binding, but when it comes to bookbinding I do feel I'm a master in the area.
Recently my mama was given a little book of prayers as a present, so battered that when I saw it I wondered what its former owner did with it, how he turned each page, and many other questions because it was one of the most battered books I have seen since I stopped working in that bookshop.
-2-Notice that the cover is almost missing, the back of the cover is missing and the rest of the book itself is unprotected. So after evaluating it a bit, seeing the number of damaged pages, and taking into account that I had a very low budget for the repair, I decided to ask my mom for some cheaper tools that also cover the same function of several meters of transparent contact paper.
Many of the pages of the little book were in a similar situation to the ones I show below:
| -3- | -4- |
|---|---|
| |
𝙴𝚕𝚎𝚖𝚎𝚗𝚝𝚜 𝚝𝚘 𝙱𝚎 𝚄𝚜𝚎𝚍
-5-
The low-budget items I used were:
- Transparent (wrapping) strip
- Transparent tissue
- Scissors.
- School cardboard for the cover.
- Plastic or acetate covers for greater protection of the book.
- Spiral or ring for binding.
𝚂𝚝𝚎𝚙-𝚋𝚢-𝚂𝚝𝚎𝚙
| Step 1 | Step 2 |
|---|---|
| |
- Step 1: I started by removing the staples that held it in the middle.
- Step 2: I went on to trim the edges on both sides of each page as they were very badly damaged. I left them flush, very close to the text.
| Step 3 | Step 4 |
|---|---|
| |
- Step 3: Then I started gluing strips of clear string along the length. I started from one of the edges, leaving a tab on the outside to fold it over and glue it inwards, making the most of the strip.
- Step 4: I covered one side and then the other side with several strips of string. In total, I used 7 strips of tyro for each sheet. In this way, I "plasticized" each piece of paper.
| Step 5 | Step 6 | Step 7 |
|---|---|---|
| | |
- Step 5: Here I show how I covered one side of the page.
- Step 6: This is how I covered the back side.
- Step 7: I then proceeded to cut off the excess paper along the top and bottom edges of each sheet of paper.
| Step 8 | Step 9 |
|---|---|
| |
- Step 8: Then with a 2-hole punch, I punched holes in each page at an eye-percent. In total, I made 10 holes in each page. I also added school cardboard for the covers and two plastic covers.
- Step 9: I also chose to "laminate" the school cardboard with clear tape for added protection and durability. As for the acetate or plastic covers, I took them from old bindings that I dismantled at some point. In other words, they are recycled.
| Step 10 | Step 11 | Step 12 |
|---|---|---|
| | |
- Step 10: I took the spiral to finish the binding.
- Step 11: I started by tucking the ring through one side, all the way through to the other.
- Step 12: Here is more of the binding process, it was relatively simple.
| Step 13 | Step 14 |
|---|---|
| |
- Step 13: I trimmed off the excess of the spiral on both sides and folded the tip so it doesn't come loose. First on one side and then on the other.
- Step 14: Here's the edge on the other side.
𝙵𝚒𝚗𝚊𝚕 𝚁𝚎𝚜𝚞𝚕𝚝
This is what it looked like after the restoration was completed. Each sheet was "plasticized" with transparent tape. In total, there were 29 sheets, covered with 7 strips of tyro of 26 cm long with a lot of love and patience. The budget was just over 2 $. But the most important thing of all is that my mum loved it and I was able to rescue her little prayer book.
Before I go I just want to add that in my family we are catholic and this post was made by and for informational purposes, showing the step-by-step of restoration and binding. I respect other people's religion and beliefs. I wish you all a beautiful day. Greetings! 💕
𝚆𝚑𝚊𝚝 𝚍𝚒𝚍 𝚢𝚘𝚞 𝚝𝚑𝚒𝚗𝚔 𝚊𝚋𝚘𝚞𝚝 𝚝𝚑𝚒𝚜?
𝙸 𝚠𝚘𝚞𝚕𝚍 𝚕𝚘𝚟𝚎 𝚝𝚘 𝚛𝚎𝚊𝚍 𝚢𝚘𝚞!
𝚂𝚎𝚎 𝚢𝚘𝚞 𝚗𝚎𝚡𝚝 𝚝𝚒𝚖𝚎!

| 𝙴𝚕𝚎𝚖𝚎𝚗𝚝𝚜 | 𝚃𝚘𝚘𝚕𝚜 |
|---|---|
| Front Cover Image | DeepL Translator |
| Image 1 | CANVA |
| Image 2 onwards (used throughout the post): belong to me | Grammarly Extension for English corrections |
| Content and Original Text of my Authorship | Microsoft 365 Word Online for Spanish corrections |
| --- | Camera Redmi Note 9A |
| 𝙼𝚢 𝚂𝚘𝚌𝚒𝚊𝚕 𝙼𝚎𝚍𝚒𝚊 |
|---|
| X |
| TikTok |
| Threads |
| Discord |