Hello friends.
The year has just begun and we are in awards of an important month since the International Day of Peace is celebrated in January. To raise awareness about the need to end all conflicts today I wanted to make a small idea, a dove as a sign of a peaceful message and I come to share the process with you.
This time I made a small amigurumi in the shape of a dove and I'm still learning some stitches and patterns, but I've always thought that great challenges serve to learn a lot and reaffirm ourselves in what we really like to do.
Materials
🧶Yarn
🧶Needle
🧶Scissors
Steps
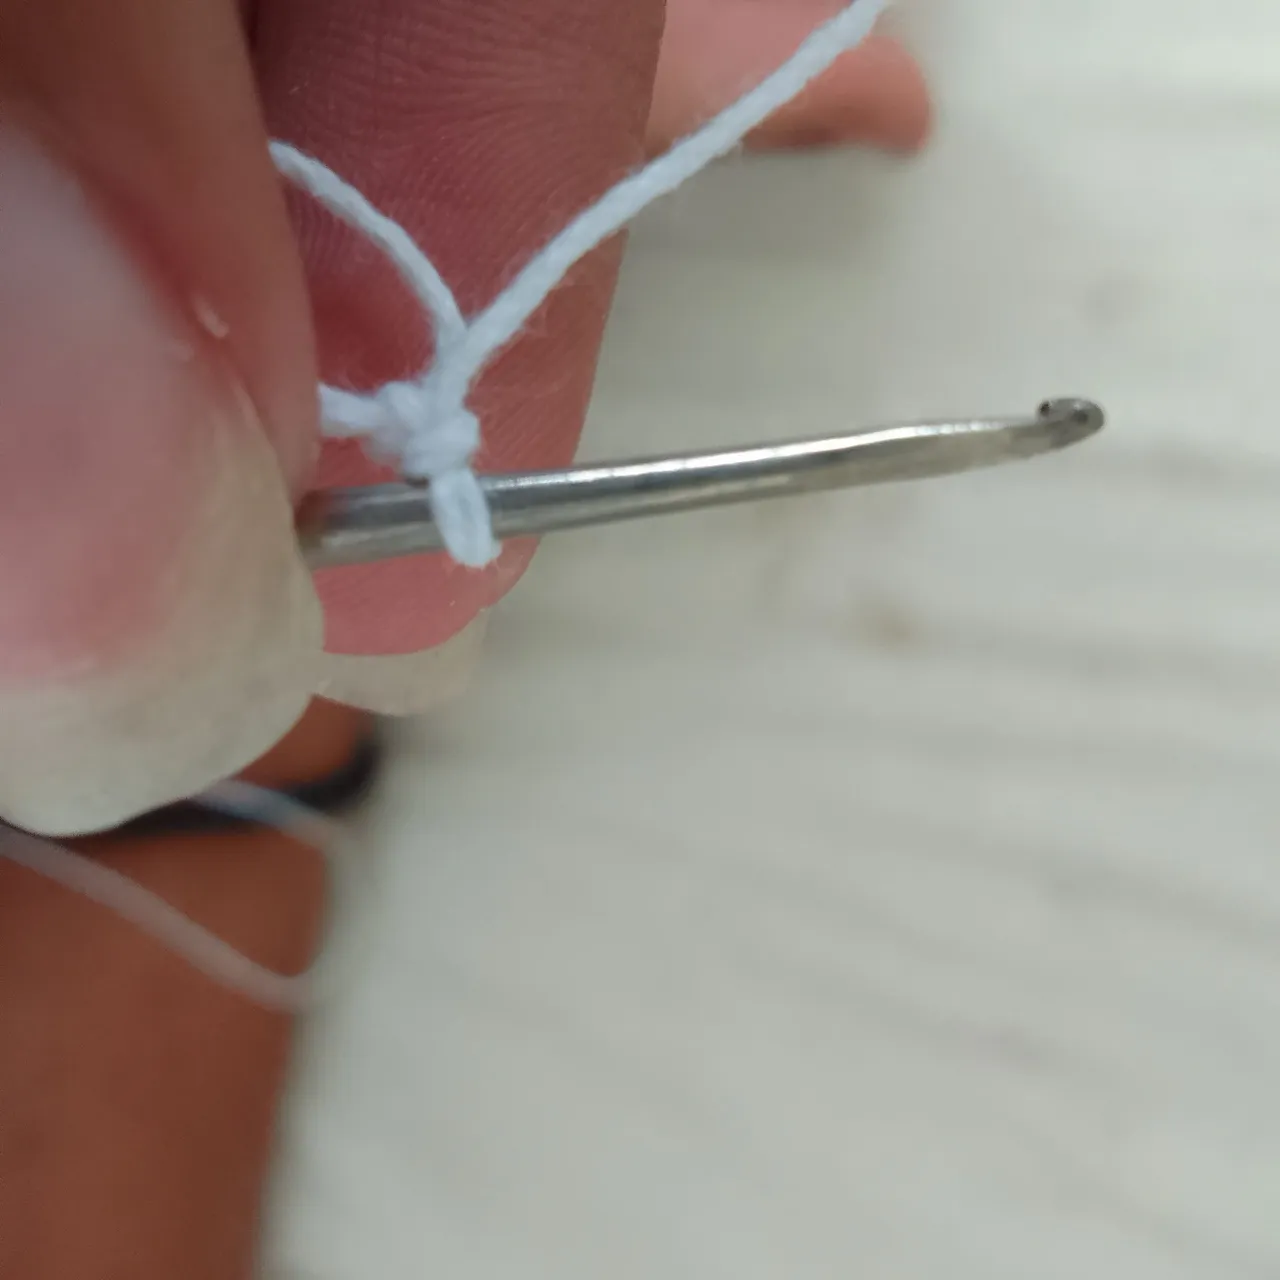
1 First I started by making the ring and then the first chain should be made and then continue with half stitches (in my case I decided to do it with varette stitch to speed up the process a little).
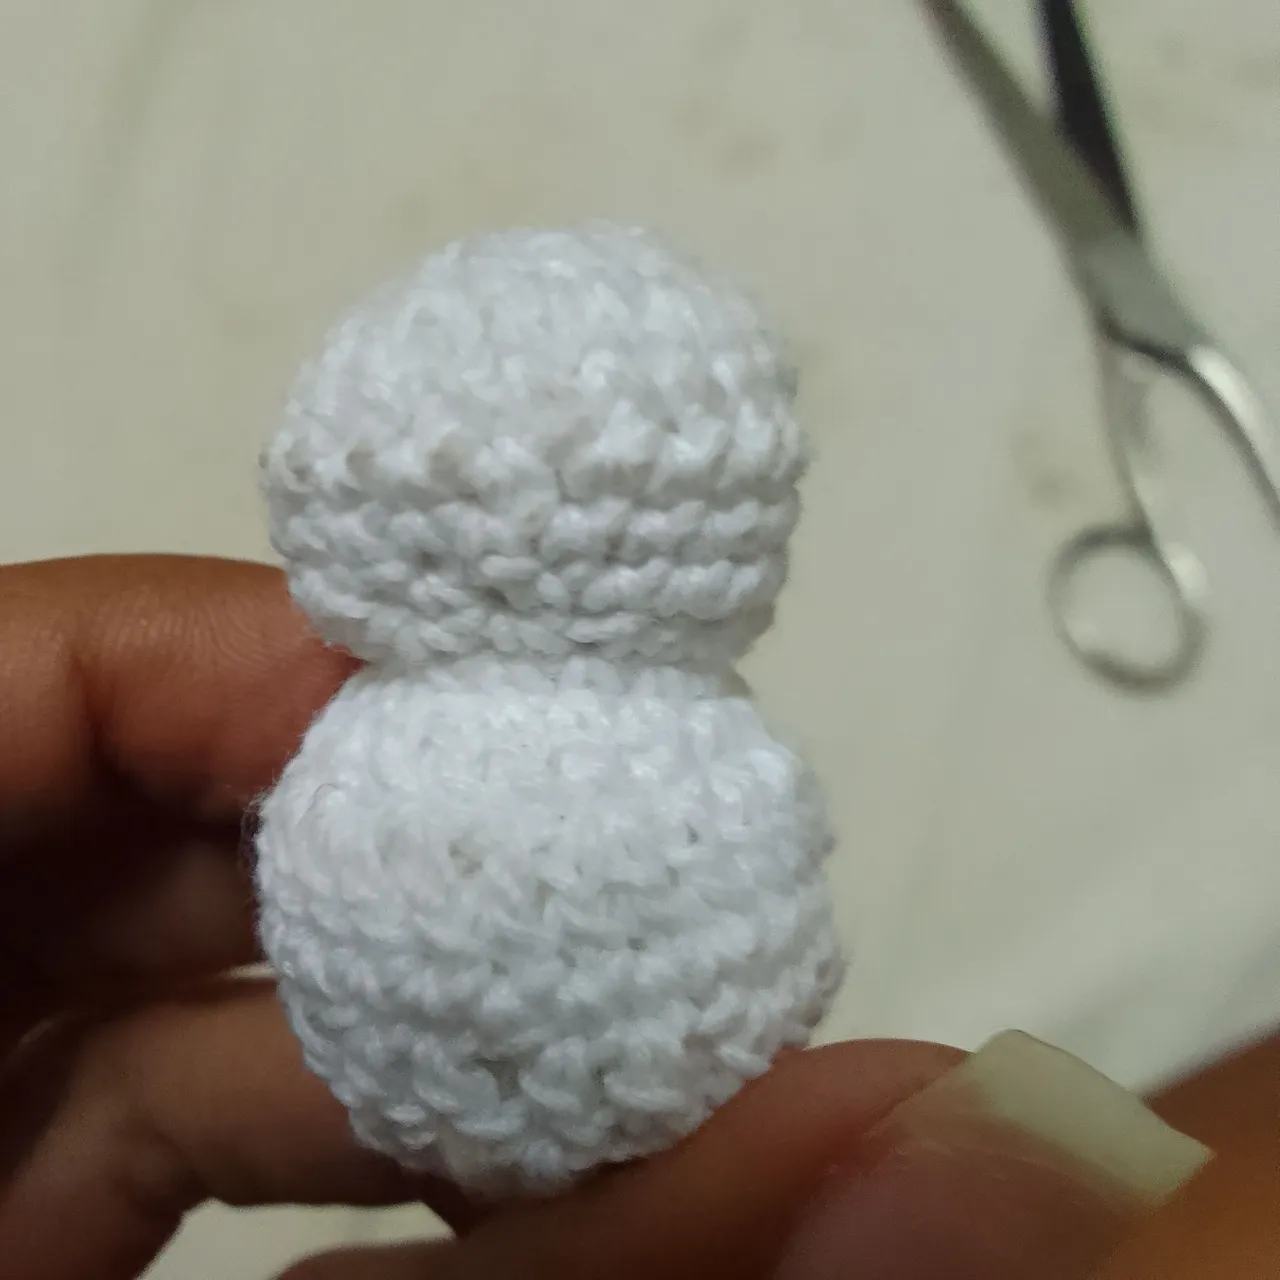
2 We are going to increase by making two points in one to make a kind of ball that we are going to fill in. To close we make a point and leave one in between to make the other point.

3 Without closing our little ball we are going to do the same as at the beginning and make another little ball a little bigger, but we are going to close this one.
4 After this, we have the body of our little dove, we would be missing the wings and the tail. For this I made the ring and 3 braided stitches. In the second round I went up 3 chains and increased with two stitches in one until I reached the other end where I went up again to then do the simple fan stitch. (We repeat this 2 more times we close it and cut it separately)
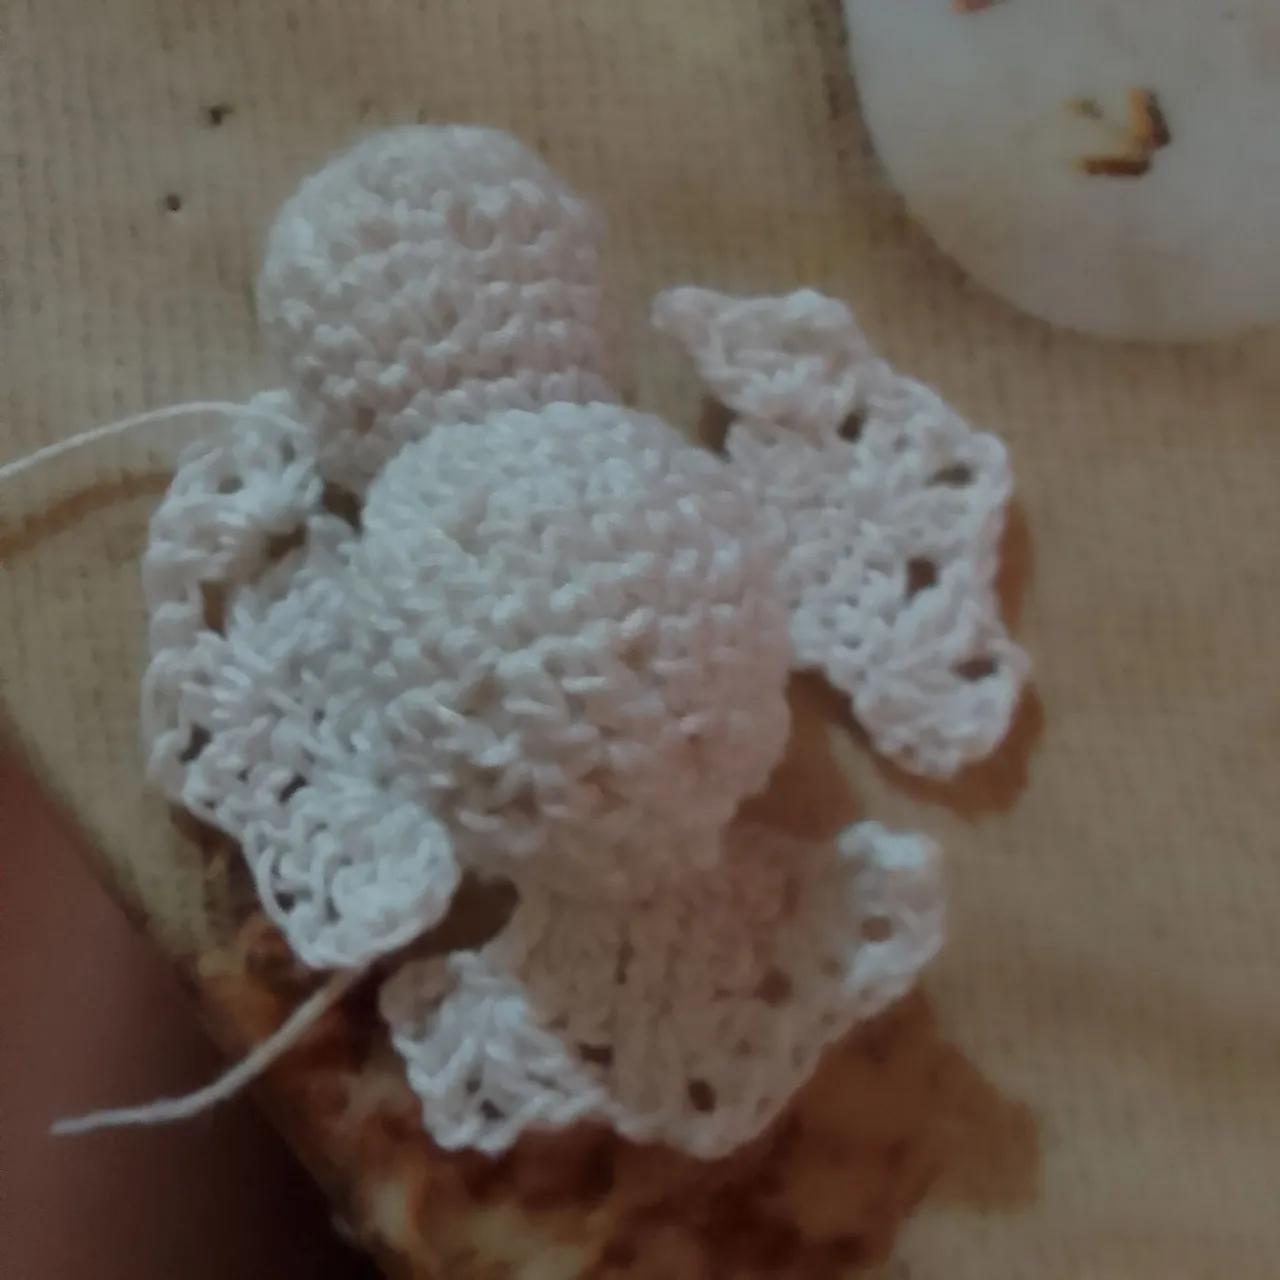
5 The next step is to join the pieces that we will do with the help of our needle as if we were sewing it directly to the body of our dove (I had left a surplus of thread for this step).
6 Finally what remains are the details, for this we will make the beak (I made it with 3 chains and a string 😅, quite simple) and we are going to fix it on what would be the face of the dovie. We also do the eyes and that's it.
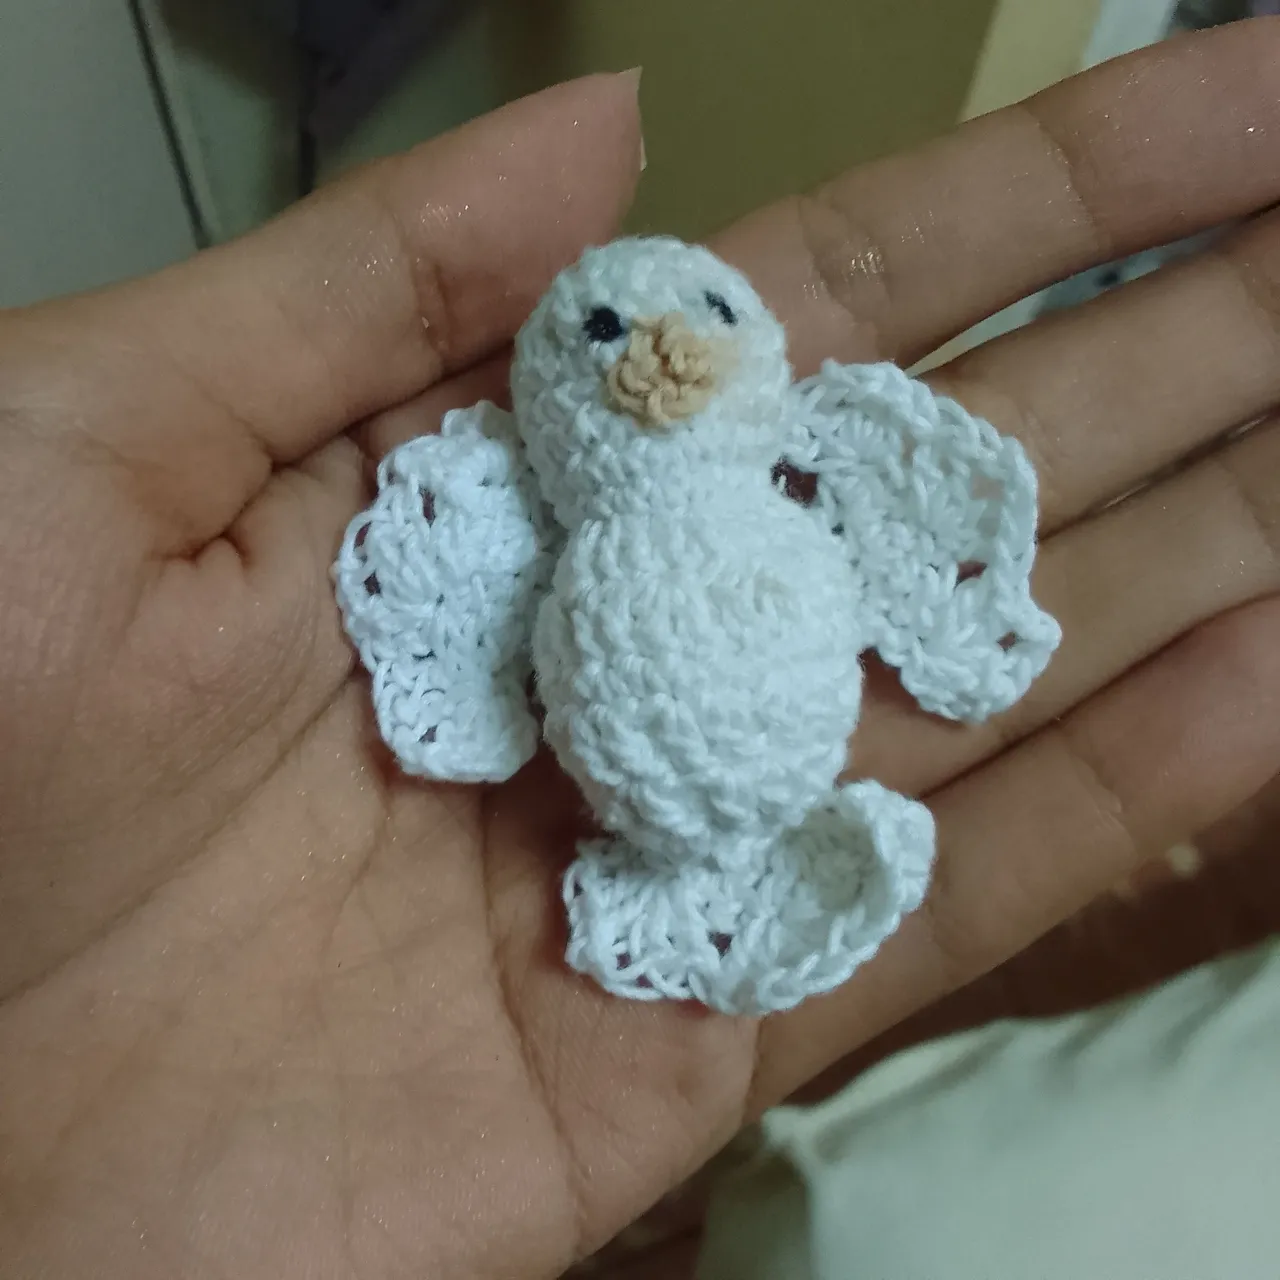
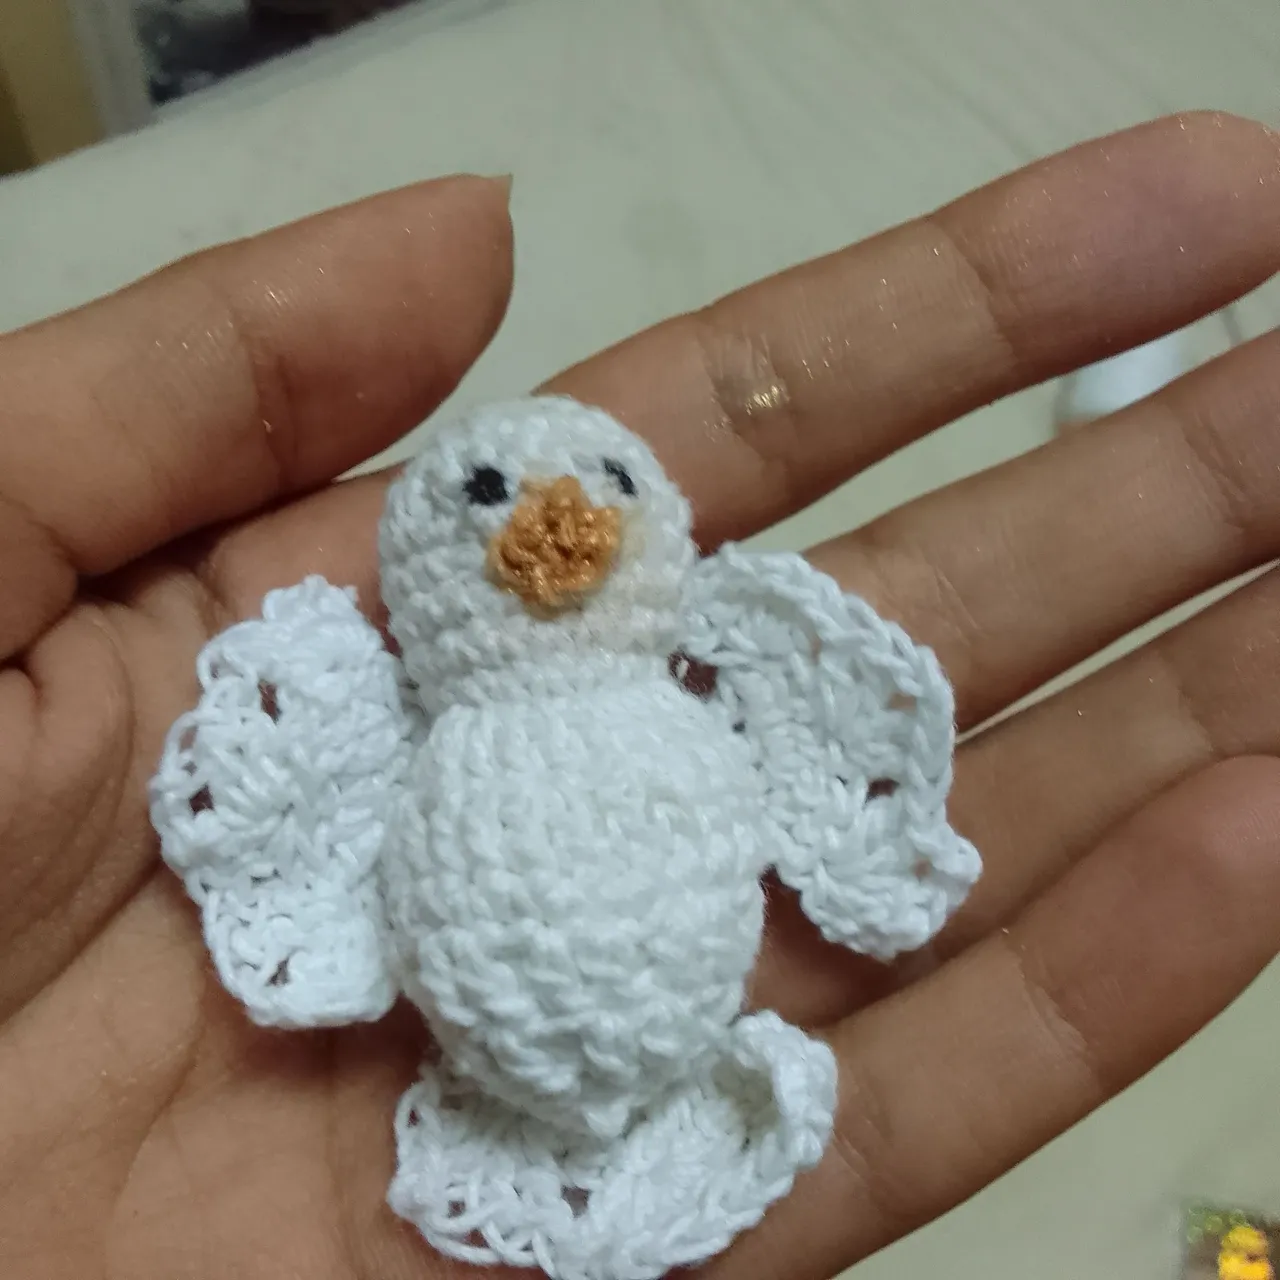
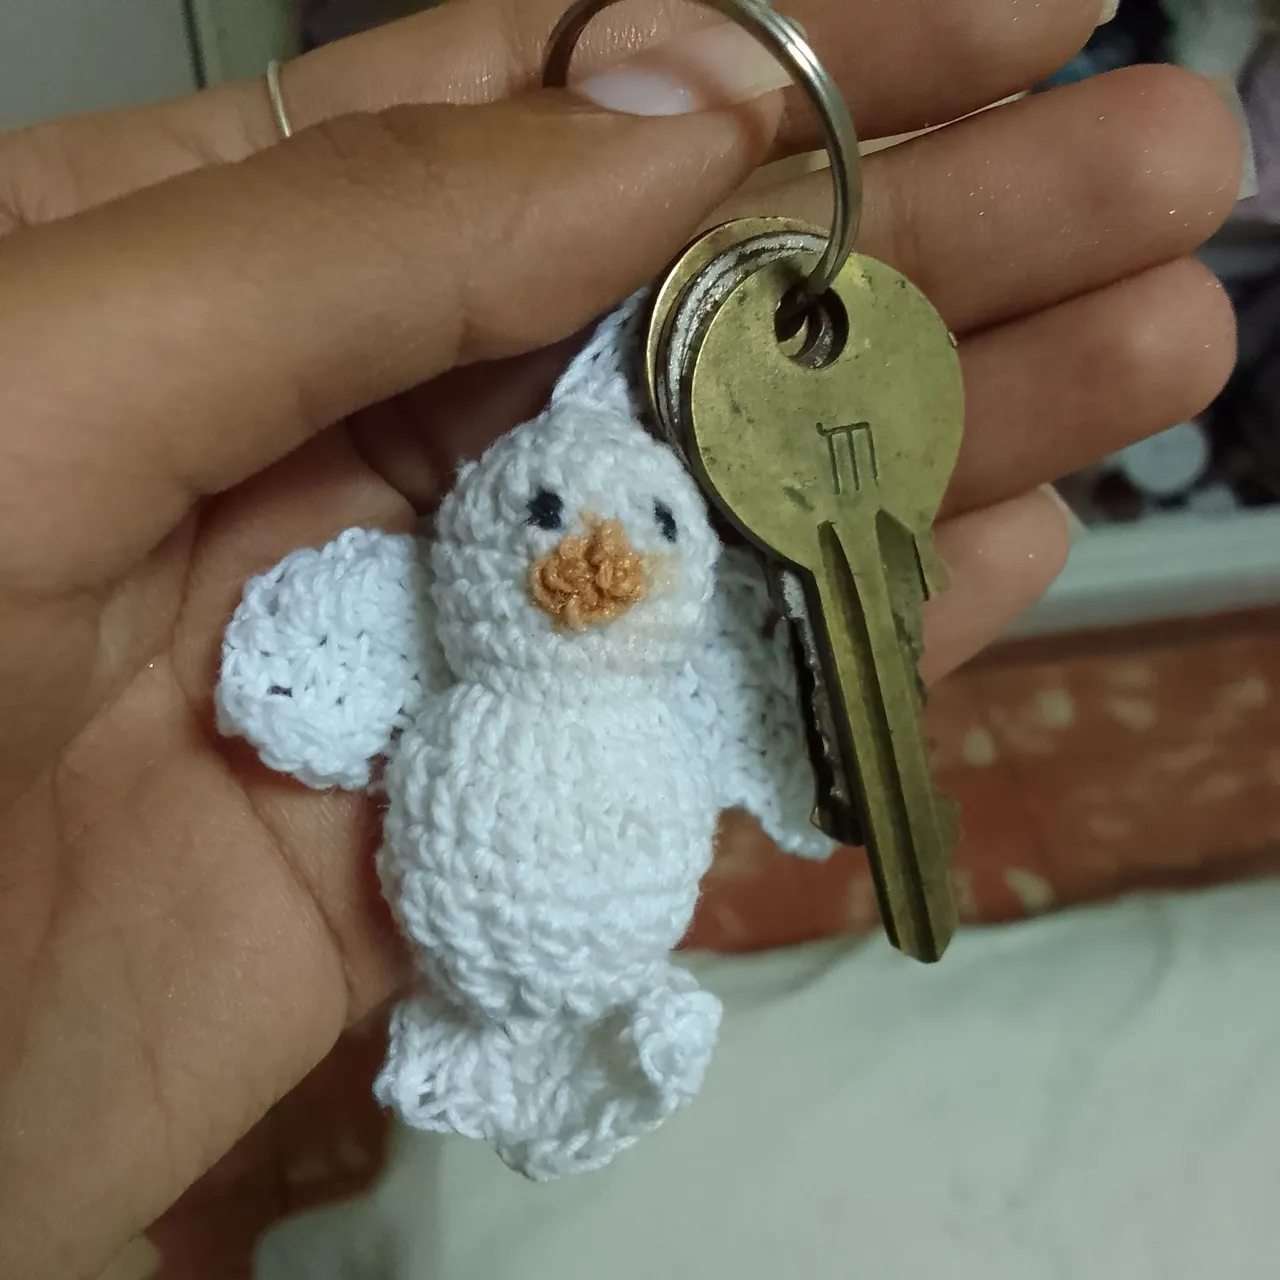
This is how my dove turned out 😅, I really loved it, it was a great job because I'm still learning but it's worth every effort to do it 😊. I don't show you a pattern since I didn't rely on one😅, what I can tell you is that you can make this amigurumi and use it in bags, as a home ornament or a keychain like I did😄.
If you made it this far thank you very much for reading, I hope you liked it. See you in the next post ❤️.
Hola amigos.
Recién comienza el año y nos encontramos en el marco de un mes importante, ya que en enero se celebra el Día Mundial de la Paz. Para hacer conciencia sobre la necesidad de acabar con todos los conflictos hoy quise hacer una pequeña idea, una paloma como signo del mensaje de paz y vengo a compartir el proceso con ustedes.
En esta ocasión realicé un pequeño amigurumi con forma de paloma y aún estoy aprendiendo algunos puntos y patrones, pero siempre he pensado que los grandes retos sirven para aprender mucho y reafirmarse en lo que verdaderamente nos gusta hacer.
Materiales
🧶Hilo
🧶Aguja
🧶Tijeras
Pasos
1 Primero empecé por hacer la anilla y seguido a esto se debe de hacer la primera cadena para luego continuar con medios puntos (en mi caso decidí hacerlo con punto vareta para acelerar un poco el proceso).
2 Vamos a ir aumentando haciendo dos puntos en uno para hacer una especie de pelota que vamos a ir rellenando. Para cerrar hacemos un punto y dejamos uno de por medio para hacer el otro punto.
3 Sin llegar a cerrar nuestra pelotita vamos a hacer lo mismo que al inicio y hacemos otra pelotita un poco más grande, pero esta si la vamos a cerrar.
4 Terminado esto, ya tenemos el cuerpo de nuestra palomita, nos faltarían las alas y la colita. Para esto hice la anilla y 3 puntos varetas. En la segunda vuelta subí 3 cadenetas y aumenté con dos puntos en uno hasta llegar al otro extremo donde subí nuevamente para entonces hacer el punto de abanico simple. (Esto lo repetimos 2 veces más lo cerramos y cortamos por separado)
5 El próximo paso es unir las piezas que lo haremos con ayuda de nuestra aguja como si lo estuviésemos cosiendo directamente al cuerpo de nuestra palomita (yo había dejado un excedente de hilo para este paso).
6 finalmente lo que queda son los detalles, para esto haremos el pico (yo lo hice con 3 cadenetas y una vareta 😅, bastante simple) y lo vamos a fijar en la que sería la cara de la palomita. Hacemos también los ojos y listo.
Así es como quedó mi palomita 😅, en verdad me encantó, fue un gran trabajo porque aún estoy aprendiendo pero vale cada esfuerzo hacerlo 😊. No les muestro un patrón ya que no me apoyé de uno😅, lo que si les puedo decir es que pueden hacer este amigurumi y usarlo en bolsas, como adorno para el hogar o un llavero como hice yo😄.
Si llegaste hasta aquí muchas gracias por leer, espero que les haya gustado. Nos vemos en el próximo post ❤️.