Hello dear Community @diyhub
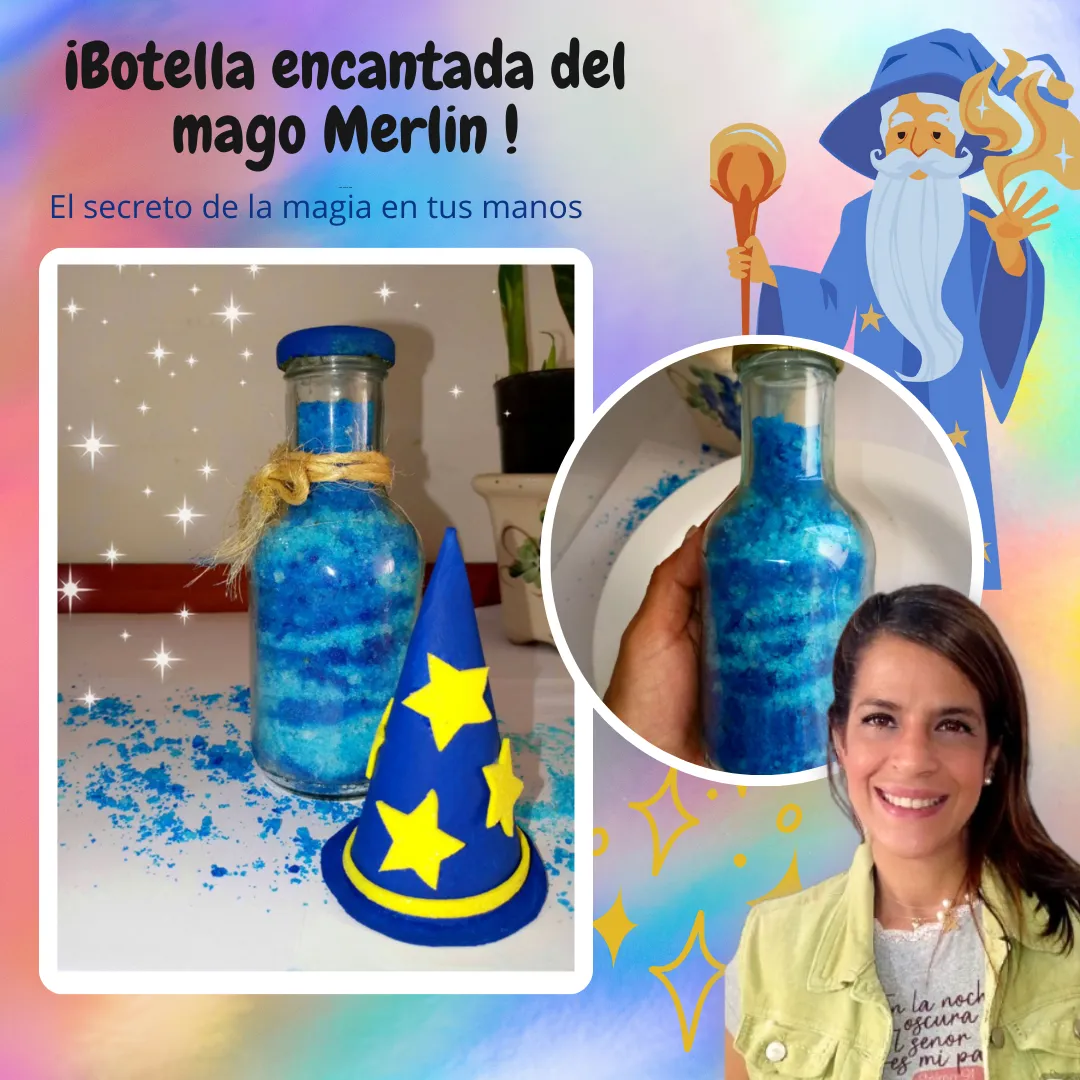
When I hear the word "magic", I think of a fantasy world, where the most amazing fairies, wizards, witches and mystical characters use potions, magical elements and words to fulfil wishes and do amazing things.
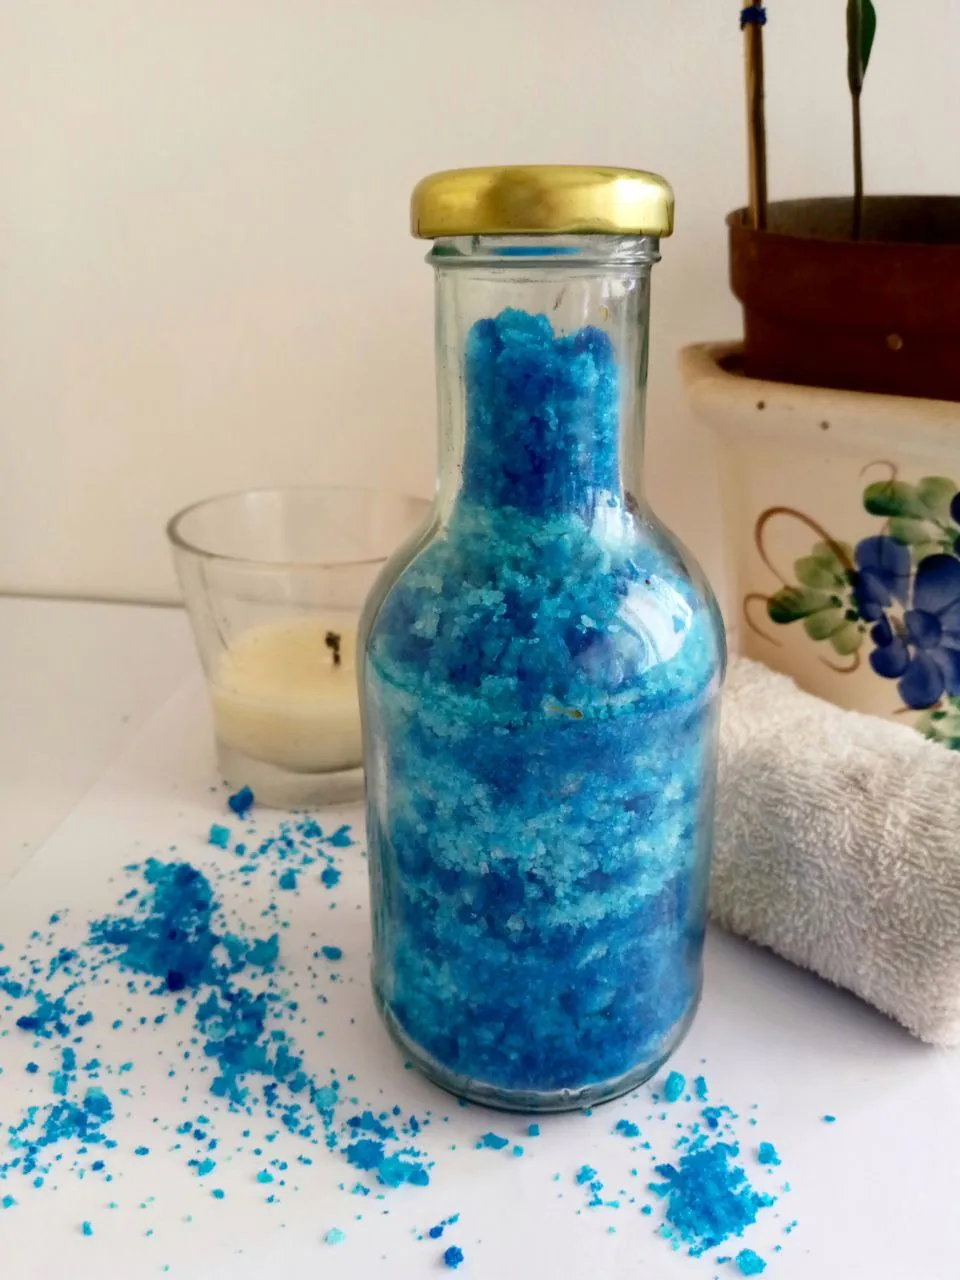
And one of those elements is sea salt, known to be a conductor of energy and is said to have magical powers, so to participate in this contest : "Let's make magic", I have created a beautiful and striking aromatic and decorative bottle with salt, which serves to purify and perfume the environments, to be used in drawers, bedrooms, wardrobes and bathrooms and why not? also to take a relaxing foot bath.
It is inspired by the mystical wizard Merlin, so I used his colours to paint the salt, I also made a hat alluding to the wizard to go with the bottle, I used an essential oil to give it a rich aroma and I recycled a beautiful bottle to transform it into "A real magic bottle".
Hola querida Comunidad @diyhub
Cuando oigo la palabra "magia", pienso en un mundo de fantasía, donde las hadas, magos, brujas y personajes místicos más asombrosos utilizan pociones, elementos y palabras mágicas para cumplir deseos y hacer cosas asombrosas.
Y unos de esos elementos, es la sal marina, conocida por ser conductor de energía y se dice que tiene poderes mágicos, por eso para participar en este concurso :"Hagamos magia", he creado una hermosa y llamativa botella aromática y decorativa con sal, que sirve para purificar y perfumar los ambientes, para ser utilizada en gavetas, dormitorios, armarios y cuartos de baño y ¿por qué no? también para darse un relajante baño de pies.
Está inspirada en el místico mago Merlín, por eso se utilizaron sus colores en la pintura de la sal, así como también hice un gorro alusivo al mago para que acompañara la botella , se usó un aceite esencial para darle un rico aroma y reciclé una bonita botella para transformarla en "Una verdadera Botella mágica".

𝐌𝐚𝐭𝐞𝐫𝐢𝐚𝐥𝐬 / 𝐌𝐚𝐭𝐞𝐫𝐢𝐚𝐥𝐞𝐬
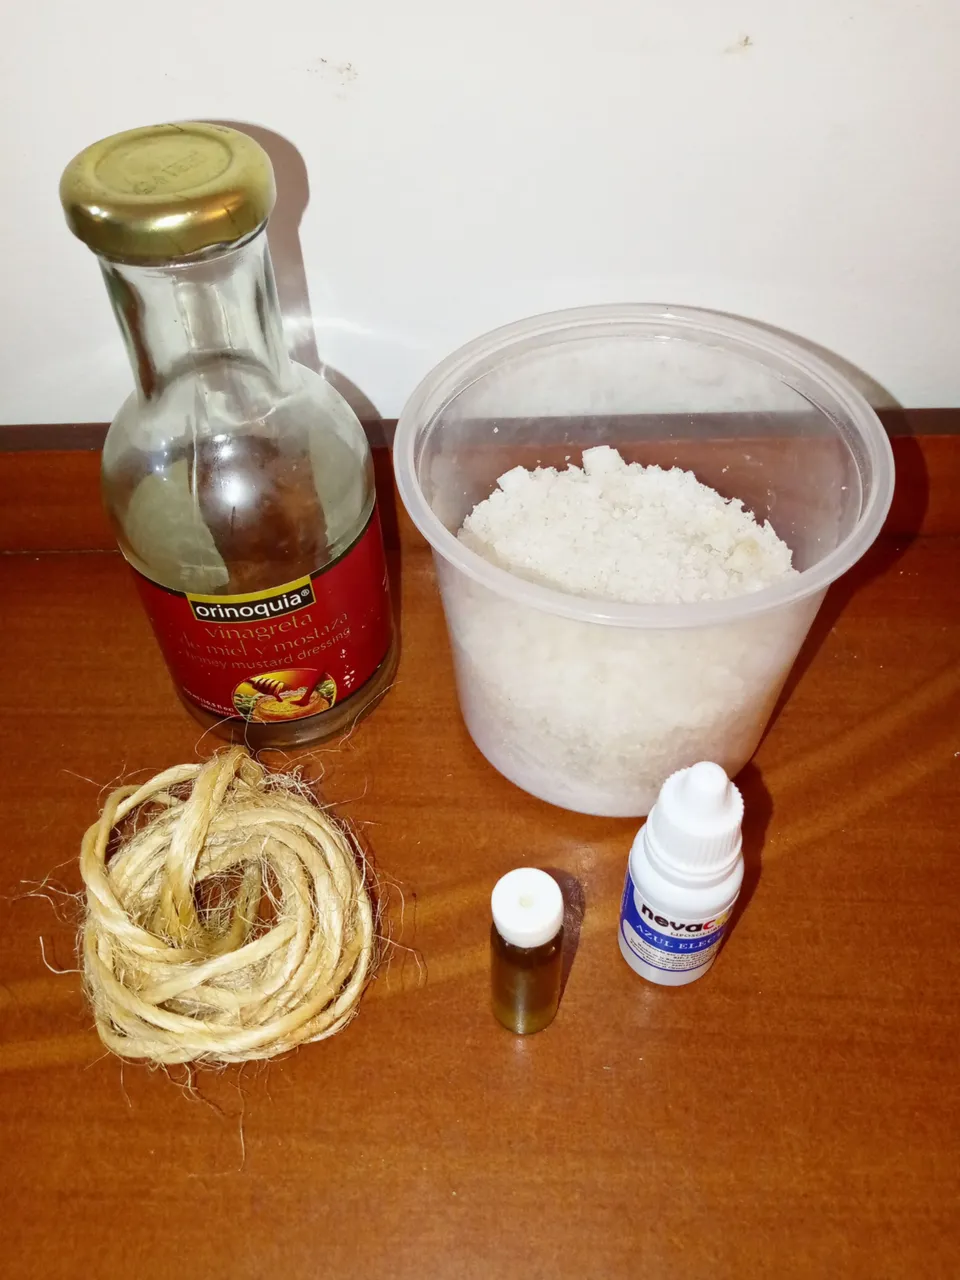
| Bottle | Botella | |
| Coarse sea salt in an amount according to the size of the container. | Sal marina gruesa en cantidad de acuerdo al tamaño del envase | |
| Blue vegetable colouring | Colorante vegetal color azul | |
| Essential oil | Aceite esencial | |
| Glass bottle | Botella de vidrio | |
| Mecatillo | Mecatillo |
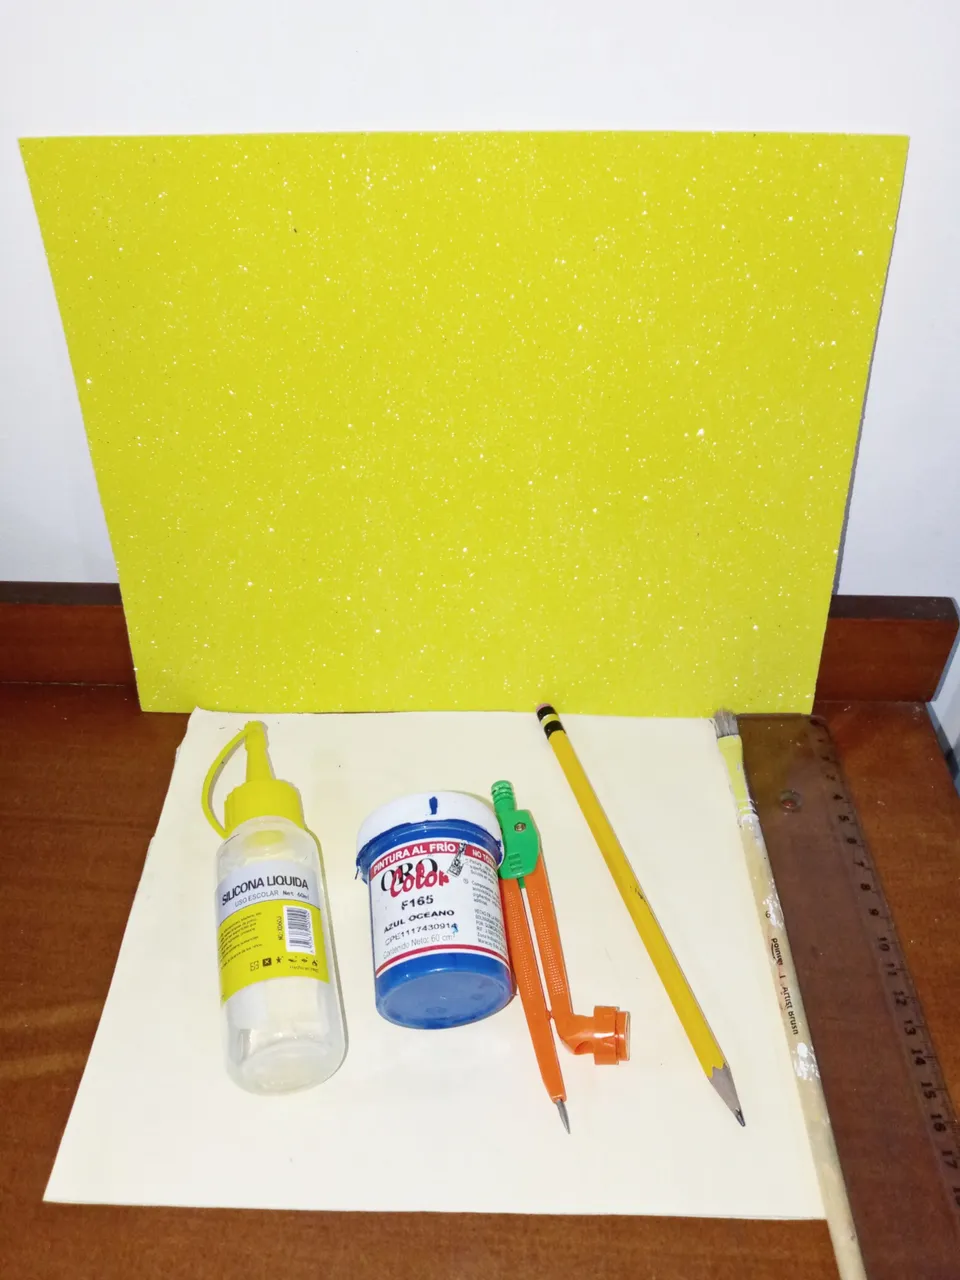
| Merlin wizard hat | Sombrero mago Merlin | |
| A piece of cardboard | Un pedazo de cartulina | |
| Yellow foami | Foami amarillo | |
| Blue cold paint | Pintura al frío azul | |
| Liquid silicone | Silicón líquido | |
| Compass | Compás | |
| Pencil | Lápiz | |
| Measuring ruler | Regla | |
| Scissors | Tijera |
𝐒𝐭𝐞𝐩 𝐛𝐲 𝐒𝐭𝐞𝐩 / 𝐏𝐚𝐬𝐨 𝐚 𝐩𝐚𝐬𝐨
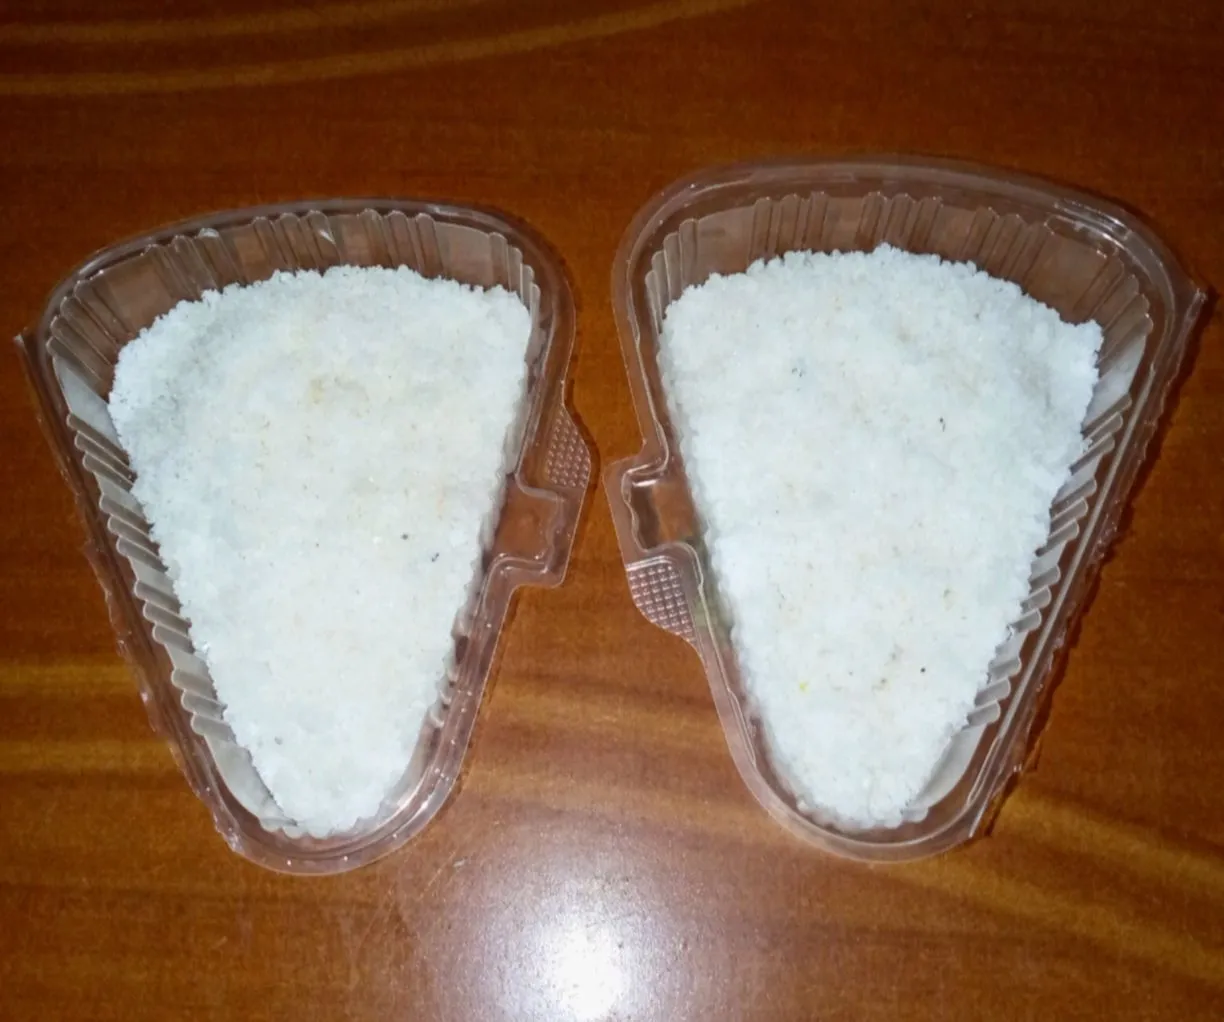
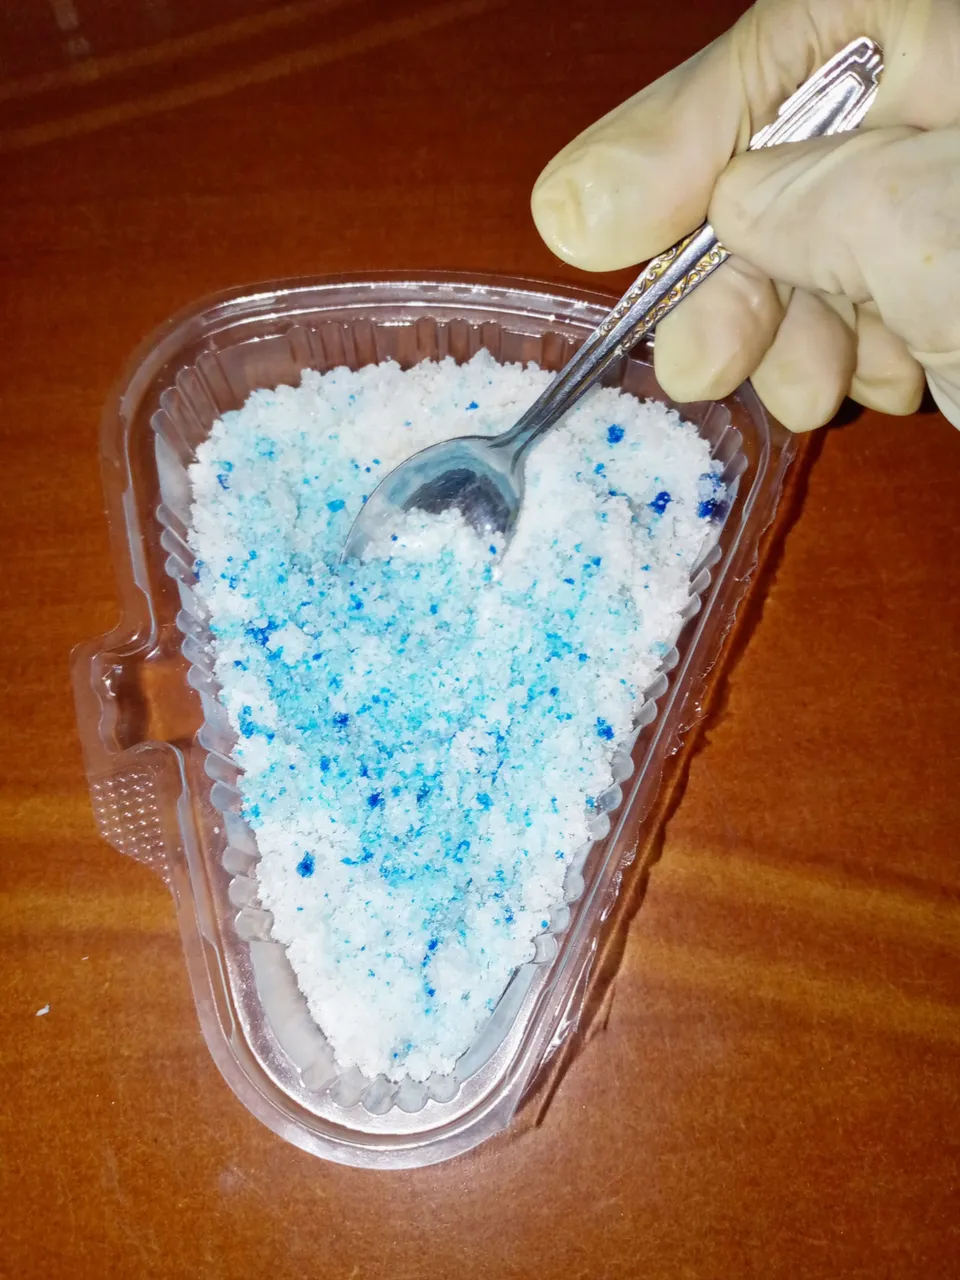
Step 1 :
Pour the sea salt into as many containers as necessary, depending on the colours you want to use. In this case I used a single colour, electric blue to create two shades, one dark and one lighter.
Paso 1 :
Se vierte la sal marina en tantos recipientes como sea necesario, según los colores que quieras utilizar. En este caso usé un solo color, el azul eléctrico para crear dos tonos , uno oscuro y otro más claro.
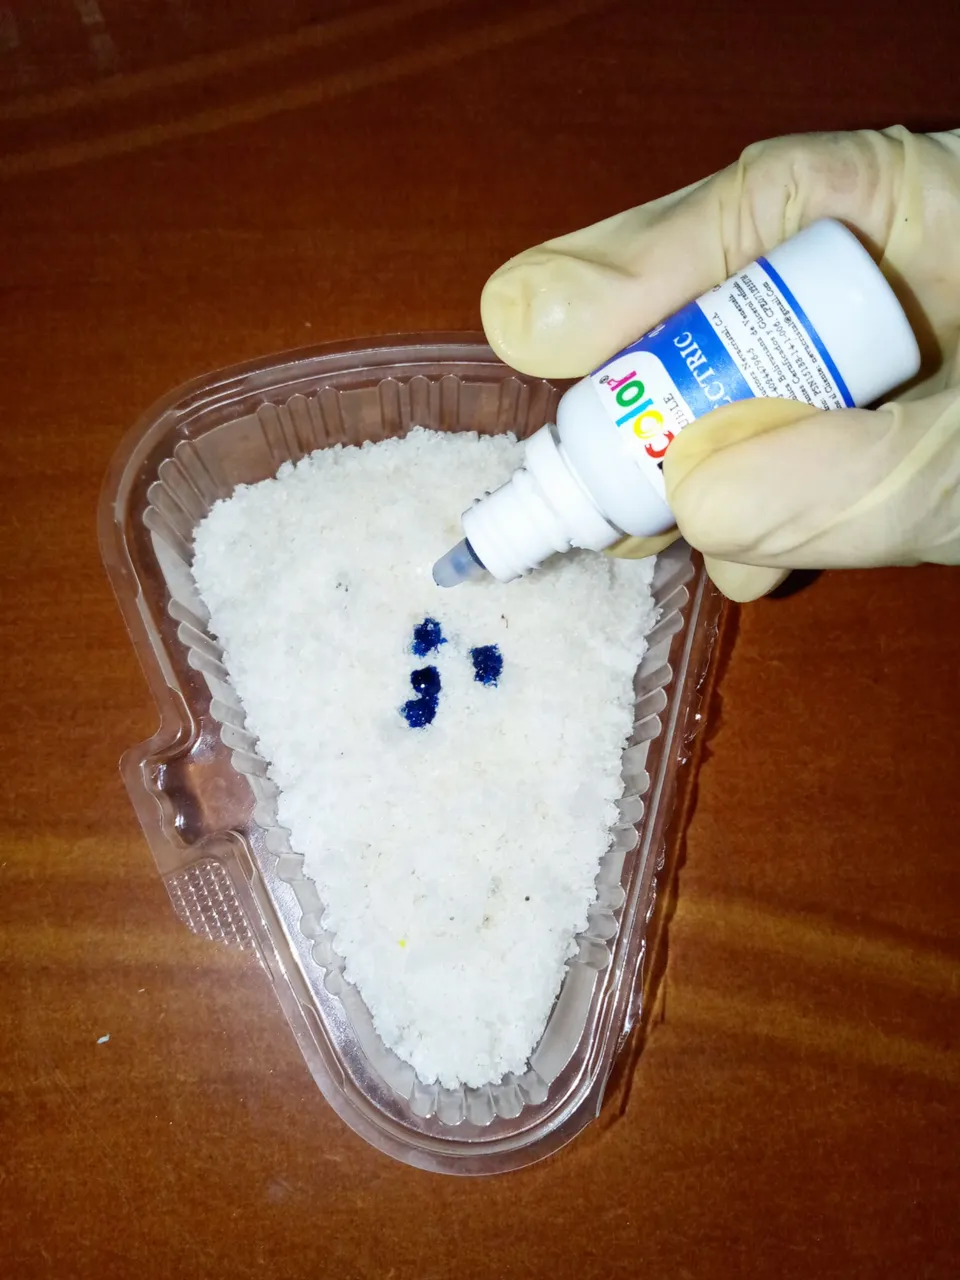
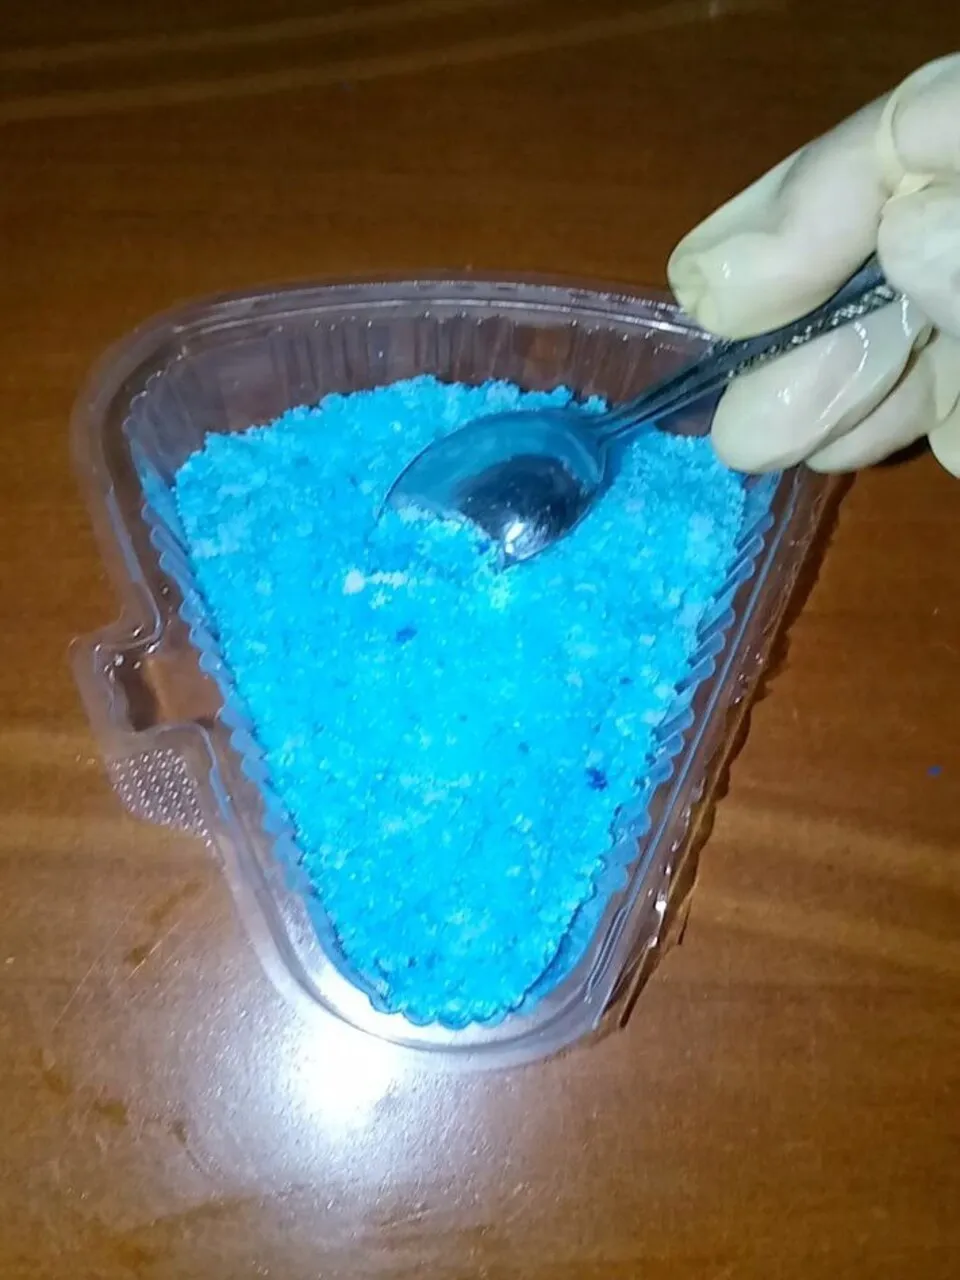
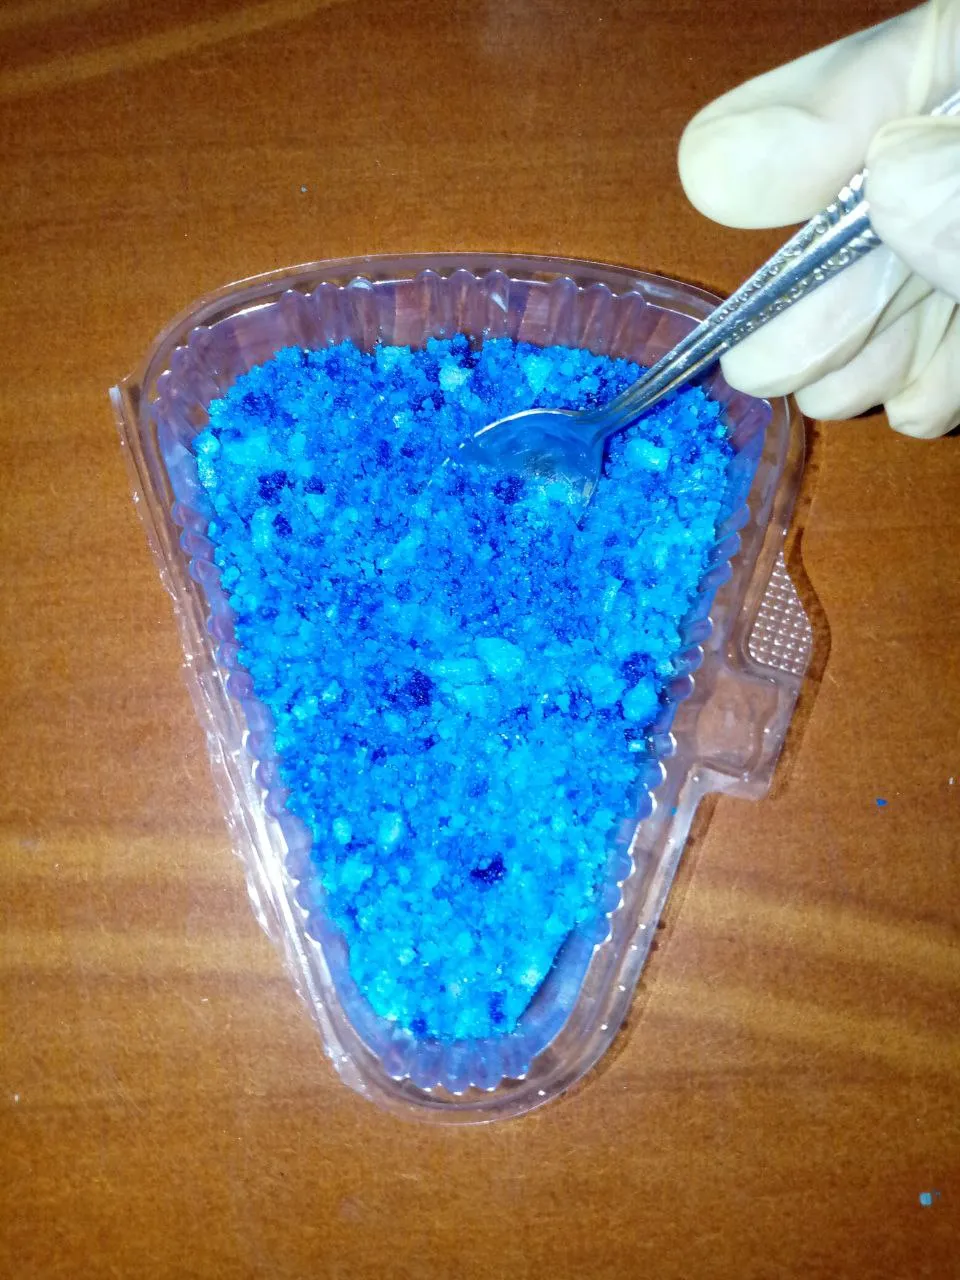
Step 2:
Add drops of blue vegetable colouring to the salt and mix with the help of a teaspoon or with your hands, wearing gloves to avoid staining, mix well until the desired colour is obtained. Do the same with the same colouring but now I put more drops to achieve a more intense blue. Mix again.
Paso 2:
Se añaden a la sal, gotas de colorante vegetal azul y se mezcla con la ayuda de una cucharilla o con las manos, usar guantes para evitar mancharse, mezclar bien hasta obtener el color deseado. Hacer lo mismo con el mismo colorante pero ahora coloqué más gotas para lograr un azul más intenso. Mezclé de nuevo.

Step 3:
Add the essential oil to perfume the salts. I used peppermint essence, for its relaxing and refreshing effect. Nowadays you can find many essential oils of very good quality and with divine aromas.
Paso 3:
Añadir el aceite esencial para perfumar las sales. Yo utilicé esencia de menta, por su efecto relajante y refrescante, ahorita se consiguen muchos aceites esenciales de muy buena calidad y con aromas divinos.
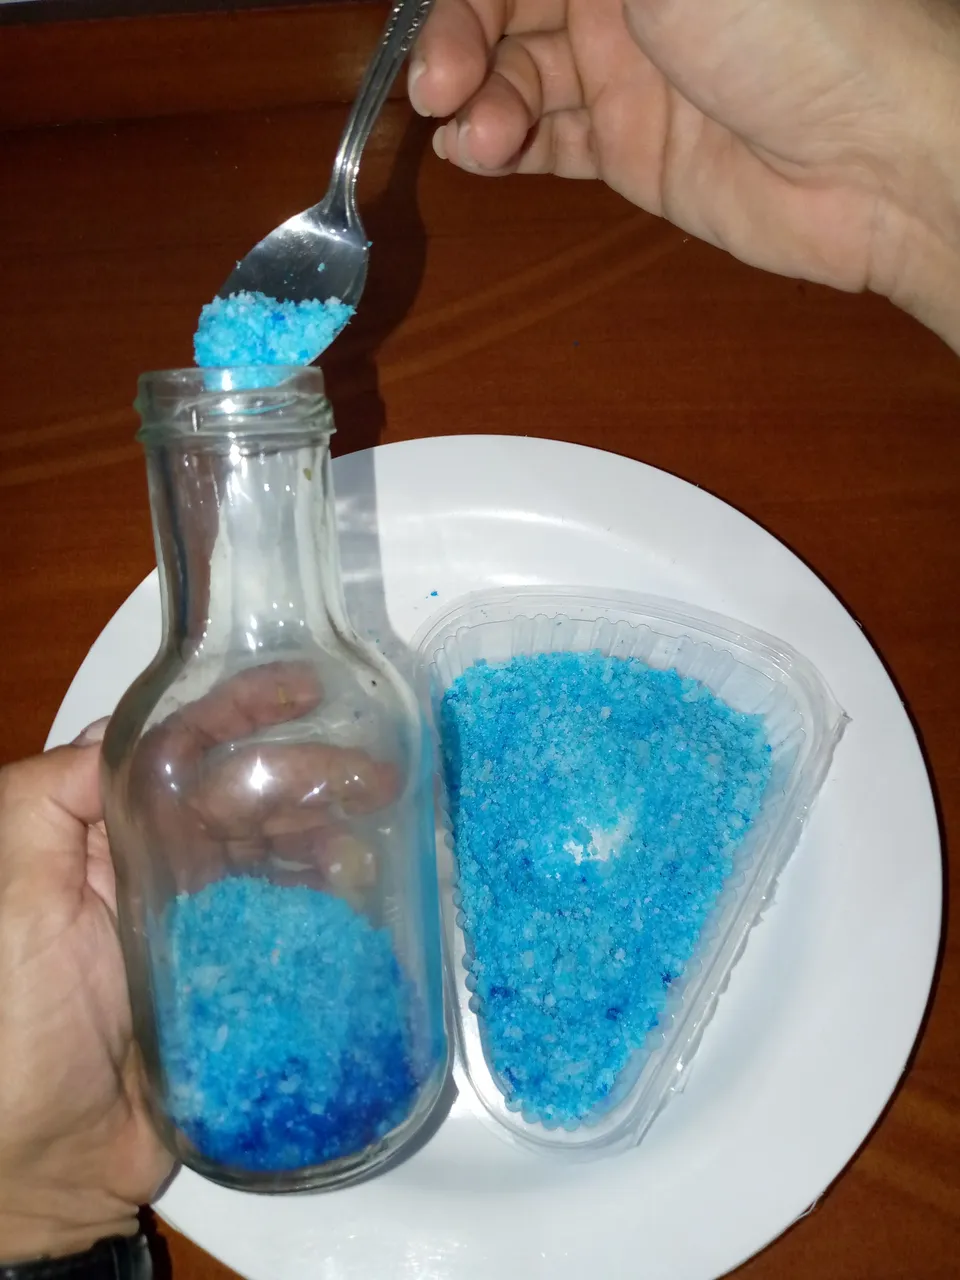
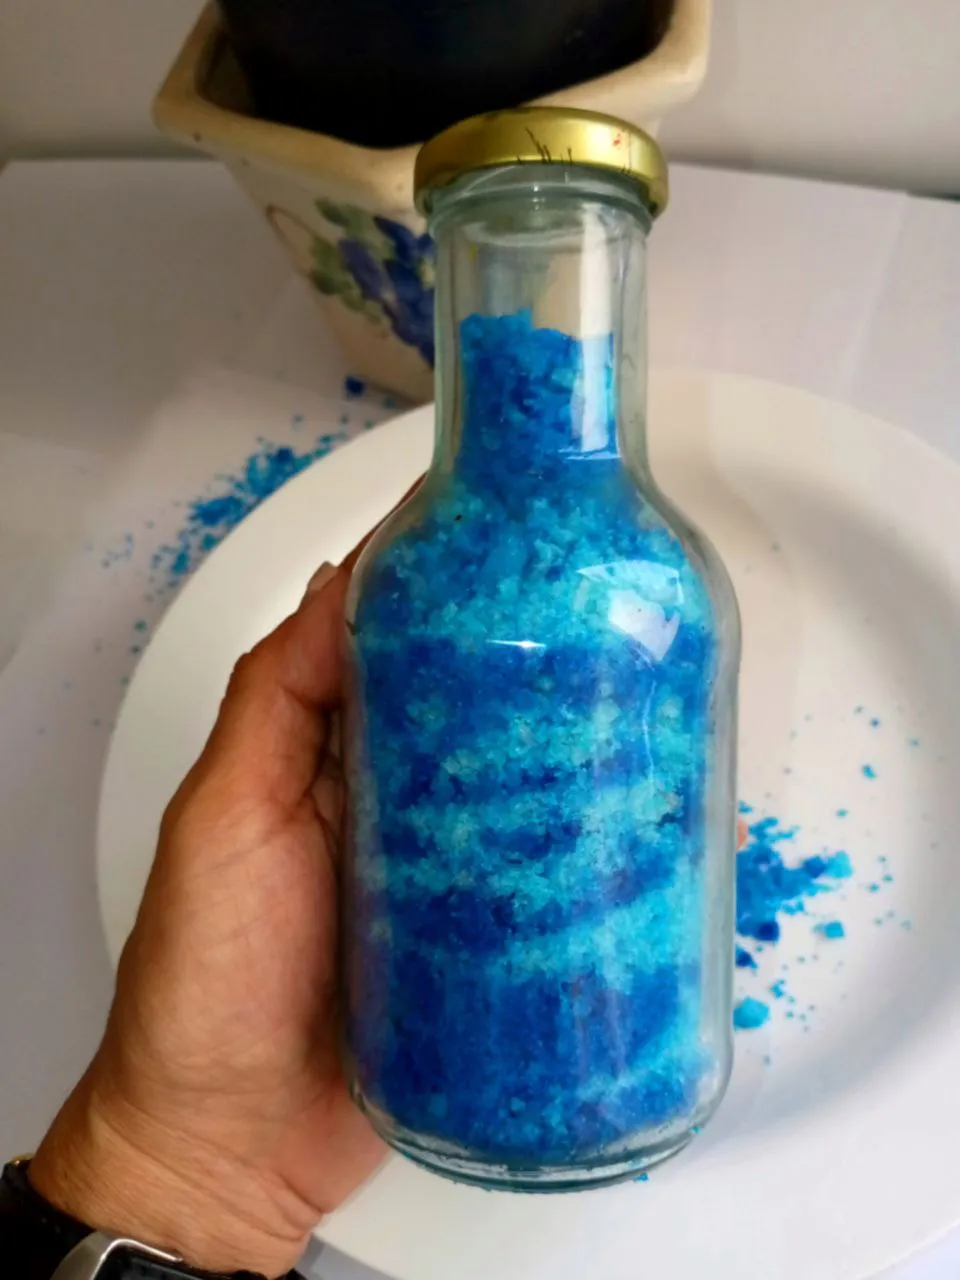
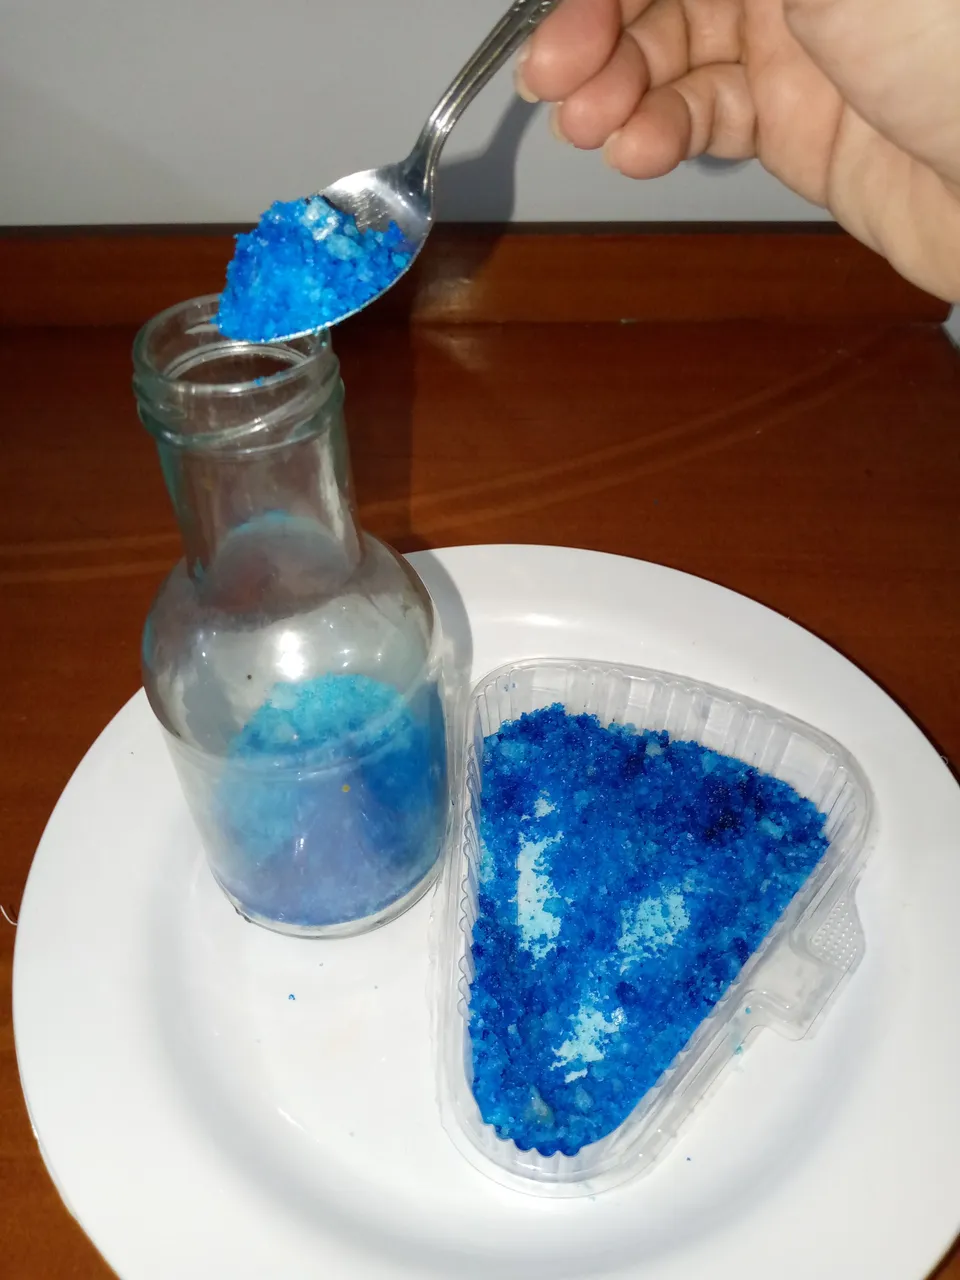
Step 4:
Now comes the fun part, which is to add the salts of both colours in layers in the bottle. I wanted to create a marine effect, so I moved the bottle while pouring the salt to create the shape. It's very easy and the result is beautiful, but before this step, I had to soak the bottle for a while in hot water to remove the label.
Paso 4:
Ahora viene la parte más divertida! que es añadir las sales de ambos colores por capas en la botella. Yo quería crear un efecto marino, así que movía la botella mientras echaba la sal para crear la forma. Es muy fácil y el resultado es precioso, pero antes de este paso, tuve que sumergir la botella un rato en agua caliente para quitarle la etiqueta.
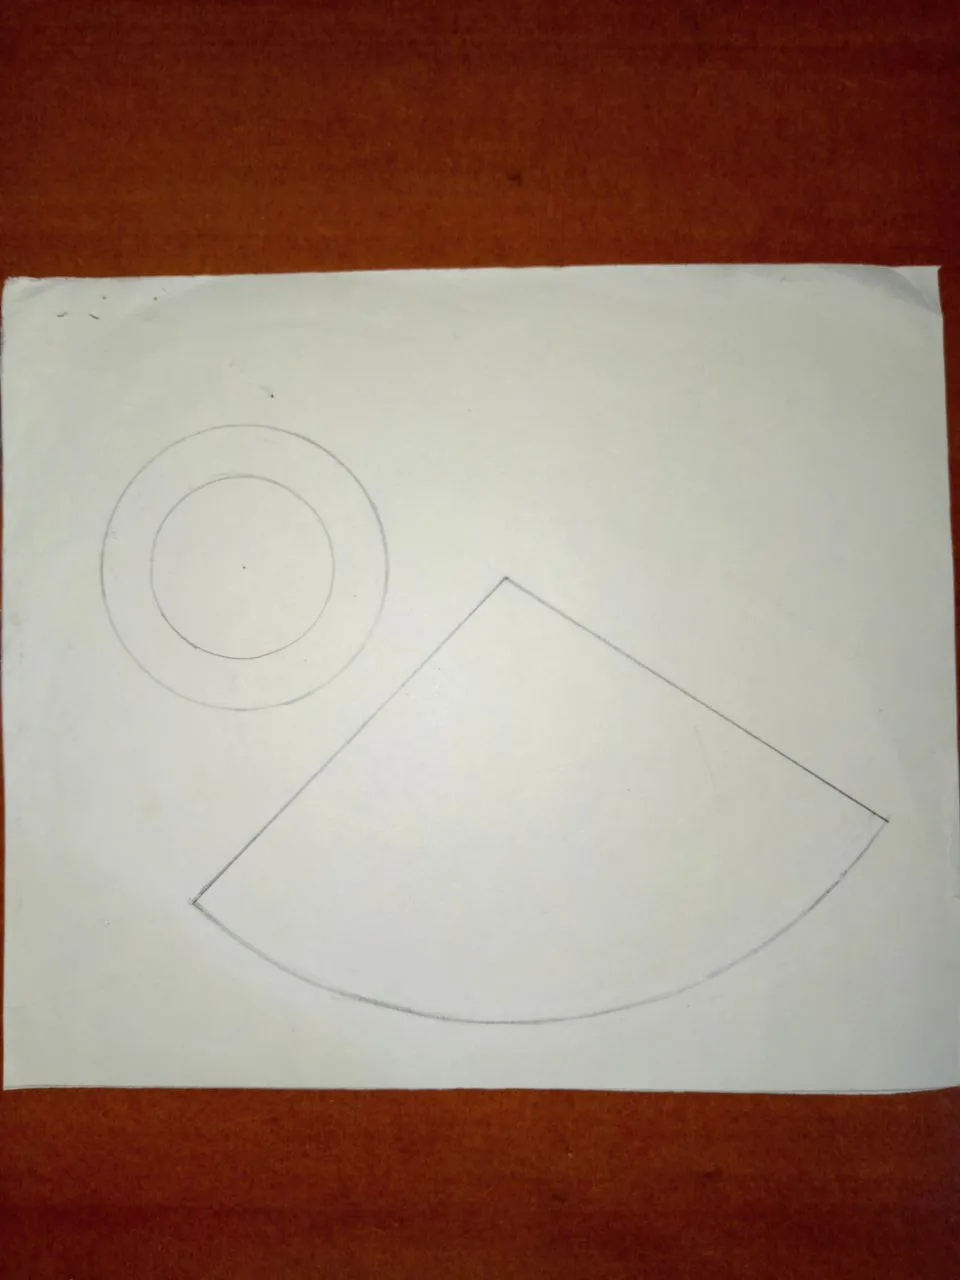
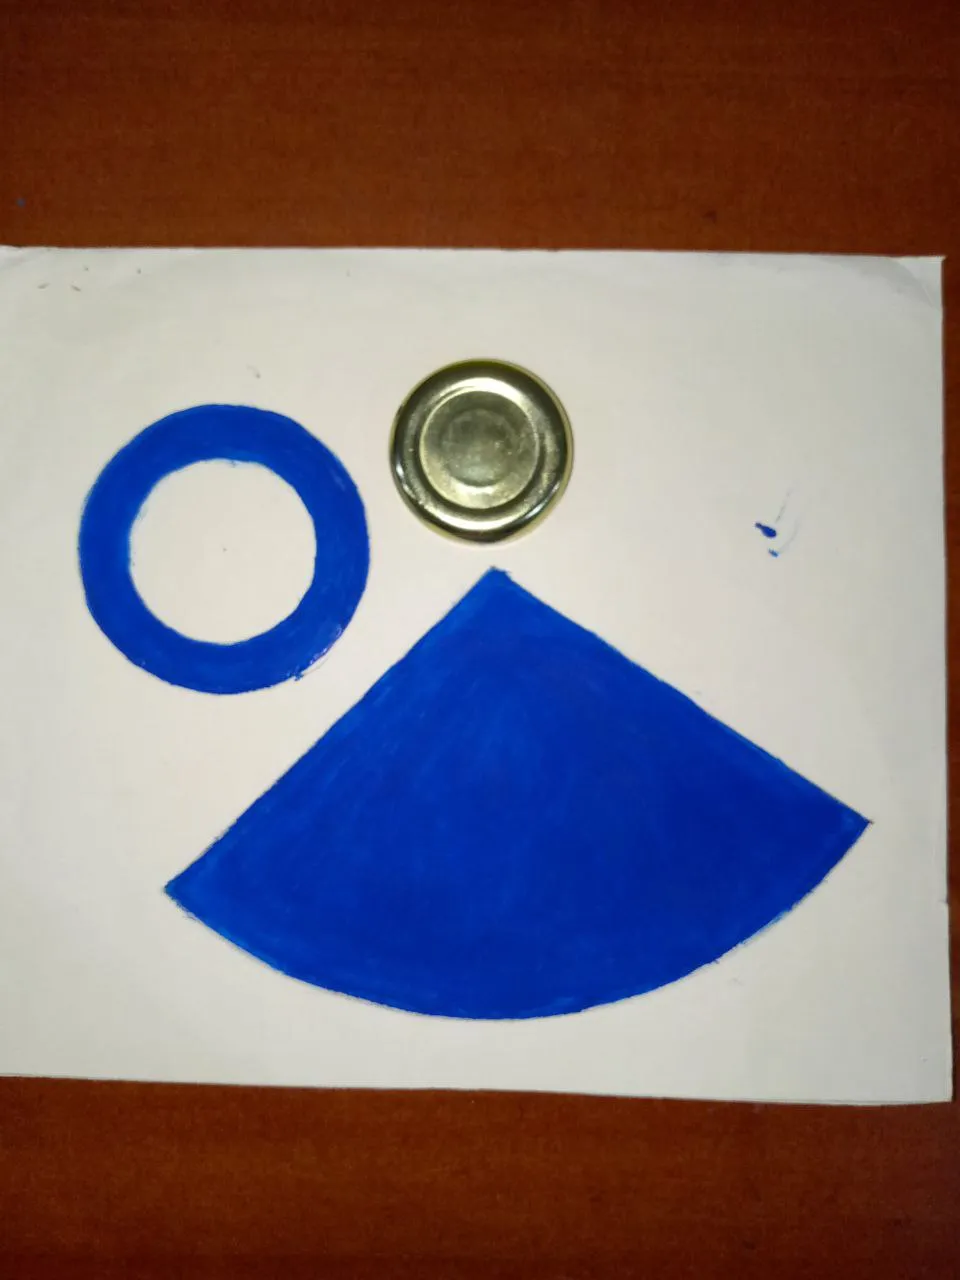
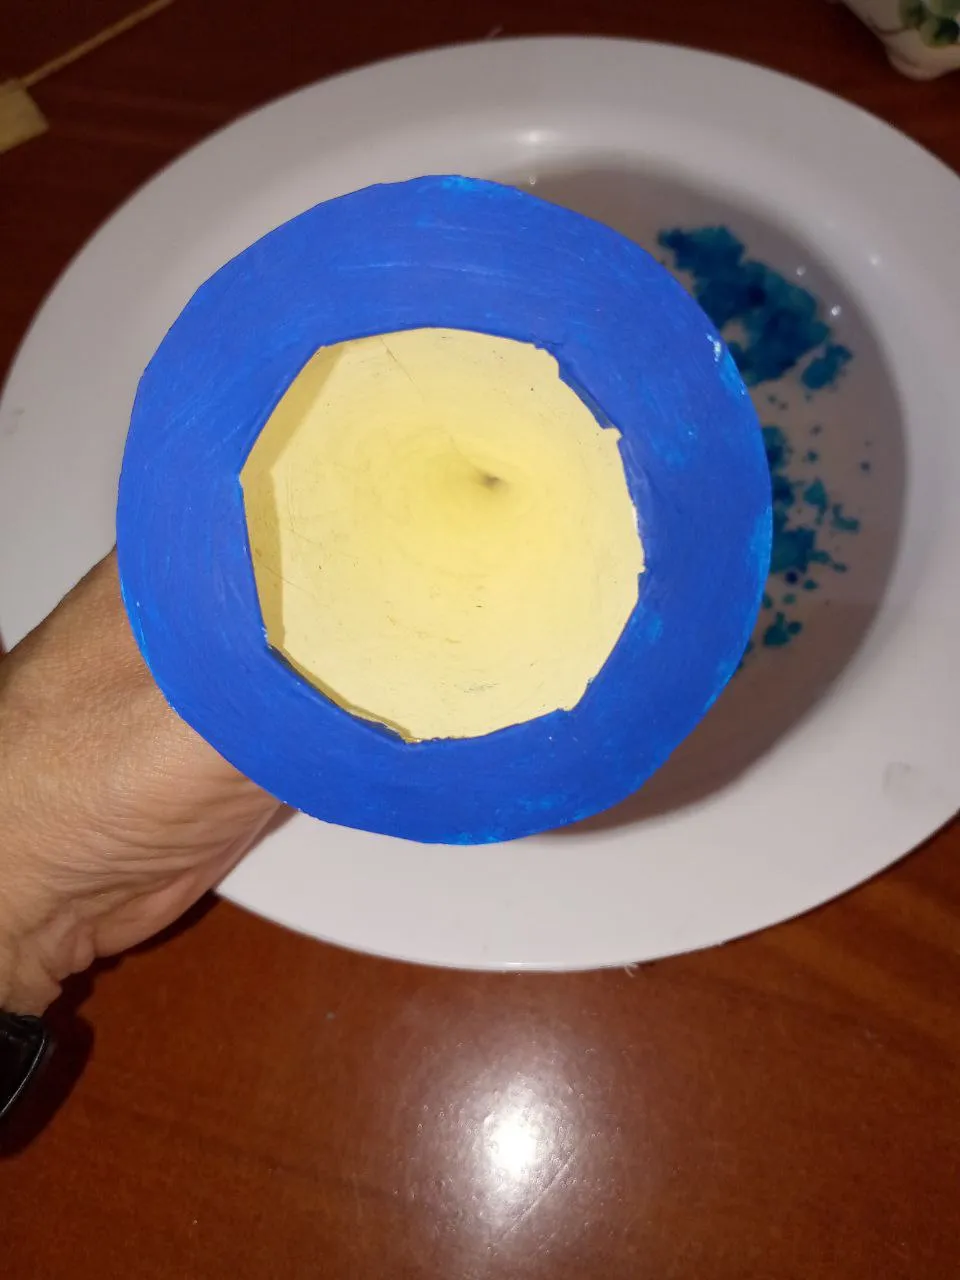
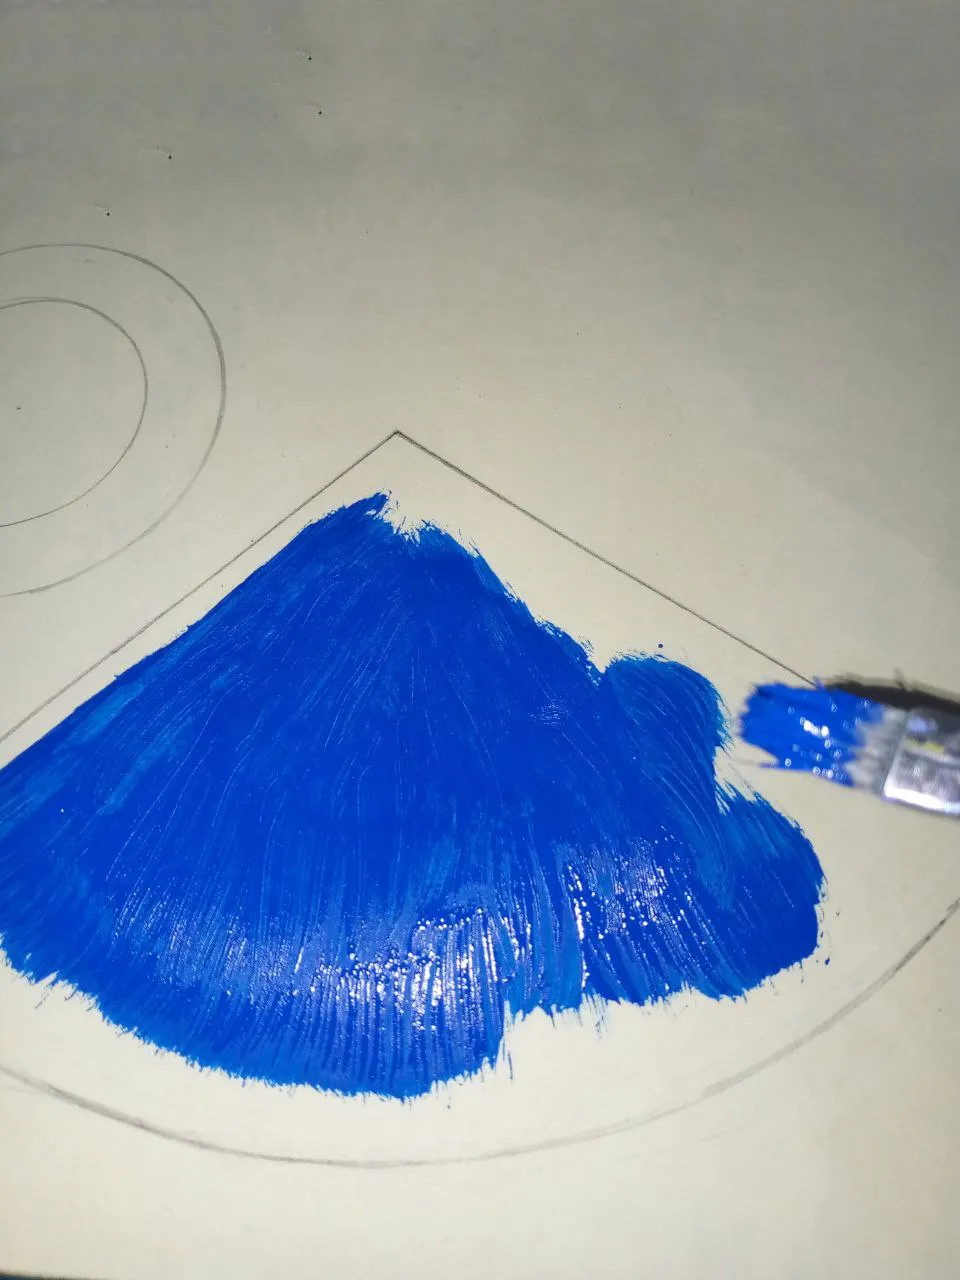
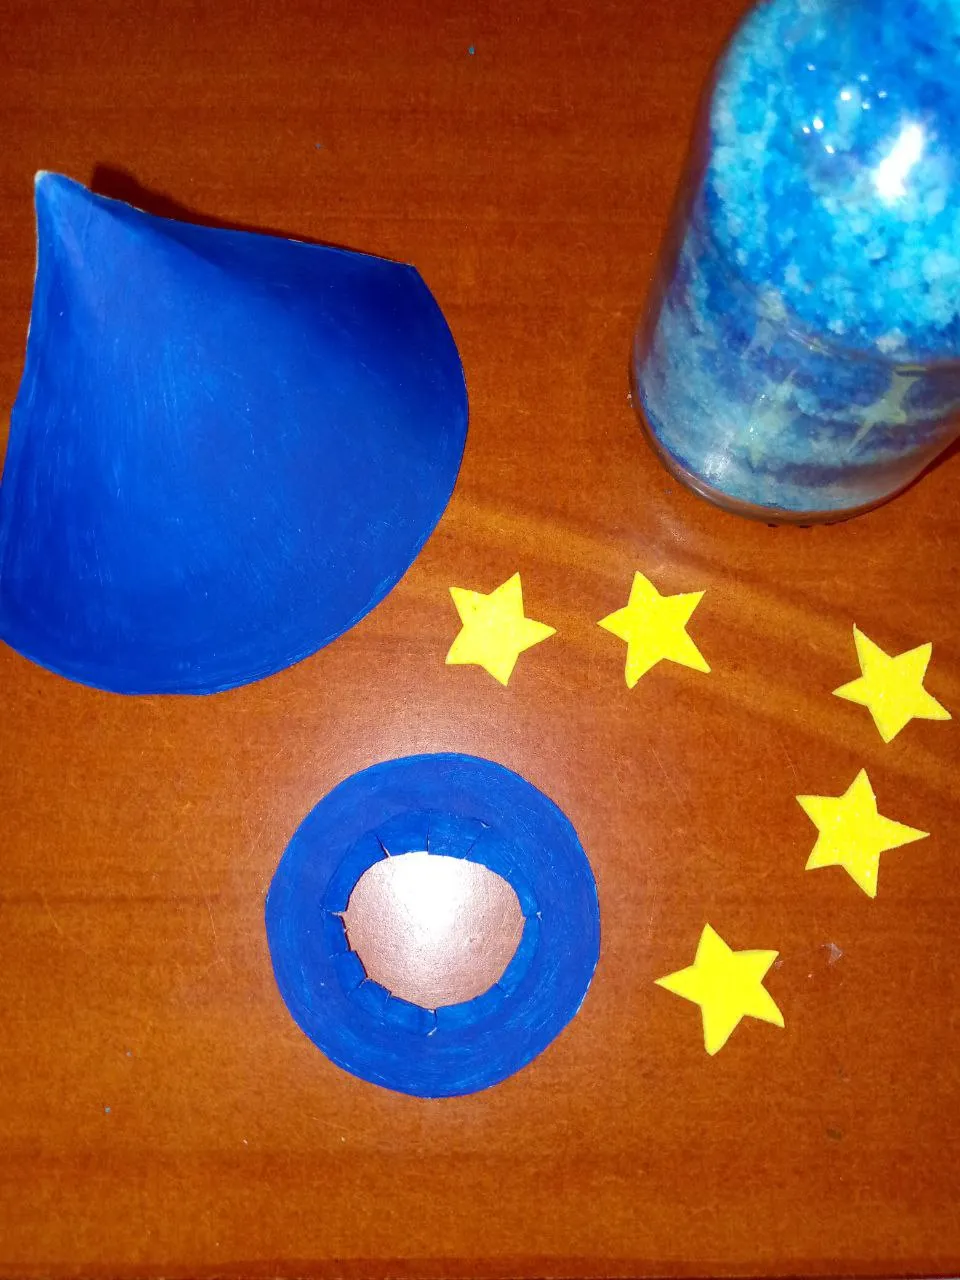
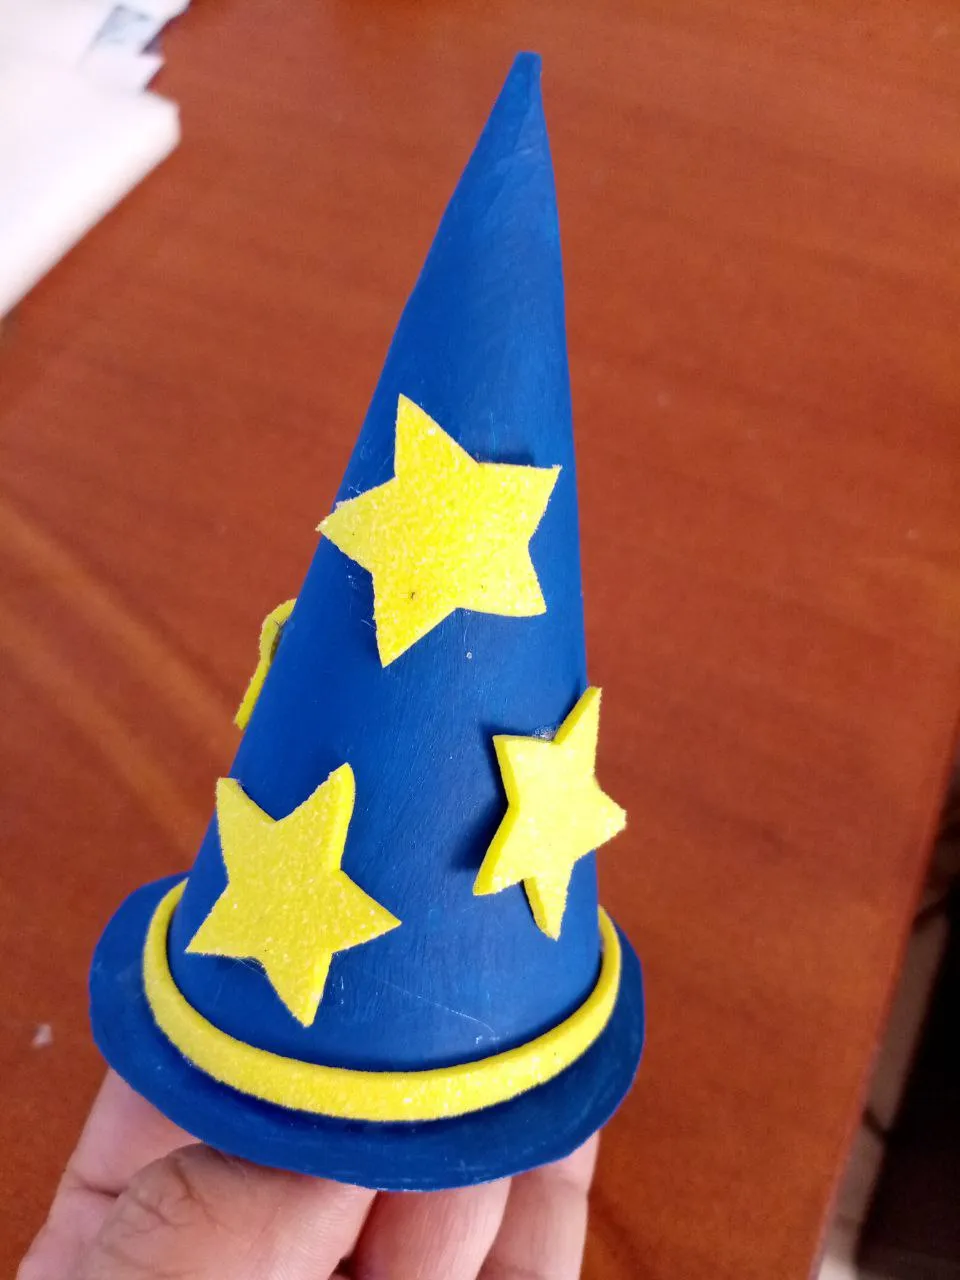
Step 5:
I wanted to make Merlin the wizard's hat out of cardboard, so I looked at some tutorials on the internet to see how to do it. I measured the size of the lid to work out the diameter and from there I used a ruler and compass to make the shape of the cone. Then I painted it with the blue paint and let it dry, while I made the stars with the yellow foami, I also cut a thin strip of the same foami to place around the hat. With the liquid silicone I joined the ends of the cone, then I glued it to the base, glued the stars and the strip to the hat.
Paso 5:
Quería hacer el sombrero del mago Merlín con cartulina, así que miré algunos tutoriales en Internet para ver cómo hacerlo. Medí el tamaño de la tapa para calcular el diámetro y a partir de ahí utilicé una regla y un compás para hacer la forma del cono. Luego lo pinté con la pintura azul y lo dejé secar, mientras hacía las estrellas con el foami amarillo, también corté una tira fina del mismo foami para colocarla alrededor del sombrero. Con el silicón líquido uní los extremos del cono, luego lo pegué de la base, pegué las estrellas y la tira al sombrero.
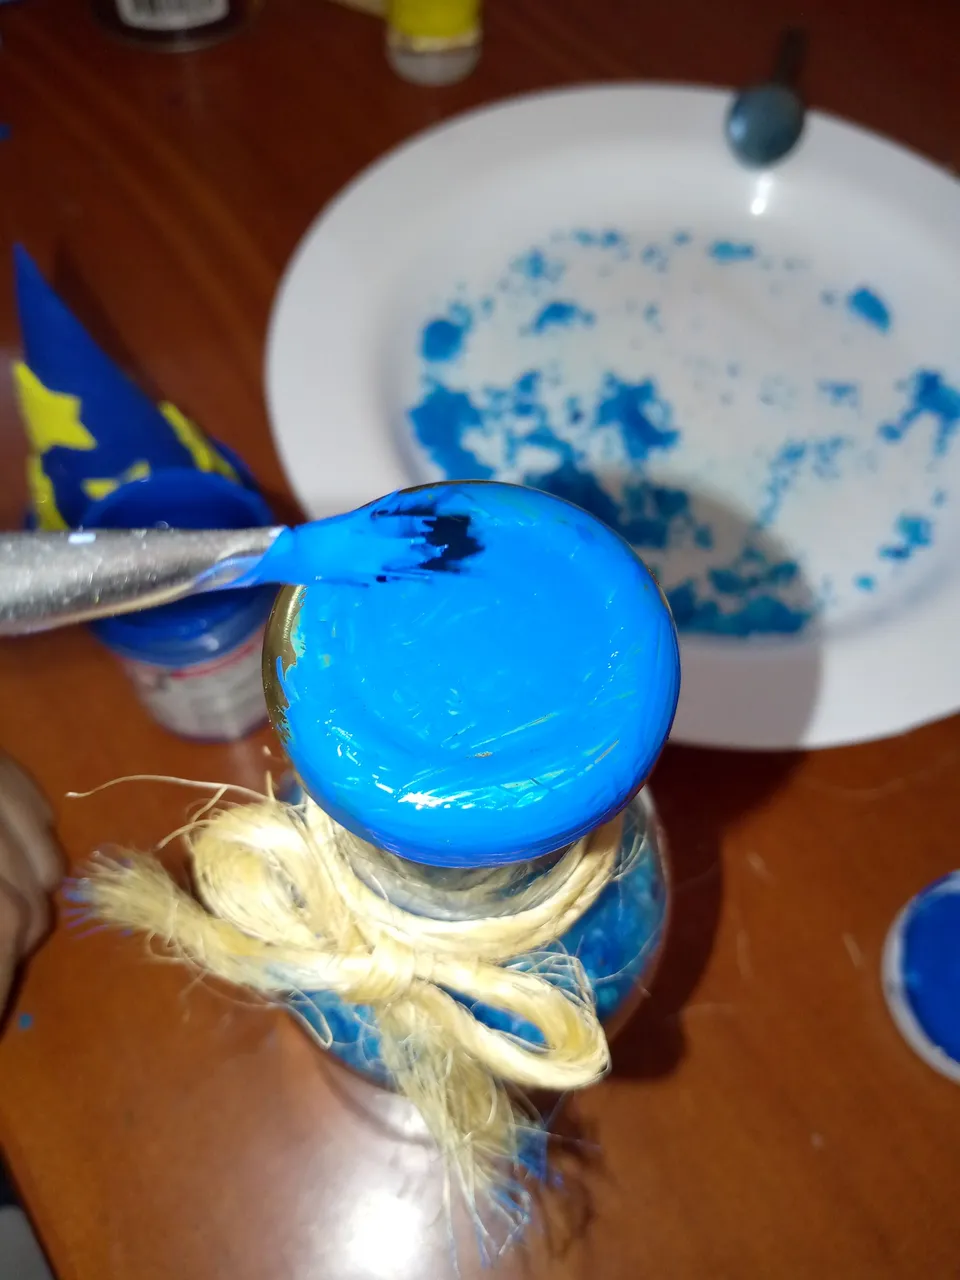
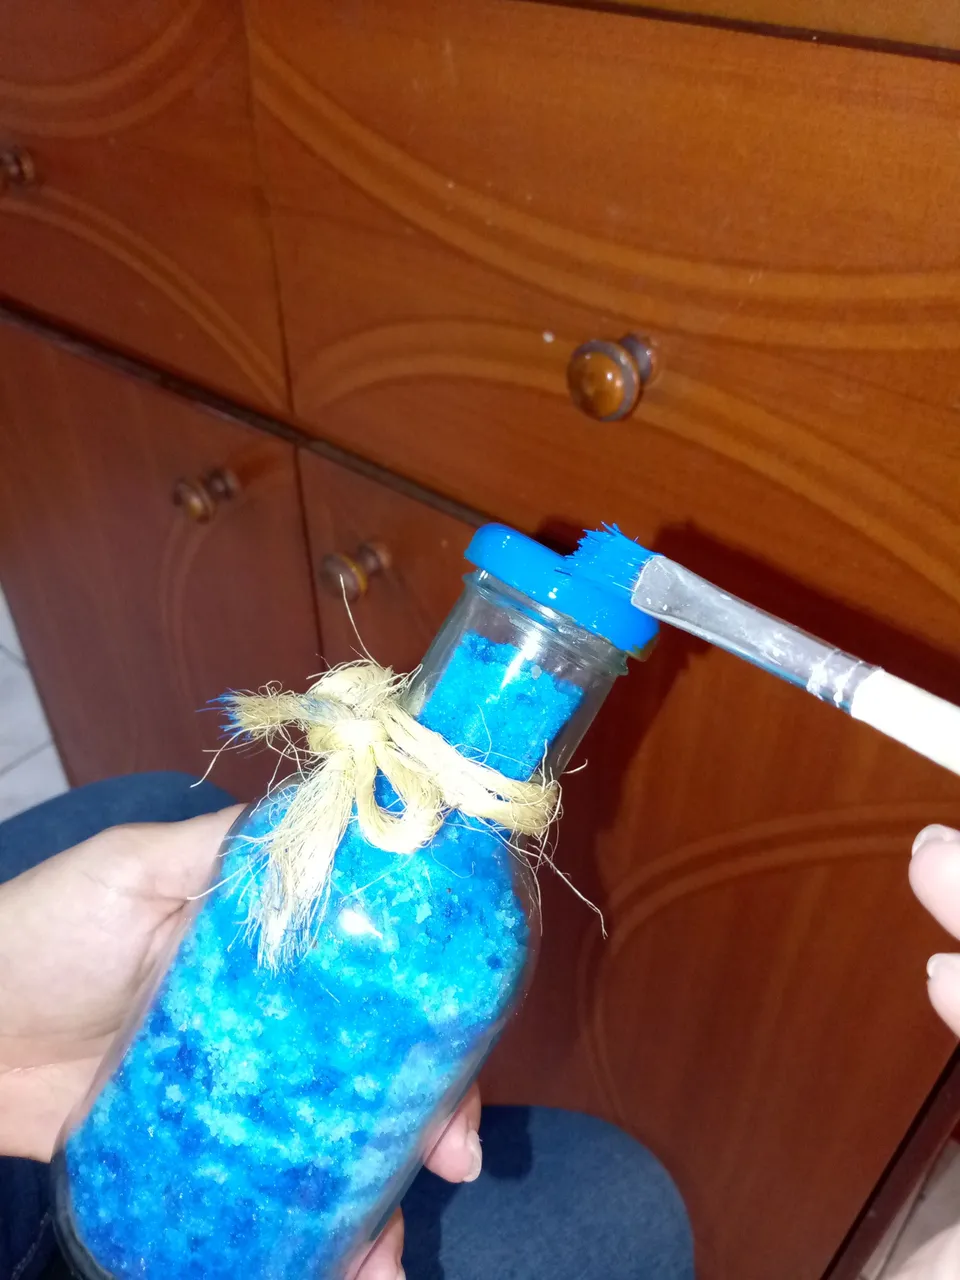
Step 6:
To finish, take the rope and twist it around the bottle three times, knot it with a ribbon. Paint the top of the bottle with the blue paint, let it dry well.
Paso 6:
Para finalizar , se toma el mecatillo y dar tres vueltas sobre la botella, anudar con un lazo. Pintar la tapa de la botella con la pintura azul, dejar secar bien.
Final Result / Resultado Final
"I wish you all the beautiful magic in the world for each of your days! "
¡Te deseo toda la magia bonita del mundo para cada uno de tus días!

Todas las fotos son de mi propiedad // All photos are my property
Portada editada en Canva // Cover edited in Canva
Separadores realizados en Canva // Dividers made in Canva
Traducción realizada con www.deepl.com // Translation made with www.deepl.com

O