
Saludos mis amigos de #hive especialmente a mis amigos de esta hermosa comunidad de #diyhub a la cual tenía tiempo sin poder visitar, por la situación tan tremenda por la que estoy viviendo con la salud de mi esposo, hecho este que me ha mantenido un poco alejada de mis tareas manuales, aunque siempre consigo un espacio para practicar el maquillaje artístico y compartir de vez en cuando con ustedes algunas creaciones.
Quiero darle las gracias a la amiga @ladyaryastark quien me invitó a participar en este evento, y por ese motivo estoy acá, esperando de corazón les guste está mi primera creación para este concurso, tuvo una duración de 5 horas y 21 minutos la realización de este personaje y acá les dejo un poco de como fue el proceso creativo de esta propuesta que les muestro el día de hoy.
🎃 MATERIALES 🎃
🎃 Paletas de maquillaje artístico.
🕷️ Lápiz marrón.
🎃 Sombras de diferentes colores.
🕷️ Polvo suelto translúcido.
🎃 Brochas y pinceles.
🕷️ Borlas triangulares.
🎃 Esponjas.
🕷️ Peluca de payaso.
🎃 Sangre artificial.
🎃 PROCESO CREATIVO 🎃
🎃 PASO 1
Primero que nada y antes de iniciar el maquillaje realice mi rutina de skin care para preparar la piel,así como para protegerla del uso del maquillaje, y también porque cuando nuestra piel está bien hidratada y preparada los maquillajes tienen mejor acabado.
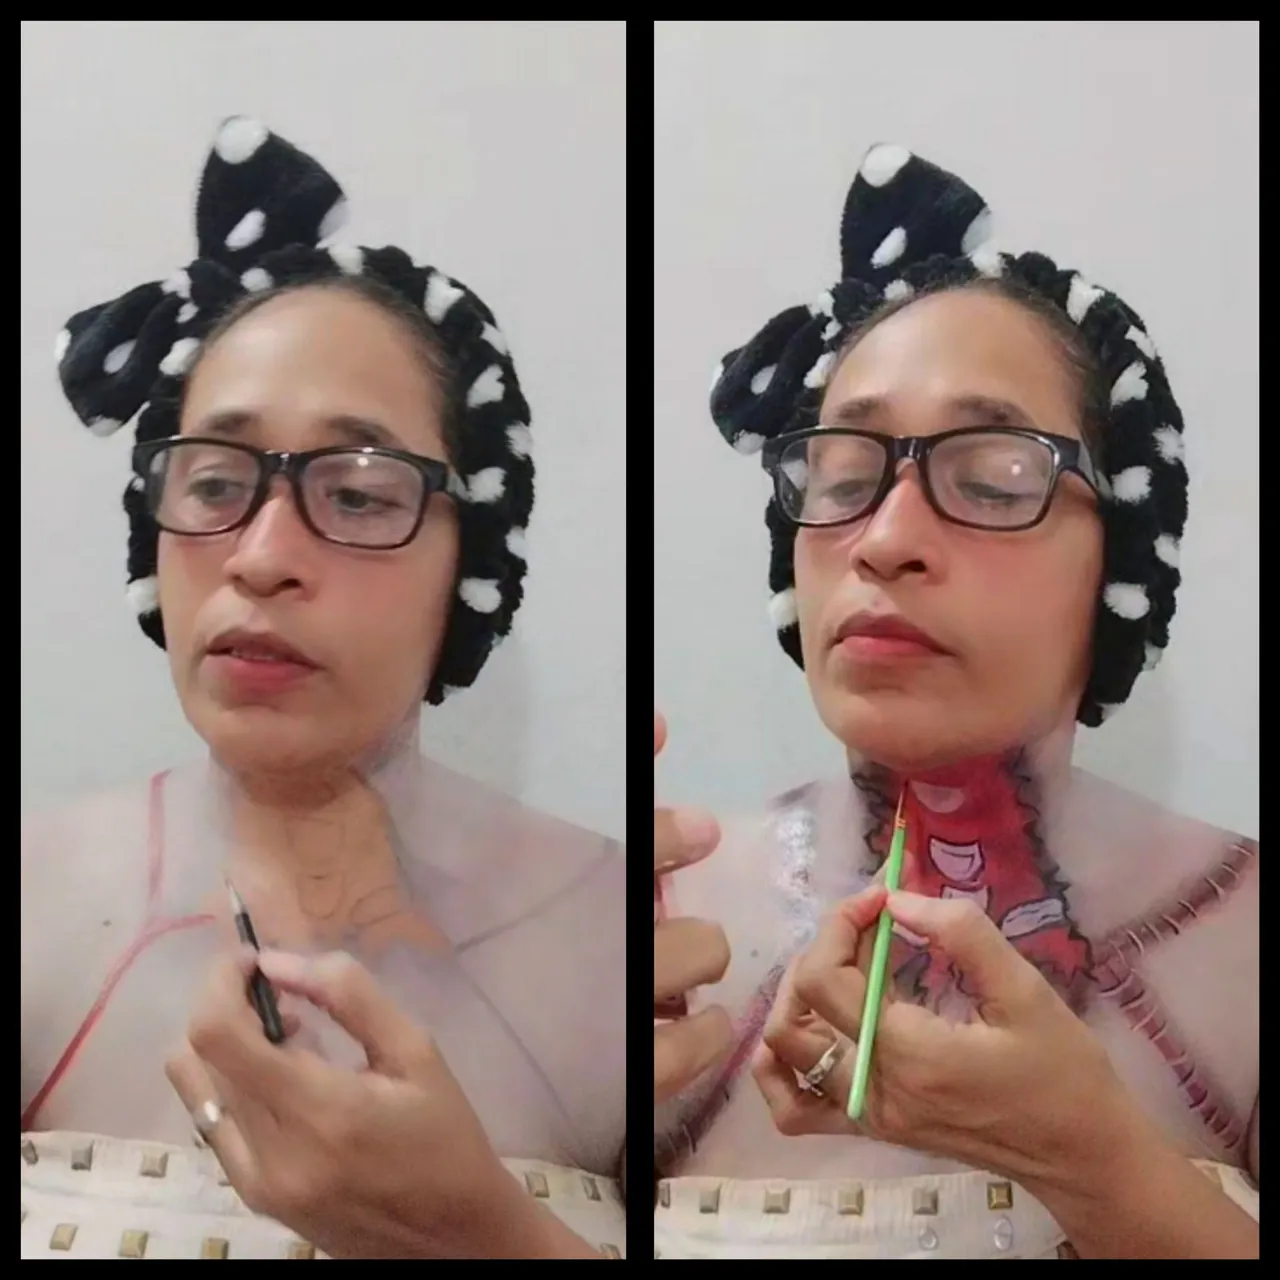
Luego de preparar la piel, tomé el lápiz marrón y en mi torso dibuje unas líneas que vendrán a ser las heridas, además dibuje parte de los huesos.
Cuando ya dibuje, tome primero la pintura corporal de color blanco y la apliqué, luego procedí a colocar pintura de color gris y también la de color piel, todas estas las aplique con el pincel, aclarando que fui colocando el gris y el piel en diferentes partes aleatorias, luego con una esponja húmeda difumine todo el maquillaje, dando como resultado un aspecto de piel en descomposición qué era lo que estaba buscando realizar.
Luego tomé el pincel fino y con la pintura roja marque las líneas que dibuje, también rellene el dibujo del cuello, y los huesos con el color blanco, al terminar sellamos todo con el polvo suelto translúcido y retiro el exceso con la brocha gruesa.
Luego tomé la sangre artificial y la aplicó encima de las líneas que dibuje de rojo, al terminar tomé un pincel fino y con la pintura de color negro dibuje las grapas encimas de la sangre artificial, luego con la pintura blanca les di luz pintado le las orillas de blanco.
🎃 PASO 2
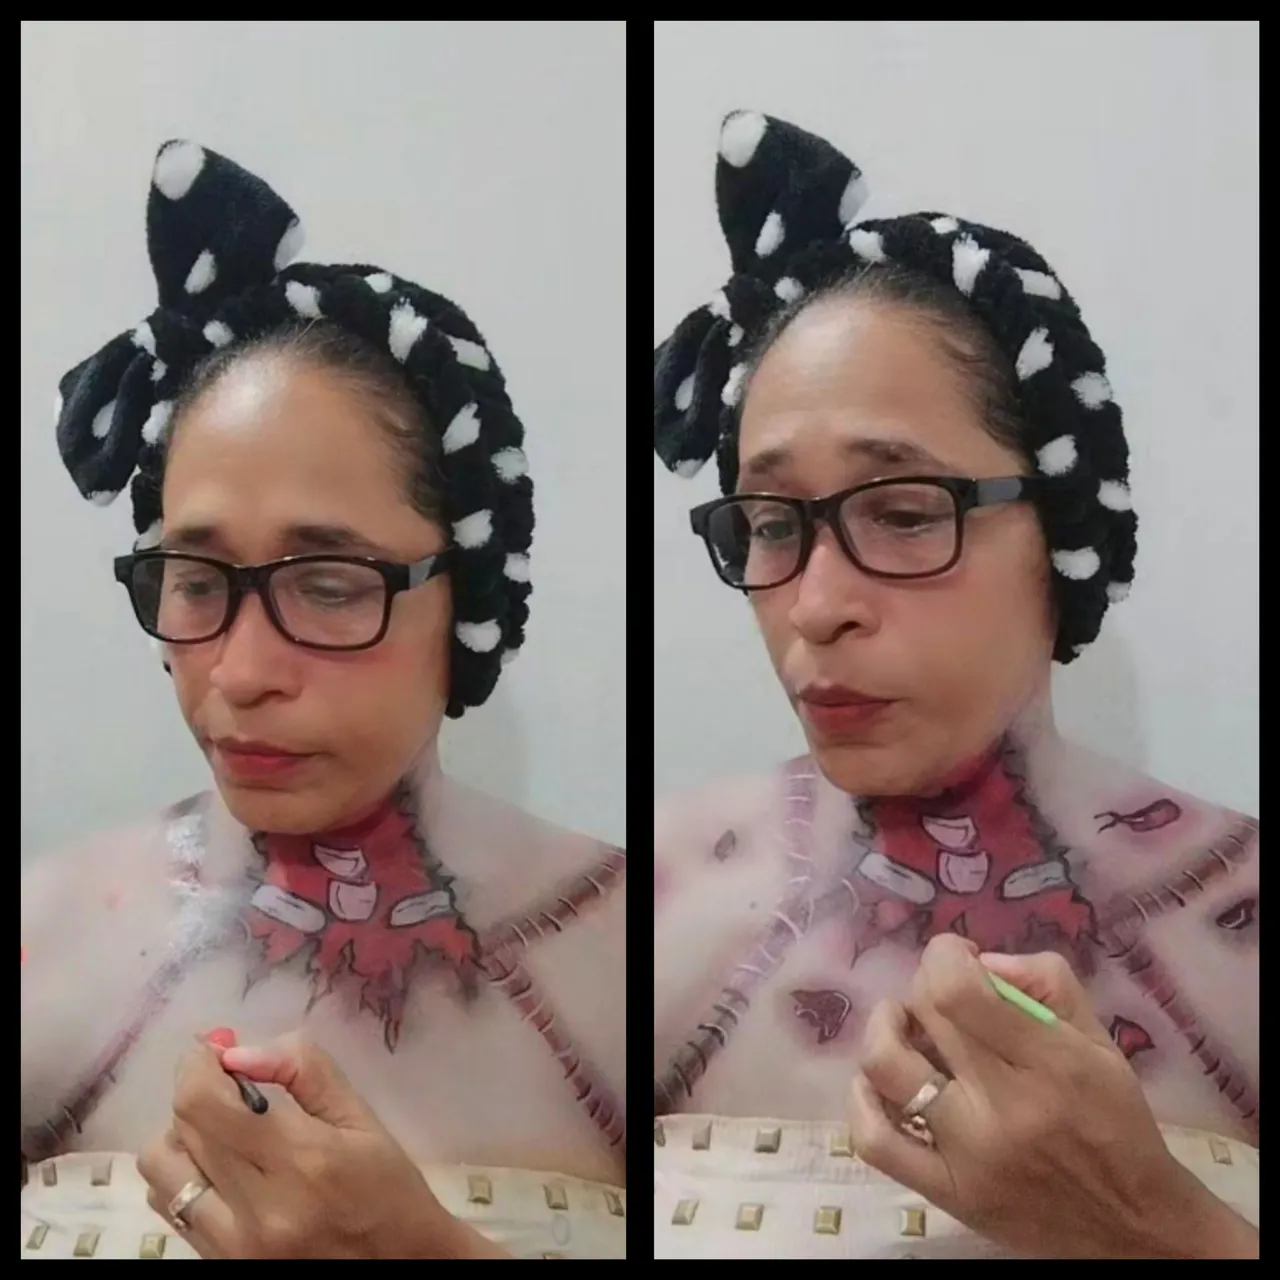
Tome el pincel y la pintura roja y dibuje diferentes marcas en el cuerpo que simulan la piel rasgada, las selló con el polvo suelto translúcido y aplico sombras negras, rojas, y un poco de morado. Luego tomé un pincel de difuminar y aplicó sombra negras en las cicatrices y con la pintura negra delineamos.
🎃 PASO 3
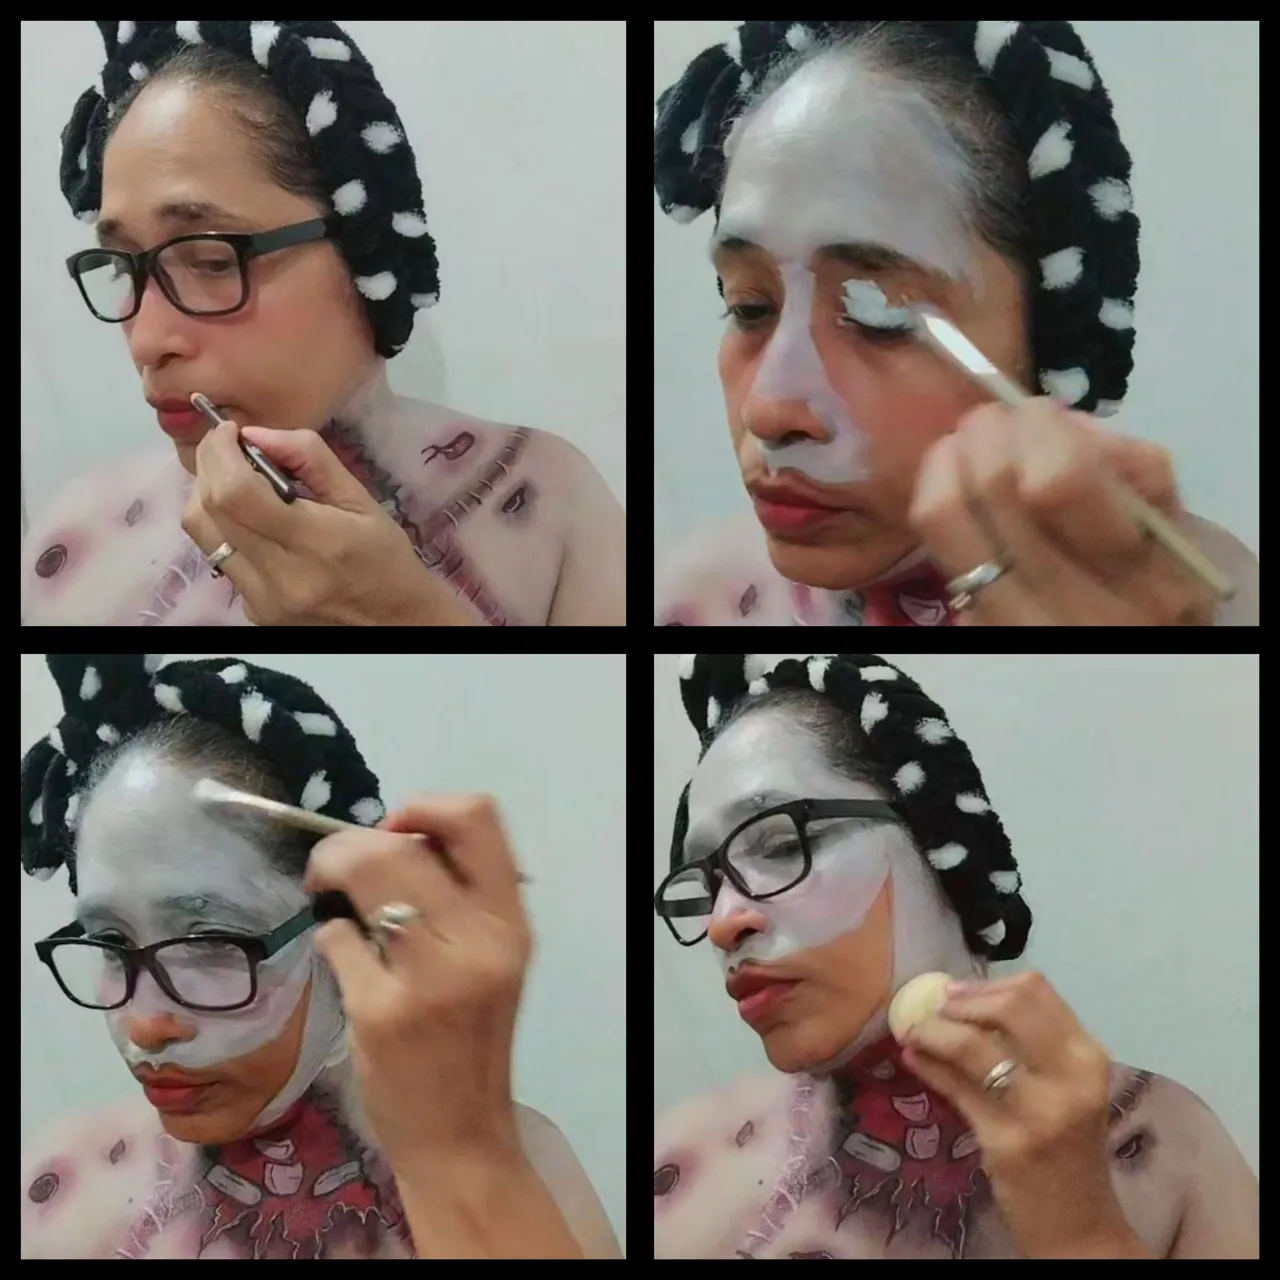
Ahora pasamos a la parte del rostro, para esto, con el lápiz marrón dibujo la boca de mi personaje, luego tome la pintura blanca y con un pincel aplico la pintura en el rostro asegurandome que cubra bien todos los espacios, luego con una esponja húmeda y a toquecitos difumine la pintura .
🎃 PASO 4
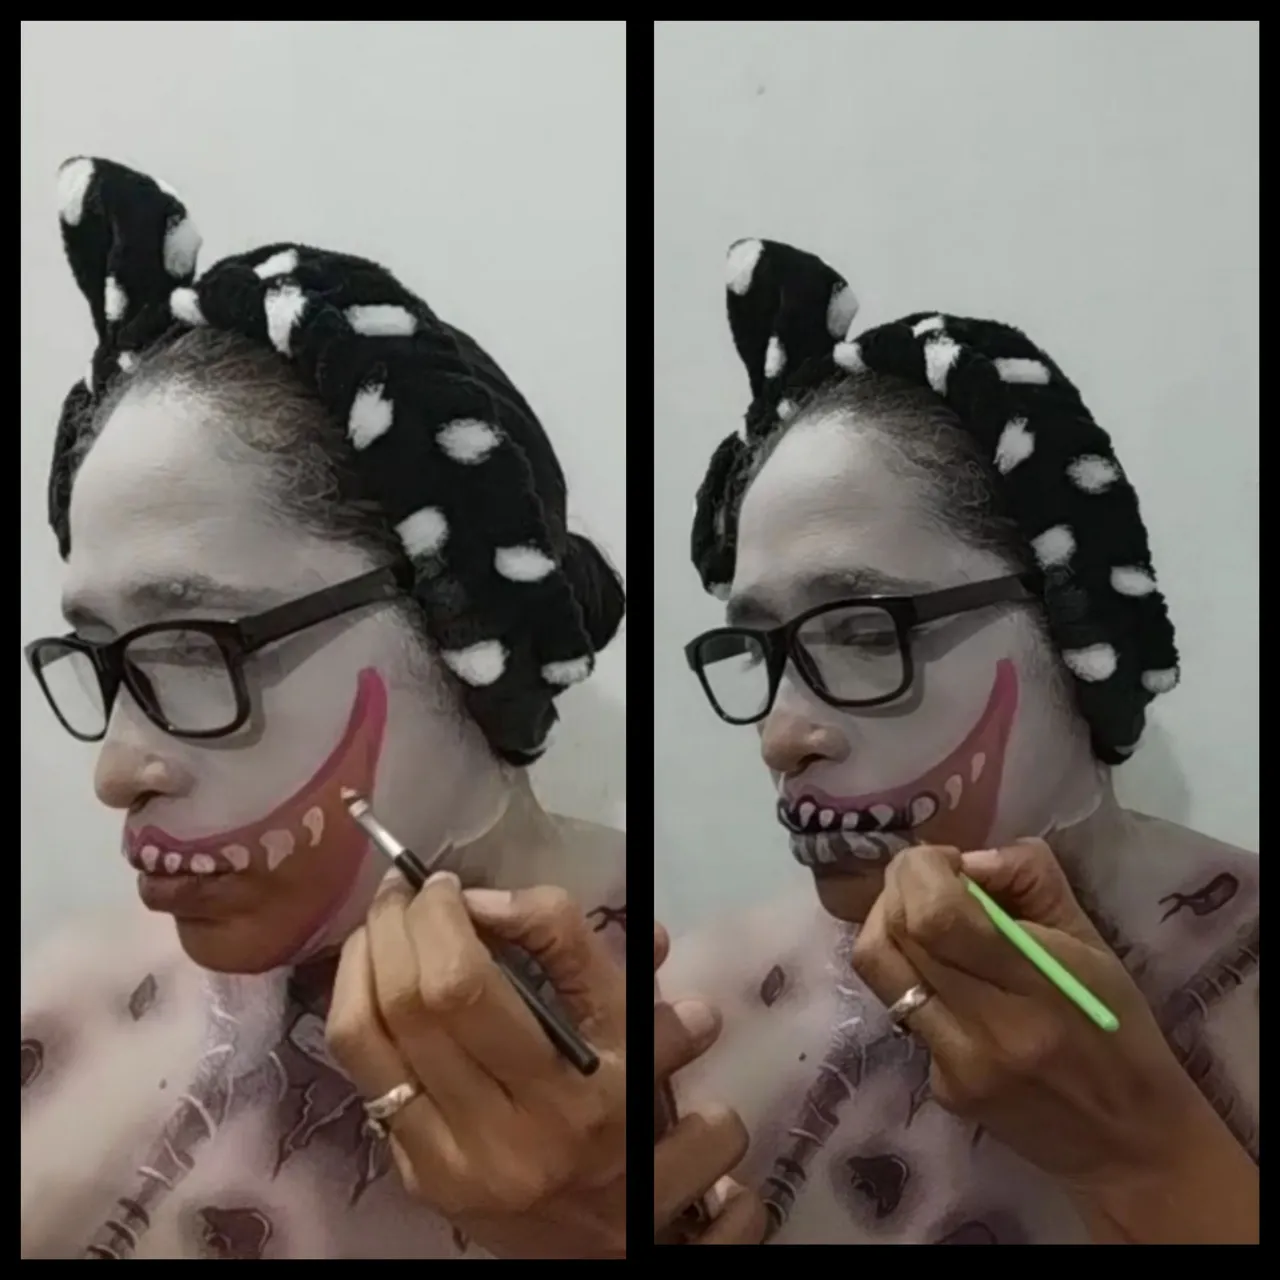
Ahora tome un pincel plano pequeño y con la pintura de color rosa delineamos el borde de la boca de mi personaje y con la borla triangular sellamos con el polvo suelto.
Seguidamente tomé un pincel fino y la pintura blanca y fui dibujando los dientes, luego con la pintura negra delineamos y rellenamos los espacios restantes de la boca.
🎃 PASO 5
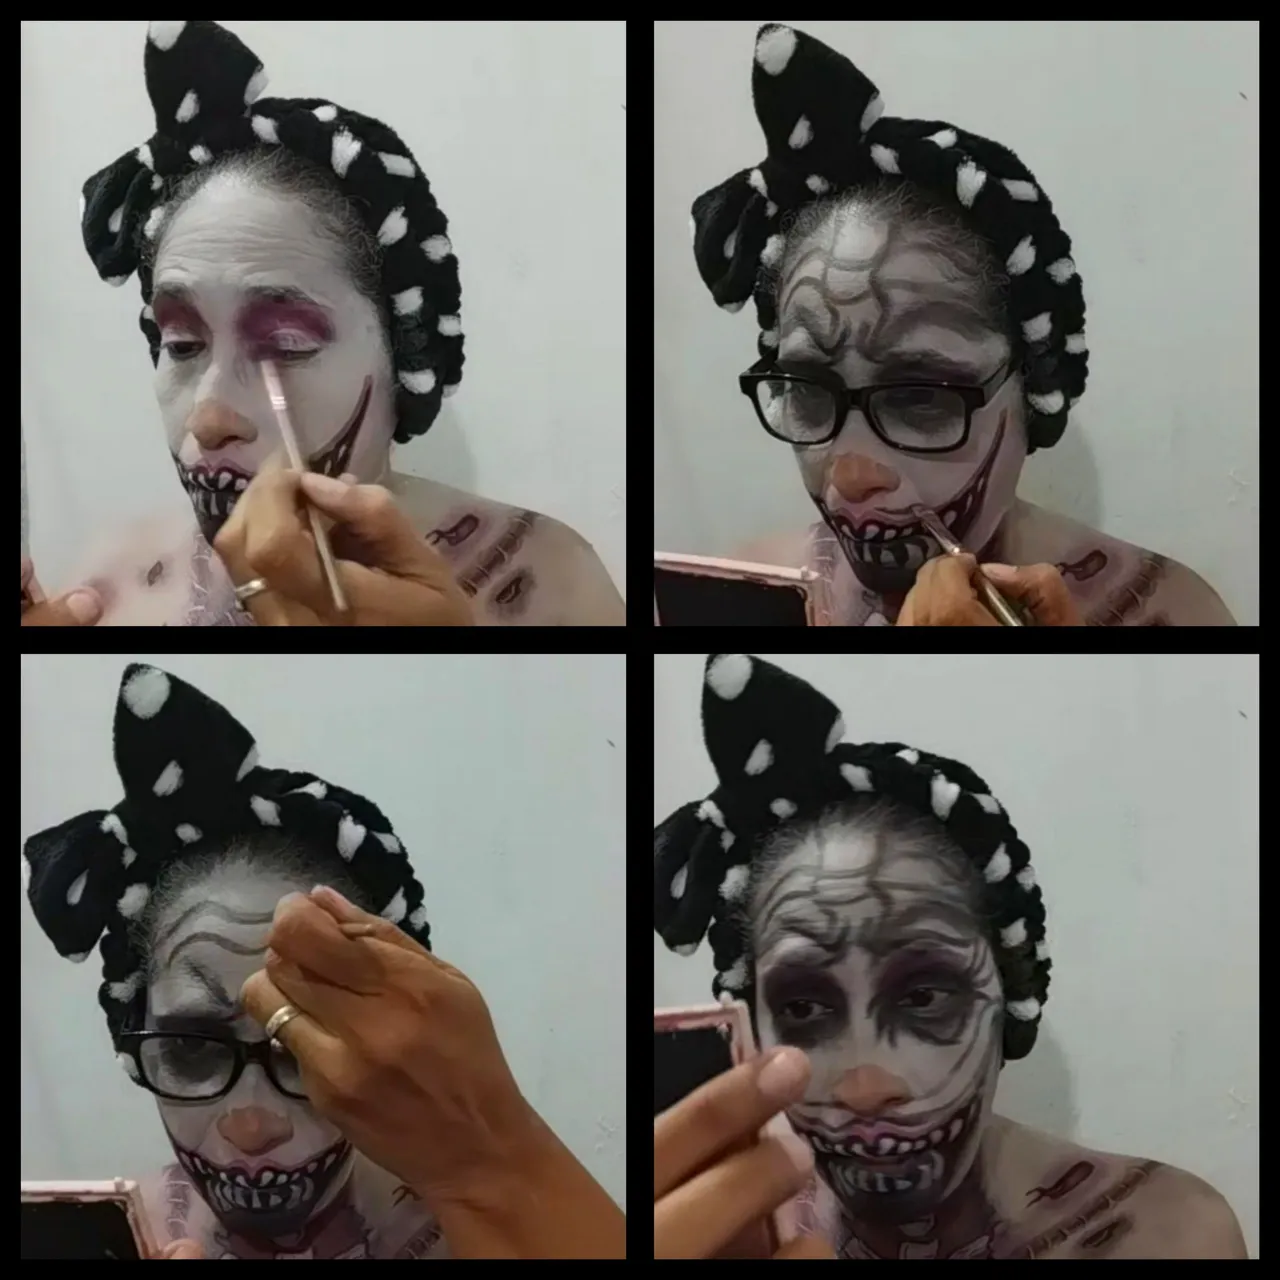
Tome el pincel para sombrear y con las sombras rojas y negras aplicó en el párpado además de en la línea de agua. Luego con otro pincel plano cargado de sombra negra dibuje las líneas de expresión de la frente, boca y ojos del personaje.
🎃 PASO 6
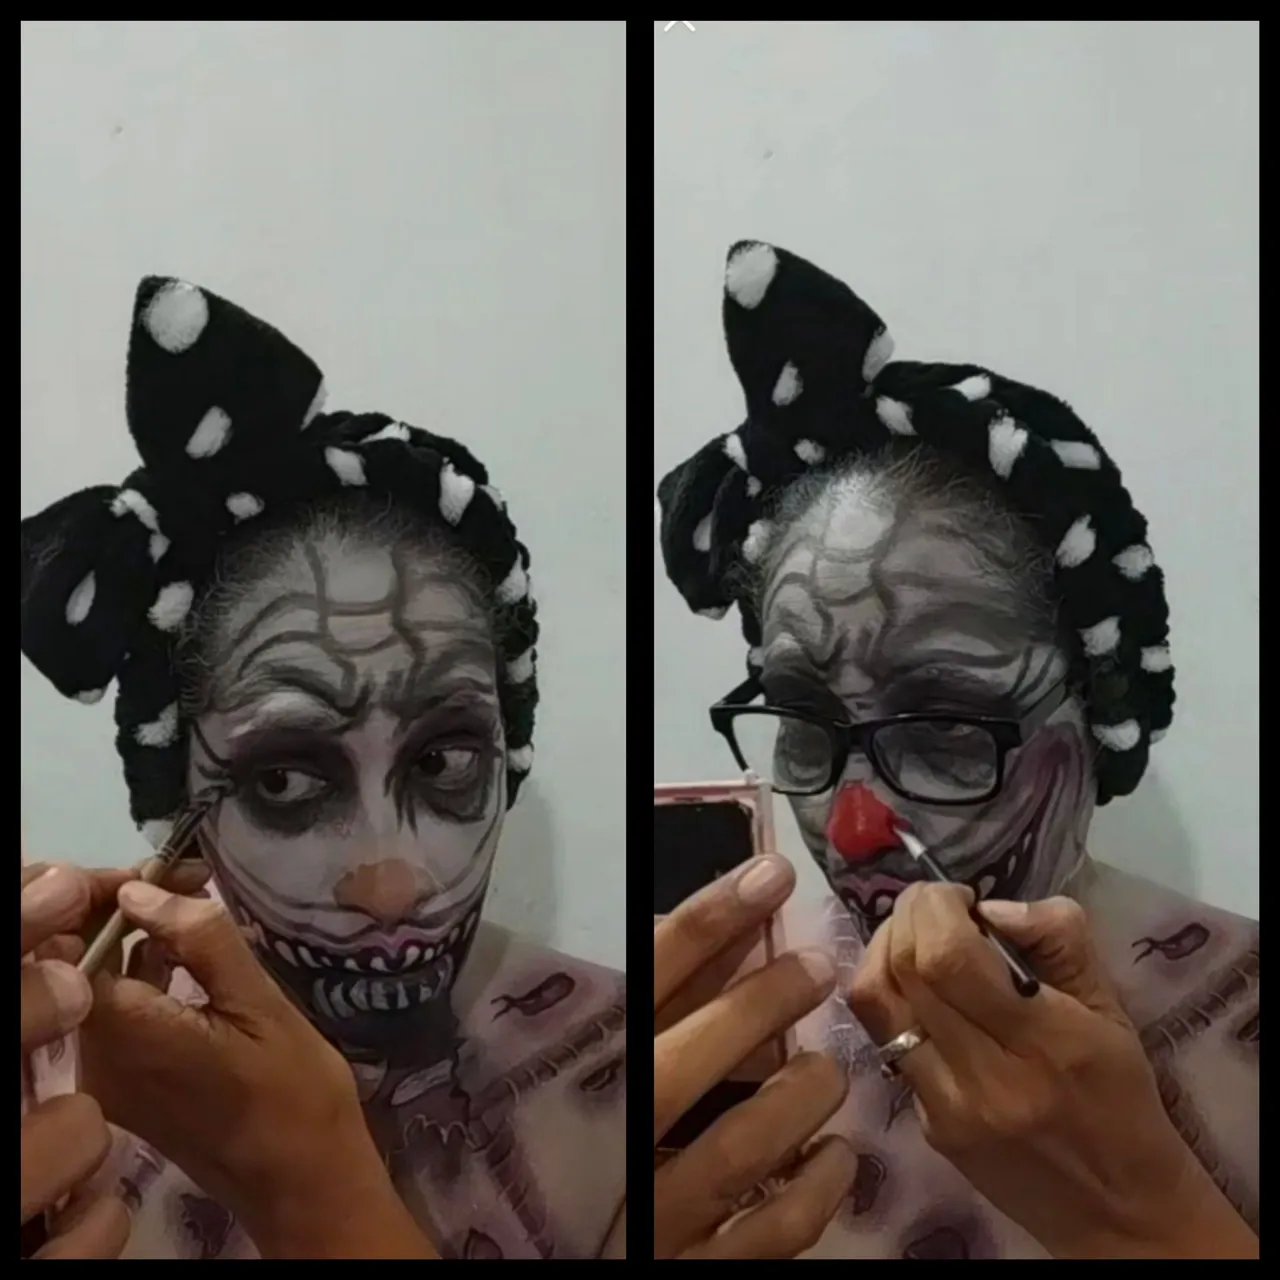
Tome la pintura negra y dibujé unas líneas de expresión a los lados de los ojos luego tome la pintura roja y dibujamos la nariz y de esta forma queda listo nuestro personaje, solo resto arreglarnos el cabello y colocarse la peluca y listo.
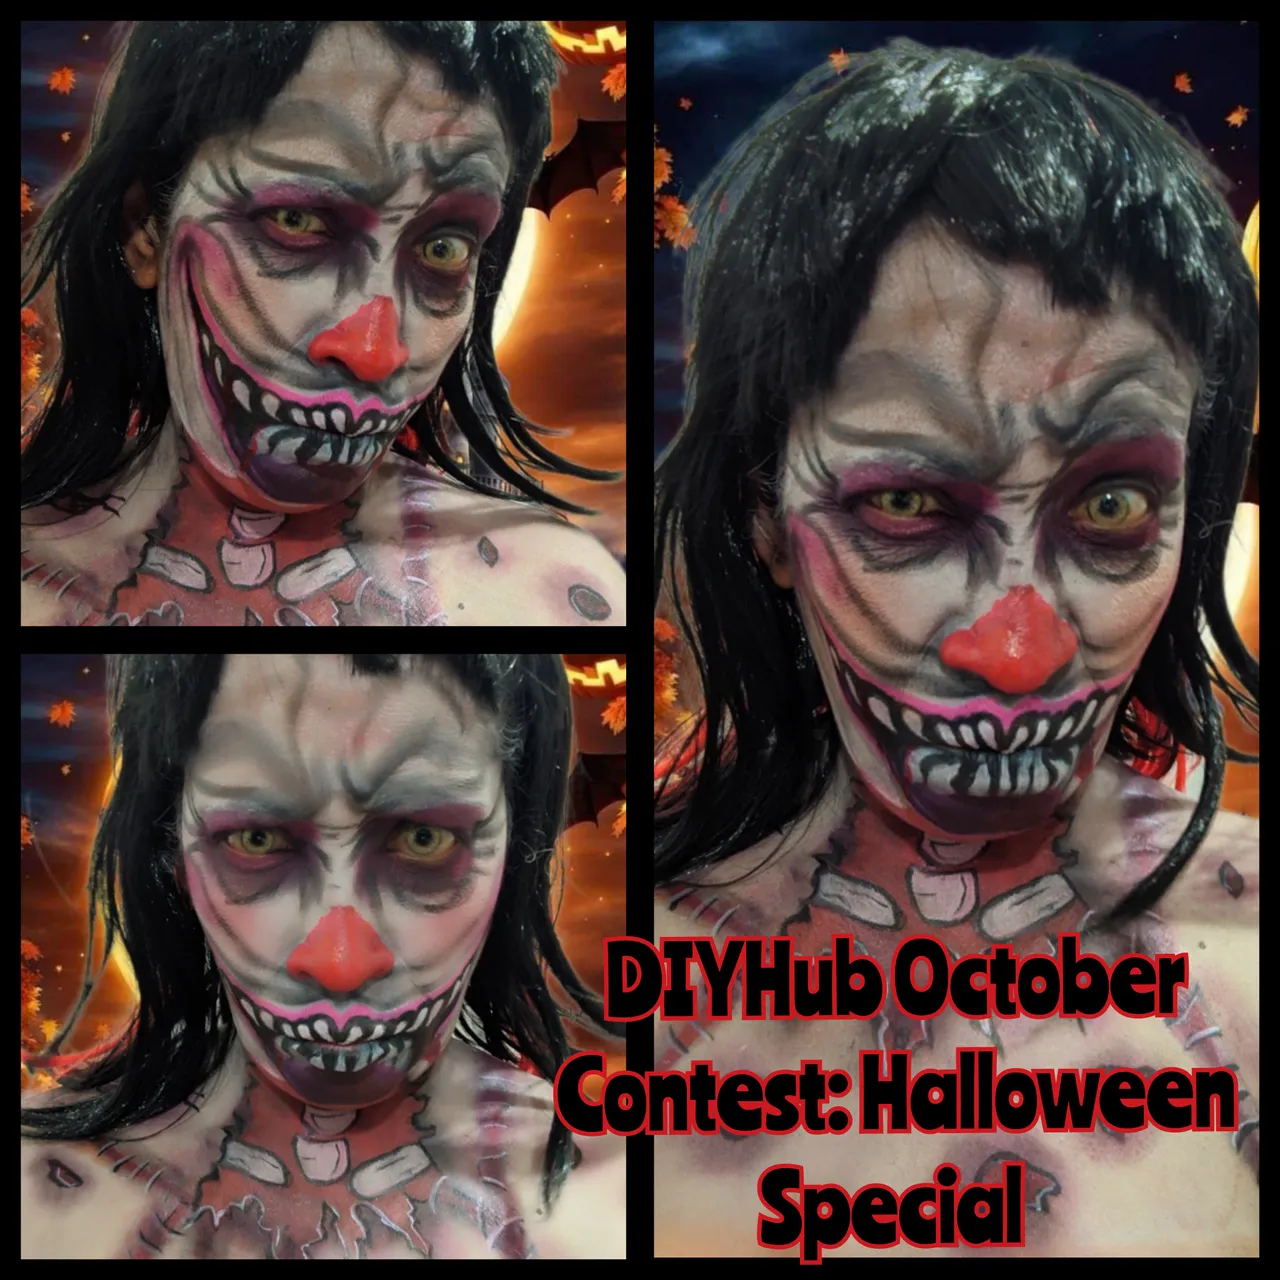
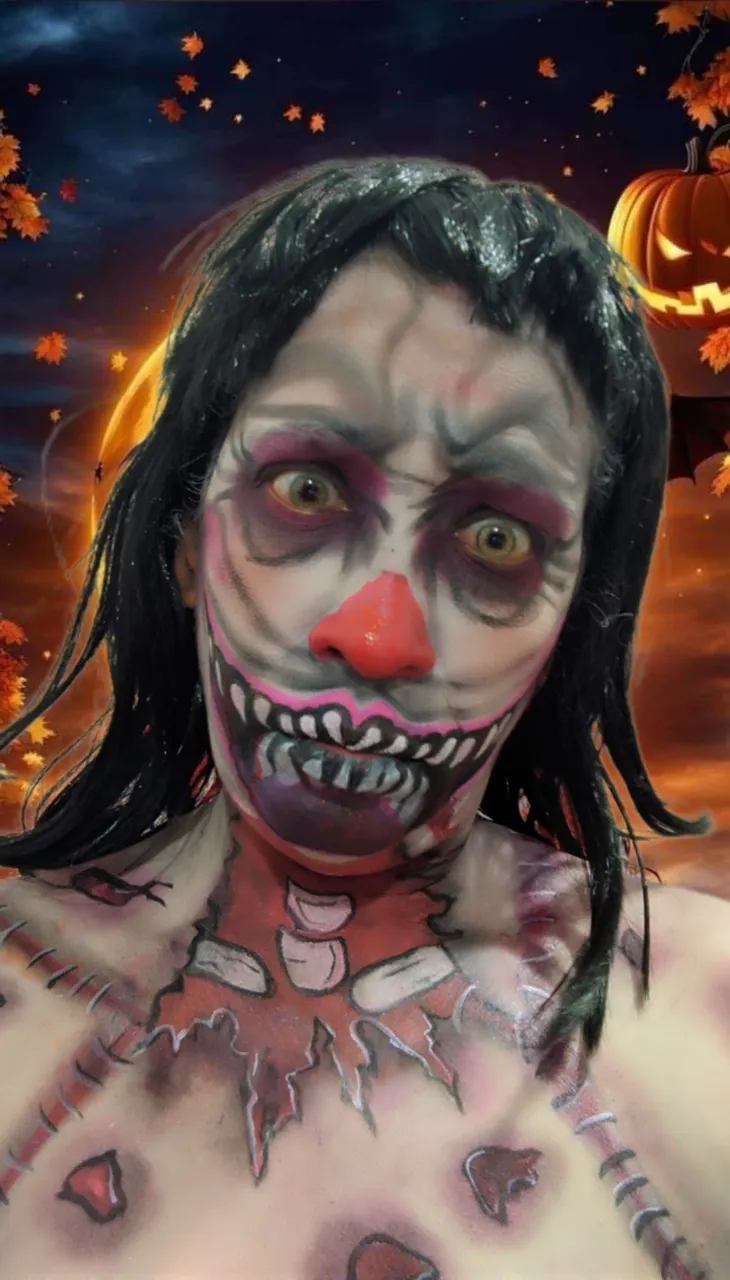
Se dice tan fácil el paso a paso y realmente no lo es, fueron 6 horas de arduo trabajo dándole detalles específicos a mi personaje para lograr el mejor acabado posible, ahora acá les muestro el resultado final, espero que les guste y los lleve directo a una noche de halloween.
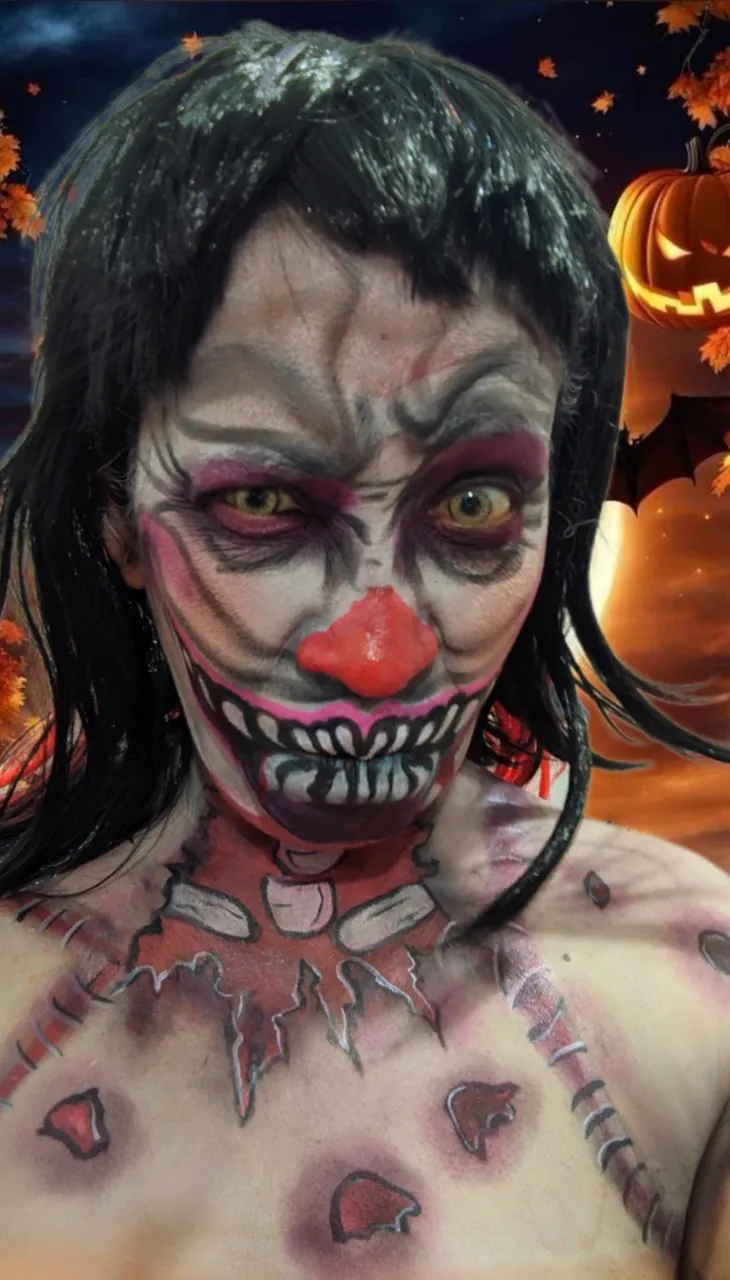
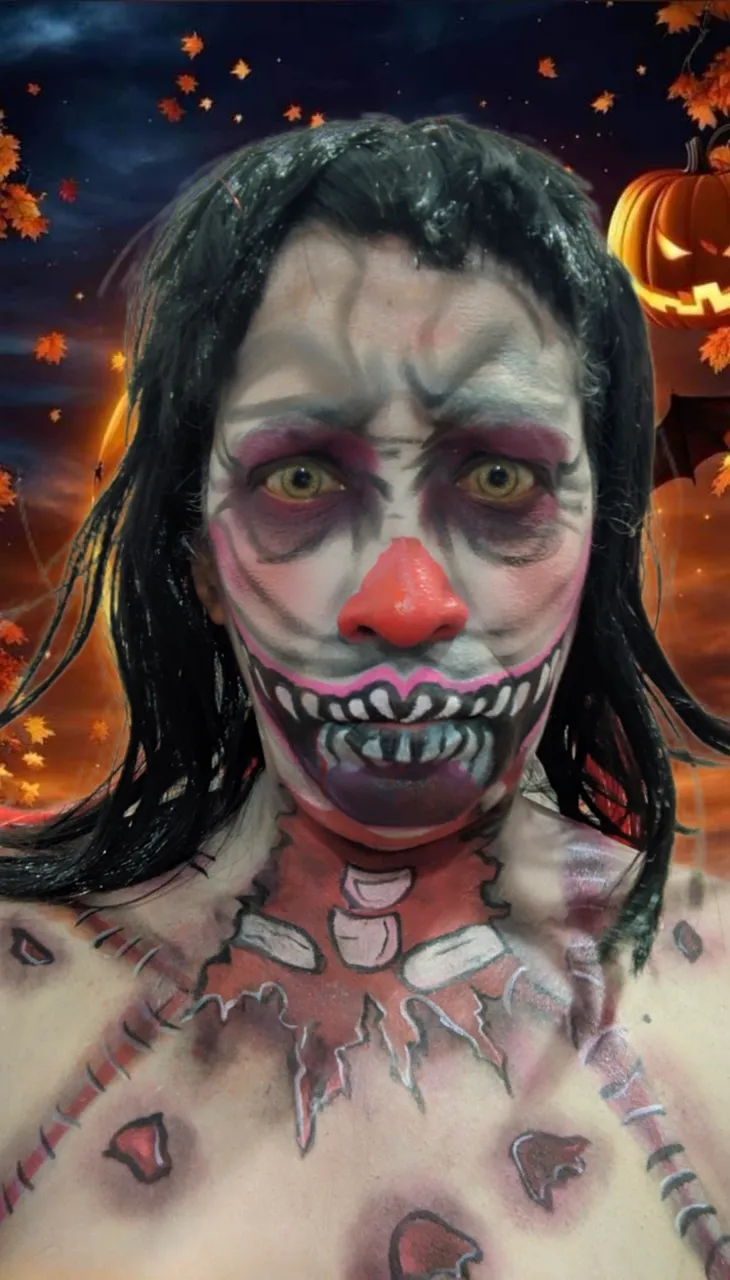
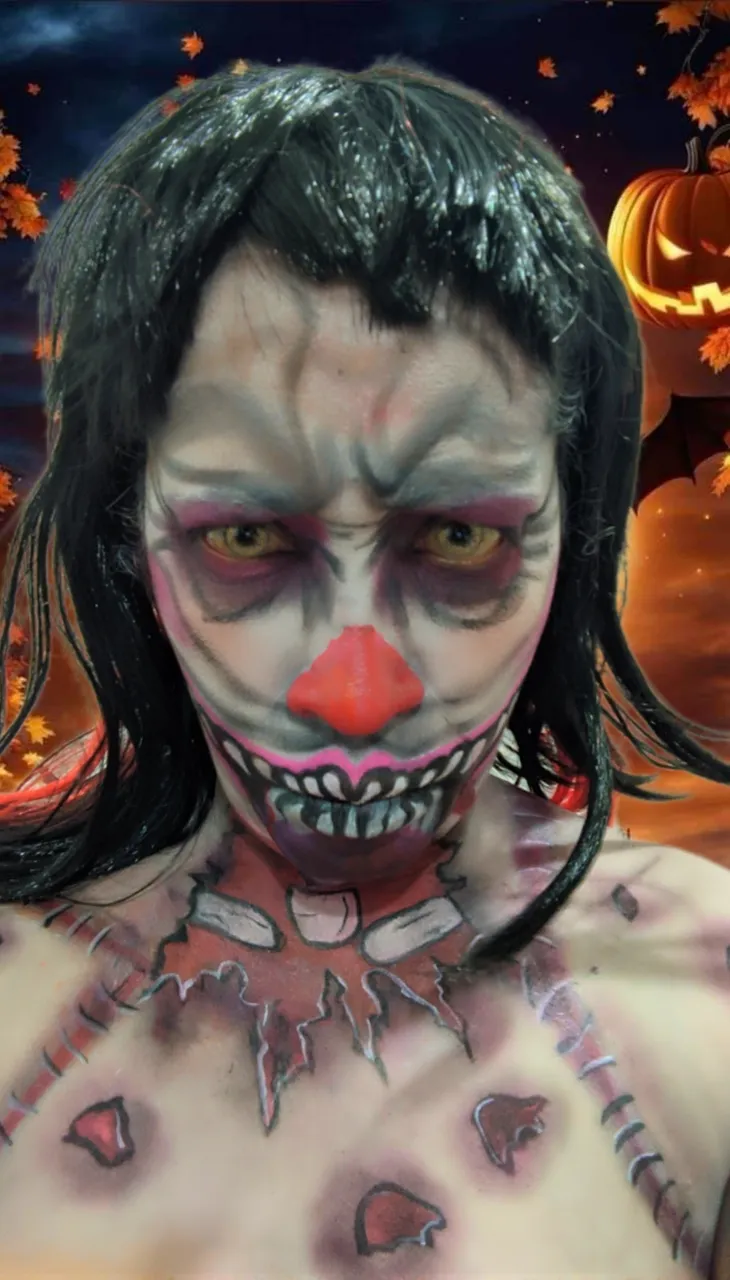
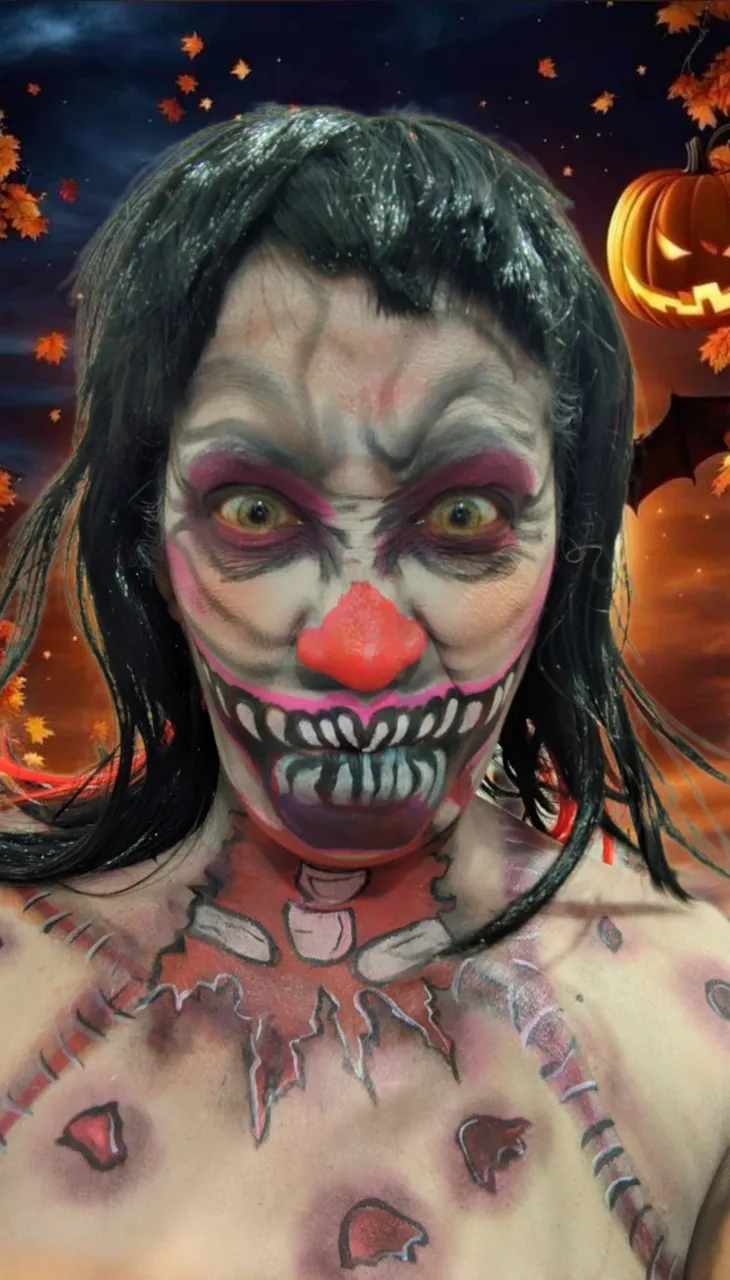
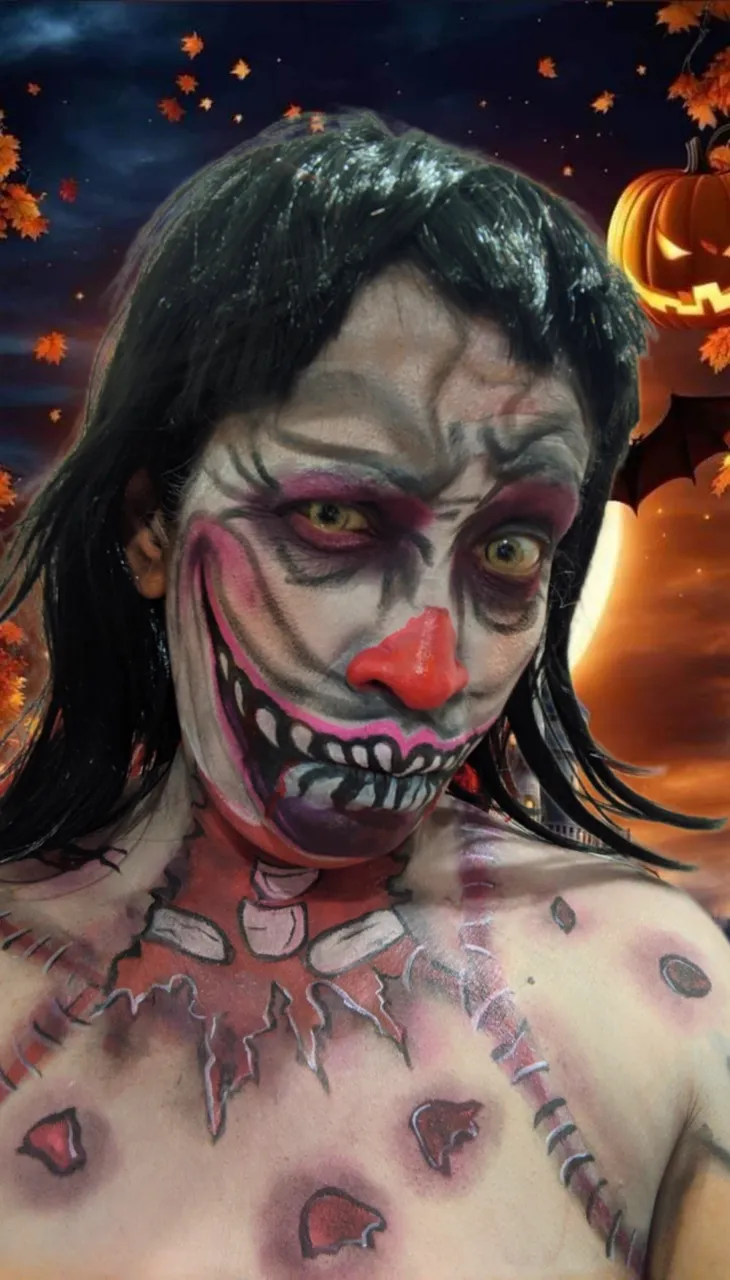
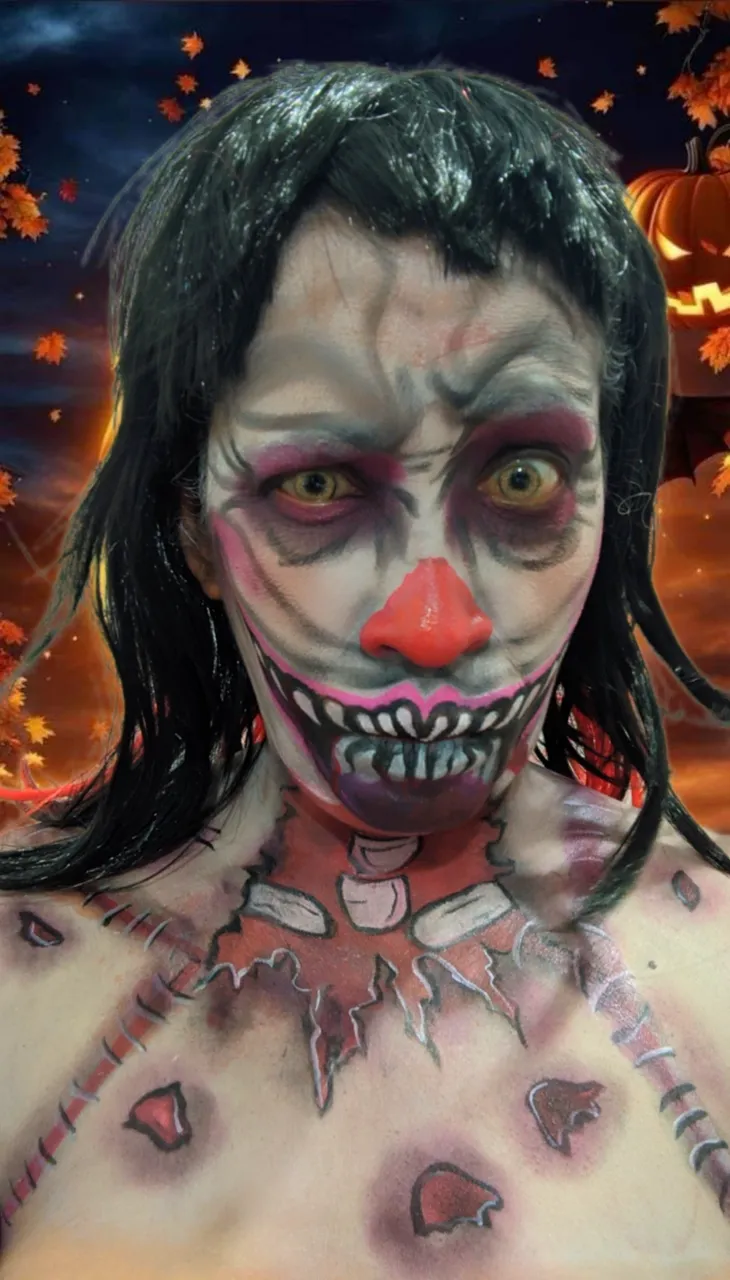
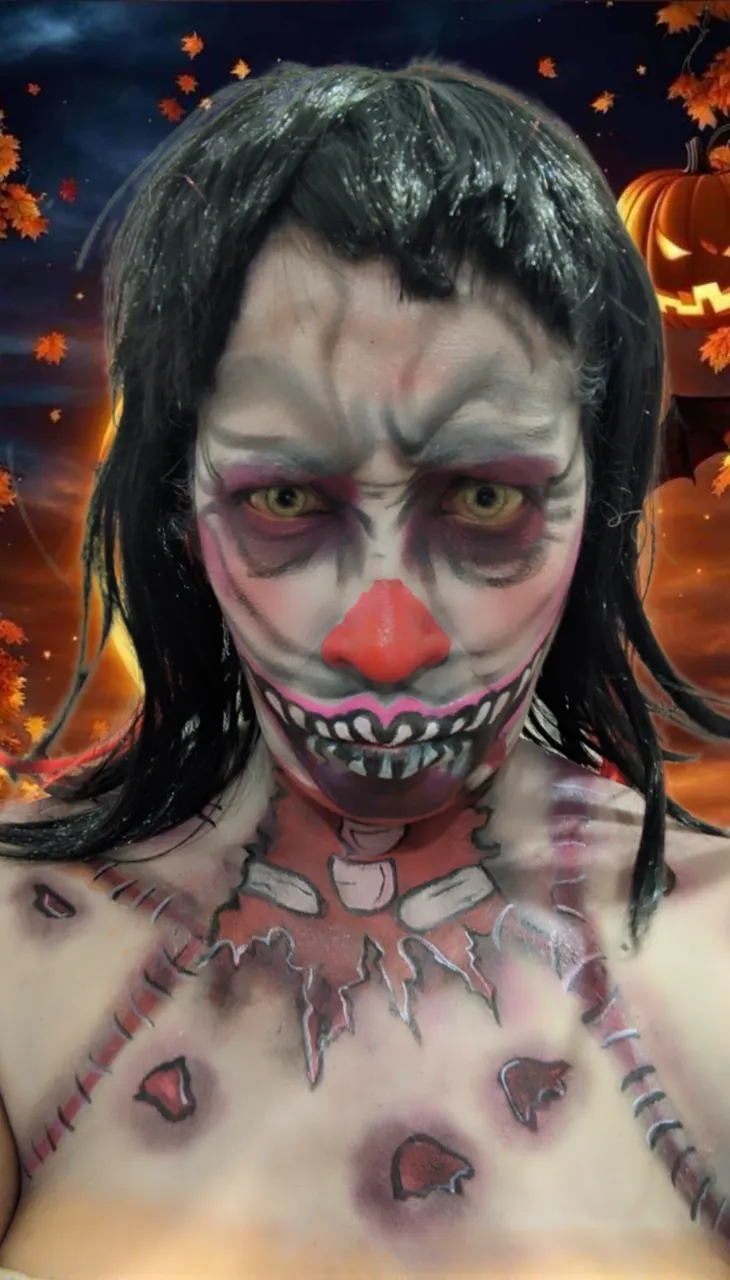
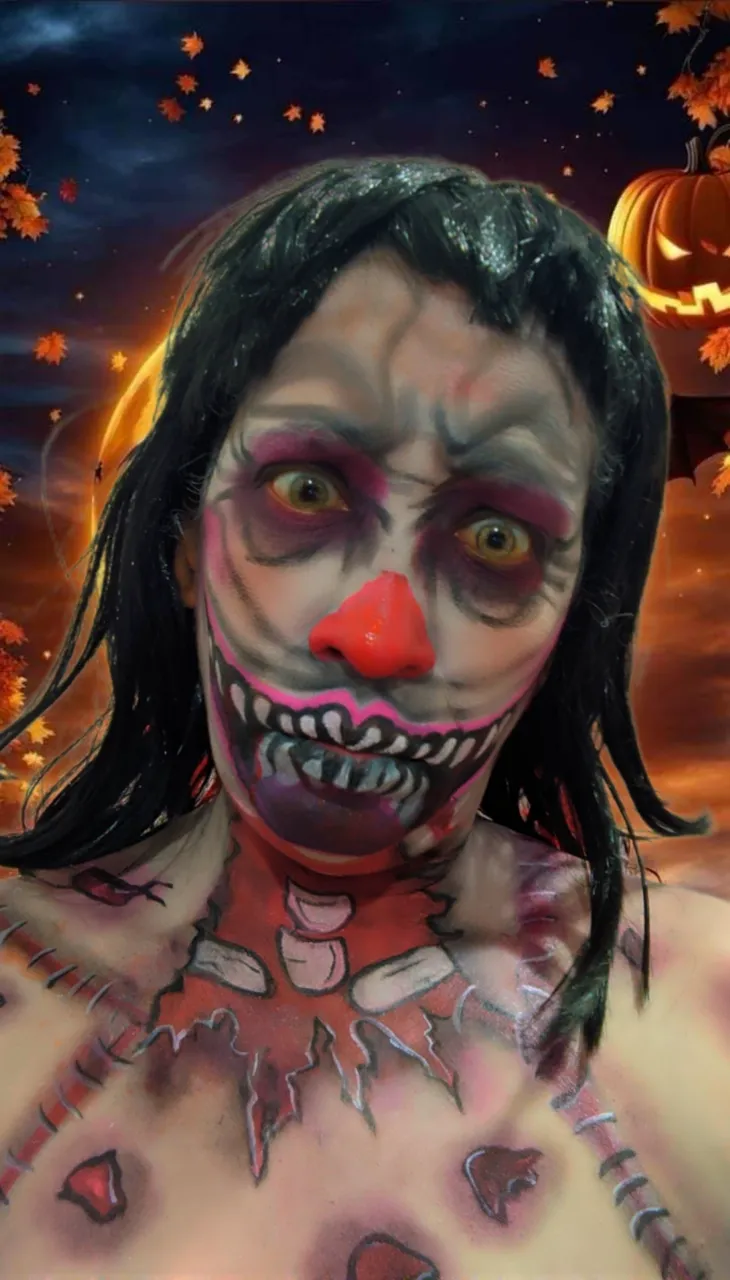
🎃 RESULTADO FINAL 🎃

CRÉDITOS
Todas las fotografías fueron tomadas con mi teléfono Xiaomi redmi 9T y son de mi propiedad utilice el programa polish y el traductor Deepl, y para el vídeo utilice el programa vídeo maker y capcut.

Greetings my friends of #hive especially to my friends of this beautiful community of #diyhub to which I had some time without being able to visit, because of the tremendous situation I am living with my husband's health, a fact that has kept me a little away from my manual tasks, although I always get a space to practice makeup artistry and share from time to time with you some creations.
I want to thank my friend @ladyaryastark who invited me to participate in this event, and for that reason I'm here, I hope you like this my first creation for this contest, it took 5 hours and 21 minutes to make this character and here I leave a little of how was the creative process of this proposal that I show you today.
🎃MATERIALS🎃
🎃 Artistic makeup palettes.
🕷️ Brown pencil.
🎃 Shadows of different colors.
🕷️ Translucent loose powder.
🎃 Brushes and brushes.
🕷️ Triangular tassels.
🎃 Sponges.
🕷️ Clown wig.
🎃 Artificial blood.
🎃CREATIVE PROCESS🎃
🎃 STEP 1
First of all and before starting the makeup, I do my skin care routine to prepare the skin, as well as to protect it from the use of makeup, and also because when our skin is well hydrated and prepared, the makeup has a better finish.
After preparing the skin, I took the brown pencil and on my torso I drew some lines that would become the wounds, I also drew part of the bones.
When I drew, I first took the white body paint and applied it, then I proceeded to place gray paint and also the skin color, all these I applied with the brush, clarifying that I was placing the gray and skin in different random parts, then with a damp sponge blurred all the makeup, resulting in an aspect of decomposing skin which was what I was looking for to perform.
Then I took the fine brush and with the red paint I marked the lines I drew, I also filled the drawing of the neck, and the bones with the white color, when we finished we sealed everything with the translucent loose powder and I remove the excess with the thick brush.
Then I took the artificial blood and applied it on top of the lines that I drew in red, when I finished I took a fine brush and with the black paint I drew the staples on top of the artificial blood, then with the white paint I gave them light painted the edges in white.
🎃 STEP 2
I took the brush and red paint and drew different marks on the body that simulate the torn skin, sealed them with the translucent loose powder and applied black, red, and a little purple shadows. Then I took a blending brush and applied black shadow on the scars and with the black paint we outlined.
🎃 STEP 3
Now we move to the face part, for this, with the brown pencil I draw the mouth of my character, then I take the white paint and with a brush I apply the paint on the face making sure it covers well all the spaces, then with a wet sponge and with a damp sponge I blur the paint.
🎃 STEP 4
Now take a small flat brush and with the pink paint we outline the edge of my character's mouth and with the triangular tassel we seal with the loose powder.
Next I took a fine brush and white paint and drew the teeth, then with black paint we outlined and filled in the remaining spaces of the mouth.
🎃 STEP 5
Take the shading brush and with the red and black shadows applied on the eyelid as well as on the water line. Then with another flat brush loaded with black shadow draw the expression lines of the character's forehead, mouth and eyes.
🎃 STEP 6
Take the black paint and draw some lines of expression on the sides of the eyes, then take the red paint and draw the nose and this way our character is ready, we just need to fix the hair and put on the wig and that's it.
It is said so easy step by step and it really is not, it was 6 hours of hard work giving specific details to my character to achieve the best possible finish, now here I show you the final result, I hope you like it and take you straight to a halloween night.
🎃FINAL RESULT🎃
CRÉDITS
All the pictures were taken with my Xiaomi redmi 9T phone and are my own, I used the polish program and Deepl translator, and for the video I used the video maker program and capcut.
▶️ 3Speak